Overview
Detail pages (or Pages with context) differ from Public and Private pages in that the Context (i.e., the starting point of the data model that determines how the user navigates through the set of attributes and how the information is constructed) is not the Persona but another entity. Thus, this type of page is exclusively accessed through a Collection and works with Dynamic content.
This article explains in detail how to set up a Detail page for your app.
Create a Detail page
To create a Detail page, follow the next steps:
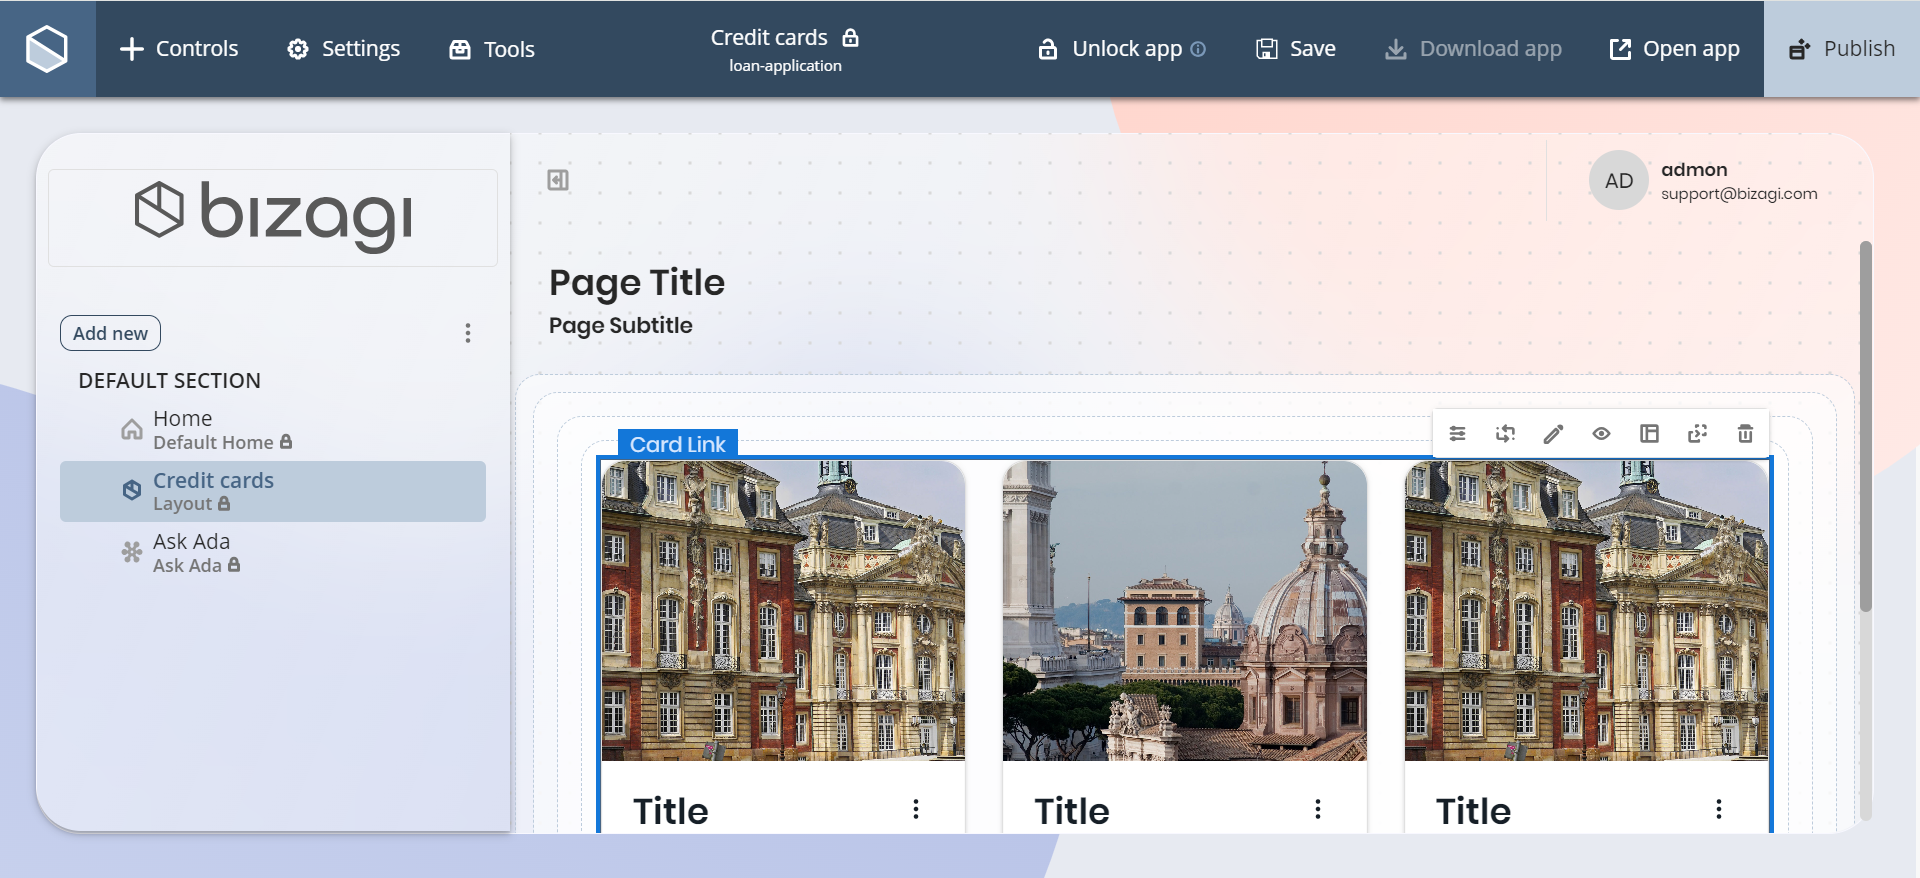
1.The creation of a Detail page is generally done through a Private page. Hence, you must create a Private page first. Once you have done this, add a Collection control to the Private page.
|
If you try to create a Detail page from a Public page, the Public page is automatically converted to a Private page. Moreover, you cannot change the Context (associated entity) defined for your Detail page. If necessary, you must create a new Detail page with the new entity. |
2.Select the Collection control and on the configuration options that appear at the top of the row, click the ![]() icon to open the control's Manage content panel to the right of your screen. In this panel, select the Dynamic tab.
icon to open the control's Manage content panel to the right of your screen. In this panel, select the Dynamic tab.
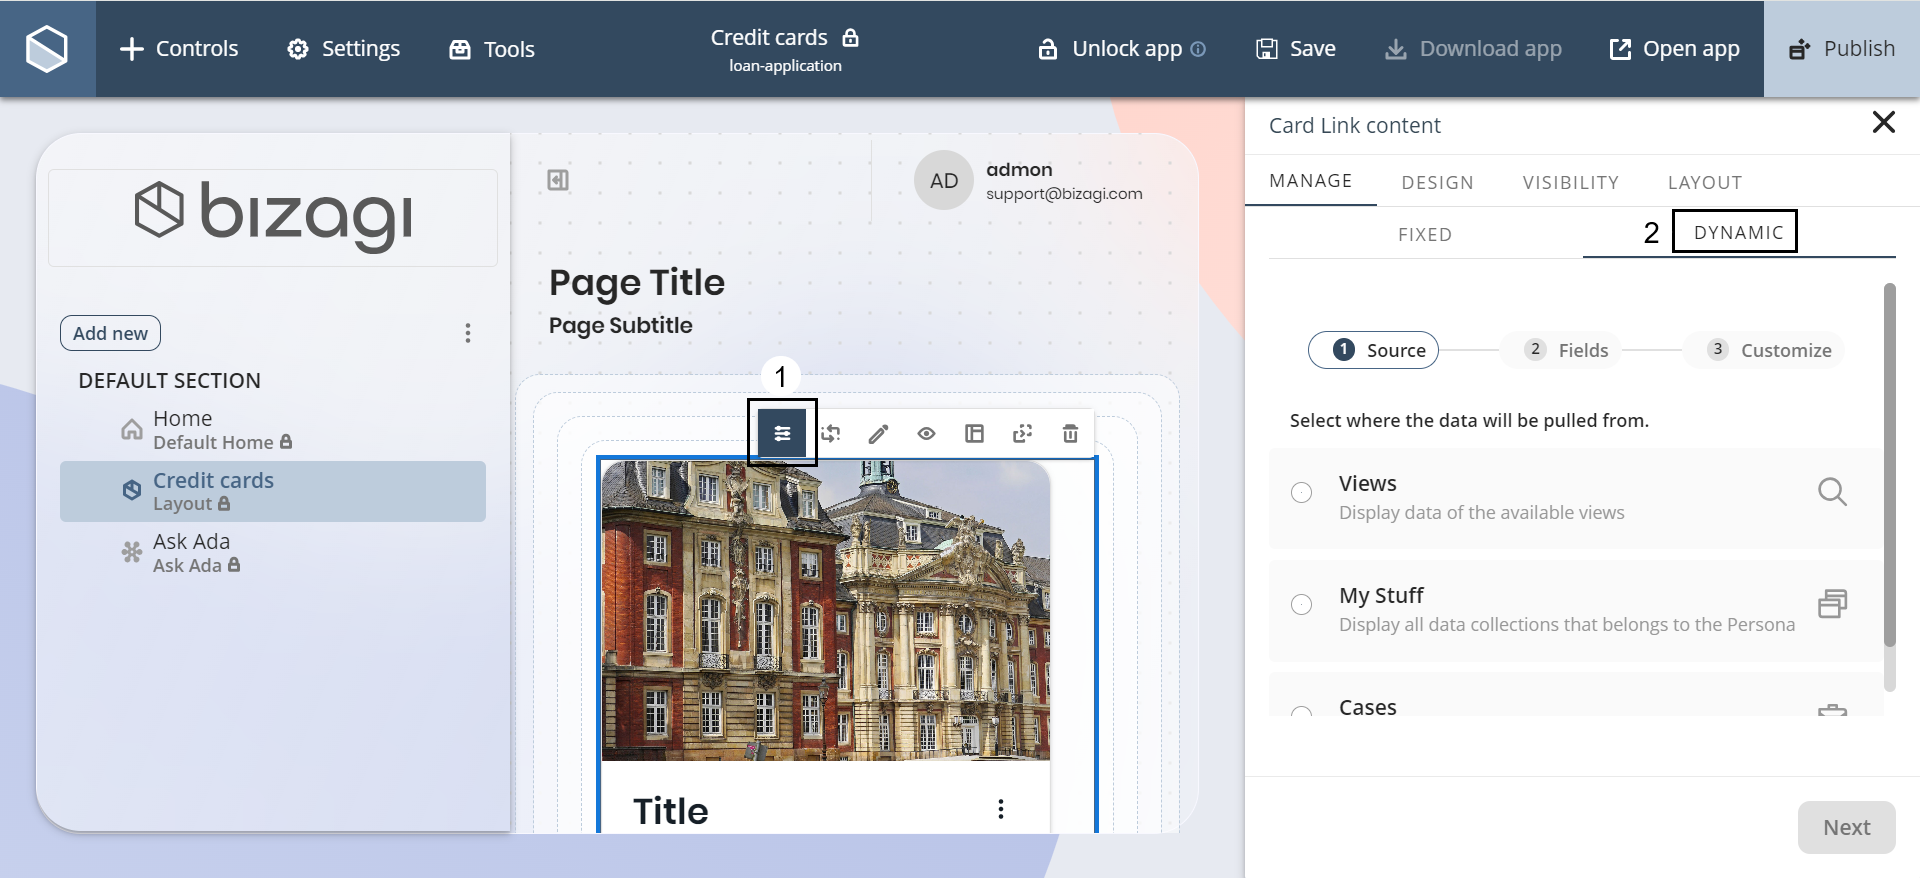
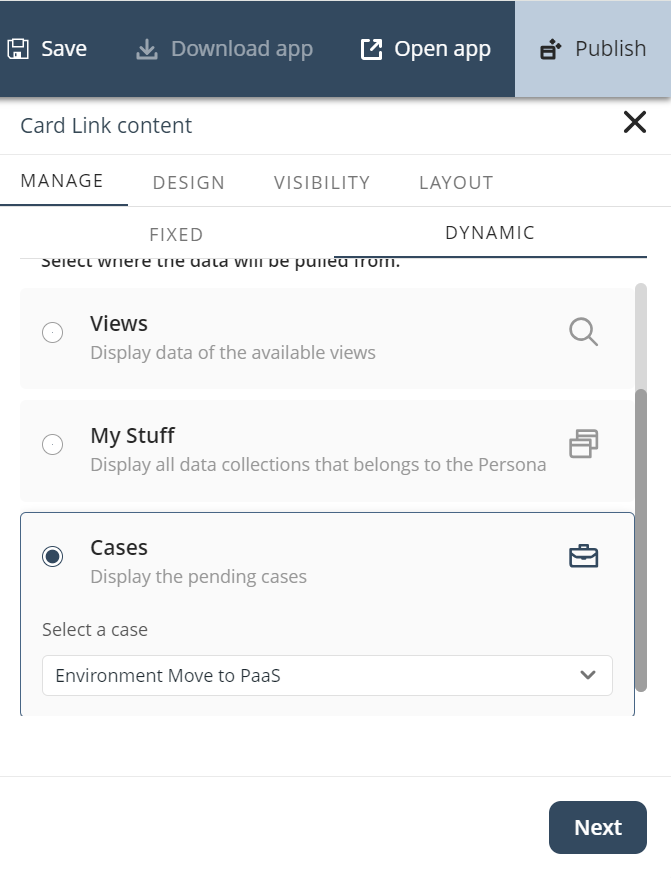
3.Select the source of the data for your control. For an explanation of the different data sources, refer to Dynamic content.
Click the Next button to continue.
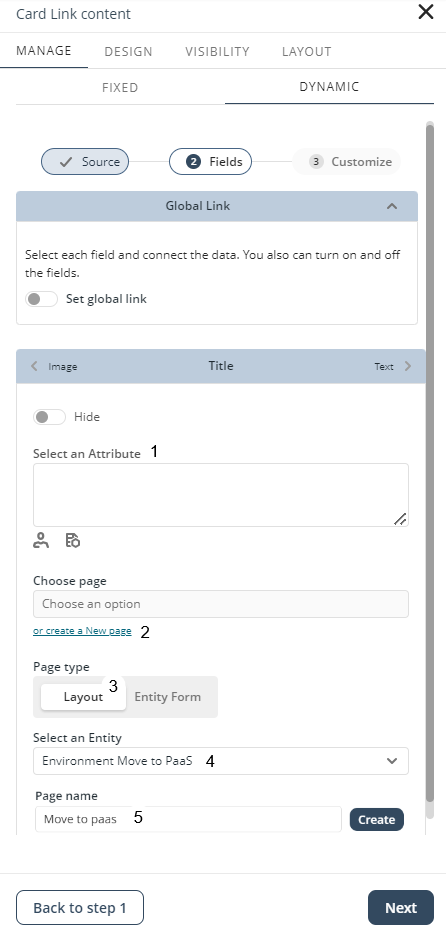
4.The next step is where you define the control fields and connect the data. For the explanation, assume you want to configure the Title attribute. After you select the attribute to configure, you have two options to connect the data:
a.Choose page: choose an existing Detail page.
b.Create a New page: link button that lets you create a Detail page.
Click the Create a New page link button.
Then, setup the following fields:
•For the Page type select the Layout option.
•Select an Entity you want to establish as context of your Detail page.
•Give a Page name to your Detail page.
Once you have setup these fields click the Create button.
5.Once created, you can access your Detail page from the Side menu.
You can visually identify Detail pages in two different ways:
a.In the menus, Detail pages have the Detail label beneath the page name.
b.At the top of the page, you can see a label that specifies the Context of the Detail page.
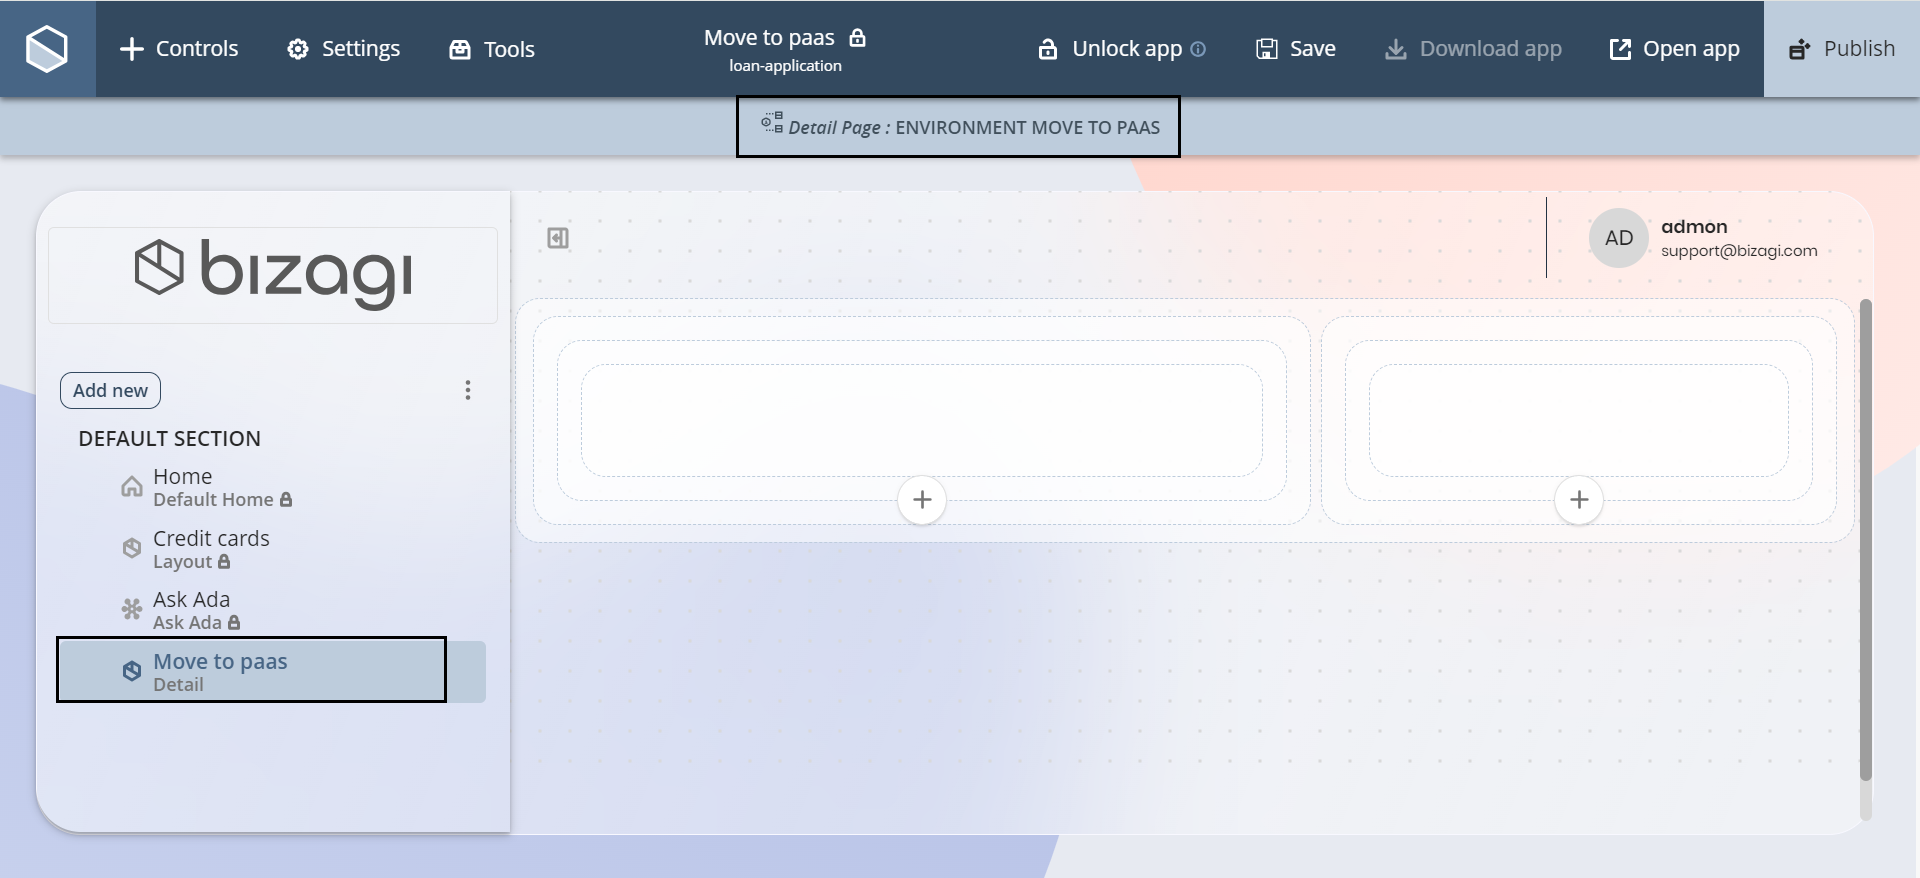
Notice that when you add and configure controls in your Detail page, the starting point is the Context entity.

Events as actions
Events allow you to access the events related to an entity, once your app is published from a Detail page.
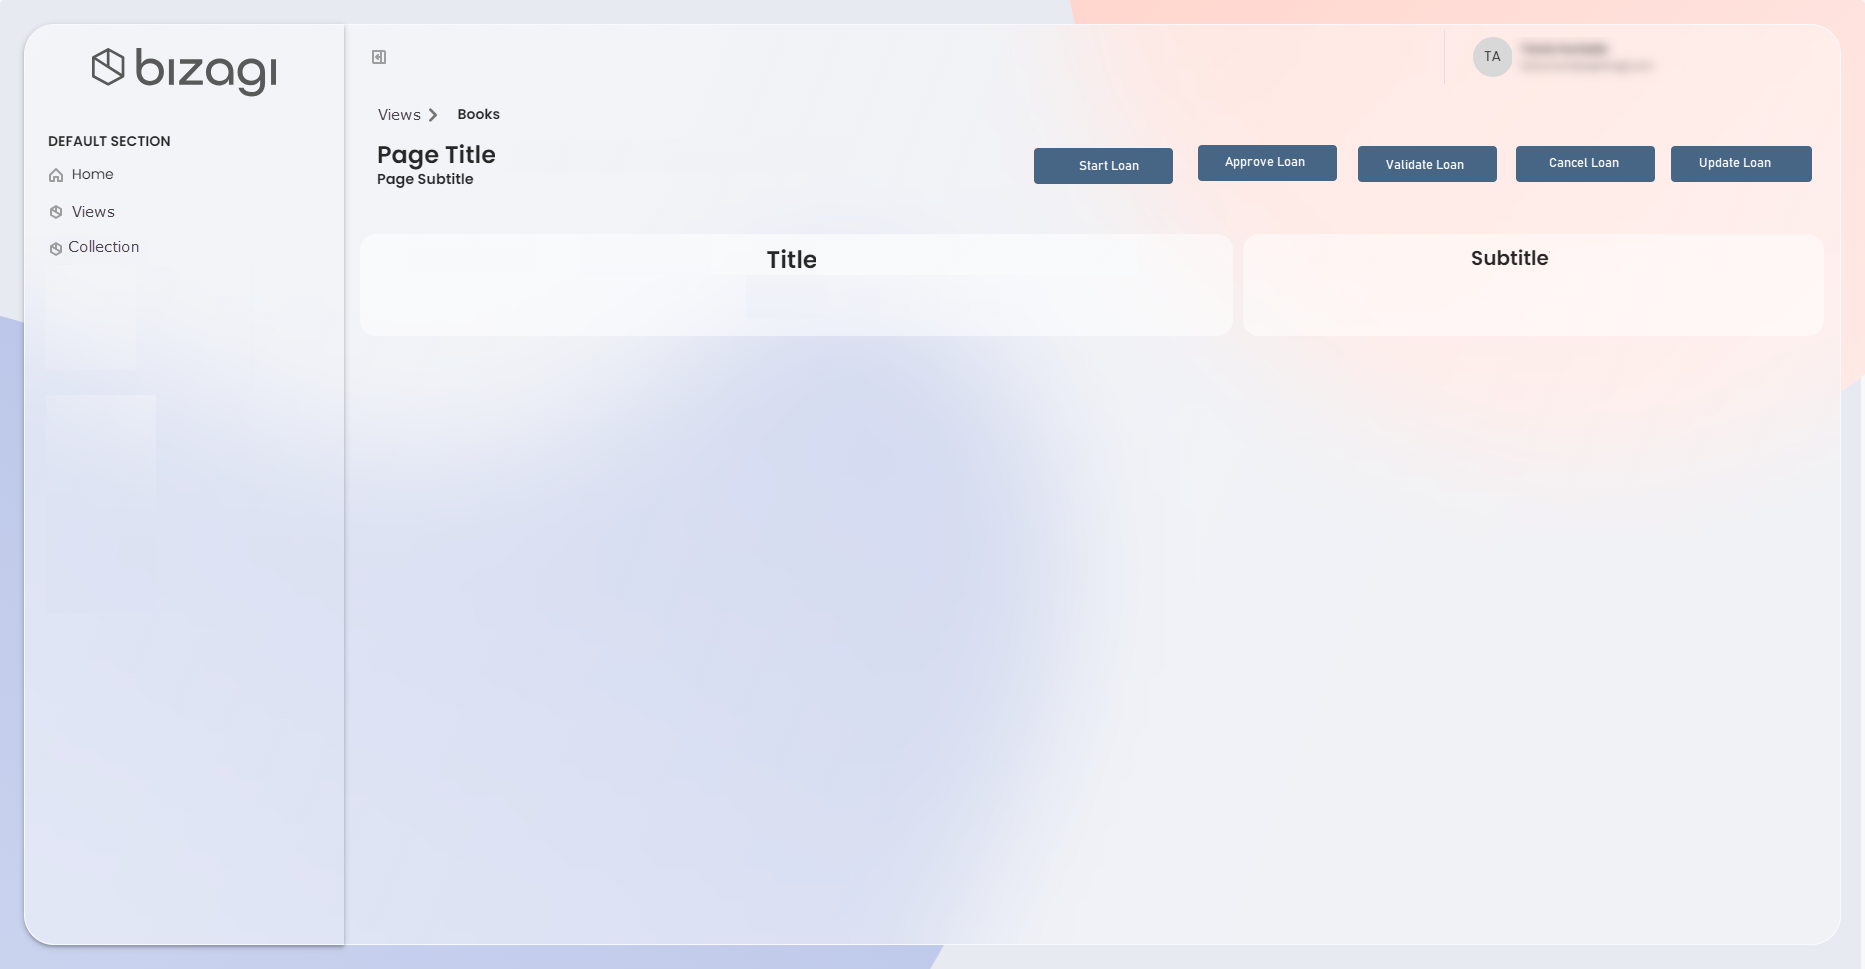
On the top right corner of your screen, under your user and email, you have buttons displaying the name of the events of that entity. Click the button that has the name of the event you need.

Activities as Actions
Users can visualize and execute the pending activities of a process from the three dot menu in an item of a collection or in a Detail Page. This visualization of the activities allows users to execute them more easily and faster without any configuration needed.
There are two ways to visualize the collection of pending activities:
1.Once you have published your app in the App Designer editor enter a page where a collection has been configured.
a.Select one item from the collection and click the action menu. This will display the list of the pending actions in this example there are three pending activities: Start Loan, Approve Loan, Validate Loan, Cancel Loan, and Update Loan. To execute an activity, simply select it and a case will be generated.
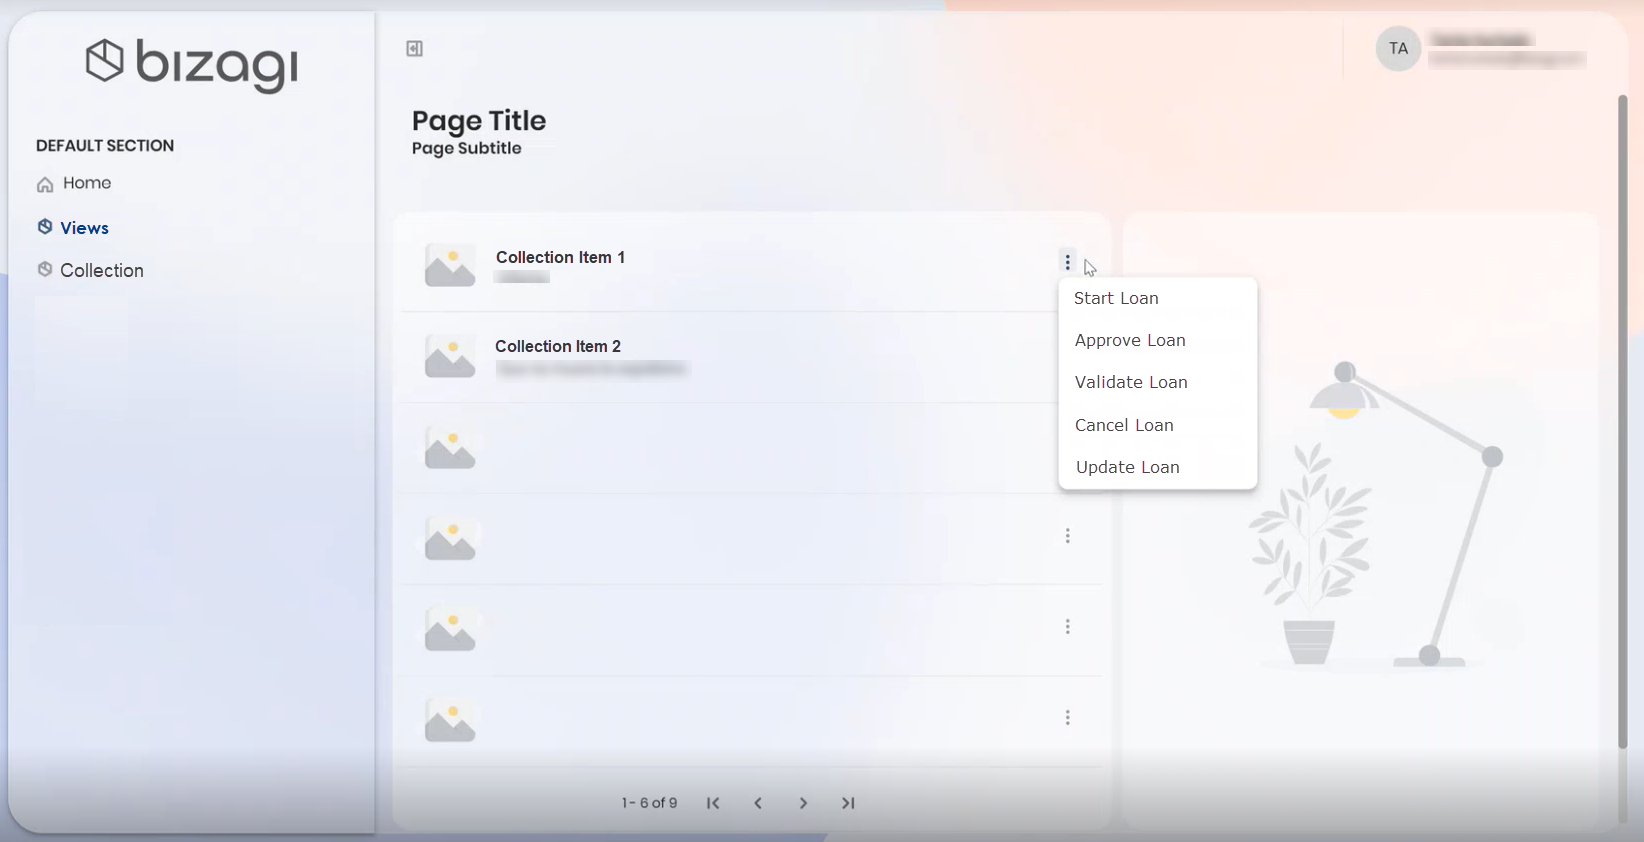
2.Once you have published your app in the App Designer editor enter a Detail page previously created.
a.In this case, we will access a Detail page from a Small Card collection. Inside the Detail page, you can visualize three buttons associated with the same pending activities as actions: Start Loan, Approve Loan, Validate Loan, Cancel Loan, and Update Loan. To execute an activity, simply select it and a case will be generated.
Reusable Detail Pages
When creating a Detail page from a collection control mapped to a view, my stuff or cases, it is possible to reuse the page from a collection mapped to a different data source.
Since the page is set up with a base entity, the information from the Detail page can be used for the creation of other collection controls. The detail page that was created for a collection control can be used for the creation of another collection control.
To reuse a Detail page follow these steps:
1.Repeat steps 1 and 2 of the Create a Detail Page section.
2.In the Fields section enable the Set Global link component in the Global Link section.
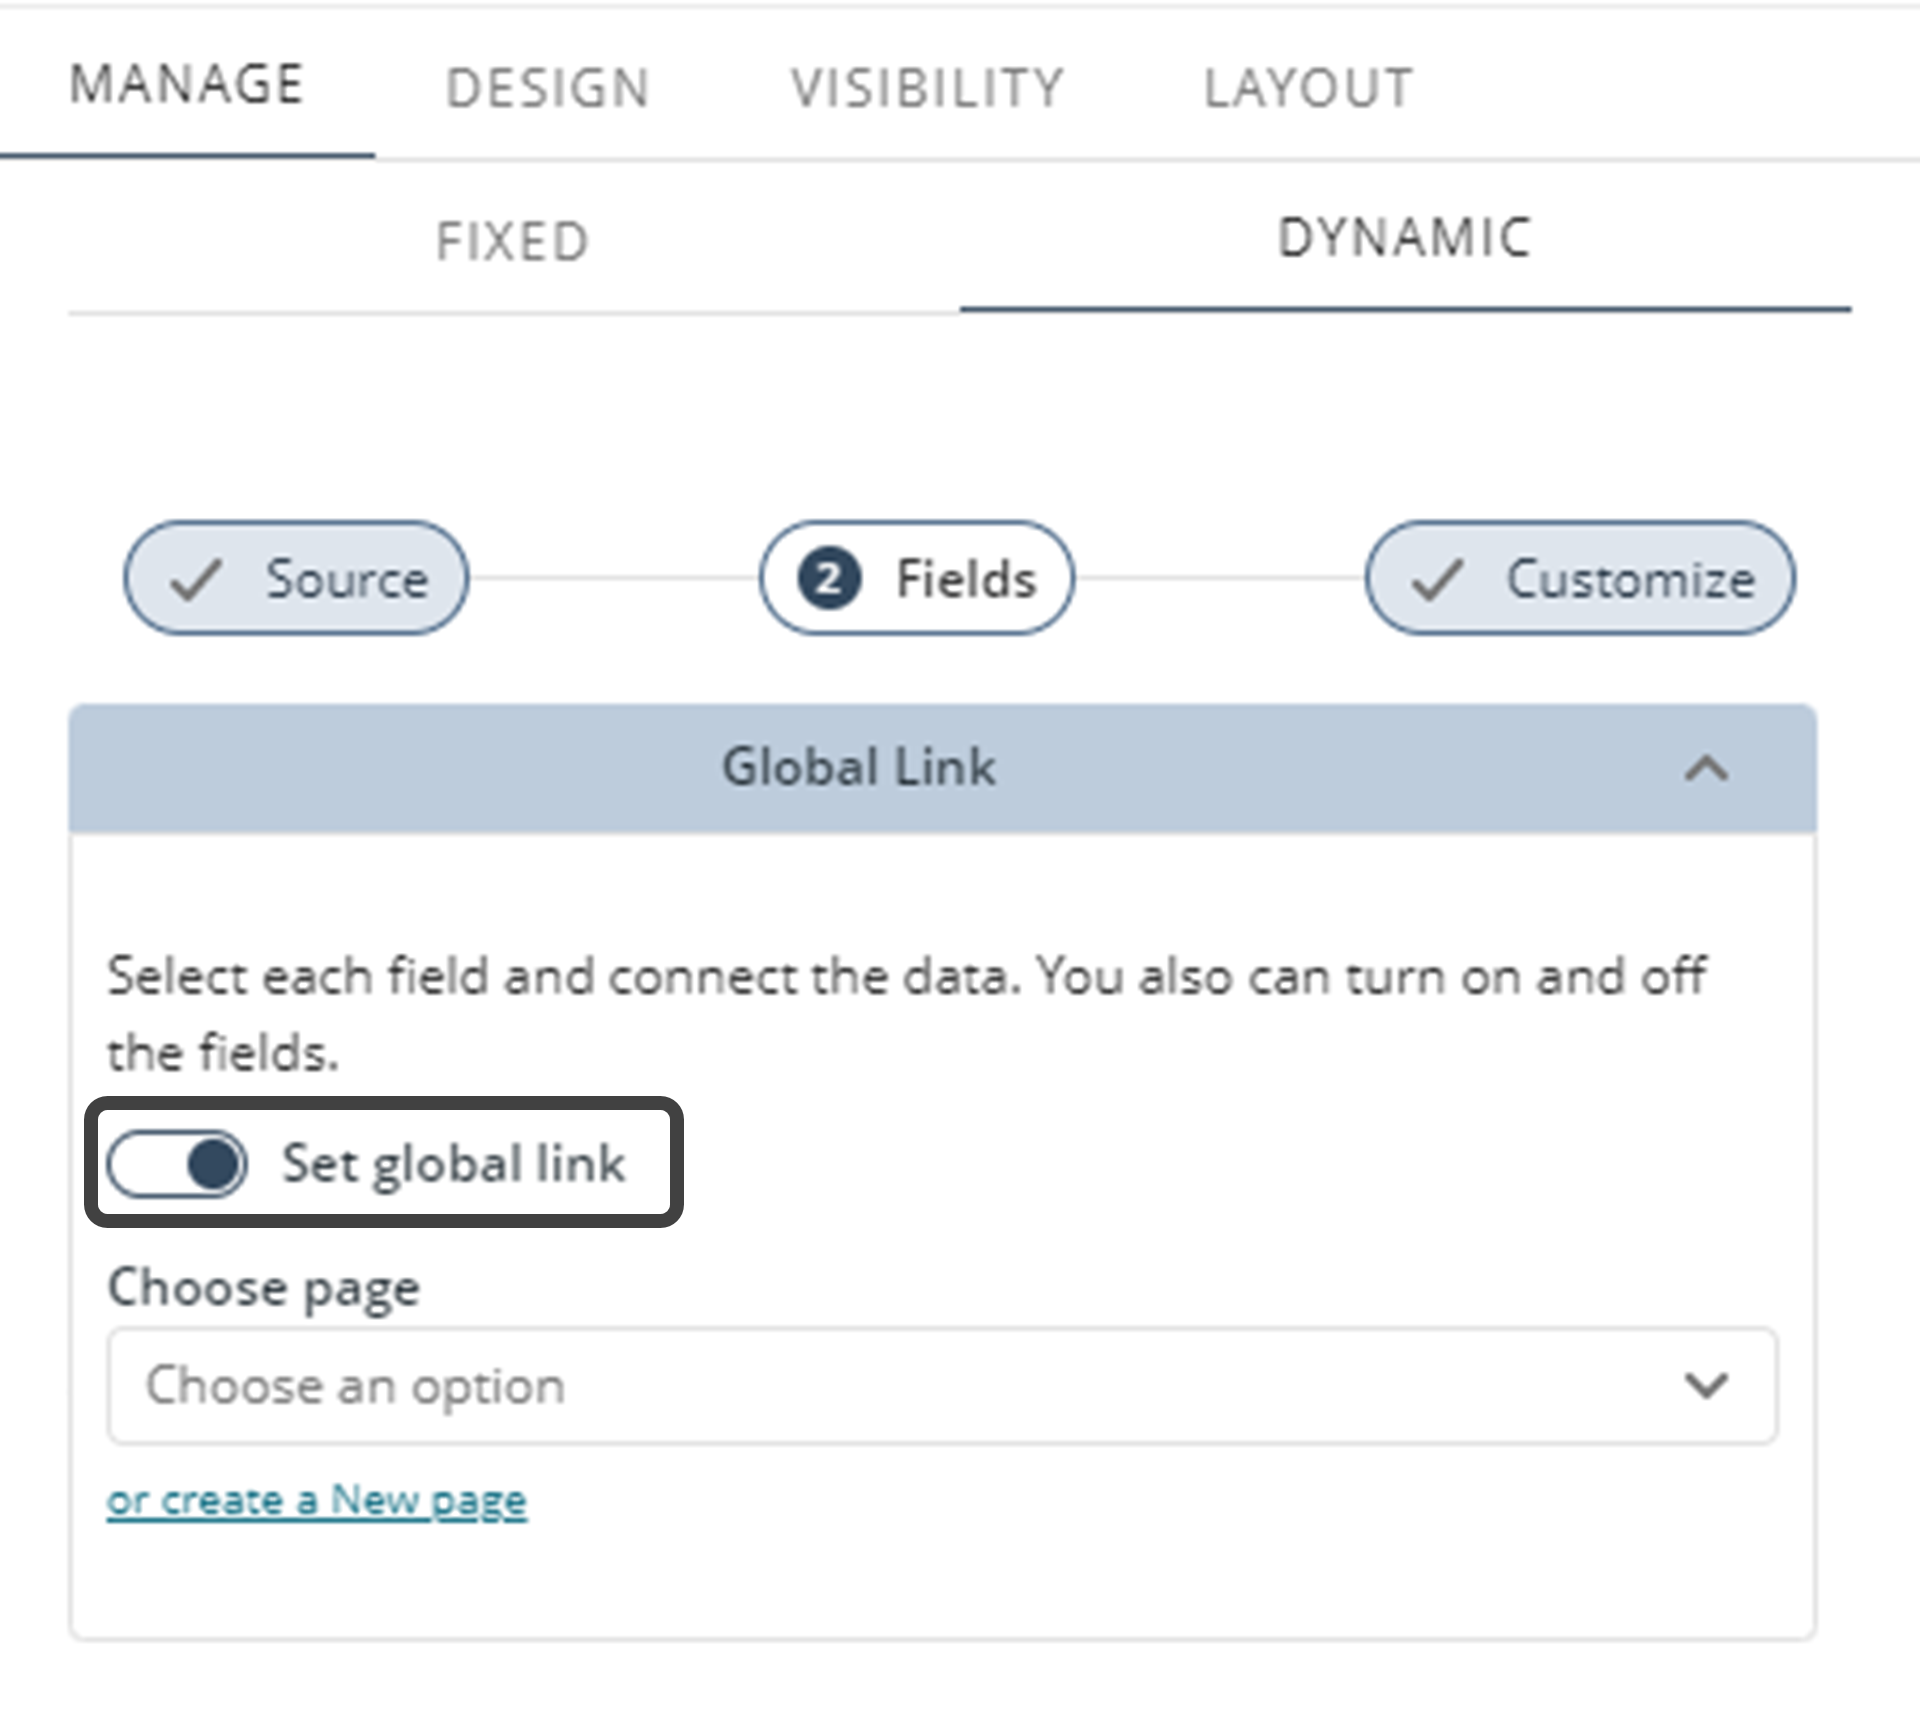
3.The previous step enables the Choose a Page field. In this field select the link or Create a new page that enables the fields to create a Detail page.
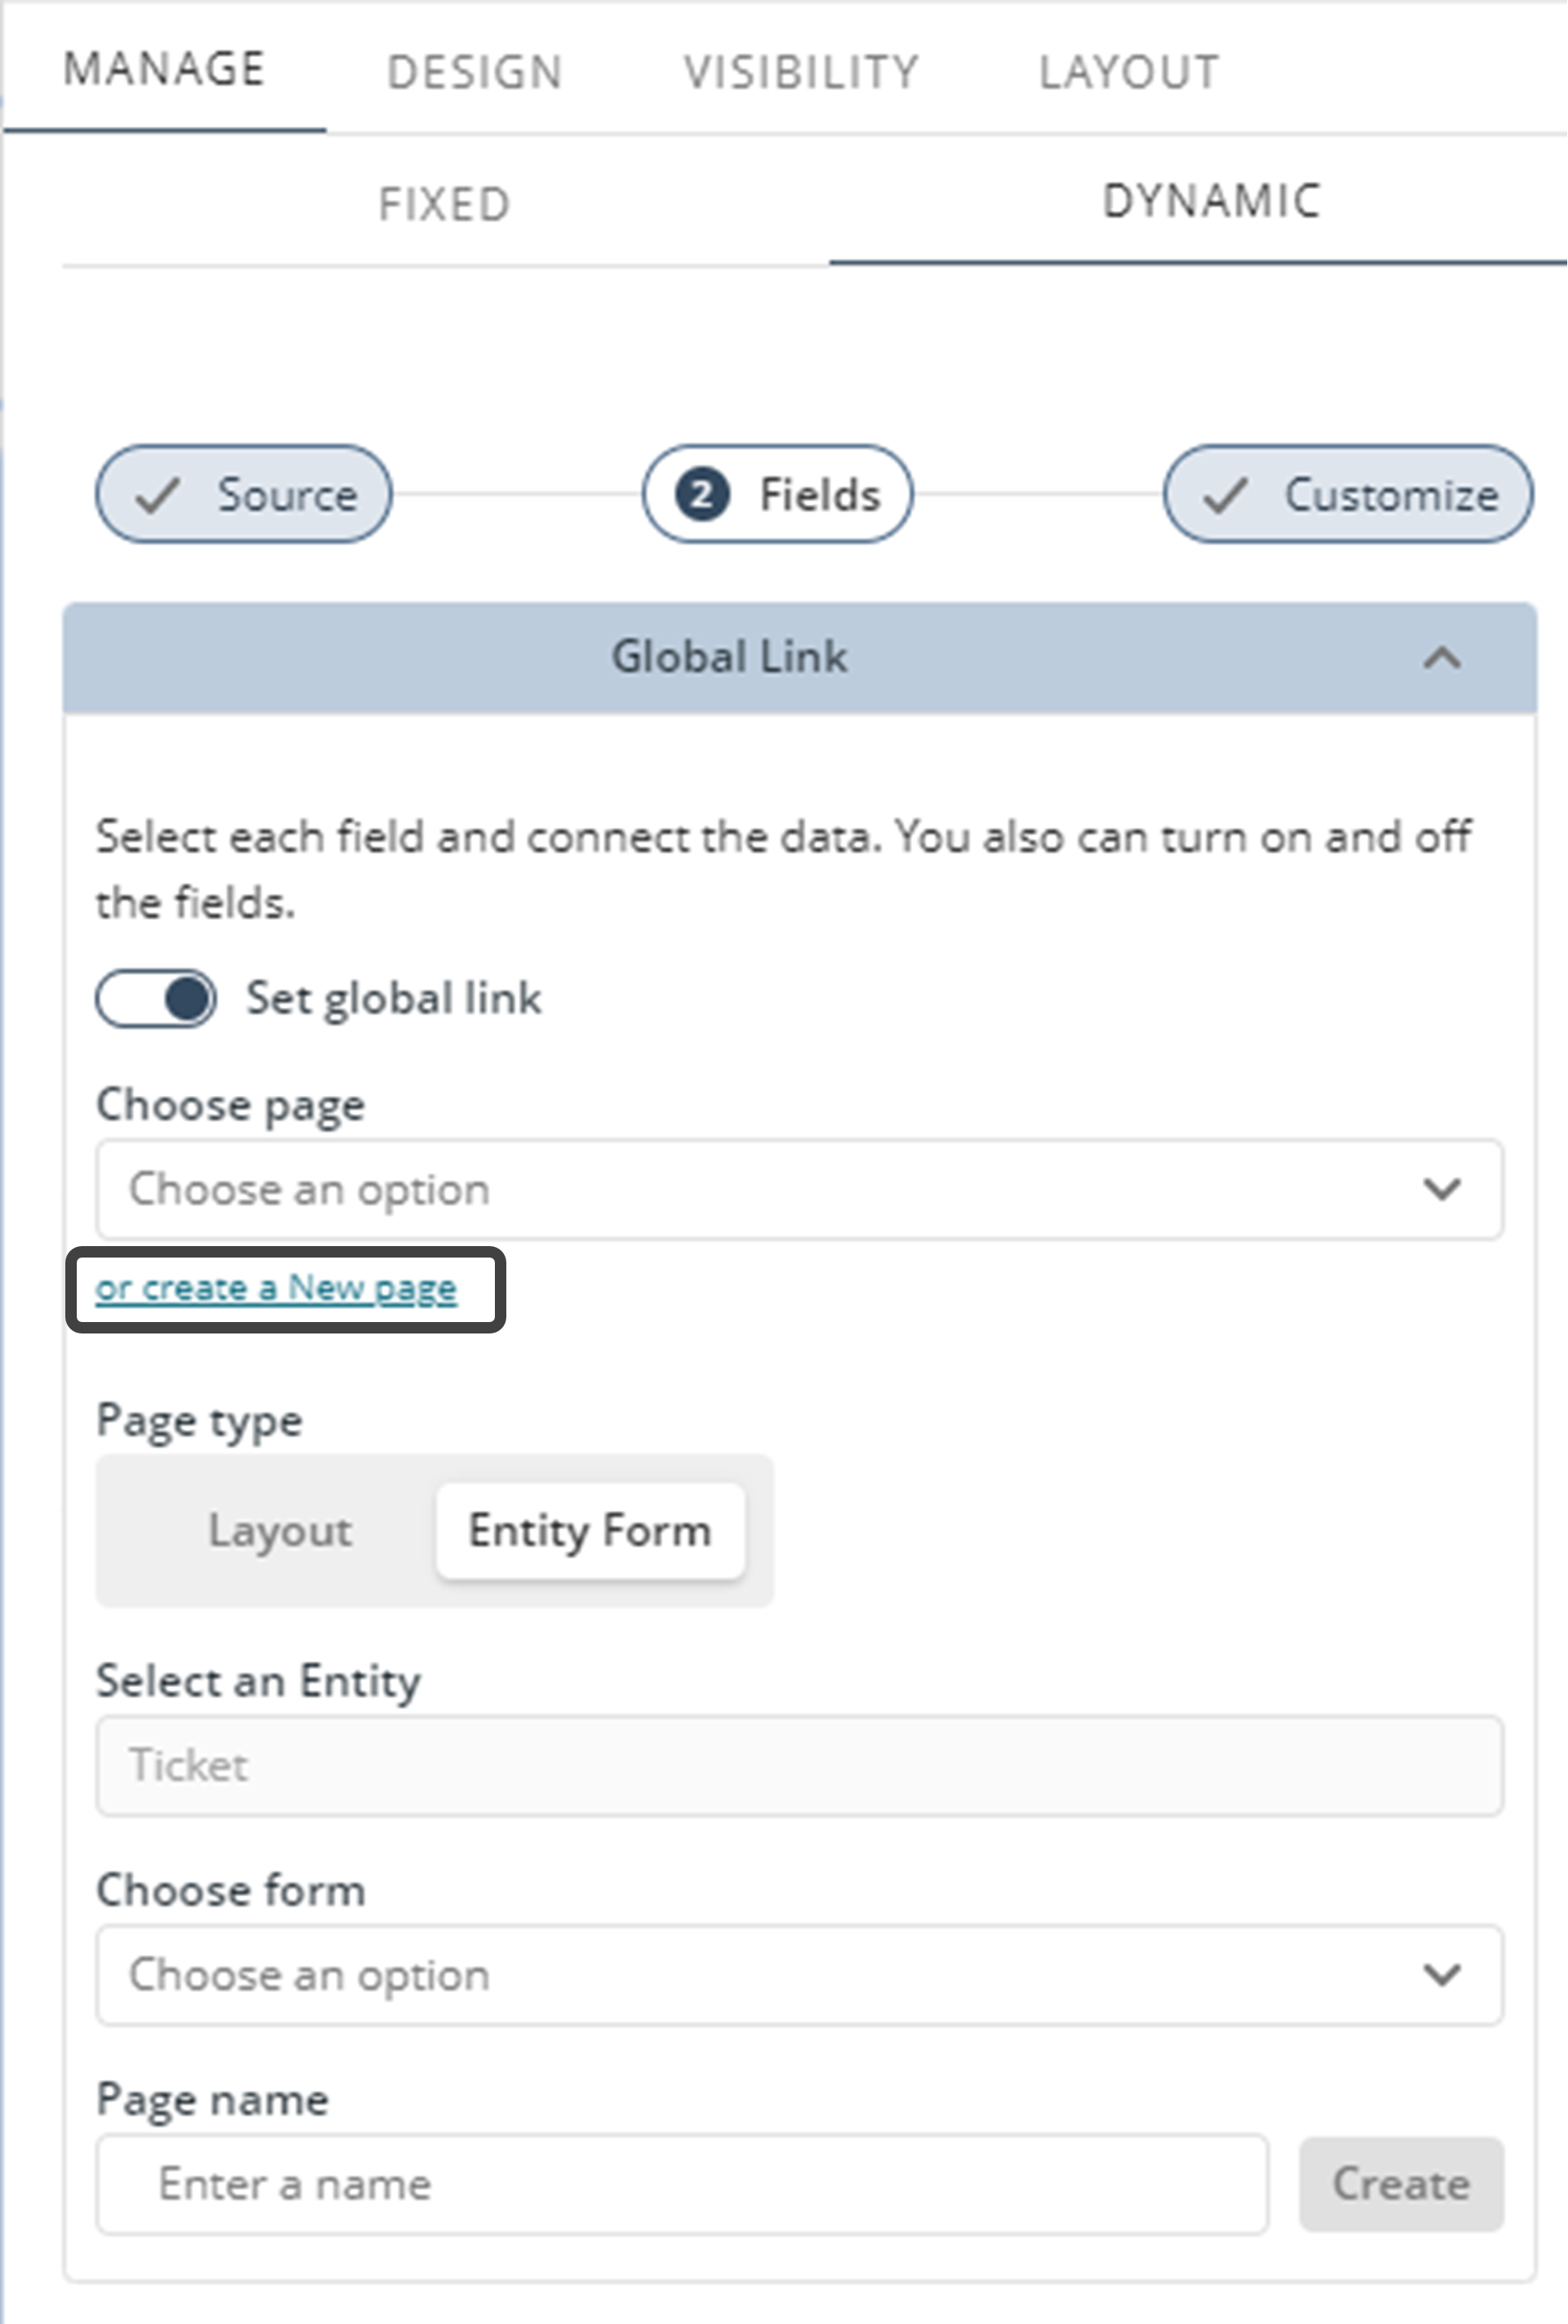
4.Set the Page Type by selecting the Layout option. The Select an Entity field is disabled since the Detail page is automatically associated to a base entity.
5.The last field to configure is Name of the page that will be reuses. Enter a descriptive name and finish by clicking the Create button.
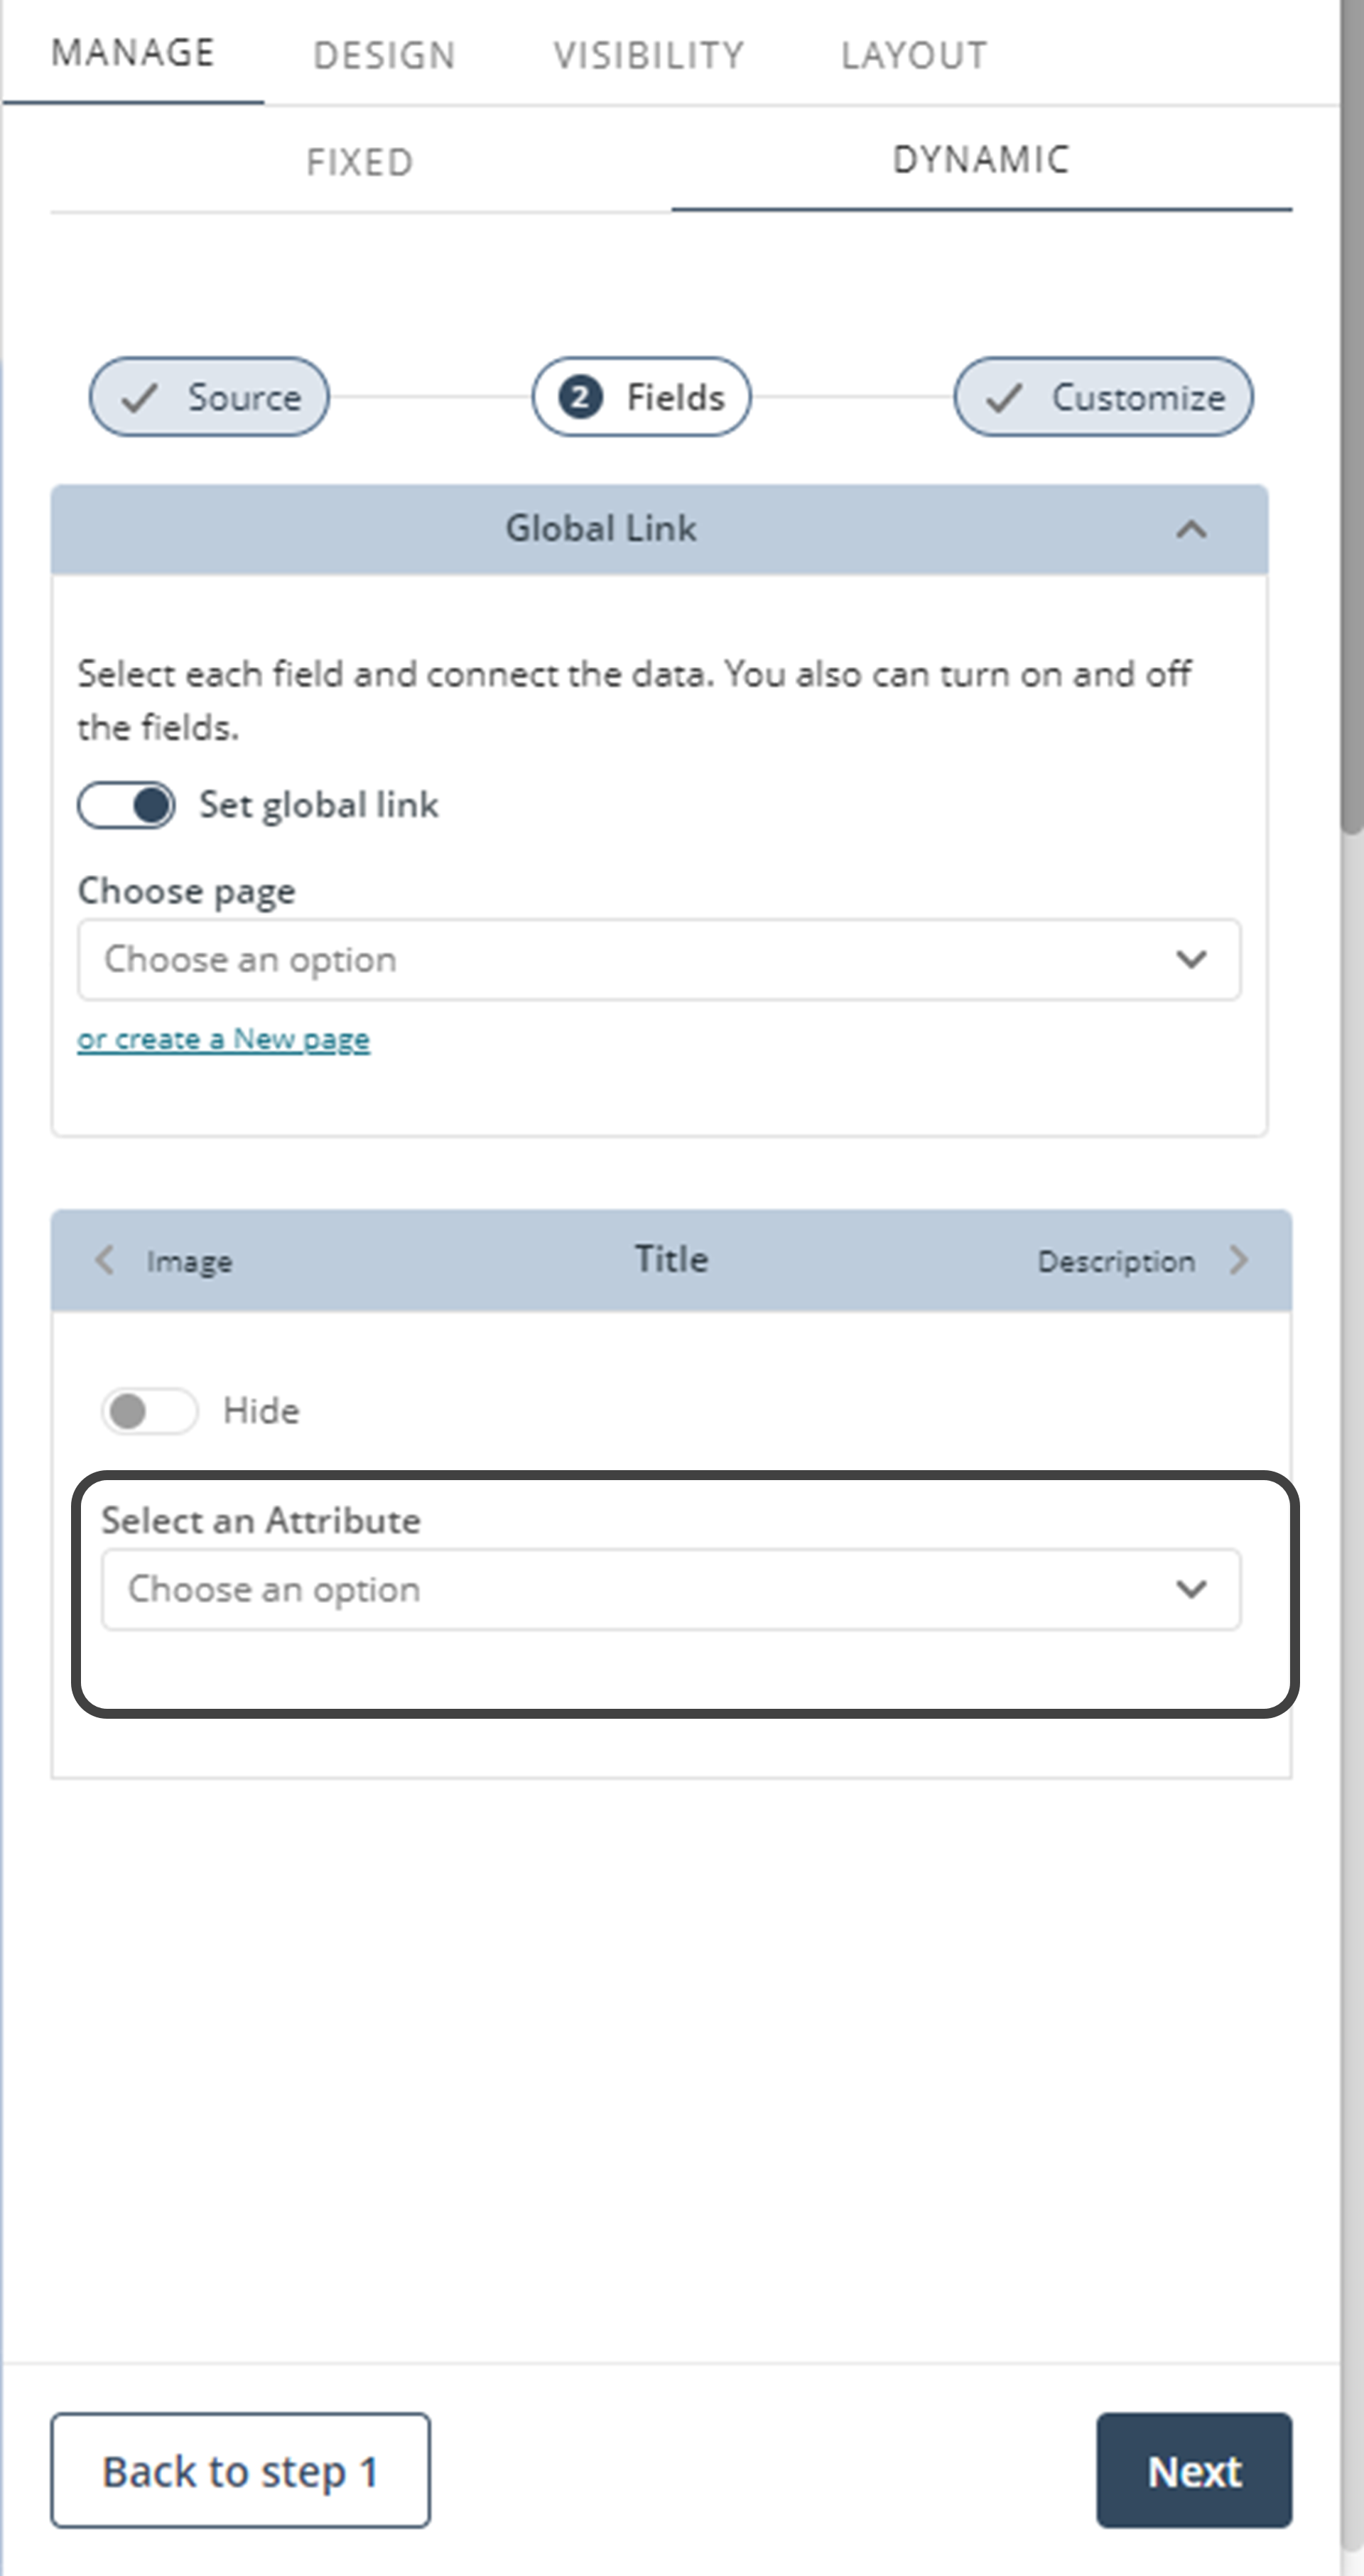
6.Define whether to add an image, title, description, caption or actions to the page. In this case we select an attribute for the Title configuration. Then click the Next button.
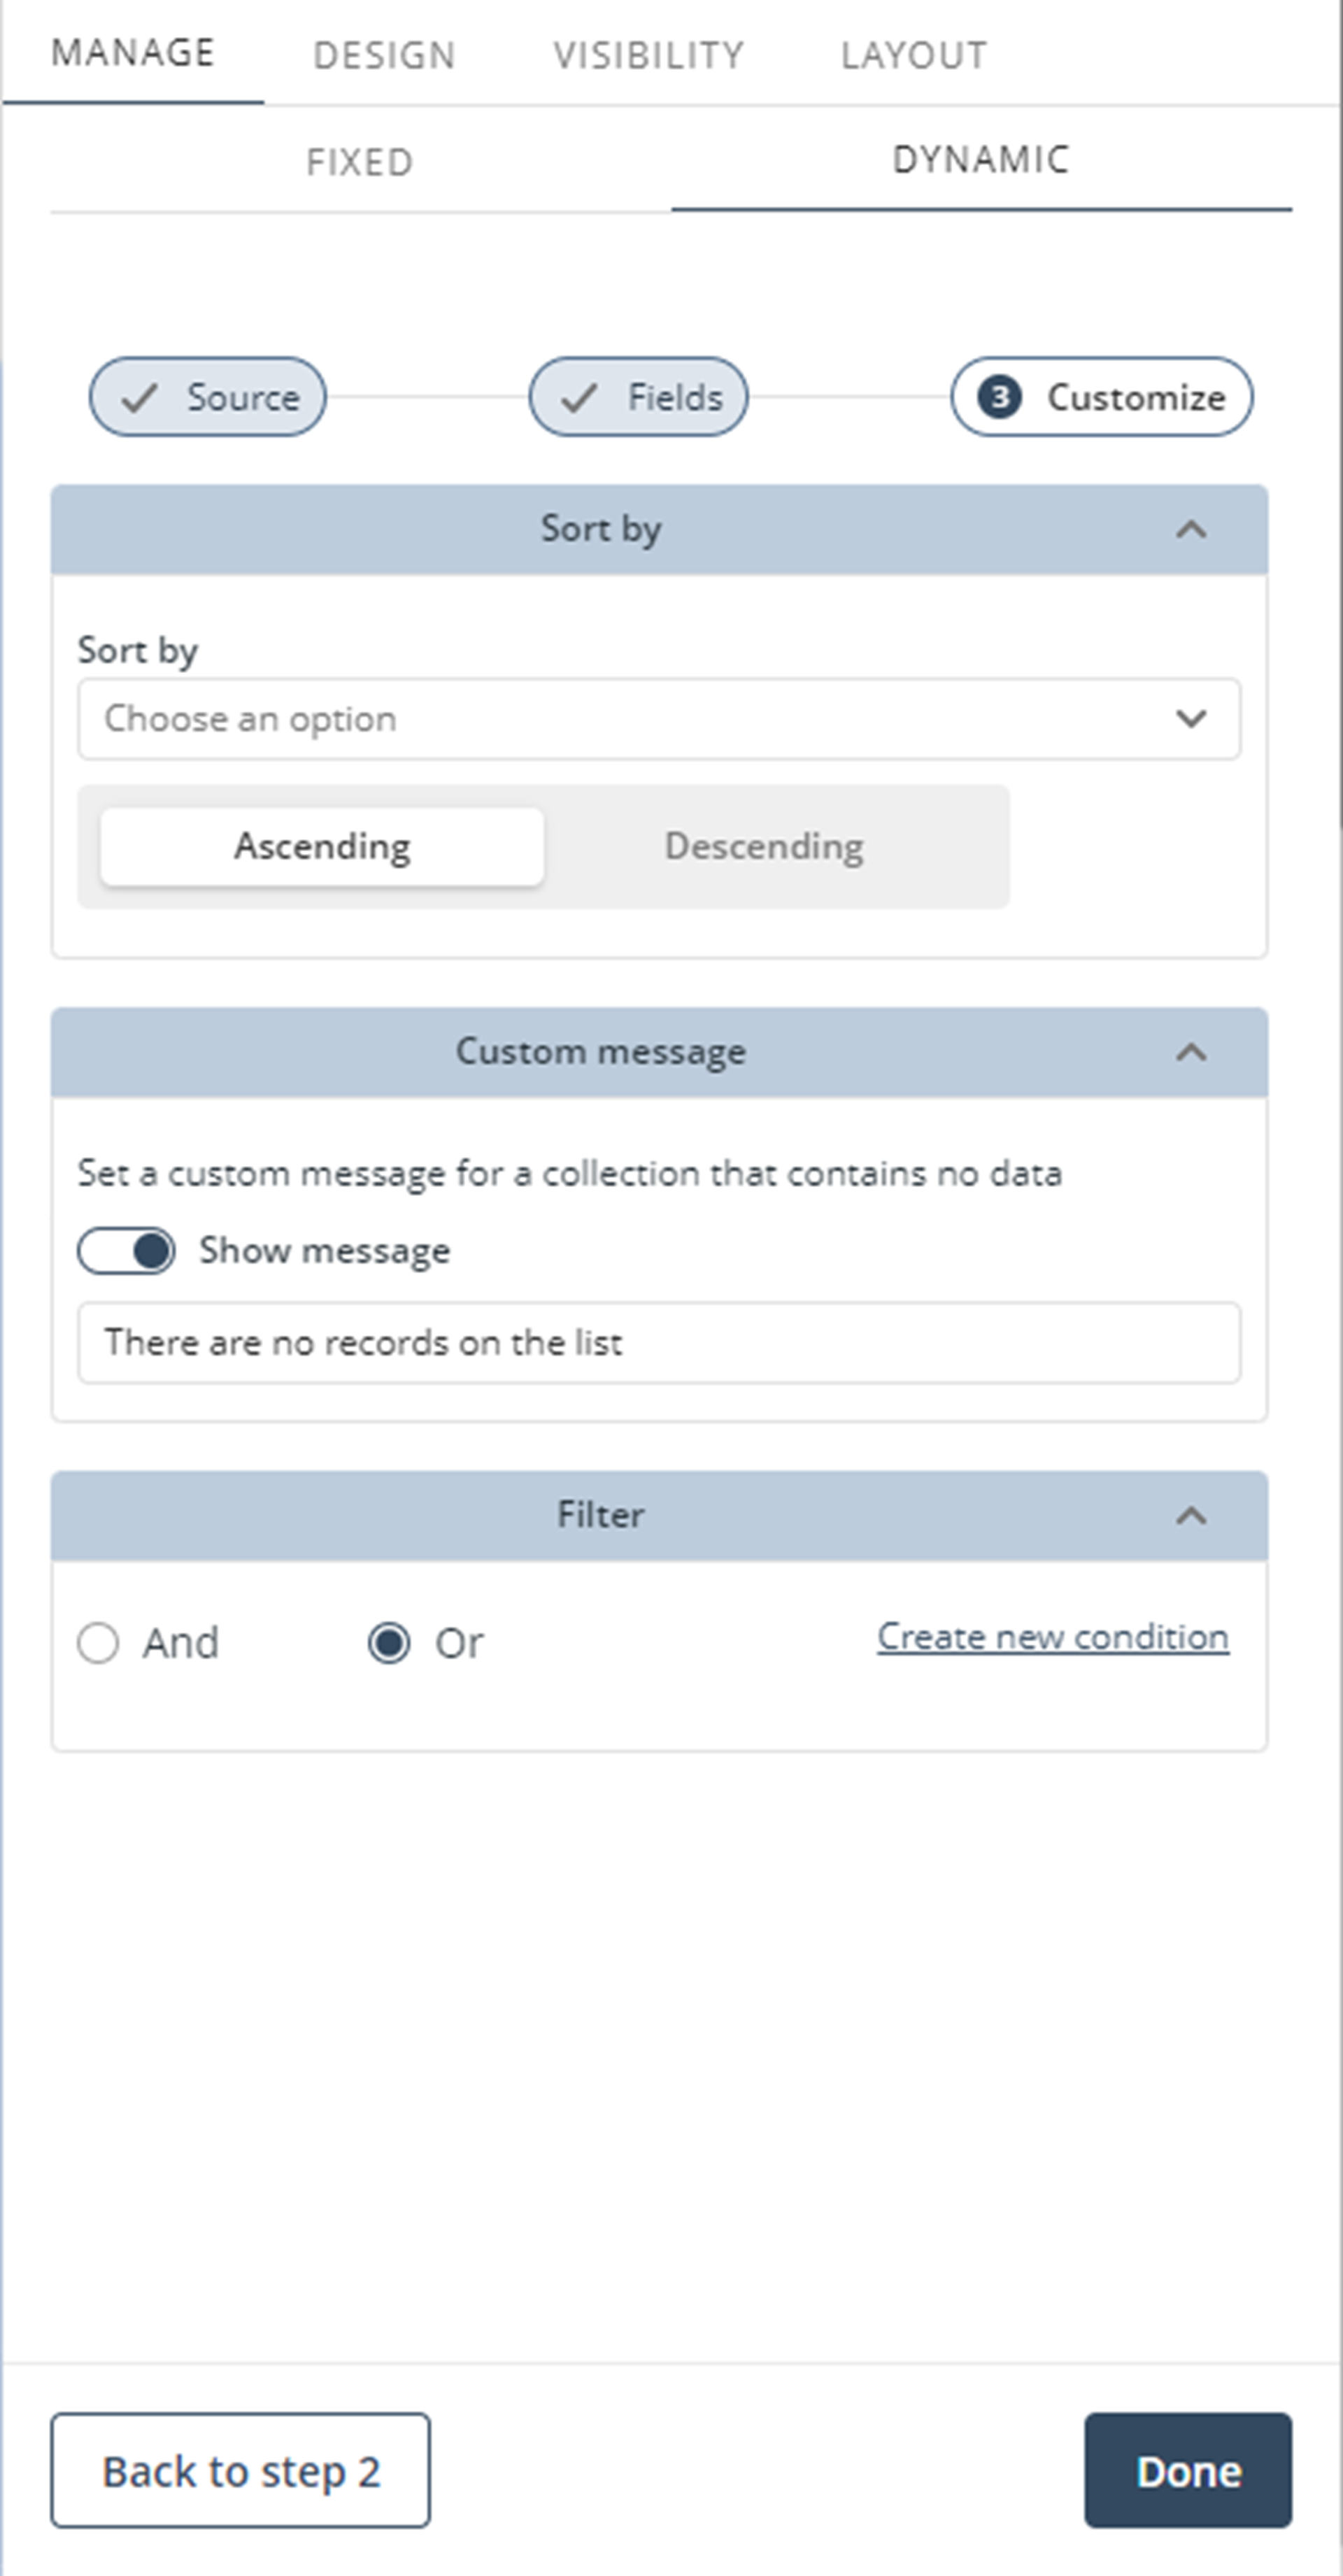
7.In the Customize section you can arrange the information of the collection in a ascending or descending order. Also, you can enable a custom message to be displayed when a collection has no data.
8.When adding a new collection control, repeat this configuration until step 2. To select the previously created Detail page, enable the Set Global Link component which displays the option to choose existing Detail pages. In this case example select the Detail Page.
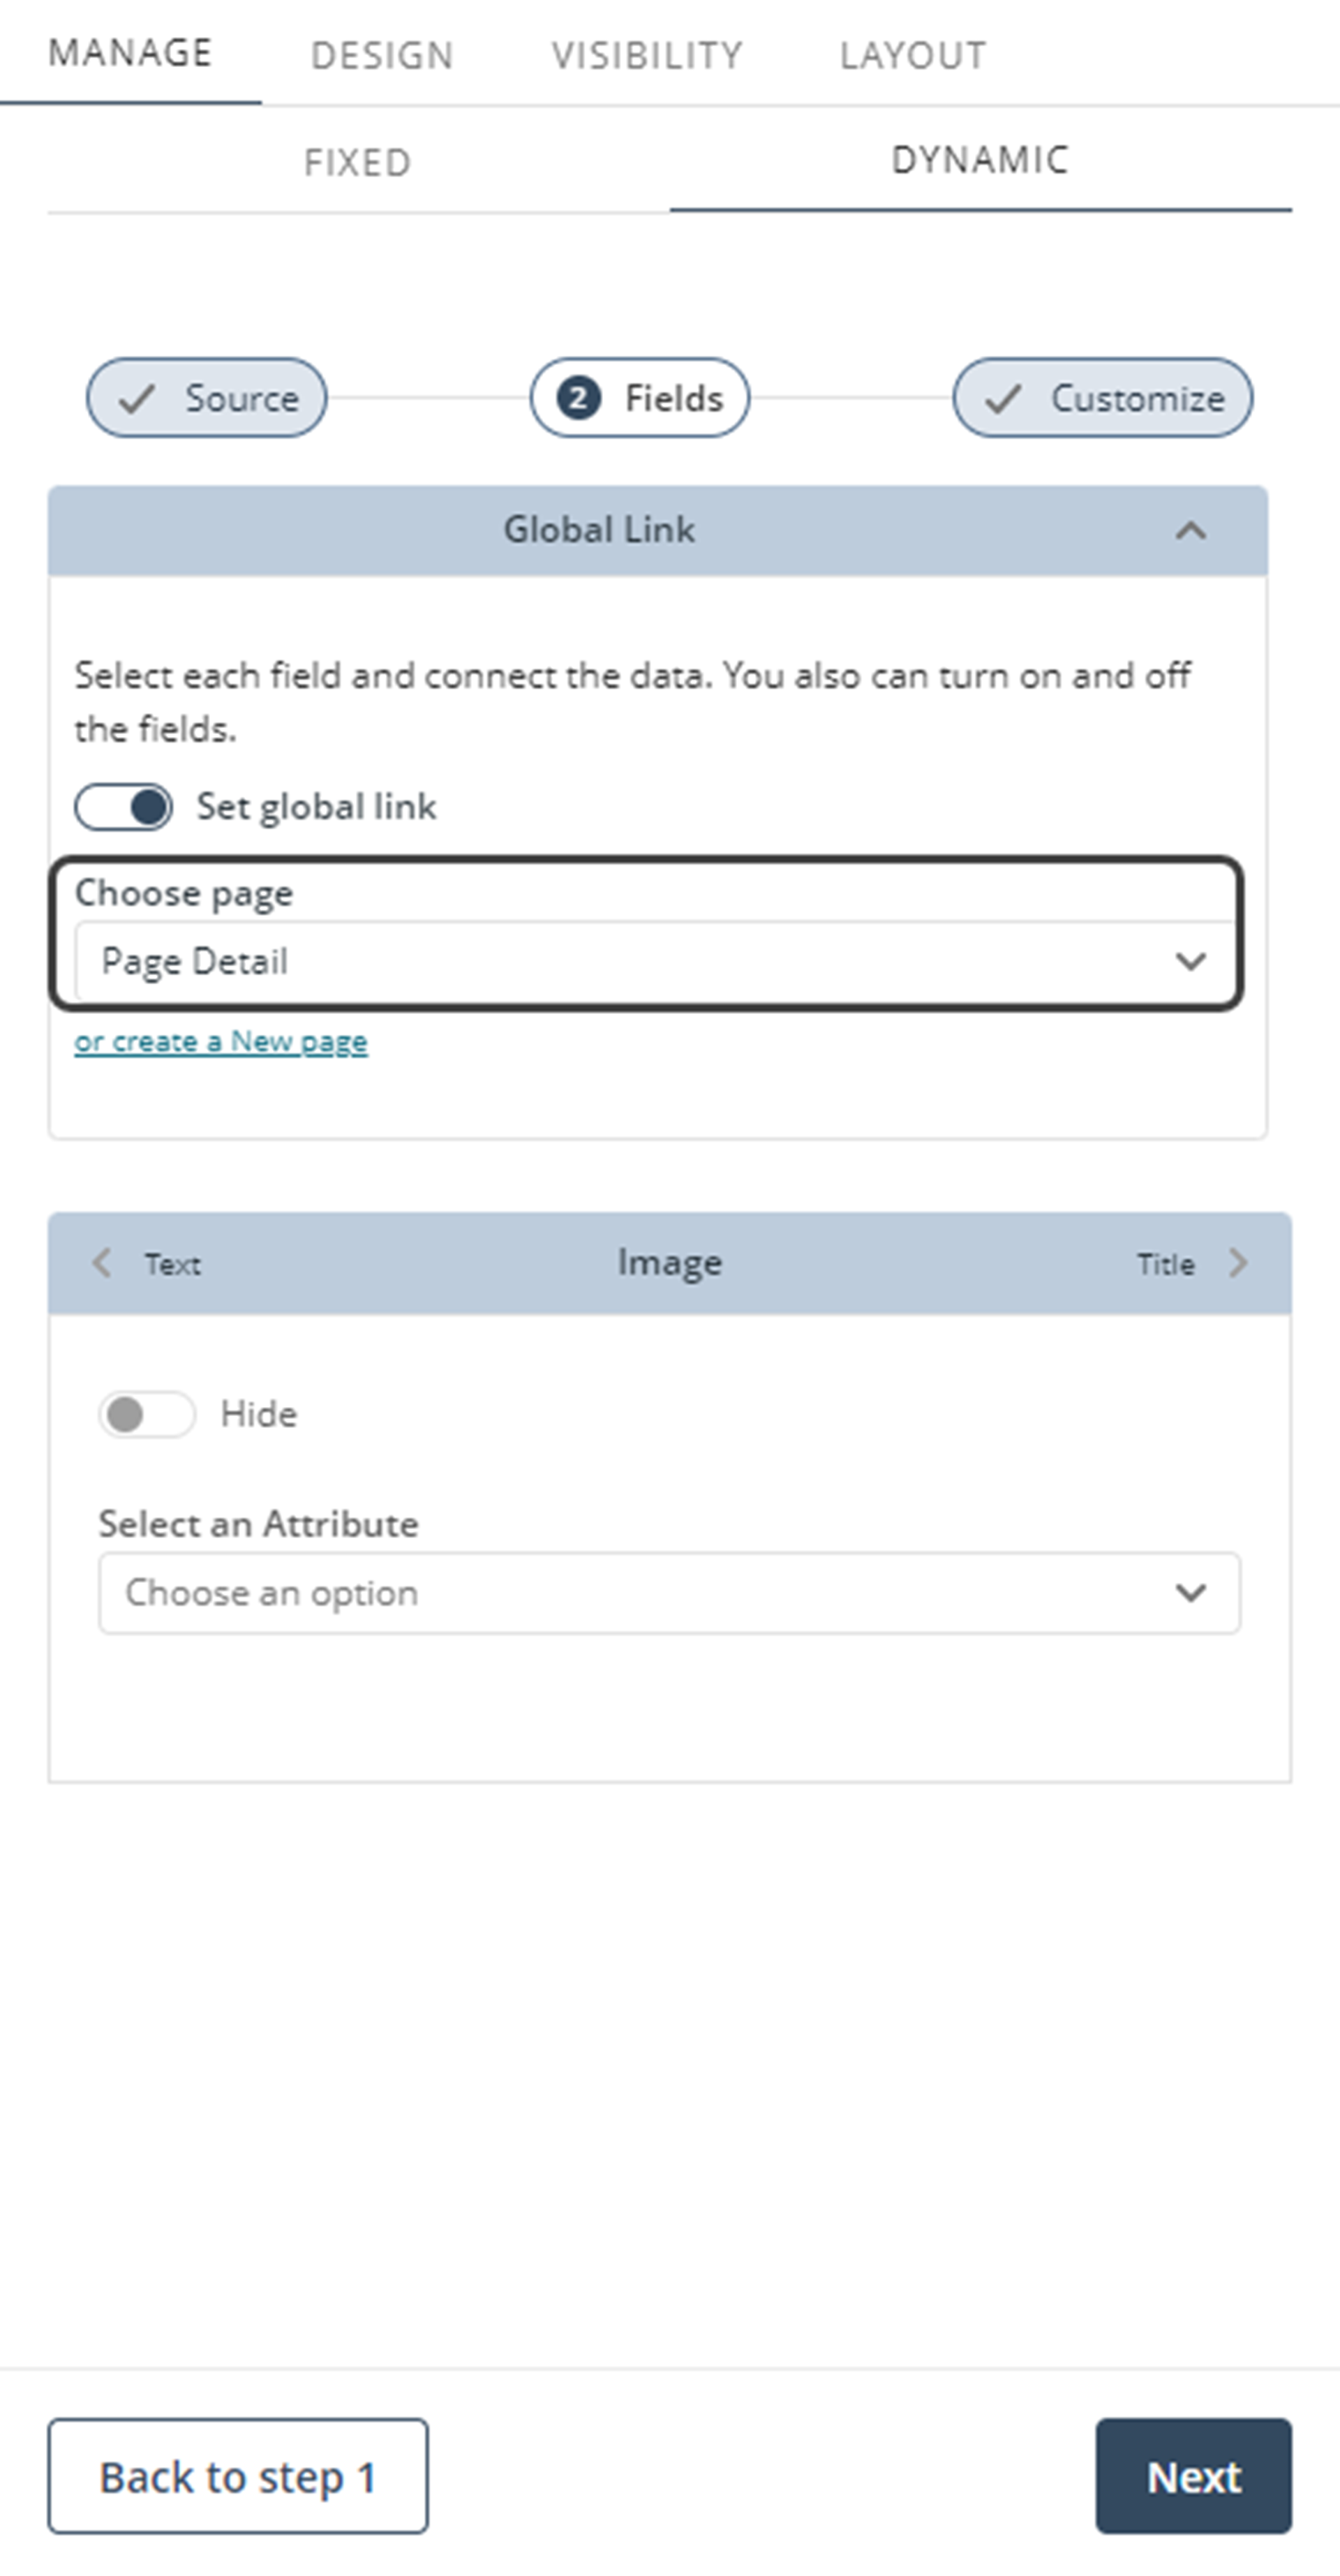
9.Configure either an Image, Title, Text, or Action associated to an attribute. Then click the Next button.
10.In the Customize section of the new Detail page, configure the page to your liking and then click the Create button.
Last Updated 10/30/2023 3:19:19 PM