Overview
One of the controls you can find inside Experience Elements is the My relevants control. With this control, you can enable and access a Persona's relevant processes (My relevants) in your app's Private pages.
This article explains how to add and setup the My relevants control, as well as how to customize the control's properties.
Adding the control to your page
To add the My relevants control to your page, follow the next steps:
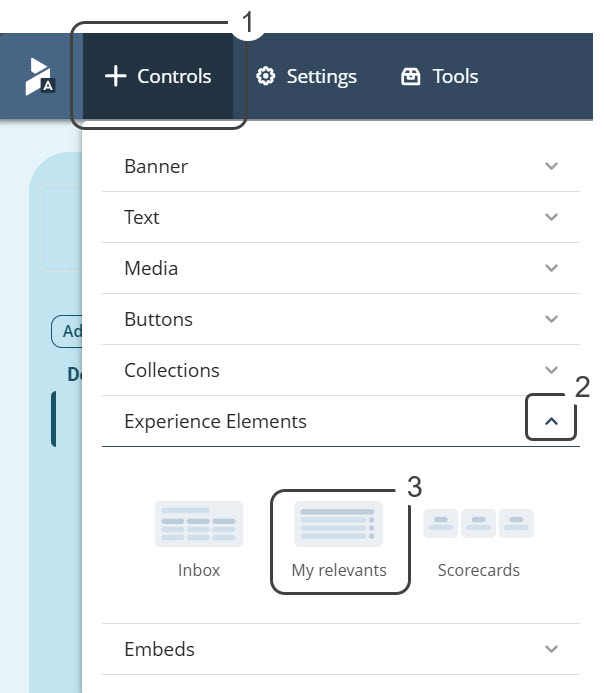
1.Go to the App Designer editor and verify that the page to which you want to add the My relevants control is a Private page.
2.Open the Controls menu and look for the Experience Elements option. Click the option's arrow icon to open a drop-down list with the different Experience Elements controls.
3.Look for the My relevants control and drag it to the page. Drop the control in the position where you want to add it.
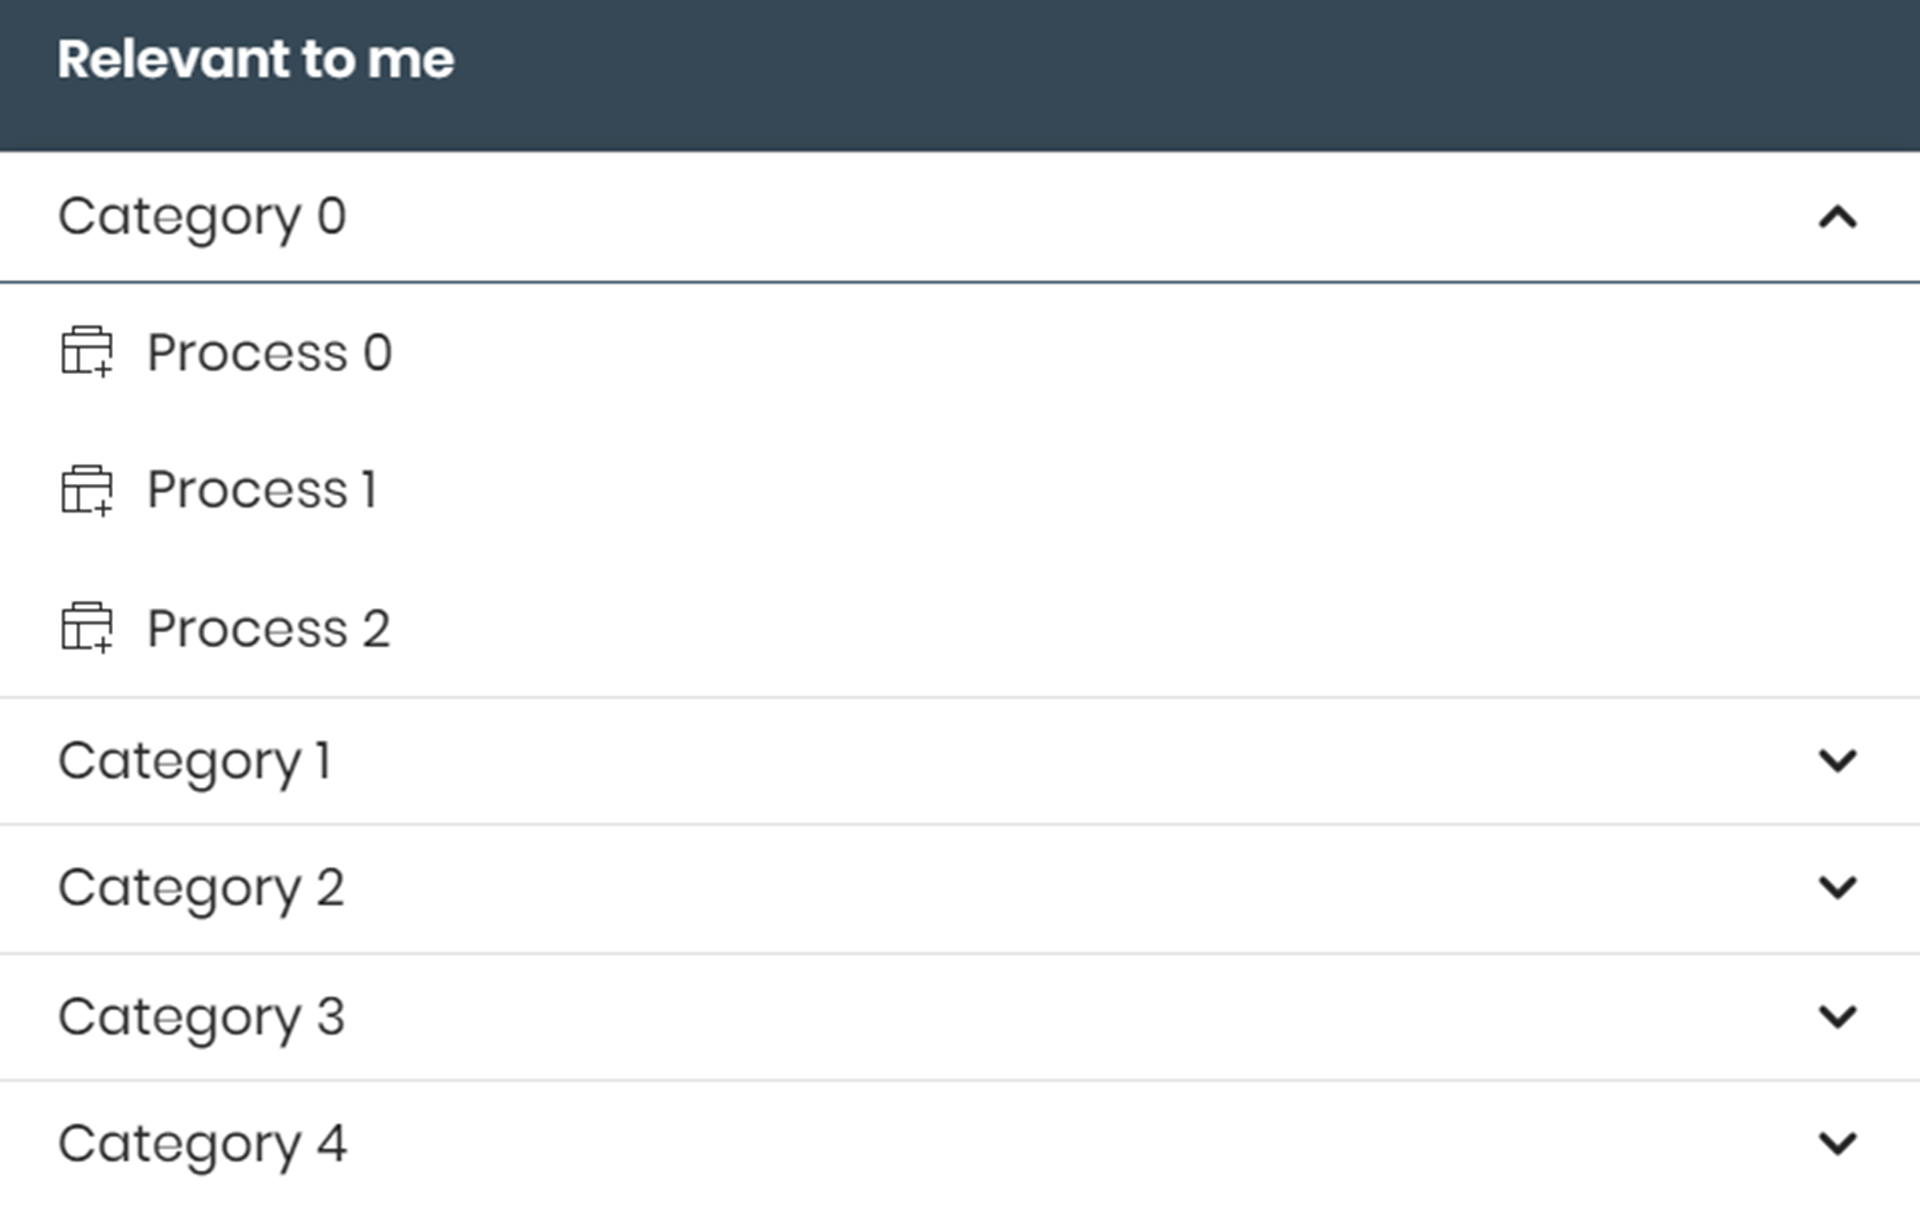
Once you have done this, the control appears on your page as follows:
|
In Detail pages, the Actions associated with the page entity are displayed instead of the Persona's My relevants. |
Configuration options
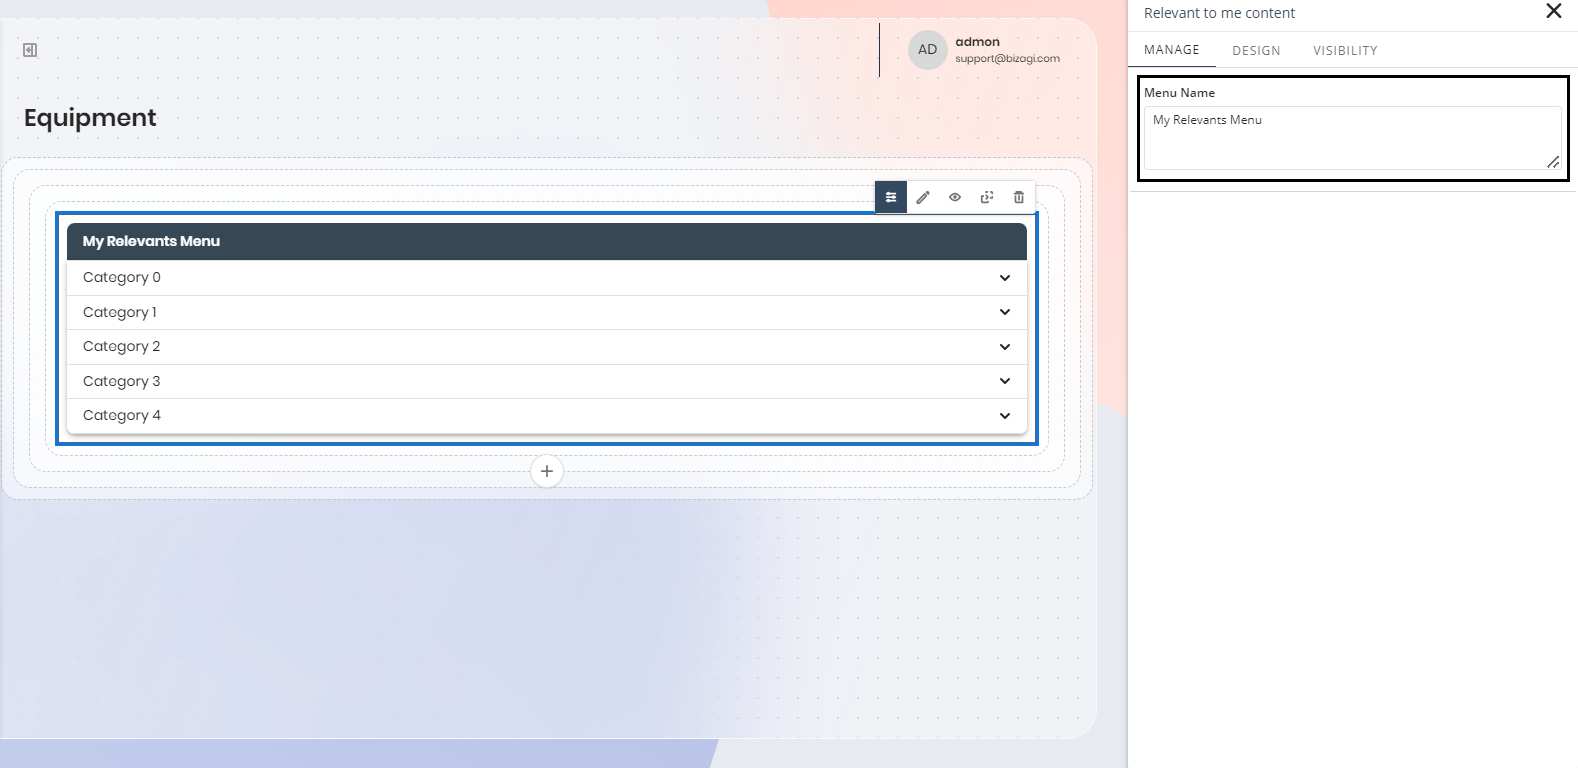
When you click the My relevants control, the configuration options appear in the top right corner of the control.
Manage Content
To manage the content to be displayed in the control, click the ![]() icon in the control's configuration options. This opens the Manage tab of the Relevant to me content panel to the right of your screen. In this tab, you can change the My relevants control's title (or menu name). By default, the control's title is Relevants to me.
icon in the control's configuration options. This opens the Manage tab of the Relevant to me content panel to the right of your screen. In this tab, you can change the My relevants control's title (or menu name). By default, the control's title is Relevants to me.
Settings
You can also change the control's look and feel by modifying its design. To do so, click the ![]() icon in the control's configuration options. This opens the Settings tab of the Relevant to me content panel to the right of your screen.
icon in the control's configuration options. This opens the Settings tab of the Relevant to me content panel to the right of your screen.
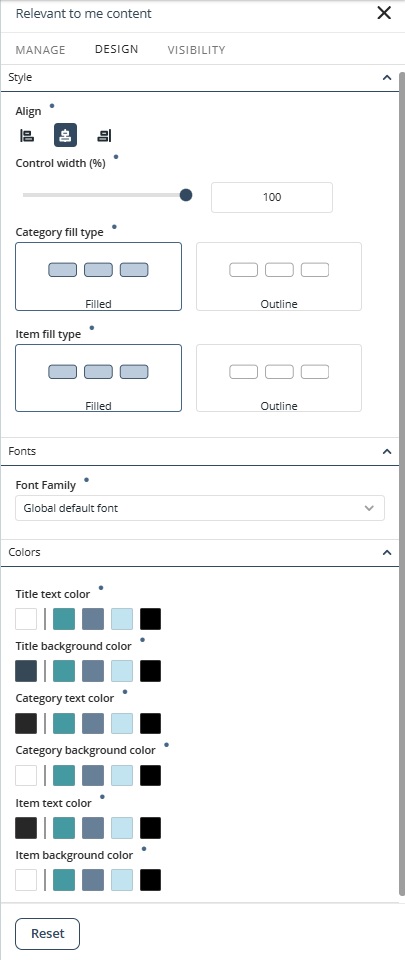
In this tab, you can configure the following properties to customize the My relevants control:
Style
•Align: Set the control's alignment to Left, Center or Right.
•Control width (%): Set the width of the control. The width is defined as a percentage of the width of the column or row that contains the control.
•Category fill type: Select how you want to display the control's categories. You can choose between Filled to include a background color on the categories drop-down menus, or Outline for a transparent background.
•Item fill type: Select how you want to display the control categories. You can choose between Filled to include a background color on the items, or Outline for a transparent background.
Fonts
•Font Family: Set the font family. Poppins Regular is defined as the default font.
Colors
•Title text color: Set the color of the text displayed in the control's title.
•Title background color: Set the background color for the control's title.
•Category text color: Set the color of the text displayed in the control's categories.
•Category background color: Set the background color for the control's categories.
•Item text color: Set the color of the text displayed in the control's items.
•Item background color: Set the background color for the control's items.
|
•Click the Reset button to restore the default settings. •Properties with inherited values display a blue dot next to their title. This indicator allows you to make targeted adjustments without affecting other settings. Hover over the blue dot to see the source of the inherited value, giving you greater control over your text control’s appearance. When you modify a property marked with a blue dot, its individual Reset button appears. Clicking this button restores the property to its default inherited configuration. |
Visible to
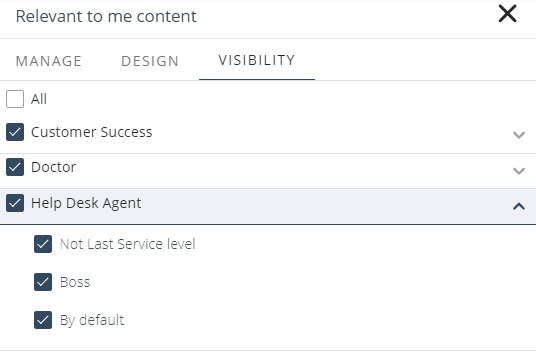
Finally, you can select which Personas can visualize the My relevants control. To do so, click the ![]() icon in the control's configuration options. This opens the Visibility tab of the Relevant to me content panel to the right of your screen.
icon in the control's configuration options. This opens the Visibility tab of the Relevant to me content panel to the right of your screen.
In this tab, you can check the All checkbox to select all Personas, or you can select the Personas (and Contexts) you want to grant access to the control by checking the corresponding checkbox.
Last Updated 11/19/2025 12:00:49 AM