Overview
Thanks to its friendly and intuitive design, you can easily manage pages in the App Designer editor from the Side menu. From the organization, configuration, and categorization in menus, as well as duplication, the different page options are detailed below.
Organize and categorize pages
To organize a page, drag the page and drop it in the desired position within the corresponding menu.
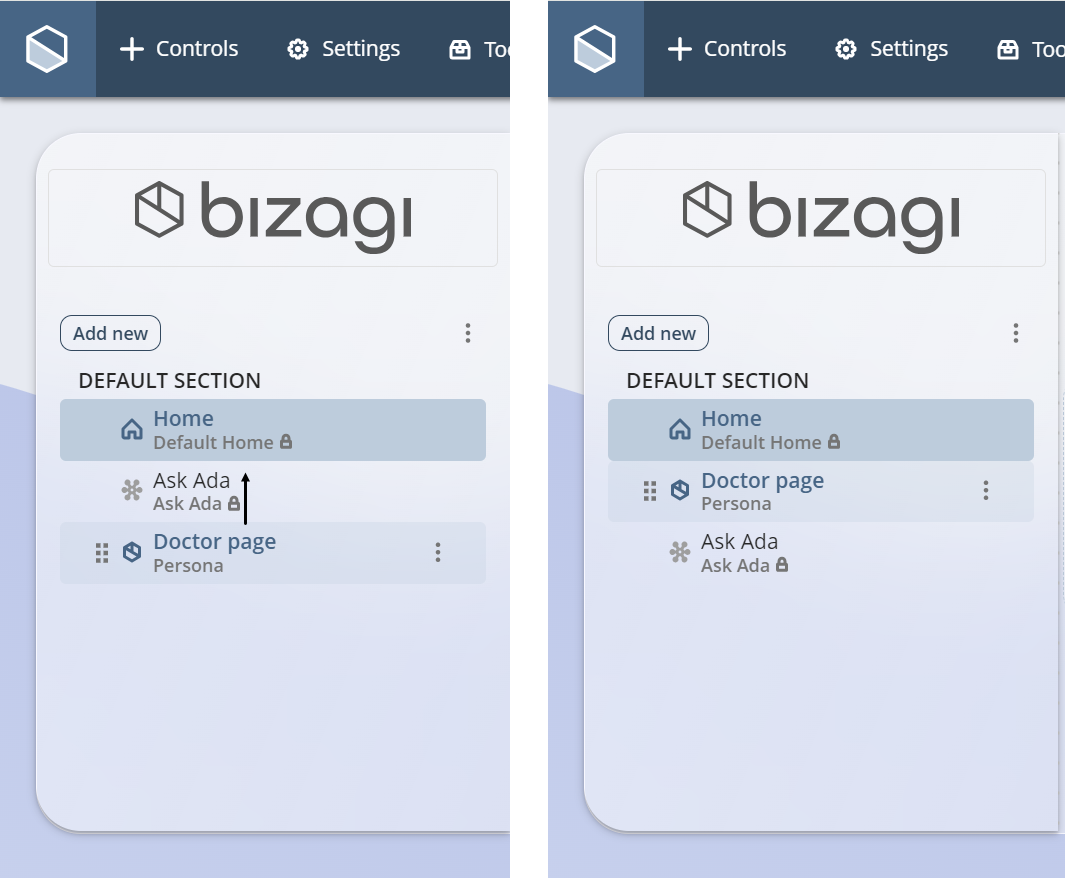
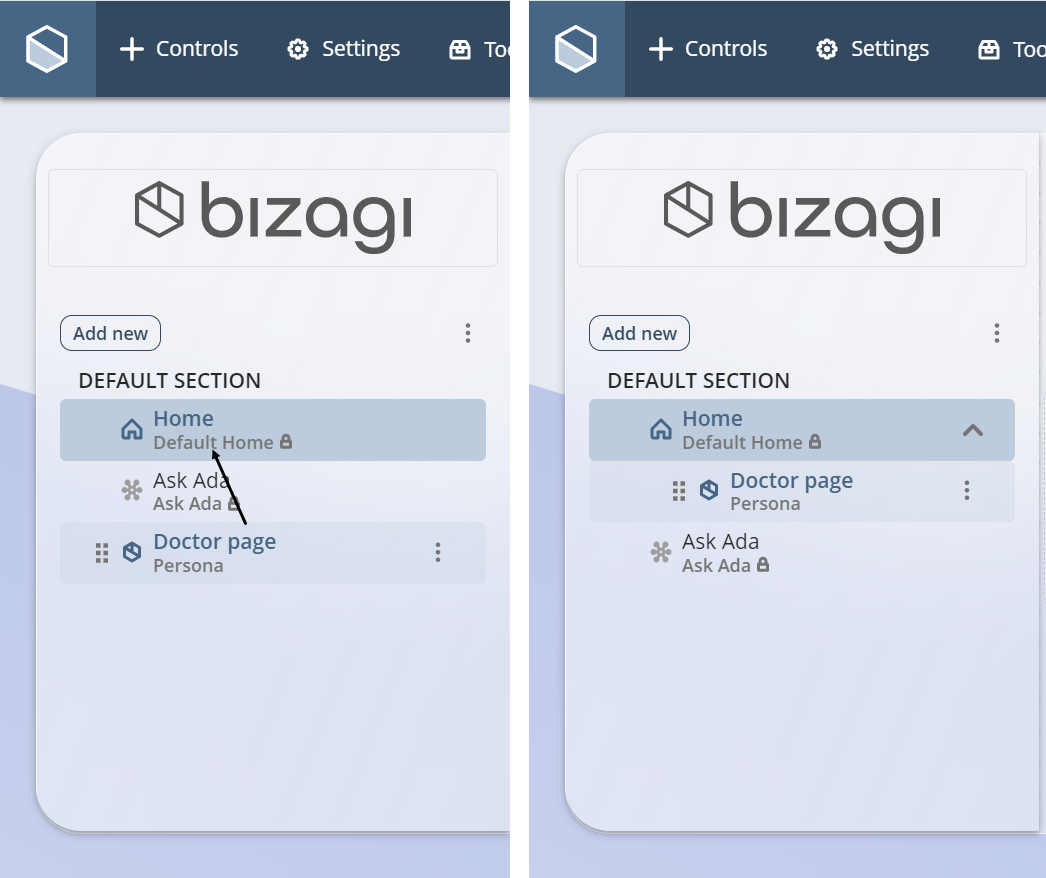
When you drop the selected page on another page, the selected page becomes a subpage and the other one its parent page. Subpages are organized inside their parent page as second-level items with a different indentation.
Page settings
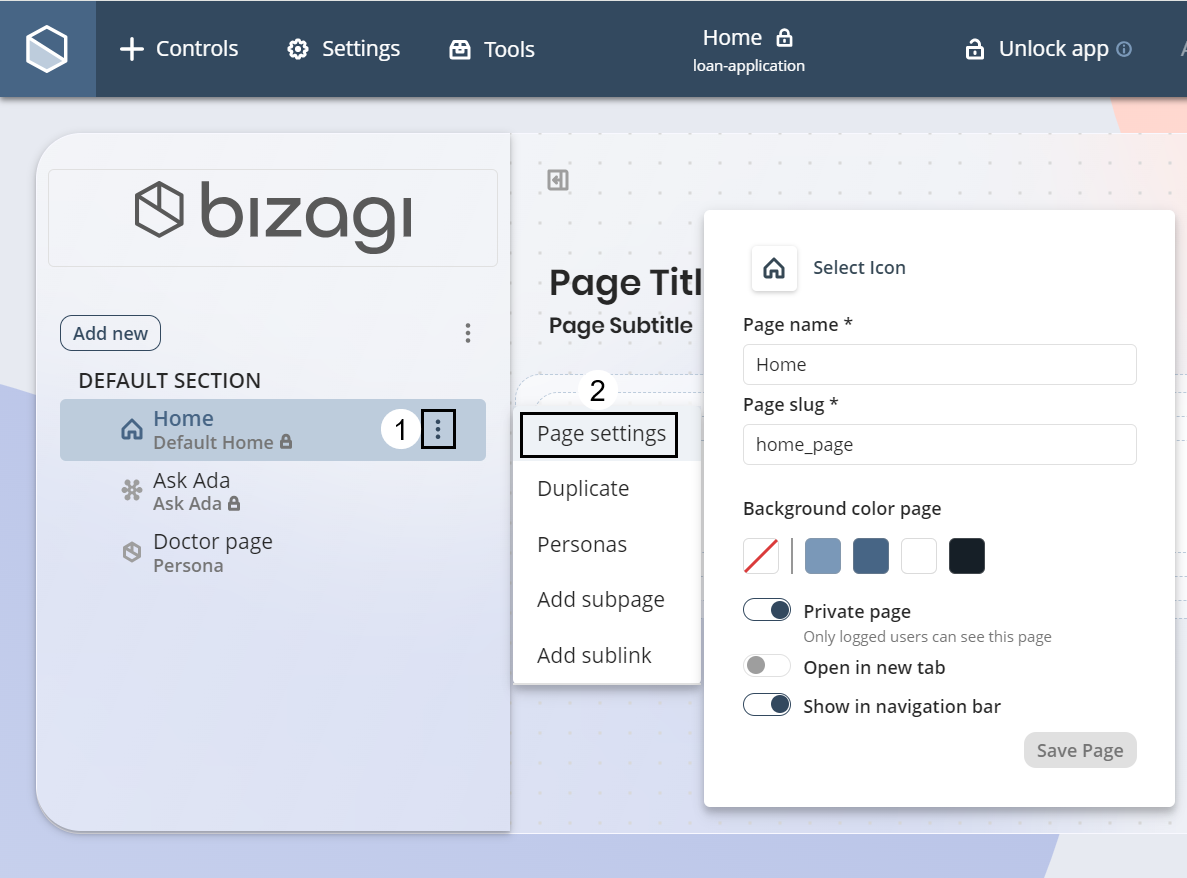
To access the page settings, hover over the page name and click the three-dot menu that appears. Then, select the Page settings option.
A menu appears for you to define the following settings:
•Select icon: Select an icon for your page. This icon can be seen when navigating your pages from the Side menu.
•Page name: Field that allows you to give a name to your page.
•URL slug: Field that allows you to define the URL slug for your page. When you type the Page name, the App Designer automatically suggests a URL slug.
The slug is the part of the URL that identifies the new page on the published app. When the new page is clicked, the slug is displayed in the address bar of the browser at the end of the app's URL. When the slug contains spaces, Bizagi automatically fills them in with a hyphen "-". As the slug is the part of the URL that explains the page's content, we recommend defining a slug on line with what people expect to see in the page and that's easy to understand.
|
The Page Slug field will not accept special characters except "-" and "_". |
•Background color: Set the background color of the page.
•Private page: Toggle switch that sets the page as Public or Private.
•Open in new tab: Toggle switch that defines if the page opens or not in a new tab.
•Show in navigation bar: Toggle switch that allows you to display or hide the page from the navigation bar once the app is published.
Duplicate a page
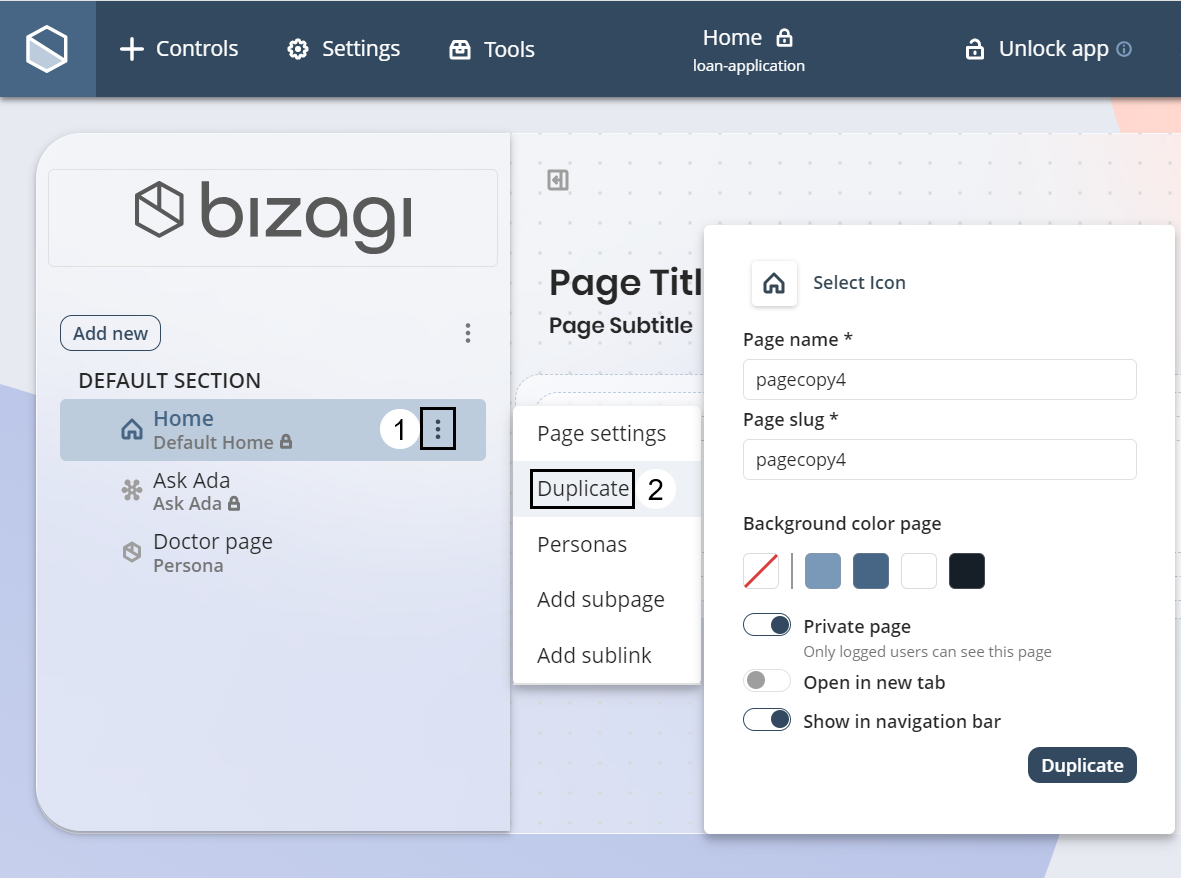
To duplicate a page, click the page three-dot menu and select the Duplicate option.
A menu appears for you to define the duplicate page settings. Once you define these settings, click the Duplicate button to create the duplicate page.
Add a subpage
You can also create a subpage directly from its parent page. To do so, click the parent page three-dot menu and select the Add subpage option.
A menu appears for you to define the subpage settings. Once you are done, click the Add page button to create the subpage.
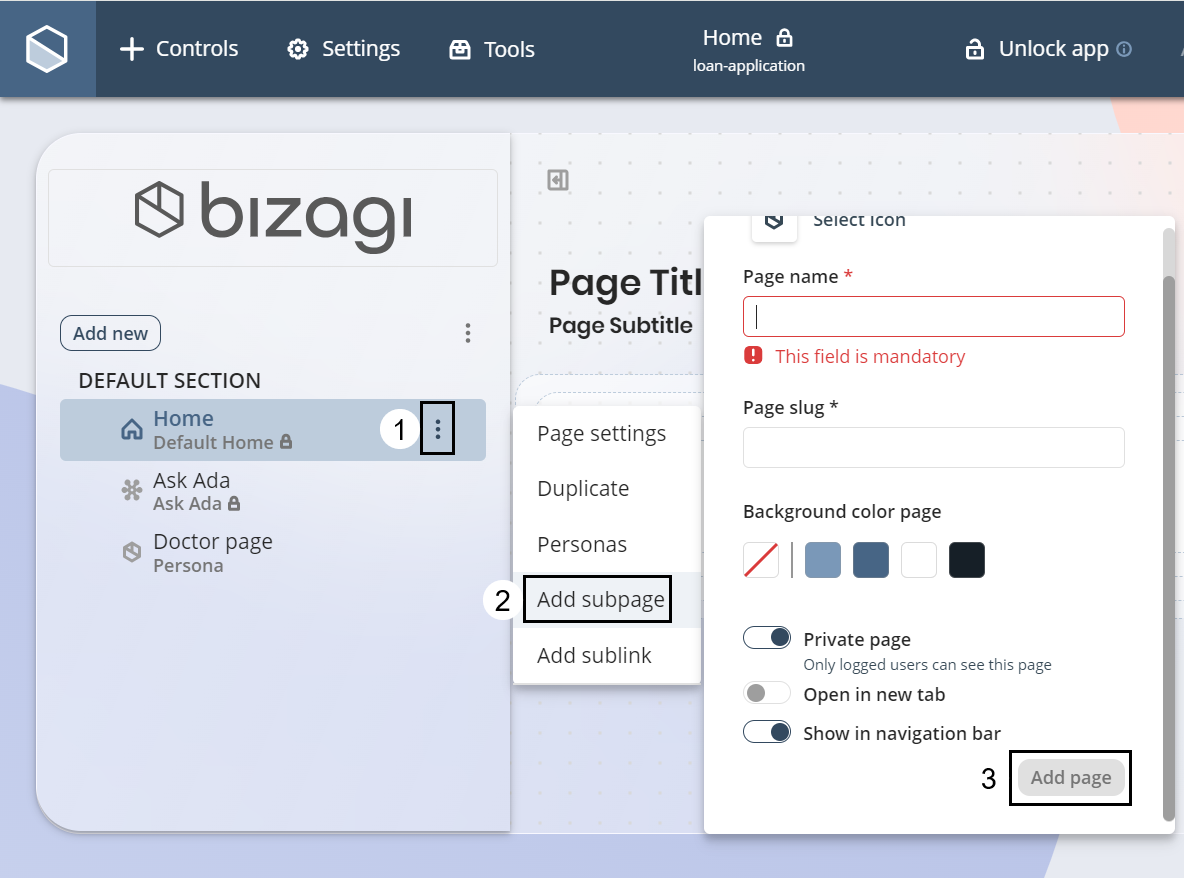
Recall that subpages are organized inside its parent page with a different indentation.
Add a sublink
Finally, you can add a sublink to a page, which is a subpage that redirects you to a specific link. To do so, click the parent page three-dot menu and select the Add sublink option.
A menu appears for you to define the following sublink settings:
•Display name: field that allows you to give a name to your sublink.
•URL: field where you must specify the URL to which you want to redirect the user of your app.
•Open in new tab: toggle switch that defines if the link content opens or not in a new tab.
Once you are done, click the Add link button to create the sublink.
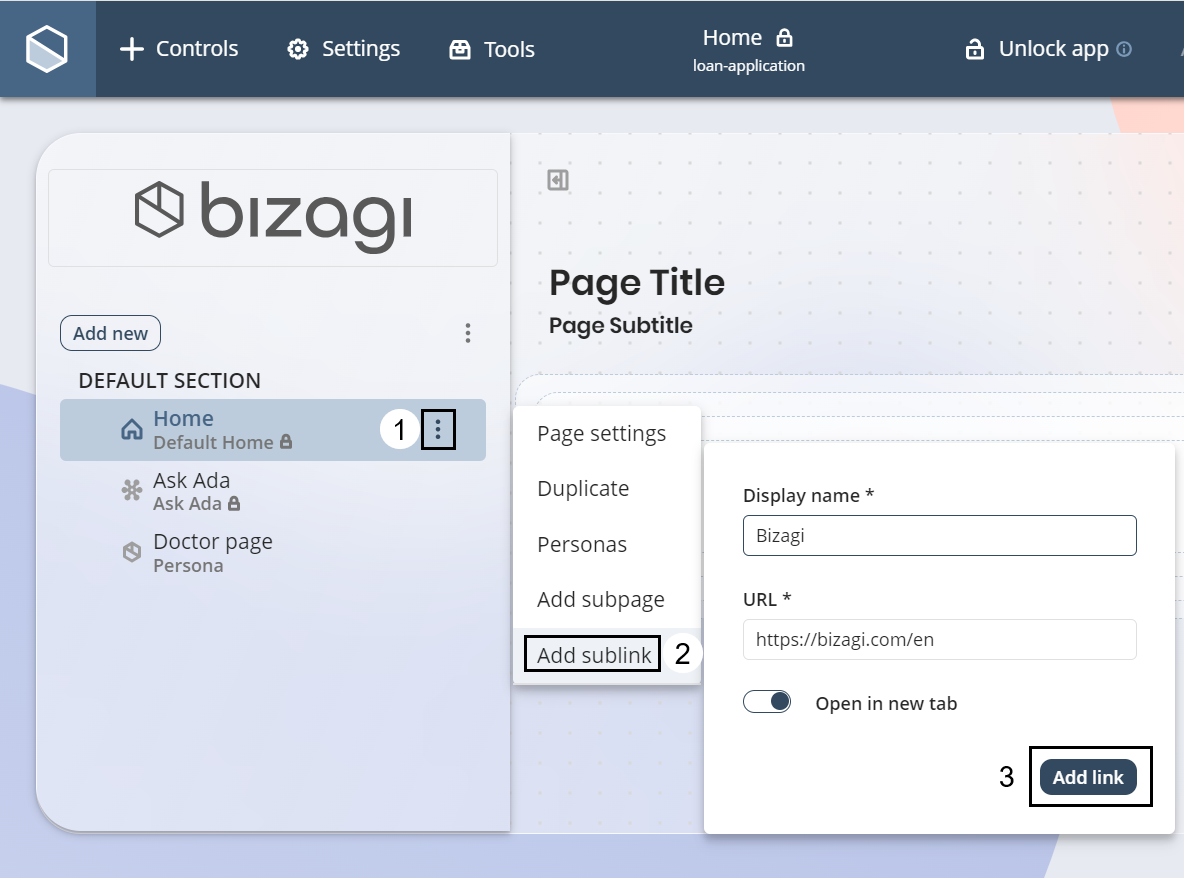
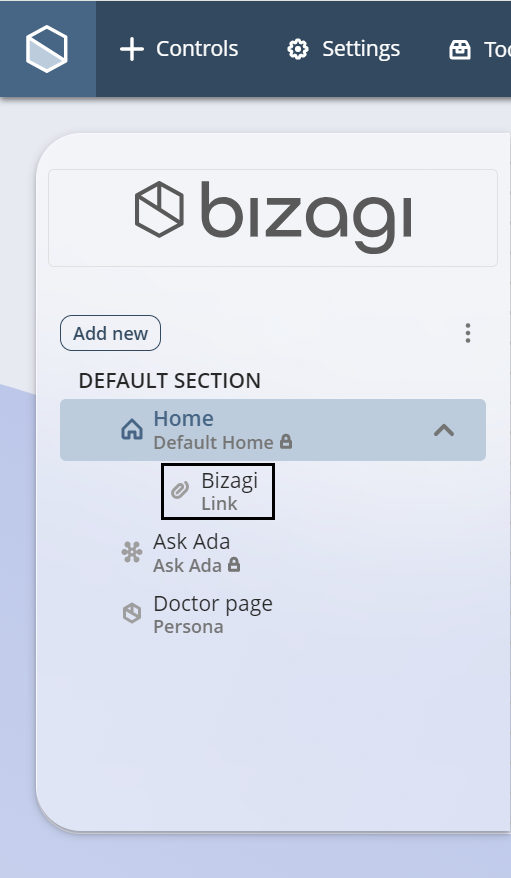
The sublink will be added to the parent page as a second-level item with a different indentation.
Last Updated 5/28/2024 4:01:20 PM