Overview
The following article describes how to use additional options when choosing to integrate Bizagi into SharePoint through specific Web Parts.
Such additional options provide advanced settings for a SharePoint Web designers to enhance flexibility so that they may:
•Customize exactly where each of the Web Parts (that make up the complete Bizagi Work portal) is exactly displayed.
•Decide if certain options are available and shown for a given SharePoint page (For example, you can show the inbox from a certain page as a summarized view without having the full work portal options).
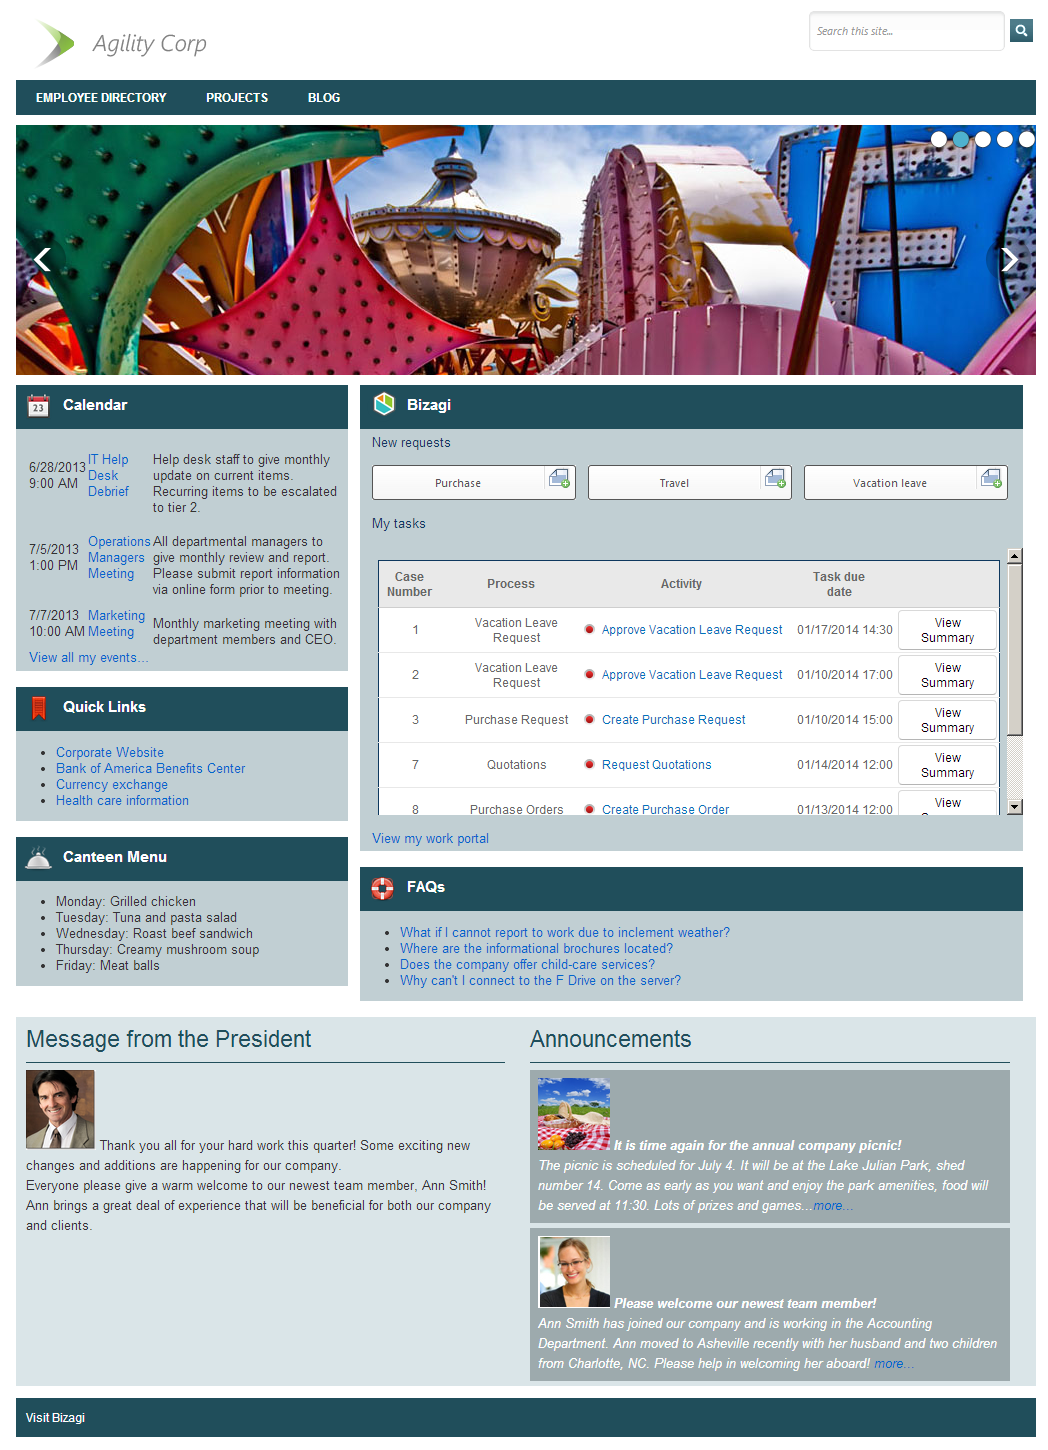
In the example above, the inbox presents five cases per page.
Specific Web Parts
For this approach you choose to include separately the information and views that Bizagi presents at its Work portal.
The specific Web Parts are: Activity Form, My Inbox, Case summary, Start Process list, Start Process button, and they are described in the sections below.
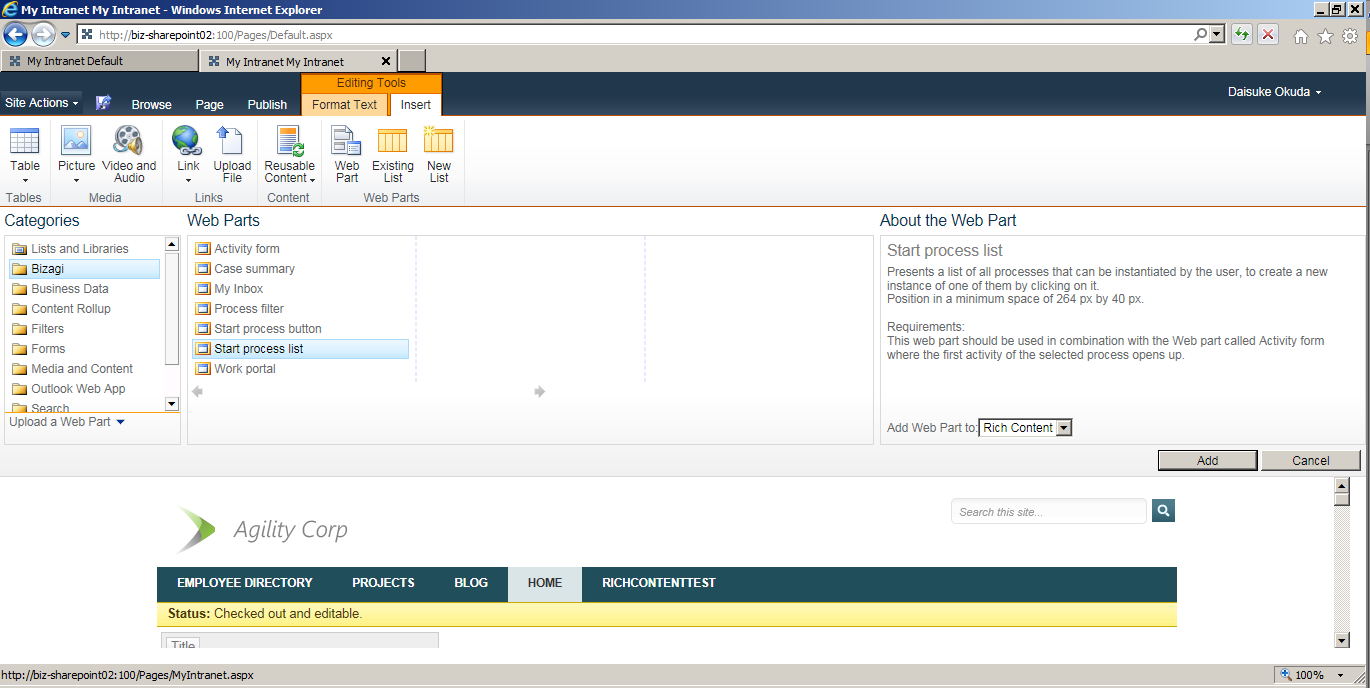
By including all of these, you may build up the Bizagi Work portal manually.
If you wish to automatically include Bizagi Work Portal as a whole Web Part, refer to The Work portal Web Part.
1. My Inbox
This Web Part shows the list of the user's pending work (their Inbox).
The user sees a filtered list of his or her to-do list (according to the activities' due date or to specific Processes).
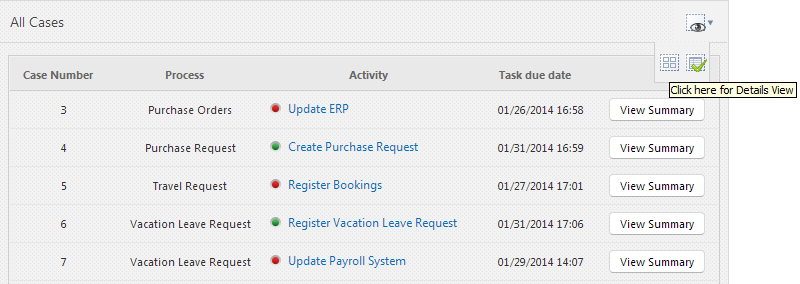
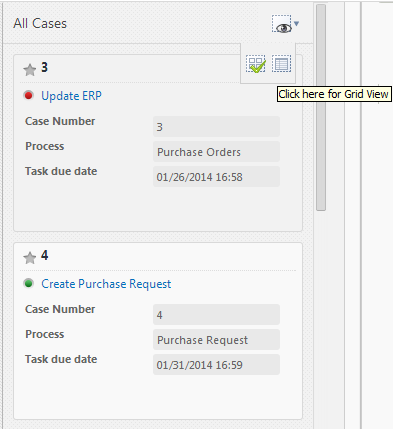
The Bizagi Inbox appears in two different views: as a grid or with details, and you can switch between the views:
Clicking on a pending task triggers the Case summary Web Part.
Keep in mind this Web Part has some settings which require configuration (as described in the next section: Web Parts settings). To learn how to configure this Web Part refer to My Inbox Web Part.
2. Activity form
This Web Part lets users work in a pending activity (includes whether a Process instance has started).
This Web Part appears when the user clicks a pending task or creates a new case (triggered by the Work Portal, Cases summary, Start process button and Start process list Web Parts). The user can fill out any information to complete his or her work (click Save or Next).
This Web Part can appear as a pop-up window, or in a totally different page (useful when having a lot of information to fill out), or somewhere else right in the same page.
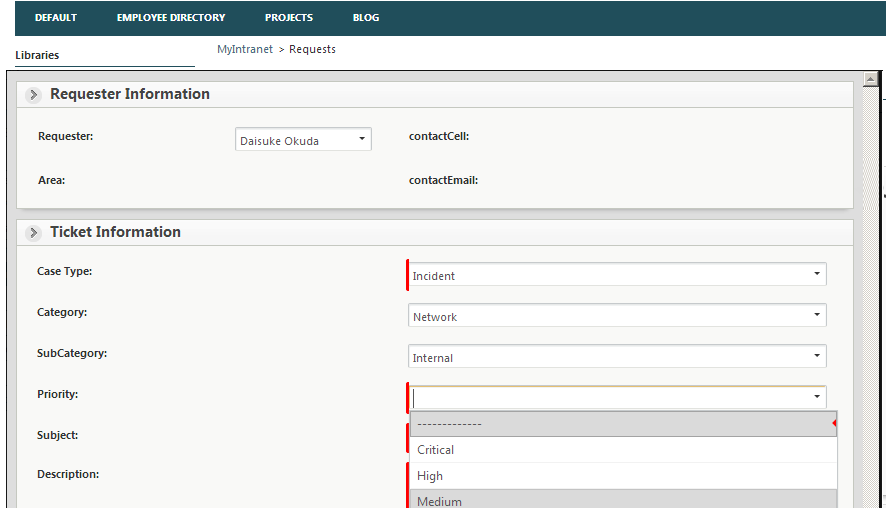
Keep in mind this Web Part has some settings which require configuration (as described in the next section: Web Parts settings). To learn how to configure this Web Part refer to Activity form Web Part.
3. Case summary
This Web Part shows lets users view the summary form of a case, and whether to work on this it by clicking the Work on it button.
It is really useful when a user needs to first take a look at summarized and important information related to processes, before starting to work on a case.
The summary appears by default in the right side of the Inbox in details view, or also when the user clicks the View Summary button when in grid view).
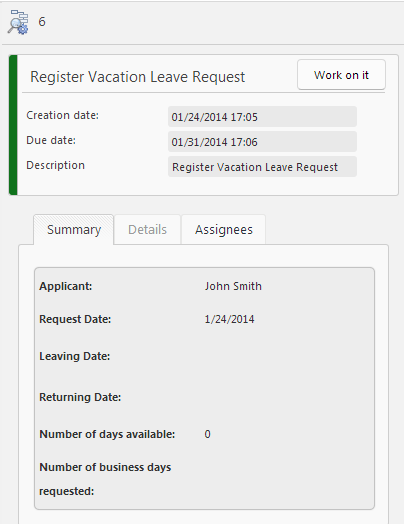
Clicking to work on a case opens the Activity form Web Part.
This Web Part has some settings which require configuration (as described in the next section: Web Parts settings). To learn how to configure this Web Part refer to Case summary Web Part.
4. Start process list
This Web Part shows lets users start Process instances (create new cases).
It shows the available Process list, with the option to search or to filter according to recent Processes.
It is really useful when a user has many possible Processes to start, if there are few processes, it can be better to use the Start Process button Web Part instead.
Selecting and clicking a Process triggers the Activity form Web Part to show the first form of that Process.
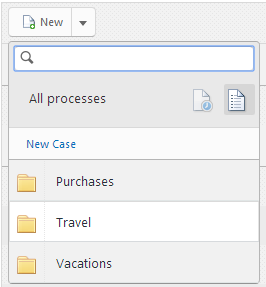
This Web Part has some settings which require configuration (as described in the next section: Web Parts settings). Refer to start process Web Part.
5. Start process button
This Web Part shows lets users to start Process instances (create new cases) with one click.
It shows a button with an optional label to provide a shortcut, and is really useful when a user usually starts one or a few types of Processes (you may have one or more of this Web Part).
On the other hand, if the user can choose to start many possible Processes, it is better to use the Start Process list Web Part.
Clicking the button triggers the Activity form Web Part to show the first form of that Process.
![]()
This Web Part has some settings which require configuration (as described in the next section: Web Parts settings). To learn how to configure this Web Part refer to Start process Web Part.
|
To configure this Web Part, sign in with a user that has the rights in Bizagi to access processes. |
Interaction between Web Parts
The following diagram illustrates how these Web Parts interact with each other (their dependencies):
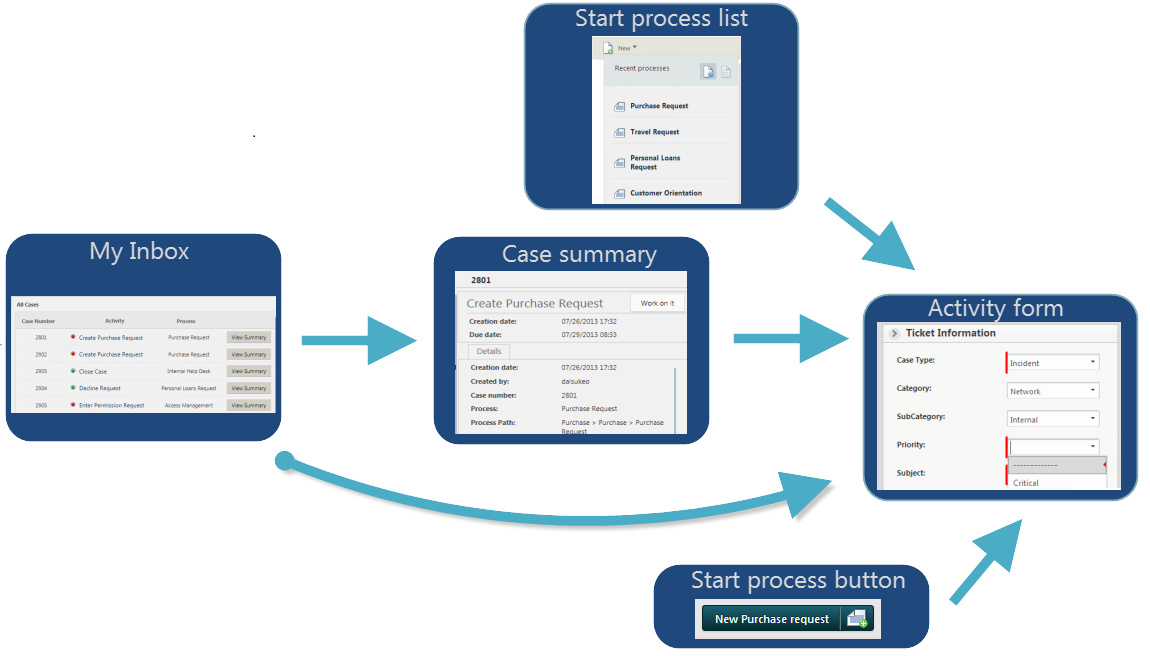
For instance, the Activity form is shown and is updated by any click events coming from either: the Start process button, the Start process list, the Case summary, or the Inbox itself.
Keep in mind you should configure each of the involved Web Parts, and then check-in your changes.
In the example above, we are using four Bizagi Web Parts: three Start process buttons, and one Inbox:
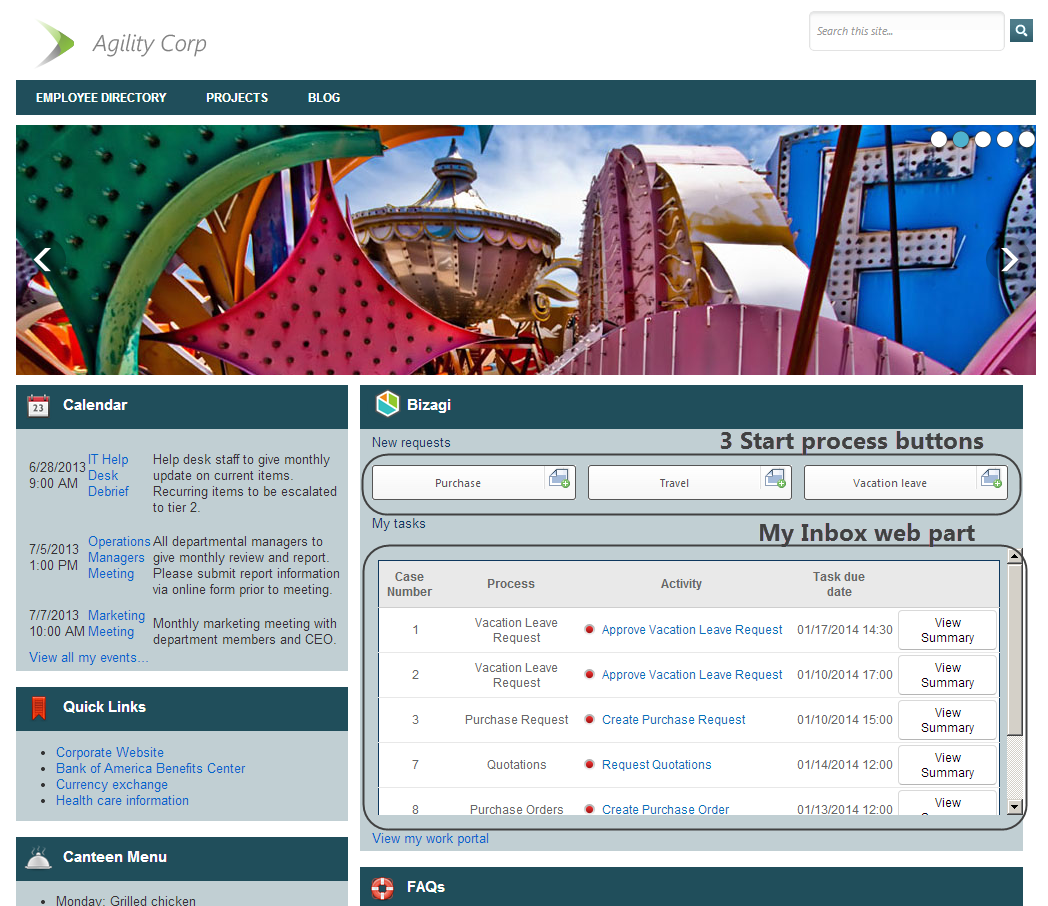
At this point, we are set configuring the Web Parts with custom options!
What is next?
You may also customize the styles used by the Web Parts.
To do this, and override the default styles, refer to Web Parts styles.
Last Updated 1/23/2023 12:05:10 PM