Use
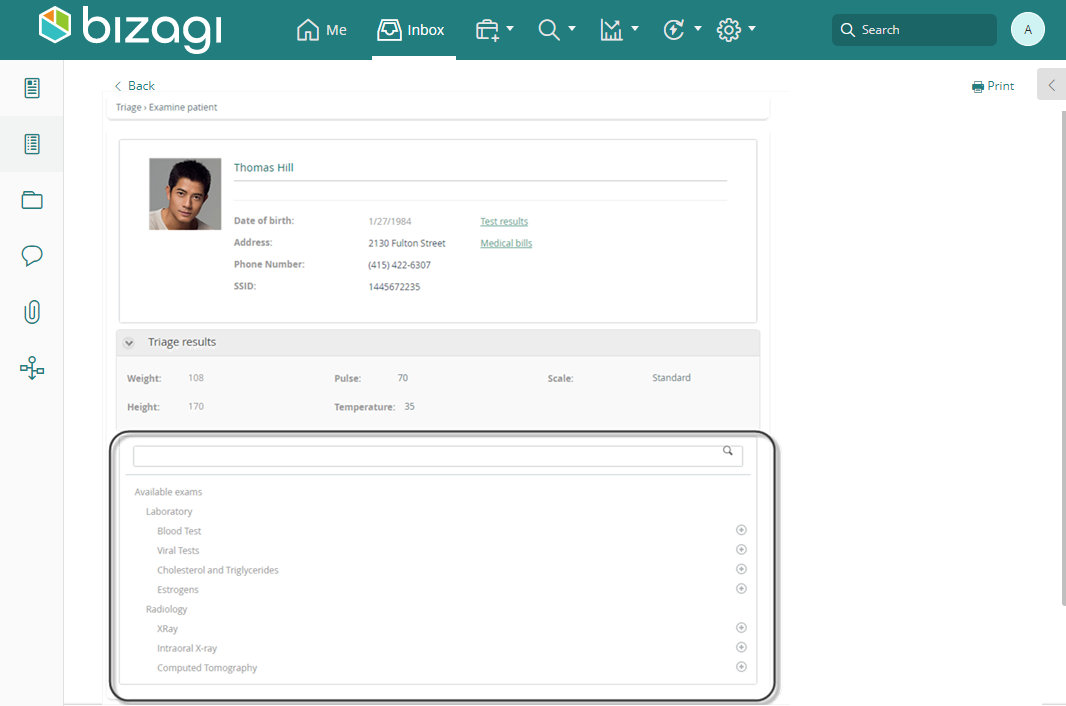
The Polymorphic Launcher control displays all Actions according to the inheritance defined for the parent entity, in a tree-like structure. Refer to Inheritance in data modeling to know more about Inheritance and polymorphism,
The control will only display the available Actions for the Persona.
Considerations
To use a Polymorphic Launcher Control:
•The Polymorphic Launcher control is not supported in Start forms.
•You have to have defined Inheritance in your Data Model.
•There must be a one-to-many relationship from a master entity to the hierarchical parent entity.
•The entity related to the action to be launched using the control must have a constructor previously defined. For more information refer to Constructors.
•If a child node has a constructor, the Polymorphic launcher will display including the hierarchy its parent entities, if not, it will not be displayed.
Properties
Every control has a set of properties that allow to customize its behavior in the Work Portal. However, some properties are exclusive to a specific control. The following are properties exclusive to the Polymorphic Launcher control:
Basic tab
PROPERTY |
DESCRIPTION |
|---|---|
Data source |
XPath of the hierarchical parent Entity |
Additional xpaths |
Define the data of the current process that has to be injected in each of the forms or process launched. The Xpaths sent will be mapped automatically when the target entities have a direct relationship with them. Otherwise the relationship to be mapped has to be created as a Hint. |
Allow to Search |
Displays a Search box in order to find the required action. |
|
Clicking the Set to default value icon will reset the properties. |
Example
In the next example we will use our Bizagi Hospital project. In the Examine patient activity, a doctor can order many exams according to the result of the examination. The available exams for a patient follows a hierarchical structure explained in the image below:

Using the Polymorphic features developed by with Bizagi, we can display this structure in any form within our process.
As you can see, we have in our data model a one-to-many relationship with the hierarchical parent entity (Available exams), represented by the XPath Triage.Patient.MyExams.
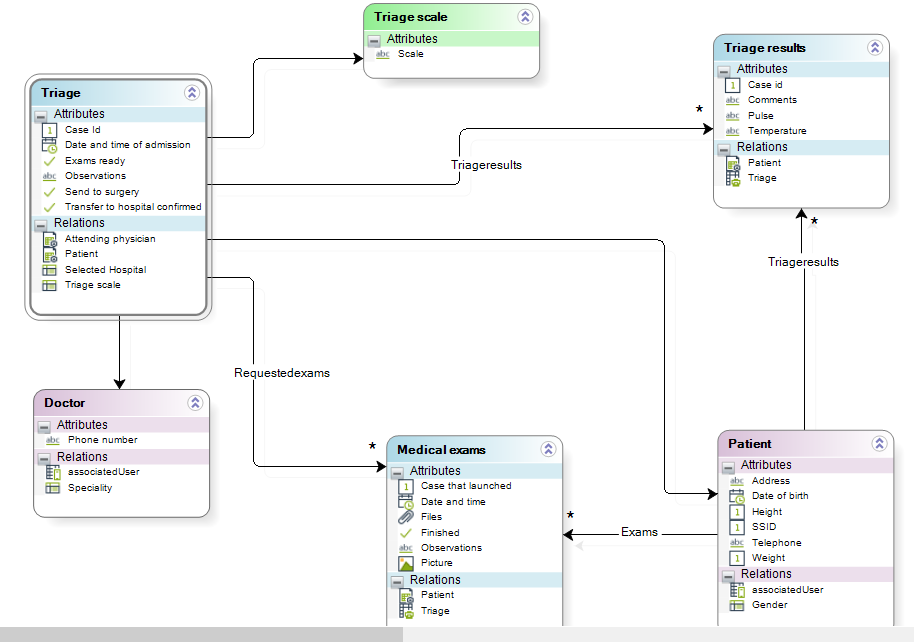
1. Define the hierarchical structure of the exams in Bizagi Studio, review the example presented Inheritance in data modeling in order to create such structure.
In our example, the leaf nodes will be available to be launched therefore, build a constructor for each one.
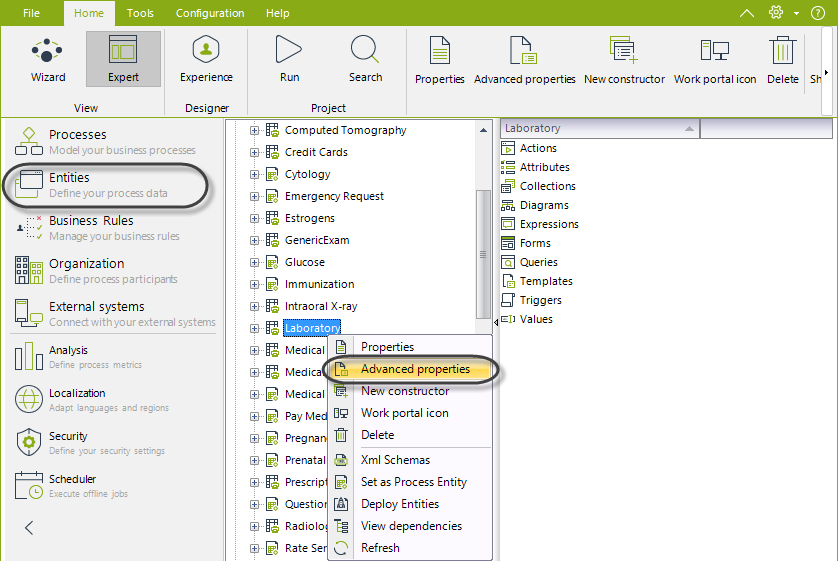
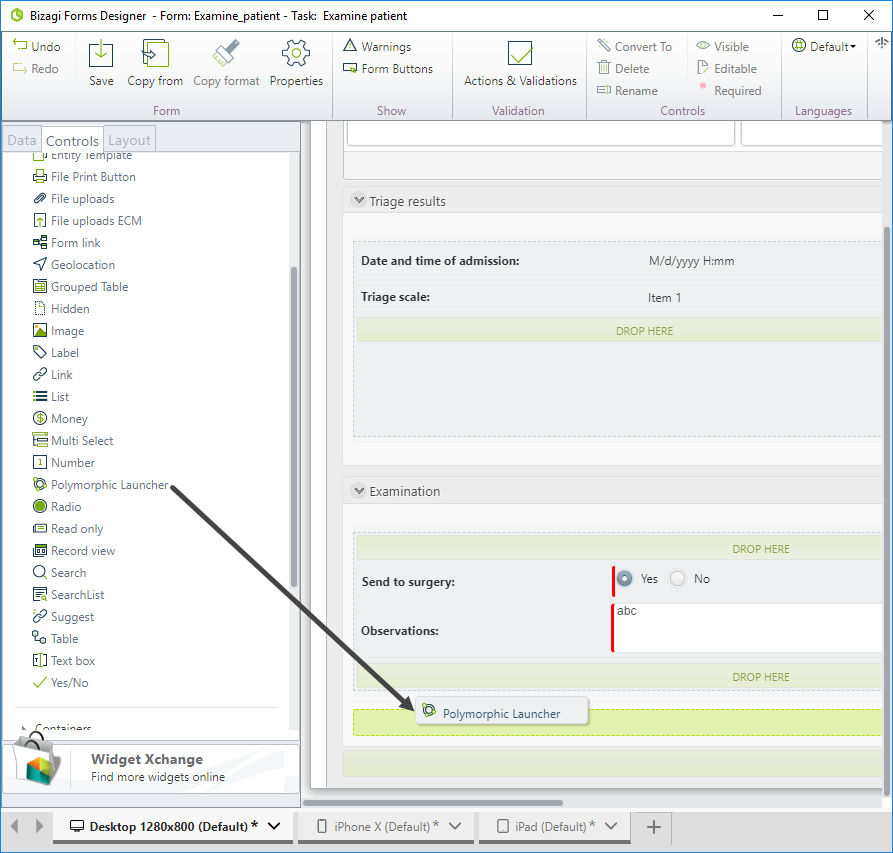
2. Go to the Triage process and open the form of the Examine patient activity. Go to Controls tab and expand Bizagi controls.
Drag and drop the Polymorphic Launcher control.
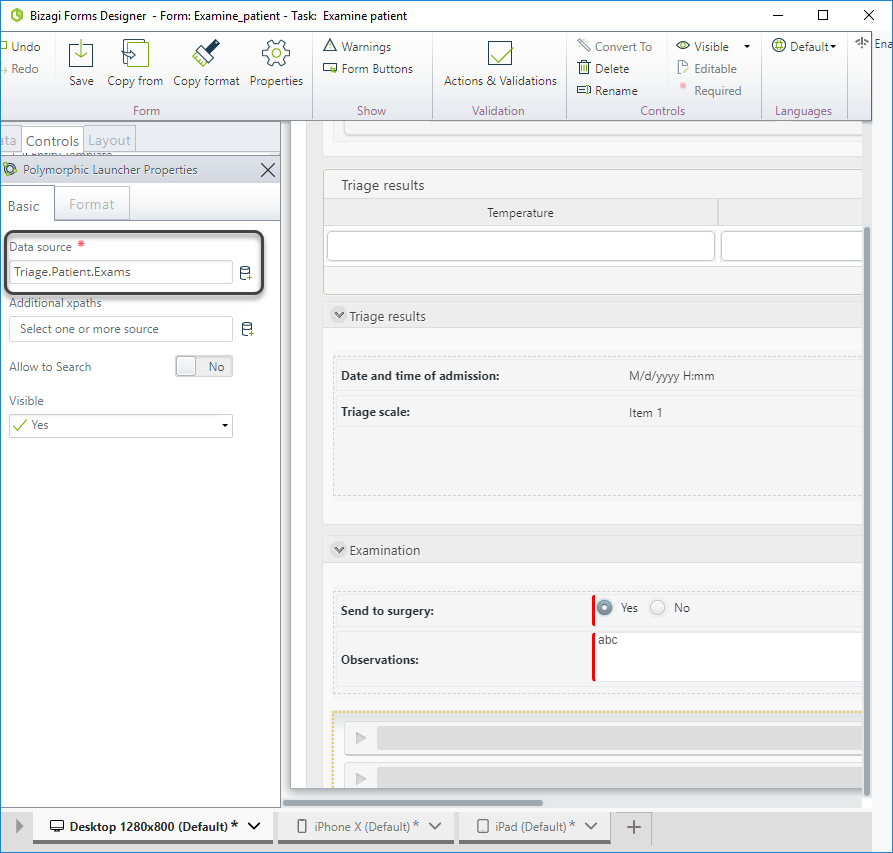
3. Open the control's properties and set the Data source. As we mentioned before, we have in our data model a one-to-many relationship with the hierarchical parent entity (Available exams), represented by the XPath Triage.Patient.MyExams..
4. The Entities of the leaf nodes defined in Step 1 have a relation with Patient and Doctor, so it is required to send the information of the current patient and the tending doctor to the entities. Select the xpaths Triage.Patient and Triage.Attendingphysician in the Additional xpaths property.
Click on the button ![]() per each additional XPath you want to add.
per each additional XPath you want to add.
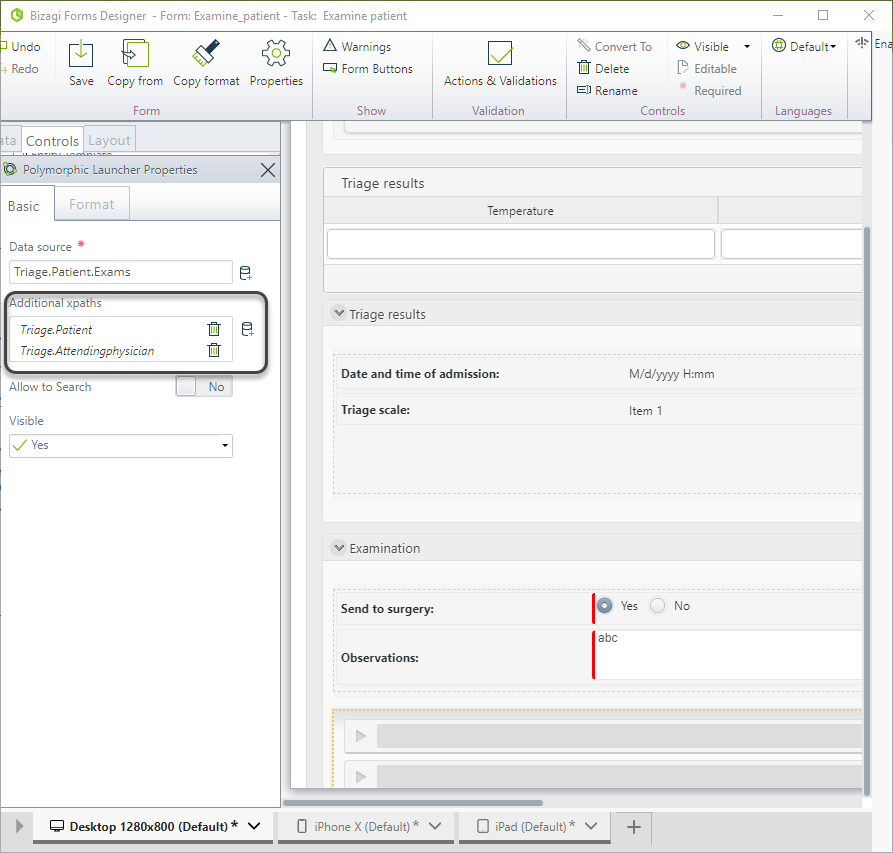
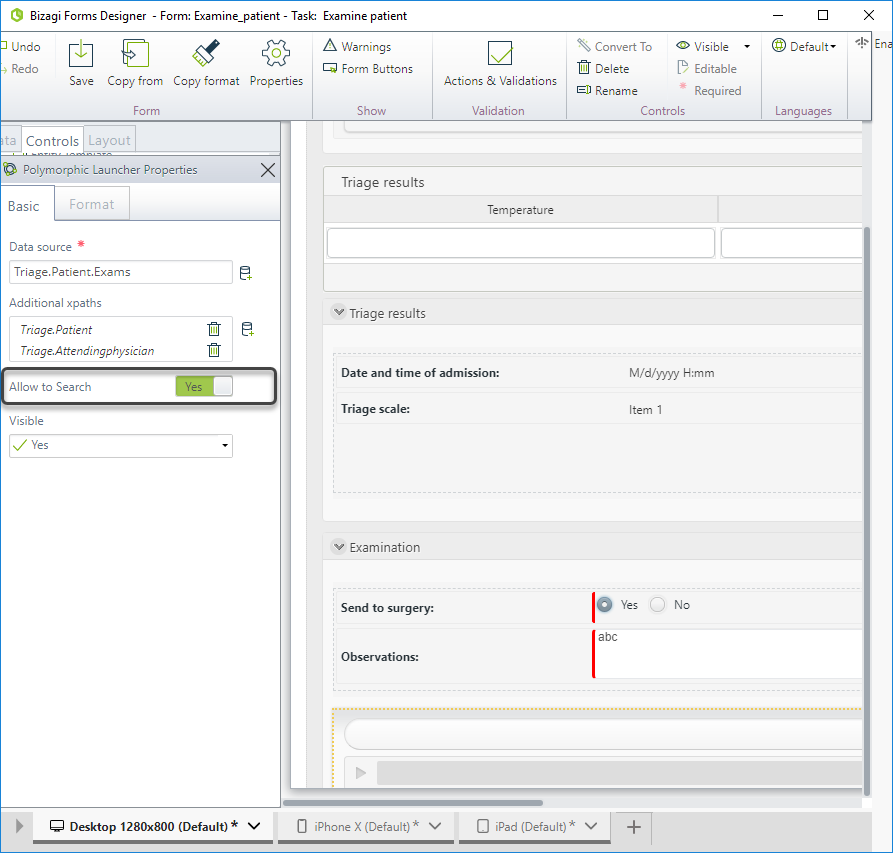
5. Set the Allow to Search property to true in order to help the Doctor to find an exam.
6. Save the changes and go to the work portal to test the results.
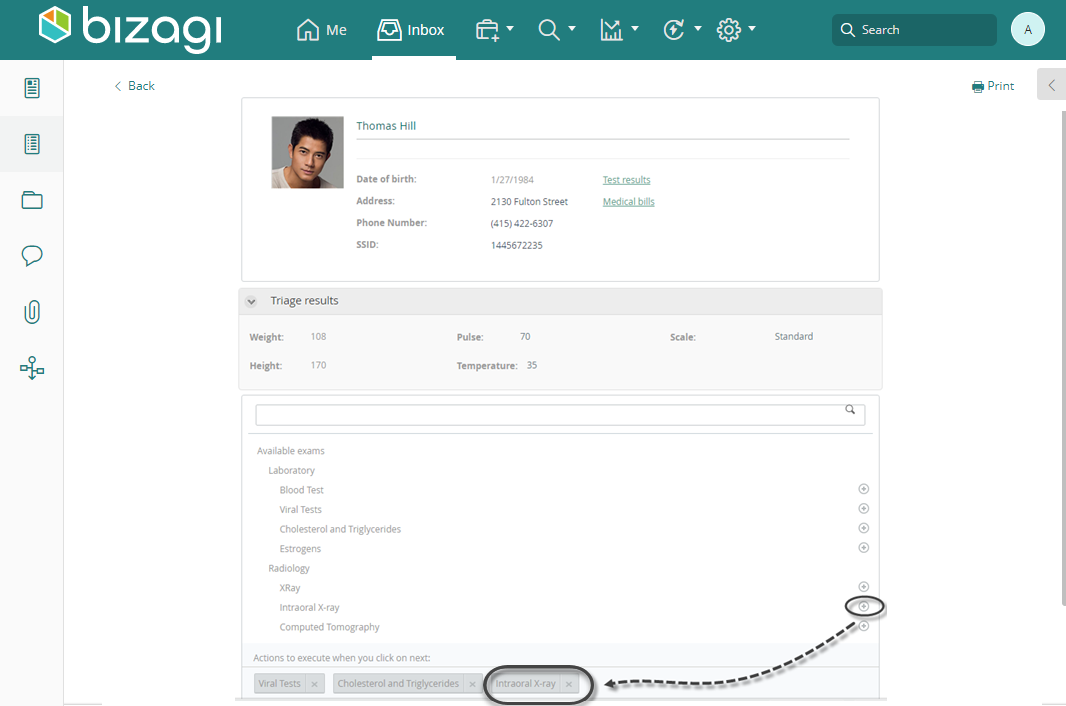
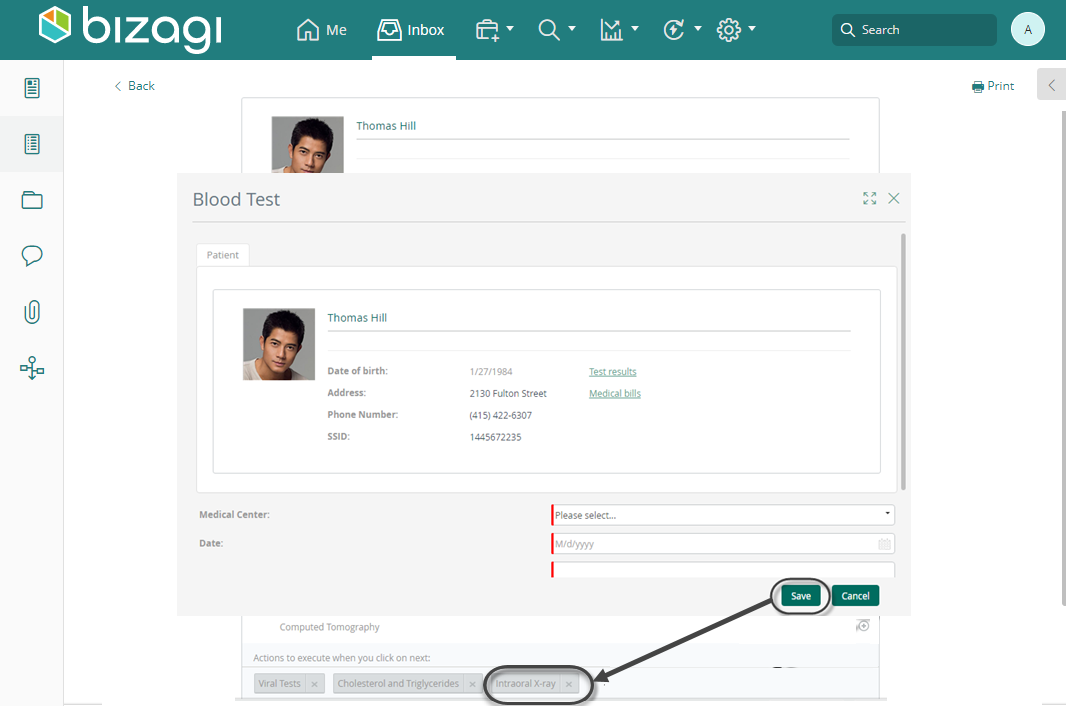
In order to set an action (order an exam to the patient) to be executed, click the icon ![]() to add the action to the list of actions to execute when you click next:
to add the action to the list of actions to execute when you click next:
When the constructor of the selected action uses a process with a Start Form, a modal window will be displayed and when the user saves the information of the start form, the control will list the action.
Last Updated 1/23/2023 12:04:36 PM