Overview
Bizagi supports integration with any Identity and Access Management systems that complies with the SAML 2.0 protocol.
SAML 2.0 is the most widely-adopted industry protocol for authentication, and most major Identity Managers on the market support it.
Prerequisites
To configure SAML2 you need:
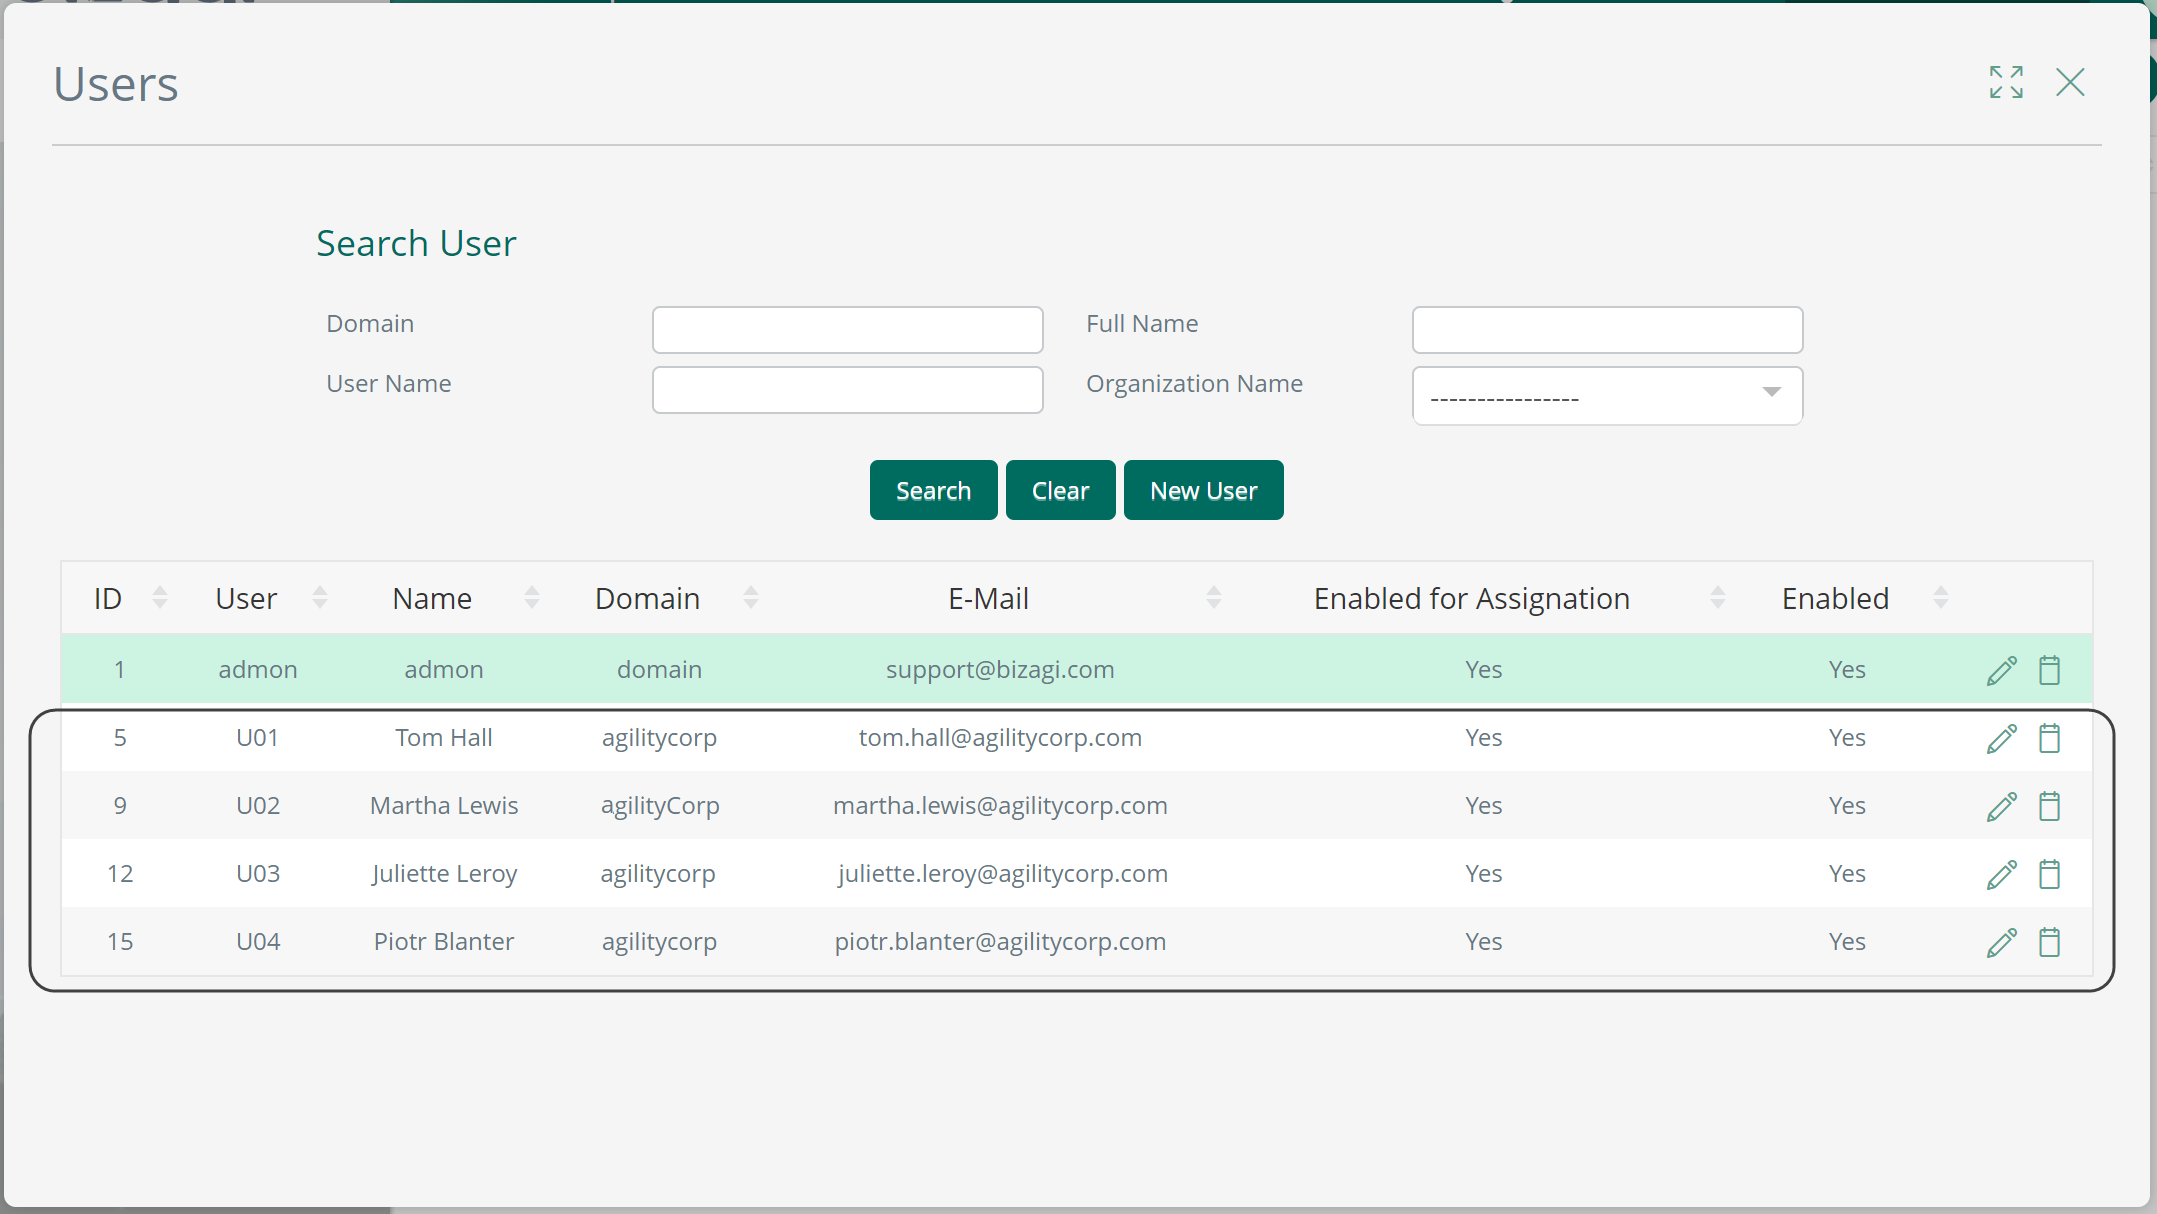
To have already imported and synchronized your users into Bizagi
When integrating any Identity Manager, you need to synchronize authorized accounts so they can access Bizagi 's Work portal.
Synchronizing means importing or updating the account's primary identifiers only (domain plus username typically, and the email address).
Bizagi does not store passwords when integrating an Identity Manager.
|
You cannot have two or more users with the same email, because it is considered as part of the primary identifier. |
Once you have verified in the Work Portal that there has been at least an initial import of your users into Bizagi, you may proceed:
|
In Bizagi, unique identifiers for users are either email or the combination of domain and username. We recommend using the email as the Unique Identifier. |
How to configure SAML-based authentication
To configure an identity provider using the SAML 2.0 protocol, you must follow these steps:
1. Generate certificates to sign assertions (mandatory)
This step is not bound to Bizagi nor restricted by any special requirement of Bizagi (you normally do it yourself).
If you need some guidance or an example on this step, refer to Certificates for SAML 2.0 authentication.
To proceed with these guided steps, you need to have:
•One certificate to sign assertions (mandatory) in .P12 or .PFX file format. You need The password for the certificate file, as defined by you when you exported the public and private keys.
•One certificate to encrypt messages (optional) in .P12 or .PFX file format. You need The password for the certificate file, as defined by you when you exported the public and private keys.
|
You will need to be in charge of managing your installed certificates (keep track of its expiration date and other relevant maintenance aspects such as changes in your Identity Provider's endpoints). |
2. Setup the identity provider in Bizagi Studio or the Management Console
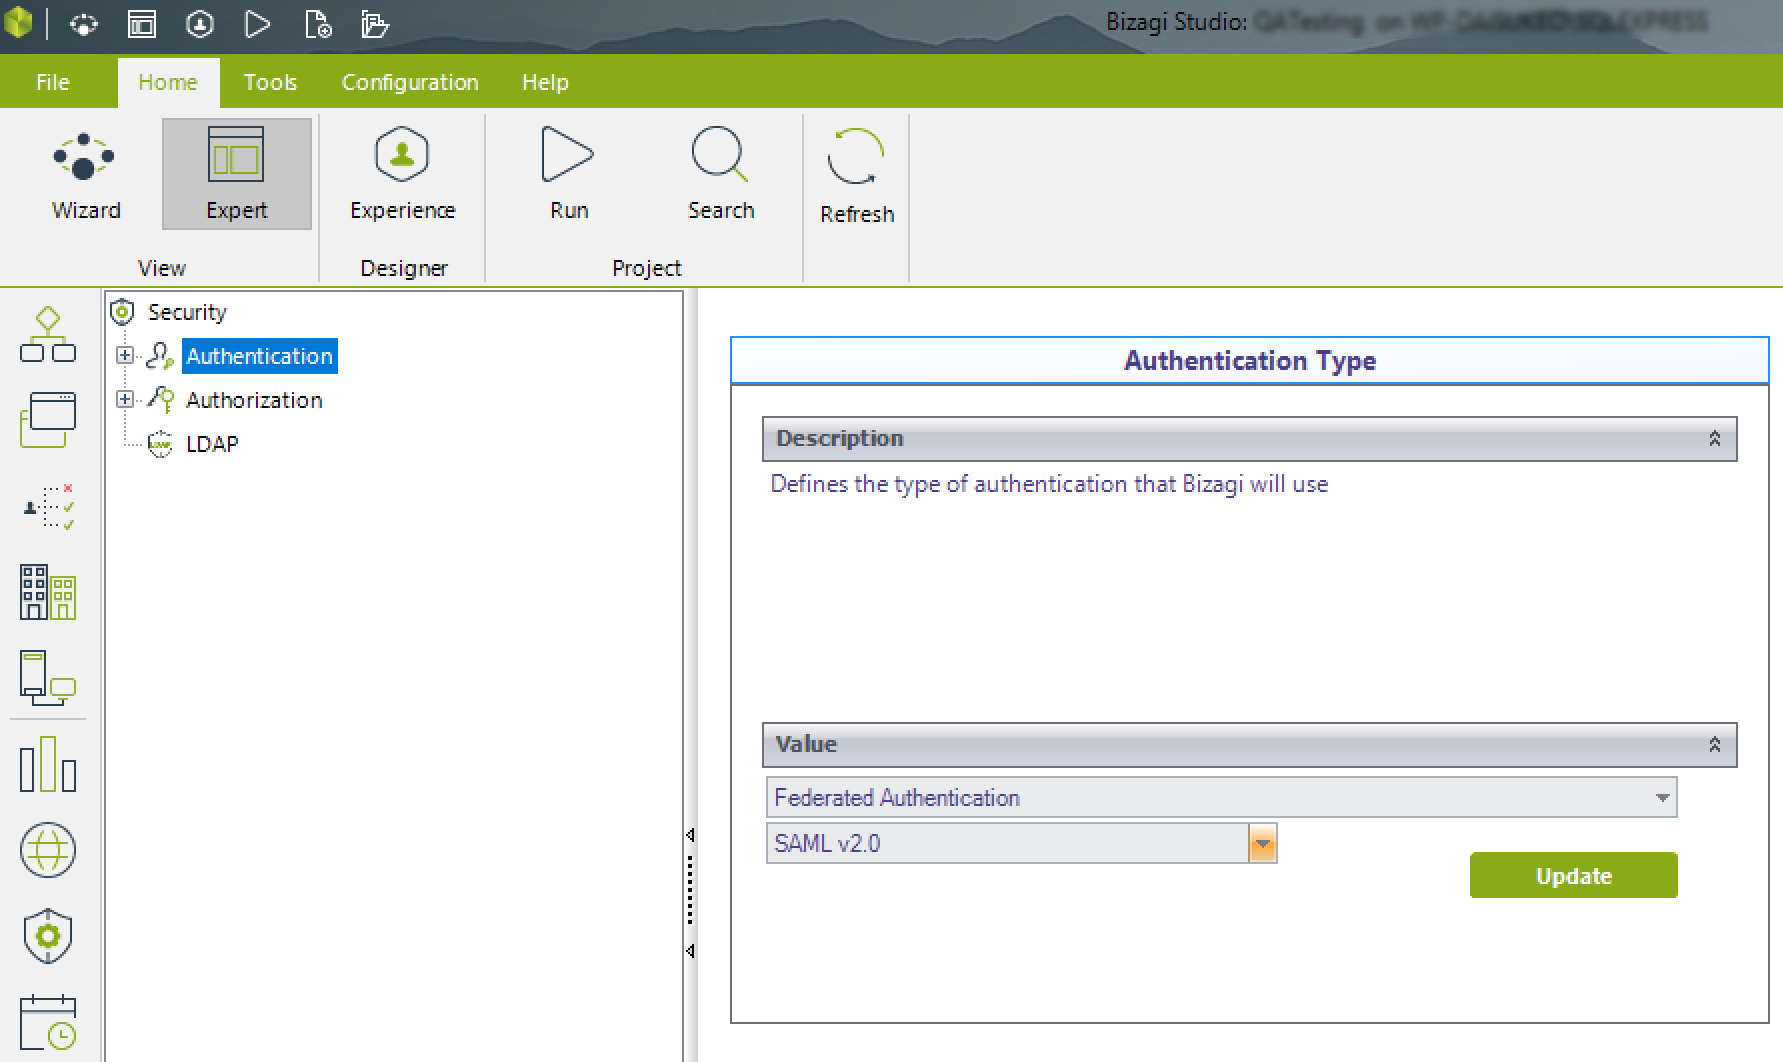
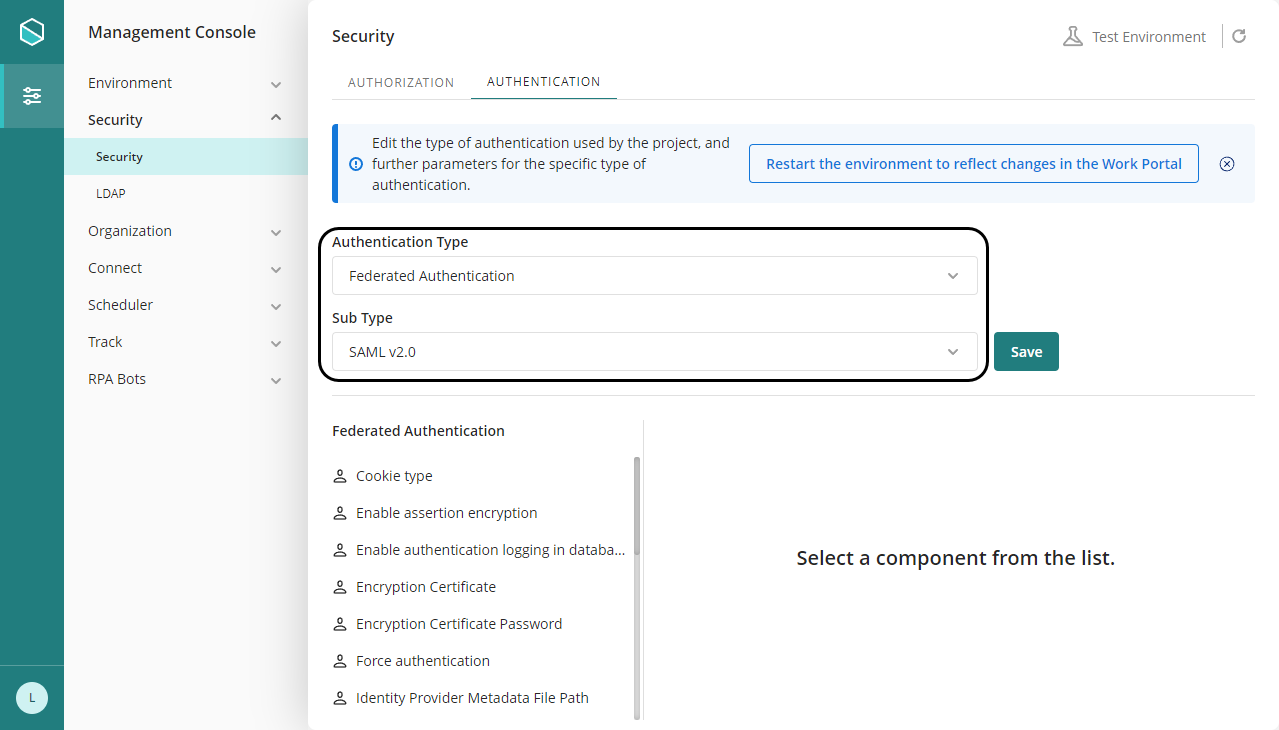
If you are going to configure it from the development environment, open Bizagi Studio. For test and production environments go to the Management Console.
Locate the Security module and click the Authentication option found under the Security item.
Select Federated authentication from the drop-down list in the panel to the right, and select SAML v2.0 from the drop-down at the lower right:
|
In the management console, before modifying the authentication configurations, it is necessary to set the environment status as Maintenance from the Maintenance window. After doing the desired modifications, remember to restart the environment to reflect the changes. |
Within these settings, you configure:
•Enable assertion encryption: When Bizagi sends messages to the Idp, it sends two types of assertions.
-Authentication request: which does not have any sensitive information, therefore is not encrypted by standard definitions.
-Session log out request: This assertion contains sensitive information, and can be encrypted. If you set this property on, session log out reques tare encrypted by Bizagi. Make sure that your identity provider supports receiving log out request encrypted.
On the other hand, Bizagi can handle any encrypted message sent by the IdP, even if this property is set off.
Okta does not support receiving encrypted messages, therefore this option must be off.
•Enable authentication logging in database: Set this option to On to have the web application log every authentication event. You can view the log from the Work portal.
•Encryption certificate: Use the Browse button to locate and upload the digital certificate (in P12 or PFX format, containing the public and private keys) that will be used to encrypt the assertions generated by Bizagi.
Applicable when enabling the Enable assertion encryption property.
Even though it is possible to reuse the same certificate as employed for the Signing certificate setting, we recommend different certificates, especially on Production environments.
Using self-signed certificates is supported. If you want guidance on this topic, refer to the Authentication Certificates in the Customer Portal.
A P12 format is equivalent to PFX format (if you have a PFX simply rename that file changing its extension).
•Encryption certificate password: Type the password for the digital certificate for encryption.
Applicable when enabling the Enable assertion encryption property.
•Force authentication: Set this option to On to avoid SSO capabilities and request credentials every time users attempt to log in at Bizagi.
•Identity Provider Metadata File Path: Provide the path, usually a URL, to where the metadata file of the Identity Provider is located.
Metadata URL depend on the IdP, here are some format examples:
Entra ID: https://login.microsoftonline.com/[Tenant]/federationmetadata/2007-06/federationmetadata.xml?appid=[applicationID]
|
The applicationId corresponds to the identifier that Azure assigns to the application whose users will be validated in the authentication process. Bear in mind that this identifier can be consulted only after registering the application. For further information, refer to Configuring SAML2 with Entra ID. |
ADFS: https://[my_federateserver]/FederationMetadata/2007-06/FederationMetadata.xml
OKTA: https://[company].okta.com/app/[id]/sso/saml/metadata
|
You can leave this parameter blank in the initial configuration or use a dummy URL. After configuring your IdP you can register this parameter. . |
•Idle session time-out: Define the number of minutes of inactivity after which a session expires.
•Organization name: Provide the name of your organization. The name is included within the request messages sent by Bizagi.
•Organization URL: Provide URL of the website of your organization. The URL is included within the request messages sent by Bizagi.
•SAML Protocol Binding for SLO: Select either POST or REDIRECT to define which Binding implementation to use in single logout.
Selecting REDIRECT may not be optimal when encrypting assertions, as such messages become part of the URL. The URL may get long enough to trigger errors in some browsers.
However, if using Entra ID we recommend using REDIRECT.
•SAML Protocol Binding for SSO: Select either POST or REDIRECT to define which Binding implementation to use in single sign-on.
Selecting REDIRECT may not be as optimal when encrypting assertions, as such messages become part of the URL. The URL may get long enough to trigger errors in some browsers.
•Service provider URL: Type the full URL (including the project) of the Service Provider. This means entering the URL for Bizagi Work portal. For Automation Service, such URL uses this format:
https://[environment]-[project]-[company].bizagi.com/.
The URL is case-sensitive. For Automation Service, leave [environment]- blank for the Production environment.
•Signature certificate password: Provide the password of the digital certificate used for signing assertions.
•Signing algorithm: Select either SHA1 or SHA256 to define which algorithm to use when signing assertions.
•Signing certificate: Use the Browse button to locate and upload the digital certificate (in P12 format, containing the public and private key) to be used to sign the assertions generated by Bizagi.
Using self-signed certificates is supported. If you want guidance for self-signed certificates, refer to the Authentication Certificates in the Customer Portal.
A P12 format is equivalent to PFX format (if you have a PFX simply rename that file changing its extension).
•Technical email contact address: Provide an email address for contacting your corporation, regarding technical issues. The email is included within the request messages sent by Bizagi.
Notice that the values you provide for the settings are encrypted in Bizagi when you save them.
After this step is completed, Bizagi generates a metadata.xml file. You can use it as input in the next step.
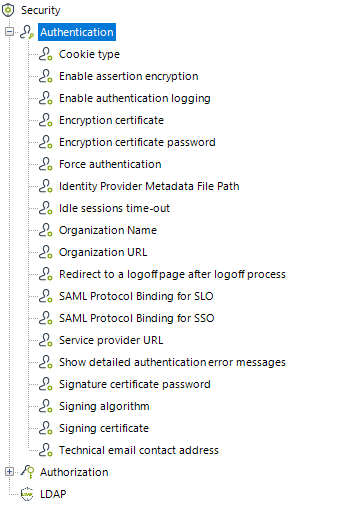
You can also set or change these parameters from the Management Console.
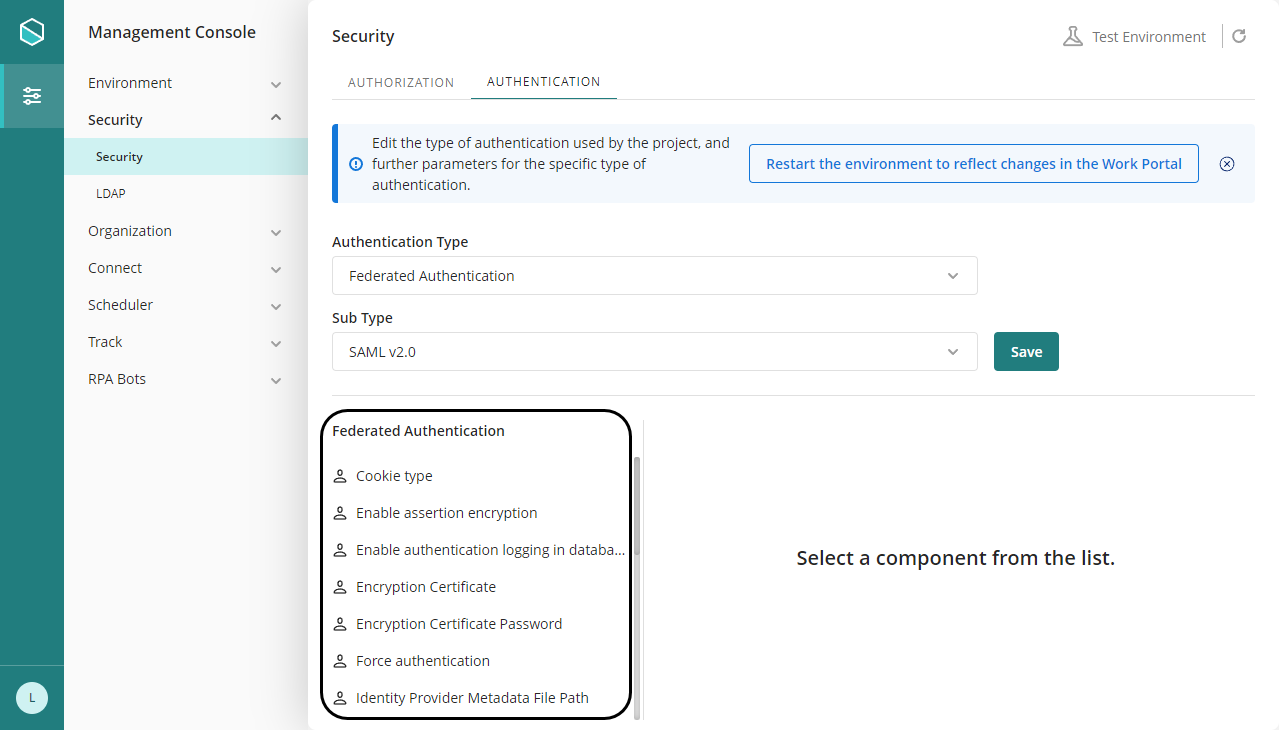
|
In the management console, before modifying the authentication configurations, it is necessary to set the environment status as Maintenance from the Maintenance window. After doing the desired modifications, remember to restart the environment to reflect the changes. |
3. Download the metadata file and upload it in your Identity Provider
Some identity providers need to upload the metadata file of the client. If your IdP requires uploading the metadata file, for example, in Entra ID, you need to download a file that contains the metadata of the SAML configuration done in the Bizagi.
Make sure that you upload the Signing Certificate, and set the Signature certificate Password.
To download the metadata file, Bizagi has the following endopints
You can review this metadata file by browsing it at:
https://[environment]-[project]-[company].bizagi.com/saml2/metadata.xml?mode=preview
Download the file by inputting in your browser:
https://[environment]-[project]-[company].bizagi.com/saml2/metadata.xml?mode=attachment
4. Initial setup in your Identity Provider
First, you need to configure the Identity Provider. See some examples:
•ADFS
•Okta
In your Identity Provider's admin options, you should be able to register Bizagi as a trusted Service Provider.
For most Identity Providers, you specify/confirm Bizagi's URL, and load information from a metadata file.
Along with this configuration, you define the certificate to use to sign assertions, and exactly which information is sent within assertions (i.e, the user's unique identifier such as their email address). Configuration regarding a certificate to use to encrypt assertions is optional and it depends on whether your Identity Provider supports it.
The exact steps to accomplish this may vary for different Identity Providers, however, some general concepts apply in all cases.
You need to provide in the Identity Provider the following endpoints:
•Single Sign on URL: Provide the URL of your Bizagi Work portal followed by the /saml2/assertionConsumer suffix.
For Automation Service, the URL has this format:
https://[environment]-[project]-[company].bizagi.com/saml2/assertionConsumer
•Service Provider ID URI (also known as audience ID URI or Application ID URI): Provide the URL of the Bizagi Work portal just configured in Bizagi Studio (or the Bizagi Management Console).
For Automation Service, the URL has this format:
https://[environment]-[project]-[company].bizagi.com/
•Single Logout URL: Provide the URL of the Bizagi Work portal followed by the /saml2/logout suffix.
For Automation Service, the URL has this format:
https://[environment]-[project]-[company].bizagi.com/saml2/logout
Last Updated 12/10/2025 12:19:20 PM