Overview
In this article you learn all about deleting and downloading the security certificates along with some restrictions and protocol configurations.
To download a security certificate follow the next steps:
1. Select the Settings icon located in the left panel menu (follow step 1 from How to create Authentication Certificates?) .
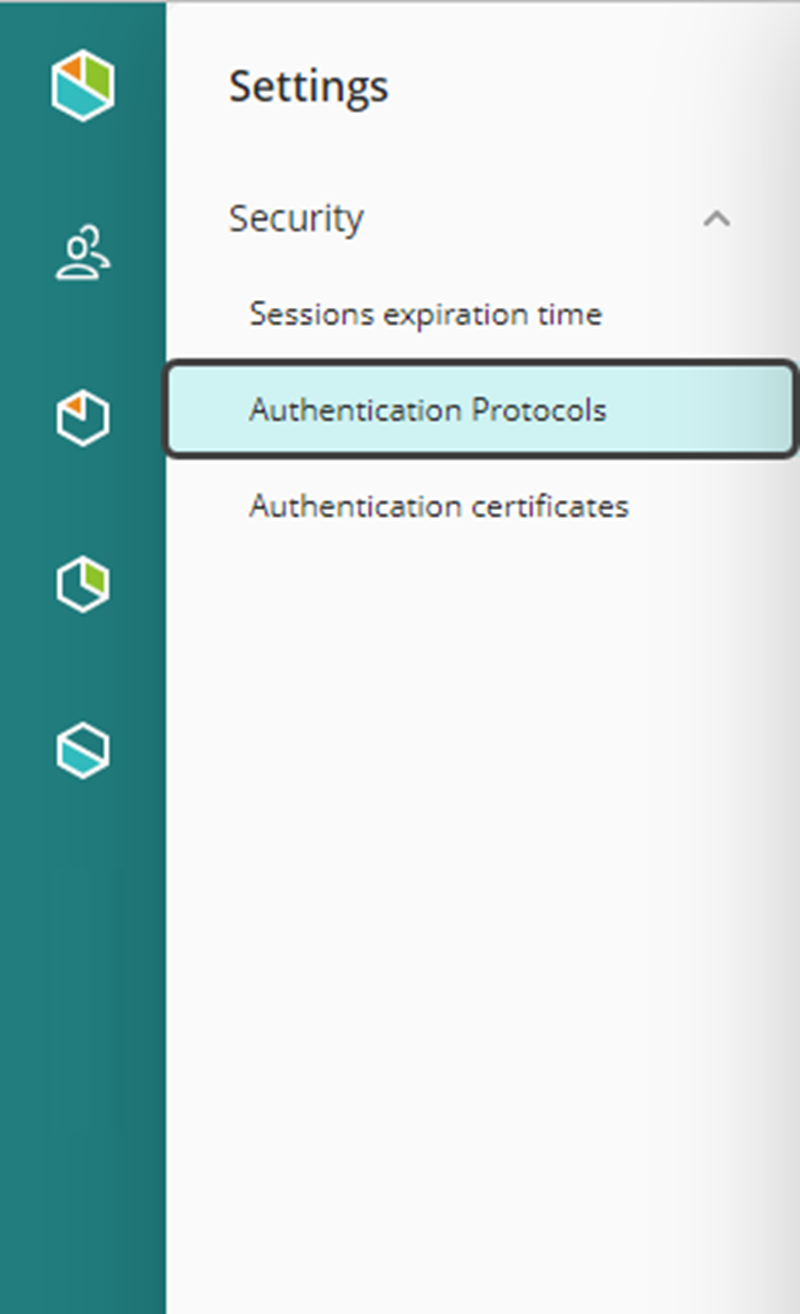
2. A panel expands on the left with all the security related topics. Select the Authentication certificates option (follow step 2 from How to create Authentication Certificates?)
3. In the row of the certificate you intend to download, select the download icon located on the right next to the Source column.

Then, the browser downloads a zip file. This file contains the security certificate (.cer file type) and a Personal Exchange Information File ( .pfx file type).


To delete a security certificate follow the next steps:
1.Repeat steps 1 and 2 from the Download a Certificate section.
2.In the row of the certificate you intend to delete, select the trash can icon located on the right next to the Source column.

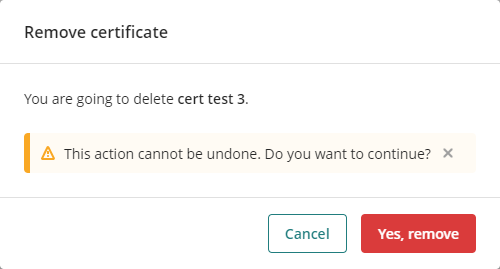
Then, a window appears as follows. Bear in mind that this action cannot be undone. To continue, select Yes, remove.

Keep in mind that if the certificate is currently under use, it is not possible to remove it. In that case, an alert message will appear in the right bottom area as follows:

Color Code for Certificate Expiration Dates
To visualize which certificates are near expiration follow the next steps:
1.Select the Settings icon located in the left panel menu (follow step 1 from How to create Authentication Certificates?).
2.A panel expands on the left with all the security related topics. Select the Authentication certificates option (follow step 2 from How to create Authentication Certificates?).
If any of the certificates from the list appears in yellow font on the Expiration date column, it means the certificate will expire soon (in the next 60 days). Also, when you hoover around the date, the Customer Portal indicates in a message the certificate expires soon.

If any of the certificates from the list appears with red font on the expiring date column, it means the certificate already expired and it will keep this color until 30 days later. Also, when you hoover around the expiring date, the Customer Portal indicates in a message that the certificate has already expired.

Protocol Configuration
When configuring the SAML or any other protocol that requires a security certificate, you can assign any of the existing certificates. If you want to navigate to the Authentication Protocols section follow these steps:
1.Select the Settings icon located in the left panel menu (follow step 1 from How to create Authentication Certificates?).
2.A panel expands on the left with all the security related topics. Select the Authentication Protocols option to see the collection of protocols under use.

Once you are inside the Authentication Protocol section, you will be able to see the list of protocols in use.

If you want to assign a certificate to a SAML or other protocols follow these steps:
1.Select the Add authenticator button.

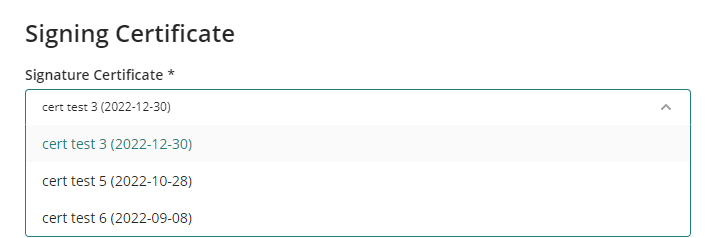
2.A window opens for you to configure the protocol. Scroll down until the Signing Certificate section. There you have the option to assign the protocol to an existing certificate or create a new one by clicking the Add certificate button and follow the steps indicated in the How to create Authentication Certificates? section.


3.Once you completed the Authentication Protocol configuration, click Save in the top right corner.

Last Updated 7/5/2023 11:34:48 AM