Overview
In the App Designer, you can upload fonts to your app, so when you download your app, it will include all the custom fonts available in the environment.
There are several ways to add fonts to your app. One way is from the App Designer home page by clicking the three-dot menu on the right panel and selecting the Manage fonts option. Another option is through the Typography settings in App Designer editor.
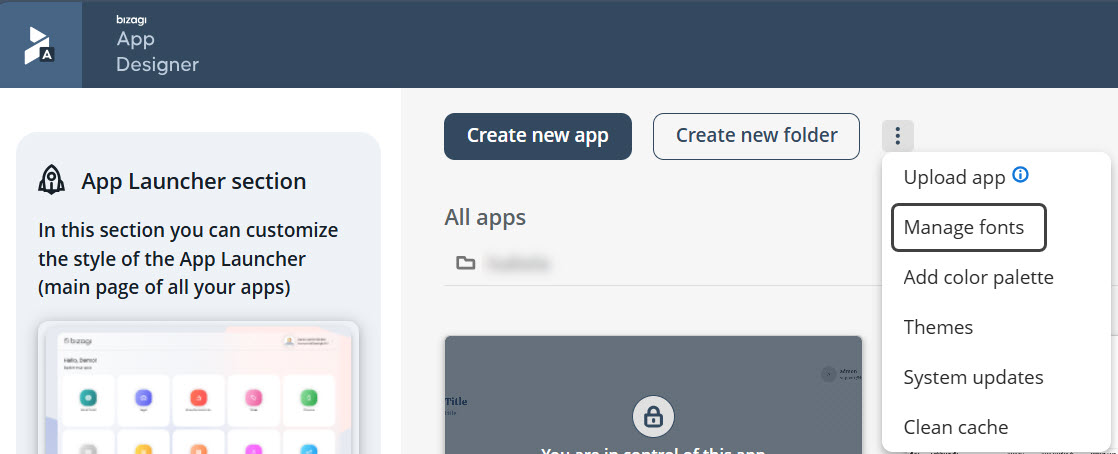
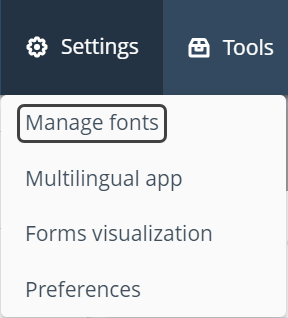
Another way is from the App Designer editor Settings, where the same Manage fonts option is available for selection.
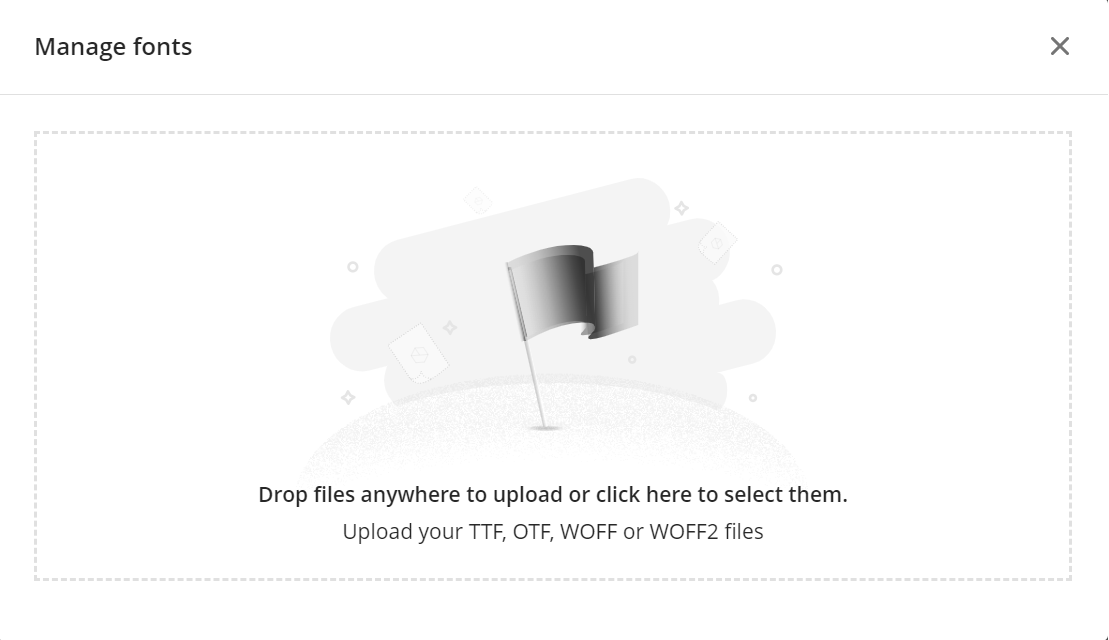
When you click the Manage fonts option, a window appears for you to upload the fonts you want to add to your app.
When you have already uploaded your fonts, you can see them listed in the window. All uploaded fonts are available and ready to use on any of the apps you have on the environment.
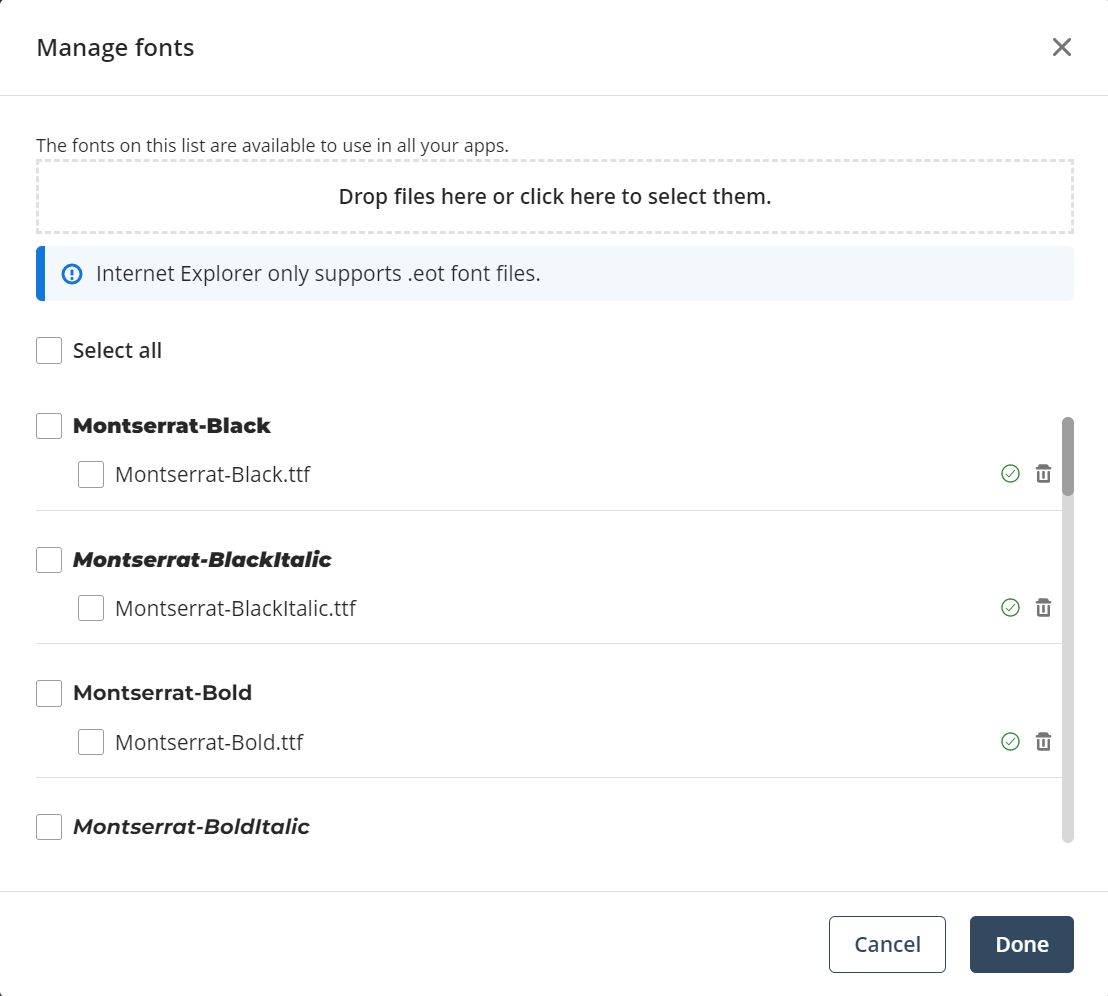
You can also delete uploaded fonts from this window by clicking the trash can icon next to the font name or by clicking the Remove button after selecting the fonts you want to delete.
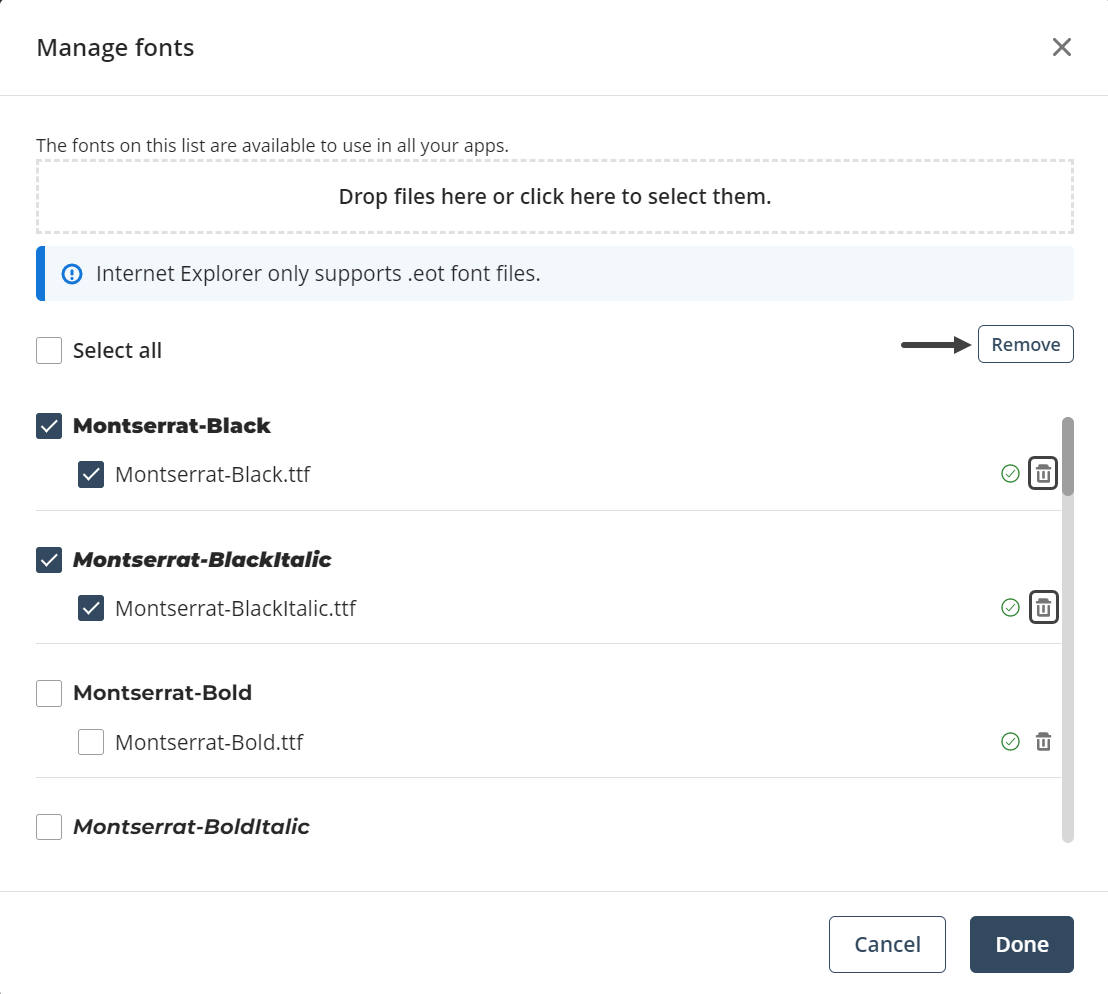
After you confirm you want to remove the font from your app, the action cannot be undone. You can upload as many fonts as you need.
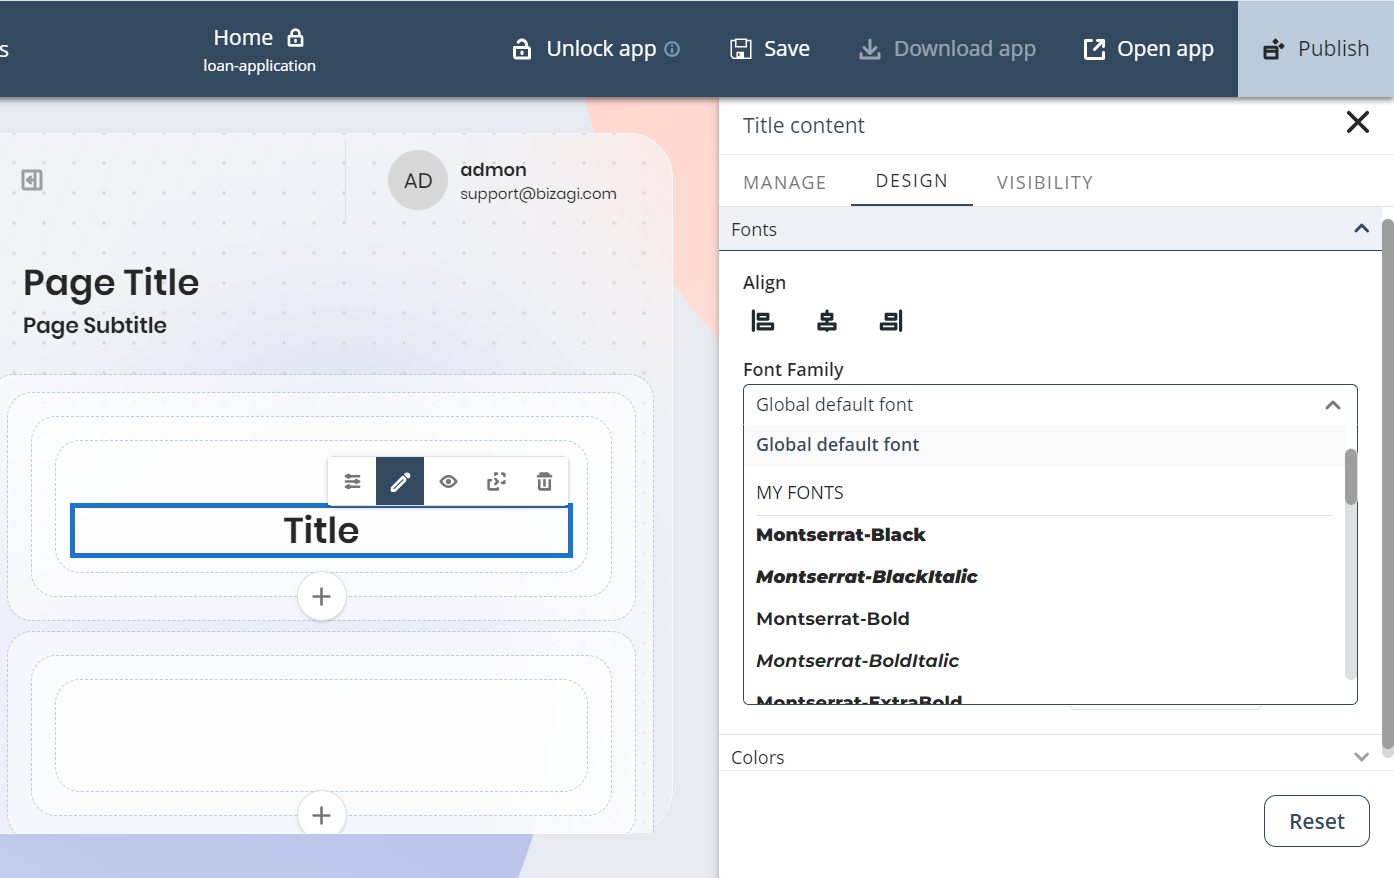
To use the uploaded fonts, all you need to do is select them on the Font family control settings. All custom fonts are listed under MY FONTS.
|
•Keep in mind that when you download your app, the output file includes the available custom fonts. •Although custom fonts are part of an app structure, these are stored outside the project and cannot be added to a backup. Hence, before importing an app's backup, be sure to locate in your system the folder custom_fonts and copy it. After successful import, restore the folder manually to keep your custom fonts. |
App Global Default Font
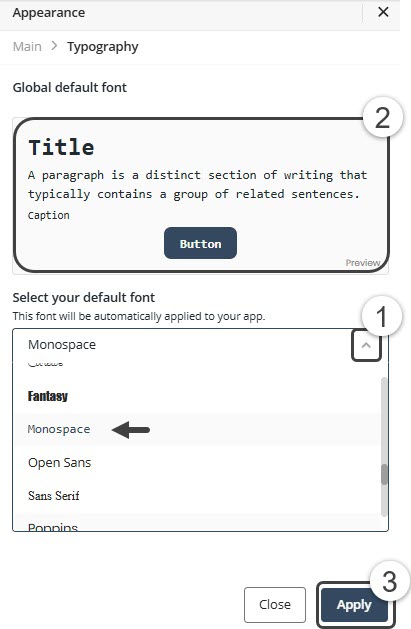
Setting up a Global default font is a simple task. Select the Typography option on the App Designer editor Appearance settings.
|
Note that Poppins is defined as the app's default font. |
Last Updated 11/18/2025 11:59:55 PM