Overview
You can upload files to AI Agents in the Work Portal, enabling Bizagi's AI to quickly generate insights and solutions based on the file content.
Whether you are extracting text from images, analyzing document data, reviewing financial information, or interpreting technical documentation, the AI significantly accelerates decision-making. It also simplifies working with large volumes of information or complex data, including handwritten content.
When creating the Prompt for an AI Agent in the Development environment, configure it to allow file input. At runtime, in the Production environment, files can be uploaded manually or generated automatically by Bizagi using existing features such as Document Templates. The configured Prompt will guide the AI Agent on how to process and use these files.
An AI Agent can process one or multiple files, providing flexibility and efficiency in handling the required information.
Supported file types
•Text (.md, .txt): Basic text files. Content is extracted as plain text.
•Image (.jpeg, .jpg, .png): Image files are converted into byte arrays and sent to GPT for analysis. AI Agents can process up to 50 images simultaneously (limitation of Microsoft Azure OpenAI Service).
•PDF (.pdf): Each page of a PDF file is converted to a PNG image, transformed into a byte array, and sent to GPT. Multiple PDF files can be uploaded, provided the total number of pages across all PDFs does not exceed 50 (Microsoft Azure OpenAI Service limitation).
•Word (.doc, .docx): Processed using Aspose to extract text content, which is sent as a String to GPT. Embedded images are not processed.
•Excel (.xls, .xlsx): Exported as CSV and sent as text to GPT. Embedded images are not processed.
|
•File size must comply with the limits defined in Automation Services. •AI Agents must use GPT-4o or a newer model to support file inputs. •Password-protected or encrypted files are not supported. |
Configuring files as inputs
Follow these steps to configure files as inputs for an AI Agent:
1. Create a new AI Agent
For detailed instructions, see Create AI Agents.
2. Add the input file
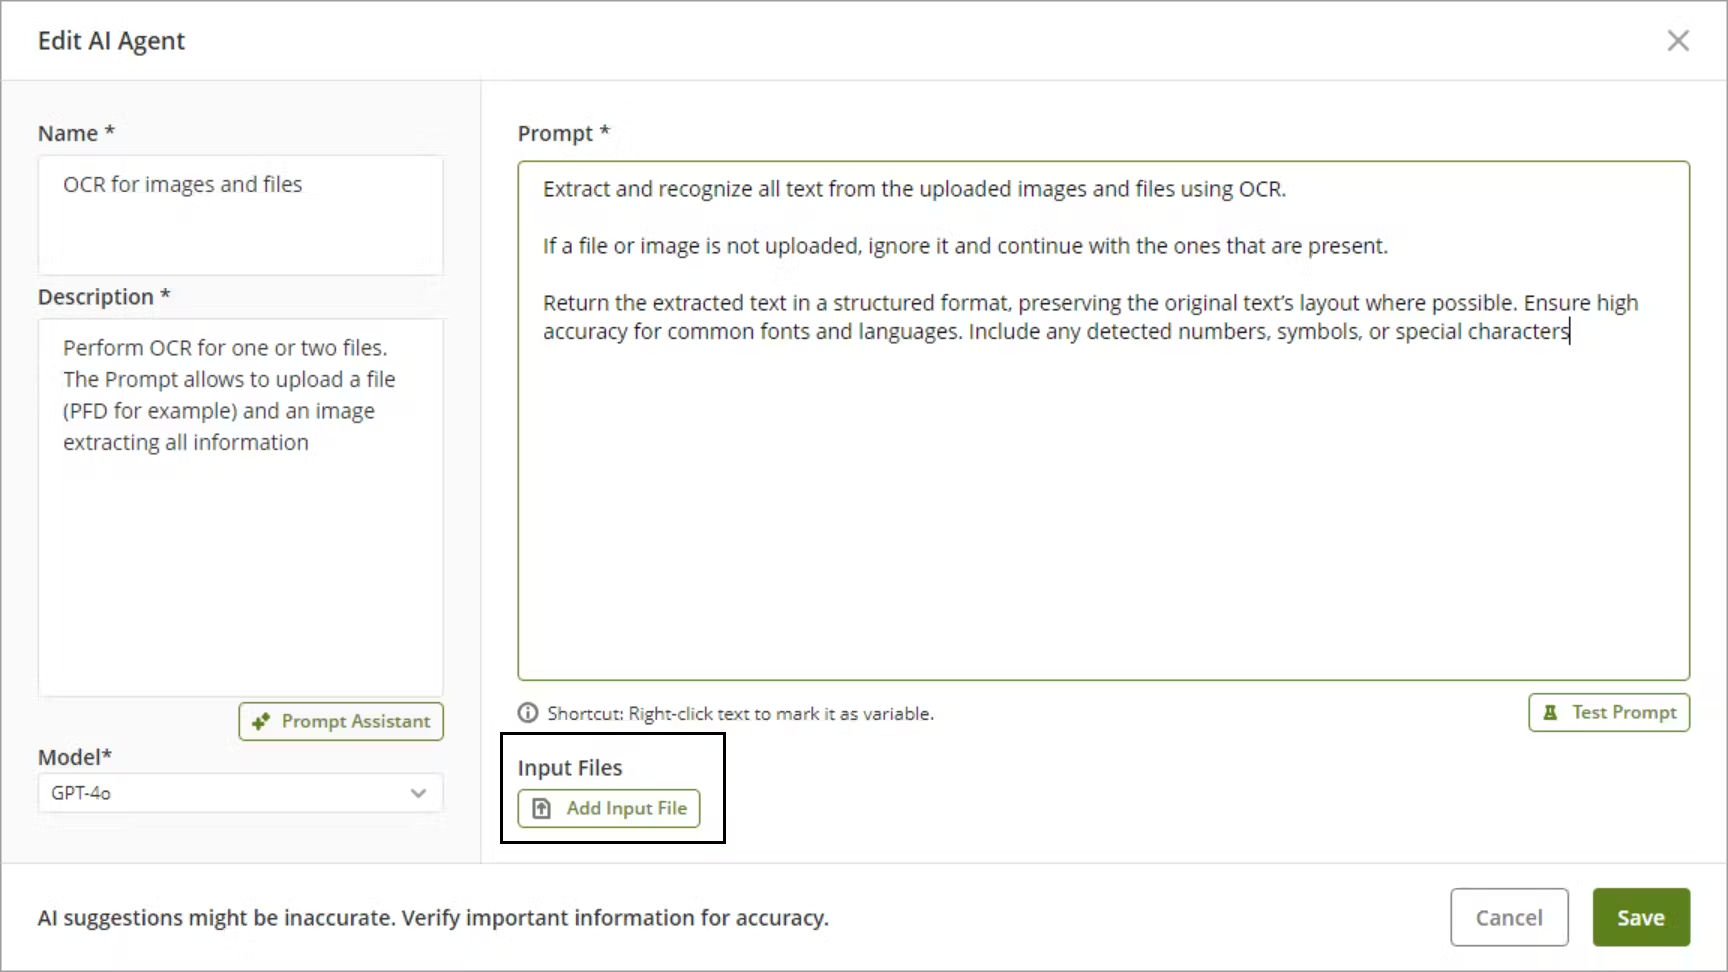
Whether creating an AI Agent from a template or from scratch, click the Add Input File button to define the files it will process.
In the Prompt section, describe the actions the AI Agent should perform on each file. For best results, clearly state what the Agent will receive, what each file represents, and the expected output.
When integrating the AI Agent into a process, define the file source via rules mapping—regardless of whether the file is uploaded manually or generated as a Document Template in a previous step.
|
You may also use rules and Document Templates to generate text-based files for AI Agent outputs. |
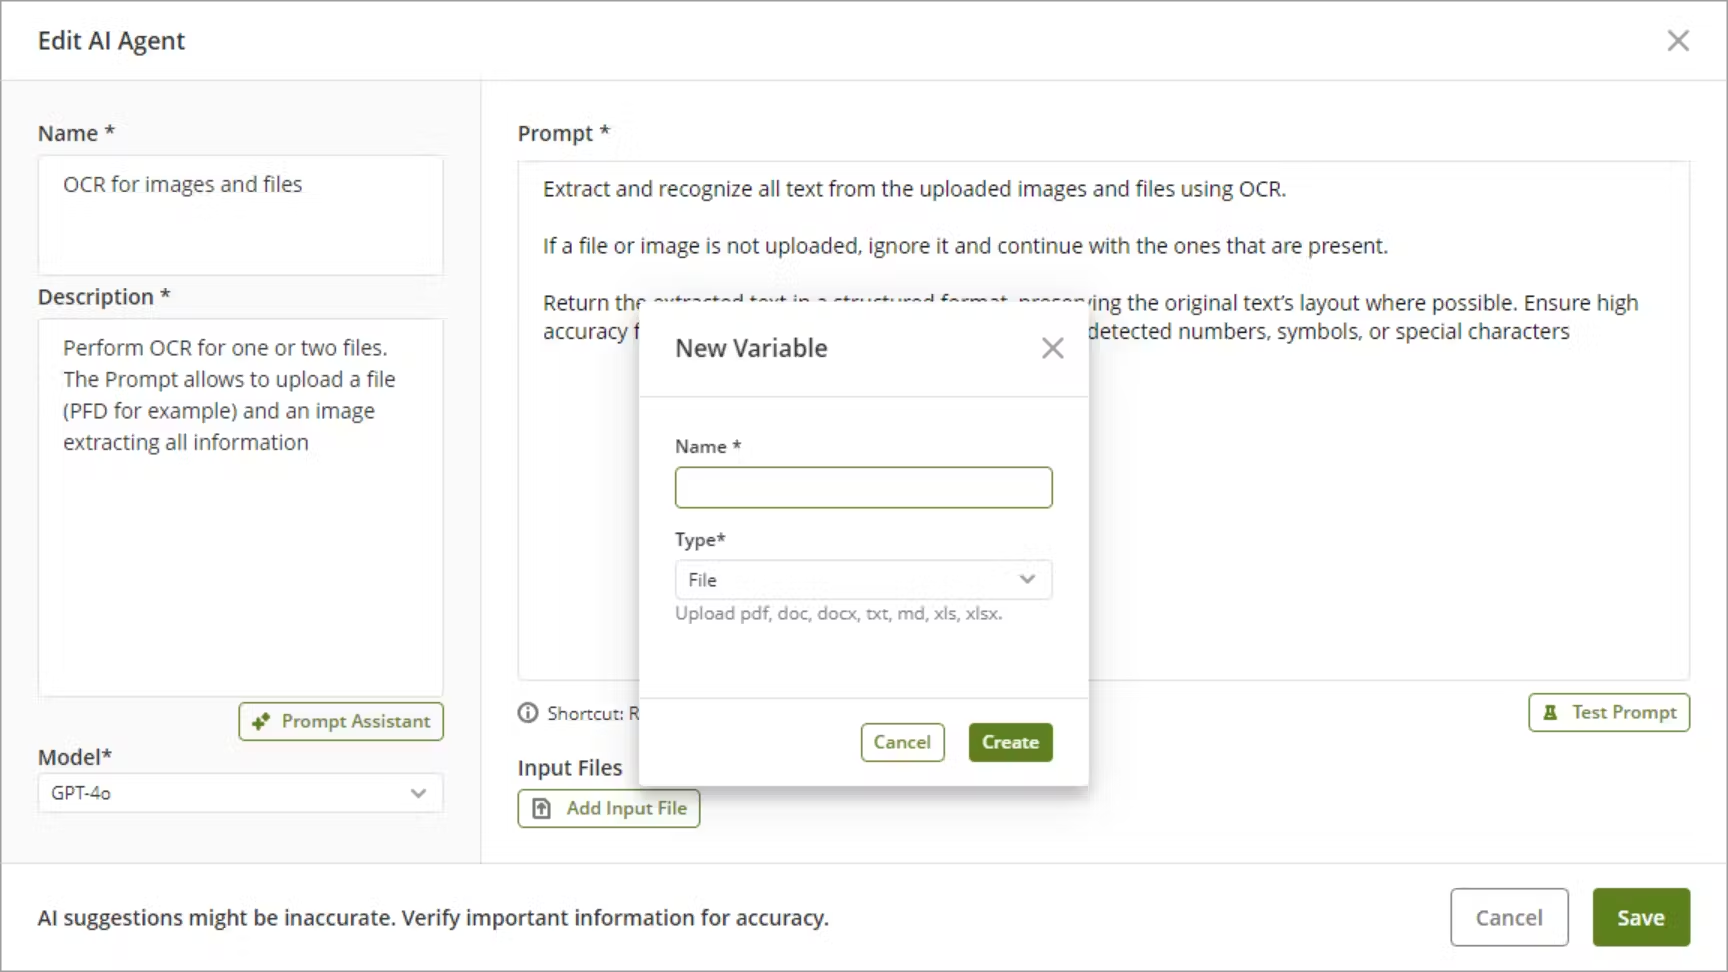
3. Name the input file and select its type
Assign a name and select a file type for the input file.
4. Add the input file
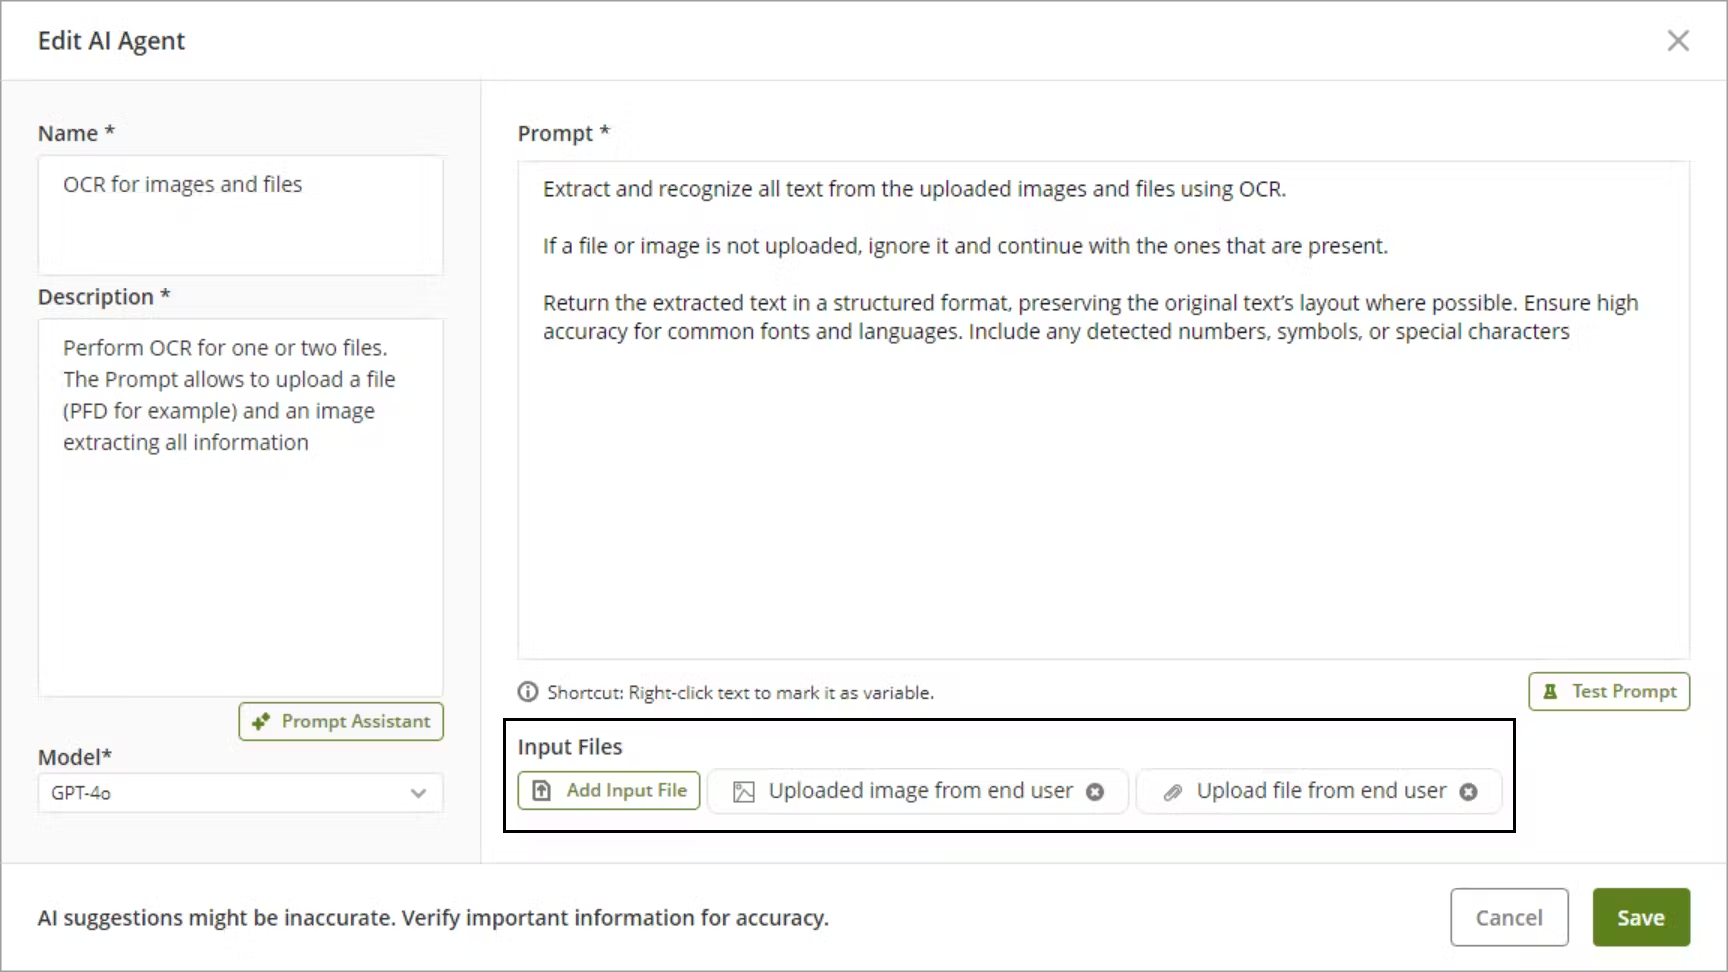
Click Create. The named file will appear in the Input Files section.
|
•AI Agents do not support Collections as inputs. However, you can manage multiple files by merging them into a single file using Merged Actions and a concatenation rule. •You can upload various file types (e.g., images and documents) to extract insights using a single AI Agent. |
5. Save the AI Agent
Once configuration is complete, the AI Agent will appear in the selected Category.
Adding input files to an existing AI Agent
To add input files to an existing AI Agent:
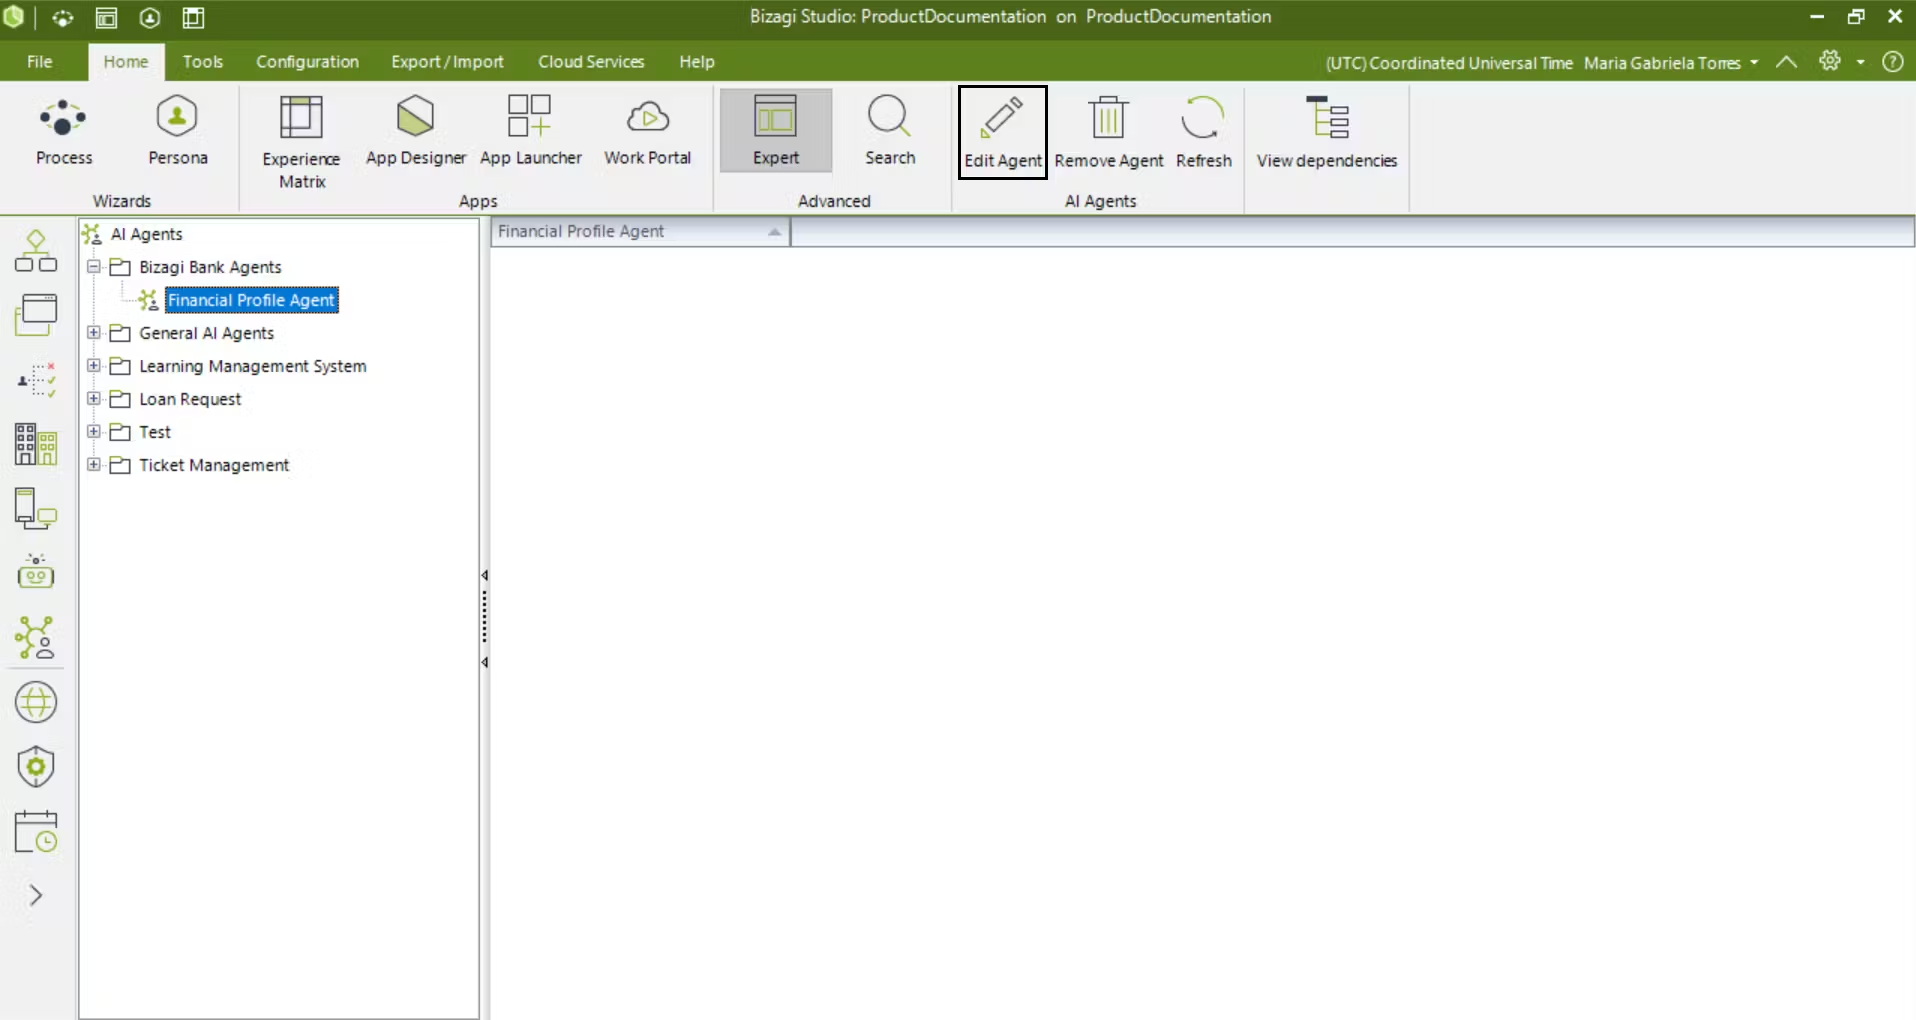
1.Navigate to the Expert view.
2.Select the desired AI Agent.
3.Click Edit Agent on the top ribbon.
4.Add a new input file following the steps described above.
|
•AI Agents can be triggered from Activity Actions, Form Actions, Entity Forms or Pipelines. •You can configure multiple AI Agents within a single process or form. |
Generate Upload and Picture variables using the Prompt Assistant
To use this feature:
1.Open an AI Agent configuration.
2.Click Prompt Assistant.
3.Type a description of the task, including that it involves working with files or images.
4.Execute the Prompt Assistant. It will generate the appropriate File variables based on the description.
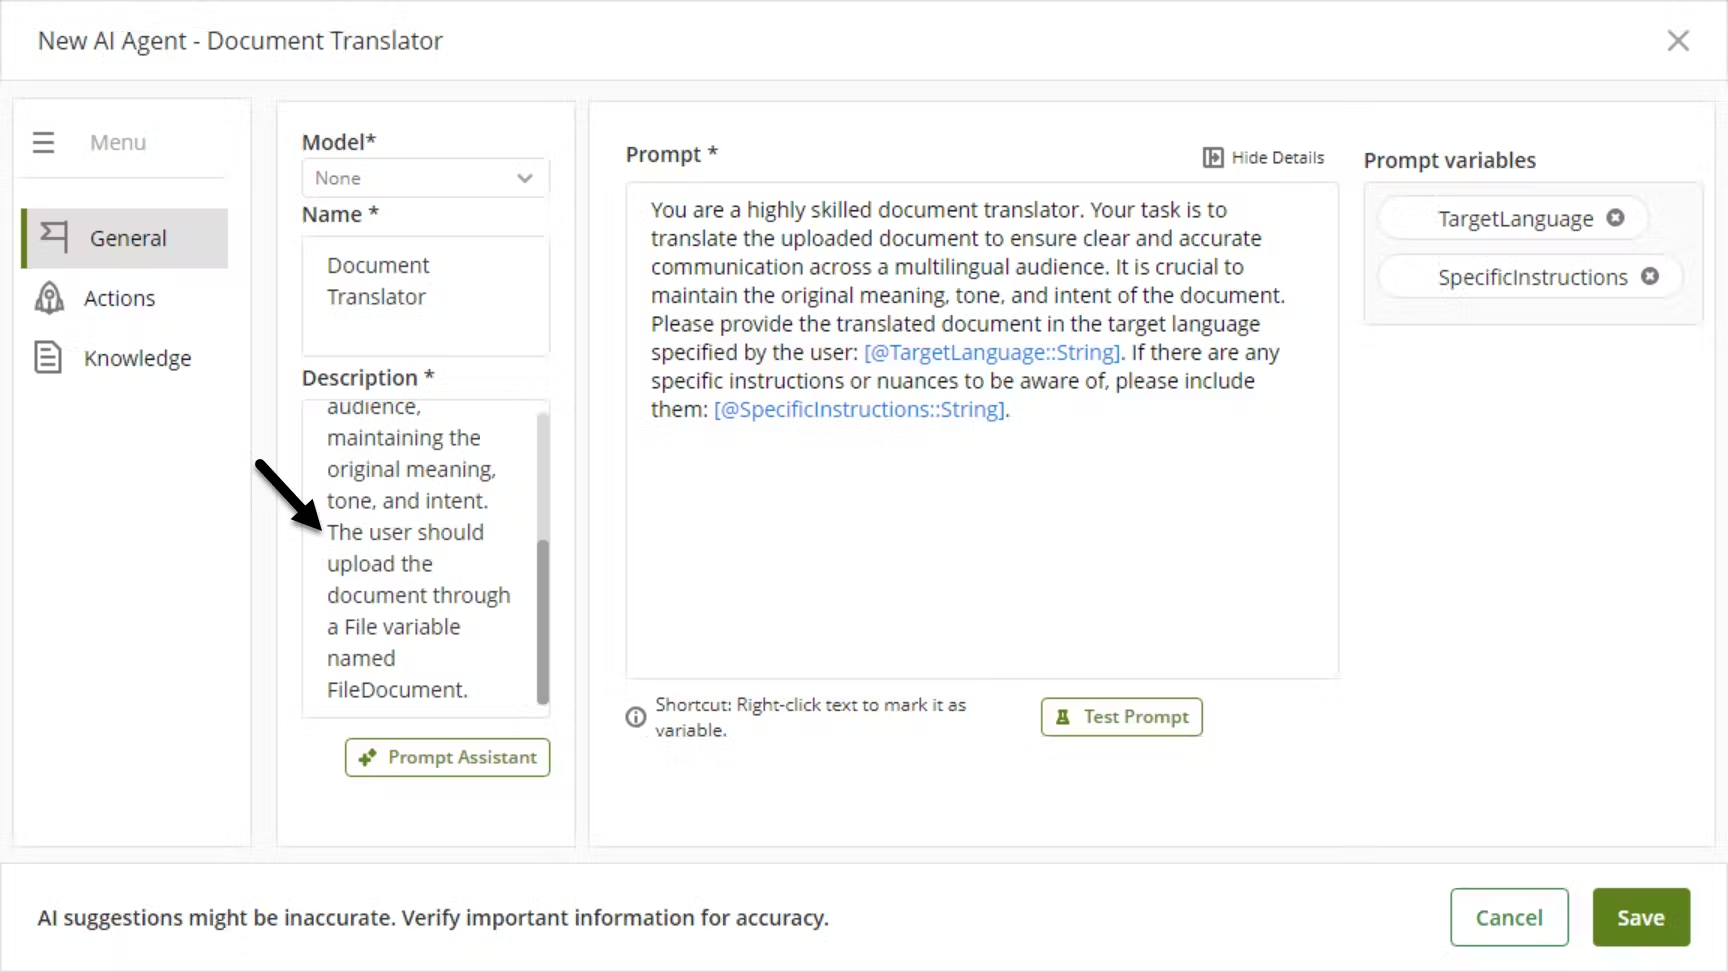
The generated variables will appear in the Input Files section.

Considerations
Because the Prompt Assistant uses AI, the following behaviors may occur:
•It might not generate Input File variables, even if specified in the description.
•It may produce different Prompts each time it is executed, even with the same input description.
•Every time the Prompt Assistant is run, existing Input File variables will be replaced with newly generated ones.
Last Updated 11/18/2025 11:49:32 PM