Overview
Categories help organize your AI Agents through a node structure, ensuring an efficient setup. This article provides guidance on managing AI Agent Categories in Bizagi Studio's Expert view, detailing the processes for creating, editing, and removing them. All actions related to Category management are performed in this view, allowing for easy navigation and modification of the Categories.
Create a Category
To create a Category, follow these steps:
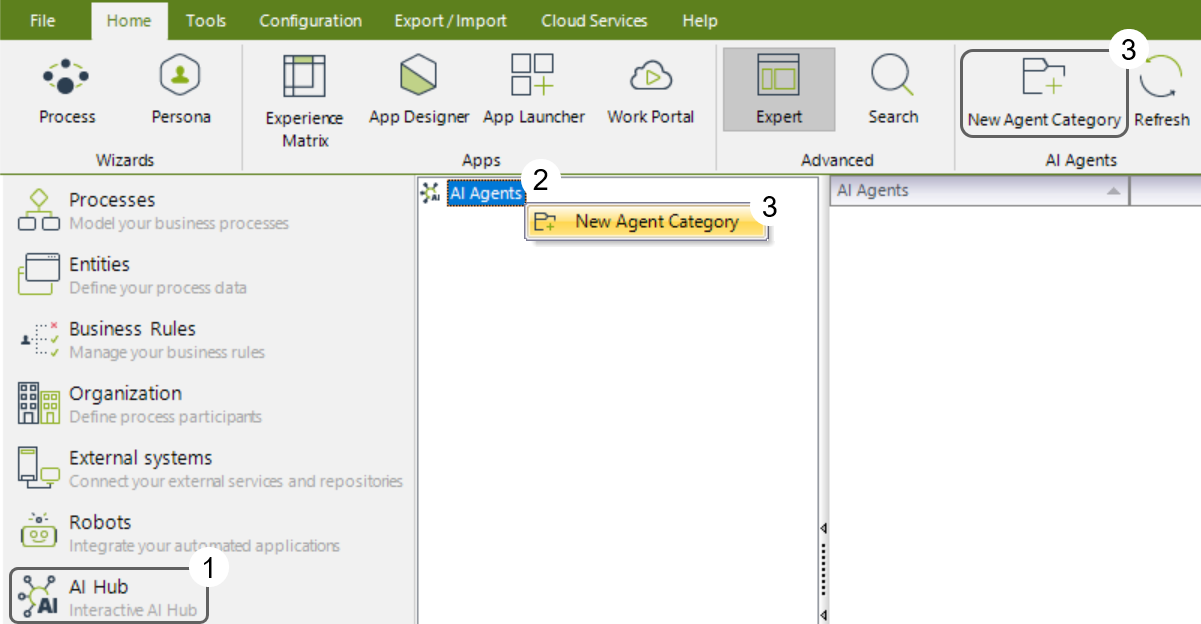
1.Navigate to Bizagi Studio's Expert view. From there, access the AI Hub option to view the node structure of AI Agents.
2.To create a new Category, right-click the AI Agents node and select New Agent Category. Alternatively, use the corresponding button in the top ribbon.

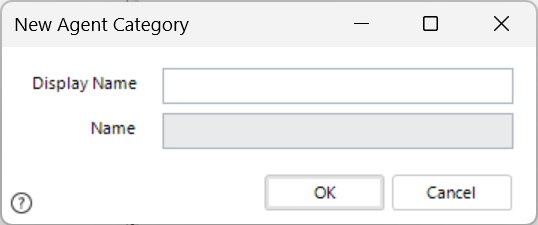
3.Define a Display Name and Name for your Category.

4.Ensure both fields are accurate, and click the OK button to create the Category. The Category will appear as a node named with the Display Name you defined under the AI Agents node.
Edit a Category
To adjust the information provided during the creation of a Category, follow these steps:
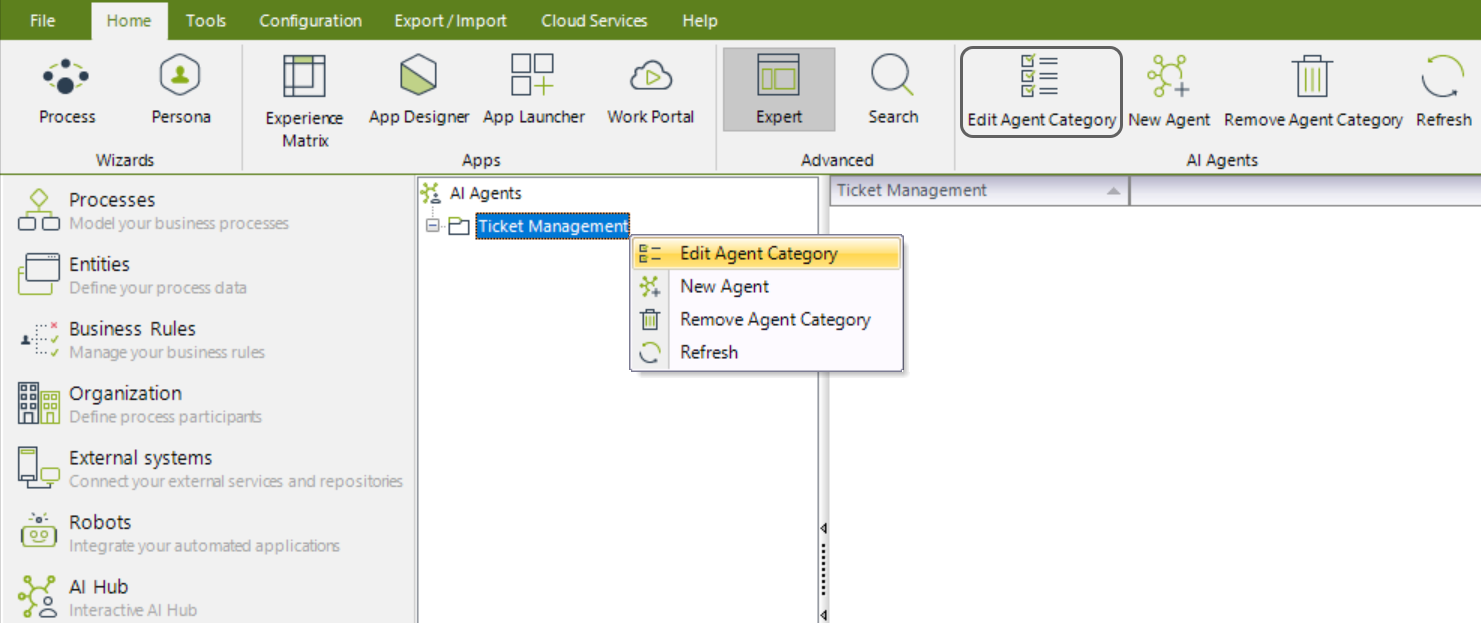
1.Right-click the node containing the current Display Name of your Category and select Edit Agent Category. Alternatively, use the corresponding button in the top ribbon.

2.Adjust the Name or Display Name as needed, and click the OK button to save your changes.
Remove a Category
To remove a Category, follow these steps:
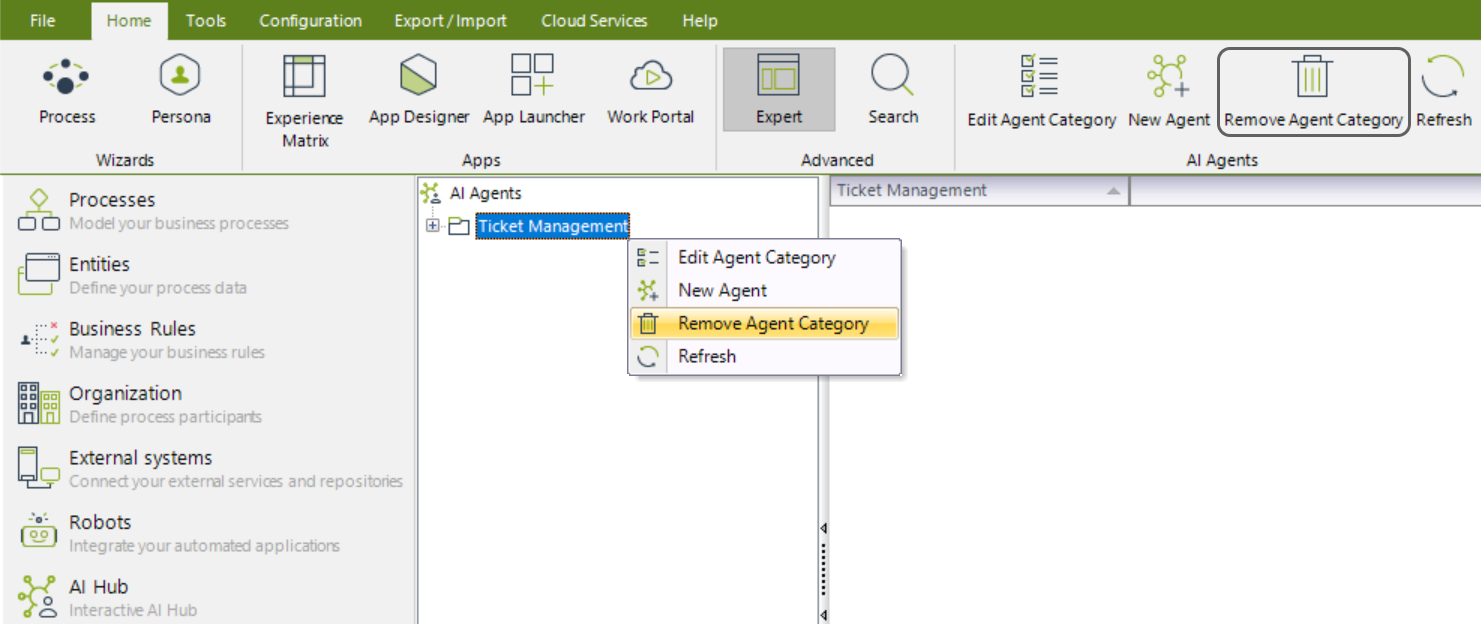
1.Right-click the Category node and select Remove Agent Category. Alternatively, use the corresponding button in the top ribbon.

2.Click the Yes button to confirm the Category removal action.
|
Before removing a Category, you must first remove any AI Agents it contains. |
Last Updated 11/25/2024 3:51:37 PM