Overview
Once you have created and appropriately configured your AI Agent in the Expert view, you can navigate to the fourth step of the Process Wizard (Business Rules) to configure the AI Agent as an Activity Action.
What you need to do
To configure your AI Agent as an Activity Action, follow these steps:
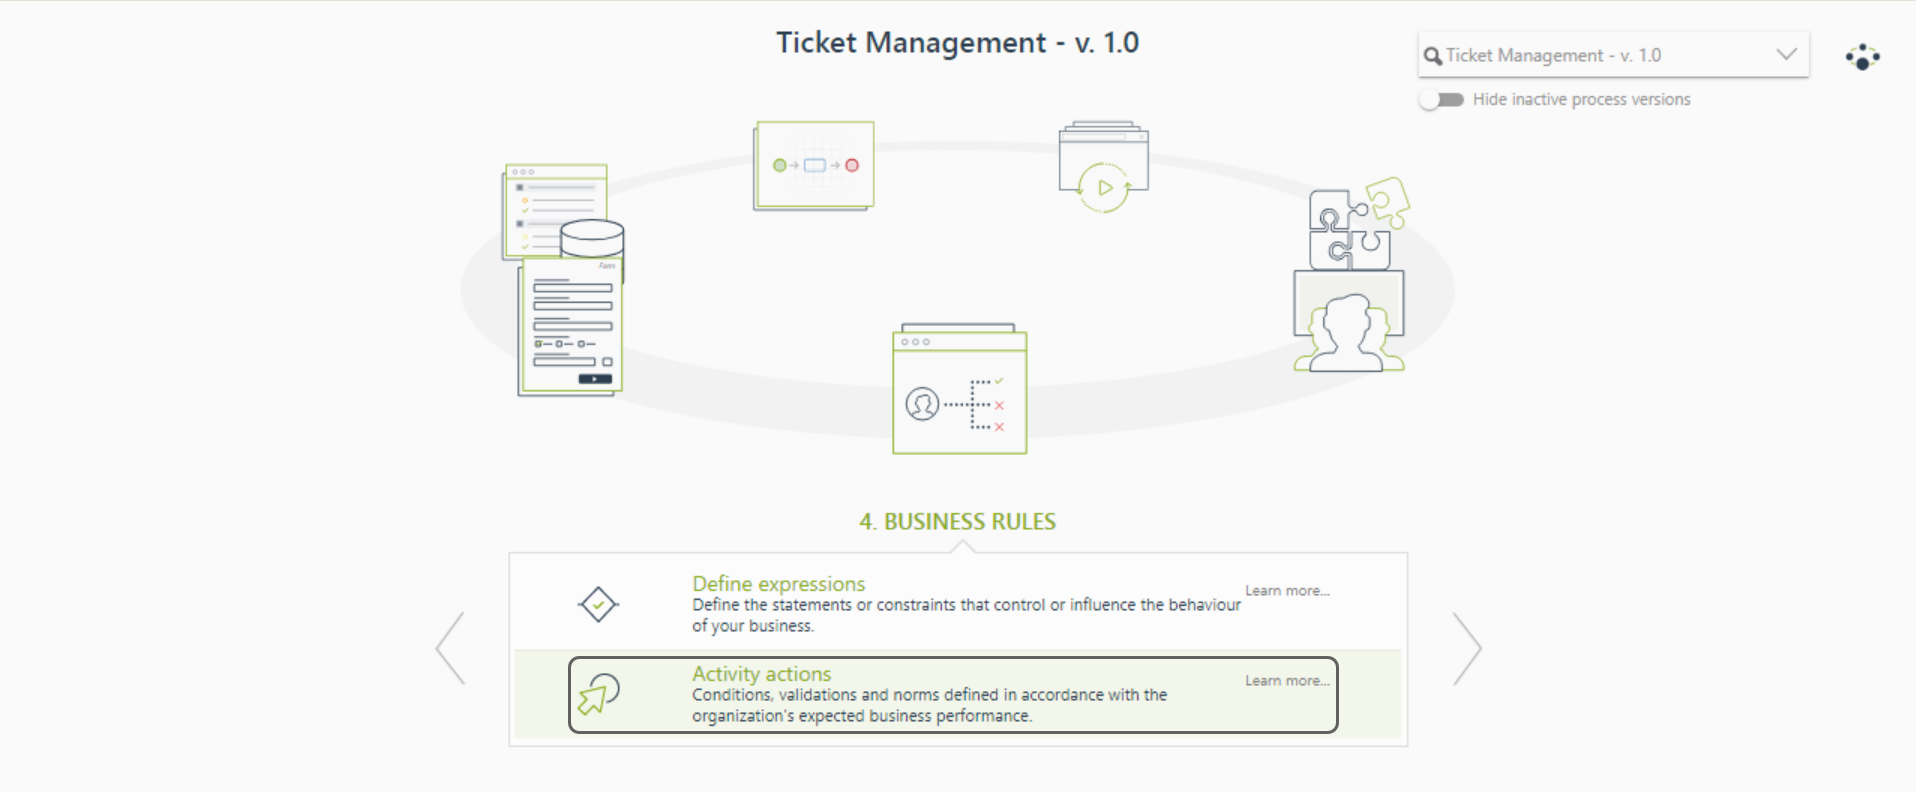
1.In the Business Rules step, click the Activity actions option.
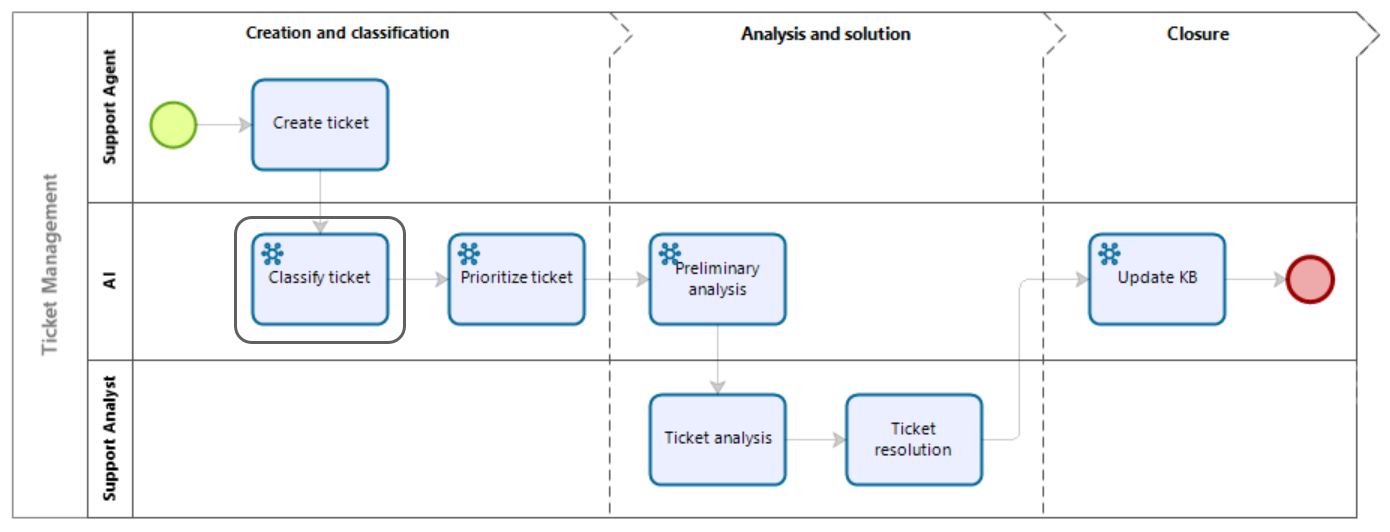
2.Click the AI Task within your process where you want to configure the AI Agent.
3.Click the + icon to add an Activity Action within the task. Remember that you can add an Activity Action either On Enter or On Exit of the task. Select the AI Agent Activity Action.
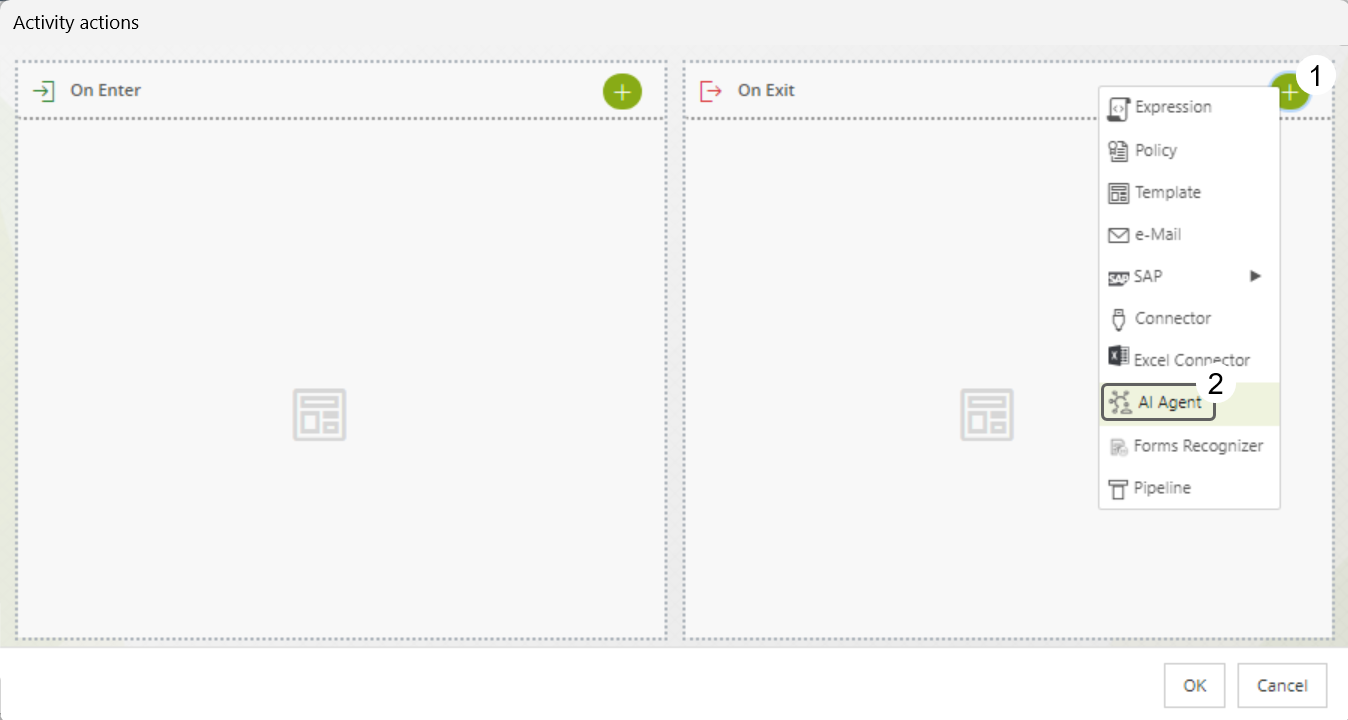
This action opens the AI Agent instance configuration wizard, where you can configure your AI Agent as an Activity Action.
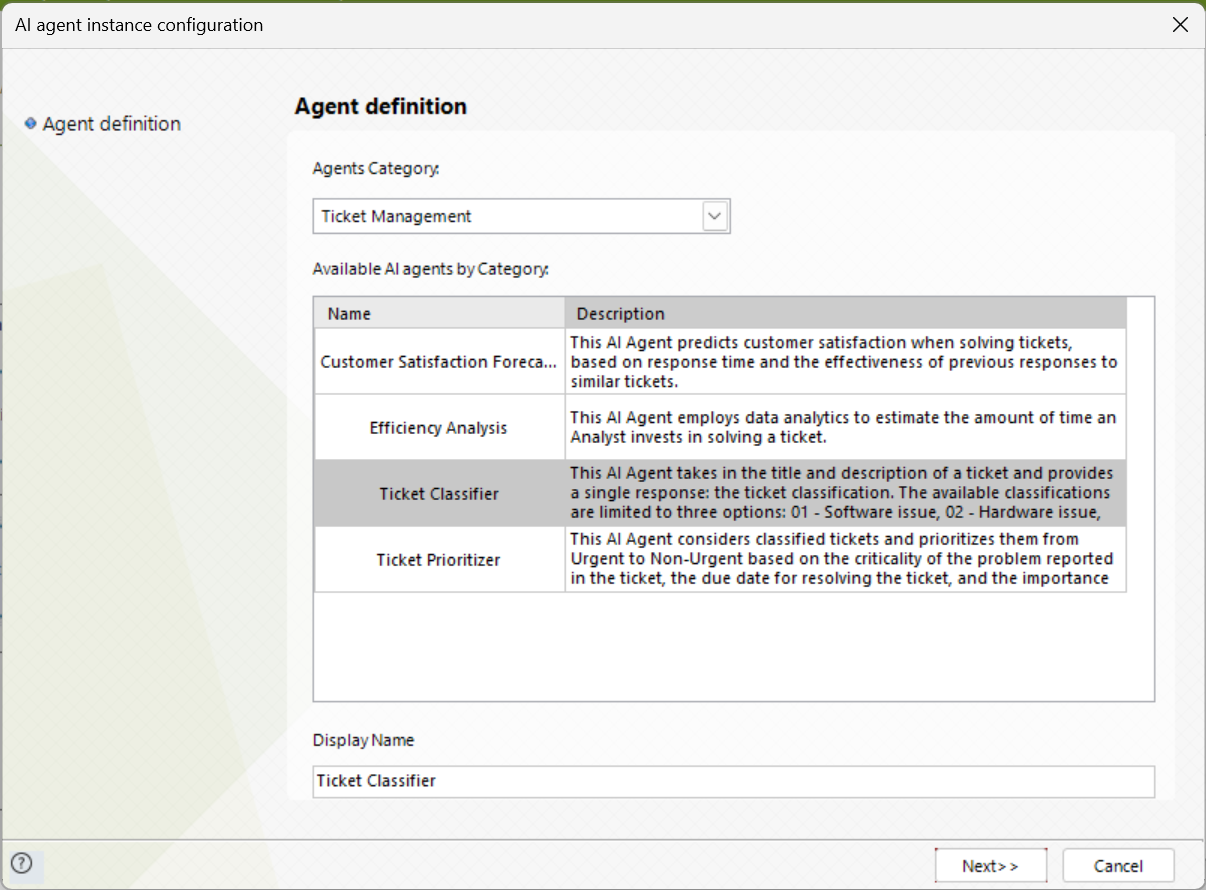
4.The first step of the wizard is the Agent definition step. Here, you can choose a Category from the drop-down menu labeled Agents Category. Below the label Available AI Agents by Category, a table displays AI Agents corresponding to the selected Category, along with their names and descriptions. To configure an AI Agent as an Activity Action, click it in the table. Additionally, define a Display Name for your Activity Action. By default, Bizagi selects the name of the AI Agent as the Display Name for this Activity Action.
Click the Next>> button to proceed to the second step of the wizard.
5.The second step of the wizard is the Agent inputs step, where you must map the attributes of your Data model that serve as inputs for your AI Agent. Click the Next>> button to continue.
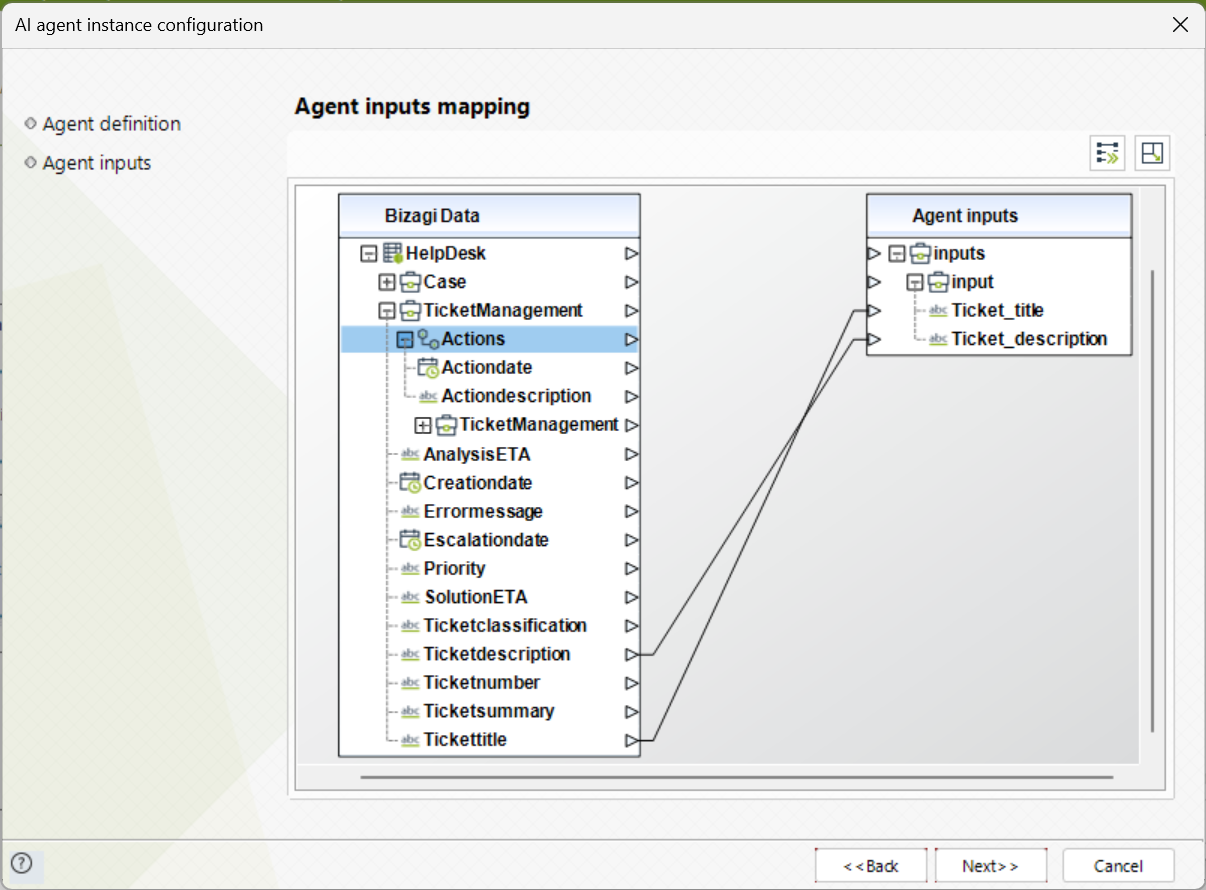
6.The third and final step of the wizard is the Agent outputs step, where you must map the attributes of your Data model that will store the output of your AI agent. Remember that the AI agent output is a String, so the Data model attribute you select must comply with this data type.
In this step, you can also define error handling in case your AI agent fails to provide a response. You can choose to throw an exception and halt the process until the error is addressed, or continue despite the error and map the error message. If you choose the latter, ensure your Data model includes an attribute to map the error message.
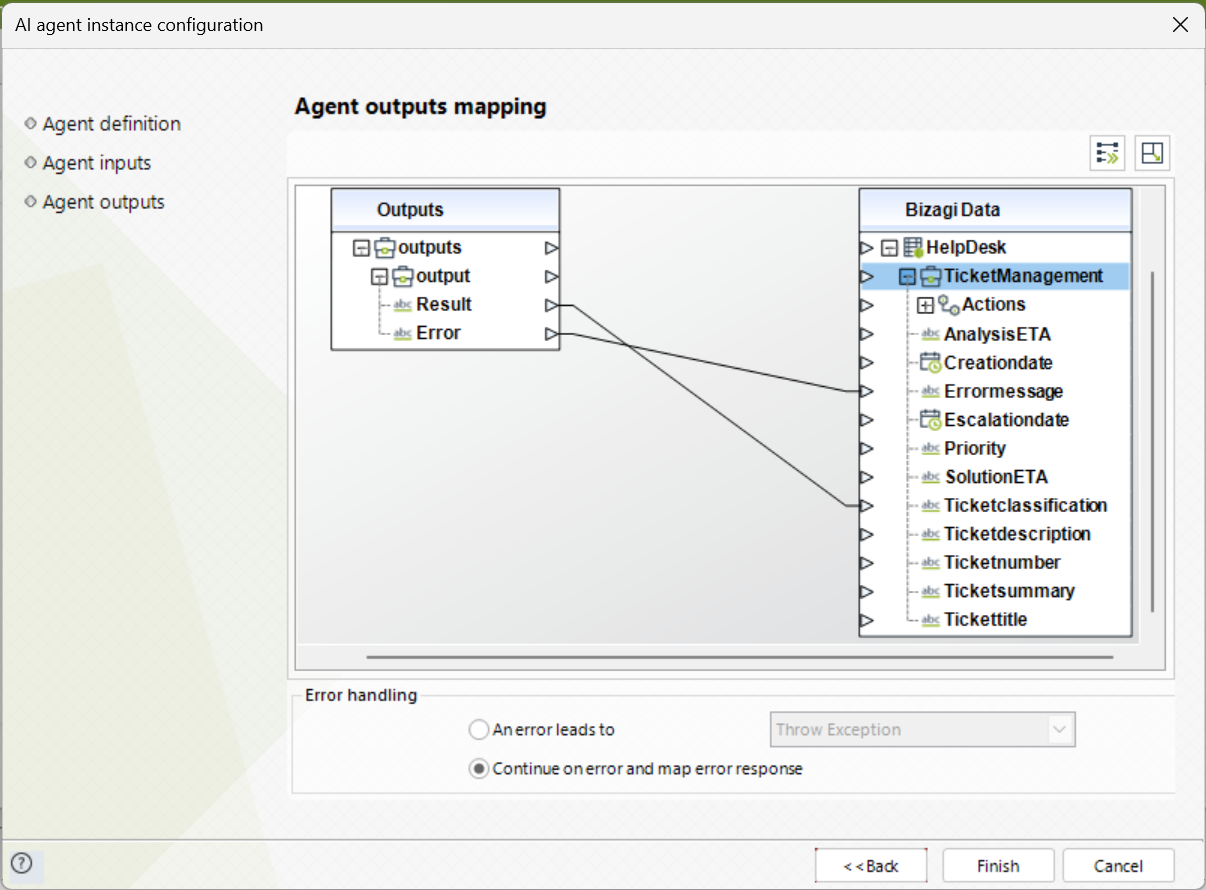
Click the Finish button to complete the configuration and close the wizard.
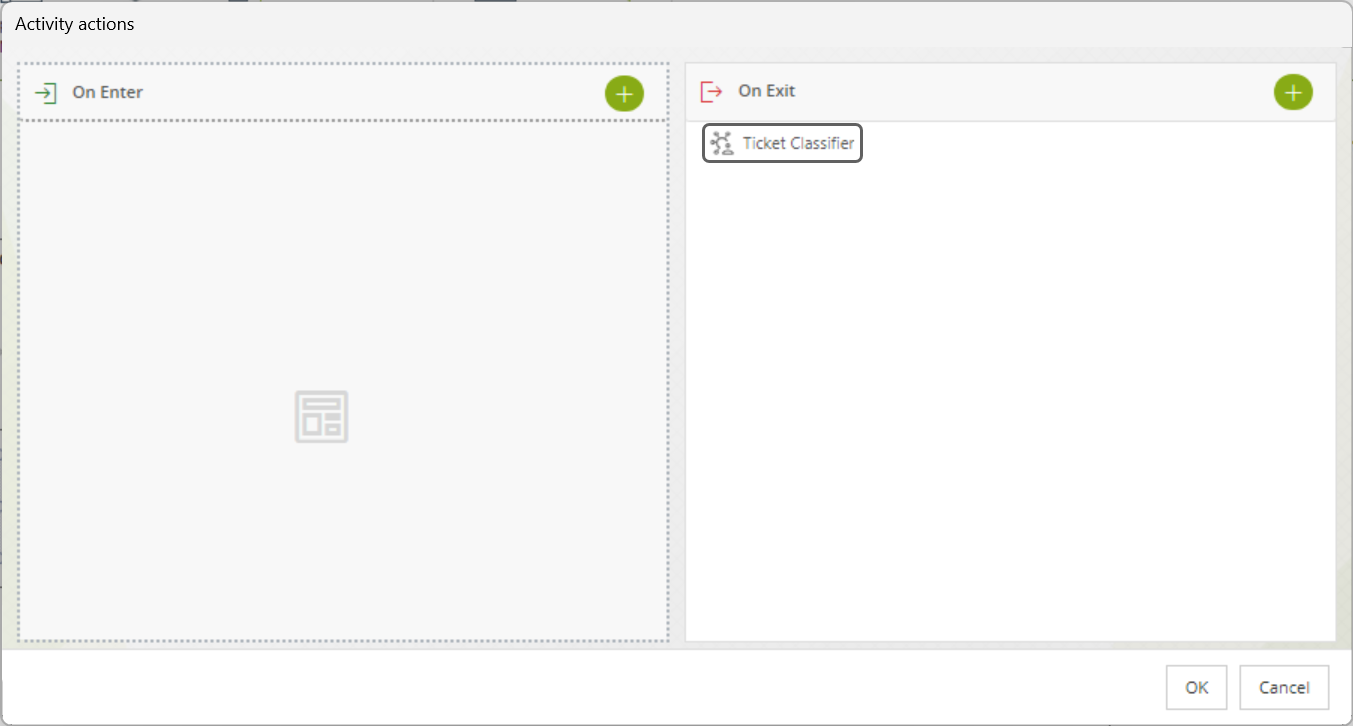
7.Confirm that the Activity Action appears where you configured it, and click the OK button to save the configuration.
|
Keep in mind that an AI Task allows only one AI Agent Activity Action. |
You are all set and ready to use your AI Agent within your process.
Last Updated 4/25/2025 4:29:53 PM