Overview
The Form link control displays as a link in the Work Portal. When users click the link, a defined form will open.
This control is very useful if you want to have information available for end users, in an informative way, but you don't want to include this information as part of the activities' form.
Considerations
•This control displays a link that opens a form created in Bizagi, thus all controls available in Bizagi can be used. If you wish to create links to URL addresses, please refer to Link.
•Forms associated with the Form Link control should always be reusable; that is, they should always be entity forms.
•If the form related contains mandatory controls, Bizagi will not validate them as the end user clicks Next on the parent form.
•If the Form Link control is not editable (i.e., its Editable property is set to No), any actions defined within the linked form—such as validations or data rules—will not be executed.
Related to attribute types
This control does not reference any attributes. It is directly related to a specific form.
Properties
Every control has a set of properties that allow to customize its behavior in the Work Portal. However, some properties are exclusive to a specific control. The following are properties exclusive to the Form link control:
Basic tab
PROPERTY |
DESCRIPTION |
|---|---|
Data source |
It determines the Context of the form opened. The form related must be available through XPath navigation, for Bizagi to be able to present the information within it. This property is not required, but we strongly recommend you set a Data source to avoid errors in the Work Portal. |
Dynamic display name |
It determines the String type attribute to be displayed in the Form Link. |
Open maximized |
When enabled, the form is opened in full-screen mode. |
Add Form |
It defines the form associated with the link when users click it. You can create a new form or select an existing one. The available forms displayed to select depend on the Data source selected. |
Advanced tab
PROPERTY |
DESCRIPTION |
Use as button |
It defines if the control is presented in the Work Portal as a button. By default, this property is disabled. When enabled, the control will display as a button, otherwise it will display as a link. |
Data Rule on Entry |
It defines the execution of a rule to perform calculations and validations before the form is opened. |
Data Rule on Exit |
It defines the execution of a rule to perform calculations and validations when the form is closed. |
Form link Example
A Sales Opportunity Management Process handles all the necessary activities to convert business opportunities into closed deals. In order to show only the relevant information to the sales agents, the detailed information of the Potential Customer is displayed in an additional form.
To access this contact form, it is necessary to include a form link control in the Process activities forms.
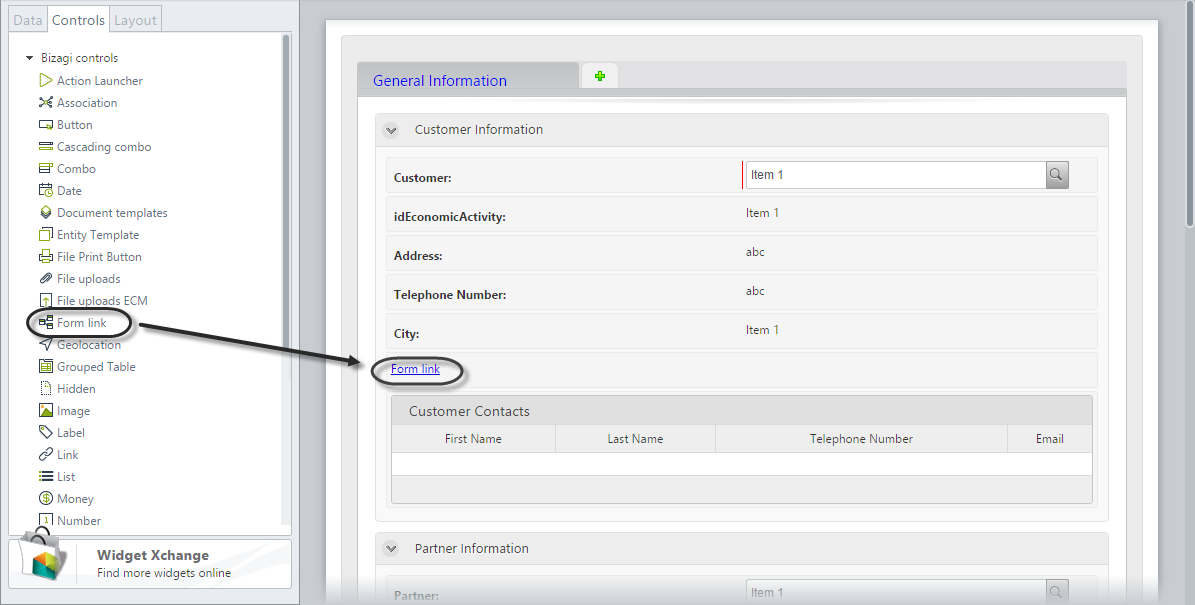
1. Open the Forms Designer to drag and drop a Form link control.
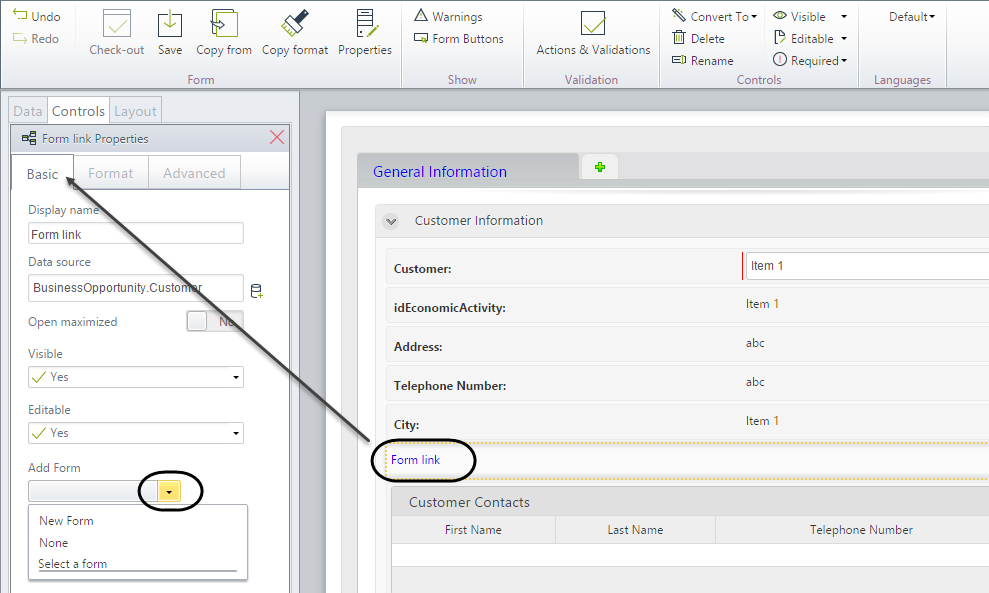
2. Go to the Basic tab in the control's Properties, select the Data source and expand the Add Form drop-down list.
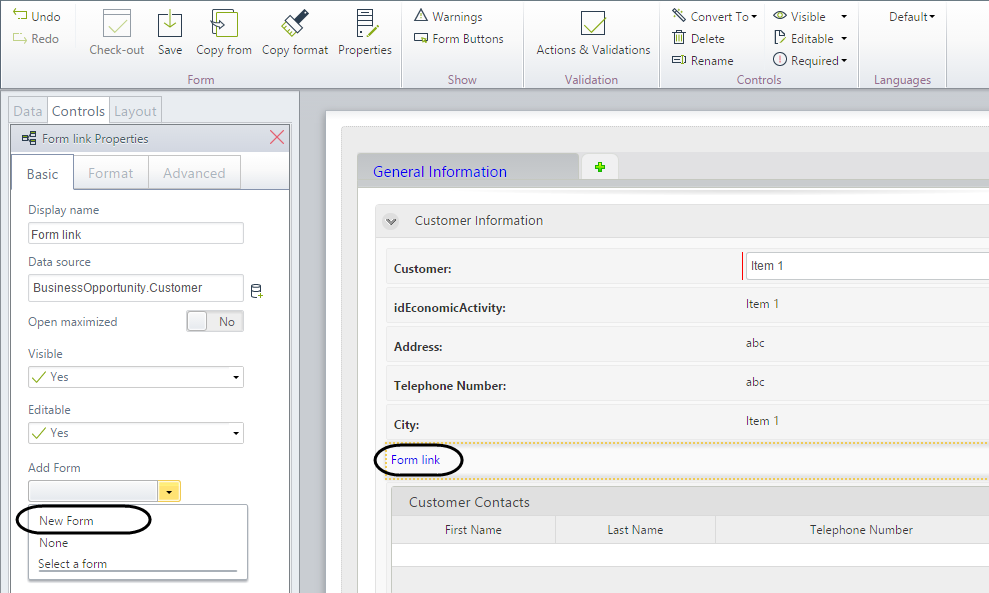
3. Then, a new form will be created. If your form has been created previously, select it from the list.
Click on the New Form option.
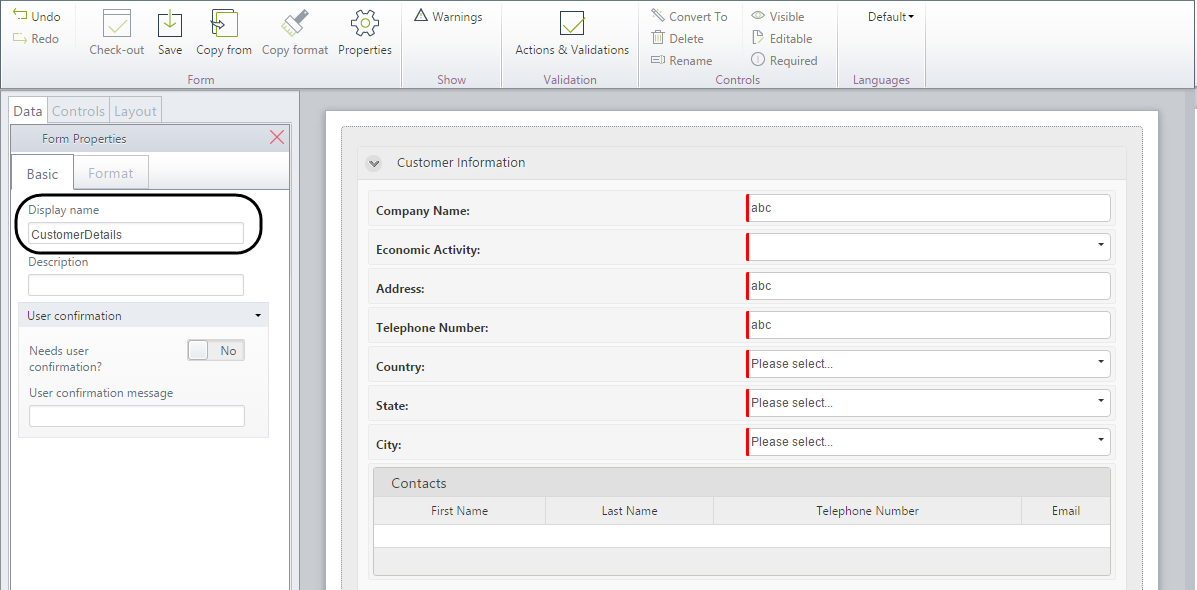
4. In the new form, include all the necessary information from the data model.
Open the Properties option of the form (located on the Ribbon) and give it a display name.
Save the child form and close the window to return to the parent Form.
5. Return to the main form and assign the form link a display name.
Save the form.
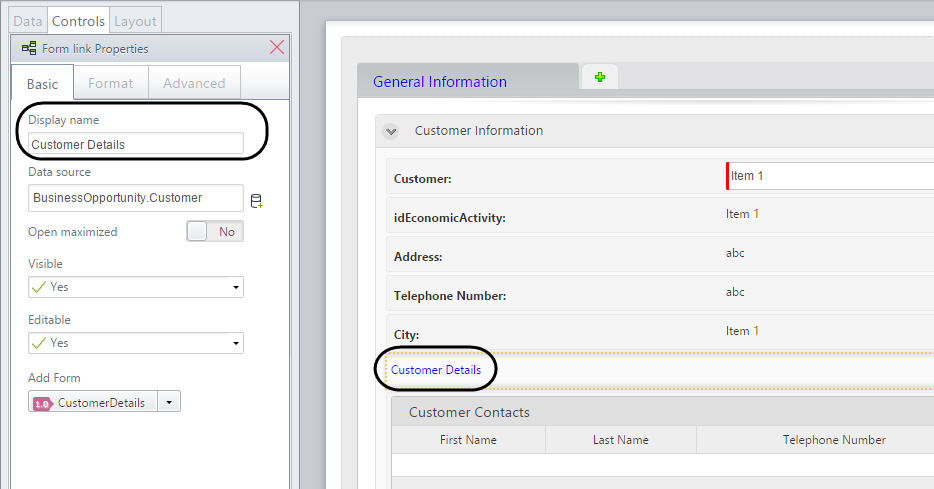
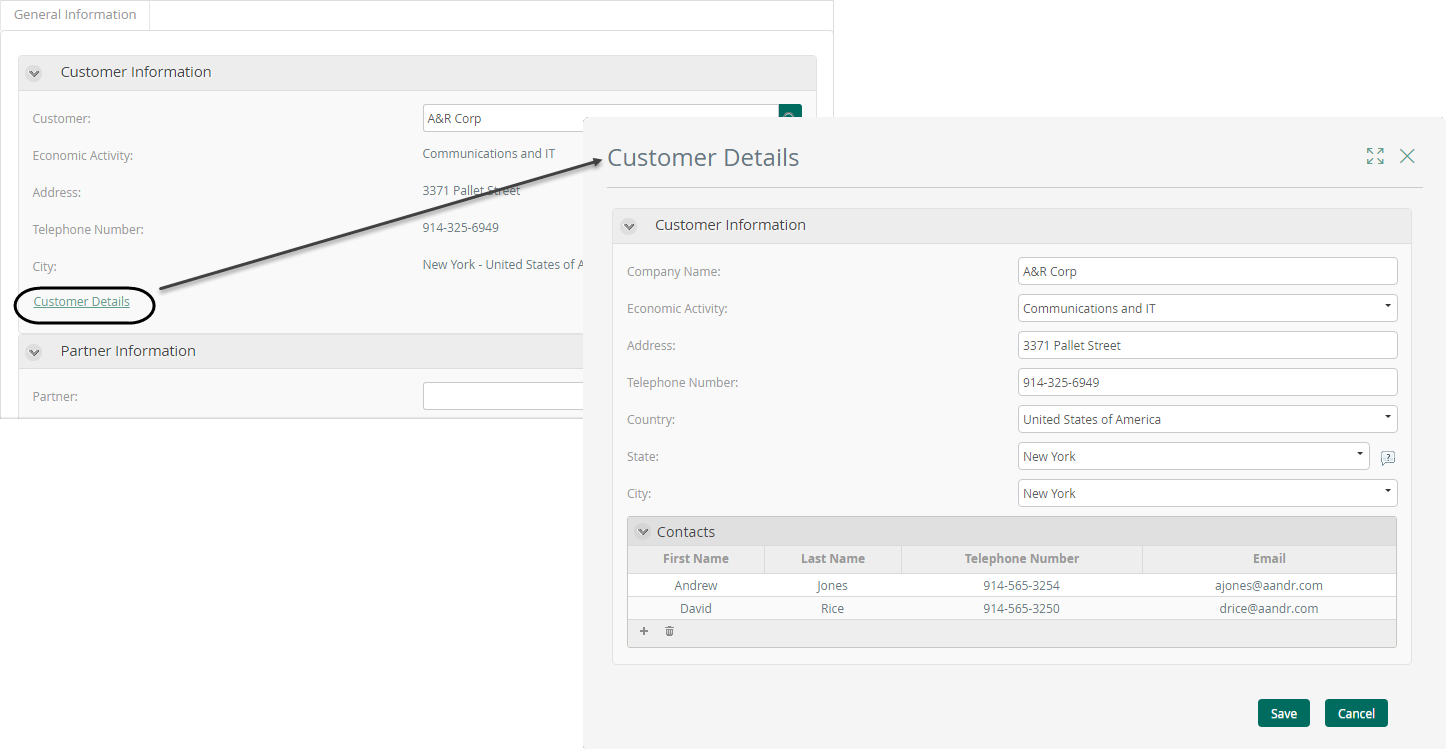
6. Go to the Work Portal to test the control.
Click on the form link. Note the child form previously created will display in a new window.
Column Form link Example
In the same process as in the example above, the Customers table only displays the first name and last name columns. Each contact's information can be viewed or edited by the sales agent. The additional information will be displayed in another Form.
To view this customer form, it is necessary to include a Column Form link control on the Contacts table.
1. Open the Forms Designer, edit the Contacts table columns and drag and drop a Form link control.
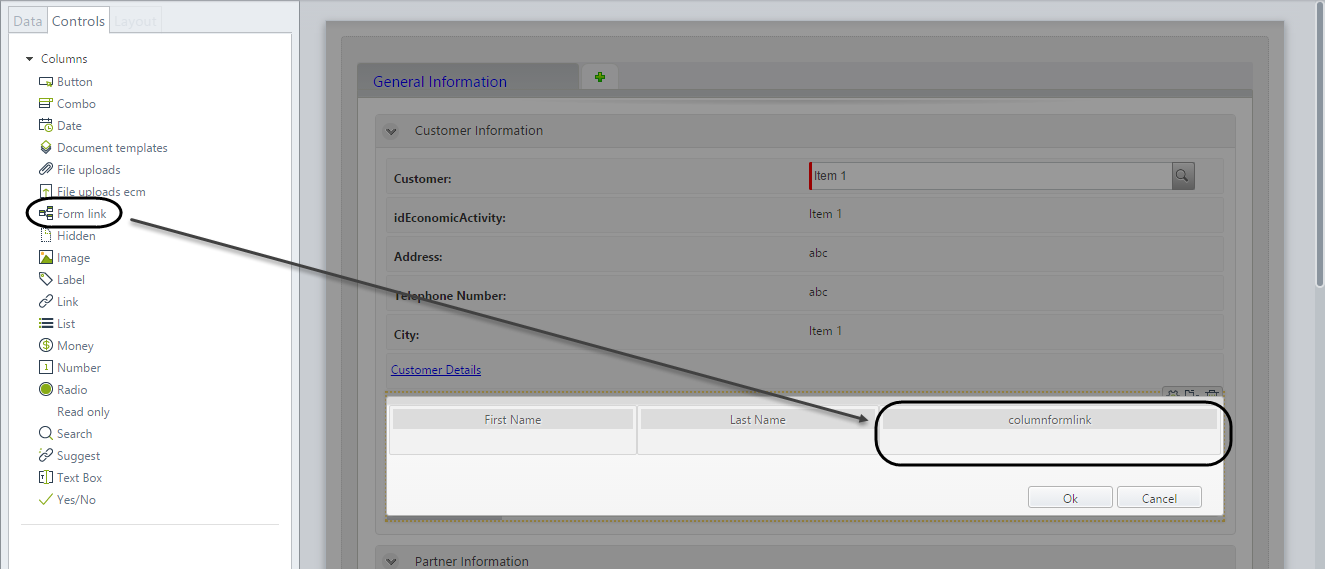
2. Go to the Basic tab in the control's properties. We will create a new form. If your form has been created previously, select it from the list.
Expand the Add Form drop-down list and click the New Form option.
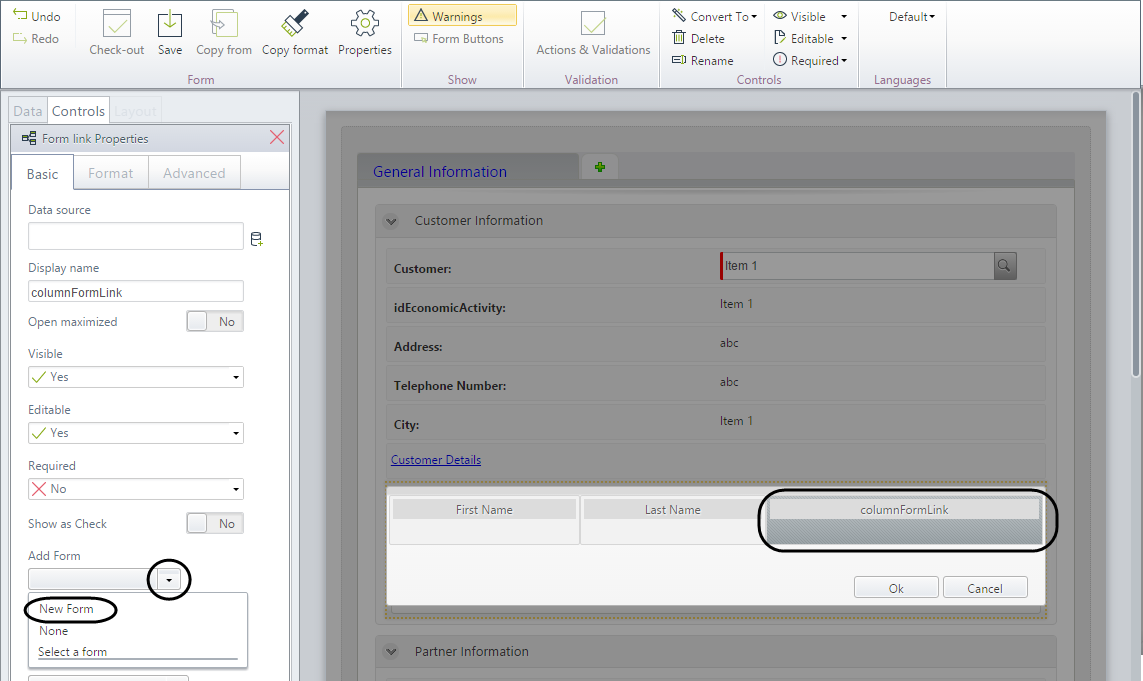
3. In the new form include all the necessary information from the data model.
Open the Properties option of the form (located on the Ribbon) and give it a display name.
Save the child form and close the window to return to the parent Form.
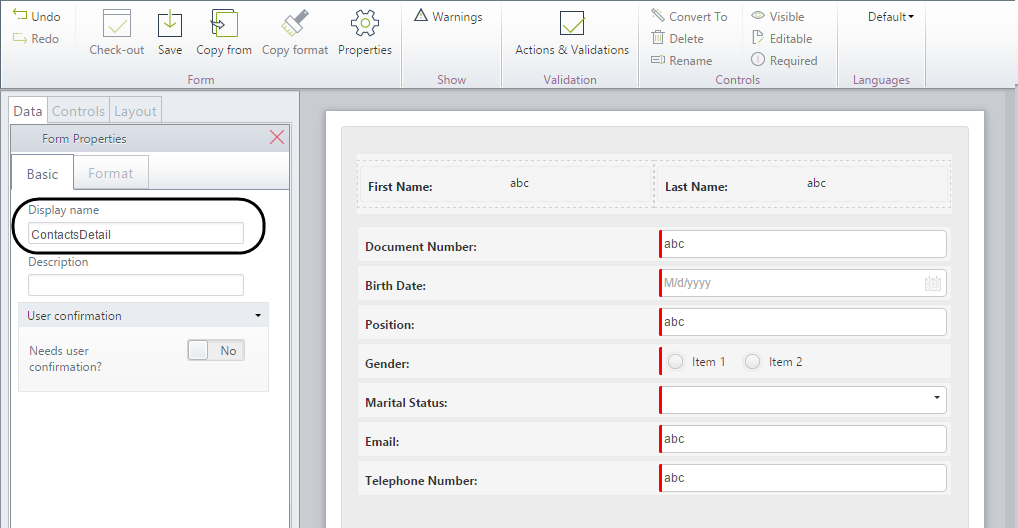
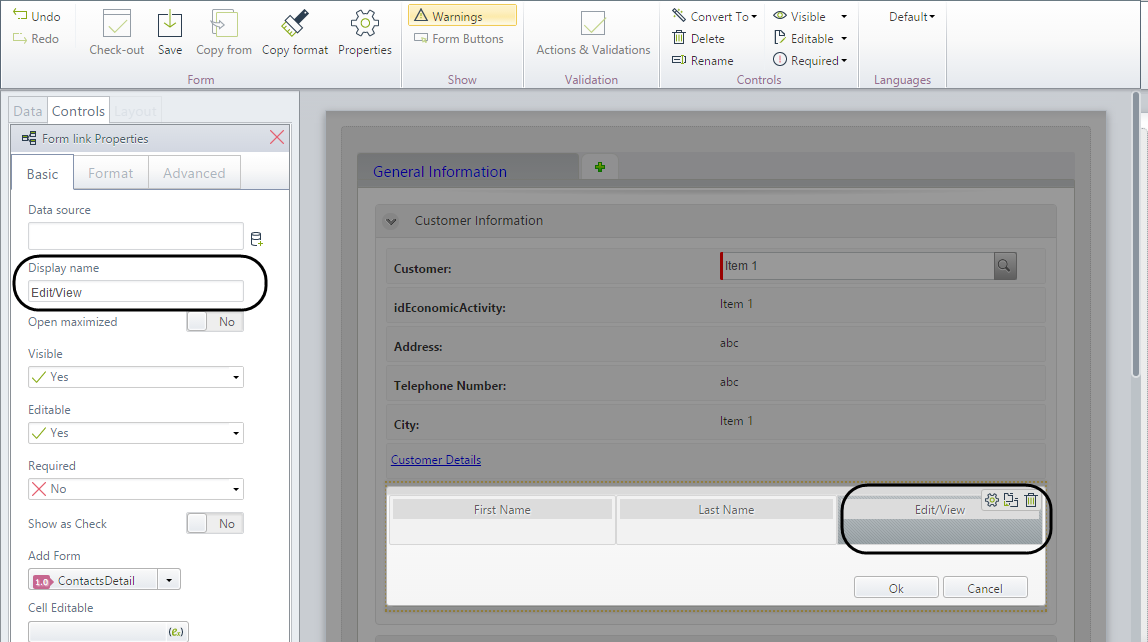
4. Set the Display name for the control, and it will use this name for both the column header and the link label.
Save the form.
When the control is a table column, the new form will take the context of the collection, so it is not necessary to set any value for this property.
|
•Keep in mind that setting the table Editable property to No will result in hiding the Save button of the Form Link created. •Setting the Form Link column Editable property as No will result in hiding the Save button of the Form Link created. |
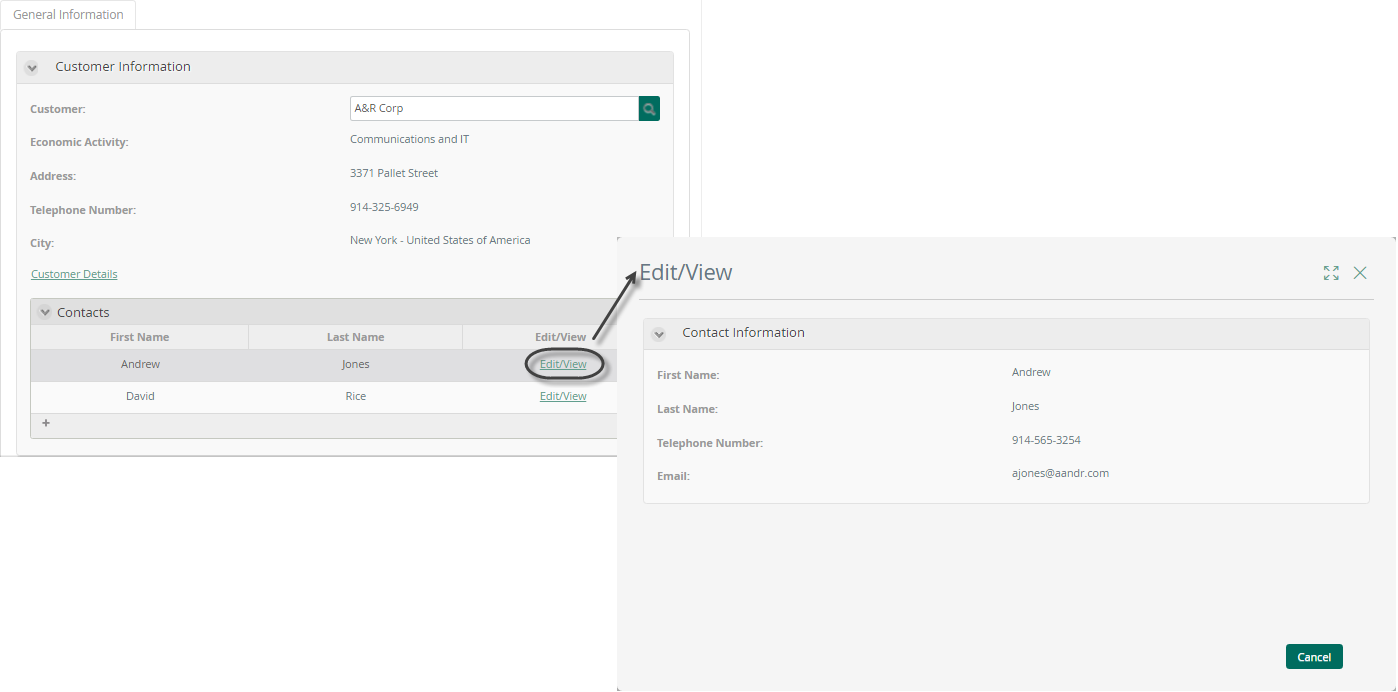
5. Go to the Work Portal to test the control.
Click on the form link. Note the child form previously created will display in a new window.
Dynamic Form Link Example
To set a dynamic name on a Shape Link in a table follow these steps:
Enter your form in Bizagi Studio and select the Edit button on your data table.
Select the Link to Form column and on the Basic tab in the control properties select the Dynamic Display Name field database icon.
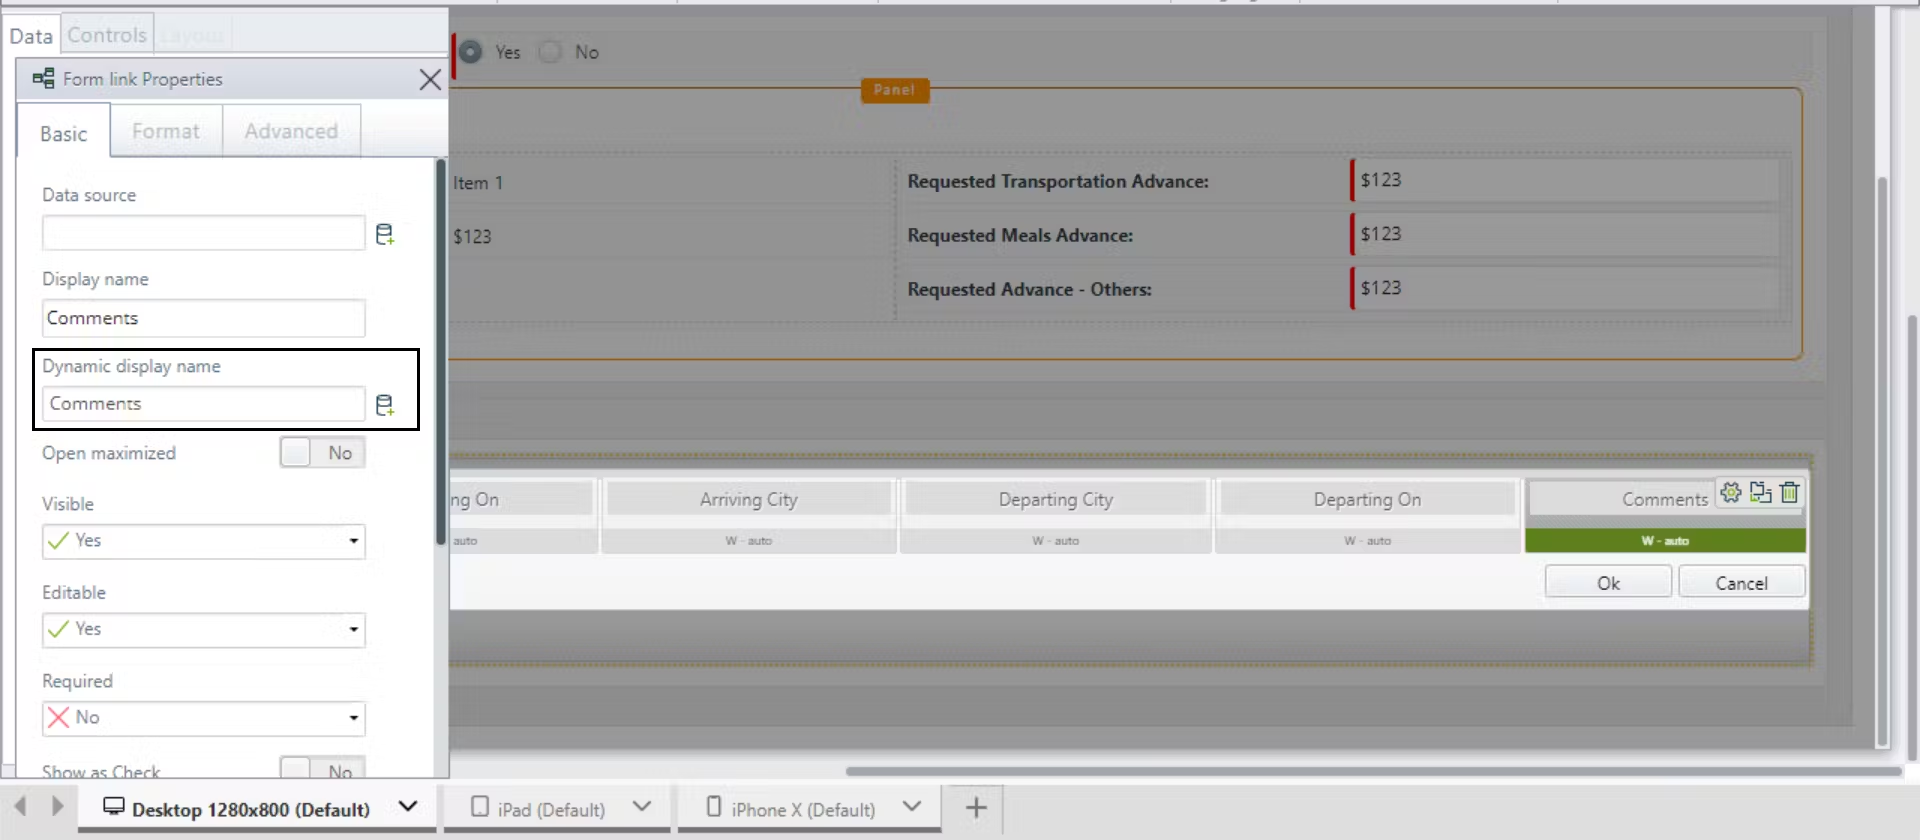
Navigate the data model and select the string attribute to be displayed in the Form Link.
To confirm and save your changes click the save button located on the top ribbon.
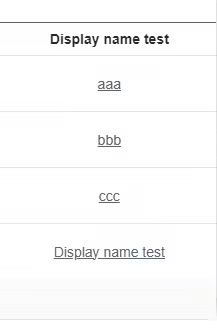
Once the form link is configured, you can view it from the Work Portal when you open a case and access the form. For each record in the table, in the Form Link column, you see a link with different names.

A similar view can be seen when the Link to Form control is displayed as a button. It has the same behavior and will be display as in the following image:

In Bizagi Apps you can also view the Form Link configuration. When you access the table, you can see that in each record of the form link column a link with different names is displayed.
If the Link to Form control has been configured as a button it might look like this:
|
This functionality can only be configured for attributes that are of type String. |
Last Updated 6/16/2025 11:55:18 AM