Overview
To integrate your cloud portals with your corporate Identity Provider (IdP) using SAML 2.0, complete the configuration steps described in this section. These steps are performed once, typically by a Customer Portal Administrator with access to the IdP.
After the configuration is completed, users sign in to cloud-based services through the IdP, as described in Signing in the Bizagi Cloud Portals and Applications.
Before you start
To configure an IdP that supports SAML 2.0, you must have already registered users in the Customer Portal.
When integrating an IdP, you must synchronize authorized accounts so that users can access the cloud-based services associated with your company.
Registering users means creating or updating their primary identifiers. The email address configured in Bizagi must match the NameID attribute included in the SAML Assertion sent by the IdP. Email is the most commonly used identifier. For more information, see Create company users.
Bizagi does not store user passwords when integrating with an IdP.
|
You cannot have multiple users with the same email address because the email address is part of the user's primary identifier. |

After verifying that users have been registered in the Customer Portal, continue with the configuration process.
Understanding SAML messages
When configuring SAML 2.0 authentication, it is important to distinguish the different message types used during authentication:
•SAML Assertion: Contains the information that identifies a user. It is generated by the IdP and validated by Bizagi.
•SAML Request: A request generated by Bizagi and sent to the IdP. Bizagi generates two types of requests: authentication requests (AuthnRequest) and logout requests (LogoutRequest).
•SAML Response: A response generated by the IdP after receiving a request from Bizagi. A SAML Response can contain one or more SAML Assertions.
Understanding these message types helps you correctly configure signing and encryption certificates.
Steps to configure your IdP in the Customer Portal
To configure an IdP using the SAML 2.0 protocol, complete the following steps:
1. Generate certificates (mandatory)
We recommend generating certificates directly from the Customer Portal. Alternatively, you can use certificates generated by a certification authority (CA) or another trusted source.
If you need guidance, see Certificates for SAML 2.0 authentication.
Before proceeding, you must have:
•A signing certificate (mandatory) in P12 or PFX format, including the password defined when you exported the public and private keys.
•An encryption certificate (optional) in P12 or PFX format, including the password defined when you exported the public and private keys.
|
You are responsible for managing your certificates, including monitoring expiration dates and maintaining any related IdP configuration. |
2. Initial setup in your IdP
Configure the IdP before creating the authenticator in the Customer Portal.
Examples:
•ADFS
•Okta
3. Add and configure the IdP in the Customer Portal
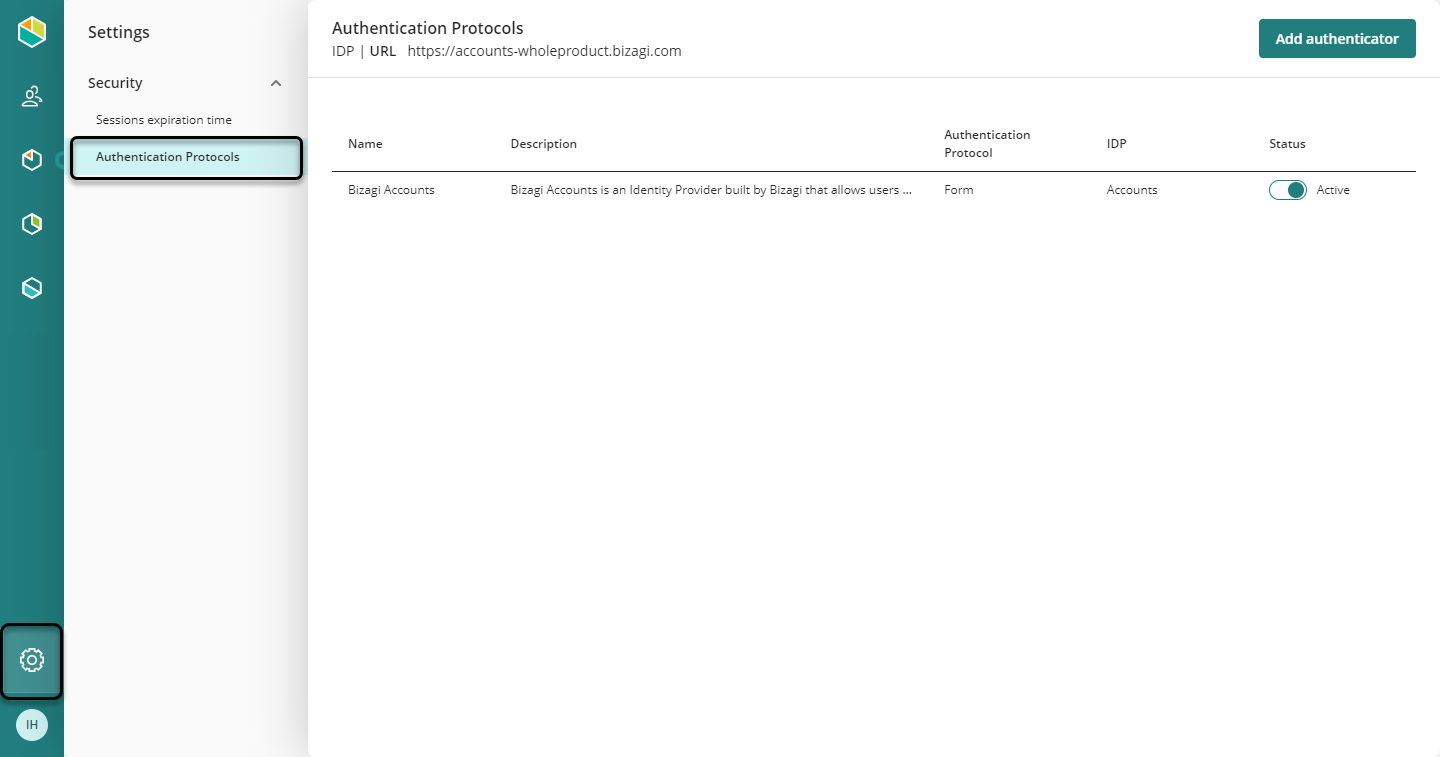
Access the Customer Portal as a Company Administrator, click the Settings icon, open the Protocols menu, and select Add authenticator.
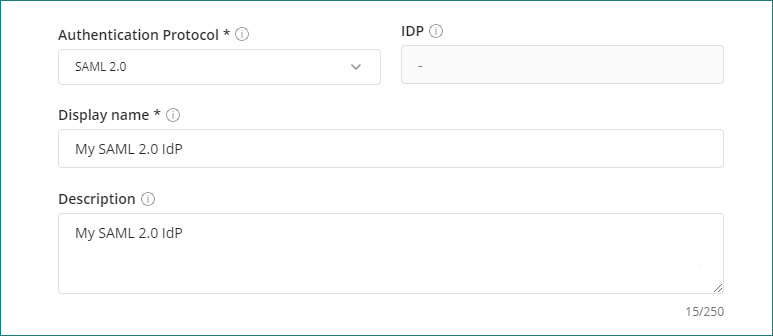
Select SAML 2.0 in the Authentication Protocol drop-down and configure the following settings:
•IDP: Name of the Identity Provider associated with the selected protocol.
•Display name: Name displayed in the Customer Portal for the authenticator.
•Description: Description of the authenticator.
Define the domains
If multiple authenticators are configured, you can associate email domains with specific authenticators. For more information, see Multiple authenticators for cloud-based portals.
Metadata file
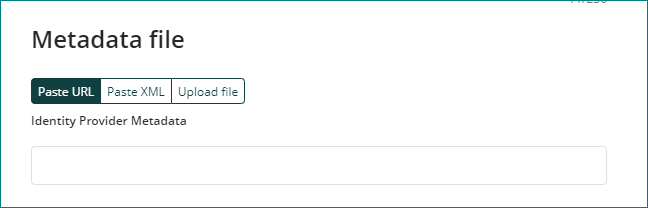
Provide the location of the IdP metadata.
We recommend using Paste URL whenever your IdP exposes a metadata endpoint. When this option is used, Bizagi retrieves the metadata directly from the IdP, including any updated certificates published in the metadata.
|
Using Paste URL reduces maintenance tasks because you do not need to manually update the metadata configuration when the IdP renews or replaces its certificates. |
Alternatively, you can use:
•Paste XML
•Upload file
|
When using Paste XML or Upload file, you are responsible for updating the metadata whenever the IdP's certificates or configuration settings change. |
Examples of metadata URLs:
•Azure AD: https://login.microsoftonline.com/[tenant]/federationmetadata/2007-06/federationmetadata.xml
•ADFS: https://[my_federateserver]/FederationMetadata/2007-06/FederationMetadata.xml
•OKTA: https://[company].okta.com/app/[id]/sso/saml/metadata
Signing Certificate
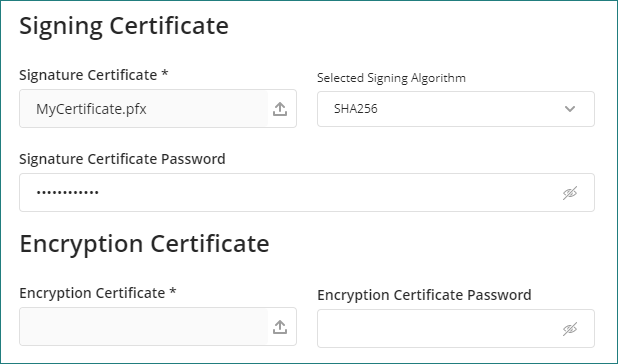
•Signing certificate: Use the Browse button to locate and upload the digital certificate (P12 or PFX format) containing the public and private keys used to sign the SAML requests generated by Bizagi, including AuthnRequest and LogoutRequest messages.
•Signature certificate password: Enter the password associated with the signing certificate.
•Signing algorithm: Select either SHA1 or SHA256.
Encryption Certificate
|
Bizagi supports encrypted SAML communications between the IdP and Bizagi.
The following message types can be protected by the encryption certificate: •SAML Assertions: generated by the IdP and sent to Bizagi. These messages contain user attributes and authentication information. •Logout requests: generated by Bizagi and sent to the IdP.
Verify that your IdP supports encrypted SAML communications before configuring encryption certificates. |
•Encryption certificate: Use the Browse button to locate and upload the digital certificate (P12 or PFX format) containing the public and private keys used for encryption operations.
•Encryption certificate password: Enter the password associated with the encryption certificate.
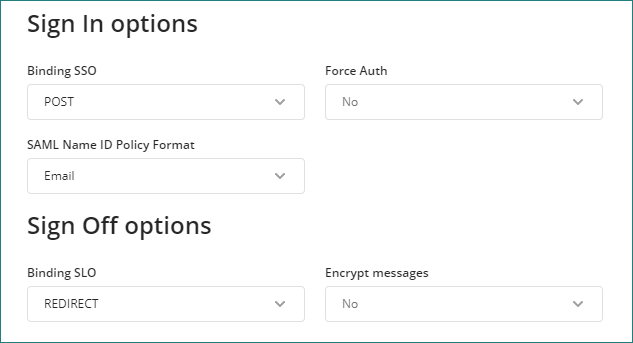
Sign In options
•Binding SSO: Bizagi recommends using POST because it supports larger messages. Consult your IdP for the supported SSO bindings.
•Force auth: Set to Yes to require users to authenticate every time they access Bizagi.
•SAML Name ID Policy format: Defines the NameID format expected by the IdP. Bizagi recommends using Email address.
Sign Off options
•Binding SLO: Defines whether logout requests use the POST or REDIRECT (GET) HTTP method. Verify the supported option with your IdP. If you use Azure AD, select REDIRECT.
•Encrypt messages: Bizagi supports receiving encrypted SAML Assertions and sending encrypted logout requests. Both message types can contain sensitive information and can be encrypted using the configured encryption certificate.
If you set this option to Yes, both the SAML Assertion sent by the IdP to Bizagi and the LogoutRequest sent by Bizagi to the IdP are encrypted using the configured encryption certificate.
Ensure that your IdP supports issuing encrypted SAML Assertions and receiving encrypted logout requests.
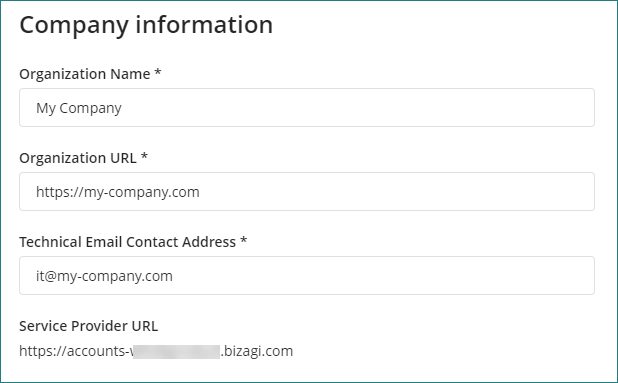
Company information
•Organization Name: Name of your company included in SAML messages generated by Bizagi.
•Organization URL: URL of your company included in SAML messages generated by Bizagi.
•Technical Email Contact Address: Email address of your platform administrator.
4. Download the metadata file and upload it to your IdP
Some IdPs require the Service Provider metadata file.
If your IdP requires metadata import, download the metadata generated by Bizagi from the SAML configuration defined in the Customer Portal. This file contains the configuration information required by the IdP, including the public keys associated with the certificates used by Bizagi to sign SAML Requests and support encrypted SAML communications.
Before downloading the metadata file, make sure that:
•A signing certificate has been uploaded.
•The signing certificate password has been configured.
To download the metadata file, use:
https://accounts-[company].bizagi.com/saml2/metadata
You can preview or download the file.
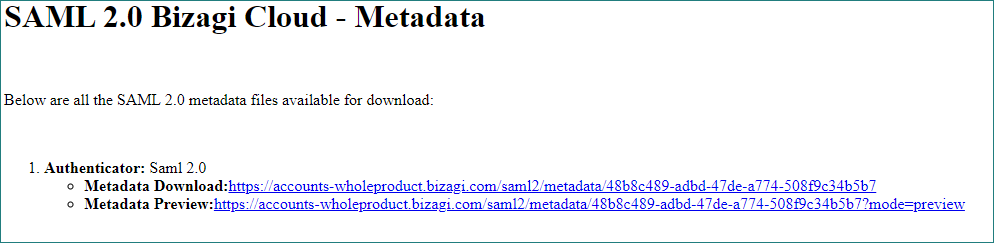
After downloading the file, upload it to the corresponding application in your IdP.
To test the configuration, sign out from all sessions and open a new browser session using an InPrivate or Incognito window. If authentication fails, you can restore the previous authentication protocol configuration.
Troubleshooting
If authentication fails, see:
•Troubleshooting SAML message exchanges
Last Updated 10/1/2026 4:12:01 PM