Overview
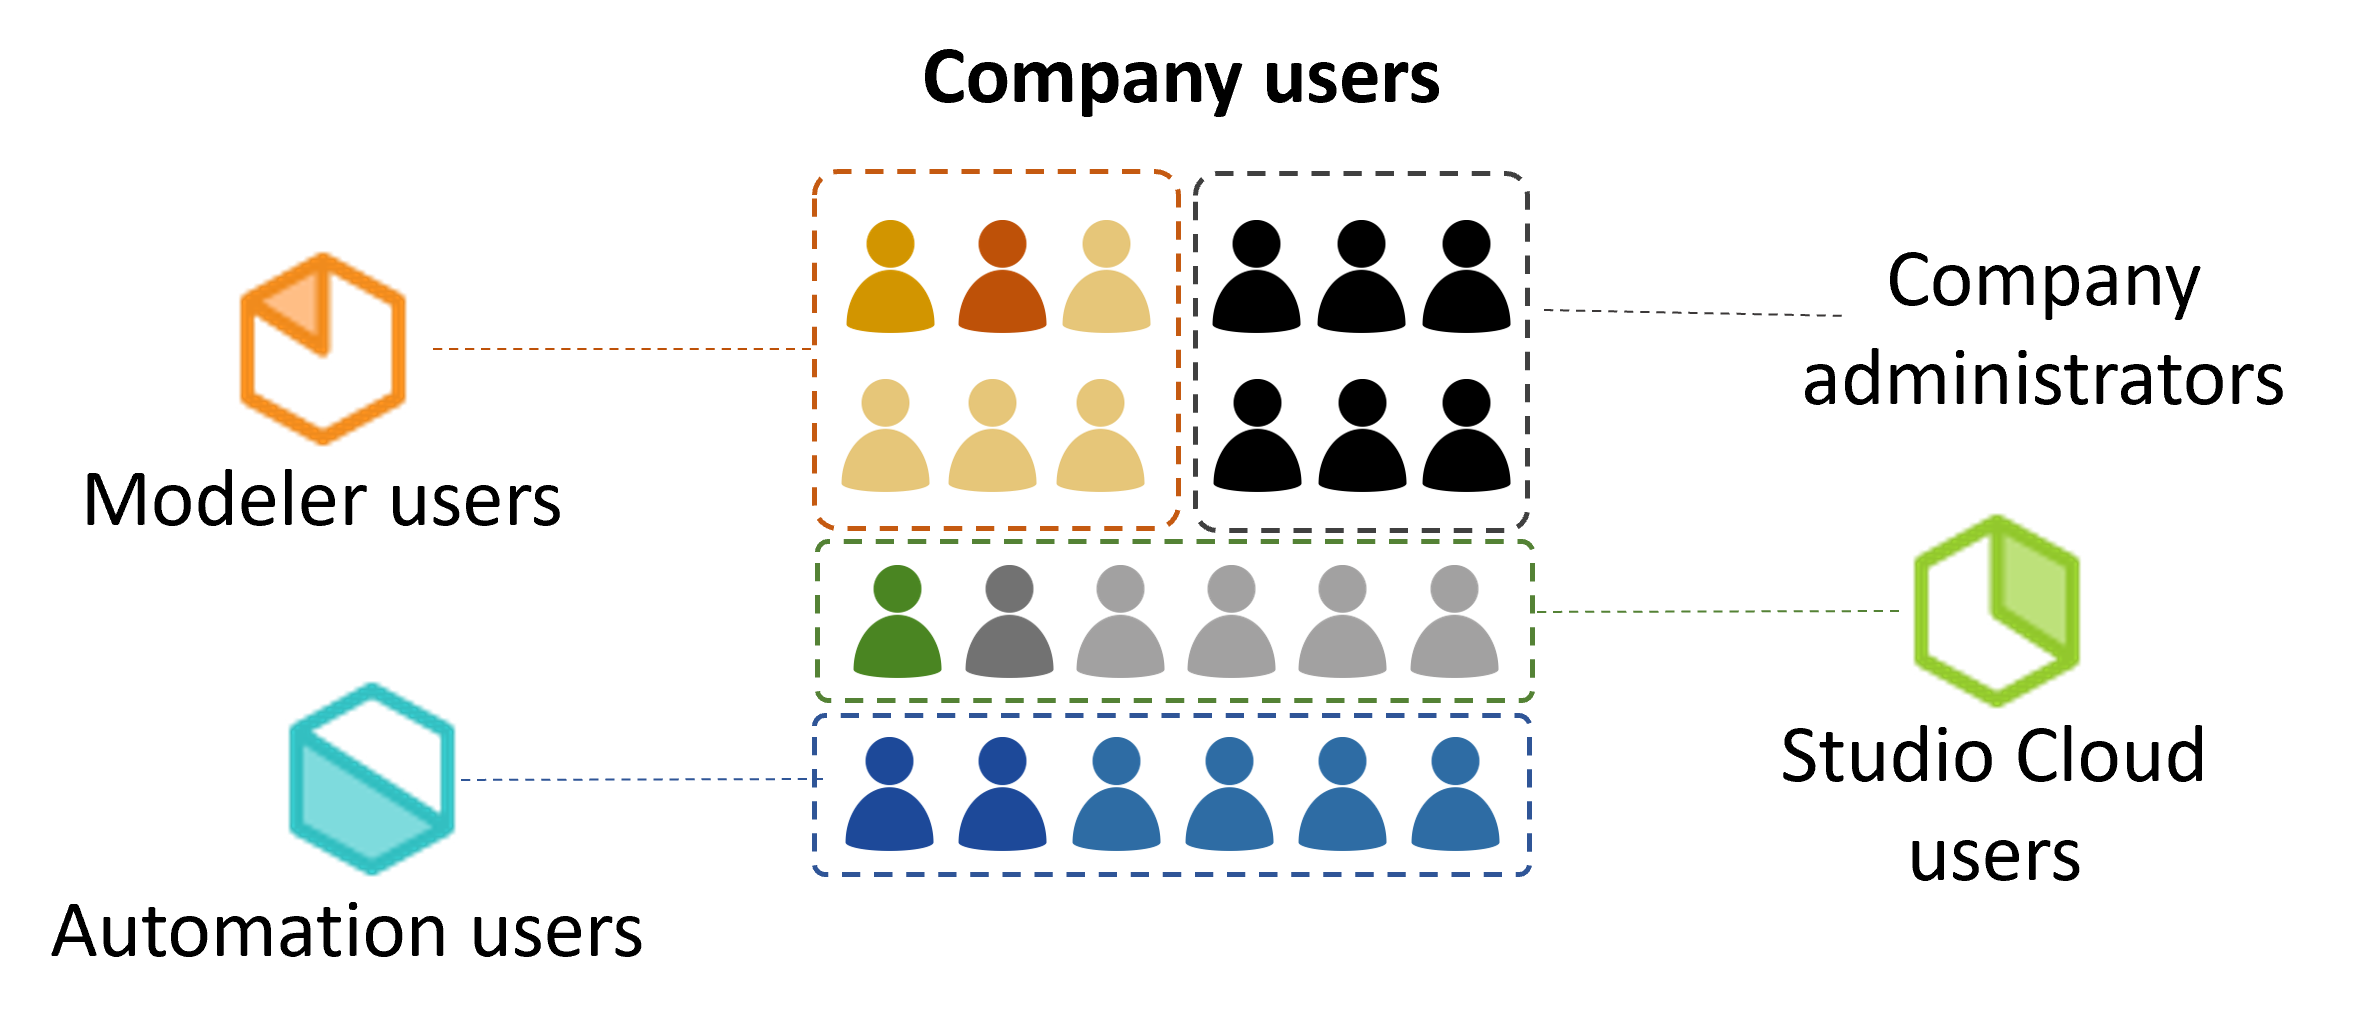
The Customer Portal encompasses all the users of your company of all services in the Bizagi cloud offering. When you create users inside the company, these users can be entitled to the different roles of each service. For more information about Bizagi cloud platform roles, refer to the Cloud services users and roles article.
Each user can be added to any of the services that the company holds.
At the company level, the company owner can perform any of the following actions:
•Create company users in batches
•Remove company administrators
For more information related to the Customer Portal, refer to the Understanding users in the Customer Portal article.
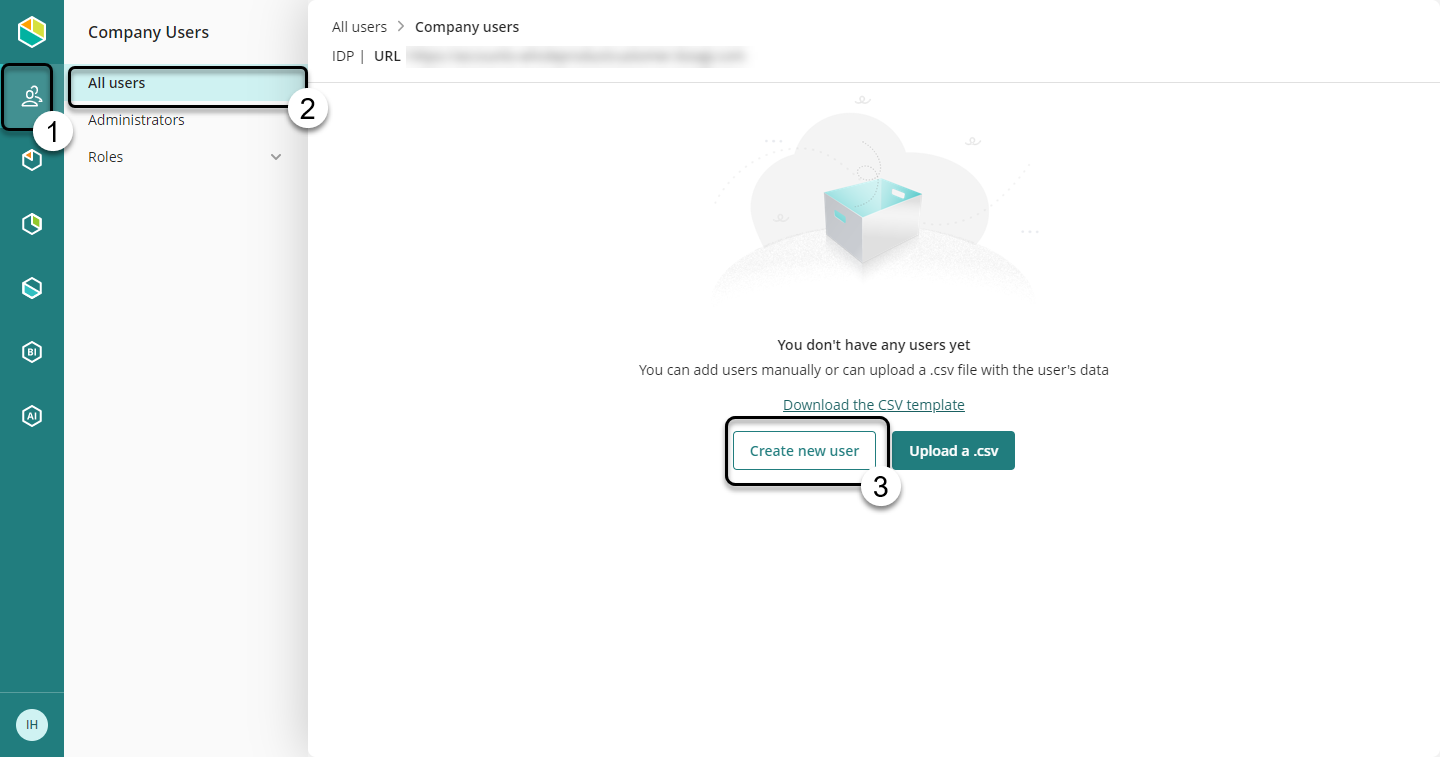
Create company users
To add a user in the company user’s pool, log in as a Customer Portal administrator. Click the user management icon in the left-side menu, then select the All users module. Click the Create new user button:
Register the user's information:
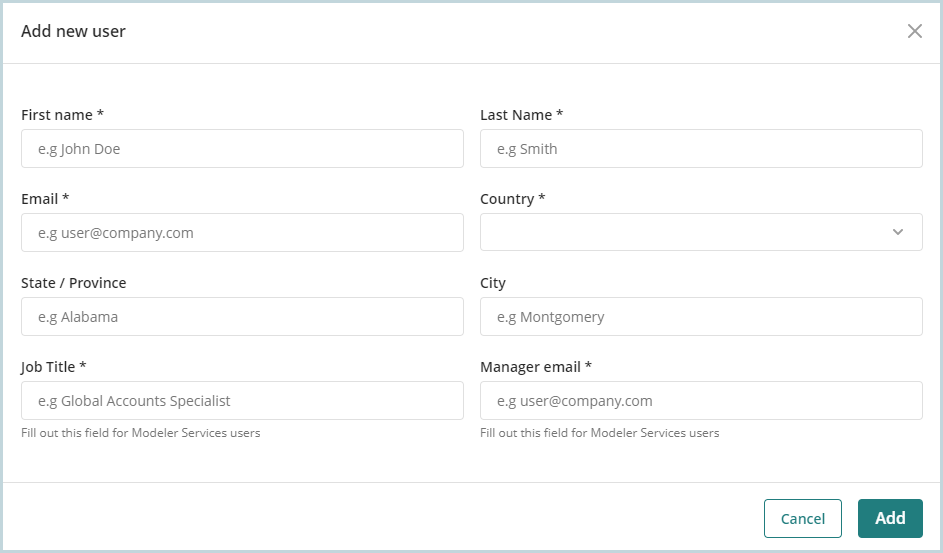
|
The User Email serves as a unique identifier. Hence, you cannot have two or more users with the same email. The Job Title and Manager email fields are mandatory for user registration, but can be edited anytime. |
Create company users in batches
When you need to add a considerable number of users in your company, you can add them in batch using a comma-separated file. This section explains how you can do that.
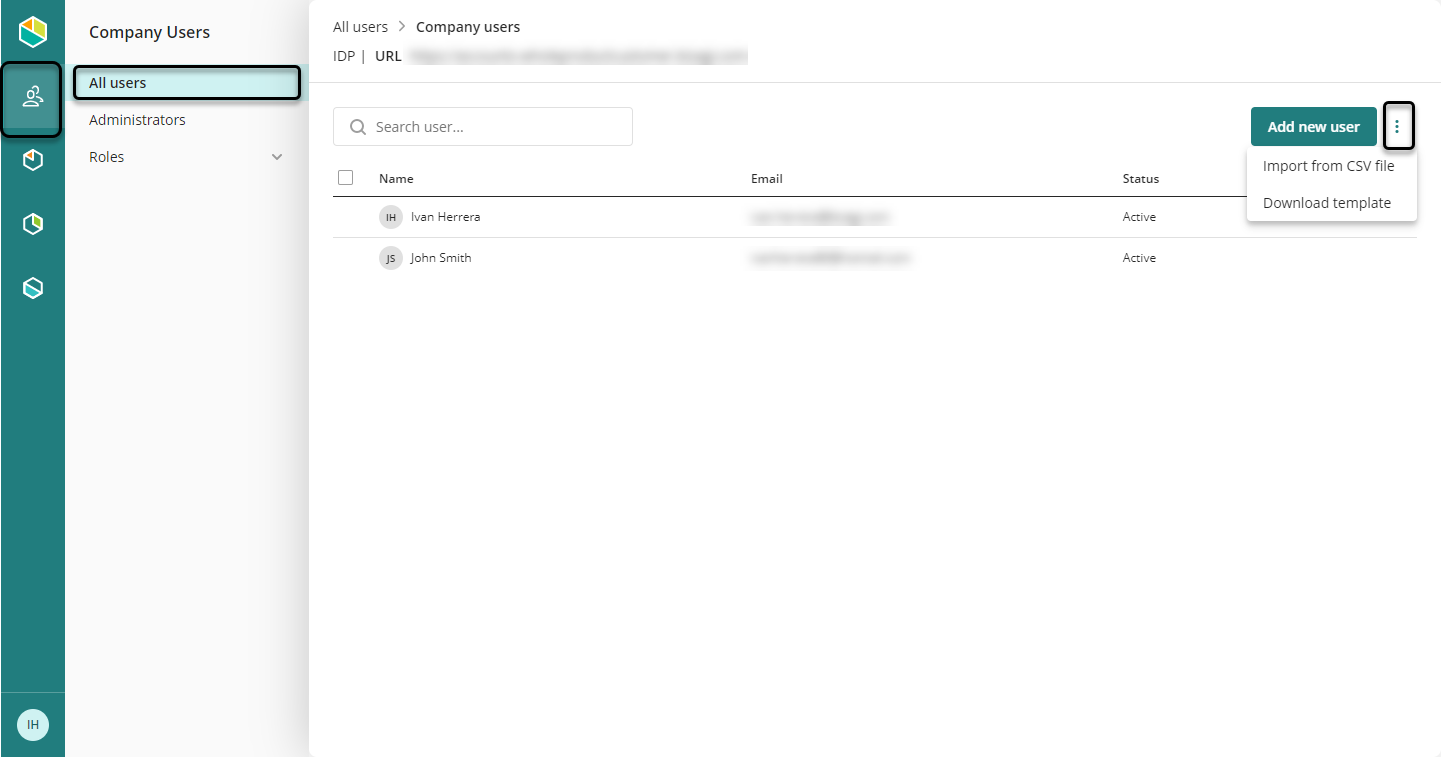
Click the Company user menu on the left-side menu. Select All Users, and click the three-dots menu at the top-right corner:
Select Download template. The portal downloads an Excel file as follows:
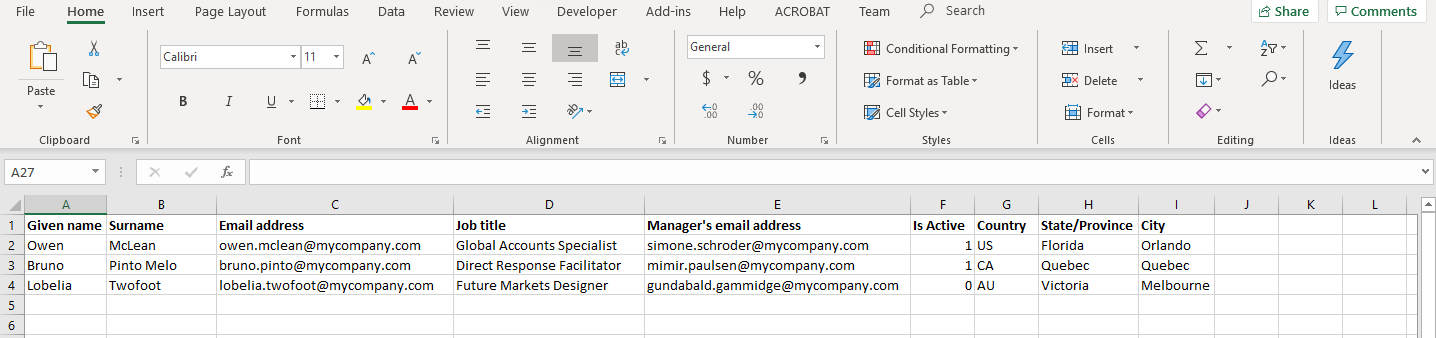
The file already contains some examples. However, consider the following:
•You cannot add more columns to the file.
•Do not leave empty cells on mandatory fields. If you need to delete a user from the file, delete the whole row from the left side.
•You cannot have two or more users with the same email. Bizagi displays warnings and errors when the file contains an email of an existing user.
•The following fields are mandatory:
-Given Name
-Surname
-Email address
-Job title
-Manager's email address
-Is Active (1 for active or 0 for non-active)
|
You can find the list of countries in the Countries tab within the Excel file. |
Save the file as CSV UTF-8, Make sure that the UsersAccounts sheet is active:
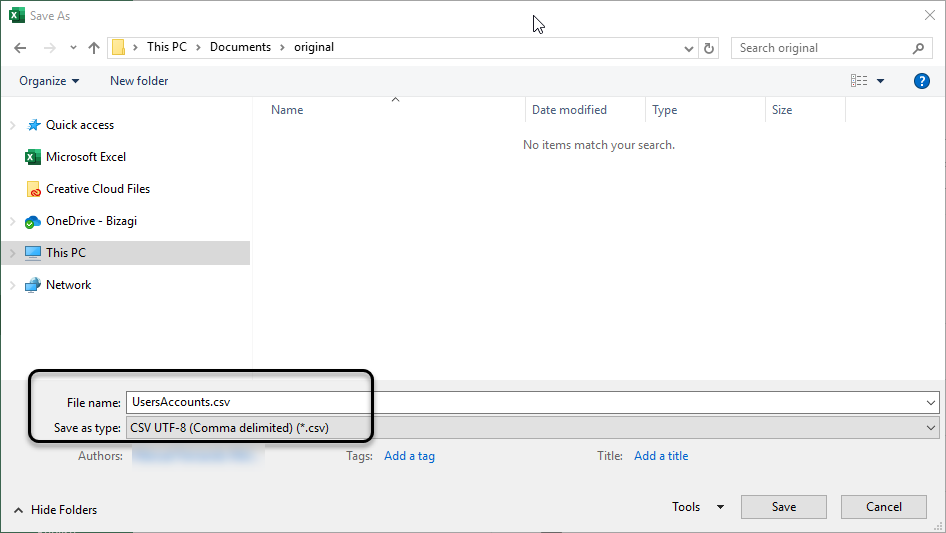
Excel displays an alert because CSV files cannot contain multiple sheets. Click OK if the UsersAccounts sheet is active.

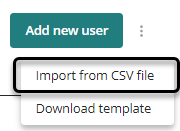
Click the three-dots menu again, in the top-right corner, and select Import from CSV file:
Upload the CSV file:
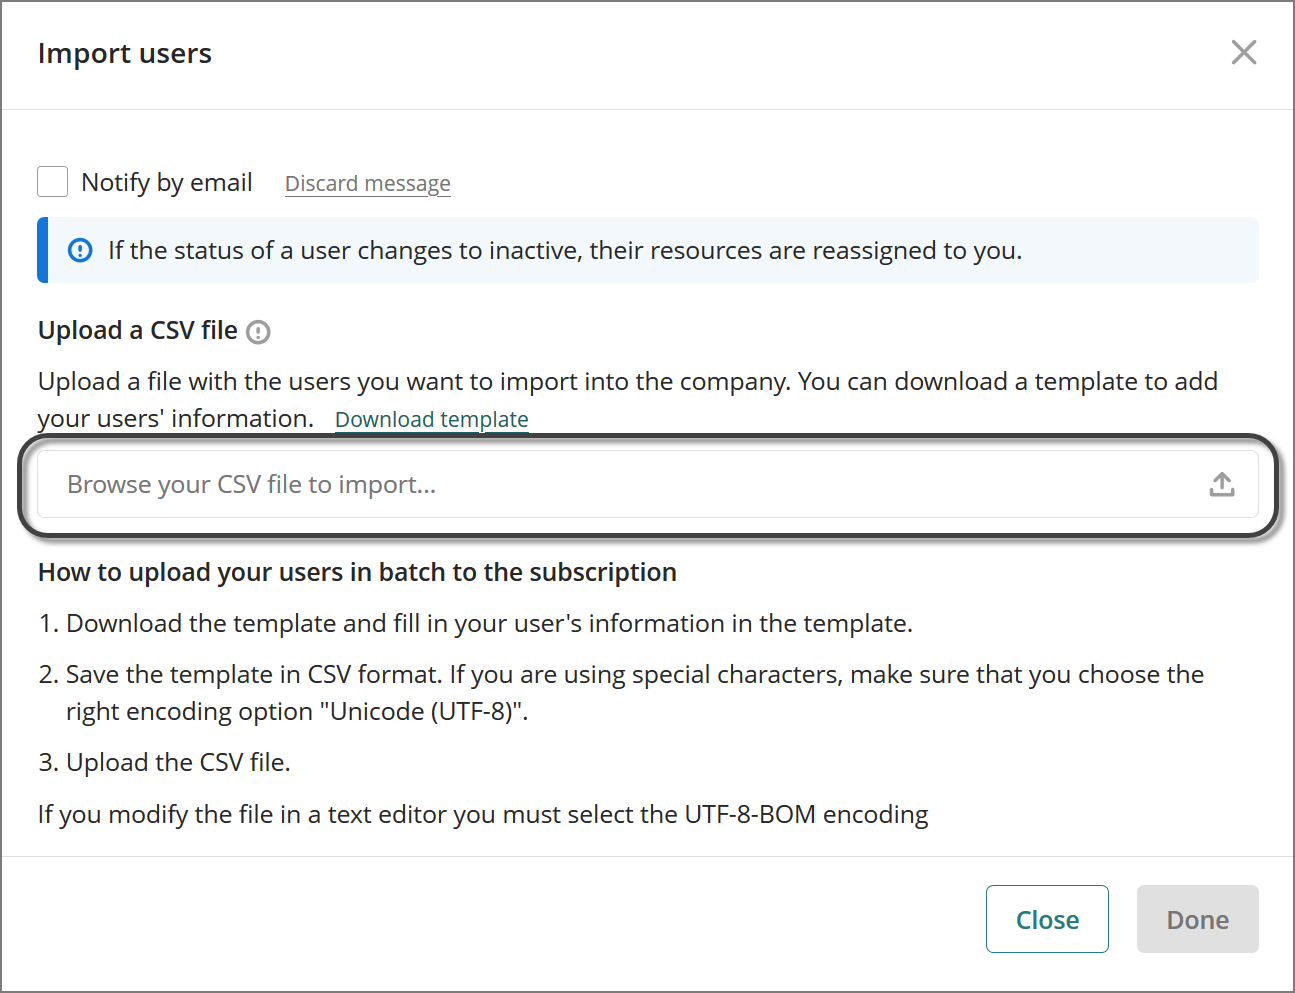
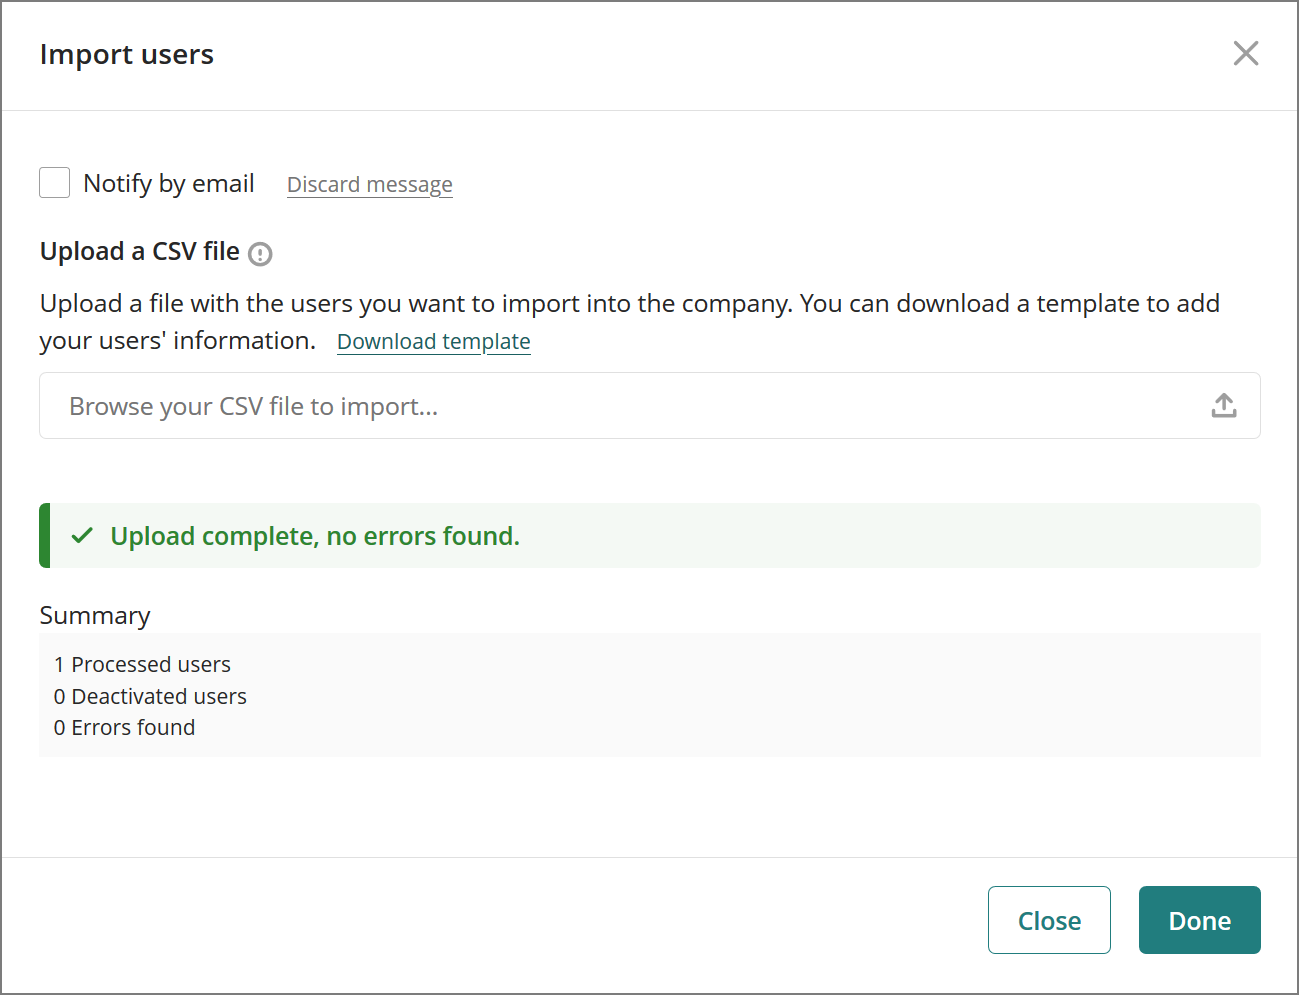
Before creating users to the company's user pool, Bizagi checks for existing users and validated user information. If no errors are found, Bizagi displays a completion message.
If the wizard finds errors, it displays a warning and you can download an error log:
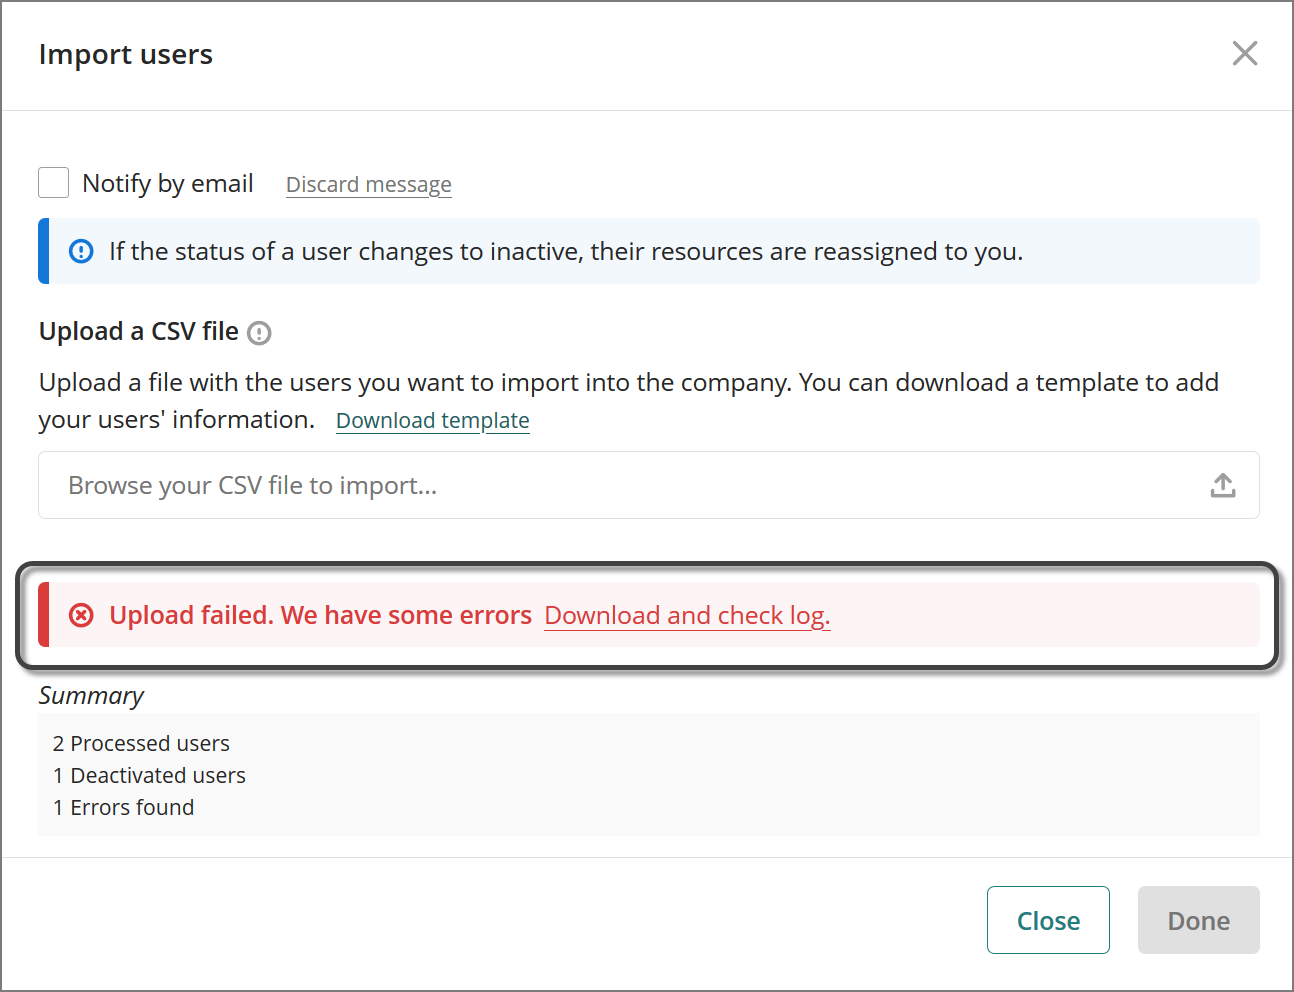
For example, it shows when mandatory fields are empty:

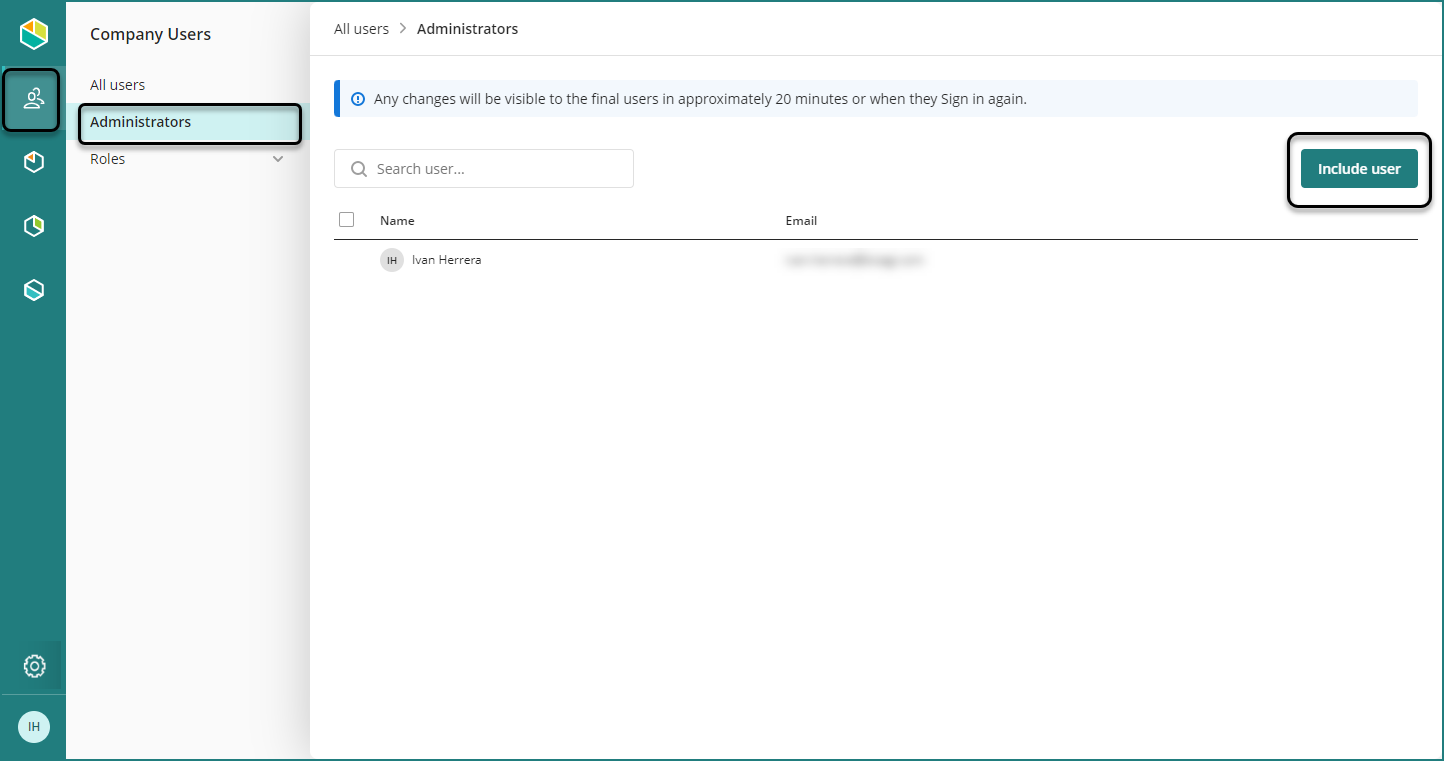
Set Company Administrators
To set a company administrator, you must include the user in the company. See Create company users. Select the users' icon, and open the Administrators module. Click the Include User button.
Search the user name or email, and click it:
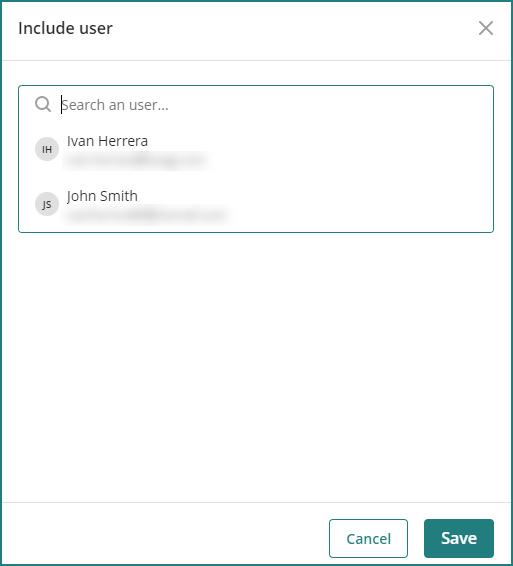
Click the Save button when you are done.
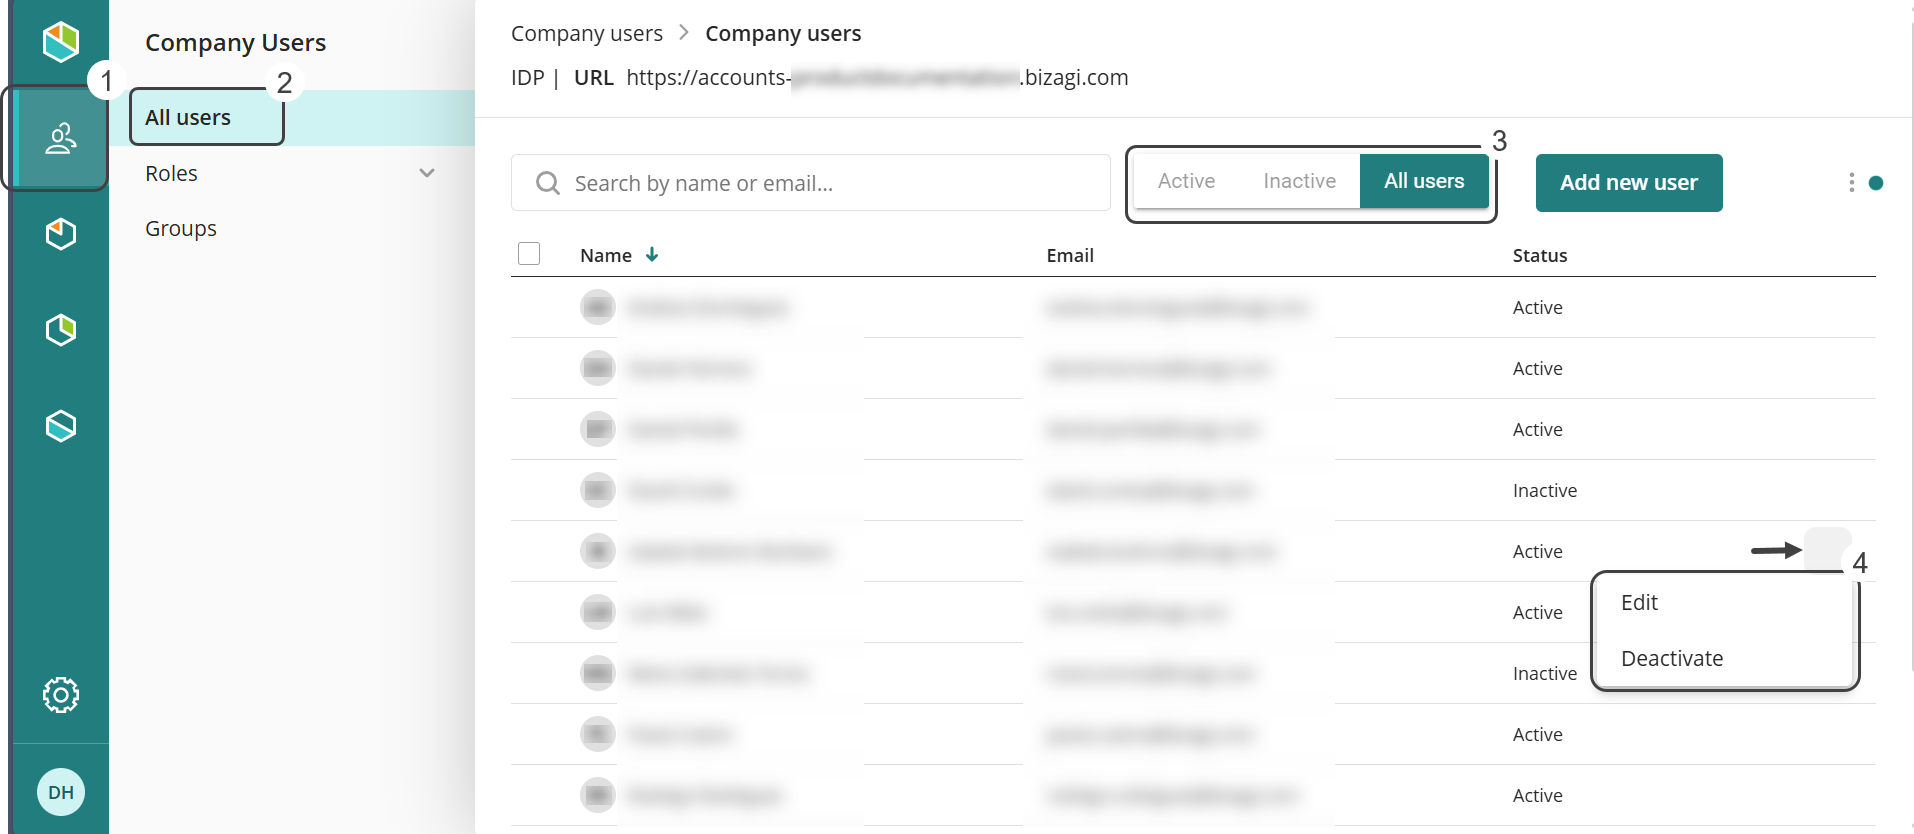
Deactivate a user
As a company administrator you can deactivate users by following these steps:
1. Click the User icon in the left menu and select All users.
2. You will see a list of all company users. Use the search bar to find users by name or email, and filter the list to show only active, inactive, or all users.
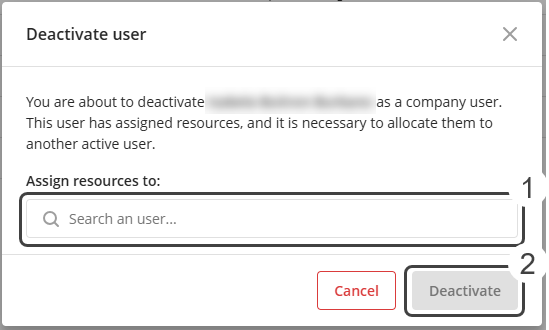
3. Locate the user you want to deactivate. Hover over the right end of the user's row and click the three-dot button, then select Deactivate.
4. A pop-up window will appear. If the user has resources assigned, you will be prompted to transfer these resources to another active user before proceeding. This ensures proper ownership and access, preventing resources from becoming unassigned. The process cannot proceed without completing this transfer.
•Resources include projects, subscriptions, models, and permissions assigned to a user. These represent the assets and responsibilities the user owns or manages.
•The recipient user must be registered in the Customer Portal and have the appropriate permissions to assume ownership of the resources. Some resources may have specific transfer rules.
oRefer to the following documentation on Environment Profiles in Automation Service, Environment Profiles in Studio Cloud Services and User management for more information on assigning company roles from the Customer Portal.
•The deactivated user will lose access, but the resources will remain active under the new owner. All audit trails and historical data associated with the original user are preserved.
5. After selecting a user to transfer the resources to, click Deactivate to complete the process.
|
Deactivation disables user access but does not remove the user or their resources. |
Delete a user
As a Company administrator, you cannot delete a user entirely through the Customer Portal. However, you can effectively remove a user using the obfuscation process, which is similar to deletion. For more details on GDPR Anonymization in the Customer Portal, refer to the official documentation. For complete user removal, you need to create a support ticket.
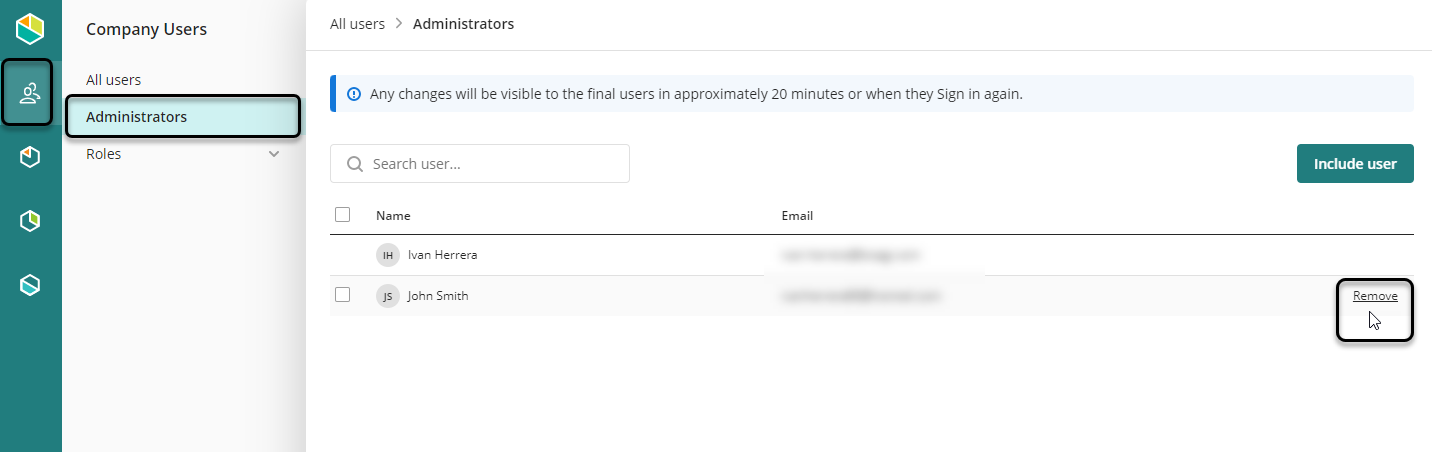
Remove a Company Administrator
Access the Administrator module and click the Remove link next to the user you want to remove as an administrator.
Last Updated 9/25/2025 8:06:56 AM