Overview
This section shows how to define the work allocation for each Activity of your Process. Performers are the end users allocated to execute each Activity.
Each Activity needs a performer definition so Bizagi can allocate it correctly to the defined user in your organization. Even the very first activity requires a performer; usually the performer of the very first activity is the case creator.
Allocations are enabled for User tasks and None Events.
Defining work allocation
Click the activity where you want to configure the assigned user then, select the Settings icon located in the Pie Menu and go to the Performers configuration.
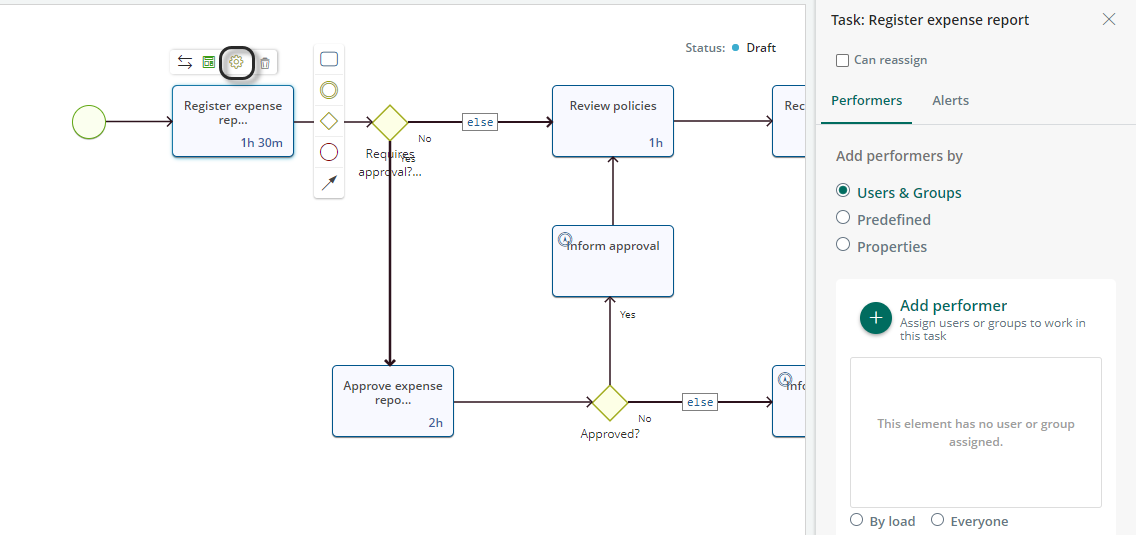
You can select the user who is going to perform the activity by selecting the options available: Users & Groups, Predefined or Properties.
User & Groups
This option lets you select a user or a group of users in your project. Users are named users available and created in the project.
User groups are:
•Those that already exist on the project created in Bizagi Studio
•Those created manually by users on the Work Portal.
For more information on manually created groups, refer to Managing User Groups.
When using User & Groups, you can select one of the available assignation methods:
•By Load: The Activity is allocated to the user with the lightest workload or with the fewest “jobs pending” on the project. However, the system first checks whether anyone in the user's group has already worked on the case. If so, they are assigned the Task, regardless of the user's workload compared to the rest of the group.
•Everyone: Allocations are given to all users who meet the condition below. The first person enter in the task, takes the ownership of the task so he is assigned to perform the task; consequently, it is no longer displayed for the others to see.
|
The Ready Only Mode configured in Business Options does not apply to Live Processes tasks. |
Select the criteria: click the ![]() icon.
icon.
You can select either a user (previously created in the Work Portal) or a group. Type the name in the search bar to select them.
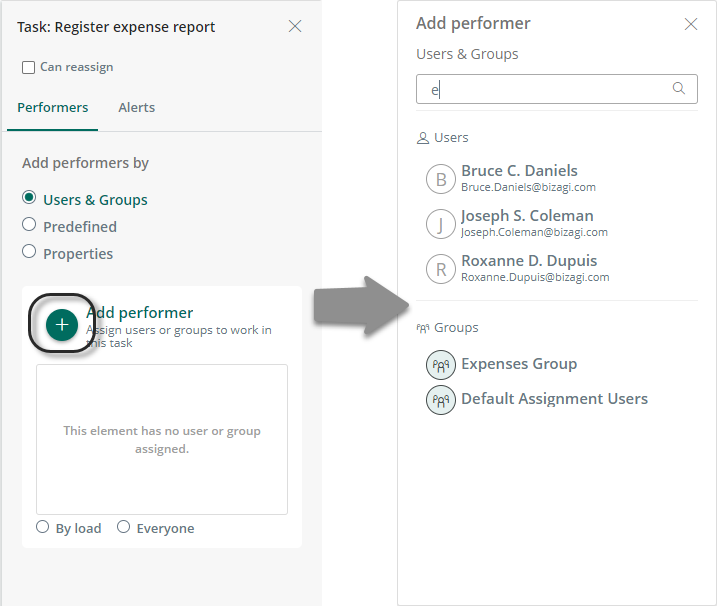
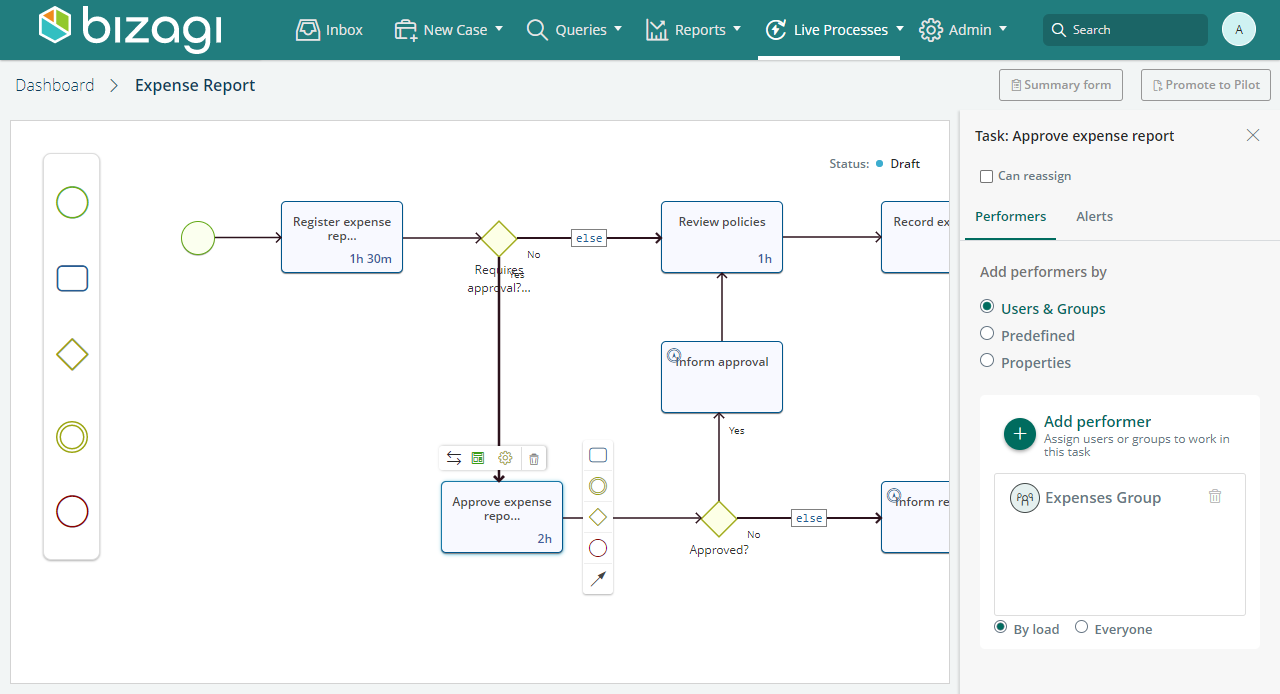
To delete a user or a group from your performers list, click the trash icon by their name.

Predefined options
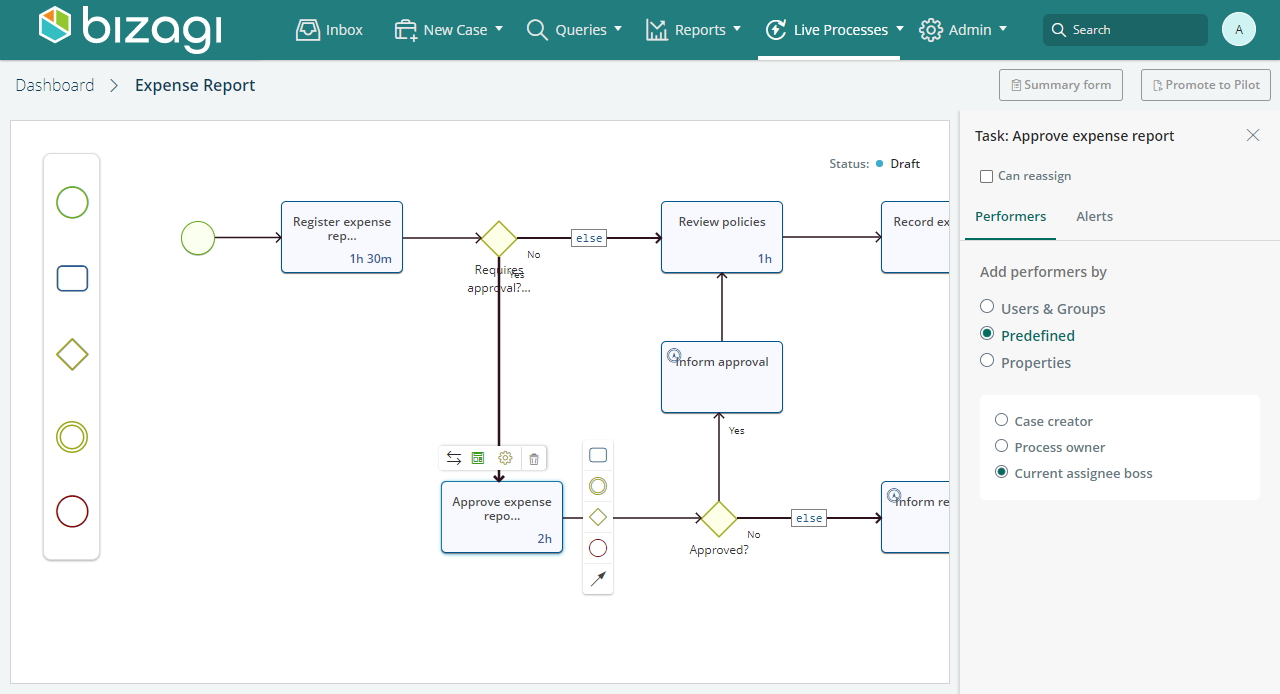
This option lets you select one of the predefined allocation methods:
•Case creator: the user who created the case
•Process owner: the user who created the Live Process definition
•Current assignee boss: the supervisor of the user who is working in the Process
Properties
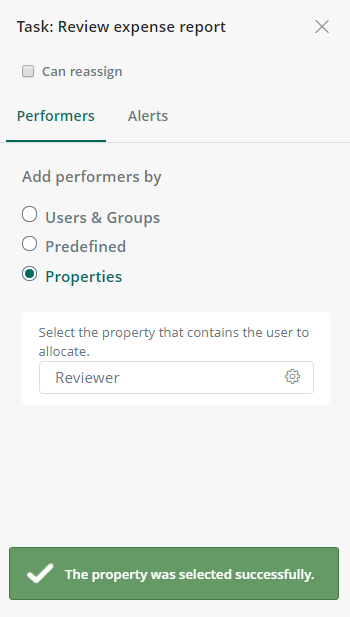
This option lets you select an attribute of the type WFUSER from the process as a performer.
For example, the user that registers the expense report can choose who will review their report in an attribute named Reviewer. So you can select the property Reviewer as the performer for the task Review expense report.
Enable Reassign option
Just as you can do with a process diagrammed in Bizagi Studio, Live Processes can be configured to allow a task or event to be reassigned to another user. To enable this option you have to select the Can reassign checkbox on the task or event.
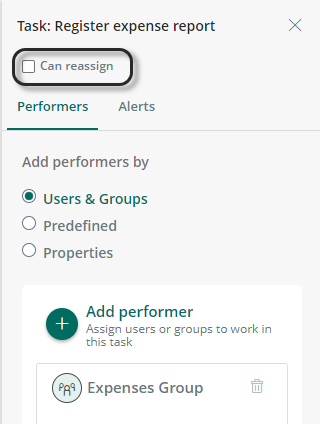
If you leave the checkbox selected, and the case comes to that activity, users with administration privileges are able to assign the activity to a different user. For more information about this, refer to Work reassignment.
Alerts
Once you're done setting allocating work, you can set up alarms for each task individually. To do so, click the Settings icon on the Pie Menu, and then click the Alerts tab.
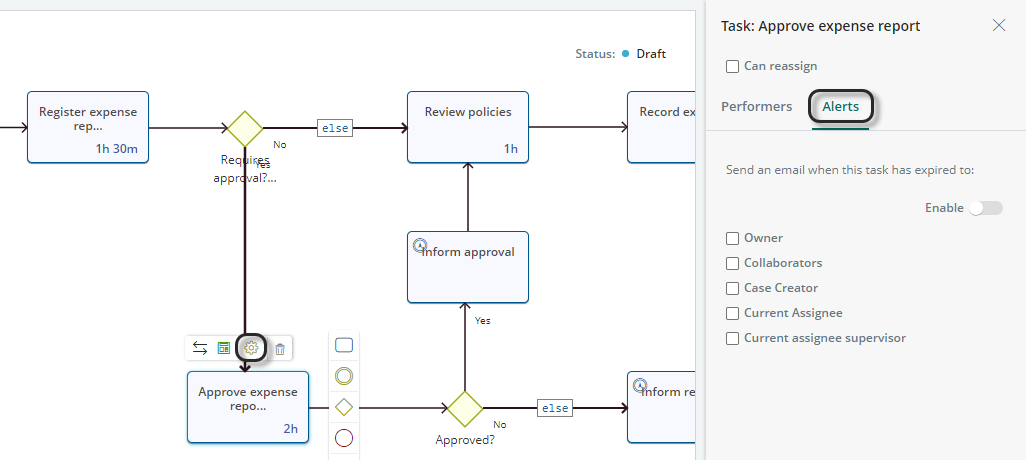
In this menu you can choose who receives an email notification when the task expires and whether or not an alert is enabled.
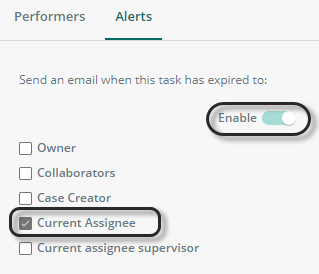
To enable the alert, click the Enable switch and check the users to whom the notification will be delivered.
What's next?
When your process is ready and you have thoroughly validated that it behaves as expected, you can publish it in your Work Portal from the Manage Live Process dashboard if you are the process owner.
Follow the details provided at publish to release your new process for your end users can start working with it.
Last Updated 1/6/2022 5:24:36 PM