Overview
Bizagi Ltd offers a Widget Editor service that allows you to create your own Widgets in an assisted manner.
Through its features, you will be able to produce Widgets in no time, and fully extend the user interfaces of your Bizagi processes.
If you have already looked at the My first Widget example, then you may find this other example helpful whenever you want to implement a Widget based on an existing jQuery plugin.
Through the example illustrated below and the guided steps, you will produce a basic Widget which visually leverages existing plugins.
Example
In this example, we will create an e-mail field which autocompletes e-mail domains upon typing, as shown below:
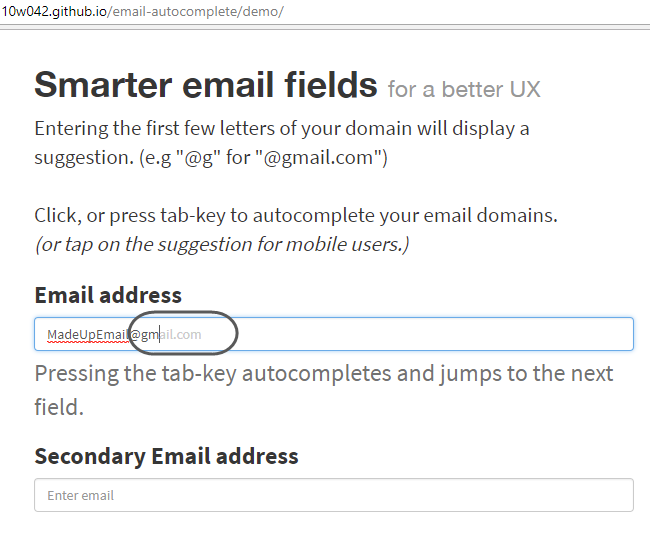
This Widget will be based on the email-autocomplete jQuery plugin available in github.
To use the demo as presented in the screenshot above, refer to http://10w042.github.io/email-autocomplete/demo/.
Notice that at this point, we can validate and make sure that the plugin is working as expected before integrating it into Bizagi.
By default capturing e-mails in Bizagi do not offer this possibility, given that e-mails are captured in standard text inputs where you can set up validations to check for adequate e-mail syntax (such as abc@domain.com), but not just about autocomplete "domain.com" whenever users type "abc@d..".
|
The above jQuery plugin came up from the list of available free plugins as listed at https://plugins.jquery.com/, which are all based on the open source project. When creating your own Widgets, you may follow a similar exercise and reuse any of the plugins listed on that site, though you should always make sure that you comply to licensing terms applicable to the plugins you choose to reuse.
Consider that these plugins rely on the jQuery library and that Bizagi is already shipped in with a 2.1.0 jQuery version. |
Scope
For this specific example, we define that:
•It is designed for editability (not read only), given that its main purpose is to capture an e-mail while allowing end users to do this faster and reliably.
•It will be available for all devices, all browsers, mainly because we would be using basic HTML elements (such as <input>, <span>, <div>).
•It will be using a jQuery plugin.
•It will store the e-mail into a string XPath of the data model (a string attribute).
Steps
Having defined the above, we move on by creating a new Widget through the Widget Editor (starting from its basic template).
We will be doing the Widget's implementation by carrying out the following:
1. Defining all relevant configurable properties
For this example, this step is basically just making sure that there is an XPath set to store the e-mail information.
2. Download and inspect the plugin
When downloading the plugin, we will need to make sure there is an index.html that helps as a demo or for an inspection of how the plugin works.
3. Including the HTML visual elements that allow capturing the e-mail
Based on the above exercise or the autocomplete demo presented at the beginning, we know that this Widget needs to namely present an HTML <div> element having an <input> inside.
4. Including CSS styles definitions for the HTML elements in the Widget
This step is about making sure that styles in the CSS stylesheet applicable to the HTML elements, are included.
5. Including JS libraries for the behavior of the Widget
Making sure you add plugins and any other needed js files that are relevant for the Widget's behavior.
6. Invoking the use of the plugin
This step is about adding the final code that invokes the jQuery plugin to have the HTML behave as expected.
7. Performing adjustments and other settings
This step is about tuning specific things in the Widget, plus any other aspects of your Widget's scope (support for tablets and mobiles, customization, etc).
Hands on!
Access the Widget Editor at https://www.bizagi.com/widgeteditor/ and login with your bizagi.com account.
Create a new Widget:
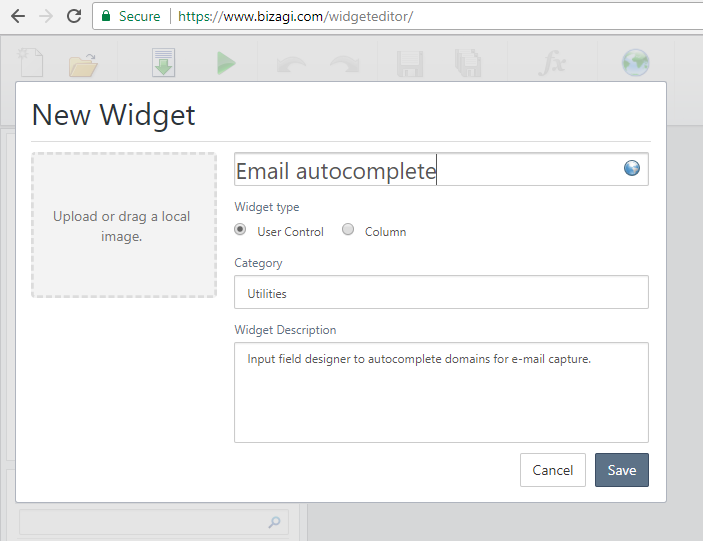
Then follow these steps to implement it:
1. Defining all relevant configurable properties
For this step, you will require no action but explicitly review that there is one property called XPath which is of the Simple Data Binding type:
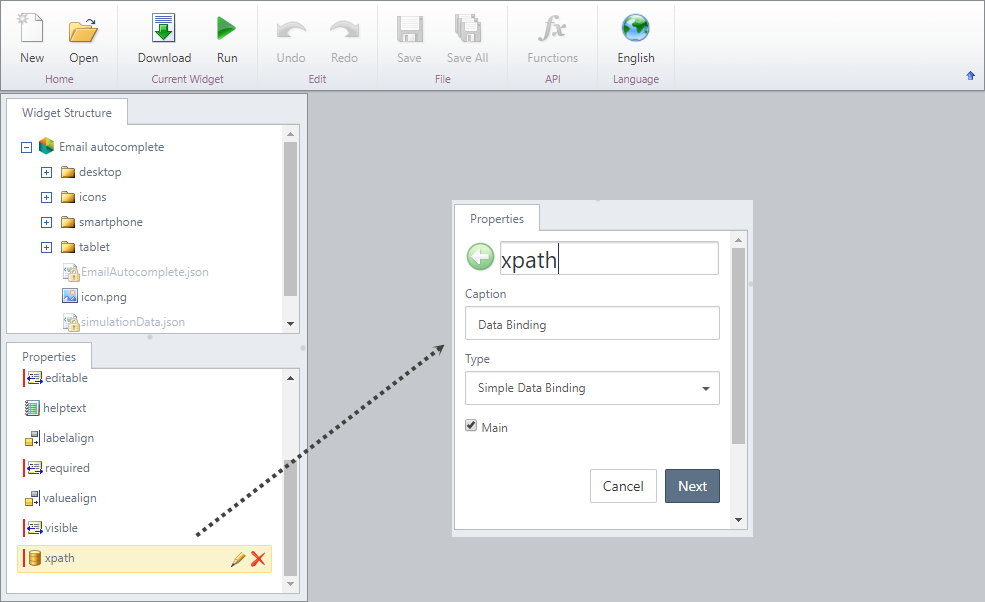
Optionally, recall that you may customize the logo of your Widget.
If you want to do so, consider:
•Updating the icon.png file found at the root of the file structure of the Widget.
•Updating the small4.png file found at the ./icons/hdpi folder of the Widget's structure.
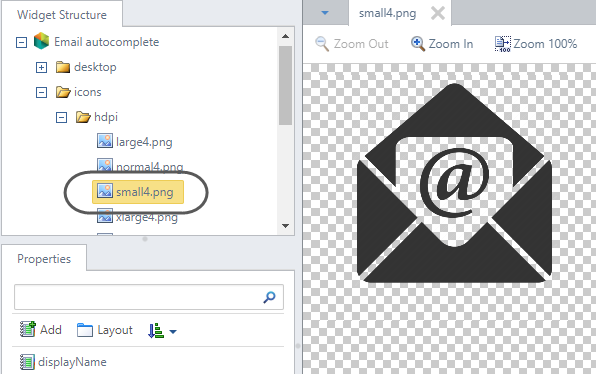
To replace this file, it is important that you use an icon with 16 x 16 pixels as dimensions.
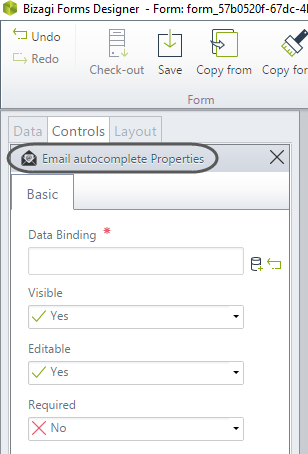
The small4.png icon is only used as the thumbnail while using the Widget in the forms designer:
2. Download and inspect the plugin
Download the plugin and browse for its index.html file providing demo capabilities.
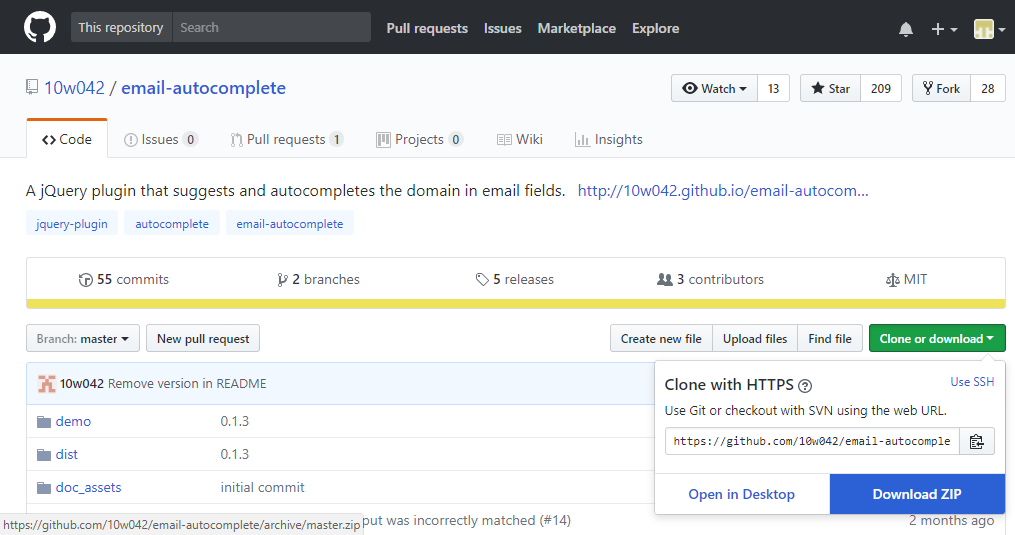
For this specific Widget, download was done via Git Hub from this link:
https://github.com/10w042/email-autocomplete/archive/master.zip
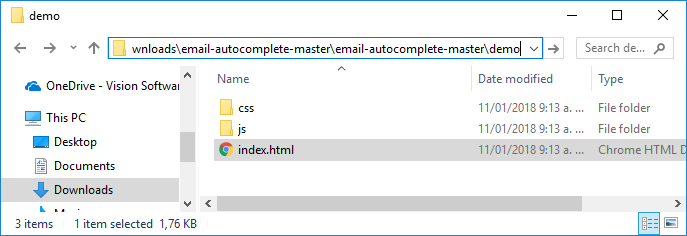
Normally, the plugins use a well-organized, standard file structure which features a demo web page, or an examples folder.
Such demo or examples come in with an index.html along with other relevant JS and CSS files:
Inspect the code of the HTML file in order to acknowledge which HTML elements you will need to include in your Widget.
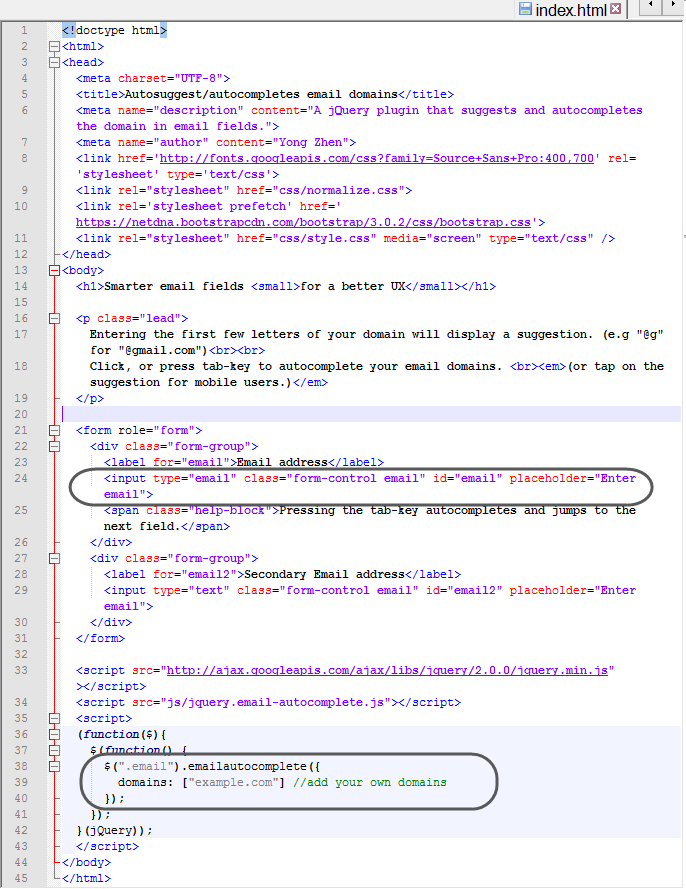
Notice that we can tell from the above code, that it is fairly simple to activate and invoke the function to "autocomplete".
Basically it is just setting .emailautocomplete() to that applicable HTML element.
Optionally you may send as parameters, those domains you want to consider as valid e-mail domain services (e.g, google.com, live.com, facebook.com, etc).
Based on the same inspection, we can also tell that we will need to import certain JS and CSS files (the plugin library and styling definitions):
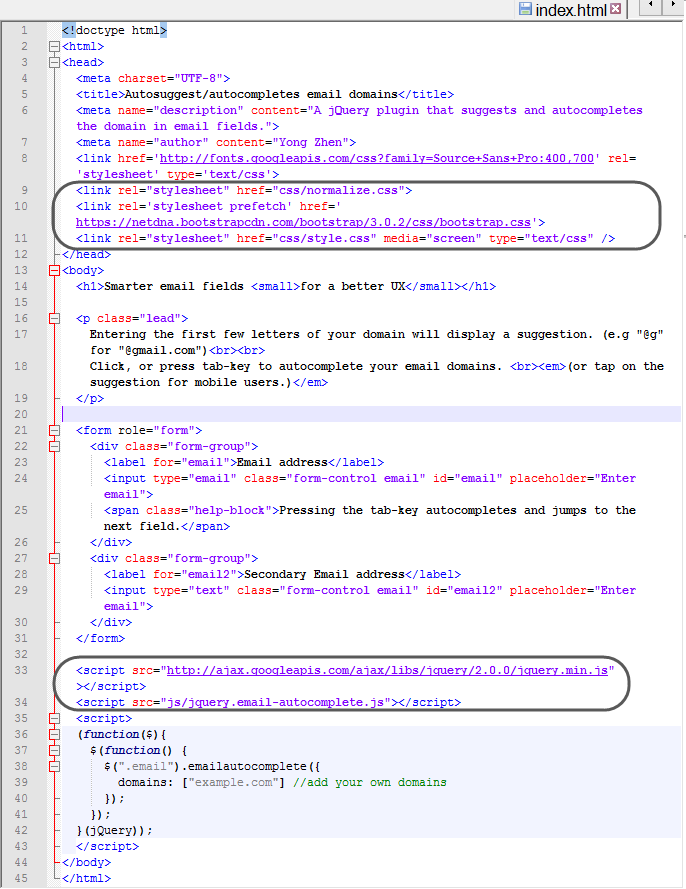
Notice that the main CSS styling files to import are: normalice.css, bootstrap.css and style.css.
JS libraries to import are: jquery.min.js in its 2.0 version and the jquery.email-autocomplete.js main plugin file.
You may run the index.html web page (with a browser) in order to verify and explore how the plugin works.
|
You need to inspect and dig deeper if you wish to know exactly which CSS files contain relevant styles for your Widget. Sometimes, not all of the CSS files are needed, given that some of these have definitions which apply to generic elements of the index.html web page (such as styles for <html> or <body> which shouldn't be included in the Widget). |
At this point it is important that you know which JS and CSS files you do need.
Consider that because Bizagi already includes jQuery, it is often not needed to forcely add the library referenced by the plugin (nor its specific version).
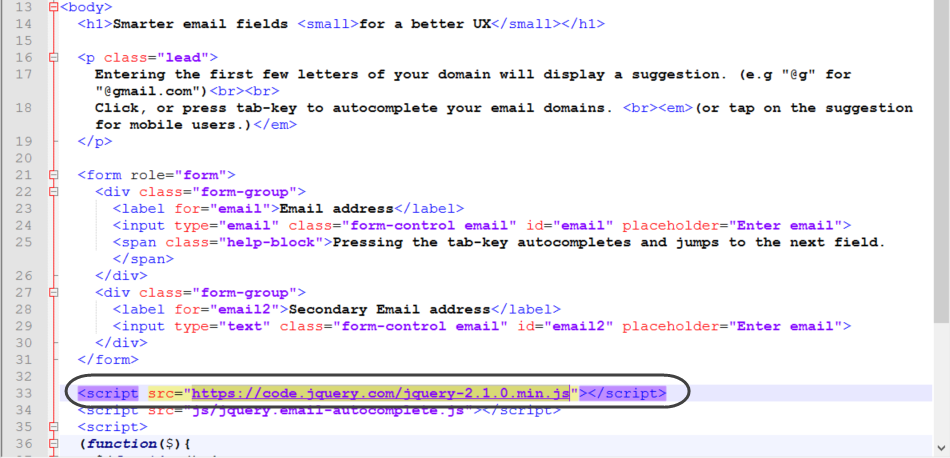
Bizagi uses jQuery version 2.1.0 and this version should be compatible enough and compliant to run plugins which use an older version.
A quick validation to make sure that the plugin is compliant to the jQuery version used by Bizagi is to edit the index.html demo so that it uses that one in its stead (https://code.jquery.com/jquery-2.1.0.min.js).
And verifying that it still works as expected.
|
In case that you do need to include the plugin's specific jQuery library (not recommended), make sure you modify it and rename its definitions by using namespaces so that adding this library does not generate conflicts within Bizagi. |
3. Including the HTML visual elements that allow capturing the e-mail
This Widget will present an HTML <div> (its default Widget element) having an <input> inside.
Relevant code to include in the Widget is (applicable to the Widget default template):
var email_element = $('<input type="email" class="form-control email" id="email" placeholder="Enter email">');
email_element.addClass("form-control email");
self.myinput.append(email_element);
You may delete other pieces of code which are not useful for our example so that the function has in the end:
getGenericControl: function () {
//standard initialization
var self = this;
var control = self.getControl();
var properties = self.properties;
var extendedData = self.extendedData;
//if no display name is explictly defined, use the following default text
var bindedXpathValue = properties.value || "";
//self is our base. The Widget control is defined in this case, containing a <div> HTML element.
self.myinput = $("<div>");
//define a class for your element so that appearance is customizable from the CSS style sheet.
self.myinput.addClass("EmailAutocomplete_MainDivClass");
var email_element = $('<input type="email" class="form-control email" id="email" placeholder="Enter email">');
email_element.addClass("form-control email");
self.myinput.append(email_element);
//always return the control
return self.myinput;
}
Recall that you add this to the function you implement inside of the main JS file (named after your Widget, in this example seen as EmailAutocomplete.js):
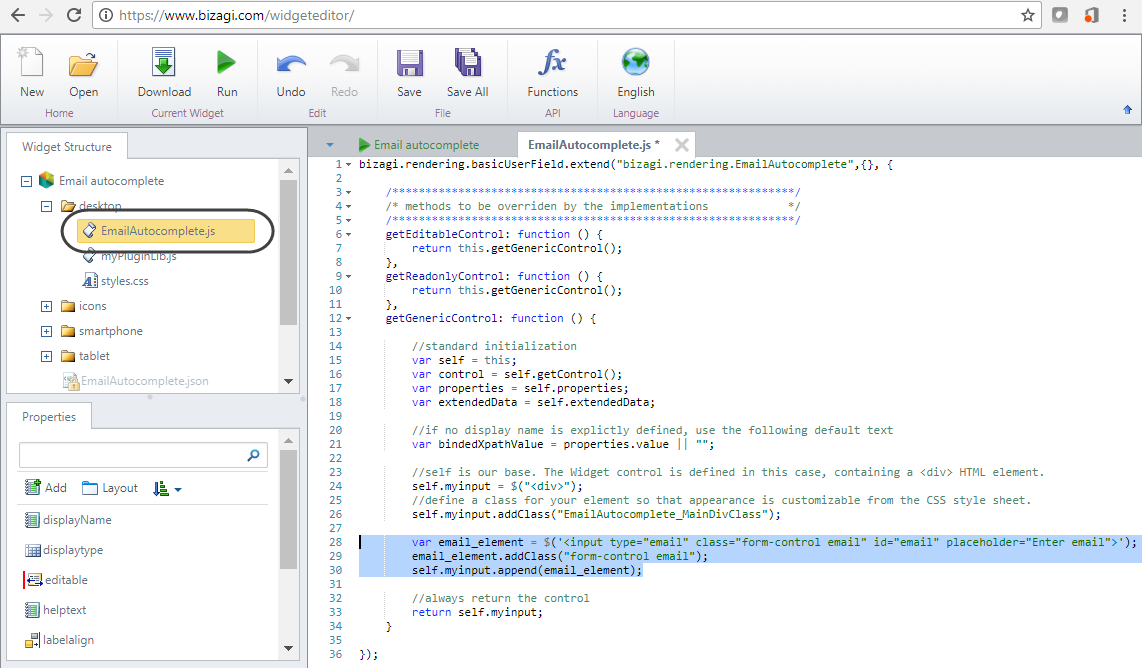
When done, you may run it to validate that the Widget is displaying such HTML elements:

Note that this does not validate the overall behavior given that we have not yet included the JS libraries or CSS stylesheets.
4. Including CSS styles definitions for the HTML elements in the Widget
Make sure styles in the CSS styling is applicable to the HTML elements placed in the previous step.
To do this, make sure you identify CSS styles which you do not need or which are not a best practice to include in Bizagi (such as modifying styles for the <body>, or non-specific general items such as <p>, <span>, etc).
Taking a look at used styles by index.html, we rule out https://netdna.bootstrapcdn.com/bootstrap/3.0.2/css/bootstrap.css, and normalice.css and determine that relevant styles for the <input> HTML element are actually contained only in style.css.
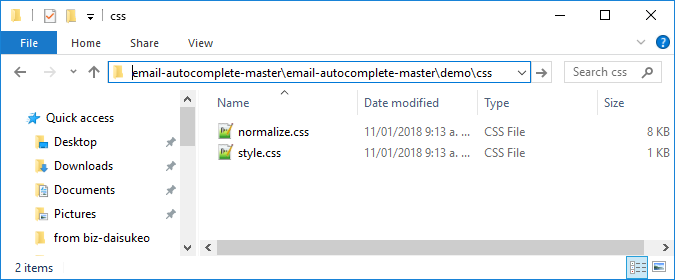
Copy the styles used for input and .eac-sugg while also ensuring you redefine the style set for input so that it doesn't apply to all inputs; but apply only to the one input inside our Widget.
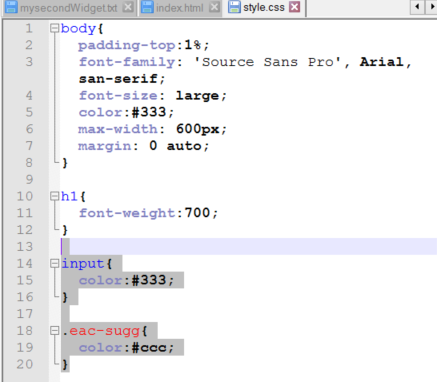
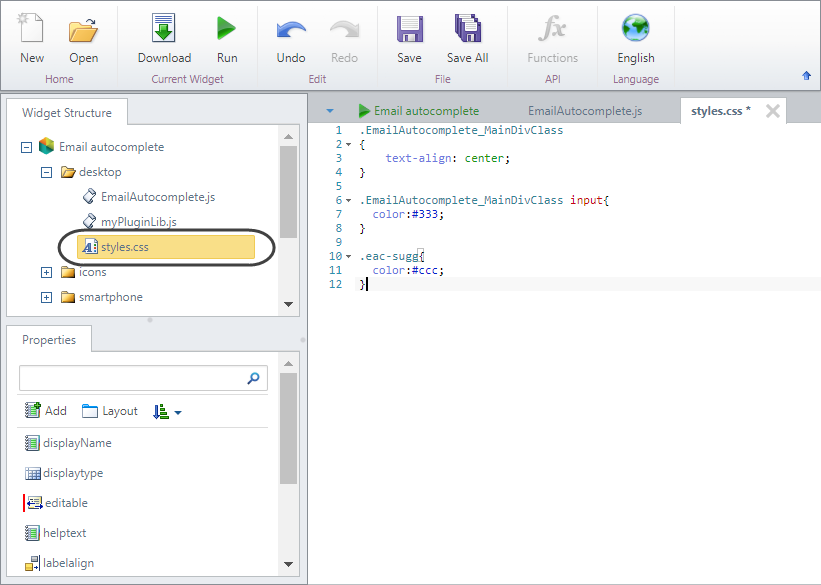
Paste these definitions inside of the styles.css file that is featured for the Widget's structure.
The applicability for inputs has to be redefined by ensuring it applies only to elements of the .EmailAutocomplete_MainDivClass class (the main <div>).
|
For testing purposes or to customize styling of the Widget, you may want to try out using more outstanding colors. For instance you may use red and blue to simply verify where are these styles being applied: .EmailAutocomplete_MainDivClass input{ color:blue; }
.eac-sugg{ color:red; } |
5. Including JS libraries for the behavior of the Widget
Add the JS plugin and libraries.
Recall that the jQuery library should not be needed, so we can tell we only need the main jquery.email-autocomplete.js:

To add it, you may open it and copy its contents.
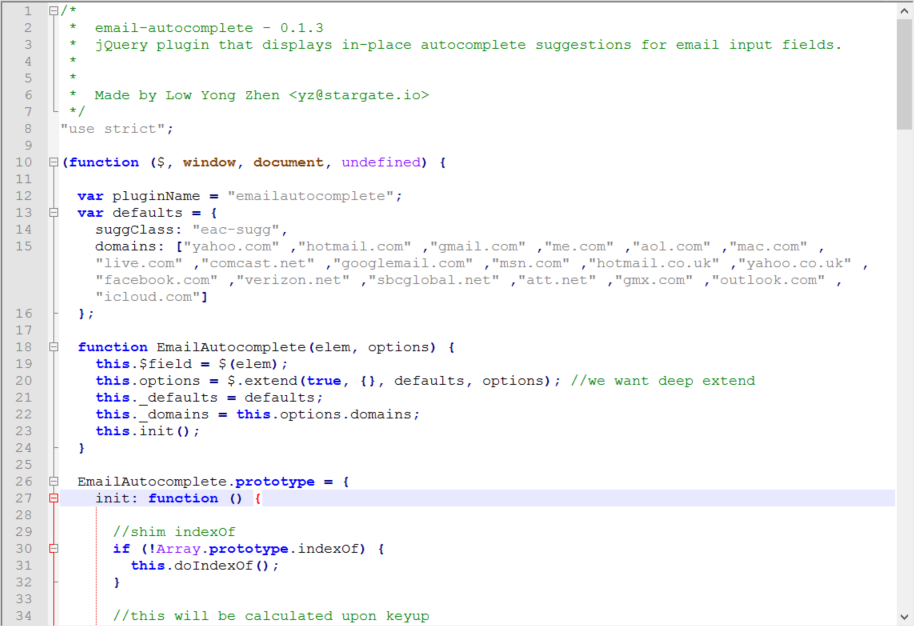
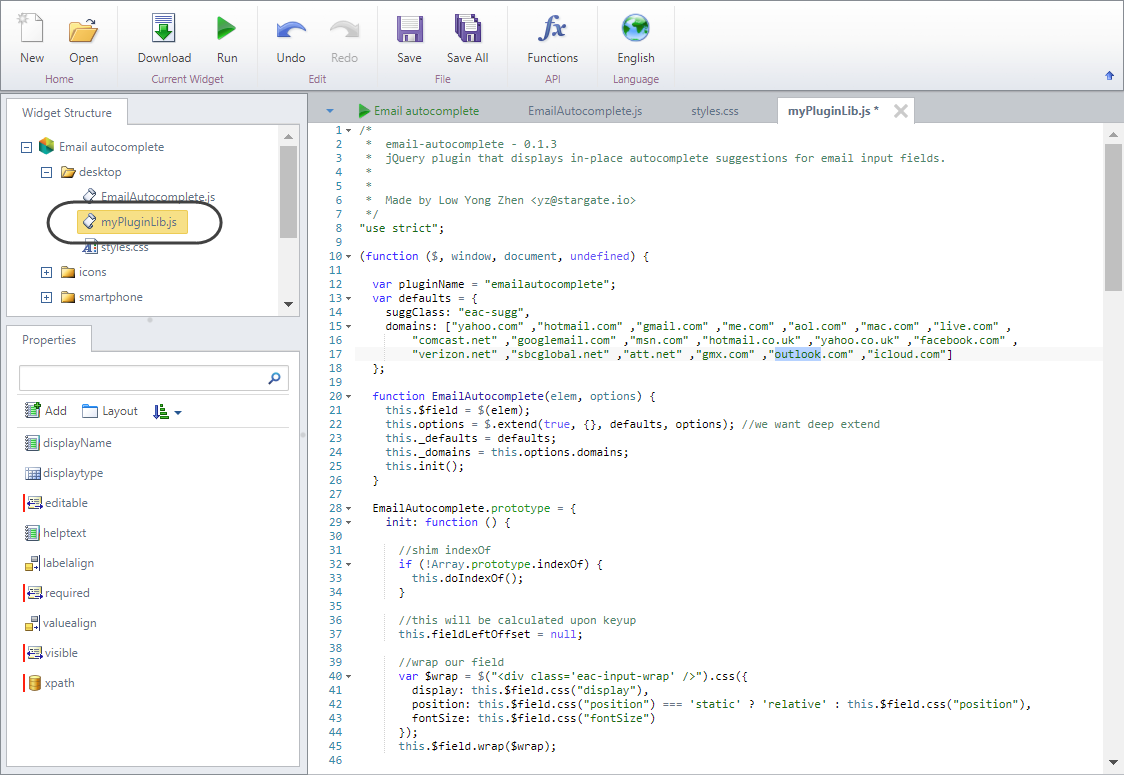
Then paste these contents into the default blank library featured by the Widget's structure presented as myPluginLib.js (replacing any other contents inside of myPluginLib.js):
|
Notice that within this plugin, most common e-mail domains are defined as constants which you may modify (e.g., yahoo.com, hotmail.com, gmail.com, etc). |
6. Invoking the use of the plugin
Adding the code where you trigger the plugin's behavior into your HTML element needs to be done inside a special function.
Such special function needs to be invoked when the Bizagi form and the Widget are ready (completely rendered).
Therefore, you may add this code inside the rendexComplex function to have Bizagi execute such code in a non-immediate fashion (not as close to the onload() event in terms of timing).
To do so, feel free to reuse this block for most Widgets you create (while replacing #email with the HTML element of your Widget and replacing .emailautocomplete(...) with the invocation of your plugin):
renderComplex: function() {
var self = this;
$("#email").val(self.getValue()); //this line is important when using Save or Next in Bizagi forms
$("#email").emailautocomplete({ //this line triggers the plugin
domains: ["agilityCorp.com"] //add your own additional domains
});
$("#email").change(function() { //the best timing to temporarily store the inputted information
self.setValue($("#email").val()); //this line is important when using Save or Next in Bizagi forms
});
}
|
Note that index.html used $(.email") as a jQuery selector instead of $("#email"). However, it is a best practice to use IDs instead of classes.
With the code above, you may also verify when adding the Widget in Bizagi, that both the Save and the Next button take in the inputted value consistently. |
This means that in the end we have:
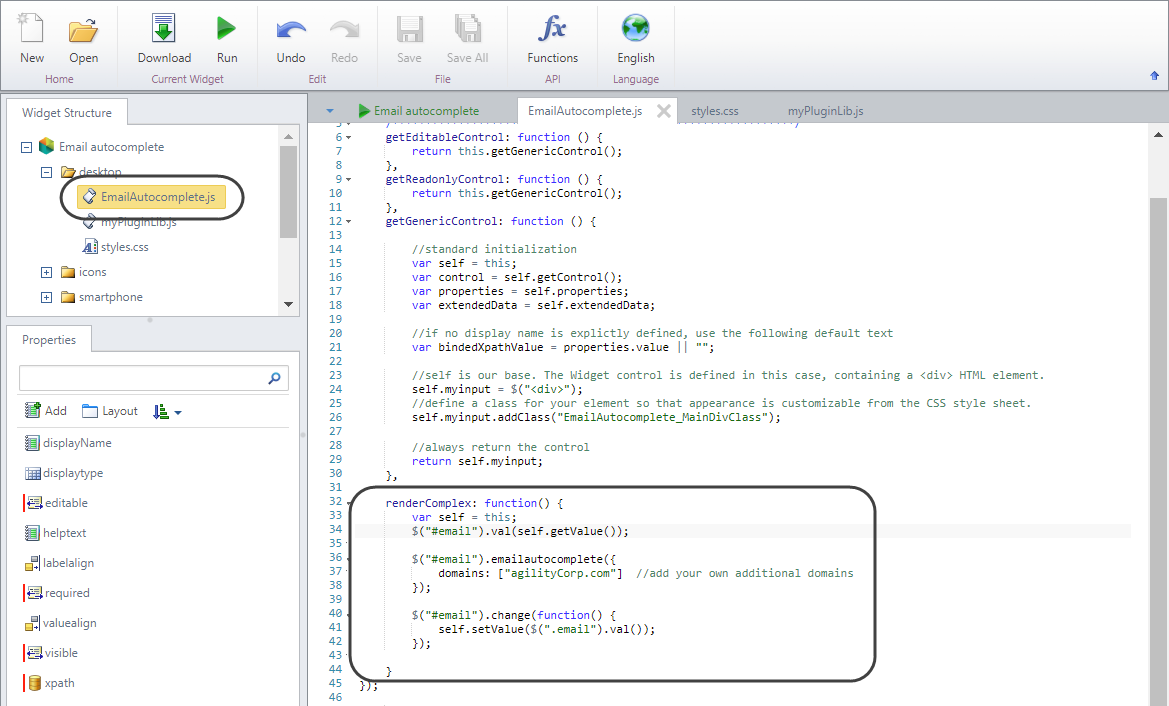
You may also run the Widget right away to validate that it now behaves as expected:

At this point, the Widget is functional and you may either move on to the next step to tweak it and finish up with details of the Widget, or you may choose to download it as it to try it out in Bizagi (though consider that you should always watch after adequate quality of Widgets you create).
In case you wish to debug and troubleshoot, don't forget to add //# sourceURL=MyWidget.js at the very end of the code.
You may also temporarily add within the lines, the debugger clause (you need to make sure that these are afterward removed).
A final Widget released to production should never include such clauses due to security and performance best practices.
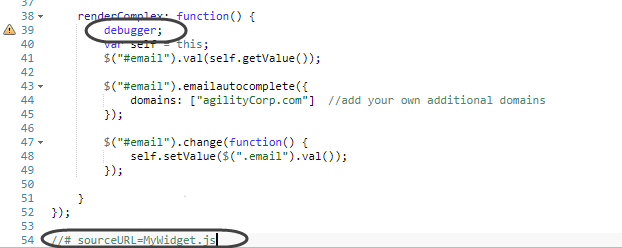
Debugging mode in the browser will take these debugger breakpoints by simply opening the developer tools' console (i.e, using F12 in Chrome).

7. Performing adjustments and other settings
Tune specific things in the Widget at this point where you have verified it is working.
For this example, tuning is centered around:
•Ensuring it is editable and not read-only,
•Adding the possibility to customize certain aspects.
•Supporting desktops along with tablets and mobiles.
First, to restrict this Widget to be editable always, we can seize the fact that default editability for Widgets is set to true, and simply remove the possibility to change the editability setting in the forms designer.
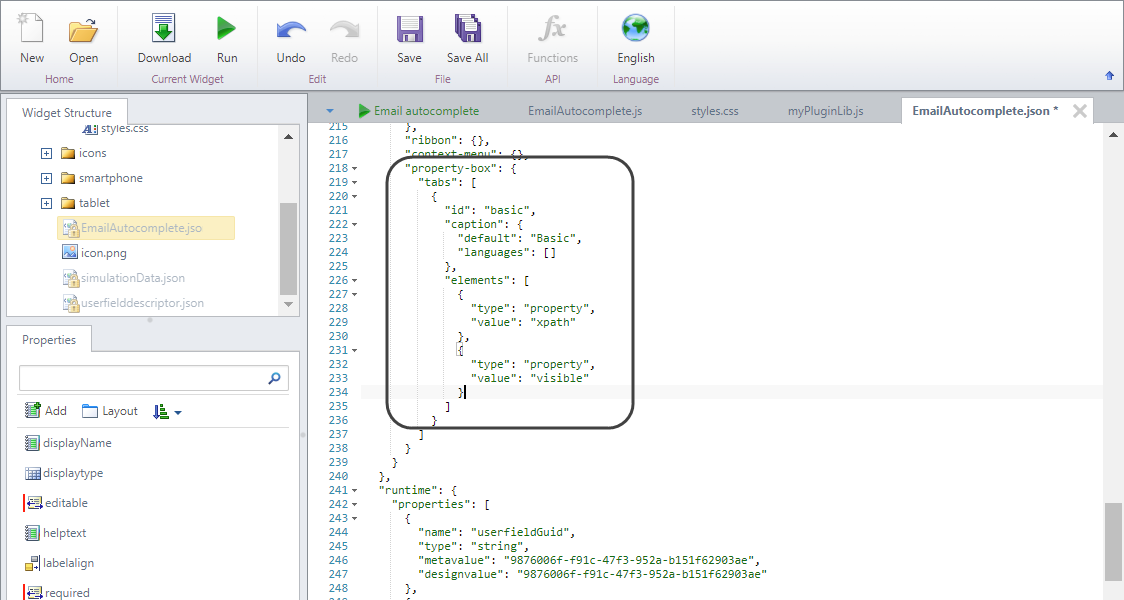
Remove the editable and required properties only from the property-box definitions that list those properties which are shown for configuration.
Do this at the JSON file named after your Widget (for this example, EmailAutocomplete.json):
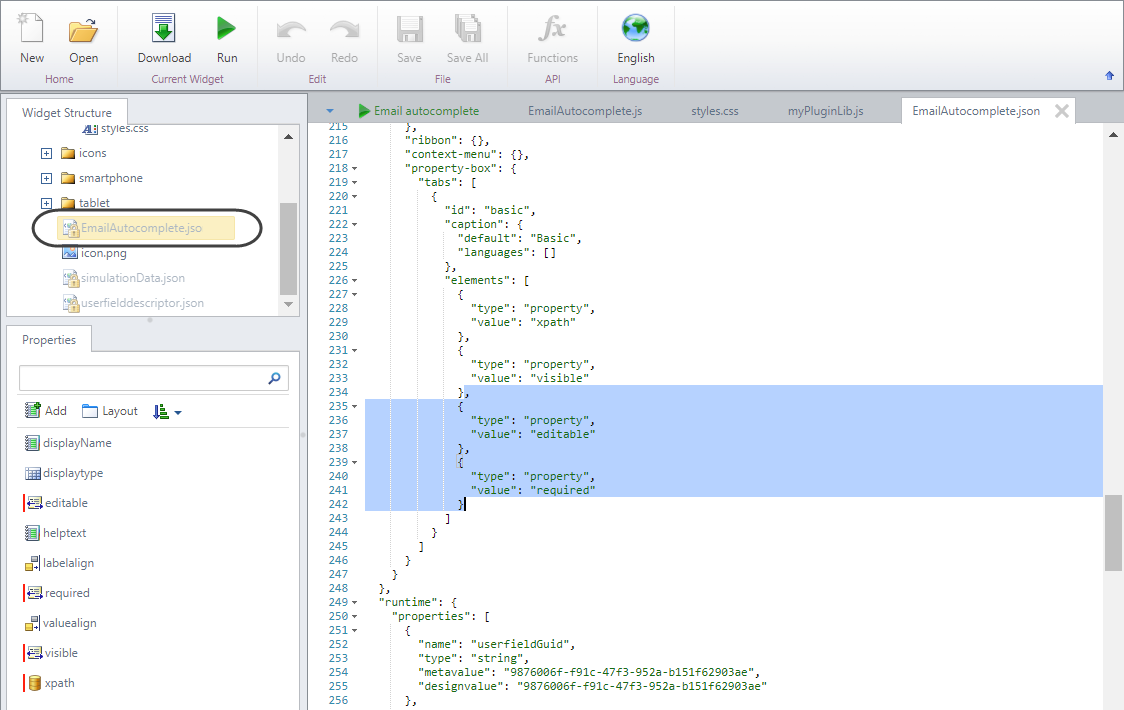
So that these properties are not deleted from the Widget but only from the forms designer:
Then, to customize certain aspects, such as labels (i.e, allows also multilanguage support), you may define extra properties.
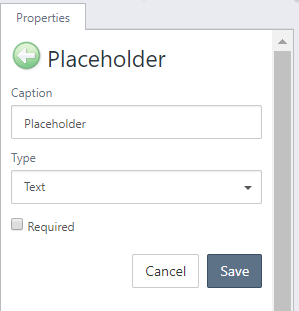
Adapting the Widget to use this property is easily done by fetching the value set for it at runtime by accessing it through self.properties.[Property_Name]:

Notice you should always make sure it has a default value.
You may run it and try out the simulation data used for this purpose (specified at the simulationData.json file):
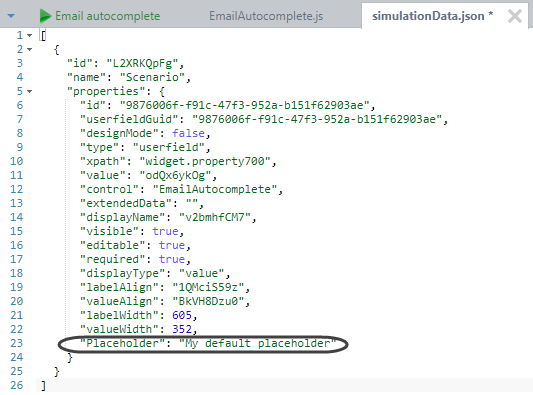
When running your Widget with the simulation data, you are encouraged to try out different scenarios applicable to your Widget:
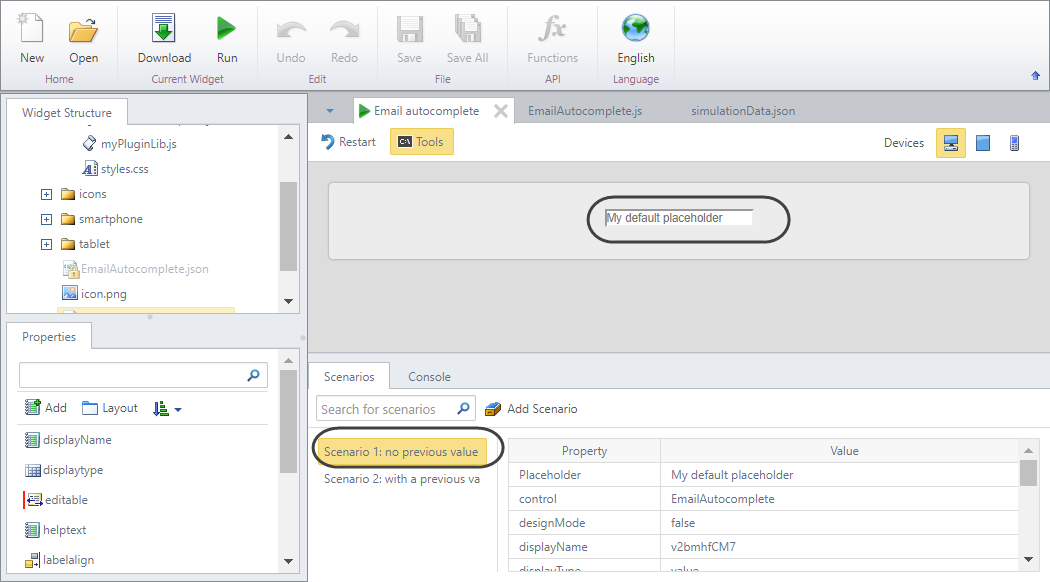
|
You may continue making tweaks and including additional possibilities, such as customization for the color used in styling. To customize the color, you would need an extra property and assign different class properties dynamically within the js code. |
Finally, apply changes in files of the implemented behavior (for desktop) so that these replicated across the similar files and structure for tablets and mobiles.
This means copying the content of desktop/EmailAutocomplete.js, desktop/myPlugin.js, and desktop/styles.css so that you paste it into both: tablet/EmailAutocomplete.js, tablet/myPlugin.js, tablet/styles.css, and into smartphone/EmailAutocomplete.js, smartphone/myPlugin.js, smartphone/styles.css respectively.
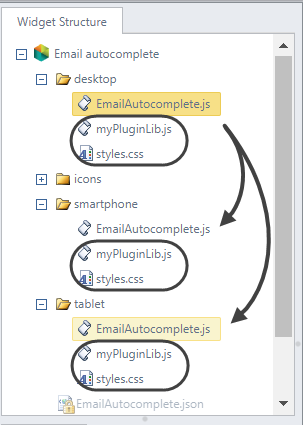
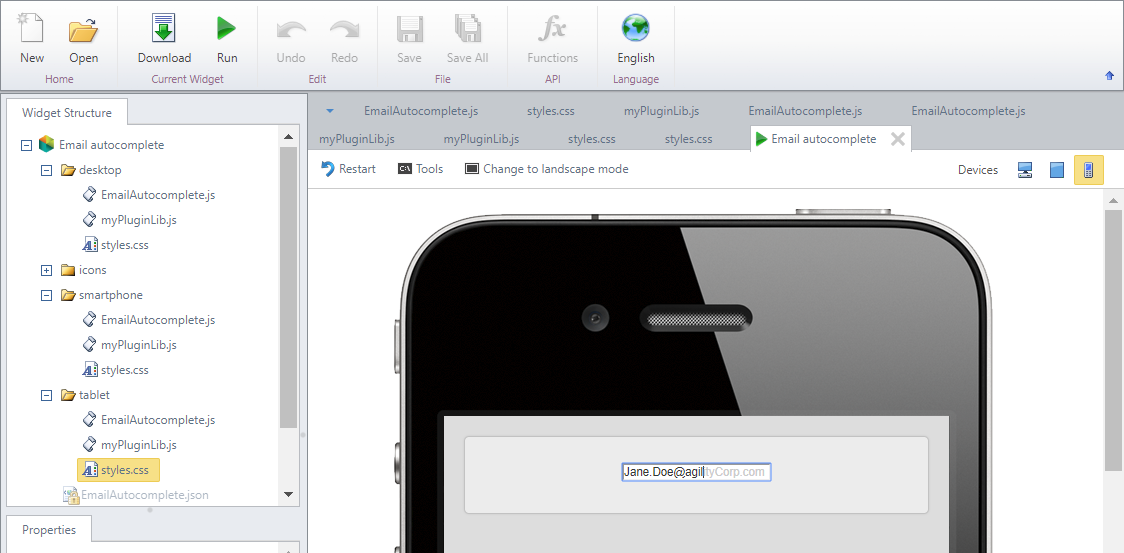
You are then encouraged to run your Widget again, so that you can explicitly make sure that simulation runs OK for tablets and mobile use:
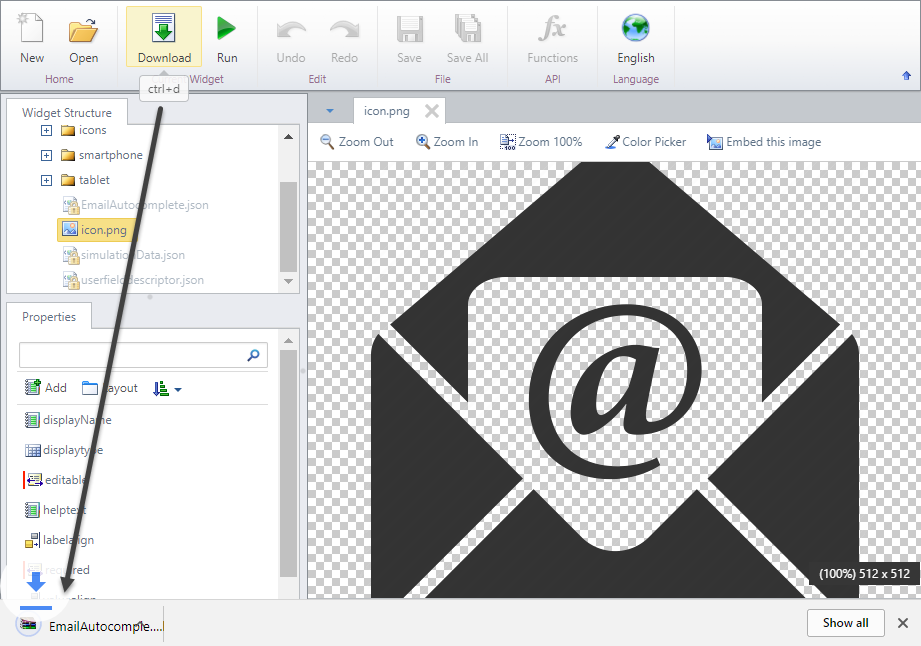
At this point you are set, and downloading the Widget will let you add its .bwg portably into Bizagi Studio:
Last Updated 2/7/2022 11:49:06 AM