Overview
User role synchronization allows Bizagi to synchronize role assignments from Microsoft Entra ID using the SCIM protocol. With this feature, role management is centralized in the identity provider, and Bizagi reflects those assignments by associating or removing existing roles for users, ensuring consistent authorization across systems.
|
Role synchronization runs only from Microsoft Entra ID to Bizagi. |

Before you start
Previous to configuration, make sure that the relevant users and or groups already exist in your Azure organization and:
1.Create the users or groups in Microsoft Entra ID. Find detailed instructions in https://learn.microsoft.com/en-us/training/modules/manage-users-and-groups-in-aad/
2.Verify that the users/groups appear correctly listed.
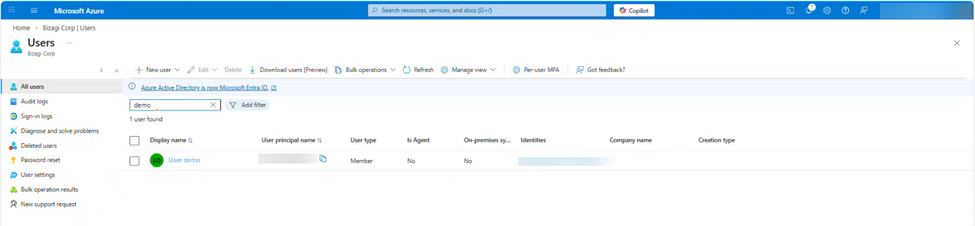
Creating and mapping the role attribute
Confirm the role exists in Bizagi before following these instructions. Role synchronization does not create new roles.
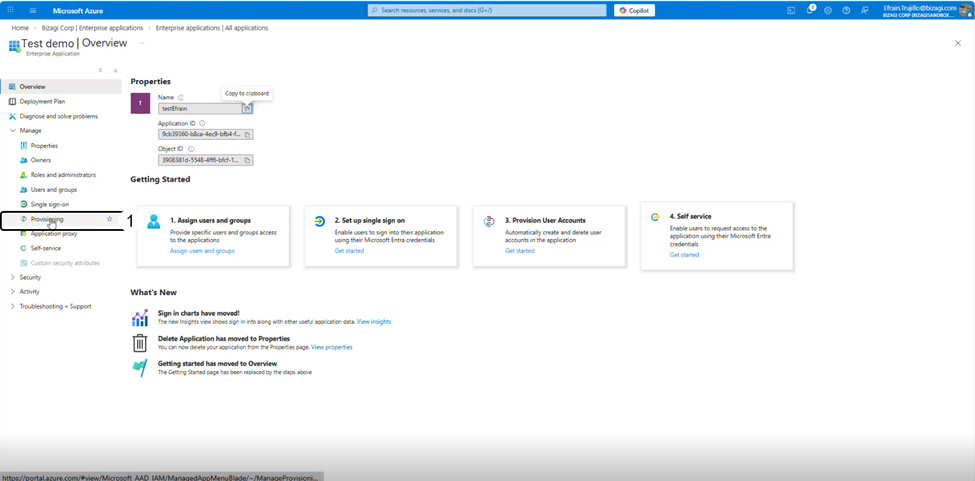
1.In your Enterprise application overview, go to the Provisioning tab.
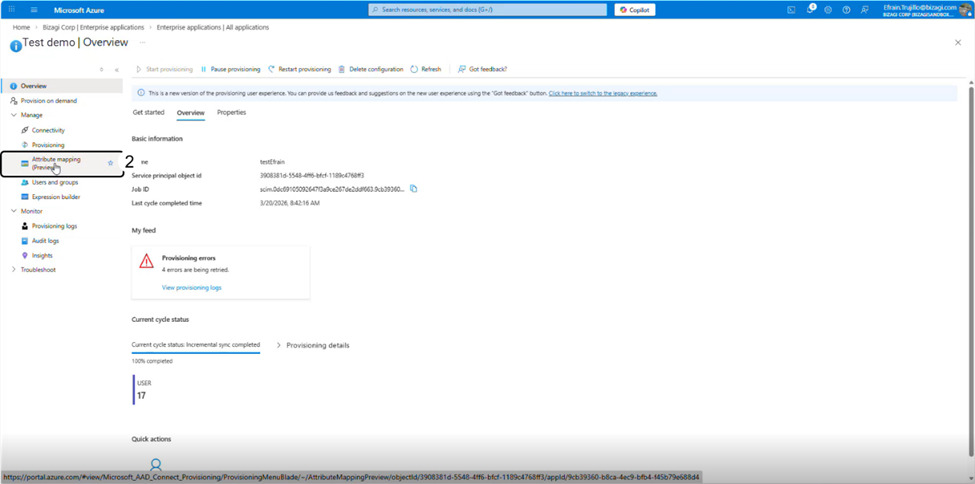
2.Go to Attribute mapping.
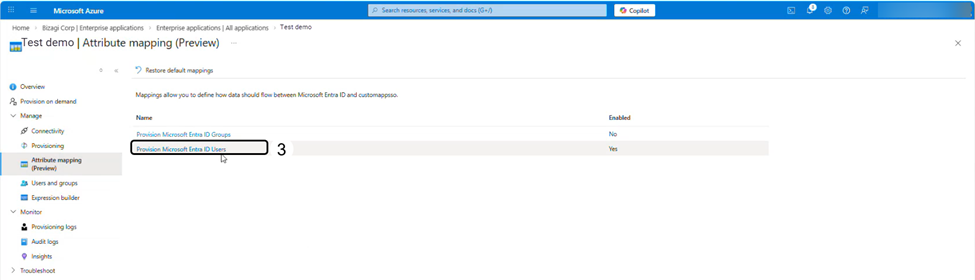
3.Click Provision Microsoft Entra ID Users.
4.Click the Show advanced options checkbox button.
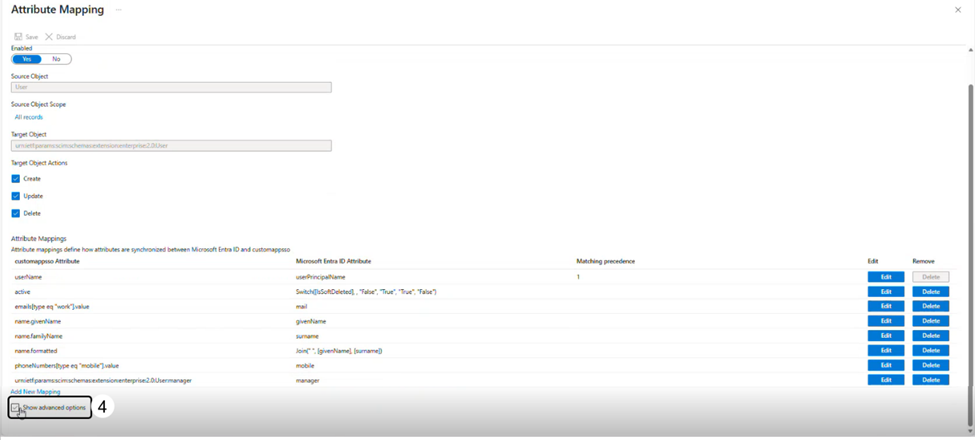
5.Additional options are displayed below. Click Edit attribute list for customappsso.

6.Add a new row with the following values:
•Name: roles
•Type: string
•Multivalue: enabled
7.When the roles attribute appears in the attribute mappings list, click Edit.
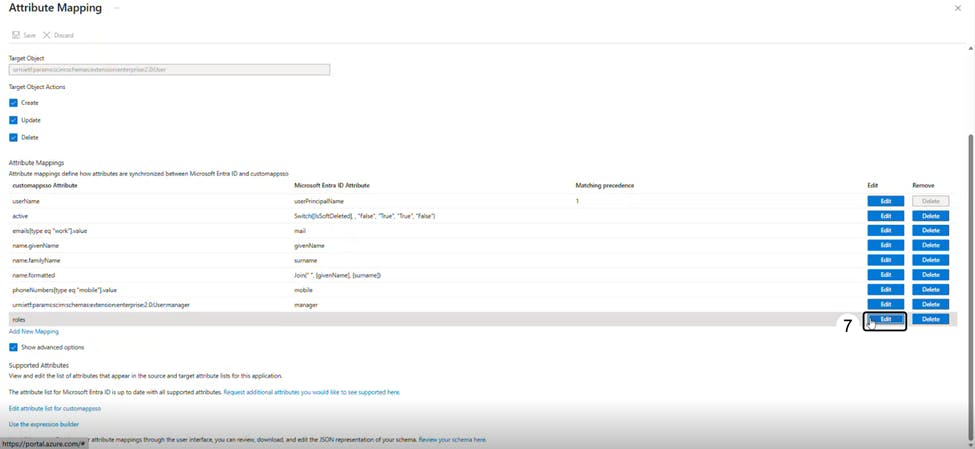
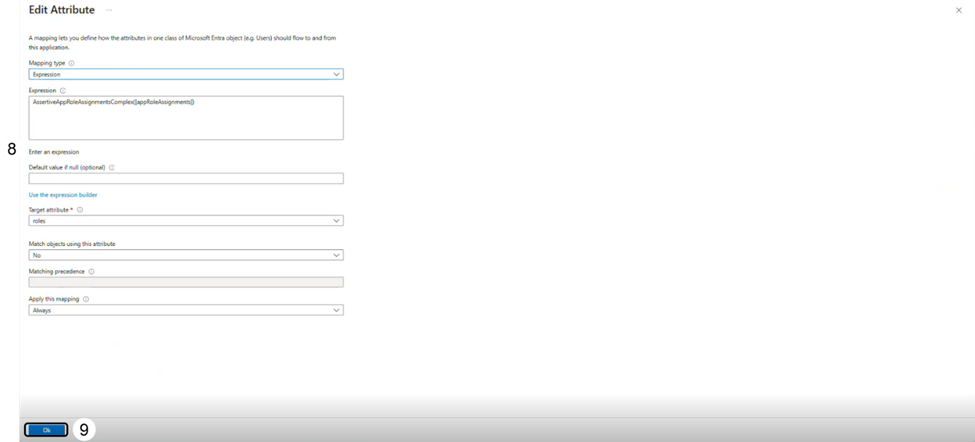
8.Complete the configuration as follows:
•Mapping type: Expression
•Expression: AssertiveAppRoleAssignmentsComplex([appRoleAssignments])
•Target attribute: roles
•Match objects using this attribute: No
•Apply this mapping: Always
9.Click Ok to save your changes.
Adding roles
Creating application roles
1.Go to App registration tab.
2.Find the app integrated with Bizagi using SCIM.
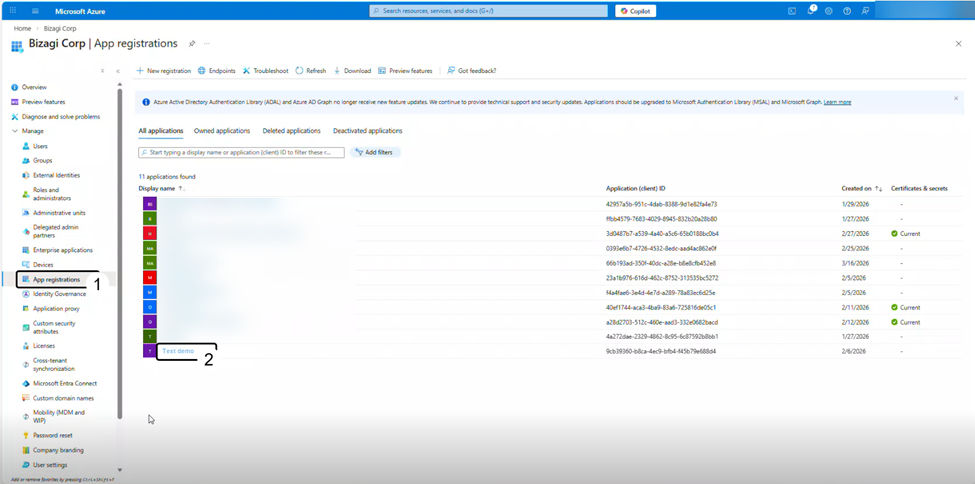
3.Go to App roles and click Create app role.
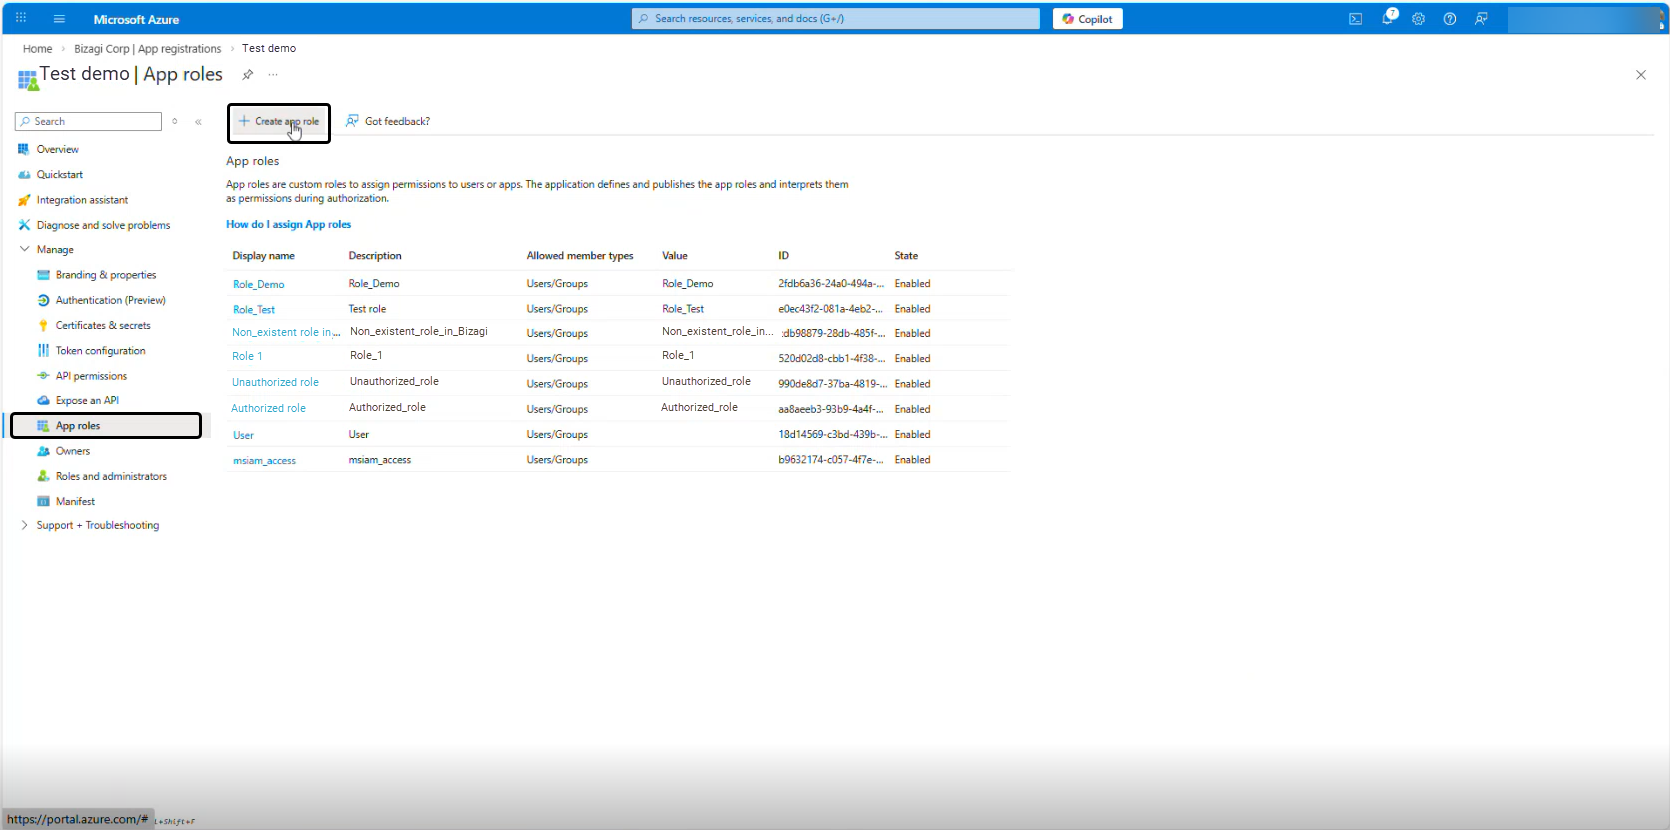
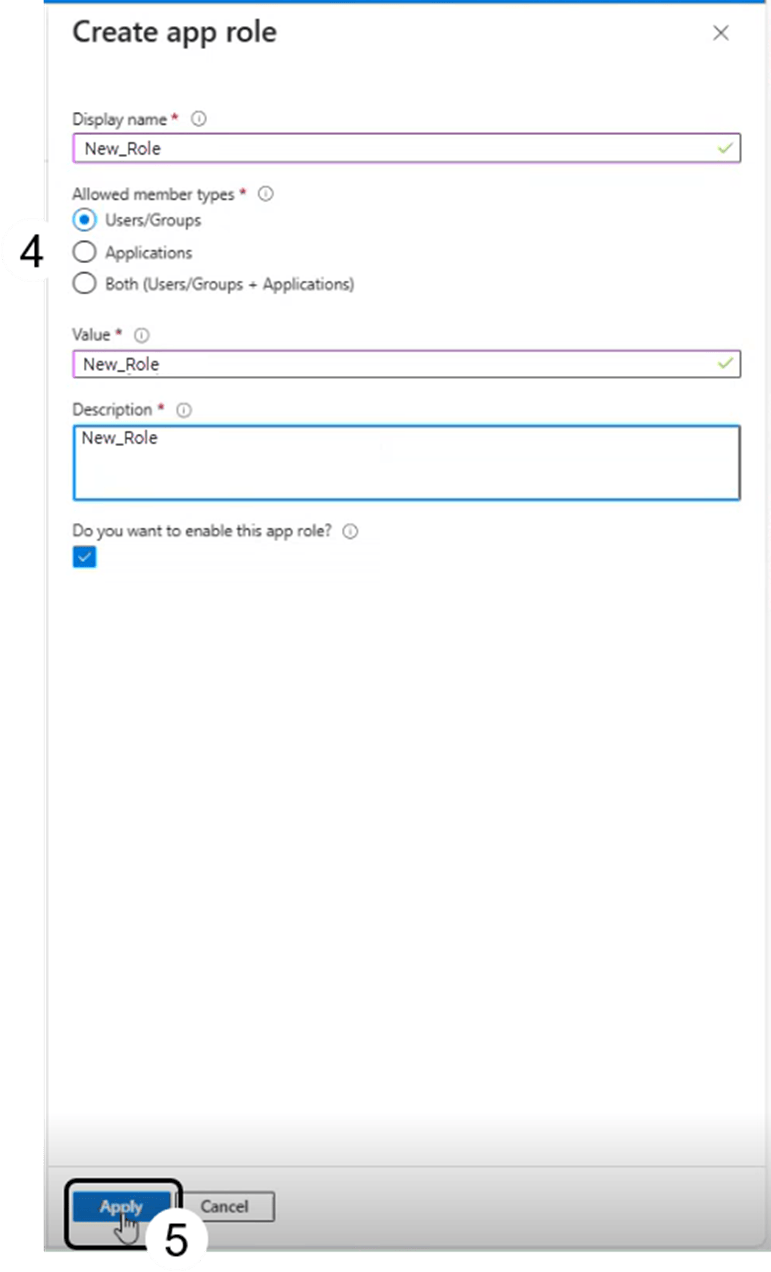
4.Enter the following information:
•Display name: Descriptive name for the role.
•Allowed member types: Users/Groups
•Value: This is the name identifier sent through SCIM, this value must match with the one stored in Bizagi. The comparison is case insensitive.
•Description: Brief description of the role.
•Do you want to enable this app role?: enabled
5.Click Apply.
Assigning roles
Once roles are created, assign them to users or groups.
In the Users and Groups tab, you can see all users and groups associated with the application.
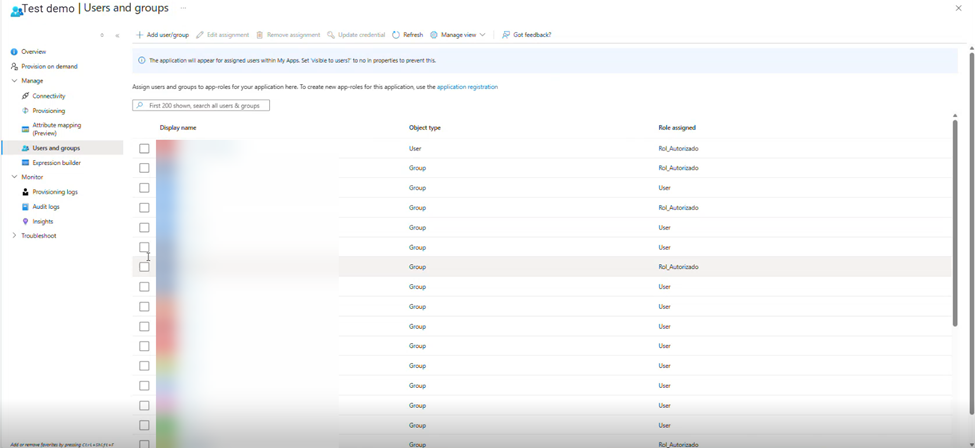
A user or group may appear multiple times. Each entry represents one assigned role.
From this tab, select Add user or group to create a new assignment.

The Add Assignment screen opens. Search for the user/group you want, click the checkbox button and confirm your selection.
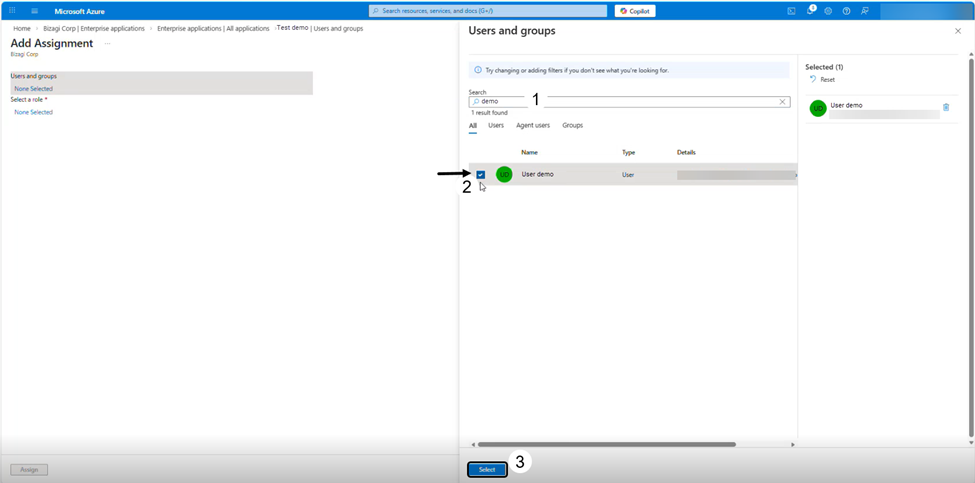
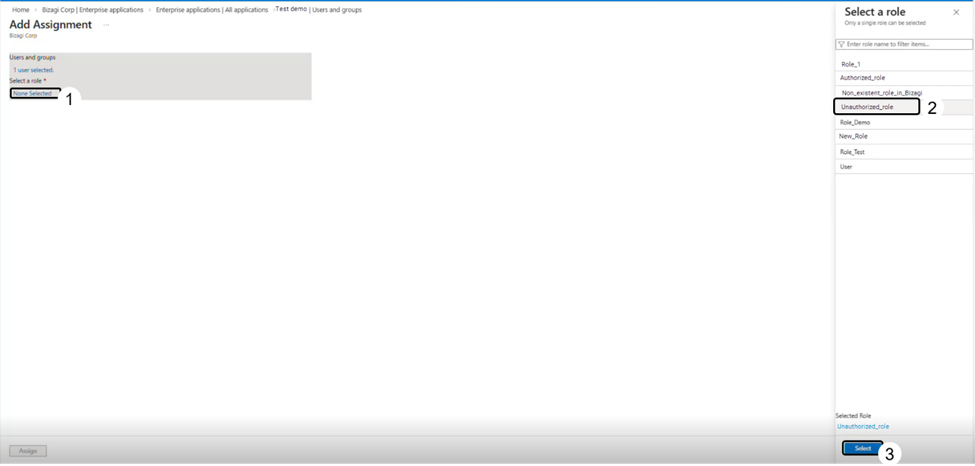
To assign a role, click None Selected under Select a role, choose the role, and confirm the selection.
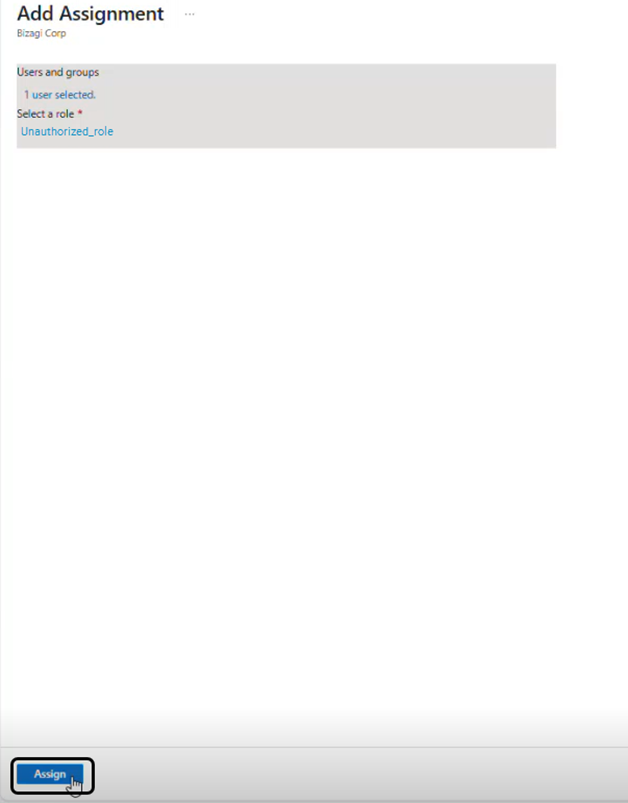
Click Assign to apply the changes.
Back in the Users and Groups tab, the user/group appears with the newly assigned role.

Synchronizing users
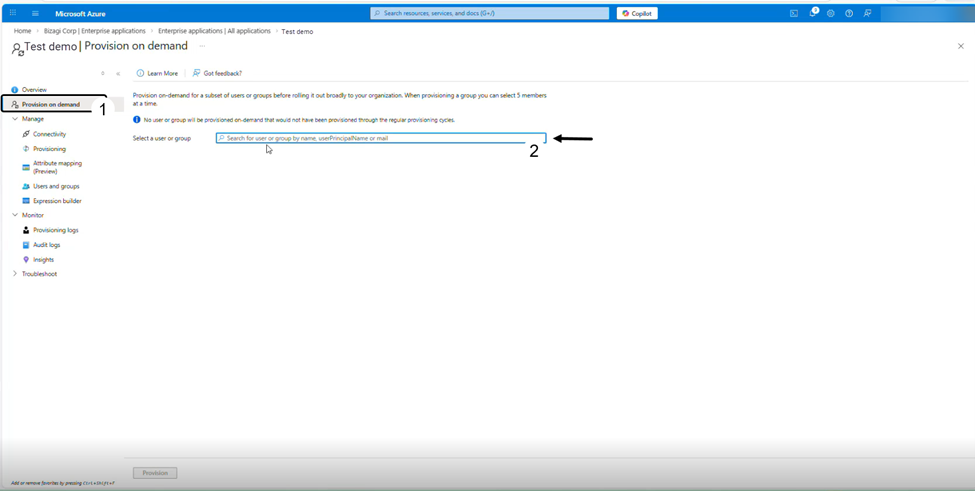
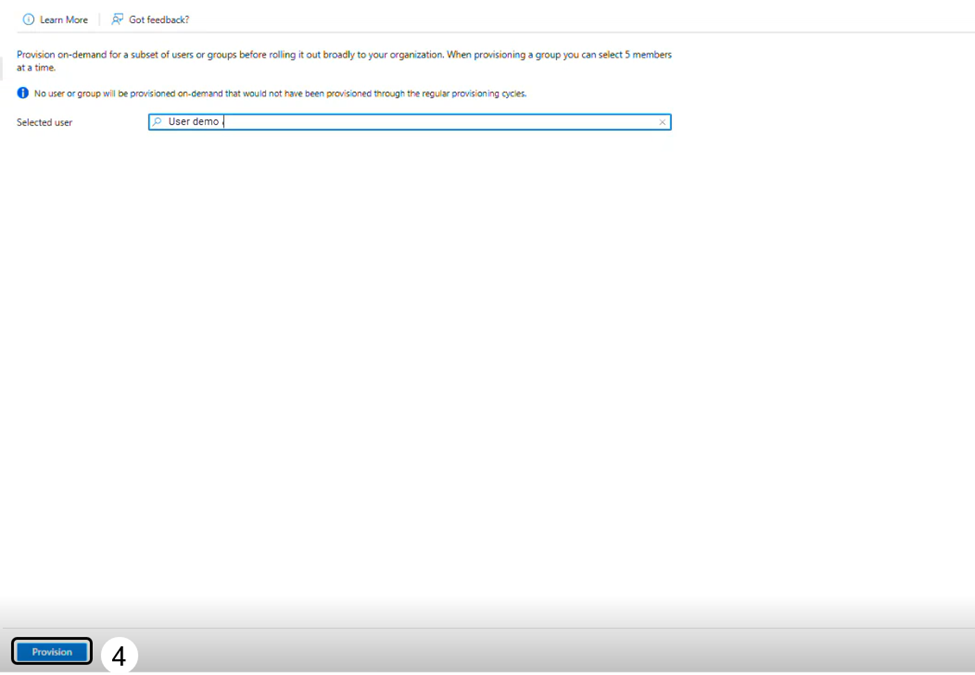
1.Go to the Provision on demand tab.
2.Use the search bar to find your user/group.
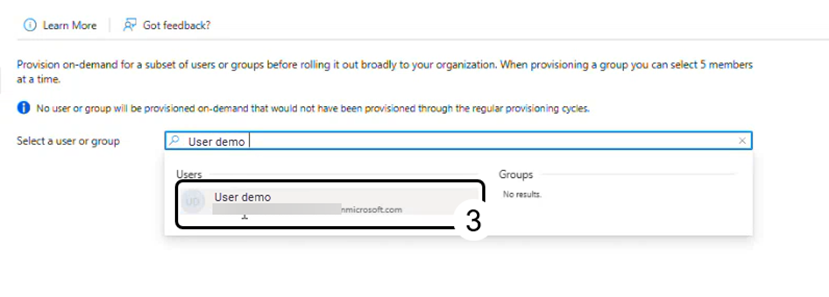
3.Select the user/group to sync.
4.Click Provision.
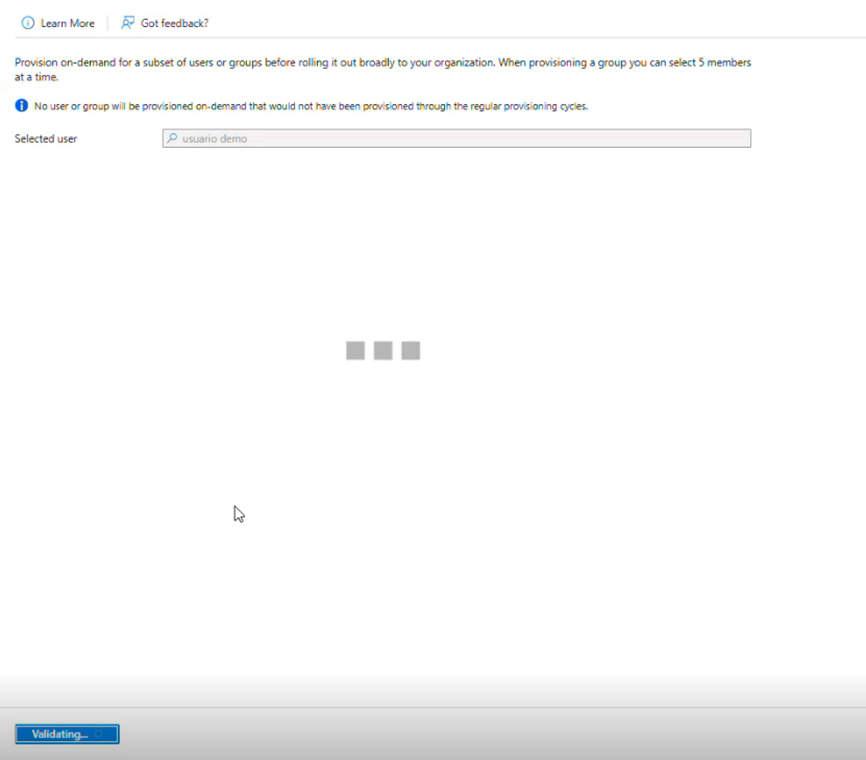
The system validates the request and performs the synchronization.
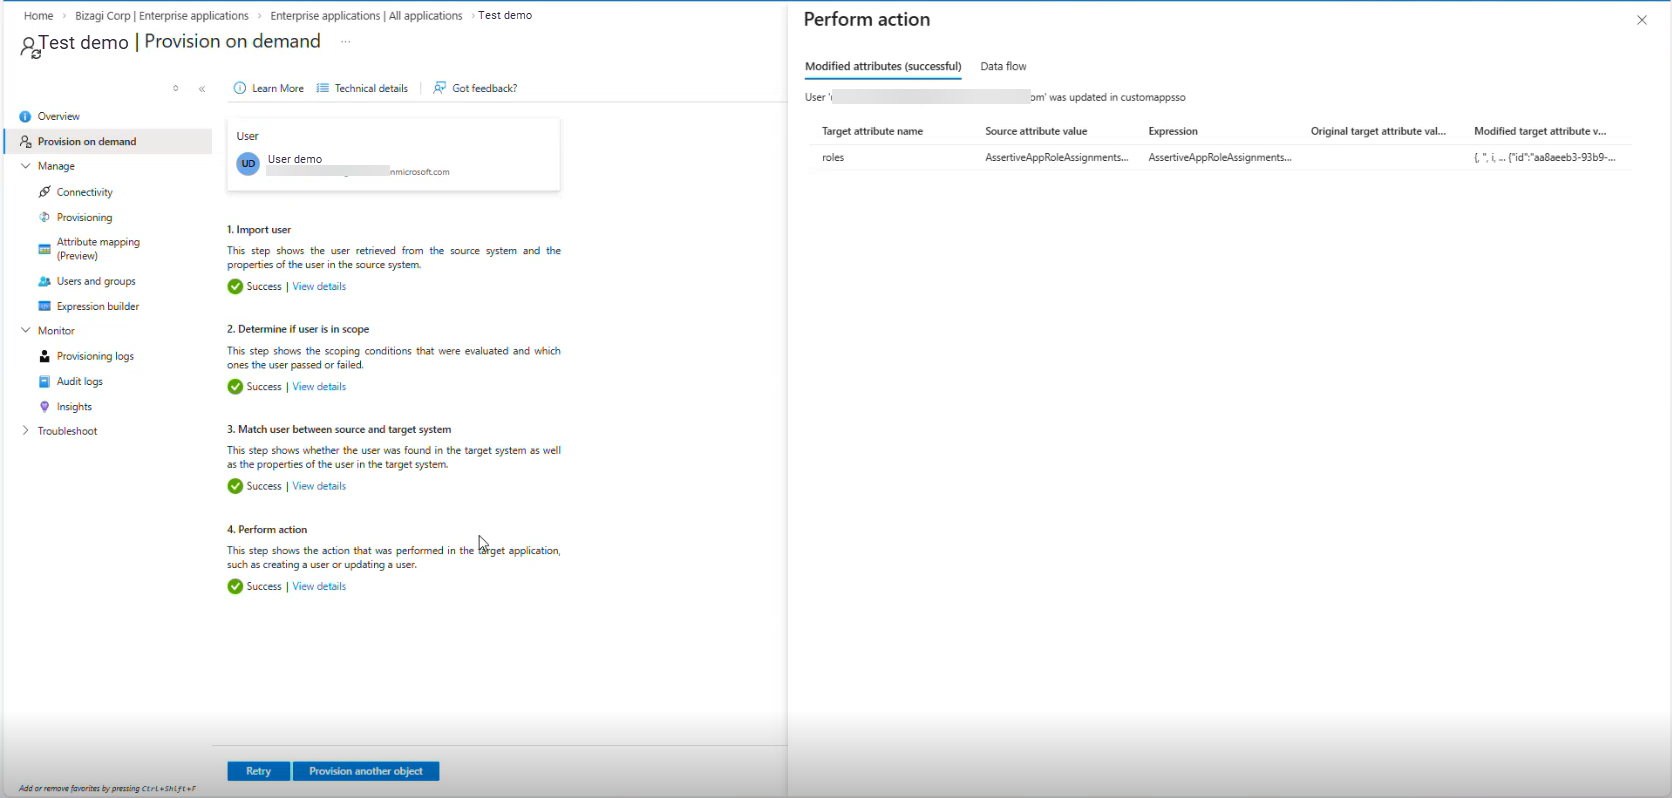
Once completed, a confirmation screen displays the result.
Review synchronized users in your Work Portal. For more information visit User Administration.
|
Bizagi system roles with an ID lower than 10000 such as Analysis, App Editor, BA Business Administrator, or Admon Viewer, are excluded and are not removed during synchronization. |
Last Updated 7/17/2026 3:45:54 PM