Overview
In this document, the SCIM user synchronization in Azure is explained step by step.
Initial set up
To set up the SCIM synchronization in Azure, follow the next steps:
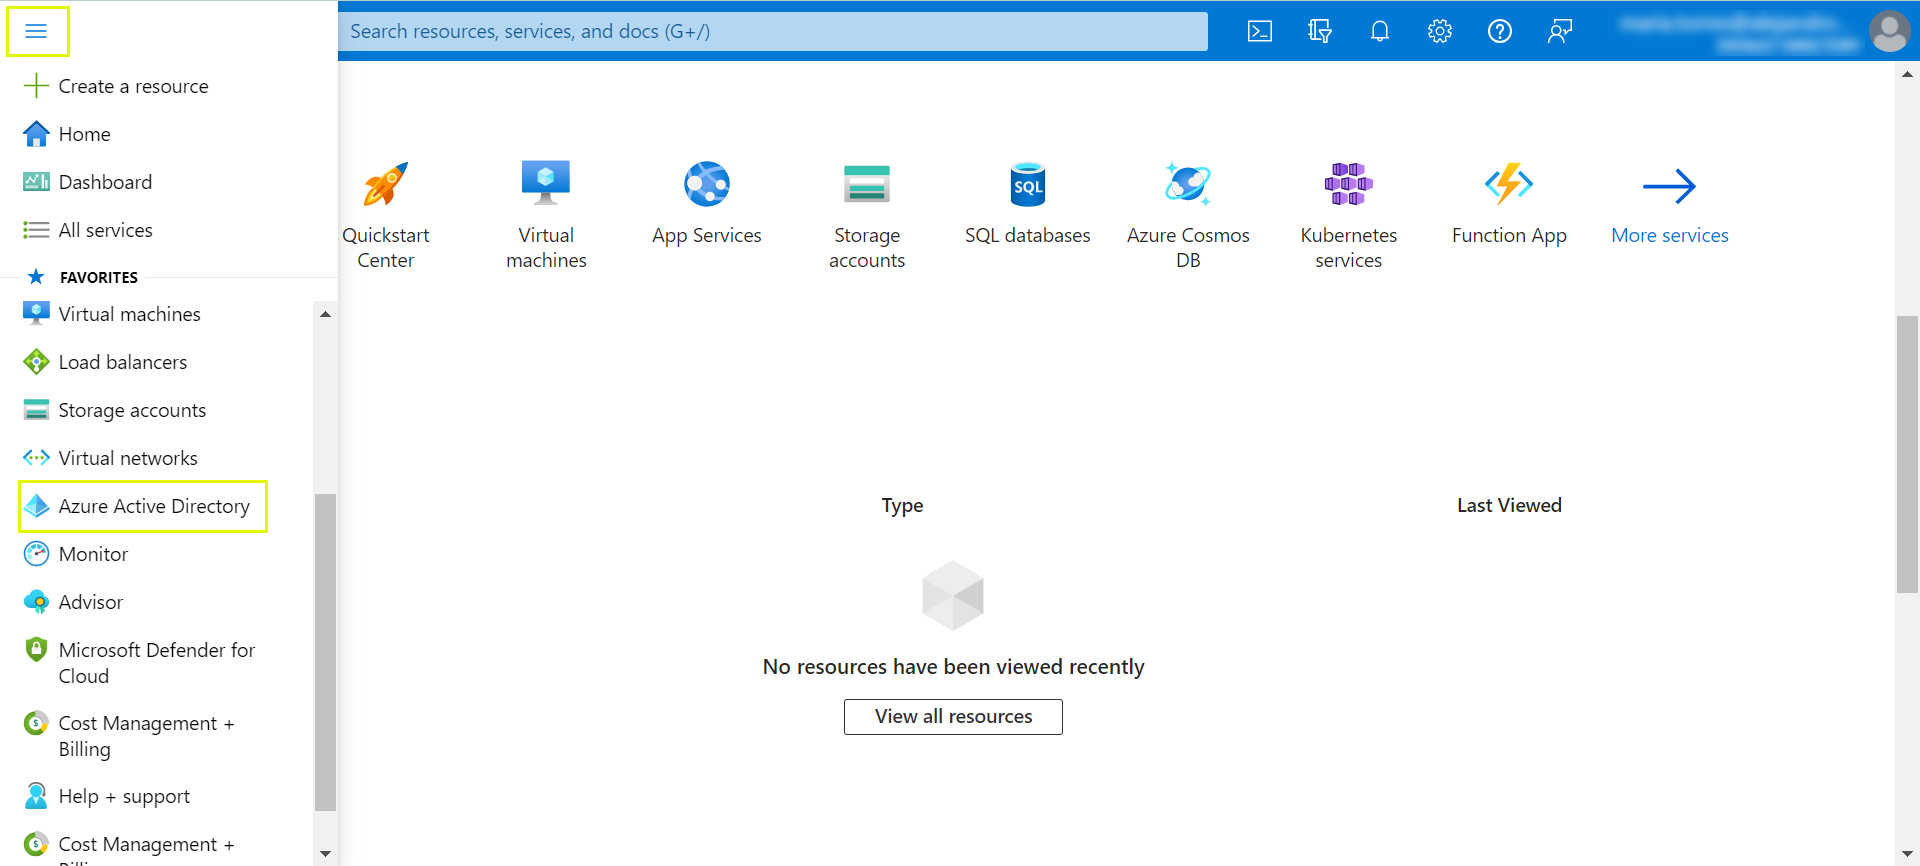
1.Go to Azure's Active Directory.
2.Look for the Bizagi App in Azure's Marketplace, following the path: Home>Default Directory>Enterprise applications>All applications>Browse Entra ID Gallery. This application configures the SCIM protocol to make the automatic user provisioning.
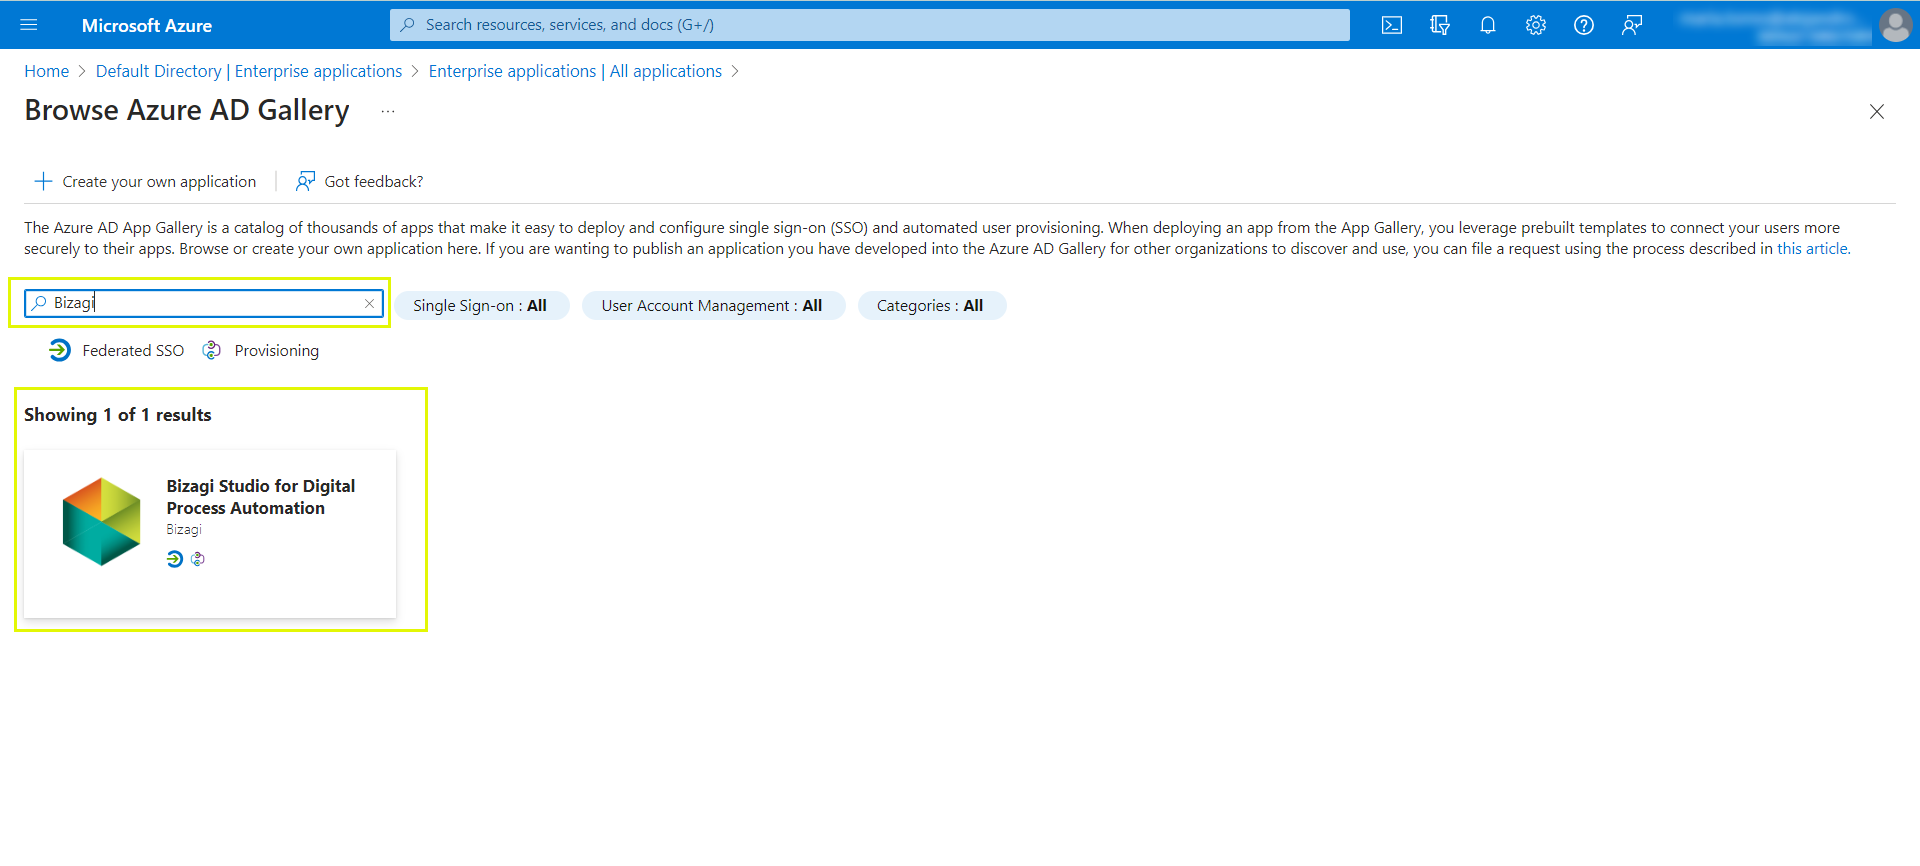
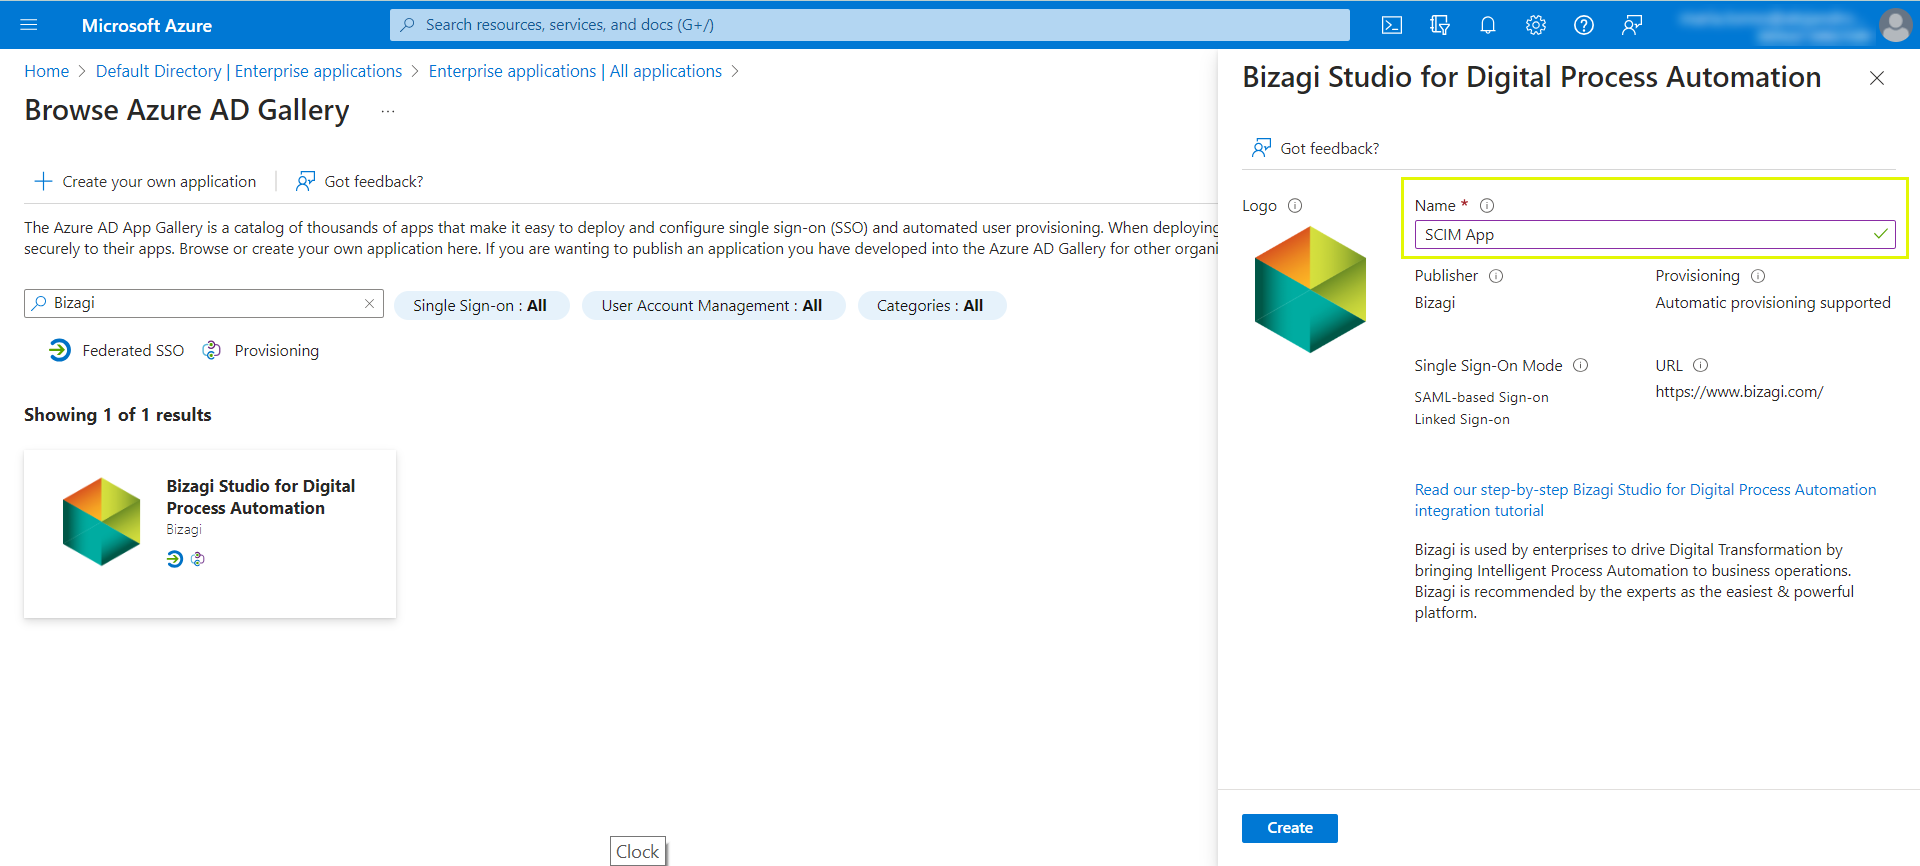
3.Create the application by clicking the Create button.
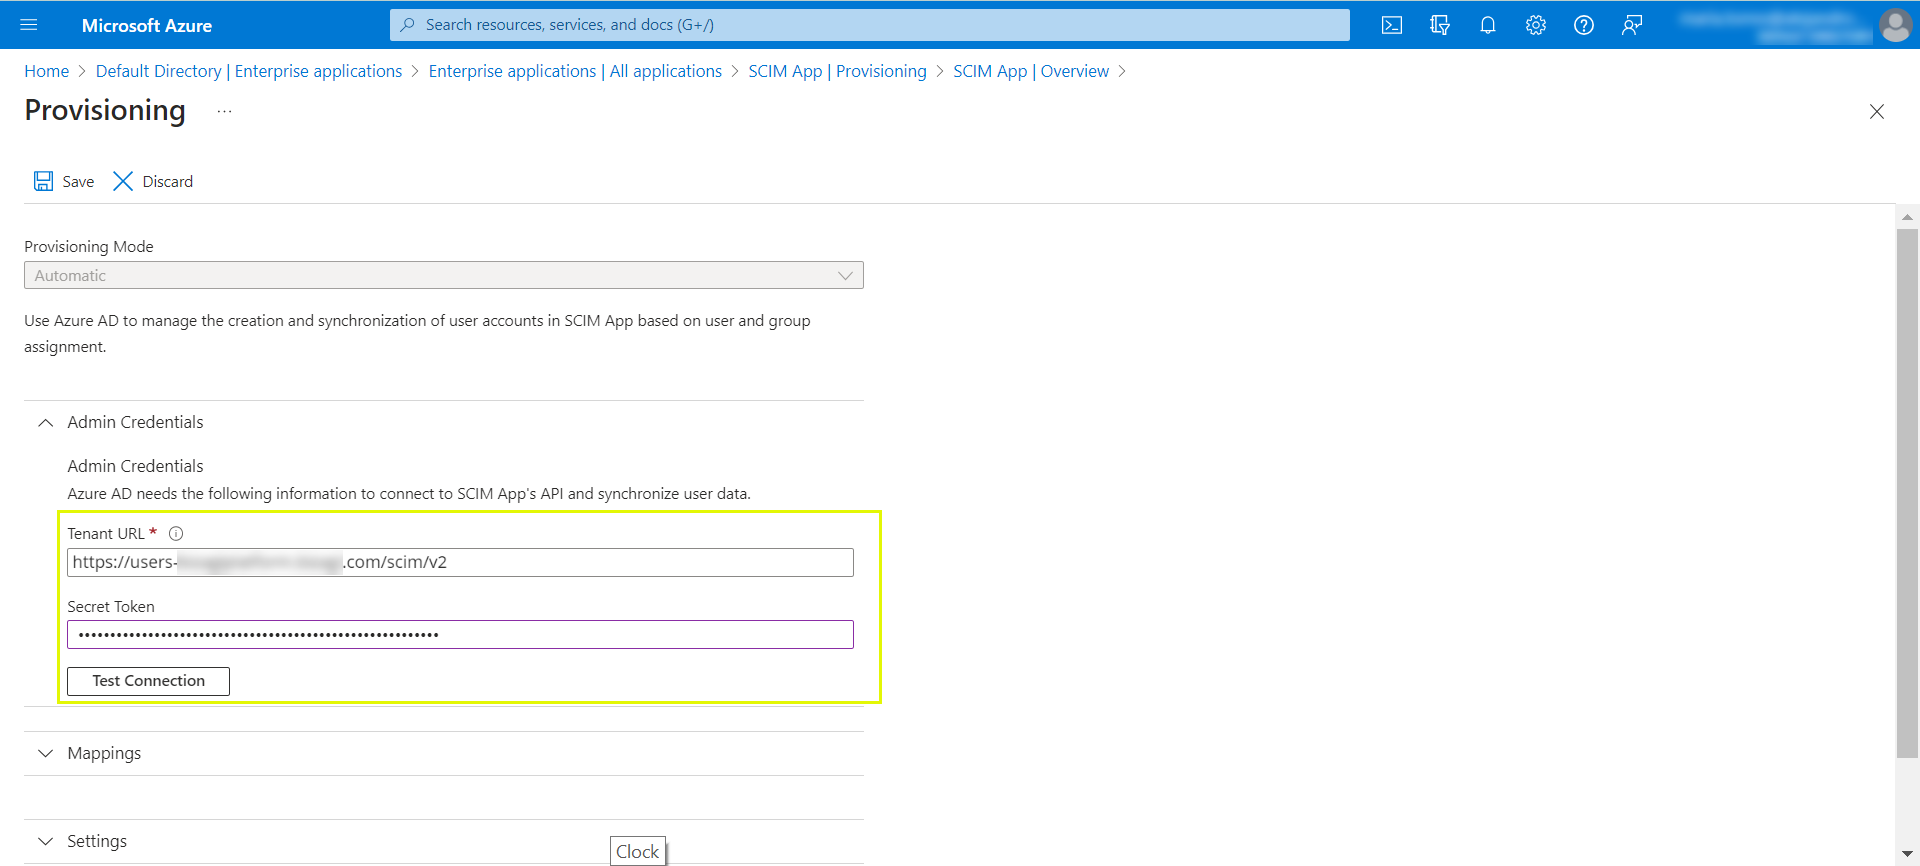
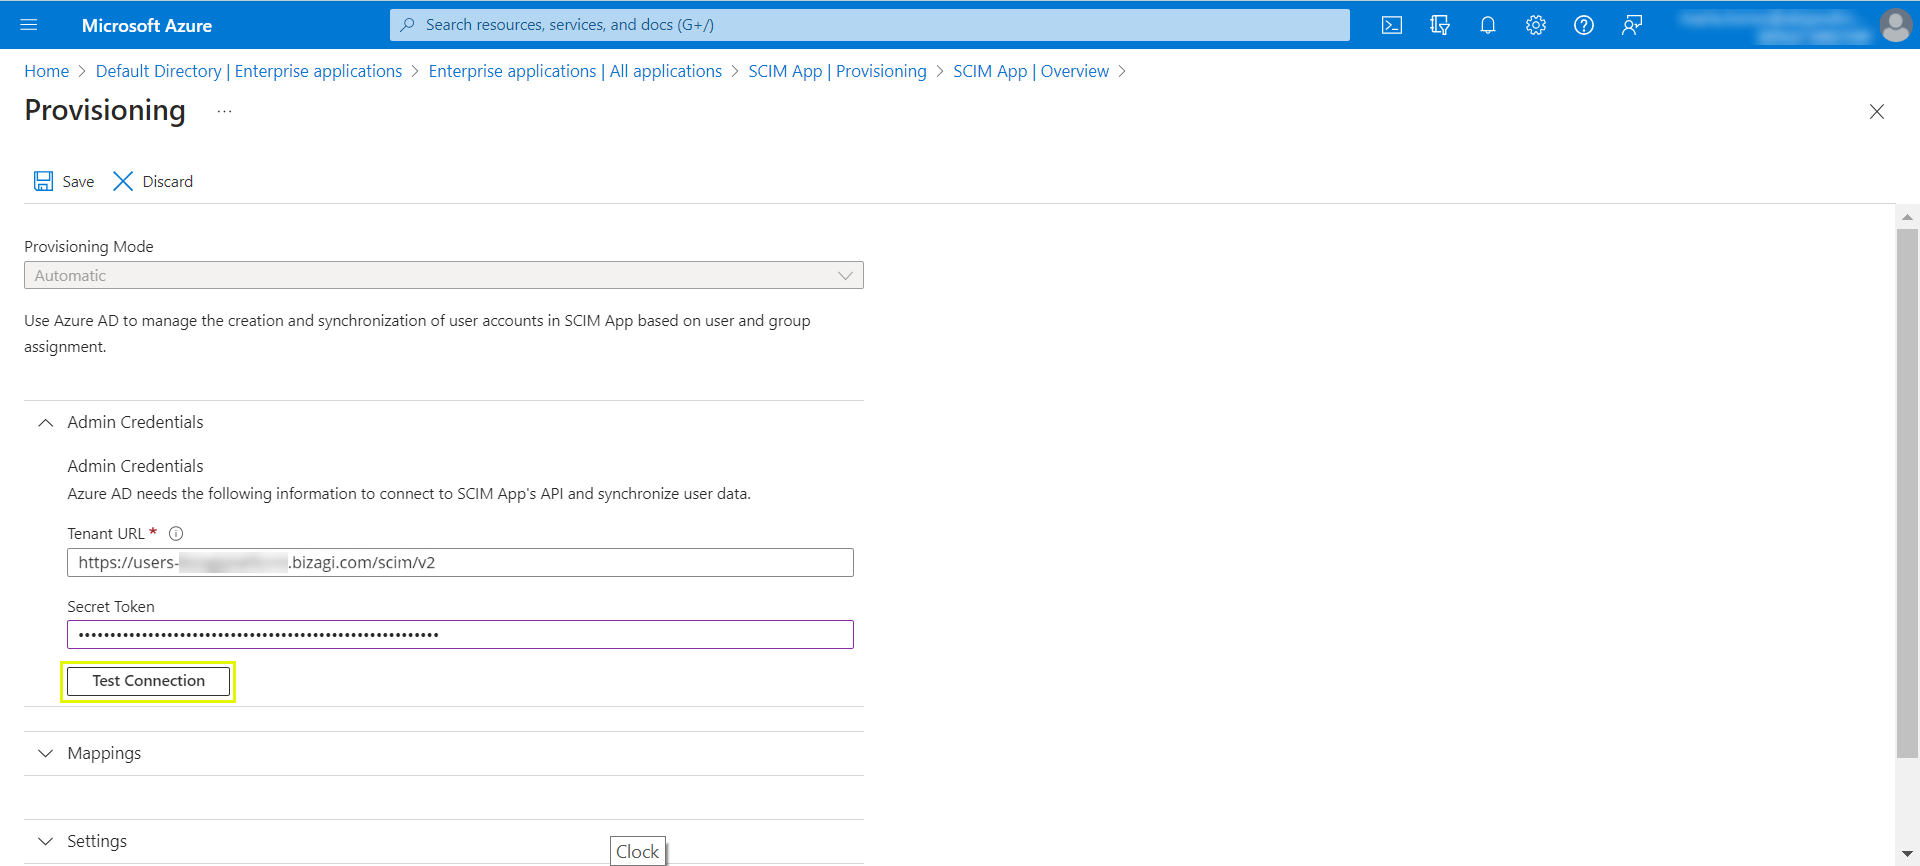
4.Return to Azure and in the section Provisioning mode, click the option Administrator credentials.
5.In the Host URL field, paste the URL Service Connection and API token values generated in the Customer Portal.
|
The Tennant URL structure is the following: http://users-subscriptionName. bizagi.com/scim/v2 |
6.Click the Test connection button to ensure that the access point is working correctly.
Provisioning users
You can provision your users in two ways:
1.Manually, in case you just need to provision a small number of users.
2.Automatically, when you have a large number of users.
Both processes are explained below.
Manual process
To provision users manually, follow the next steps:
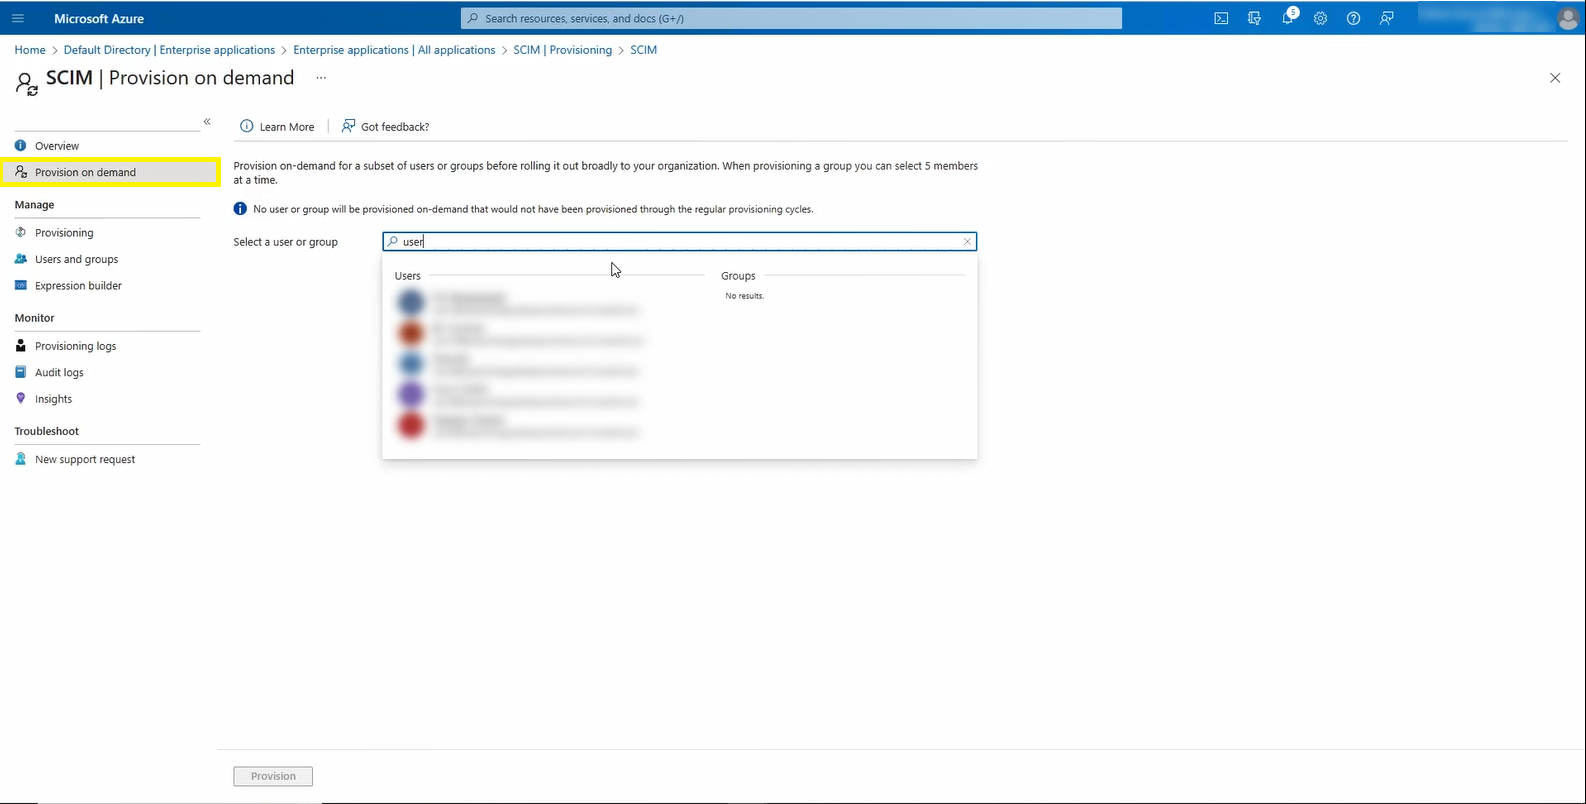
1.Go to the Provision on demand option.
2.In the search box, type the name of the user you want to synchronize with the Customer Portal.
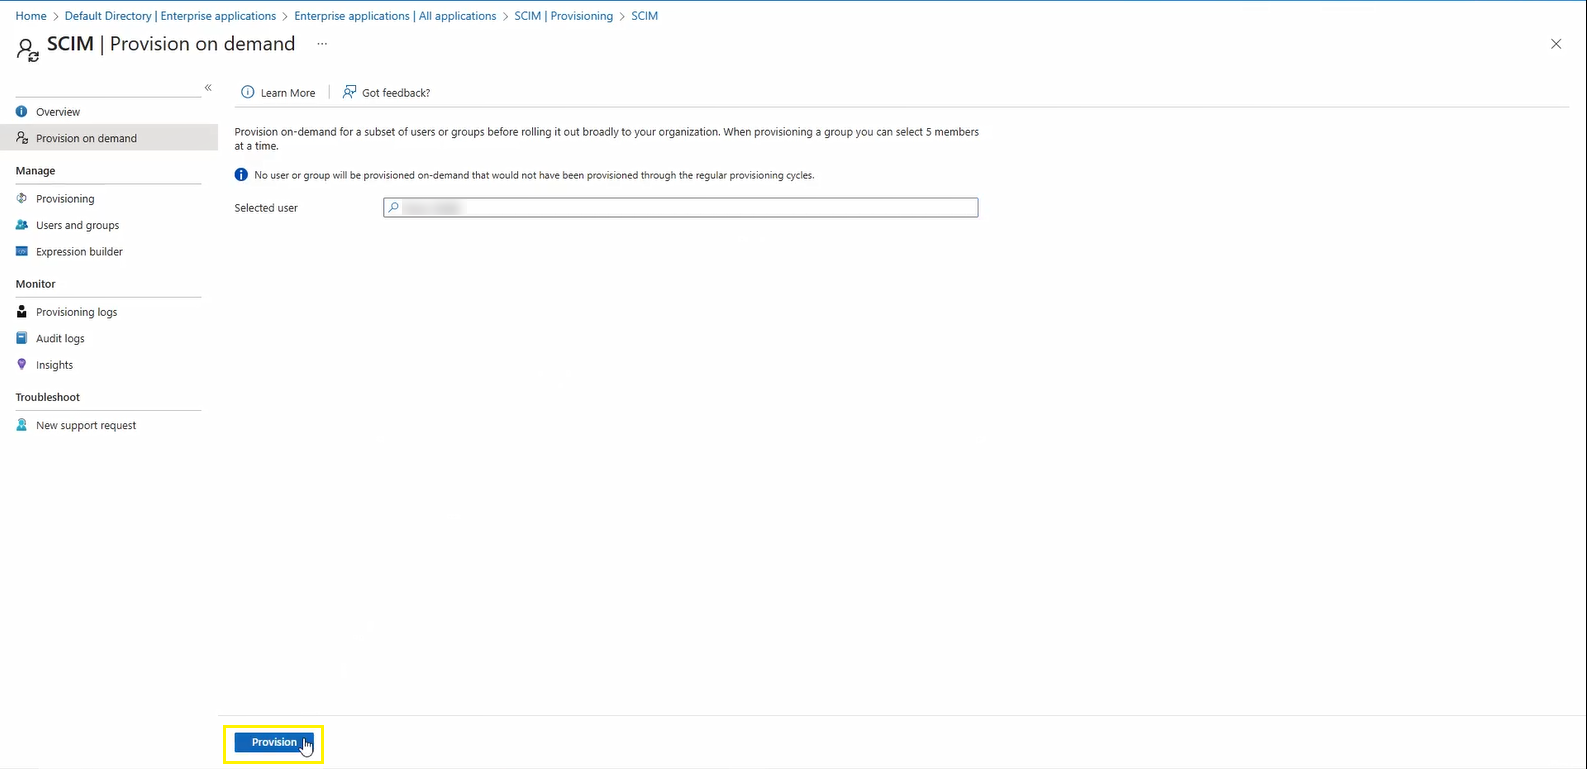
3.Click the Provision button.
Automatic process
|
To access the list of users in Azure, follow the path: Home>Active directory>Users. |
To provision users automatically, follow the next steps:
1.In Azure, follow the path: Home>Active directory>Enterprise applications>All applications>SCIM>Provisioning>General information. Set the Provisioning Status to On.
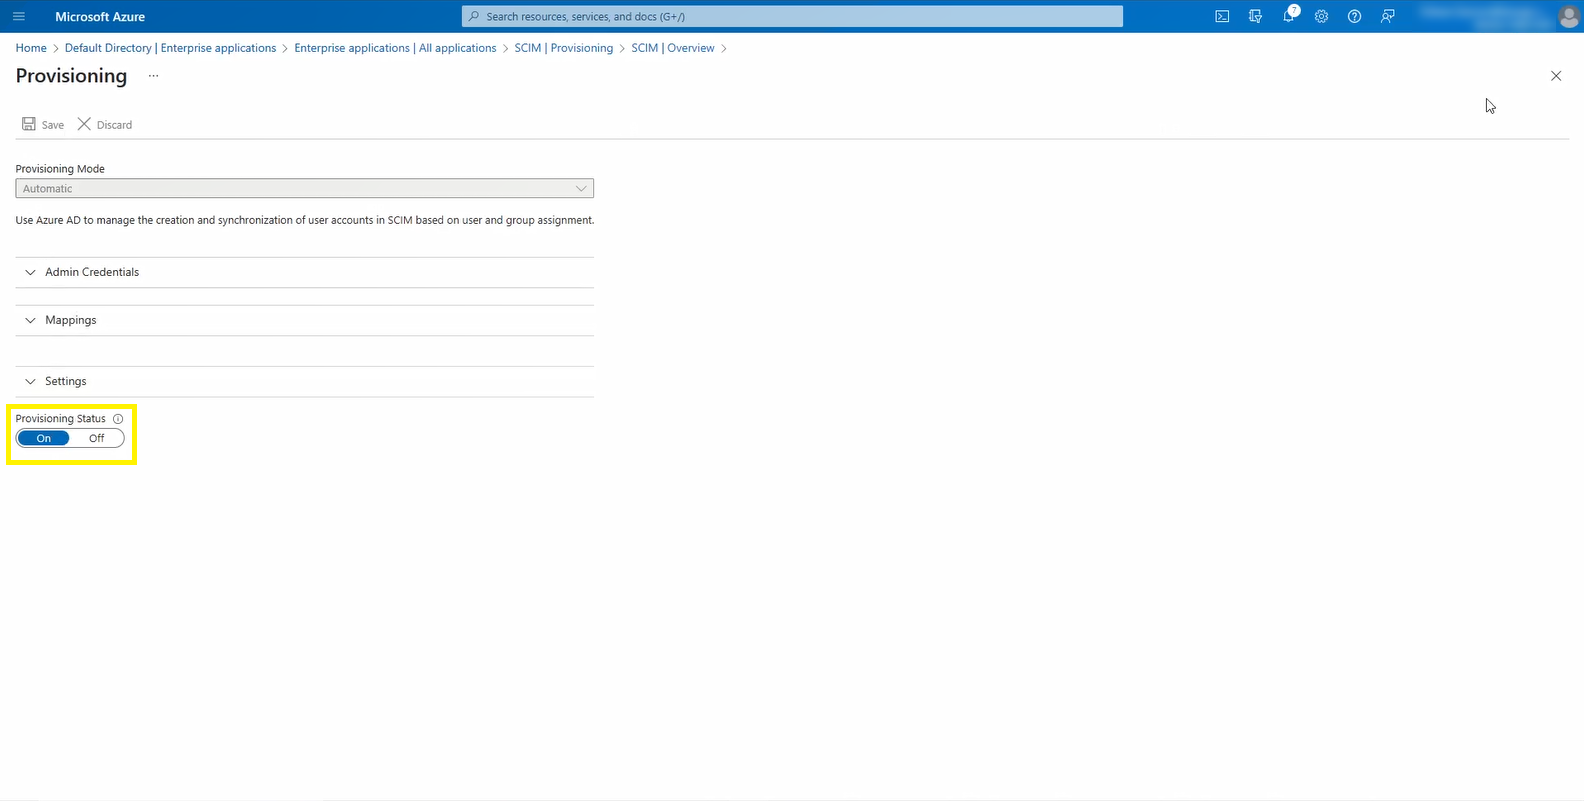
2.Click the Start provisioning option.
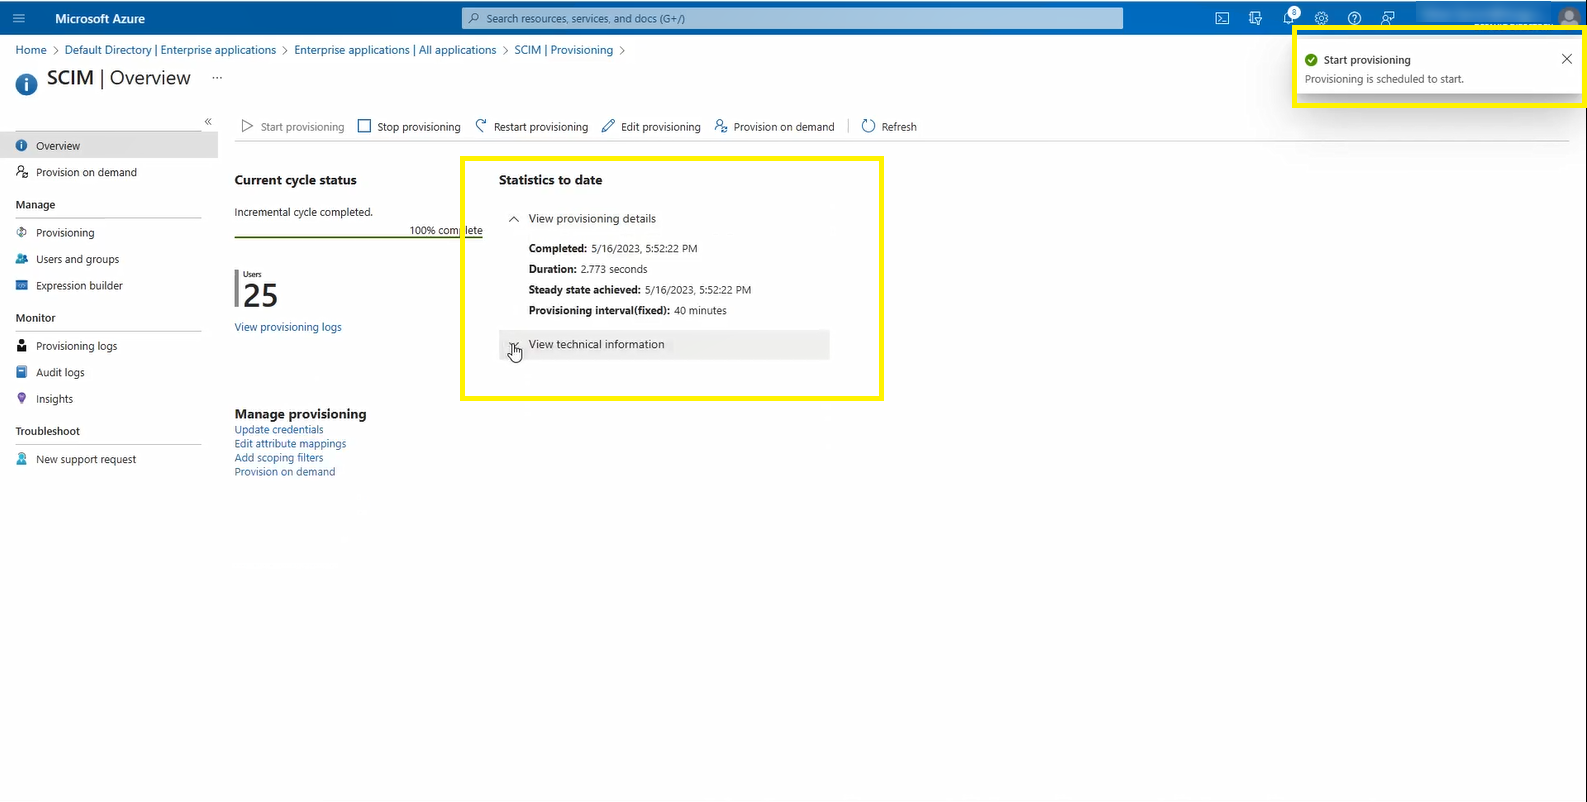
3.The users will be automatically synchronized to the Customer Portal.
|
Bear in mind that all the users' information is migrated to the Customer Portal. If you edit a user's information in the Customer Portal, the change is not reflected in Entra ID. On the other hand, if you edit a user's information in the Azure portal, the change is synchronized with the Customer Portal.
If a user has restrictions (e.g., if the account is disabled, or the data of the user is incomplete), that user is not synchronized in the Customer Portal. |
Provisioning scenarios
If you have the User Administrator role, you can do multiple actions in order to manage the provisioning of your users.
Create a user
To create a user:
1.In Azure, navigate to: Home>Active Directory>Users.
2.Click the New User option.
3.Click the Create new user option.
4.Enter the new user's information.
5.Click the Save button.
Update the information of an user
To update the information of a user:
1.In Azure, navigate to: Home>Active Directory>Users.
2.Click the name of the user that you want to update.
3.Click the Edit properties option.
4.Change the desired values.
5.Click the Save button.
Delete a user
To delete a user:
1.In Azure, navigate to: Home>Active Directory>Users.
2.Click the name of the user that you want to delete.
3.Click the Delete option.
4.Click the Accept button.
Disable a user
To disable a user:
1.In Azure, navigate to: Home>Active Directory>Users.
2.Click the name of the user that you want to disable.
3.Click the Edit properties option.
4.Uncheck the Enabled account checkbox.
5.Click the Save button.
|
If the user you are disabling created resources or has administrator permissions, the following happens: •If the Boss of the user is in the system, all resources and permissions are transferred to that person. If this is not the case, the ownership of the resources is transferred to the Subscription owner. •In case that the user is the Subscription owner, the ownership of the resources is passed to the Company owner. •In case the user is the Company owner, the ownership of the resources is transferred to another Company owner. •In case that the user is the only Company owner, it is not possible to disable the user until another Company owner is assigned. |
For further information on how to map user attributes from Azure, refer to SCIM Manual User Mapping in Azure for the Customer Portal.
Last Updated 9/11/2024 10:26:43 AM