Overview
You can map the attributes of your Bizagi App in Azure manually. Bear in mind that to to do so, you must have previously created a Bizagi App in Azure. For more information refer to SCIM Entra ID configuration for the Customer Portal.
Steps
To map a user manually follow the next steps:
In Azure go to the Provisioning section.
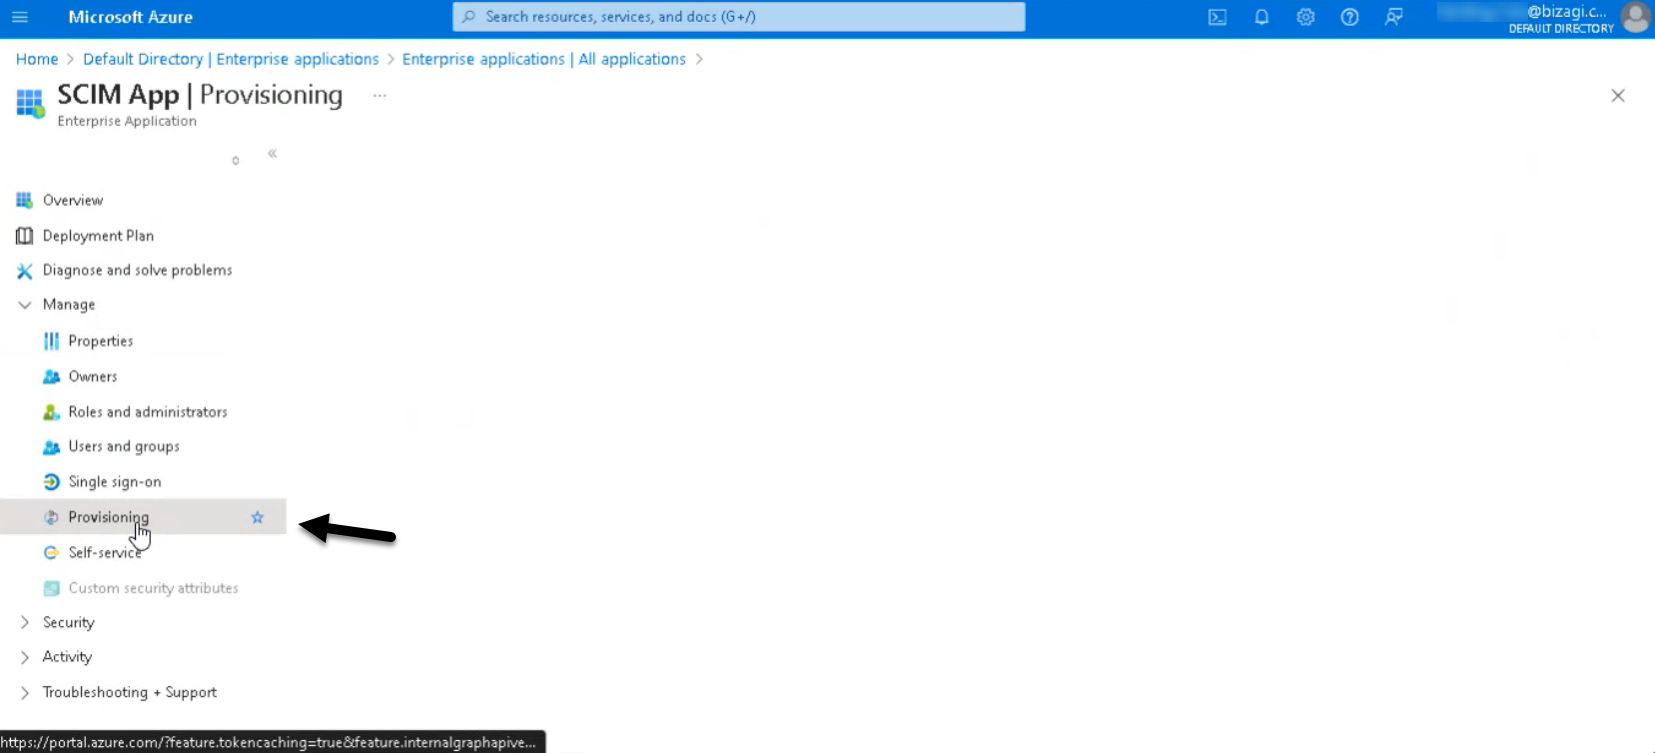
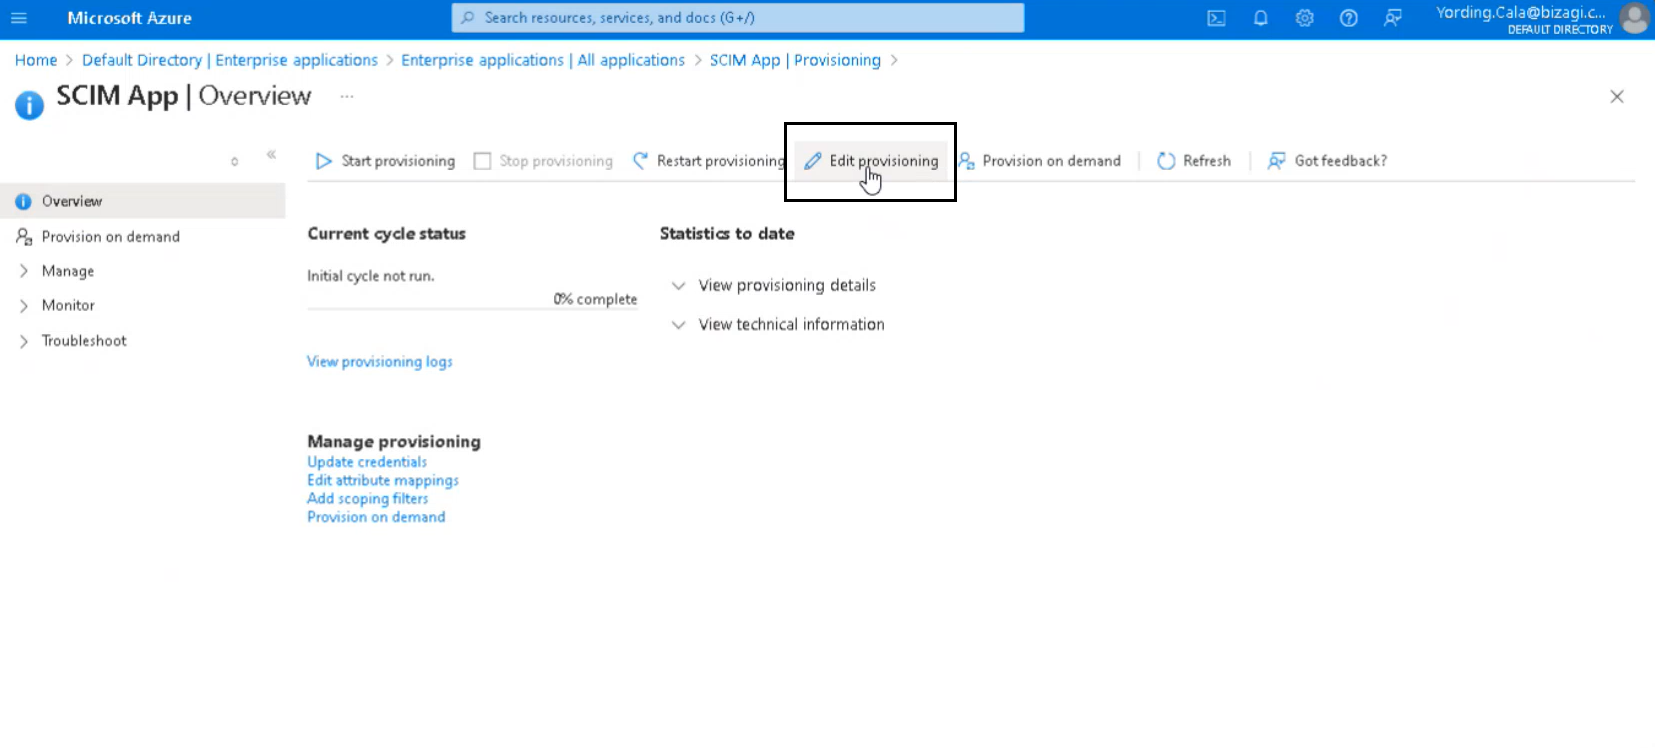
Then, go to Edit provisioning> Mappings > Provision Azure Active Directory Users.
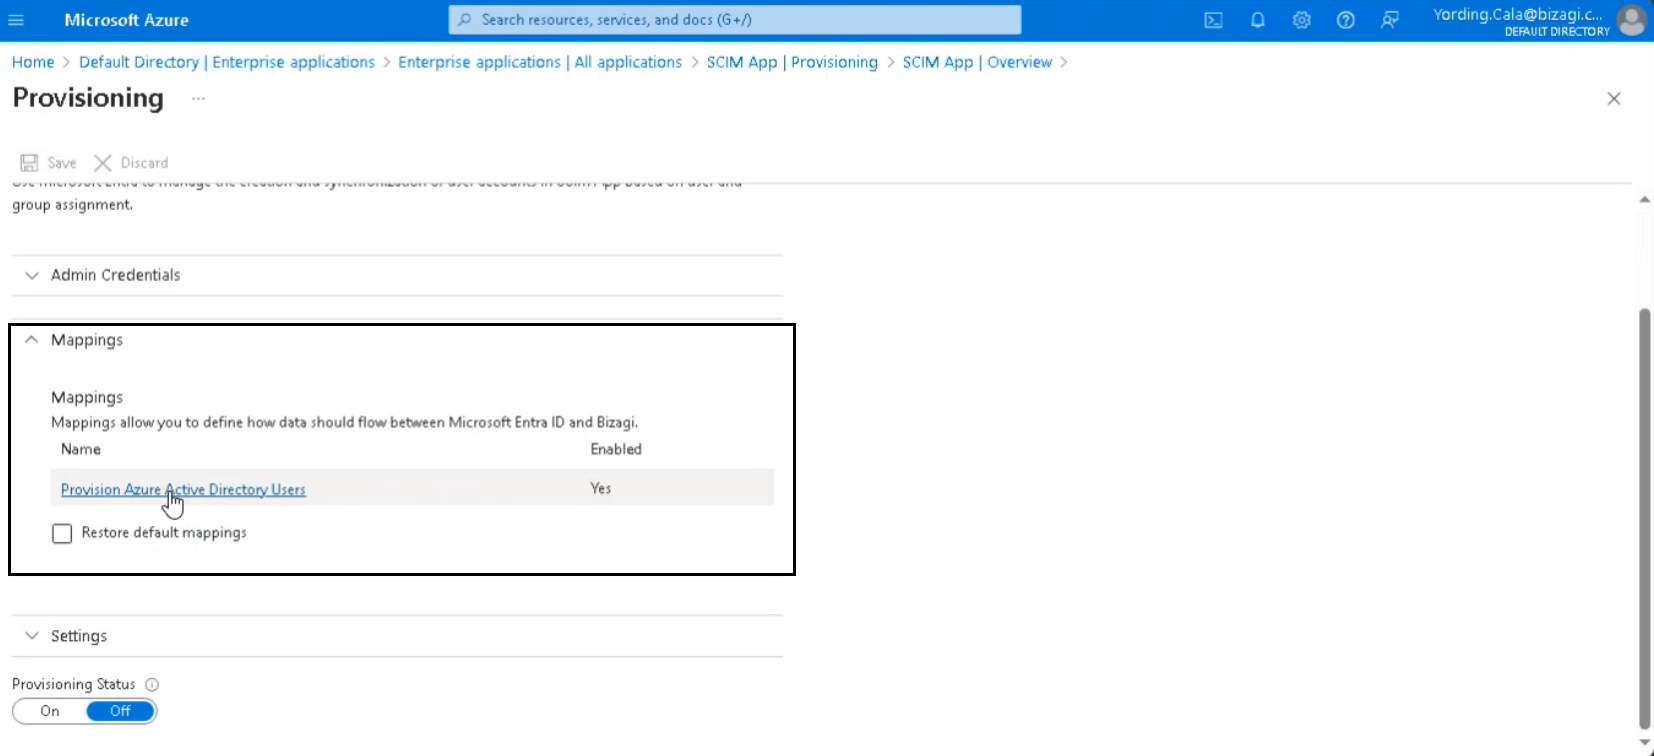
A new section opens. This section shows default attributes that are part of the Bizagi app that do not need to be modified.
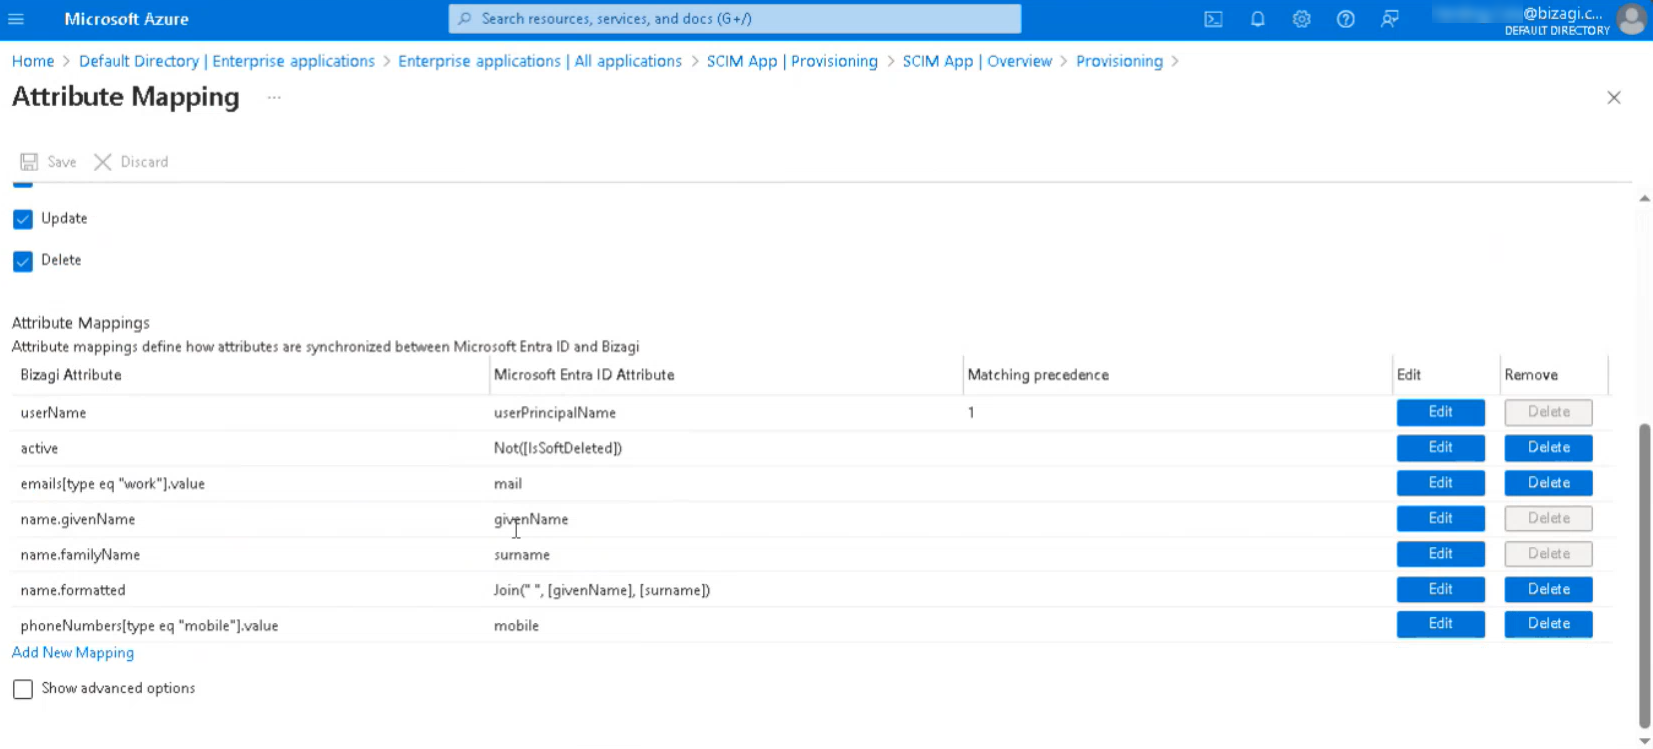
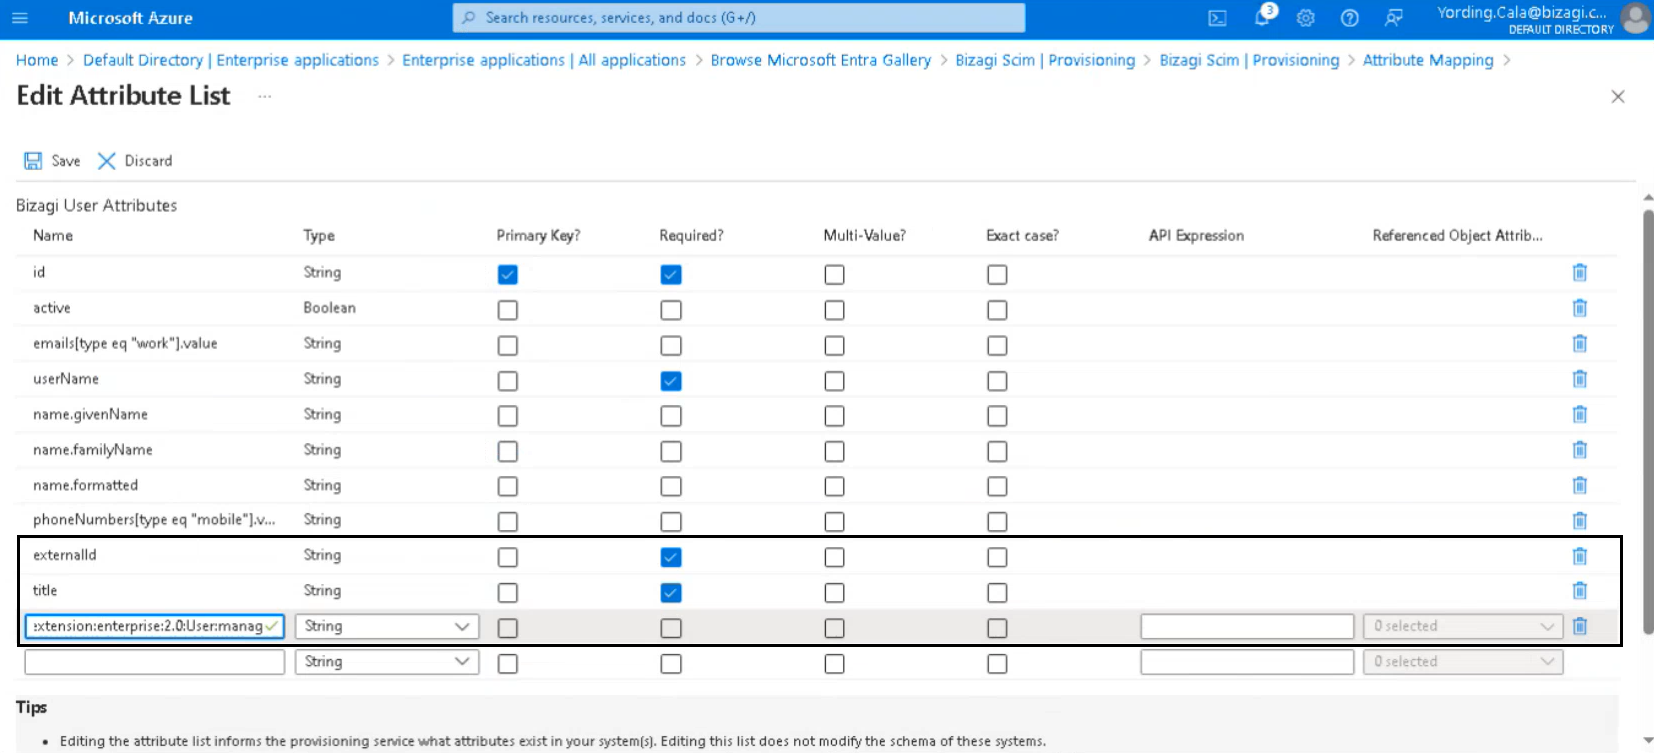
Nevertheless, for the mapping to be successful, you must add three attributes: externalId, title and the Bizagi Attribute (urn:ietf:params:scim:schemas:extension:enterprise:2.0:User:manager).
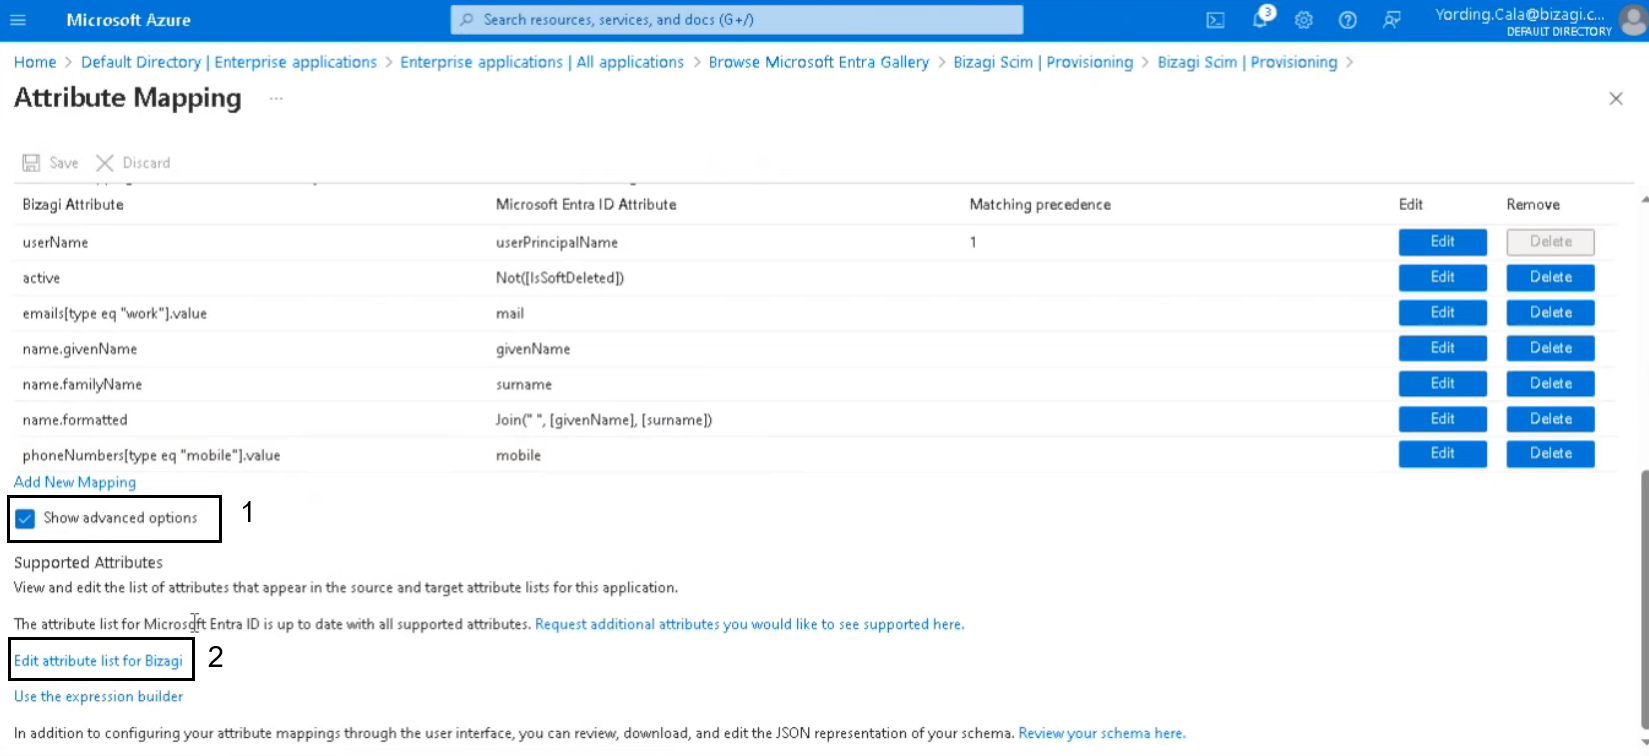
To add each one of them, you must click the Show Advanced Options option, and then select Edit attribute list for Bizagi.
For each new attribute, enter the name, select the type (String for name and title and Reference for the Bizagi attribute) and select the Required checkbox for the name and title attributes.
The Bizagi Attribute (urn:ietf:params:scim:schemas:extension:enterprise:2.0:User:manager) also requires that you select the Referenced Object Attribute shown in the image below.
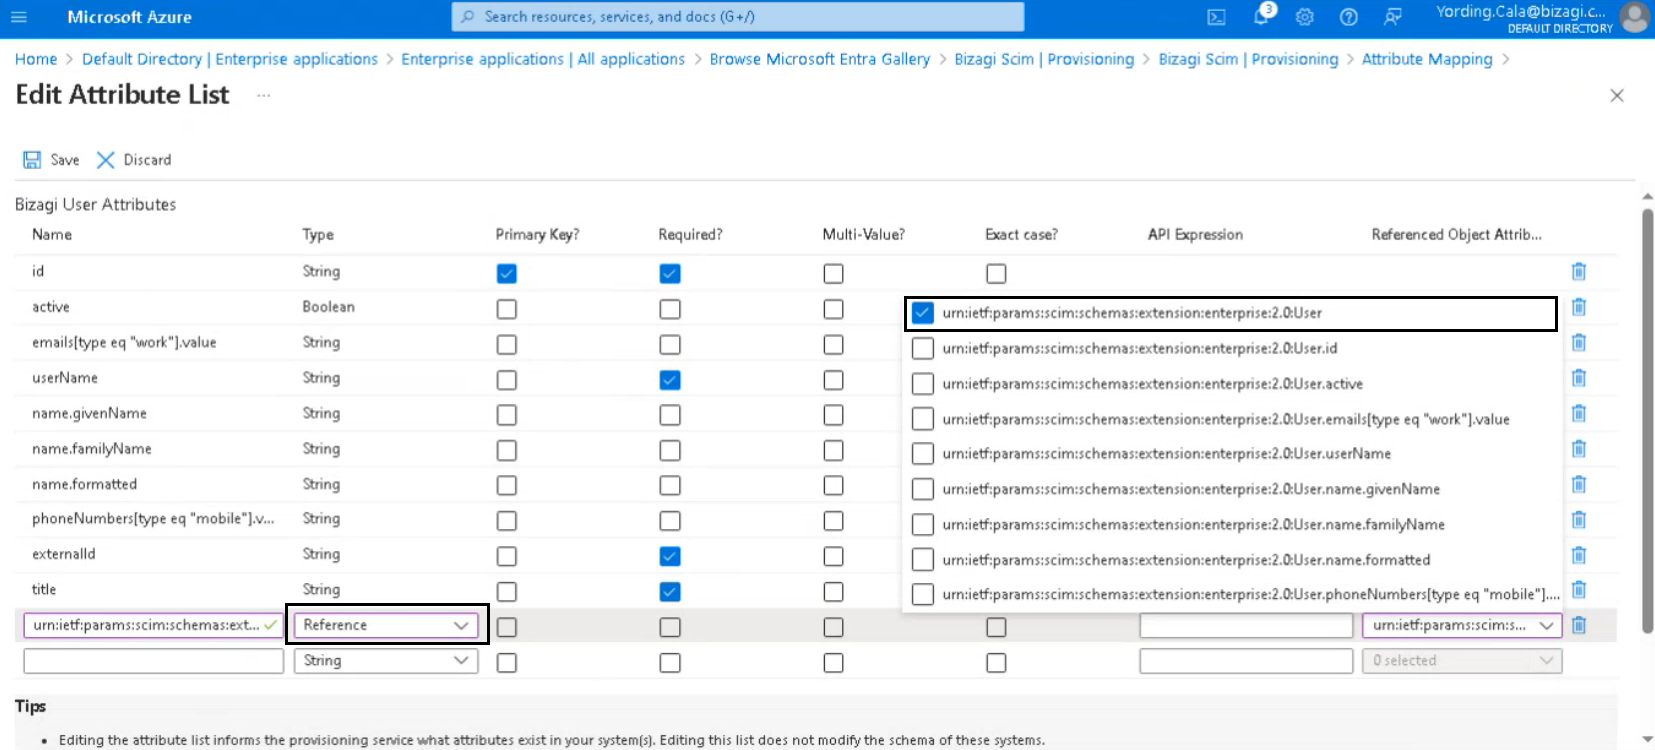
After adding the three new attributes, click Save.
Then, you must map the new attributes. To do so, click the Add new Mapping option.
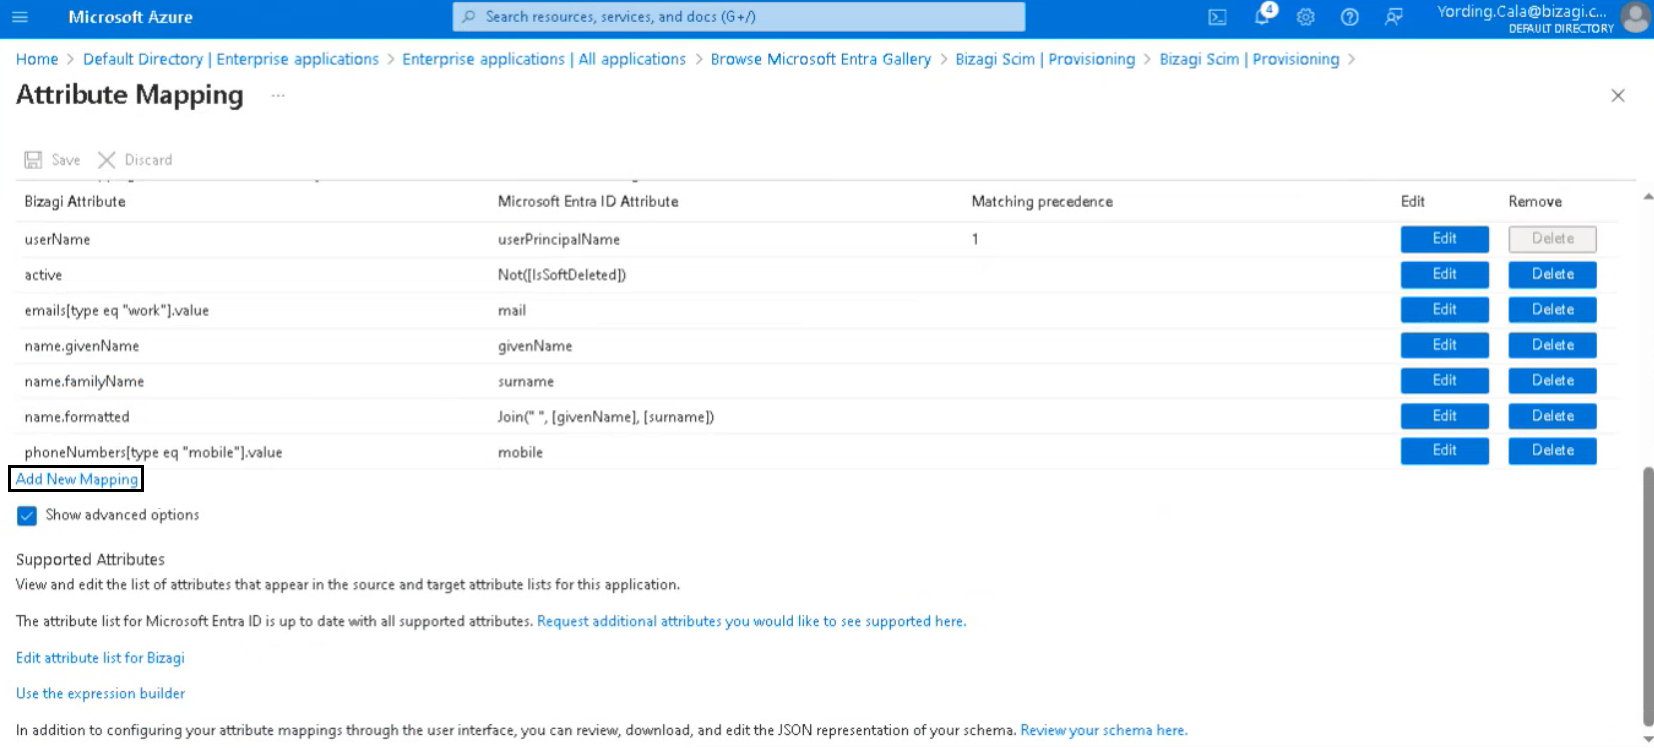
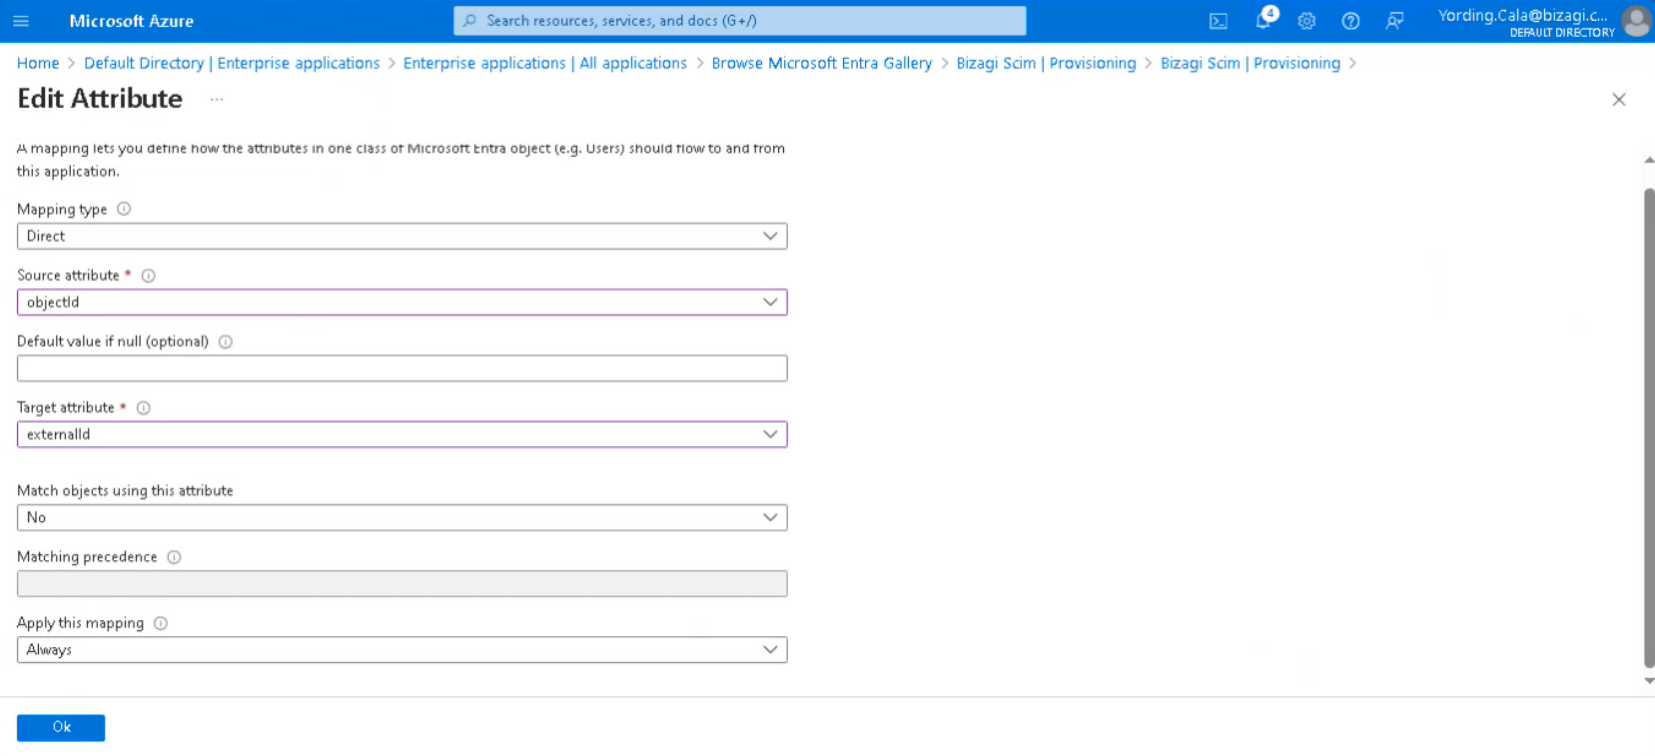
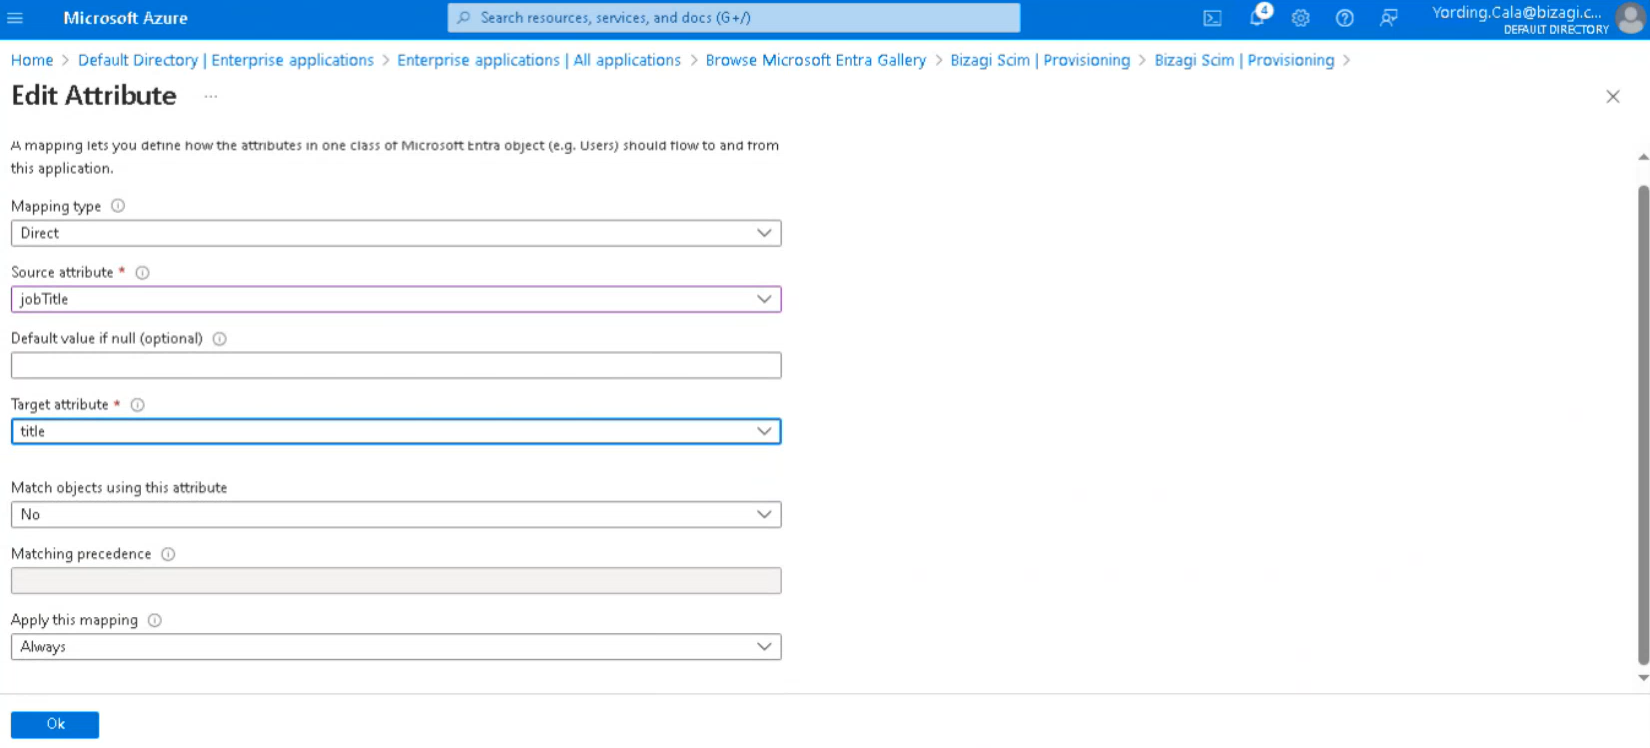
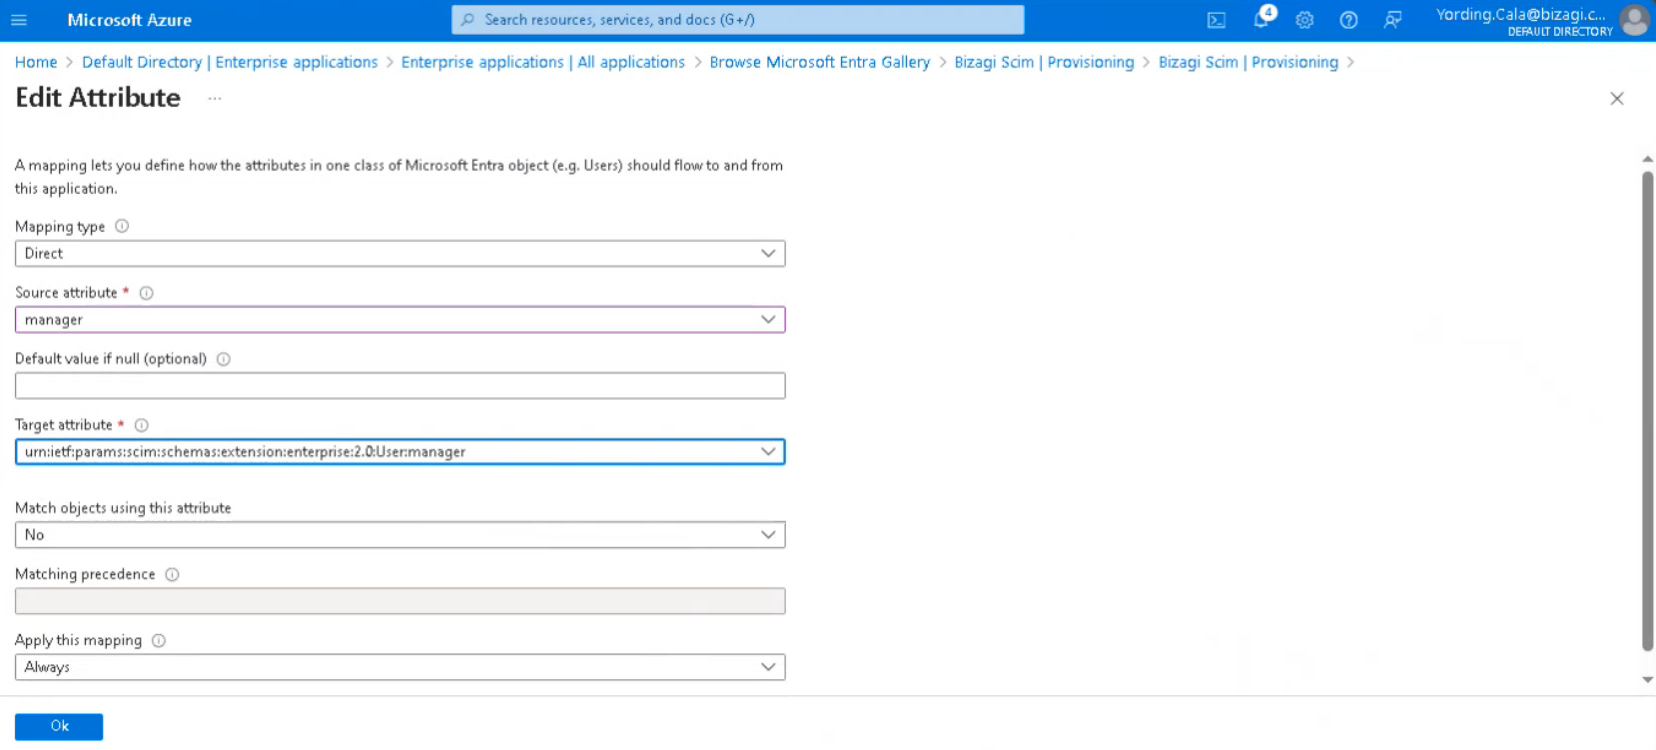
Then, select the Source Attribute and the Target Attribute.
For externalId, the Source Attribute is: objectId and the Target Attribute is: externalId
For title, the Source Attribute is: jobTitle and the Target Attribute is: title
For the Bizagi Attribute (urn:ietf:params:scim:schemas:extension:enterprise:2.0:User:manager), the Source Attribute is: manager and the Target Attribute is: urn:ietf:params:scim:schemas:extension:enterprise:2.0:User:manager
|
If you do not have the manager attribute mapped, you can use mail as the Source Attribute instead. |
When you are done, click the Ok button.
Last Updated 1/17/2025 11:00:57 AM