Use
The Label control presents read-only texts in the Work Portal. This texts can be fixed (defined in the Forms designer) or dynamic, resolving the XPath of an existing attribute or the result of an expression. You can think of Labels as titles, a set of instructions or useful information that can be displayed but not changed.
Related to attribute types
The contents of this control are not stored in an attribute. They are read-only exclusively.
However the control can be used to display dynamic values; displaying the value of an existing text-type or number-type attribute, or a text returned by an Expression.
Properties
Every control has a set of properties that allow to customize its behavior in the Work Portal. However, some properties are exclusive to a specific control. The following are properties exclusive to the Label control:
Basic tab
PROPERTY |
DESCRIPTION |
|---|---|
Label text |
Defines an static text to be displayed in the label. There is no limit on the label string length. This parameter is hidden when the Dynamic label is enabled. |
Dynamic label |
These parameters let you configure the label's behavior. •Allow: If enabled, the label will be set dynamically: by using a Data binding (value of an existing attribute) or an Expression. Otherwise, this value is a fixed string. •Label type: This parameter defines whether dynamic label is set using Data binding or Expression. •Data binding: Defines a XPath in the Data Model, navigating to a System or Parameter Entity from which the dynamic value is taken to be displayed. This value applies when the Label type selected is Data binding. •Display attribute: defines which attribute of the selected Data Binding is going to be displayed. This value applies when the Label type selected is Data binding. •Filter: Defines a filter over the selected Data Binding. When the filter returns more than one result, the label will display the first value that meets the condition. We recommend using filters that return only one value to make sure that you label contains the correct information. When the Label type selected is Data binding, this value is available and is mandatory. •Data Rule: Defines the Expression used to create the label value. The Expression must return a string that the label will then display in the Work Portal. Ideally, return a sentence within double quotes: "". |
Example: Using fixed label
A school implemented a Process in Bizagi to perform math tests. In order to show the test instructions, a Label control must be inserted onto the form.
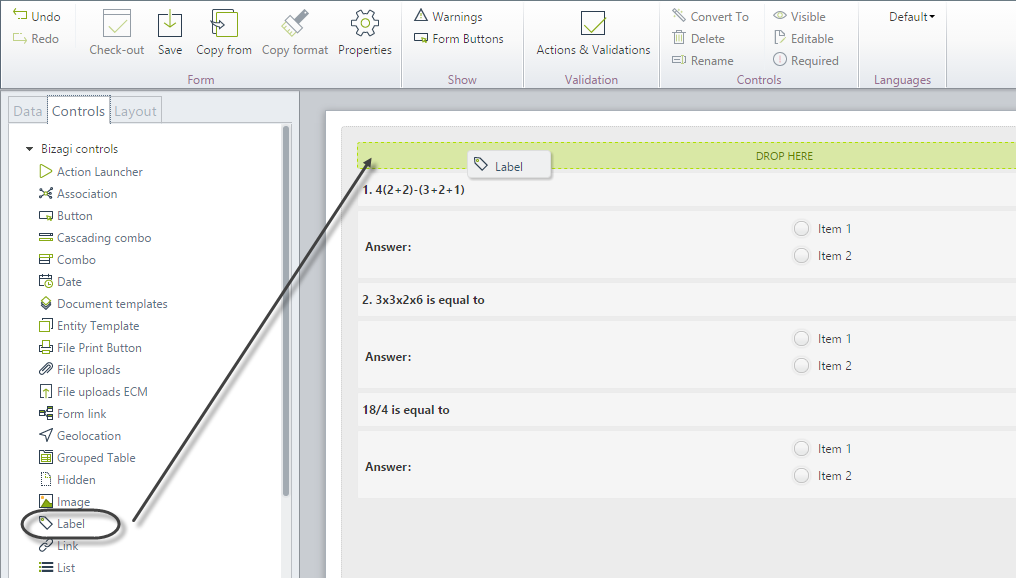
1. Drag and drop a label control, found in the Controls tab, onto the form.
For this example, the label is a fixed string, so the Dynamic label property is not allowed.
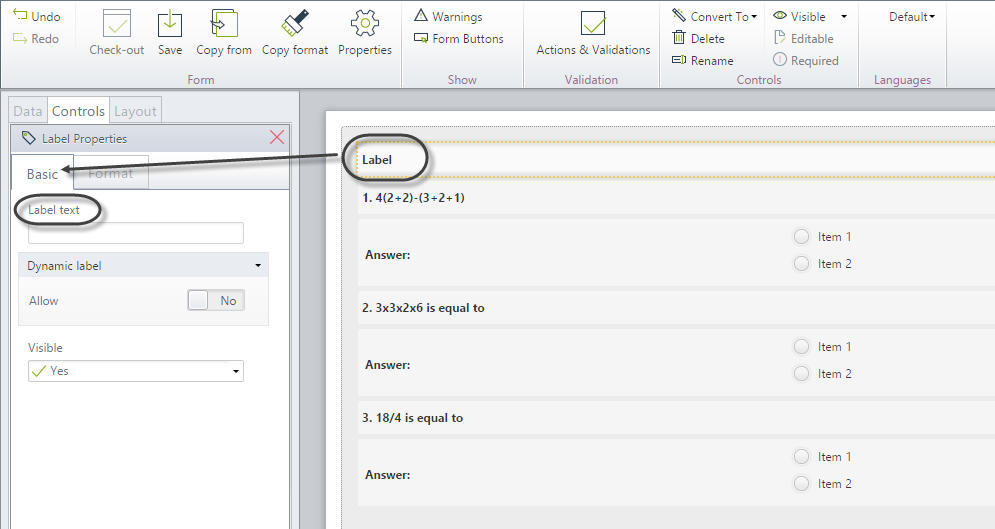
2. In the Basic tab of the control's properties locate the Label text property.
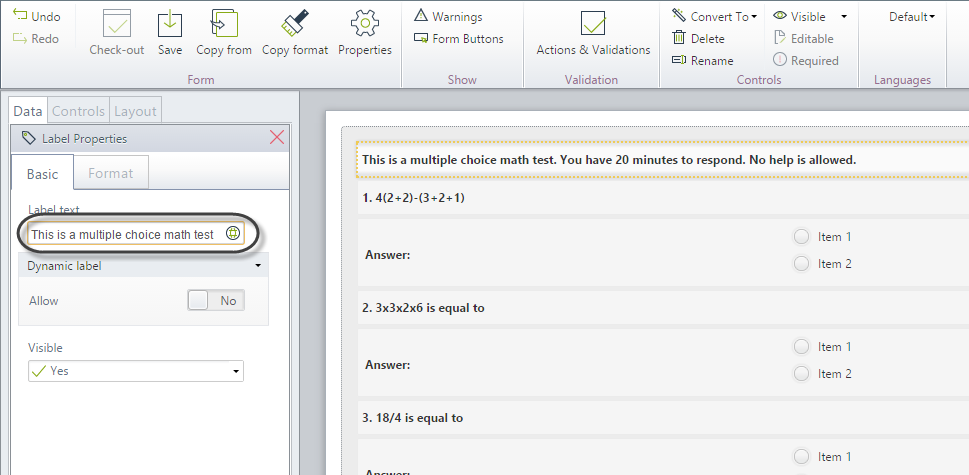
3. Type the desired text into the property. Save the form.
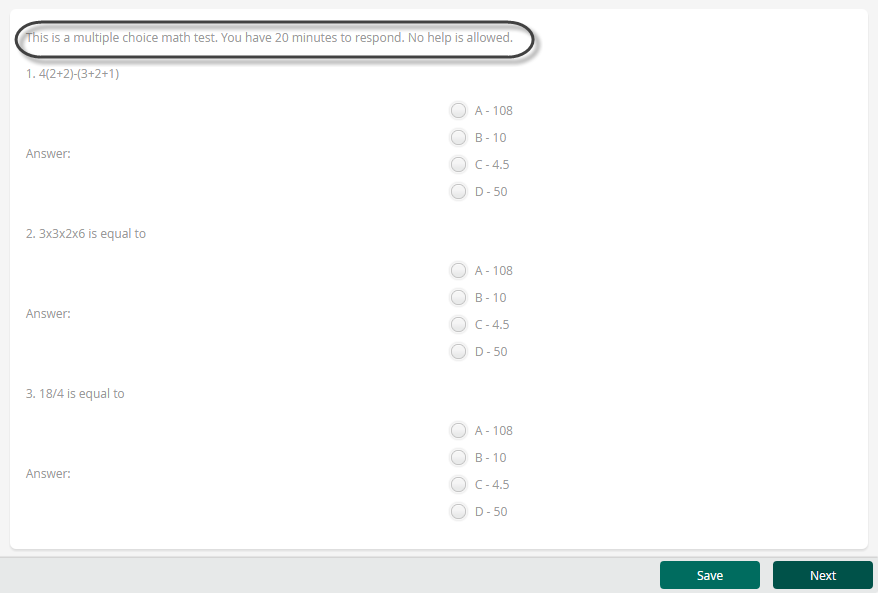
4. Go to the Work Portal to test the control.
Example: Using dynamic label using Data bindings
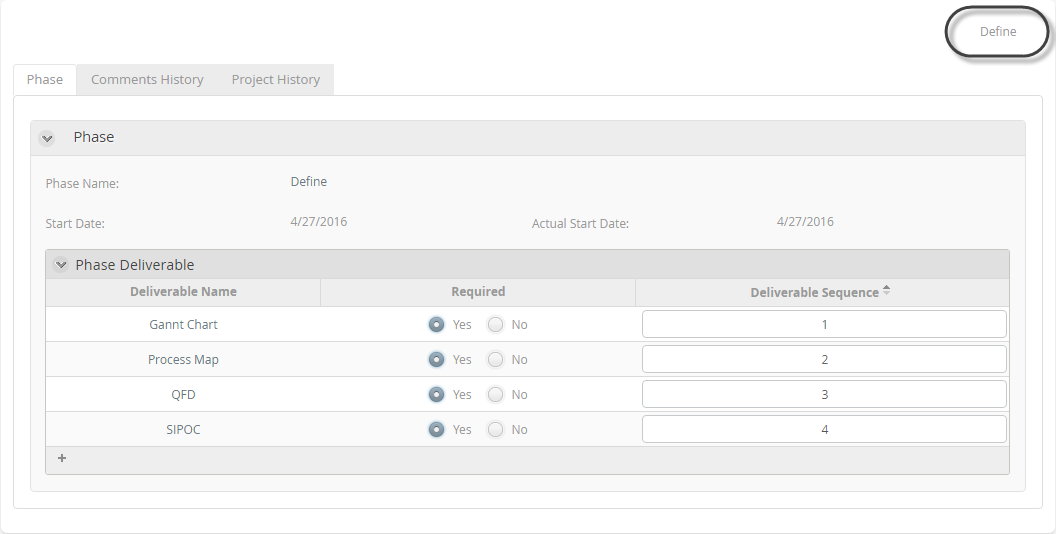
In the Six Sigma Project Management process, the end user requires to know the actual phase of the current activity. This phase will be displayed on the top right corner of the form. In order to meet this requirement, a Label control must be inserted onto the form.
1. Create a reusable form in process level. Drag and drop a label control, found in the Controls tab, onto the form.
For this example, the label is a dynamic string, so the Dynamic label property is allowed.
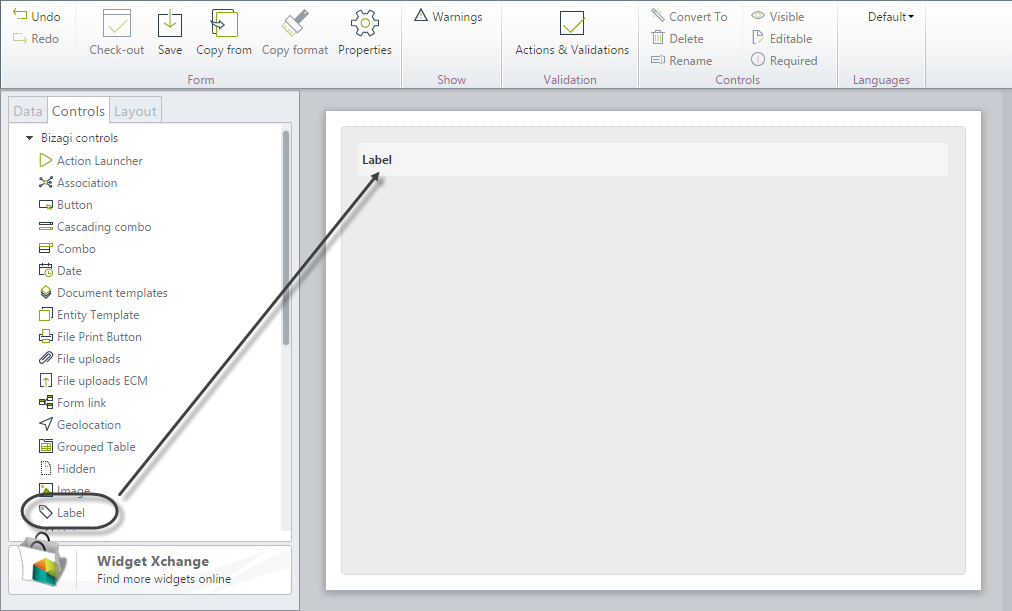
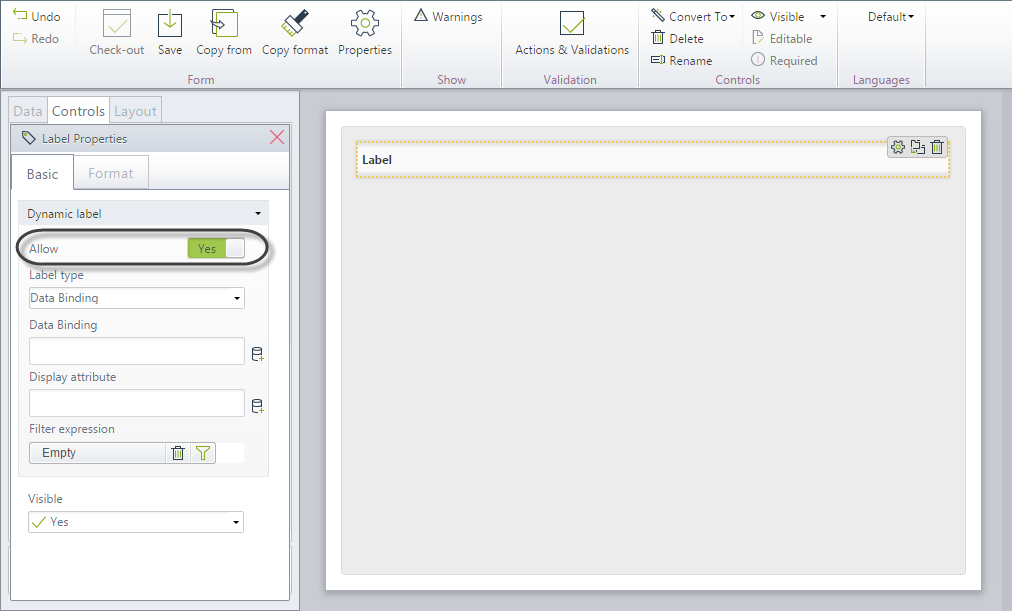
2. In the Basic tab of the control's properties locate the Dynamic label group, then set the Allow property to Yes.
3. Set the Label type to Data Binding and select the XPath of the Parameter Entity to be displayed, in our example, this entity is Phase.
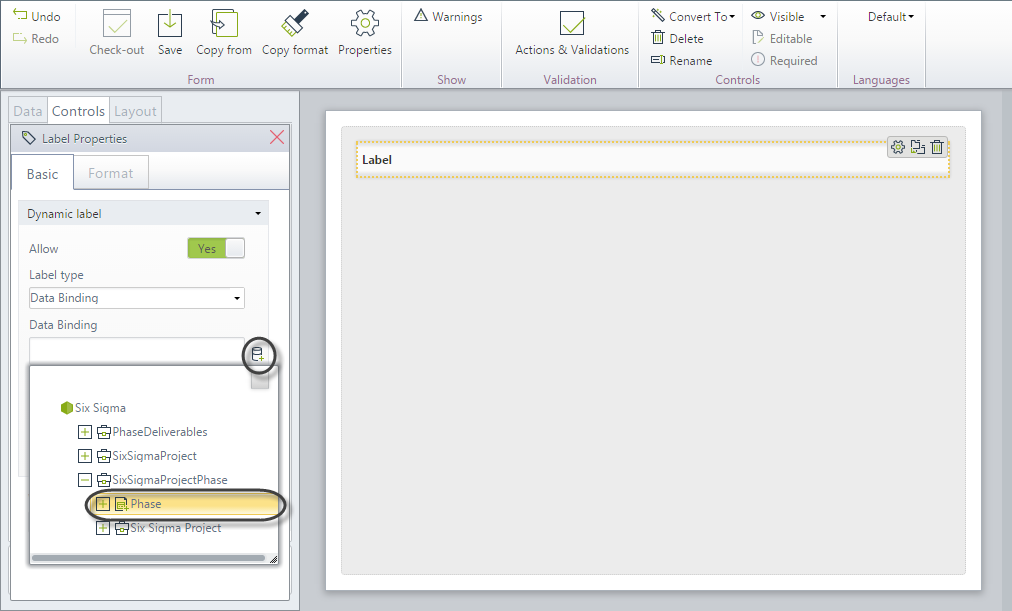
Once selected, the value for Data Binding property will be SixSigmaProjectPhase.Phase.
4. Select the Display attribute property. In our example, this attribute will be Phase Name.
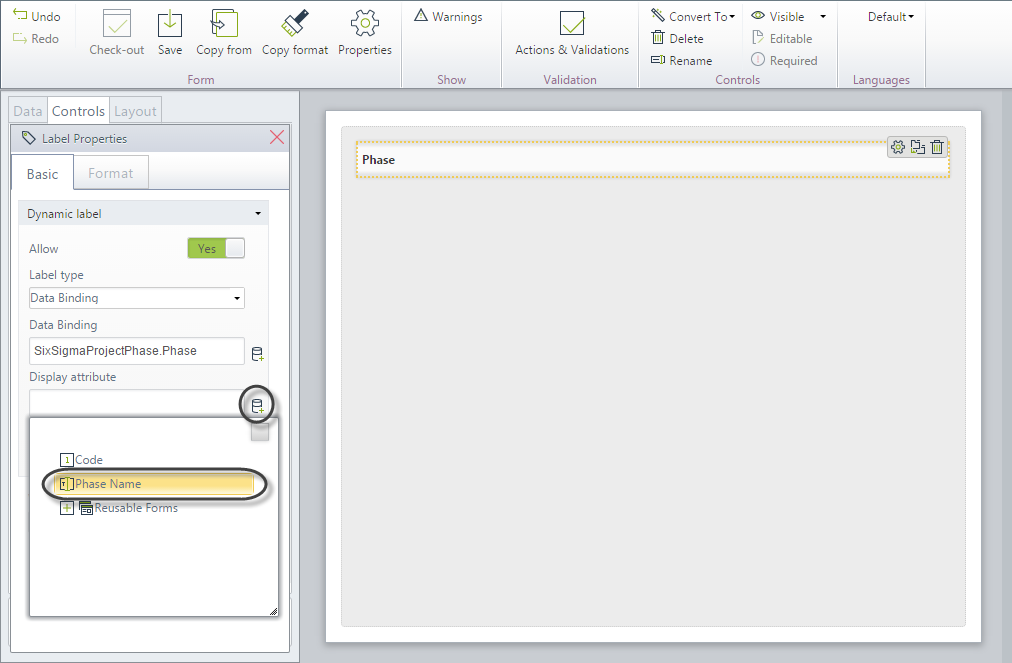
Once selected, the value for Display attribute property will be PhaseName.
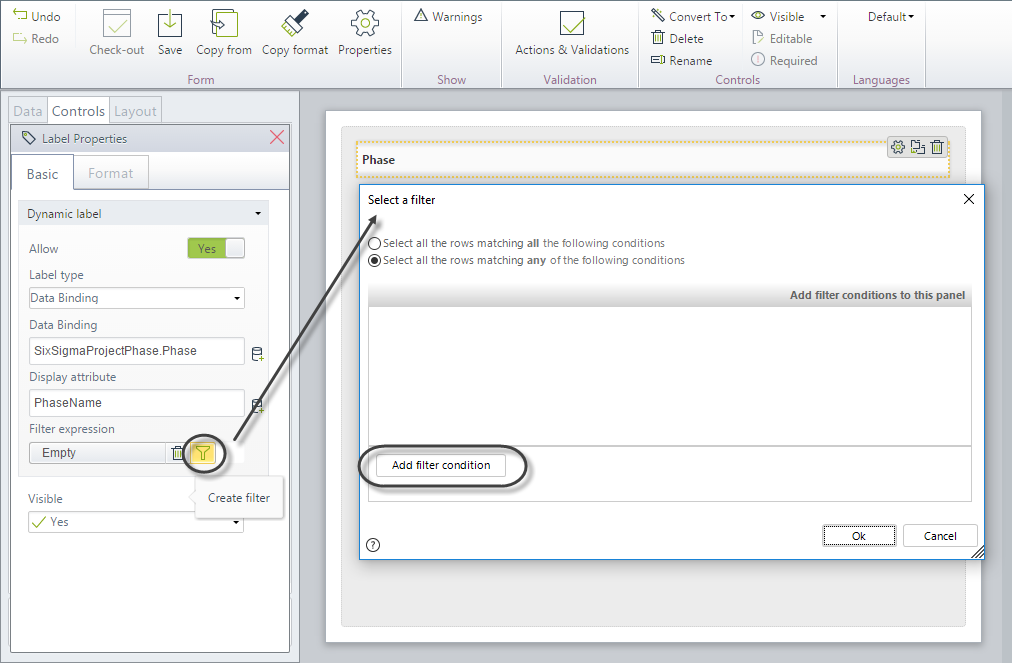
5. Select the filter for the selected Data Binding. Click on the Create Filter button.
The Select Filter window will be displayed. Click on Add filter condition.
|
When the filter returns more than one result, the label will display the first value that meets the condition. We recommend using filters that return only one value to make sure that you label contains the correct information. |
6. Enter the filter as follows:
•First argument: select Code.
•Operator: select is equal to.
•Second argument: select Evaluate data binding, then navigate and select <SixSigmaProjectPhase.Phase.Code>.
This sentence will make sure that the Phase displayed is actually the phase that the activity is on.
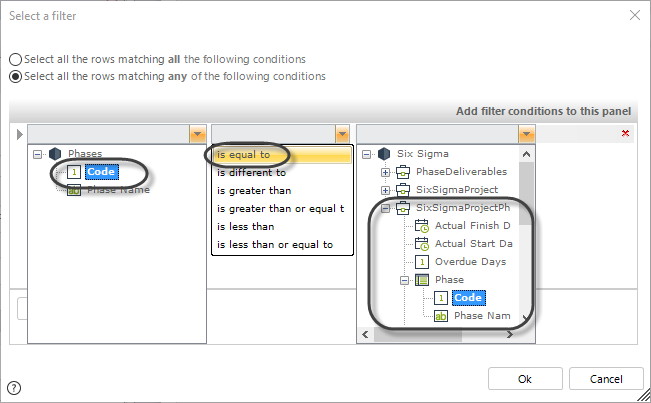
Once you have finished, click OK to save the filter.
7. Save the Reusable form and add it in every activity of the process.
8. Go to the Work Portal to test the control.
Example: Using dynamic label using Expressions
In the Vacation Leave Request process, the first activity requires to have a greeting message in which, the Requester's full name is displayed. When the requester has zero days available, this greeting message will display a warning about the situation. In the end, the Supervisor of the requester should be also displayed.
In order to meet this requirement, a Label control must be inserted onto the form.
1. Drag and drop a label control, found in the Controls tab, onto the form.
For this example, the label is a dynamic string, so the Dynamic label property is allowed.
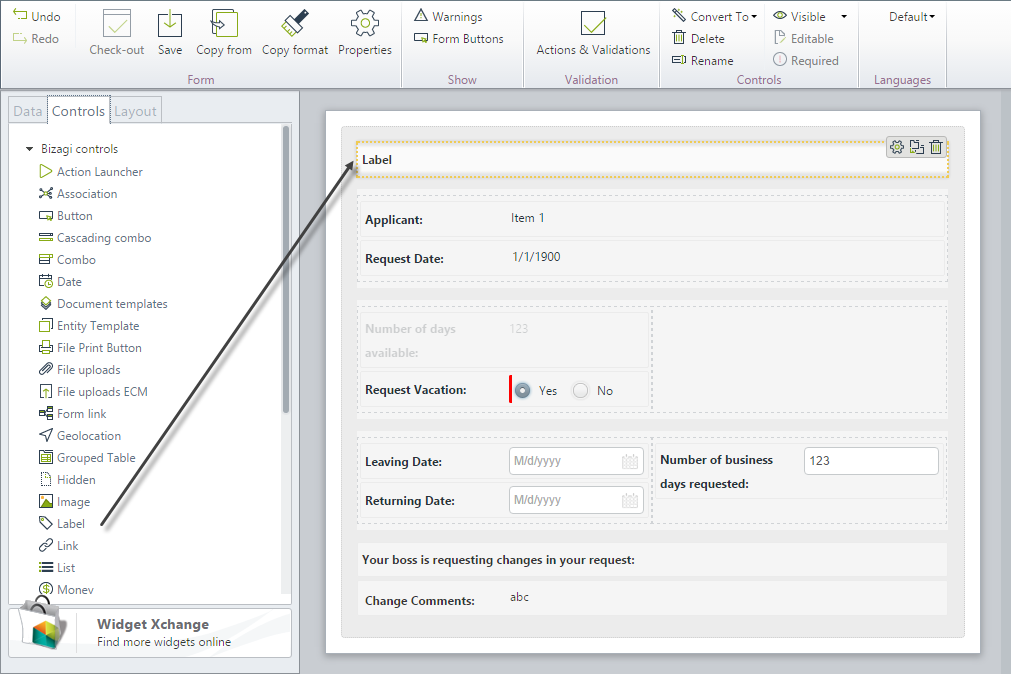
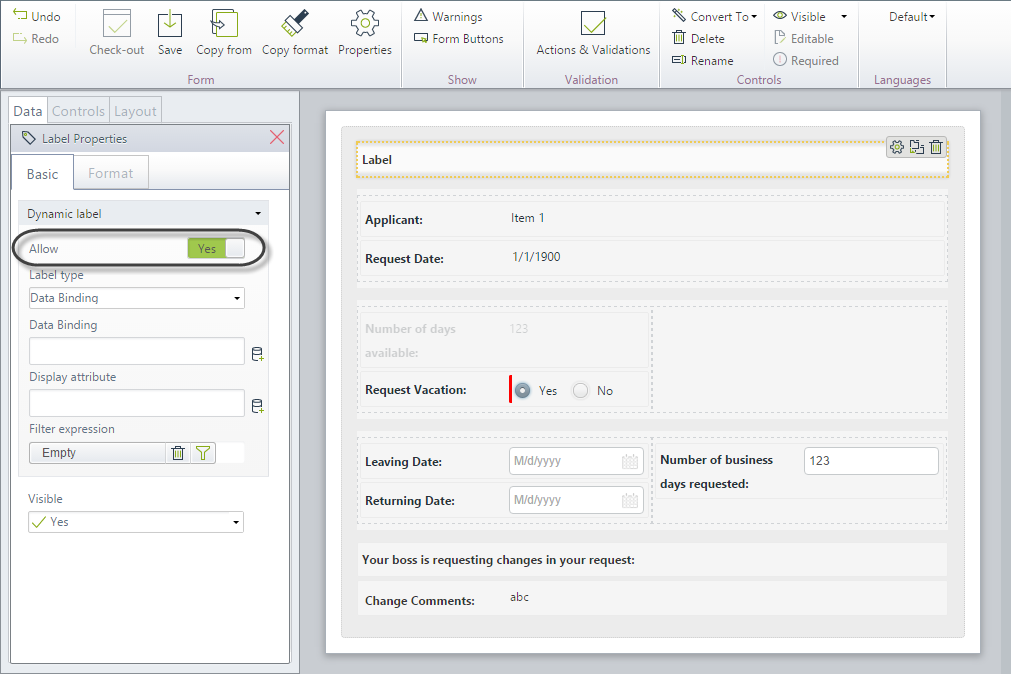
2. In the Basic tab of the control's properties locate the Dynamic label group, then set the Allow property to Yes.
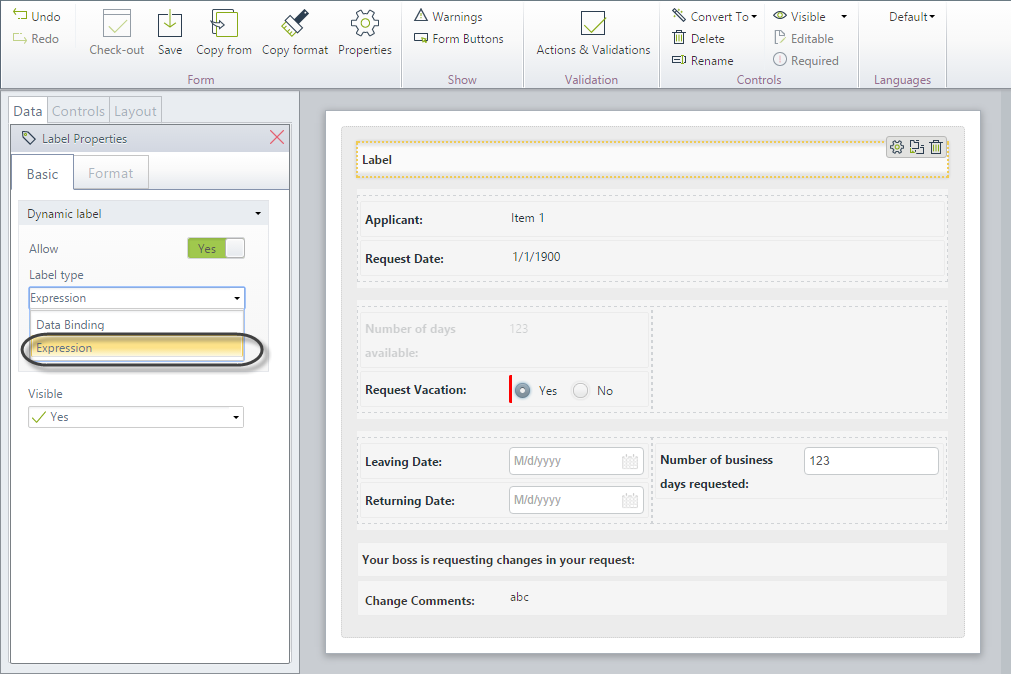
3. Locate the Label type property and select Expression.
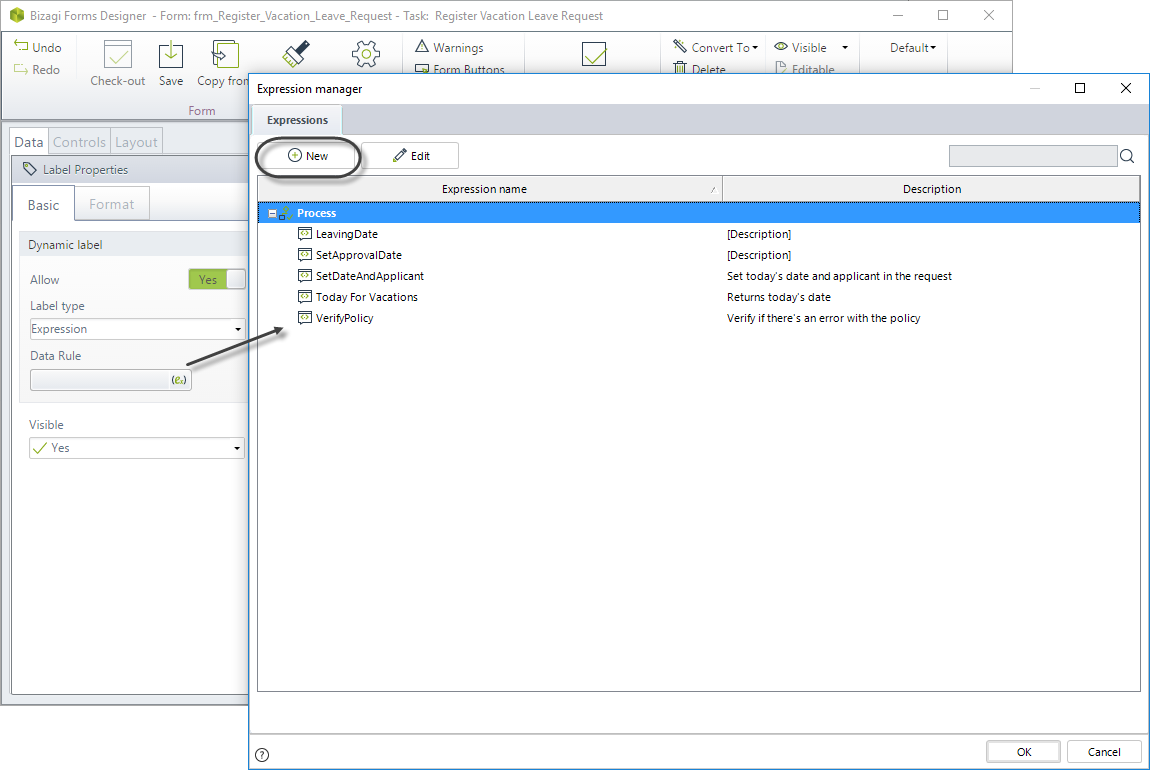
4. Click on Data Rule parameter, this will open the Expression manager and create a New expression.
5. Create the expression using the following code
var greetingMsg = "Hello! " + <VacationRequest.Applicant.fullName>;
var days = <VacationRequest.NumberOfDaysAvilable>;
if (days > 0)
{
greetingMsg += ", you have " + days;
greetingMsg += " available day(s) for your request."
}
else
{
greetingMsg += ", you don't have available days. Please, cancel this request";
}
greetingMsg += "\nThe approver for this request is "+ <VacationRequest.Applicant.idBossUser.fullName>;
greetingMsg;
The special text "\n" indicates a break-line. So, our message will be displayed in two lines, one for the available days and other for the Approval user.
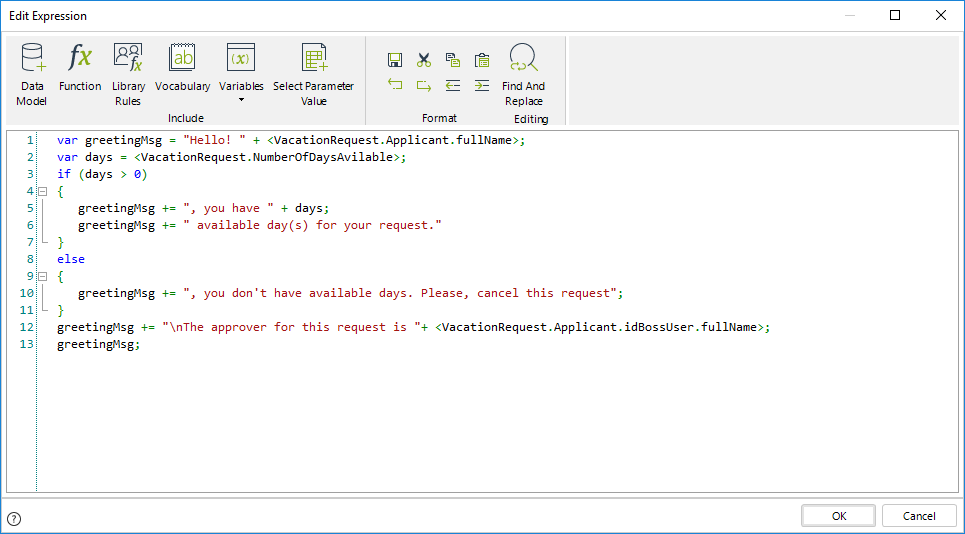
Once you have finished, save the expression.
6. Go to the Work Portal to test the control.
When the user has at least one available day for the request, the label will be displayed as follows:
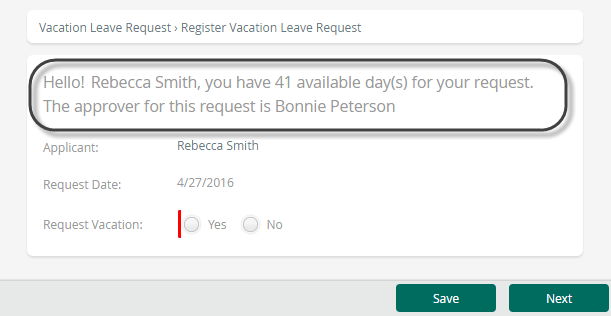
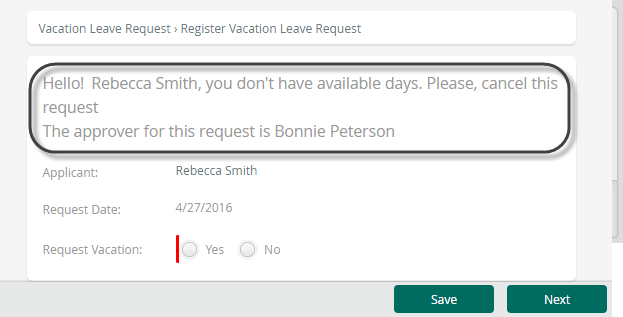
Otherwise, the label will be displayed as presented in the following image:
Last Updated 1/23/2023 12:04:32 PM