Overview
Regardless of the authentication type configured for Work Portal login, you can set up a schedule in Bizagi to import and synchronize users from your LDAP server.
With this option enabled, Bizagi runs a daily job to keep user account information—stored in your organization’s LDAP server—up to date.
Note that passwords are handled according to the selected Authentication method. If you choose LDAP or Windows Authentication, Bizagi does not store any passwords.
Before you start
To configure LDAP user synchronization, ensure the following:
•A valid LDAP URL in the proper format (LDAP over SSL is supported).
•A username and password with permission to read user information.
Steps in Bizagi
To configure and test LDAP synchronization in your project, you’ll need to provide connection details, credentials, and import settings. This is done across three tabs, following the next steps:
1.Enter connection and import settings
2.Map LDAP attributes to Bizagi attributes
3.Define default values (optional)
4.Test and save your configuration
|
You can later update these settings for specific environments (Test or Production) through the Management Console. |
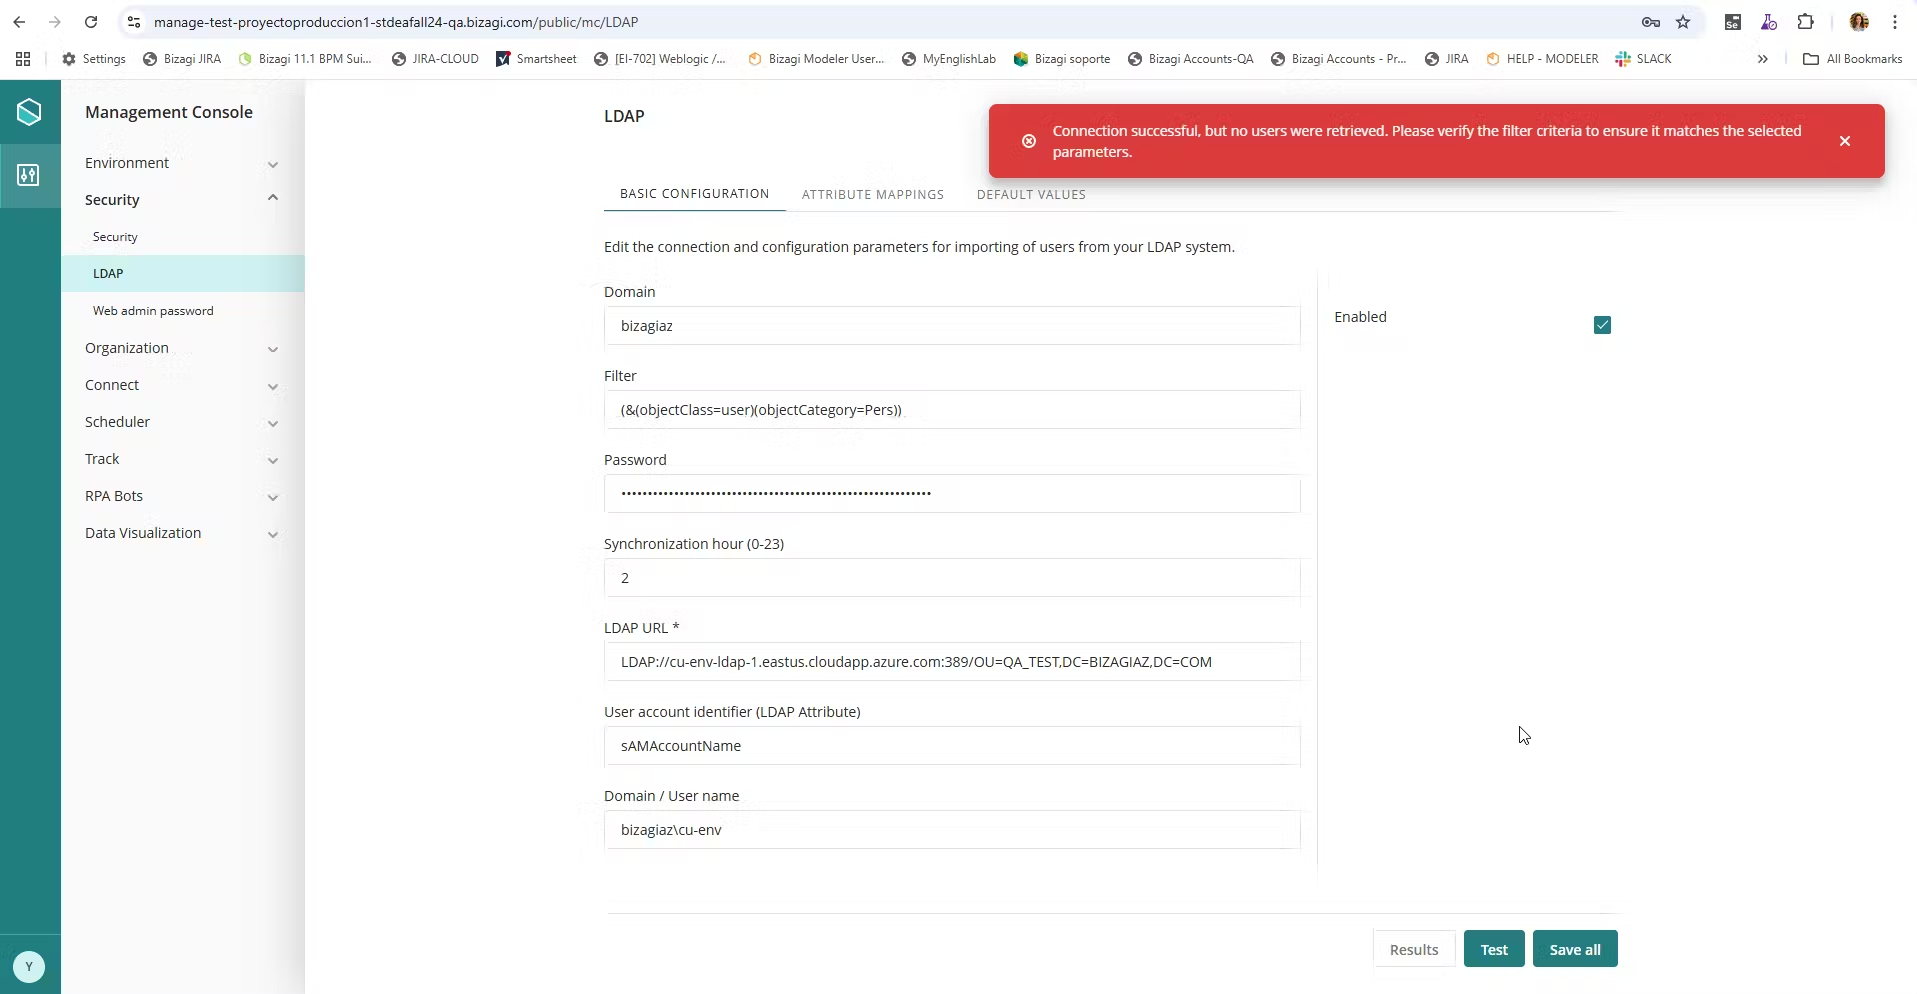
1. Enter connection and import settings
This is done in the Basic configuration tab. Start by enabling LDAP synchronization via the Enabled checkbox.
Then complete the following sections:
Setting |
Description |
|
|---|---|---|
Connection |
LDAP URL |
Specify the URL of the LDAP server. Use LDAP:// for standard connections or LDAPS:// for secure (SSL) connections. |
Domain\username |
Specify a username along with its domain, which will be used as the authenticated user performing the synchronization. This user must have read access to these definitions. |
|
Password |
Specify the password for the domain's username used as the authenticated user performing the synchronization. |
|
Synchronization hour |
Enter the desired execution time in HH:MM format (24-hour clock). To ensure proper processing by the system, note the following: •If the selected time is very close to the current time, or •If the selected time has already passed today, The synchronization will be automatically scheduled for the next day at the specified time. Example: If the current time is 14:29 UTC and you set the execution time to 14:30, the process will run tomorrow at 14:30 UTC. All times are based on UTC for the Automation Service (cloud). |
|
Import settings |
Filter |
Define a filter to import only relevant users, based on LDAP attribute criteria. This is highly recommended, especially during testing. View more information about filter options at LDAP attributes. |
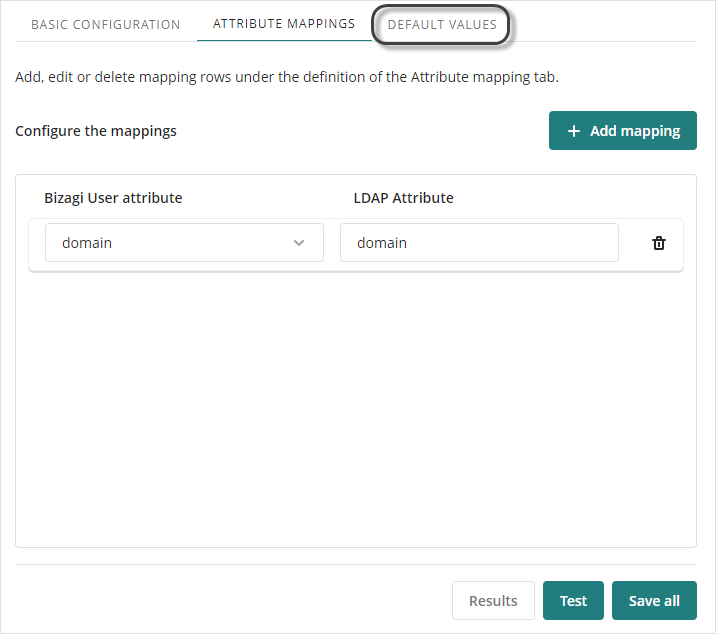
Domain |
Domain name to associate users with in the Bizagi WFUser entity. |
|
User account identifier |
LDAP attribute used to uniquely identify each account (e.g., sAMAccountName is the common LDAP attribute corresponding to an user's account name). |
|
|
If the domain field is left empty, any user whose LDAP data does not include a domain will be excluded from synchronization. To include these users, define a Default value for accounts without an LDAP domain.
|
Once all values are configured, click the Test button.
A success message confirms that the filter and connection are valid.

An error message appears if the filter cannot be applied.
|
Note that you may define the connection and all relevant LDAP import settings separately for each of your different environments (Development, Test and Production).
The initial deployment applies this configuration to all environments. Afterward, changes must be made locally in each one. |
We strongly recommend applying a filter to exclude records that have empty or null values for these fields:
•contactEmail
•fullName
•User account identifier
2. Map LDAP attributes to Bizagi attributes
LDAP account information is synchronized into Bizagi's WFUser System entity. By specifying attribute mappings, you define how information from LDAP attributes is stored in WFUser attributes.
To do this:
1.Click the Attribute mappings tab.
2.Click the Add Mapping button.
3.Select a WFUser attribute and map it to the corresponding LDAP attribute.
|
You cannot map the idUser attribute, to preserve data integrity. |
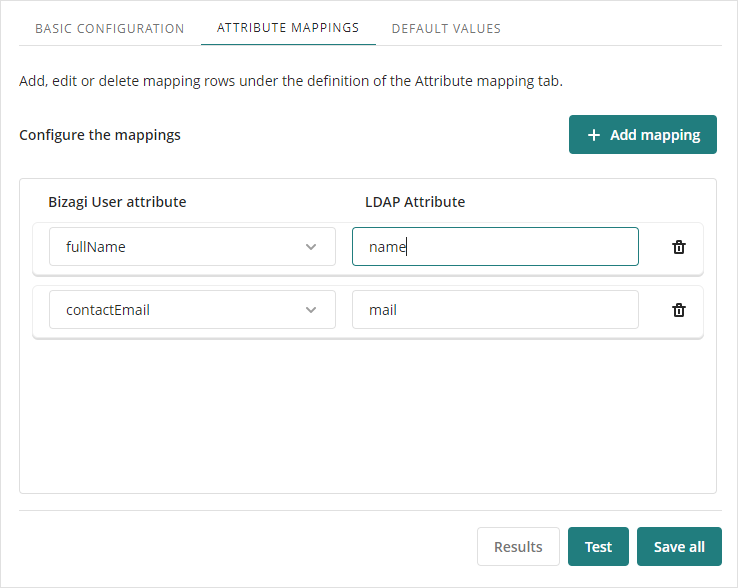
In this example, we illustrate mapping the mail and name attributes because these are explicitly required in Bizagi: contactEmail and fullName.
The attribute used as the user account identifier is also mandatory and cannot be null.
The following is the list of default WFUser attributes available for mapping:
Attribute |
Data type |
Comment |
|---|---|---|
contactEmail |
String |
Sets the user’s email address. Mandatory field (cannot be null). |
CreatedCasesSkipAssignRules |
Boolean |
Indicates whether cases created by this user in Development or Test environments should skip allocation rules. |
DelegateEnabled |
Boolean |
Indicates whether task delegation is enabled for this user. |
domain |
String |
Specifies the user's domain. Mandatory field (cannot be null). |
enabled |
Boolean |
Indicates whether the user is enabled in Bizagi. |
enabledForAssignation |
Boolean |
Indicates whether the user is eligible for task allocation. |
fullname |
String |
Sets the full name of the user. |
idArea |
Integer |
Identifier of the user’s area (from the AREA table).* |
idBossUser |
Integer |
Identifier of the user's boss (from the WFUser table).* |
idDelegate |
Integer |
Identifier of the delegated user (from the WFUser table).* |
idLocation |
Integer |
Identifier of the user's location (from the LOCATION table).* |
idTimeZone |
Integer |
Identifier of the user's time zone (from the BATIMEZONE table).* |
idWorkingTimeSchema |
Integer |
Identifier of the user's working time schema (from the WORKINGTIMESCHEMA table).* |
language |
Integer |
Identifier of the user’s preferred language. |
notifyByEmail |
Boolean |
Indicates whether the user should receive email notifications (both automatic and custom). |
userName |
String |
Sets the username. Mandatory field (cannot be null). |
userStartPage |
Integer |
Sets the default landing page after login. Options: 1.Automatic (default): "Me" if assigned to a Persona, or "Inbox" otherwise. 2.Inbox: Always opens the Inbox. 3.Me: Always opens the Me page. |
* Available for on-premises installations, as the identifier is retrieved directly from the database.
Required Attributes and Synchronization Behavior
You must map the following attributes:
•contactEmail
•domain: Bizagi recognizes domains in strings like "domain\username" and "username@domain"
•userName
Important Notes for Designing Synchronization
1.None of these three fields (contactEmail, domain, userName) should be null or left blank.
2.The combination of userName + domain uniquely identifies a user in Bizagi. No two users can share the same combination.
3.During synchronization, if Bizagi finds an existing user with the same userName and domain, it treats this as an update to that record.
4.The userName is typically taken from either the userPrincipalName or sAMAccountName LDAP attribute.
5.If Bizagi receives an invalid value (i.e., an unrecognized identifier), it will ignore it.
6.Fields not listed in the attribute table above should be ignored, as they have been deprecated (e.g., offlineForms).
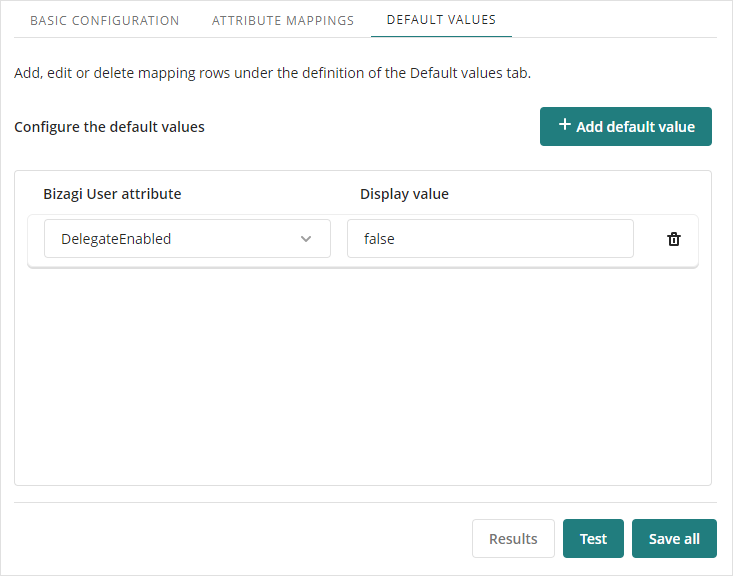
3. Define default values (optional)
This step is optional but recommended if you want to assign default values to WFUser attributes when the corresponding LDAP attribute is not present.
To do this:
1.Go to the Default values tab.
2.Click Add Default value.
3.Select a WFUser attribute and assign a value to be used when no LDAP value is provided.
4. Testing and saving your configuration
Once you finish setting up the configuration, click the Test button to preview the synchronization results.
Keep in mind that this process might take some time if you have a large number of users. For this reason, it is recommended to apply a filter to limit the results during testing.
The retrieved records will be displayed in the last tab, Test results.
|
Running this test does not trigger an actual synchronization in the Bizagi database. It is only intended to validate the configuration. The final synchronization will be performed by the Scheduler service based on your settings. |
Once the test is complete, click Save to store your configuration.
The synchronization of LDAP accounts (objects) is handled by the Scheduler service in your project. To initiate the synchronization and have users appear in the Work Portal, you need to restart the environment. You can do this by using a Maintenance Window. Once the environment is restarted, the Scheduler will run the synchronization job at the configured time.
When the process is completed, LDAP users will be automatically created in Bizagi.
To verify what happened during the synchronization (including inserted and updated records), you can check the Scheduler's trace log. Look for lines starting with INFO_LDAP, which contain the details of the synchronization activity.
|
If a user is no longer present in the LDAP server, Bizagi will automatically disable that user during the import. This is a logical deletion (the user is not physically removed from the database). |
Last Updated 10/14/2025 12:04:37 PM