Overview
Once you have diagrammed your process, you may need to change diagram elements, add additional connections or add more elements to improve and complete it.
We will continue using the Purchase Request Process example, mentioned in the previous section, to show you how to make these changes easily.
Moving elements
If you need to move a diagram element from one place to another click on it and drag it to the new position. When doing so, an orange shadow will appear to indicate where the object will be relocated.

Deleting elements
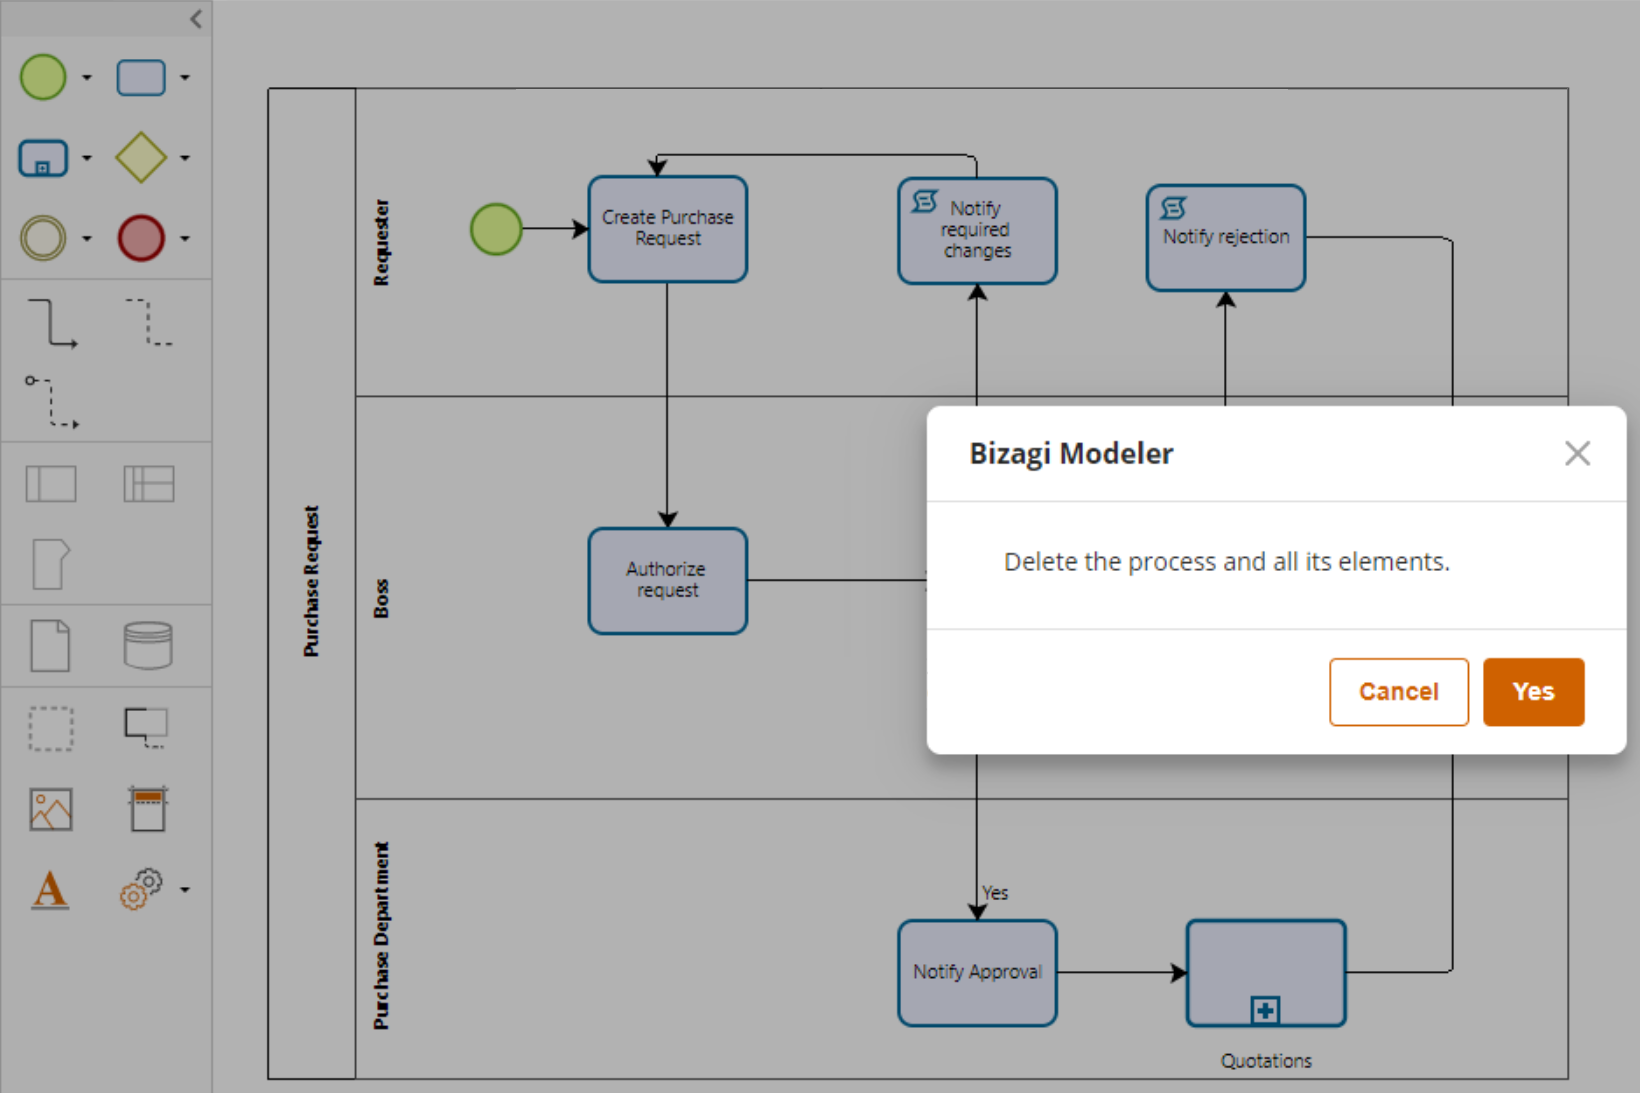
If you need to delete a diagram element click on it and press the Delete button. Elements like tasks, gateways or events, will be deleted automatically. However, when trying to delete processes, lanes or milestones that are not empty, a confirmation message will appear before its deletion.
Change/Transform elements
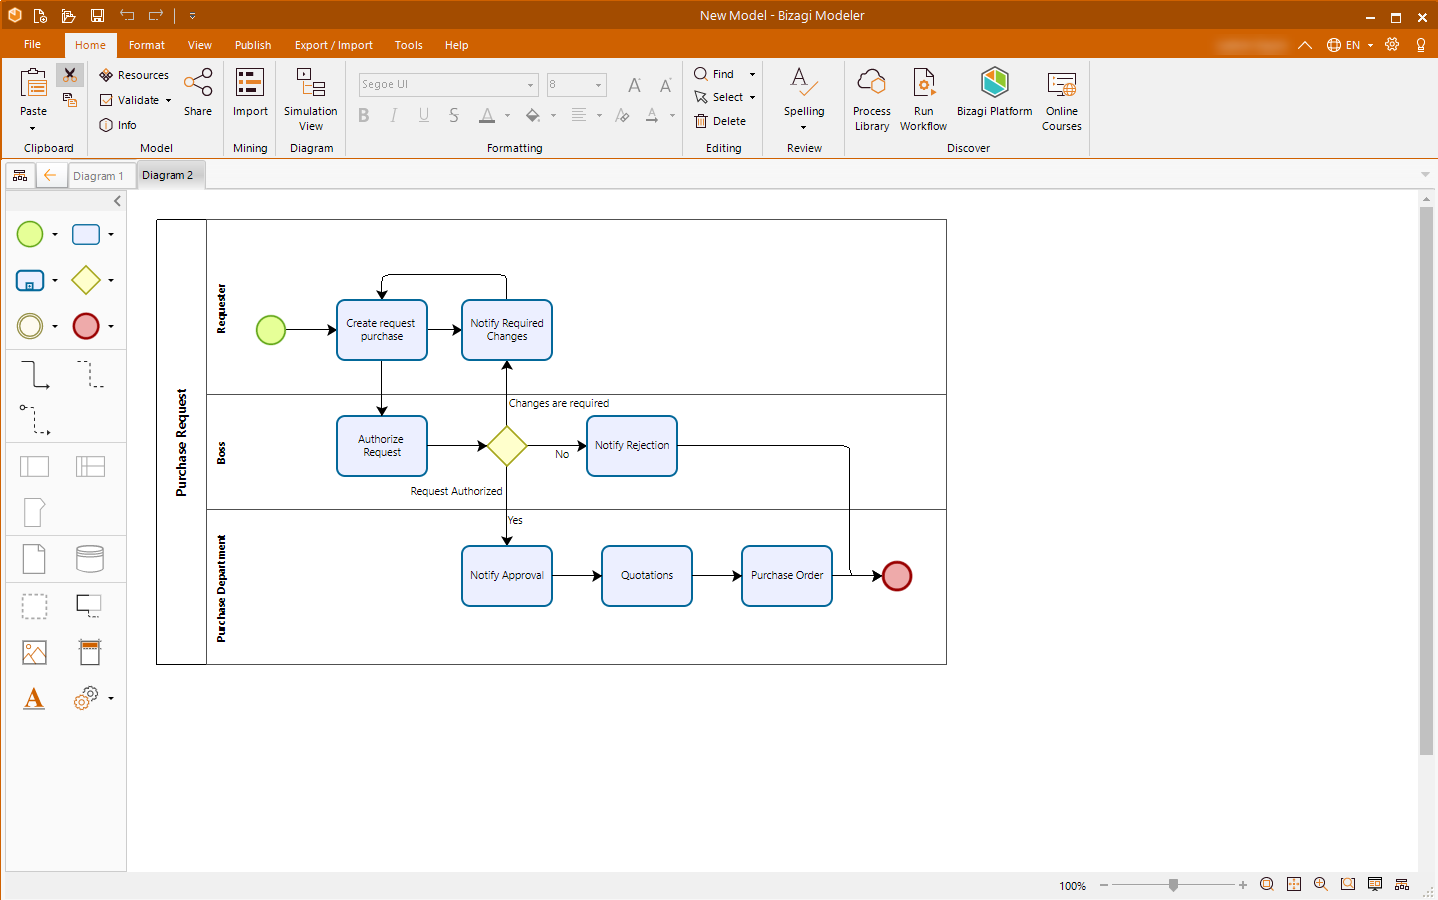
The following image shows the initial Purchase Request process we designed. However, we need to make some adjustments.
•Change the Notification Tasks to Script Tasks, since they are emails automatically sent based on a decision by the Immediate Supervisor (Boss).
•The Quotation Task is actually a Sub-process where several activities take place to be able to select a supplier.
•The Purchase order Task is also a Sub-process where the Purchase Order is sent to the Supplier and created in the ERP system.
Bizagi Modeler allows you to change elements within the same category. You do not need to introduce another element to the Process, but merely change the existing element.
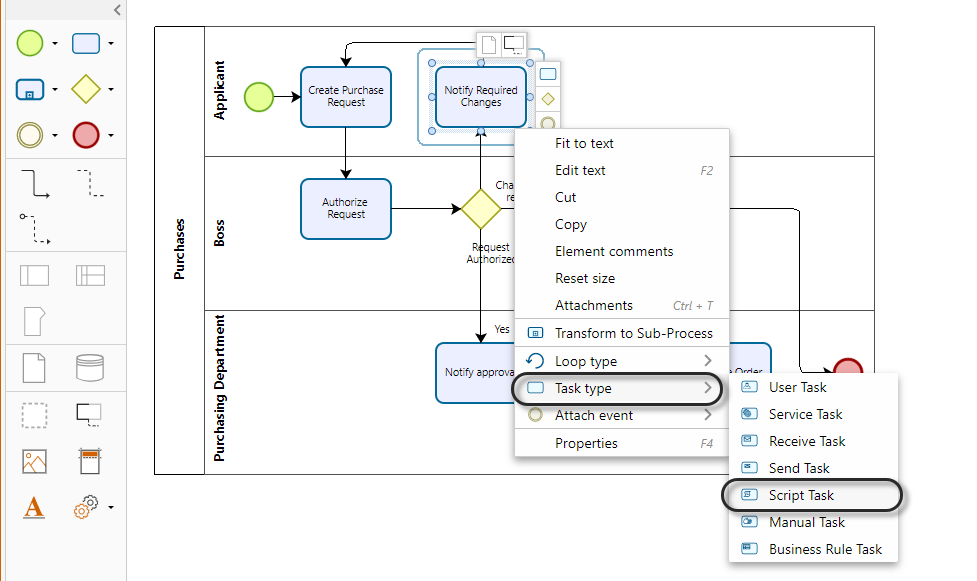
1. To change the Notification Task to a Script Task, right-click on the diagram element and select Task Type from the display menu.
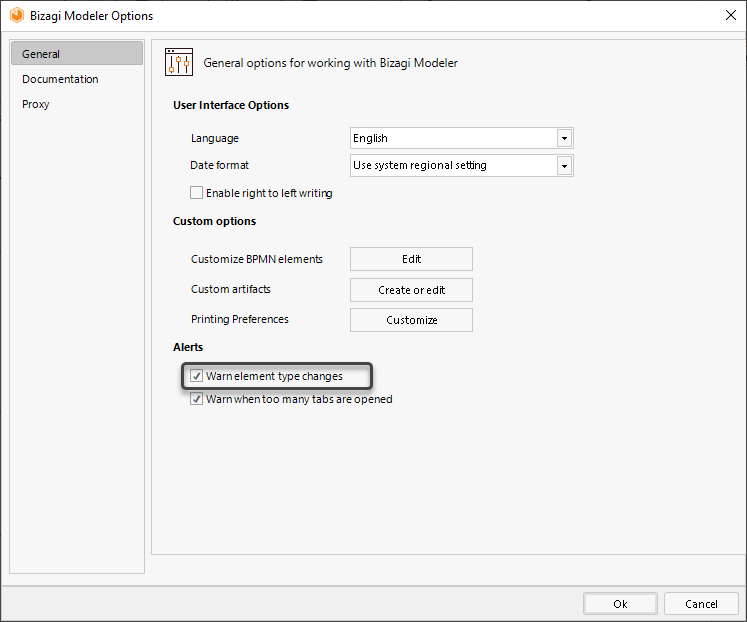
Choose the appropriate Task type from the drop-down list, note that once you change the task type you will lose any information, entered into extended attributes, that has not been shared. You will only receive a warning message if you select the Warn element type changes checkbox (located in the Show/Hide group under the View tab).
2. Follow the same procedure for the other two Notifications Tasks. The following image shows your progress up to this point.
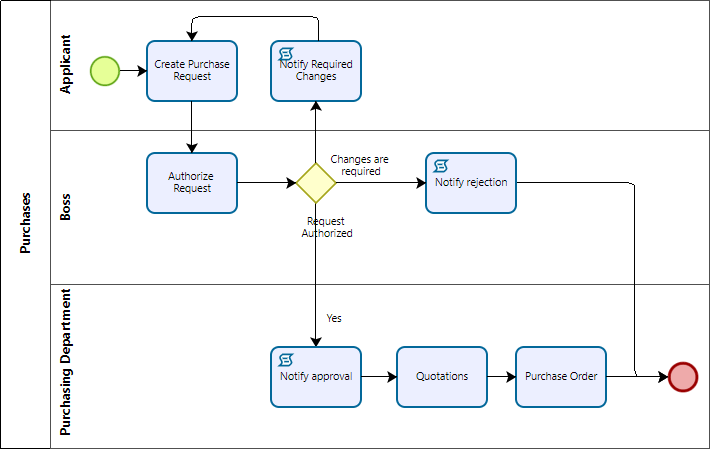
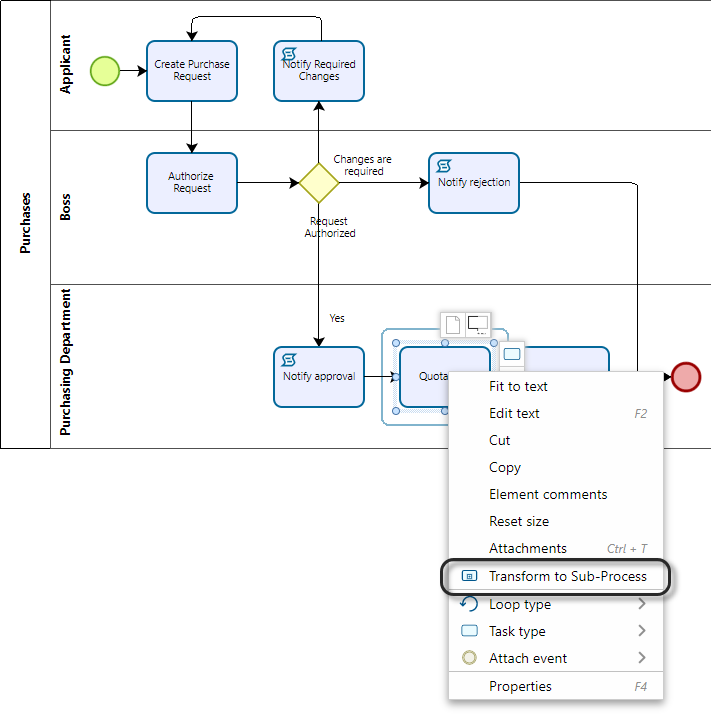
3. To transform the Quotations Task to a Sub-process, right-click on the Task and select Transform to Sub-Process from the display menu. Do the same for the Purchase Order Task.
|
When you change an element type, any extended attributes information entered will be lost if it hasn't been shared. To avoid this, select the Warn element type changes to be alerted before changing an element to a different type, this option is located within Bizagi Modeler Options as shown in the image below. Please click for further information about sharing extended attributes. |
Adding elements
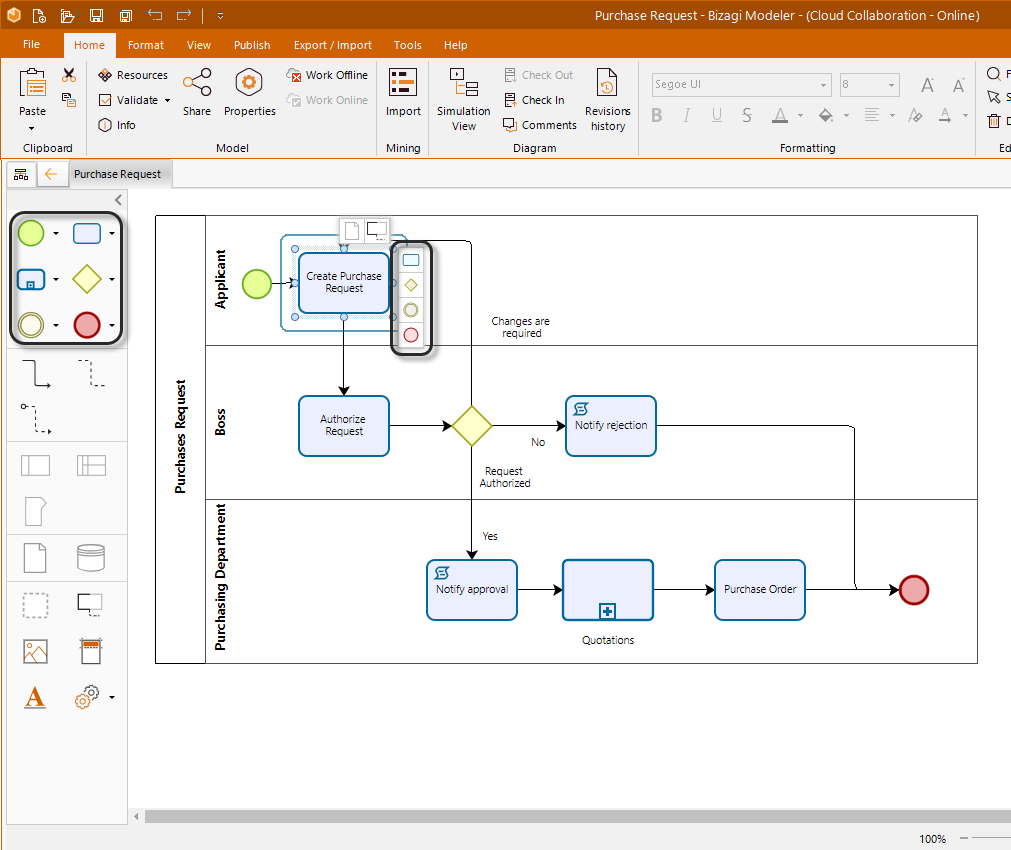
If you need to include a new element, keep in mind you may at anytime use: either the pie menu, or the Palette elements found at the left hand.
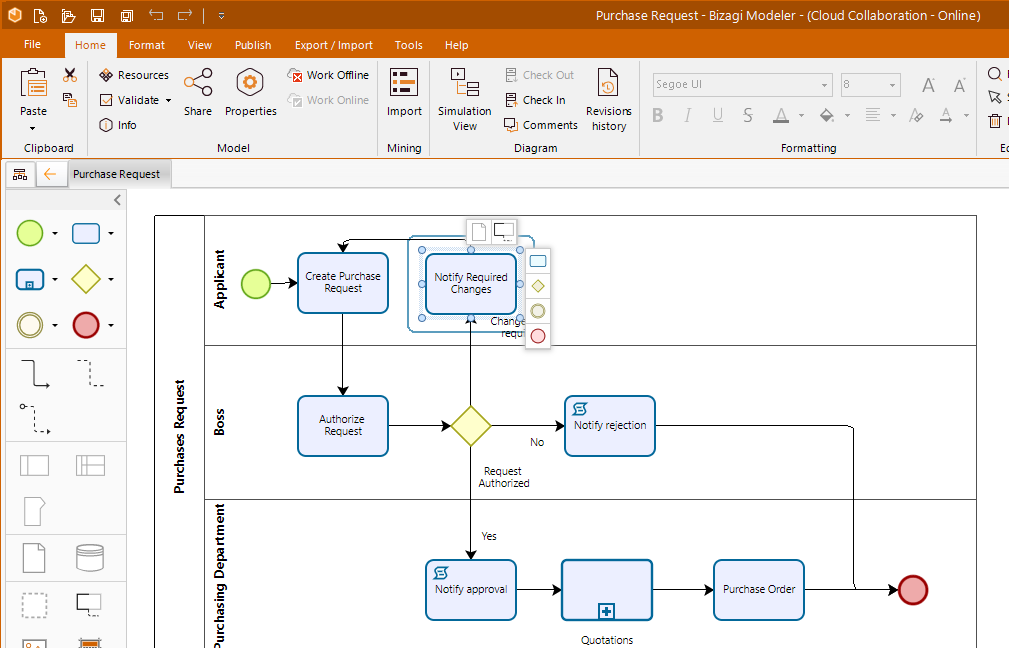
In case you want to include a new element in between of 2 existing ones (which are already connected), Bizagi will provide an option for modeling agility so that just include the new element and avoid the need to add further connectors or to delete existing ones.
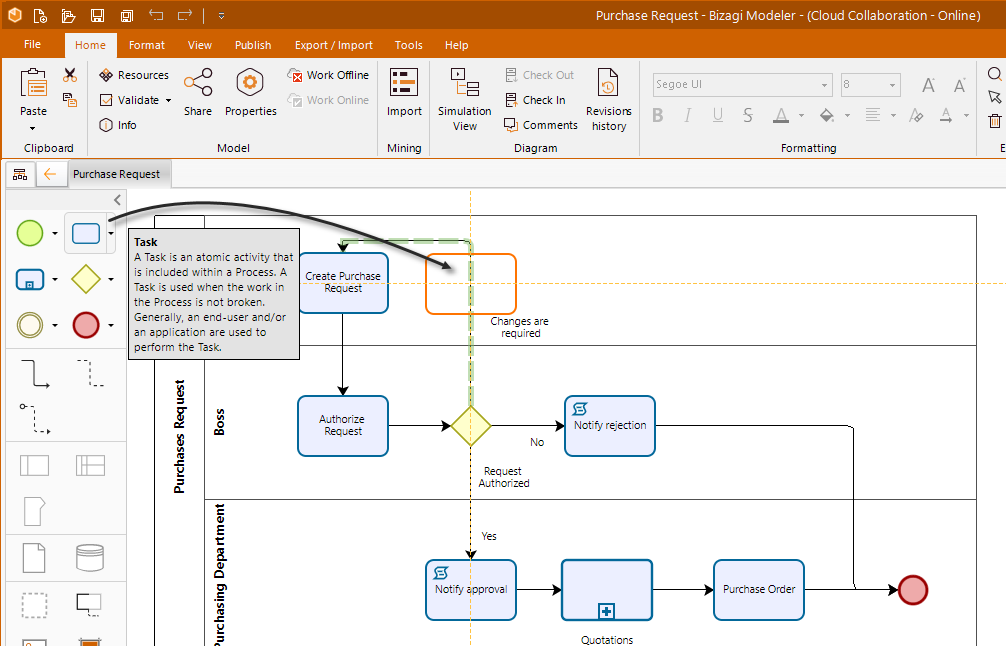
1. To include a new element between 2 existing ones, drag it from the Palette and into the connector itself.
Note that the connector will highlight to indicate where the new element can be dropped for Bizagi to attach it automatically.
2. Finally, name your element.
Notice that it will be automatically connected, and it will also create the additional connector to the other element.
Adding Milestones
Milestones are Sub-partitions of a Process used as reference points. They help the readers understand the different stages that make up the Process.
We will include three Milestones to determine the state of each activity within the Process.
1. To include a Milestone drag it from the Palette and place it in the Process. Drag and drop two more Milestones.
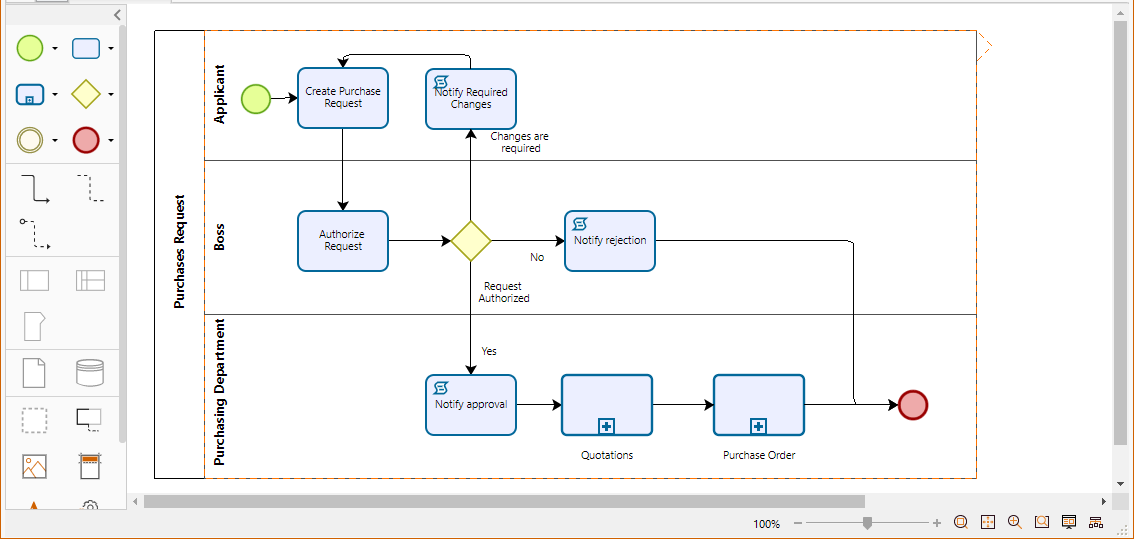
2. Drag and drop the diagram elements that belong to the Milestone.

3. Finally rename each Milestone by clicking on it, pressing the F2 key, and entering a name.

Paste options
To accelerate your modeling process, Bizagi offers different options to paste elements that you have in your clipboard.
•Paste in place in workspace: this option let you paste an element of your clipboard directly in the workspace, in the indicated area. To do so, right click in the space where you want to paste the element of the clipboard and then click Paste here.
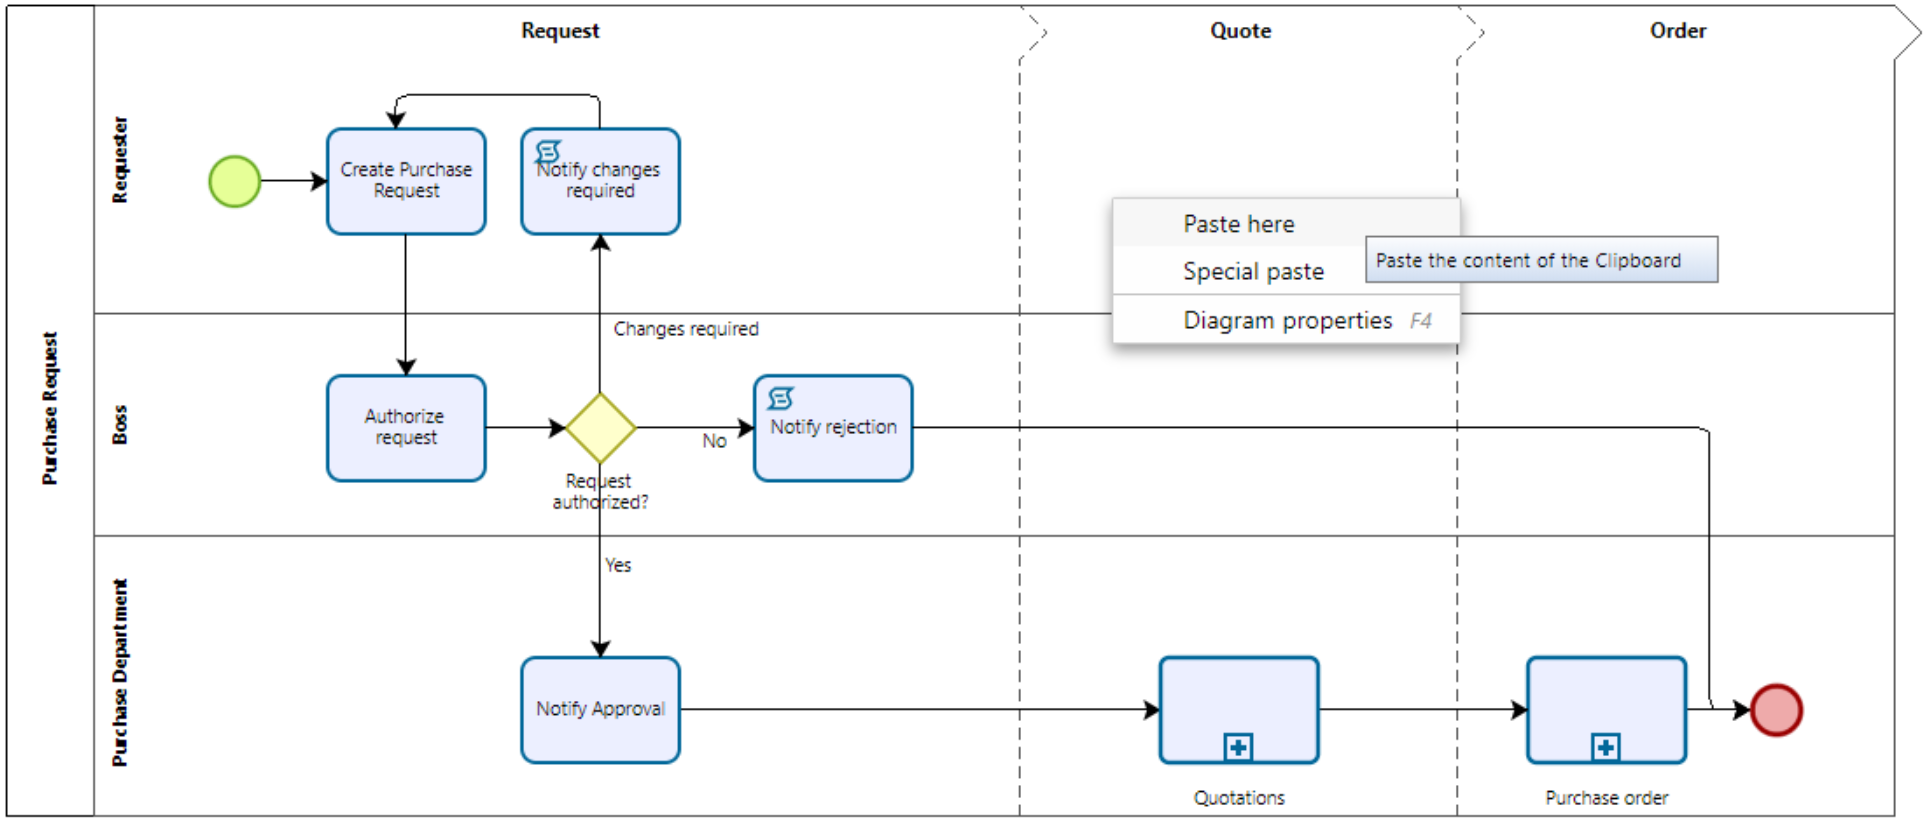
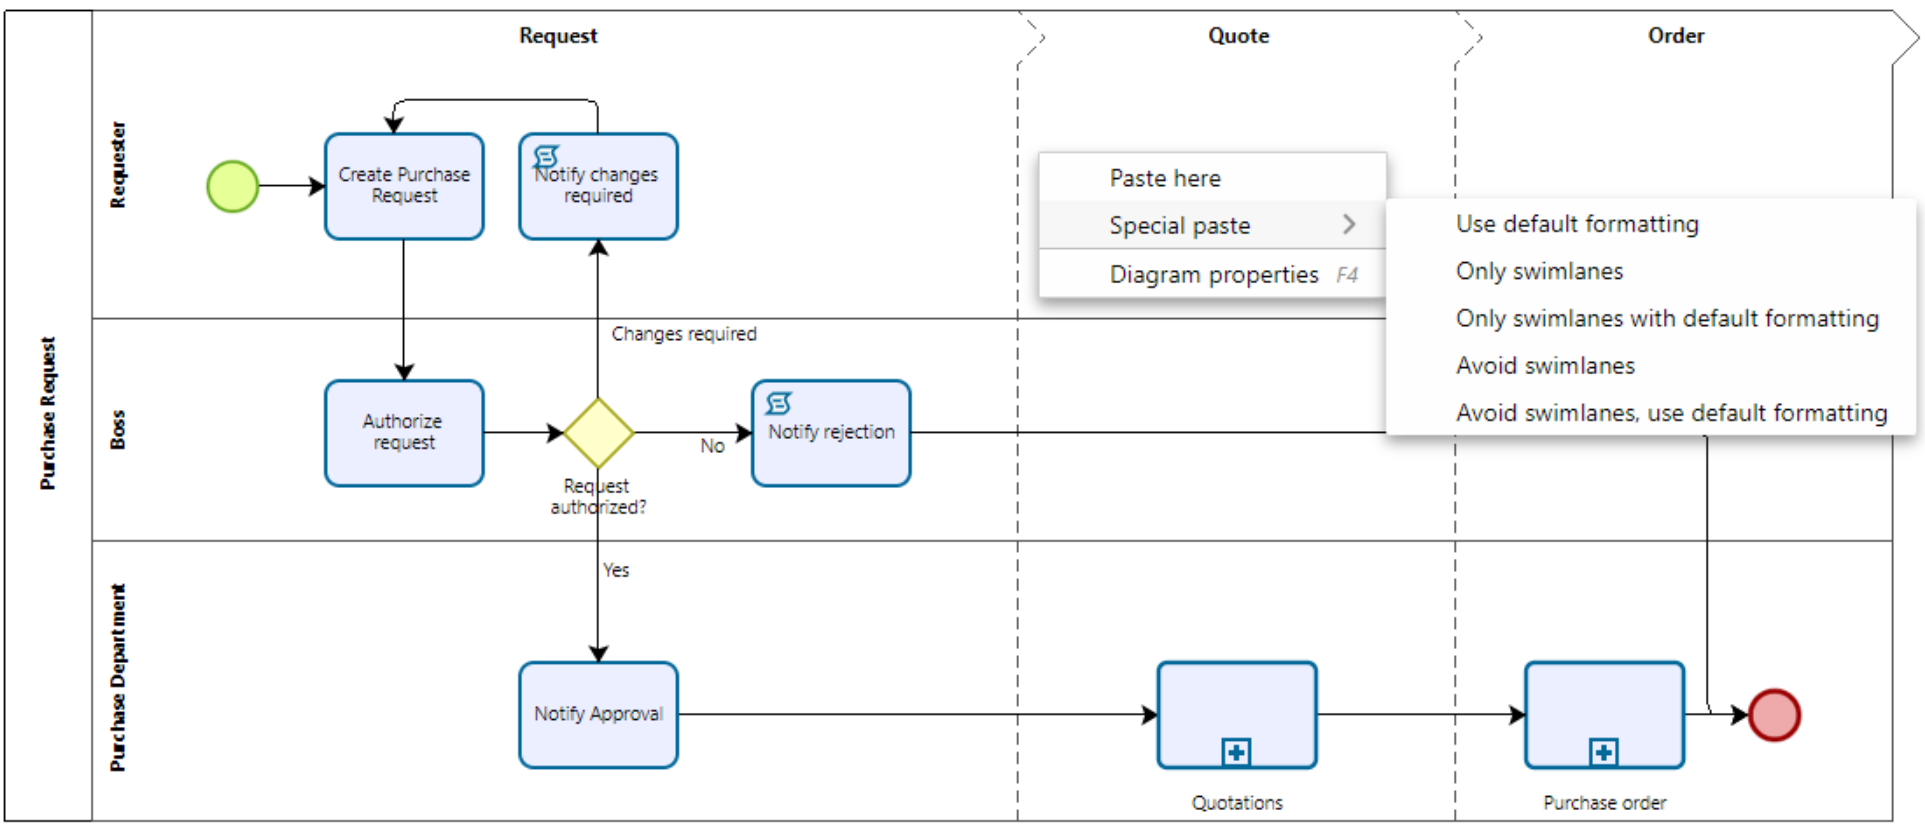
•Special paste: this option lets you paste more than one element of your clipboard taking into account the following considerations:
oPaste using default formatting: paste the contents of the clipboard into the diagram keeping the source formatting and all the copied shapes and Swimlanes (the source shapes' size is kept even if it was customized).
oPaste only Swimlanes: paste the copied Swimlanes keeping its source formatting (current and/or customized formatting). Shapes contained on them are not pasted.
oPaste only Swimlanes with default formatting: paste the copied Swimlanes keeping the default formatting. Shapes contained on them are not pasted.
oPaste avoiding Swimlanes: paste all the shapes contained on the copied Swimlanes keeping its current formatting (current and/or customized formatting). Pools, Lanes and Milestones are not pasted.
oPaste avoiding Swimlanes, using default formatting: paste all the shapes contained on the copied Swimlanes keeping the default formatting. Pools, Lanes and Milestones are not pasted (the source shapes' size is kept even if it was customized).
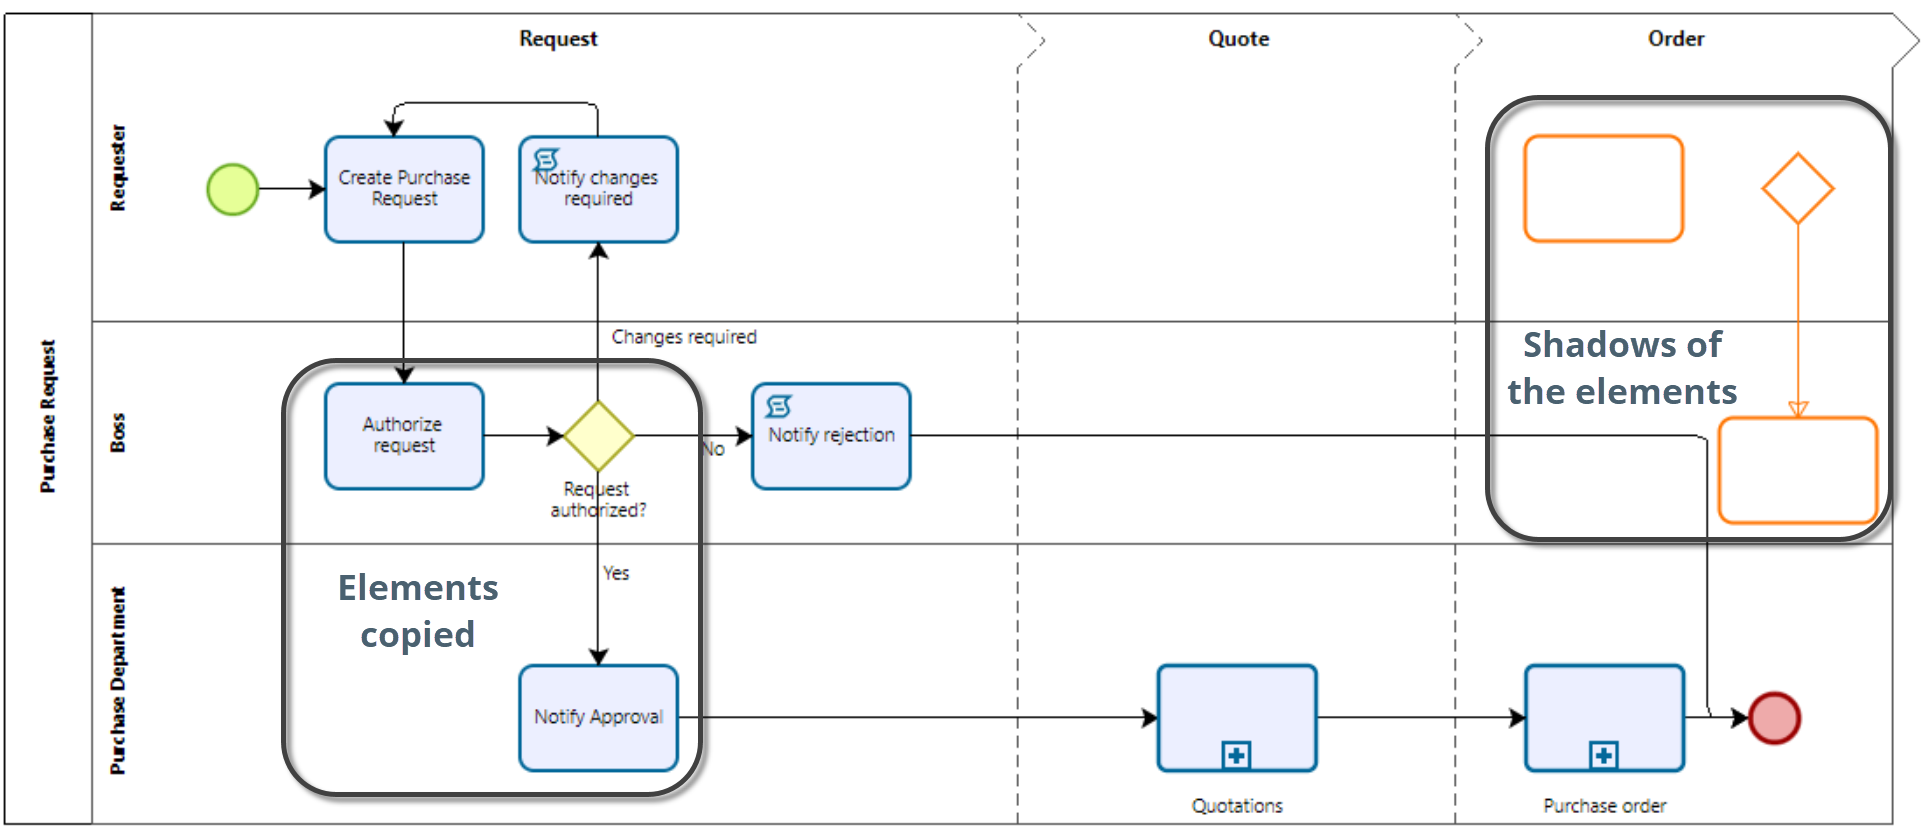
•Shadow paste: when having one or more elements in the clipboard, you will be able to paste them in the workspace using the paste command in your keyboard (Ctrl + V). However, this will not paste the elements immediately into your diagram. Instead, a shadow of the elements will be shown, allowing you to select where to paste the elements.
•Ribbon's Paste options: to know more about the paste options located in the ribbon, click here.
Last Updated 3/14/2022 5:27:50 PM