The following example gives a brief description of how to use POST and PUT methods through the invocation of a REST service directly in our Bizagi Process. The consumption of the service (inputs and outputs) will be explained with XML data, but Bizagi is also able to use JSON data.
As described previously in Invoking REST services, as a prerequisite we need to first understand the structure of the sqlREST service invocation.
This information is looked up at the source web site: http://sqlrest.sourceforge.net/5-minutes-guide.htm.
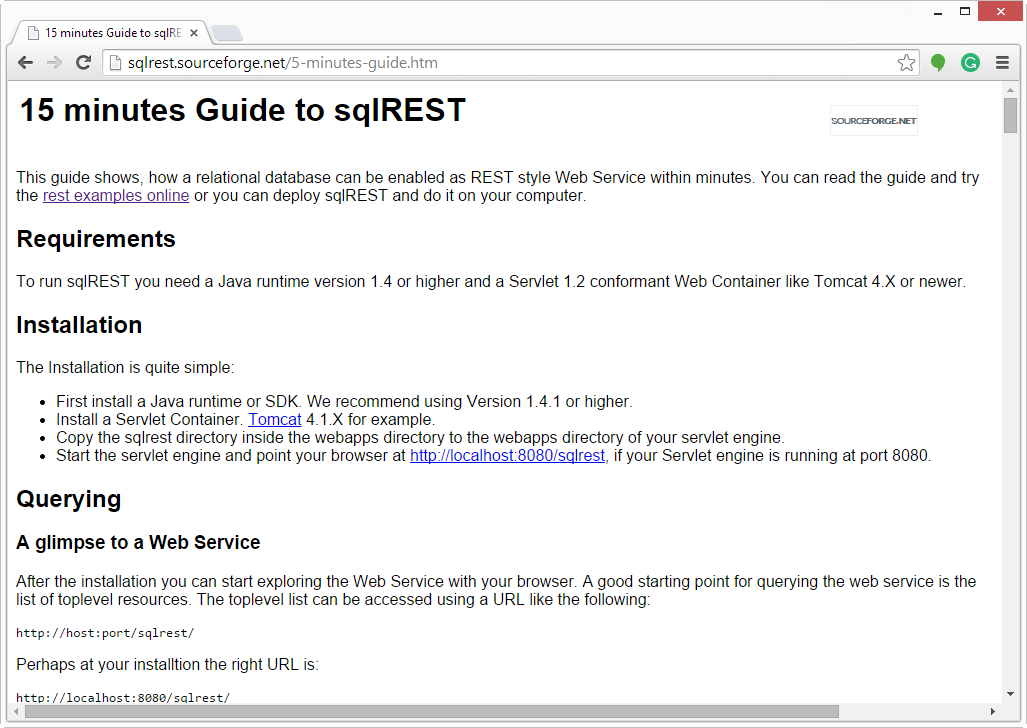
In this specific example, we will use the PRODUCT service exposed through a Web service to send an id, a name, and a price; and save this product in the target database.
We will illustrate how to invoke a REST service, using the Product Registration Process in Bizagi:
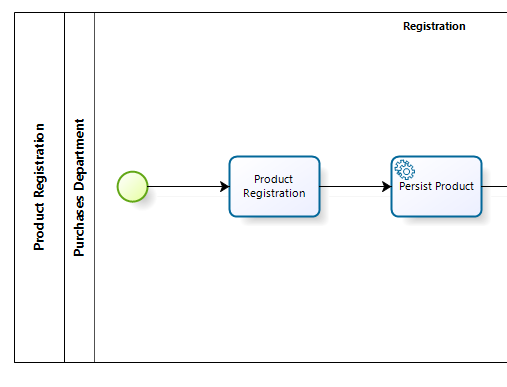
In this sample Process, our data model is as shown:
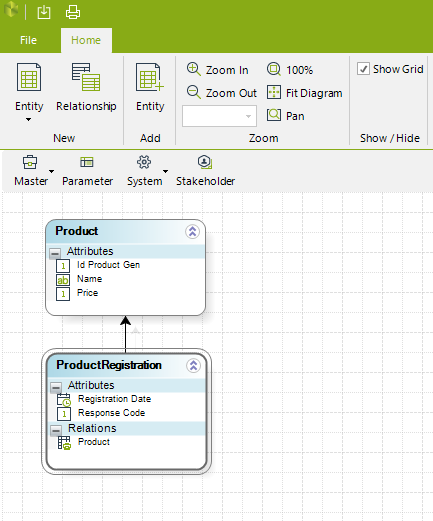
Notice that this example uses sqlREST service invocation, this service can be installed locally in your machine or using the external web service located at http://www.thomas-bayer.com/, in this case, your computer must have internet access.
Creating an interface invocation
Our first step is to create an interface invocation in our Persist Product Service Task.
This is done by going to the Process Wizard step 6 (Integrate) option and into Define integration interfaces:
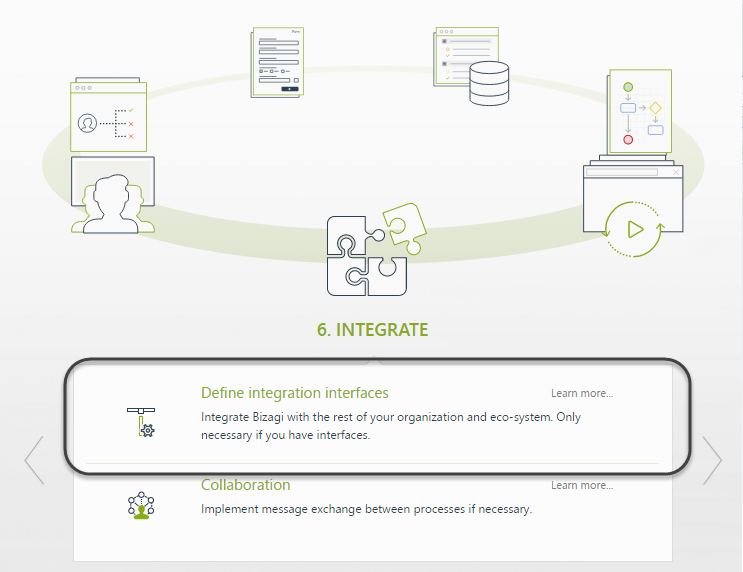
In this view, we click the Persist Product Service Task to create the interface invocation.
Specifying the service's type, URL and method
Now we must specify that this configuration invokes a REST-type service, and specify as well its location URL, method and parameters.
In the appearing interface window, we select REST as the service type:
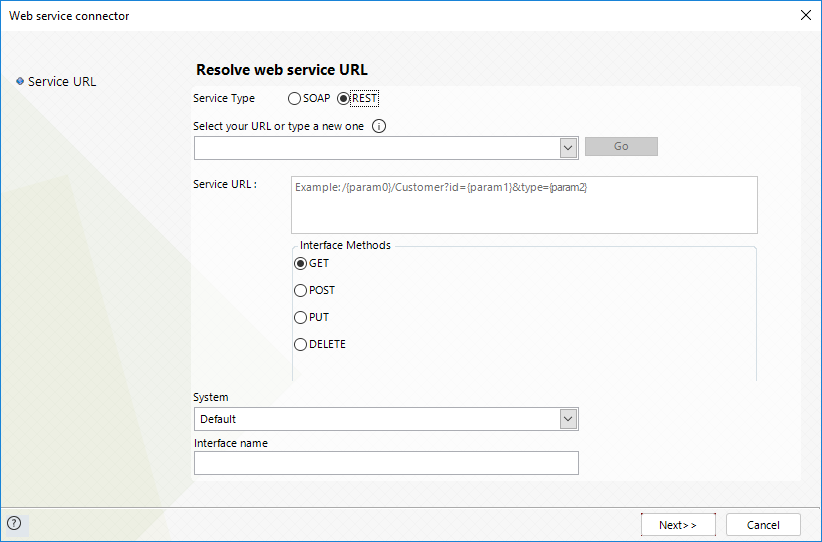
For both URL and Service URL, add the following data:
•This example's Base URL for local access: http://host:port/sqlrest/
•This example's Base URL for remote access: http://www.thomas-bayer.com/sqlrest/
•This example's service-part of the URL is ("Service URL"): PRODUCT/{ProductCode}
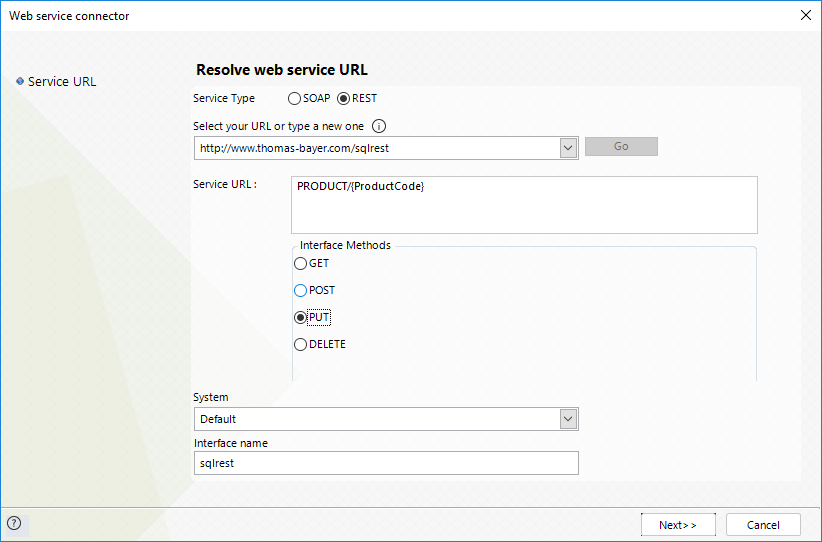
Notice that this method we are invoking is a PUT method (to add/update information), and that it also sends the information in an XML or JSON structure.
We name our interface and click Next.
Mapping all input information for the service
Next, we will map the information to be sent through the variable defined previously.
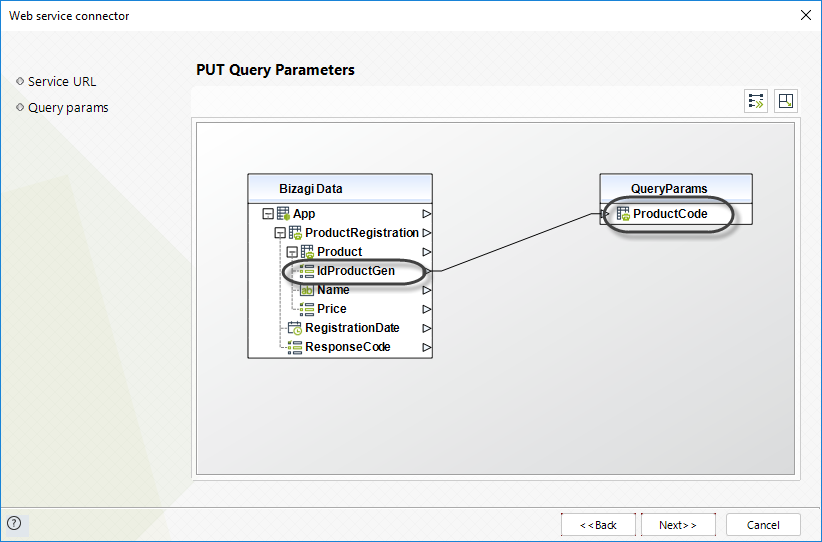
To do this, we locate our idProductGen attribute in Bizagi's Process data model (the table at the left), and click it.
Once selected, we click the ProductCode variable in the QueryParams table to the right. This way, we map and specify the information which is to be sent to this invocation:
When needed Runtime entities information is available to be mapped, from the Case attribute, just above the Process entity.
They are displayed in the simple mapping (advanced mapping is not supported).
Click Next.
Mapping the service request information
Now we will specify how to send the request information from attributes in our Bizagi Process data model.
For this, we will need to include the REST service's request structure in the Request Data.
This example is oriented to XML-formatted.
Copy the presented sample text into an file with the .xml extension.
<resource>
<NAME>Milk</NAME>
<PRICE>1.23</PRICE>
</resource>
Right-click the table at the right and enter the request structure.
This may be done manually (by adding nodes), or in an automatic manner by loading the structure from a physical XSD or XML file.
Click for more information about REST configuration options.
In this example, we choose the Import option to load the structure from the saved file (locating the copied structure previously saved):
For the XML file, we chose Load Sample XML
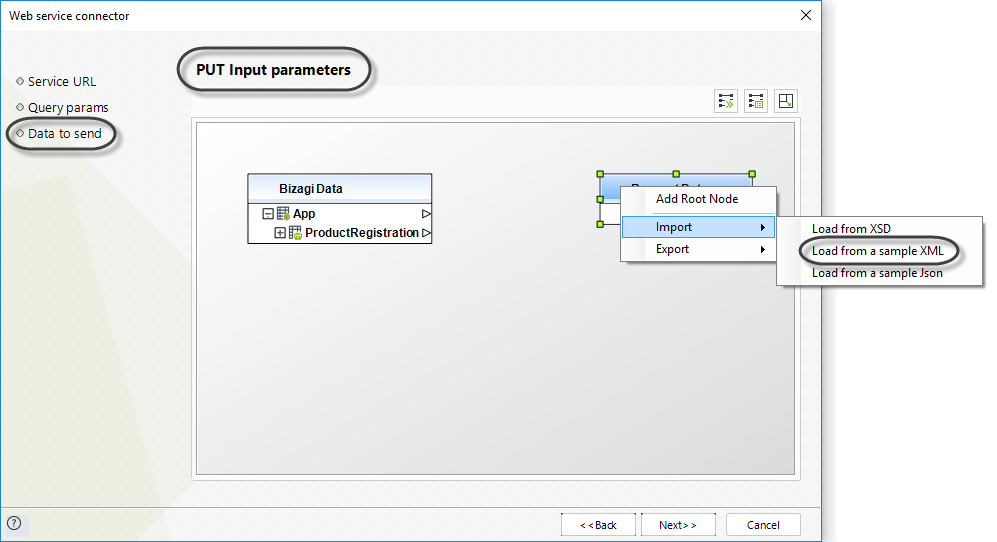
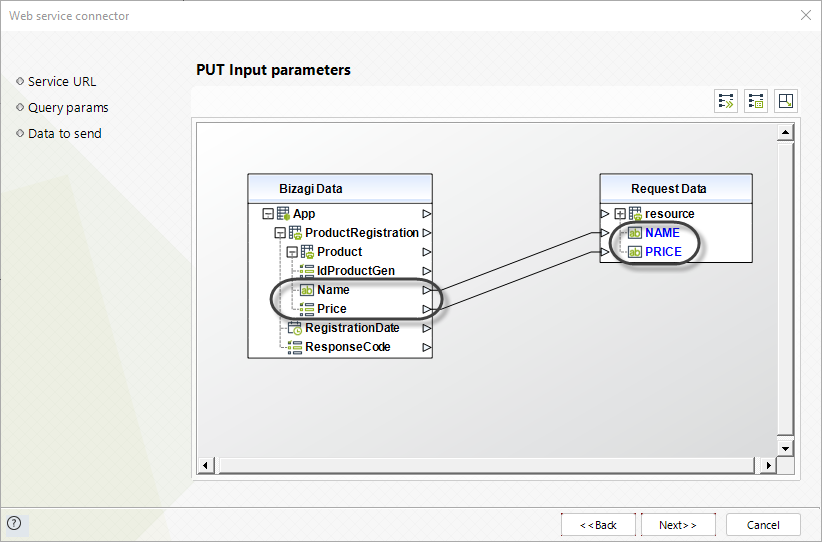
Once we have the XML structure in our Target Table, we proceed to map the attributes Name and Price to the corresponding REST service attributes.
To map these values, remember that you may either: click first on the source attribute (Bizagi Data) and then on the target attribute (Target Table), or also drag and drop a connection from the source to the target.
In the end, the mapped request information for our example will be as follows:
Click Next.
|
When mapping outputs to Bizagi, you have the possibility to include a custom XML transformation file (XSLT). To do this, use the Advanced mapping options accessed when clicking on this icon:
For more information about the advanced options, refer to Advanced mapping. |
If you require to send this information with a content-type different than the default "text/xml", you may specify this setting by editing the interfaces properties from the Expert View.
The user is able to choose for both, inputs and outputs, the content-type on how the service receives/sends the information according to the integration concept: the two options available are XML and JSON. This example will illustrate how to receive and send the information using both, XML and JSON content-types.
Bizagi's configuration is set to XML content-type as default, and thus, no additional configuration is required. When using JSON, set the content-type to "application/json". To learn more about setting a content-types, refer to REST services considerations.
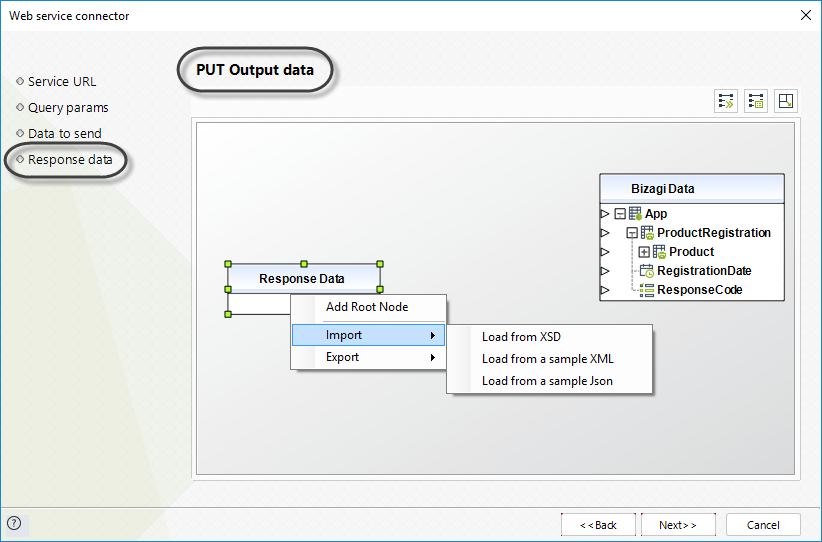
Mapping the response information returned by the service
The configuration for this step is done similarly to what is described in the previous section (Mapping the service request information).
This step is required when the method PUT or POST returns an XML-formatted or JSON-formatted response. In our example, sqlREST service does not have any formatted response, so we can avoid this step.
Configuring optional error handling
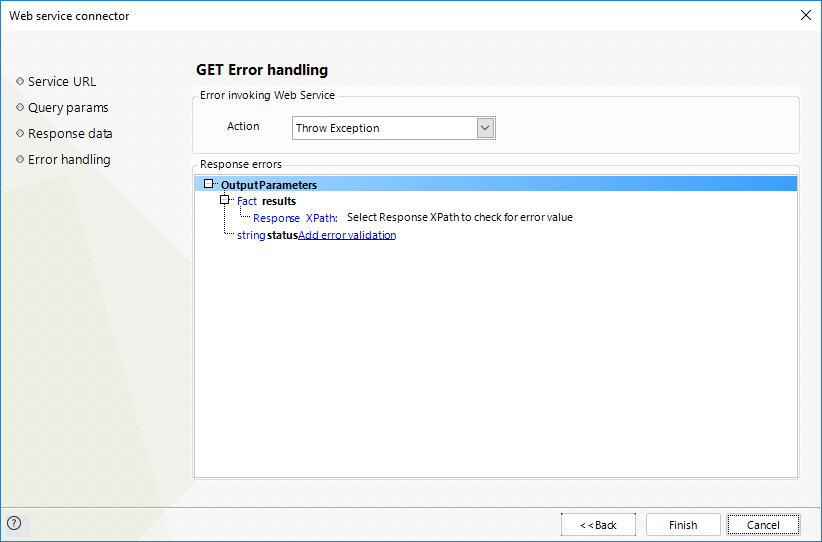
Lastly, no error handling validation is needed for this example.
To view more information about error handling options, refer to Interfaces Error handling.
Click Finish.
Execution
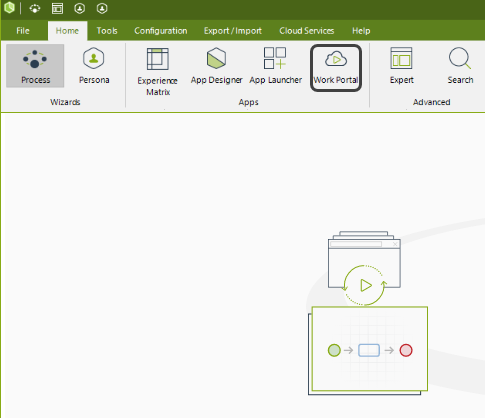
Run the Product Registration Process, and test the invocation result in the Work Portal.
To do this, click the Run button in the Home tab:
In the Work Portal, we create a new Create Vendor case and enter the information for Product Code, Name and Price.
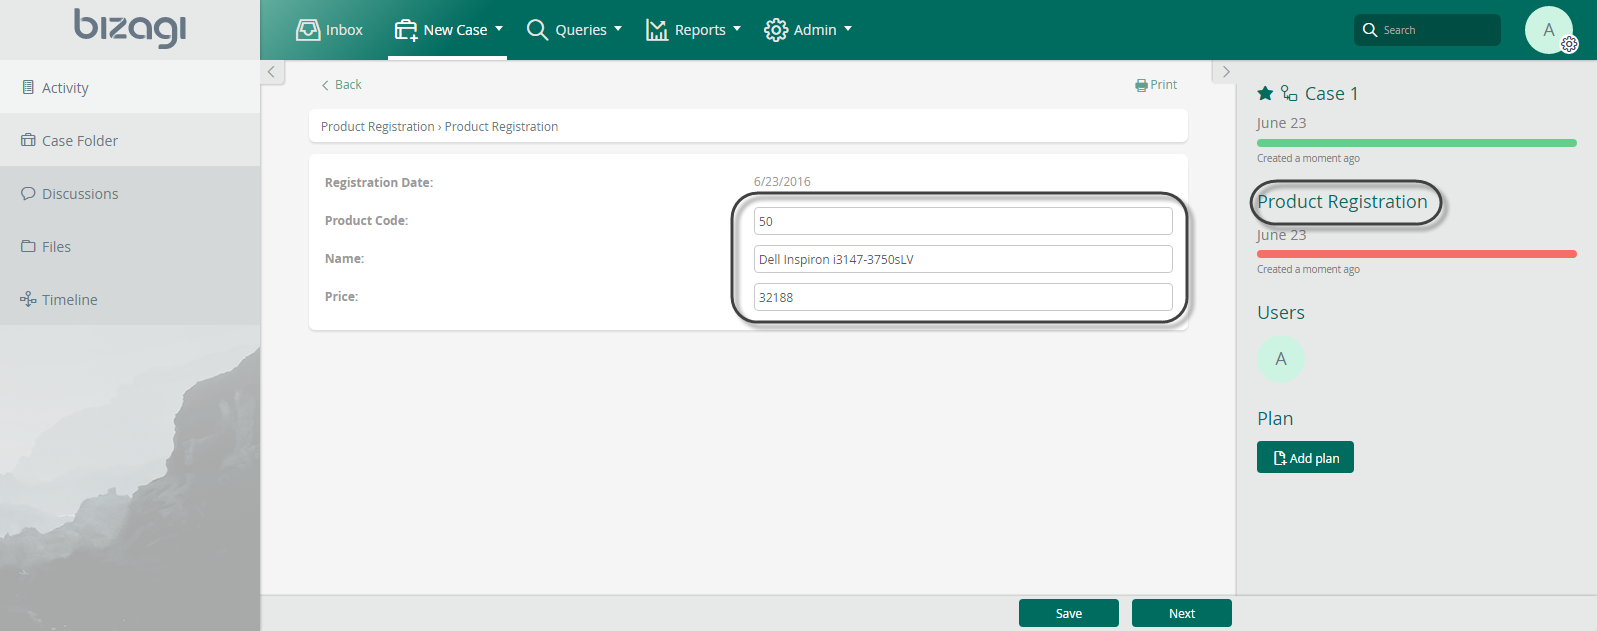
After sqlREST service invocation, test if the product that you registered is stored in the database using the corresponding link of your implementation:
•For local access: http://host:port/sqlrest/PRODUCT/{idProduct}
•For remote access: http://www.thomas-bayer.com/sqlrest/PRODUCT/{idProduct}

Last Updated 1/23/2023 12:05:09 PM
