Overview
Invoking external services from Bizagi is easily configured by using the WS Connector.
This connector provides graphical mapping configuration so that you easily configure input and output parameters for the integration points in processes.
|
Integration points in processes are most frequently configured through Asynchronous Activities to invoke Web or REST services. To view more information about configuring these integration points so that they are executed asynchronously, refer to Asynchronous Activities. |
For more sophisticated scenarios, the Web service connector will also offer the possibility to include customizations in the XML transformations involved in mappings (XSLT files).
This is useful for those scenarios in which there is the need to include advanced XSLT functions (e.g, XSLT if, namespace-alias, etc).
For this option, you may still use the Web services connector and switch to the Advanced options by clicking on this icon:

We will illustrate in the section below, how to use the additional options in Bizagi to include advanced transformations.
Notice that this feature requires an advanced technical XML knowledge (involves XSD and XSLT).
What you need to do
To use advanced options for transformations while invoking external services, we configure the invocation through the Interfaces Wizard like any other configuration.
To use such advanced options for either input or output parameters mapping, the following steps are carried out:
1. Configure the service URL and method
The first configuration screen is configured without any special considerations.
In this step is where you configure the service's URL (either for a Web or REST service invocation).
2. When mapping, switch to the Advanced options
For either input parameter or output parameter configuration, choose the Advanced options mode.
3. Obtain the schema definitions involved and generate your transformation file
In this mode, you may obtain the XSD schema file of the information you will handle in both: Bizagi and your service.
You may select these schemas and use it as input to build your transformation file (i.e, by relying on any software of your choice that handles and generates transformation files, such as Altova).
4. Upload the transformation file into the service invocation configuration
Once you have a transformation file, you upload it back into Bizagi's configuration.
This means that on execution, Bizagi will use that transformation file to prepare and manipulate information exchanged with the service (when either sending information to the service or updating a response back into Bizagi's data model).
5. Complete the invocation configuration
Repeat the above for output parameters if needed. Finally, you may also define if there is any special error handling involved.
Advanced mapping example
For this example, we will use a simple process in Bizagi in which at some point we look up for customer information from a Web service.
The process in Bizagi handles both natural and juridical persons when registering a customer.
Therefore, when looking up for customer detail, we would need to send information in a different field regarding the type of person.
1. Configure the service URL and method
For this example, we configure an invocation to a SOAP Web service.
We choose the getCustomerPhoto Web method:
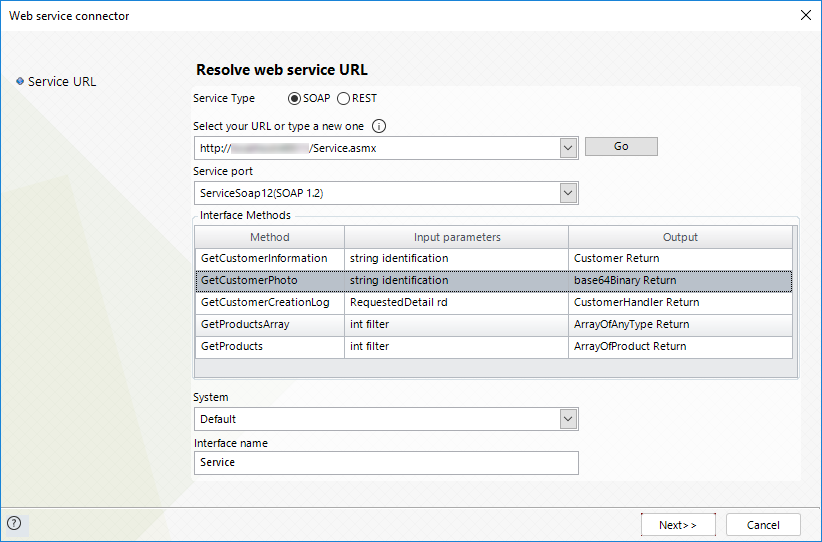
Note that this sample Web method will receive a string with the customer's identification, and will send back a picture for its record at the external system (assuming that customer has been registered before and has this detail).
Click next.
2. When mapping, switch to the Advanced options
First, for the input parameters we choose the Advanced options mode by clicking on its icon located at the right upper part:
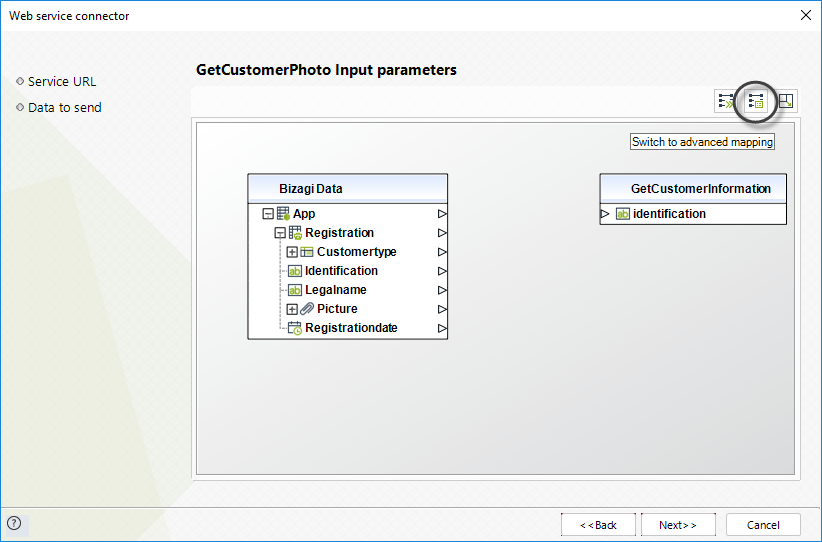
When in the advanced mapping view, make sure you select all attributes/fields with information that you want to consider for the Web service method.
When configuring input parameters, this means selecting from the left panel, all the information you need to extract from Bizagi.
All fields taken as input parameters for the Web method should be marked as well.
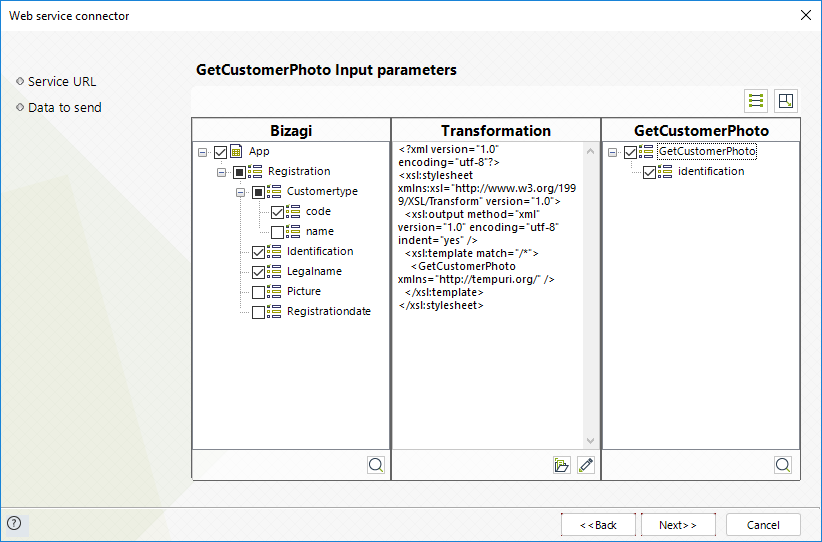
|
You may use the graphical mapping as a starting point of your transformation. However, once you switch to the advanced mapping view, any changes performed in it will be discarded if you wish to go back to the graphical mapping view. |
3. Obtain the schema definitions involved and generate your transformation file
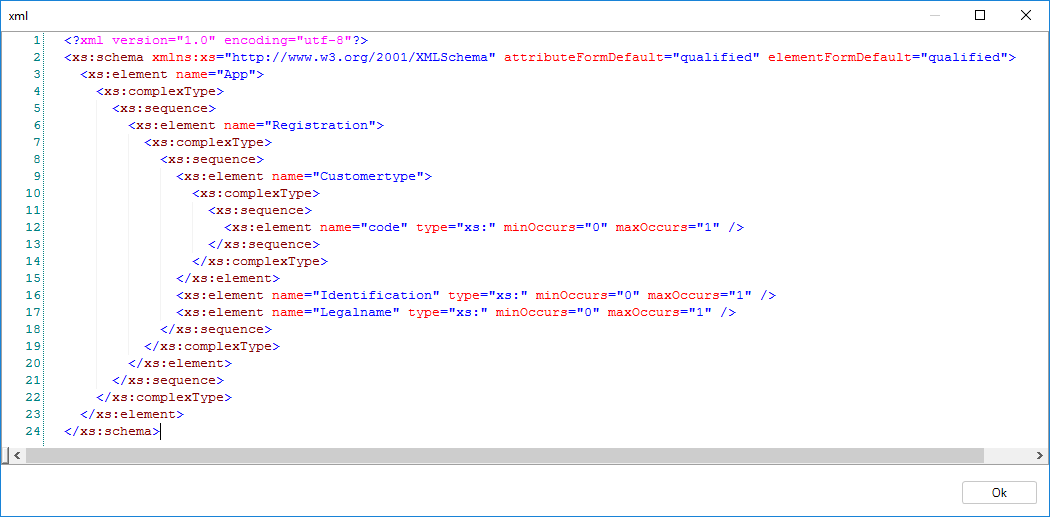
Having selected the relevant information, use the icon below of each panel to view and obtain the generated schema file (XSD).
In this way, you obtain a general definition of the information that will be exchanged between Bizagi and the service; this time for the input parameters.

From the appearing window, you may copy that XSD content and use it as input for any other tool you use to build up a custom and sophisticated XSLT file.
The image below shows the generated schema for Bizagi's information (considers what will be handled to send out to the Web service):
|
If you need to send string with XML content, or to escape special characters in XML (if you identify that your information will contain reserved characters such as: Double quotation mark, Ampersand, Apostrophe, Less-than signs or Greater-than signs), you may use the CDATA element. In transformation files, you may use: <xsl:text disable-output-escaping="yes"><![CDATA[</xsl:text> <xsl:text disable-output-escaping="yes">]]></xsl:text> to encapsulate in it the information. |
4. Upload the transformation file into the service invocation configuration
Once you have a transformation file, you upload it back into Bizagi's configuration.
This means that on execution, Bizagi will use that transformation file to prepare and manipulate information exchanged with the service (when either sending information to the service or updating a response back into Bizagi's data model).
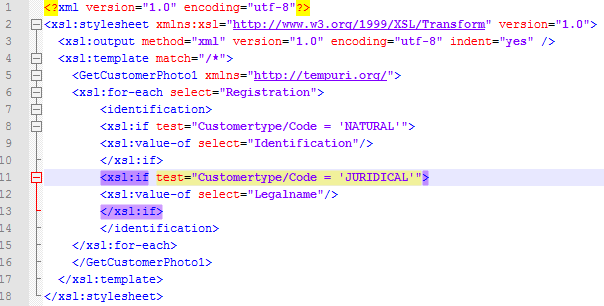
In our example, our produced transformation file uses the <xsl-if> function to send as input to the Web service (customer's identification):
•From the attribute called Legal name, if the registered customer is a juridical person.
•From the attribute called Identification, if the registered customer is a natural person.
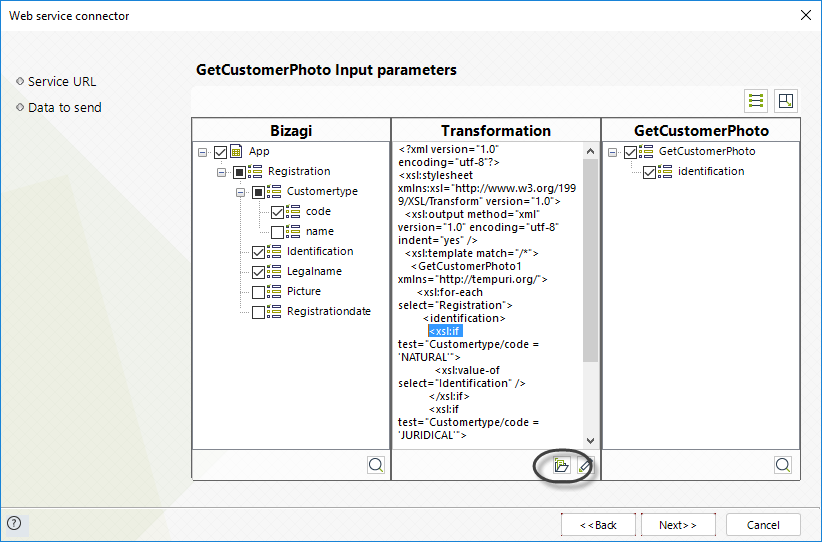
To upload the transformation, use the load icon at the bottom of the middle panel showing the transformation:
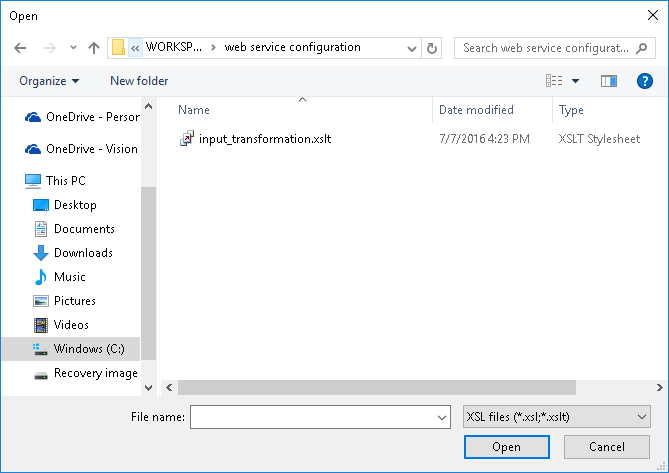
Browse for the .xslt file and click Open.
Notice you will see that the transformation panel will show your loaded transformation.
Click next.
|
When including an output custom transformation than handles collections in Bizagi (1-n relationships), you will need to consider NOT to include the name of the entity which is part of a collection (specifying the name of the relationship will suffice). For example, if you have the following model (as taken from the Purchase Request process):
Then, the appropriate transformation to manipulate records of the highlighted collection, must not specify the ProductsRequestedforPurchase entity. For this example, it would mean having:
<PurchaseRequest> <ProductsRequested> <Product>P01</Product> </ProductsRequested> <ProductsRequested> <Product>P07</Product> </ProductsRequested> <ProductsRequested> <Product>P09</Product> </ProductsRequested> <DeliveryAddress>Baker Street</DeliveryAddress> </PurchaseRequest> |
5. Complete the invocation configuration.
Repeat the above for output parameters if needed.
In our example, we do not use a custom transformation file for the output configuration.
We configure output through the graphical mapping to store the response picture into Bizagi's data model, and click next.
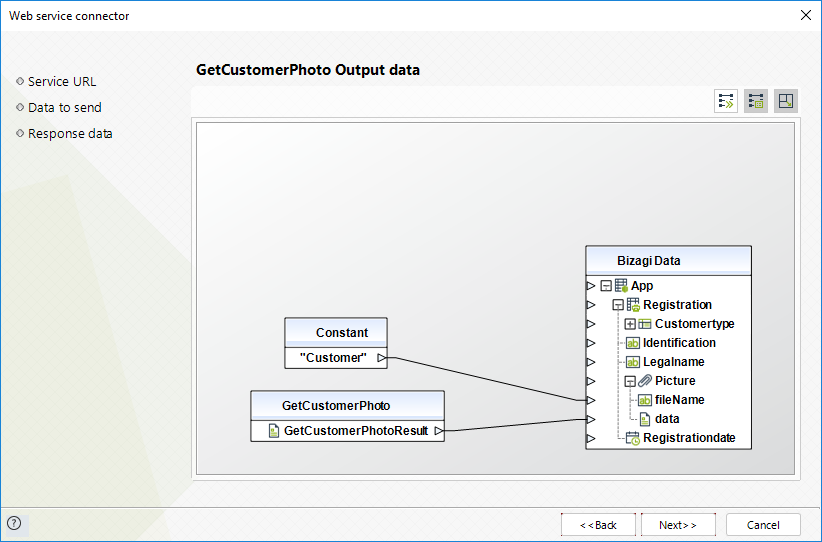
No special error handling is involved in this example and therefore, just click Finish in this screen.
At this point we are set configuring a Web service invocation by using a custom transformation!
Last Updated 1/6/2022 4:27:36 PM
