Overview
Connectors in Bizagi are portable modules that allow you to extend the functionality in terms of integrating with other systems or applications, as described in Bizagi Connectors.
This section will show you how to manually install a connector to your Bizagi project.
Remember that you can install a connector automatically by opening the Connector Xchange from Bizagi Studio.
For more information about automatic installation, refer to Connector Xchange.
Prerequisites
To install and set up the basic configuration for your connectors, make sure you have already downloaded a connector from Connector Xchange, or have created one by using the Connector Editor.
This means that at this point, it is required that you have a valid .bizc connector file in a local folder of your computer.
For more information about the latter option, refer to Creating Connectors.
Manual installation
To manually install a connector (with a .bizc file), open your Bizagi project in Bizagi Studio and follow the steps below:
1.Complete the steps described in Opening a connector from a file.
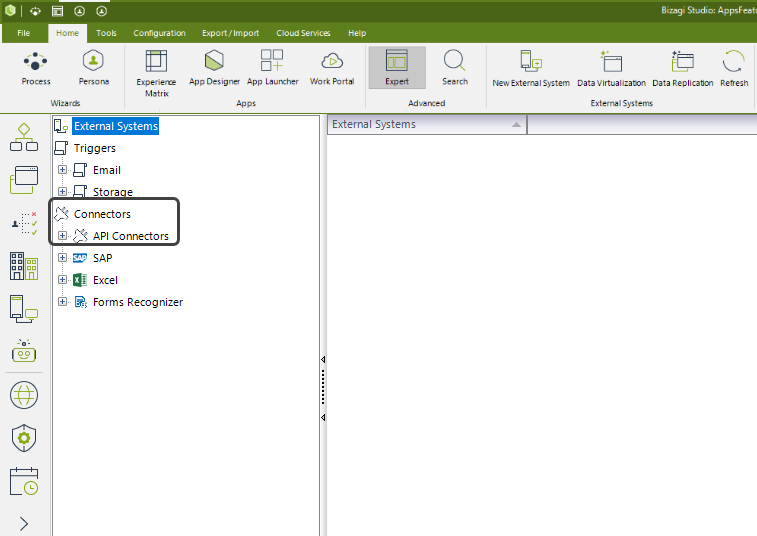
2. Your connector will be listed under API Connectors with its appropriate symbol and given name once it has been uploaded (as defined during its creation in the Connector Editor).
A list of all versions of this connector will be displayed in the right frame. When you initially upload a connector, the list will only show one version (1.x.x).
If this is not the first time you have uploaded a connector with the same name but a different major version, however, the list will show multiple versions.
|
If you are installing a modified instance (a major version) of an existing connector, then it will be listed as a new version (2. x.x, 3.x.x, etc.). Otherwise, it will just replace the same version already installed (it is strongly suggested to be fully aware of how versioning works for connectors to avoid overwriting them when not intending to).
Refer to Connectors versioning for further information about multiple versions of connectors. |
Connectors configuration
Once a connector has been installed, either manually or using the Connector Xchange, perform the following steps to configure it:
1. Create a new configuration instance by selecting the version of you connector and clicking New system configuration.
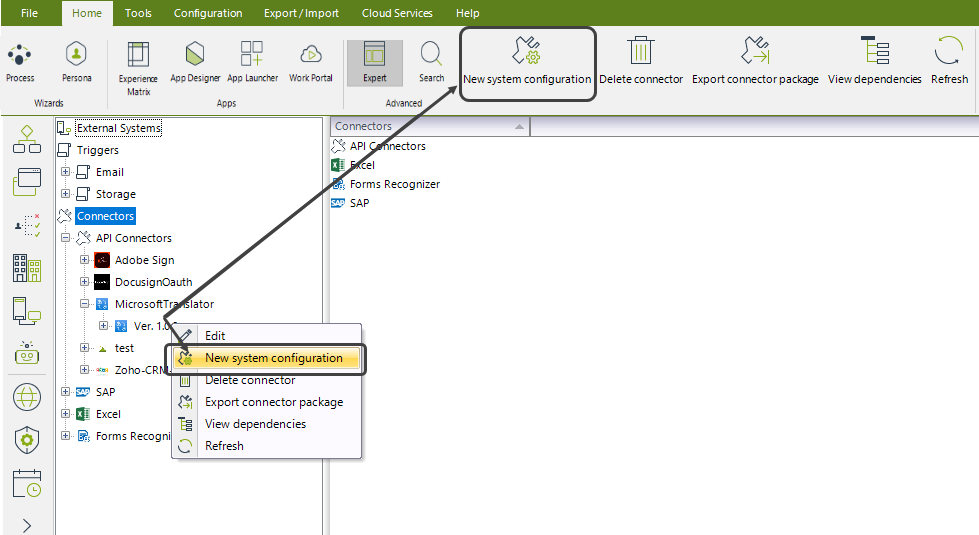
2. A new window will be displayed prompting you for basic details of your connector's configuration.
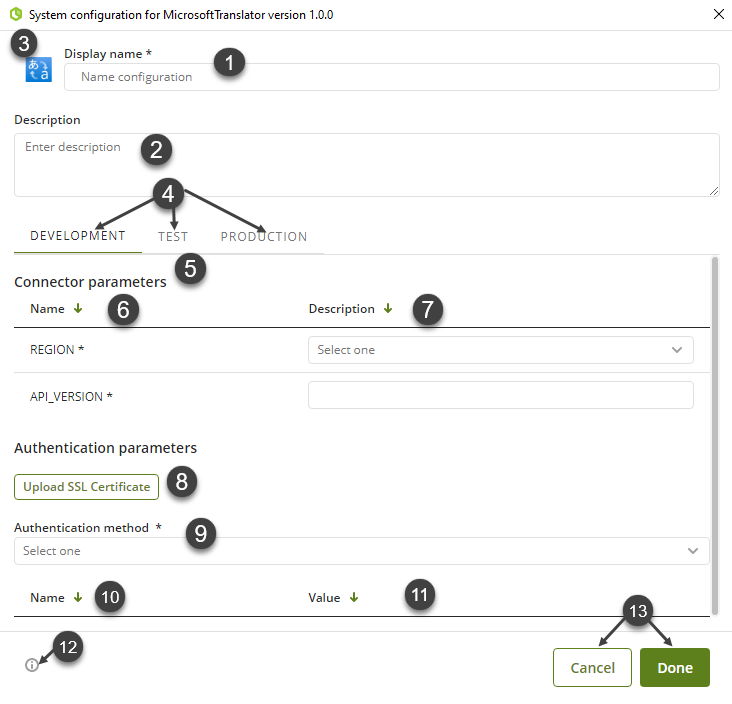
Enter details as described in the table below.
Notice that most of these fields you need to enter are tightly bound to parameters as defined during the creation of the connector (i.e., when specifying the properties or authentication parameters in the Connector Editor).
FIELD |
DESCRIPTION |
|---|---|
1- Display name |
Assigned name to a particular connector version configuration |
2- Description |
Given description to a particular connector version configuration. |
3- Icon |
Given icon to the connector when created or edited in the Connector Editor. |
4- Development/Test/ Production |
This tab specifies which values the connector will use for each separate environment: •Development •Test •Production It is not necessary to specify all the environments information the first time; it can be updated when necessary. |
5- Connector parameters |
Parameters used by the connector. This list will only show the Base URI parameter when using Easy REST Connectors. These parameters are included in the REST message's header. |
6- Name |
It is the name of the predefined connector's parameter. This name was given to the connector when it was created in the connector editor, and it cannot be changed. An asterisk character will appear before the name of the parameter if it is necessary. |
7- Description |
It is the value of the connector's parameter. This information must be fixed (not dynamic) and cannot be changed during a workflow. |
8- SSL Certificate
|
Check used to upload a self-signed certificate for the connector. Refer to Configuring a Self-Signed Certificate for the connector. |
9- Authentication parameters
|
Those are the parameters used by the connector to successfully authenticate, as required by most external systems to perform activities. These parameters are set when the connector is created using the connector editor, and they cannot be modified here. Available authentication methods are: •None •OAuth 2.0 •Custom Learn about the workings and considerations for authentication methods at How authentication works in Connectors. |
10- Name |
Name of the predefined authentication parameter. This name is assigned when creating the connector in the Connector Editor and cannot be changed here. When required, an asterisk character will appear before the Name of said parameter. |
11- Value |
It is the authentication parameter's value. This data must be fixed (not dynamic) and cannot be altered in the middle of a workflow. An asterisk character will appear before the name of the parameter if it is necessary. |
12- Help |
A link to this online documentation. |
13- Done/Cancel |
After you have finished editing, you have the following options: •The modifications will be saved once you press OK. •The changes will be discarded if you press "cancel." |
|
*The Base URI parameter is only available for the Easy REST connectors. |
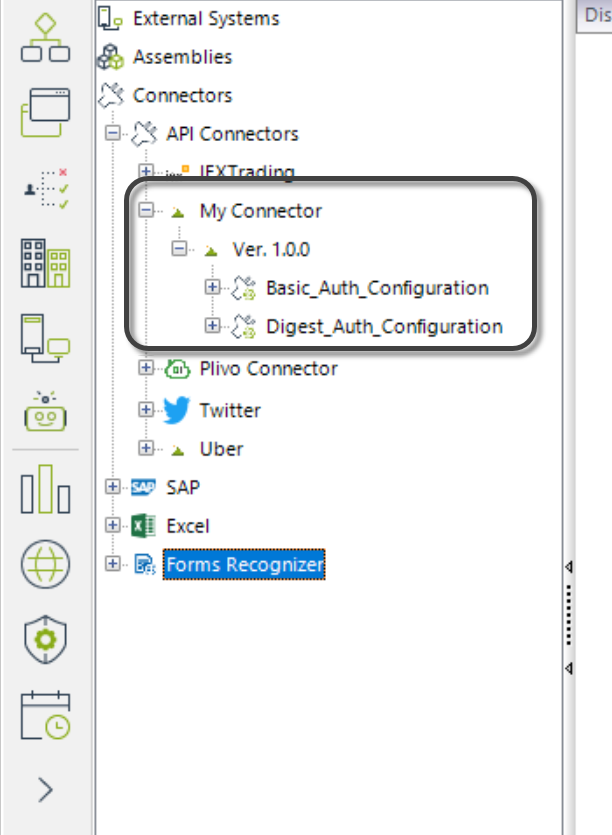
3. Once the configuration is saved, a new configuration item will be listed for that version of your connector.
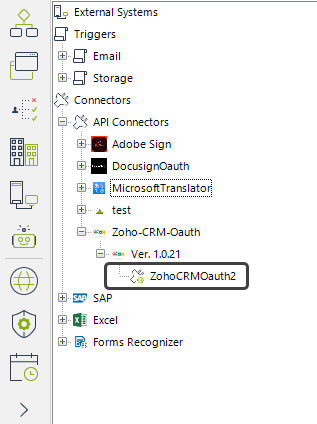
At this point, your connector has been installed and it is ready to be used in any process of your Bizagi project.
For information about how to use the connector, refer to Using Connectors.
You can create as many system configurations as you need. For that matter, when your connector includes actions with different authentication methods, you must create different system configurations for each authentication method.
Configuring a Self-Signed Certificate for the connector
If the external system associated with the connector needs a certificate when Bizagi calls a service, you can upload a self-signed certificate so that the action can be executed successfully.
To add a self-signed certificate to your connector, complete the following steps:
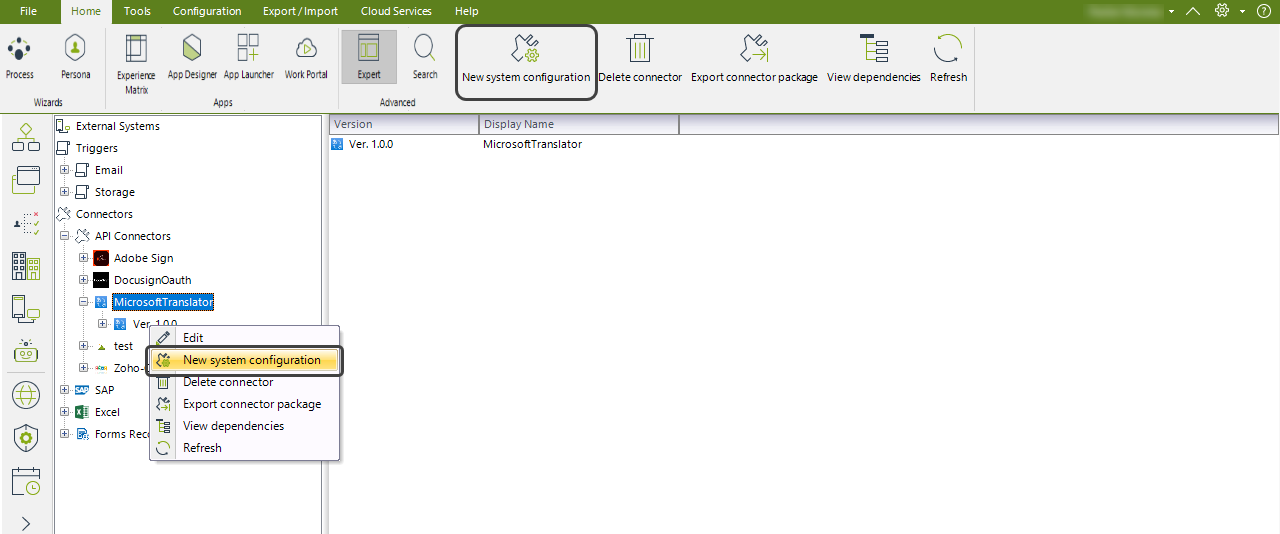
1.In the Expert view, select the connector to which you want to configure a certificate, and then in the upper ribbon, click New system configuration.
2.Select the SSL Certificate.
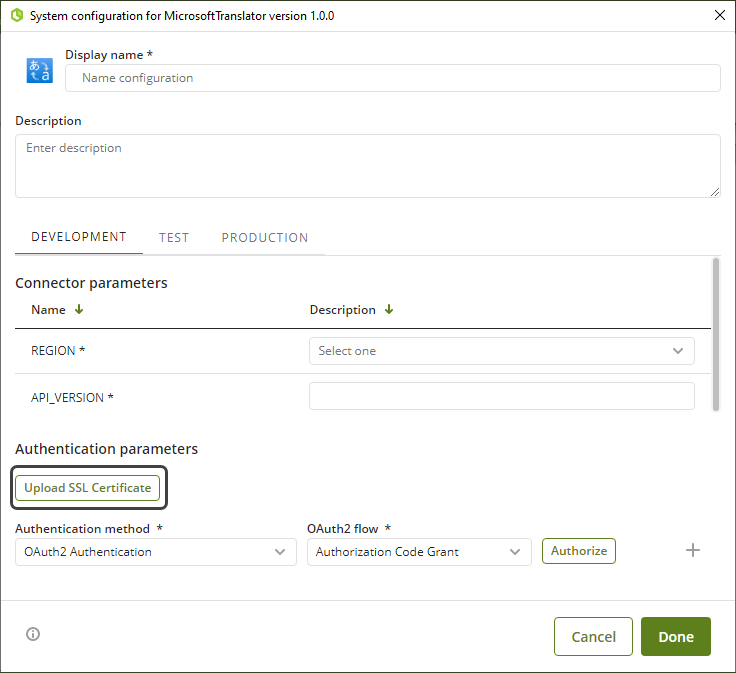
|
You can configure the self-signed certificate for any environment. If you configure it for a test or production environment, you must deploy your process. |
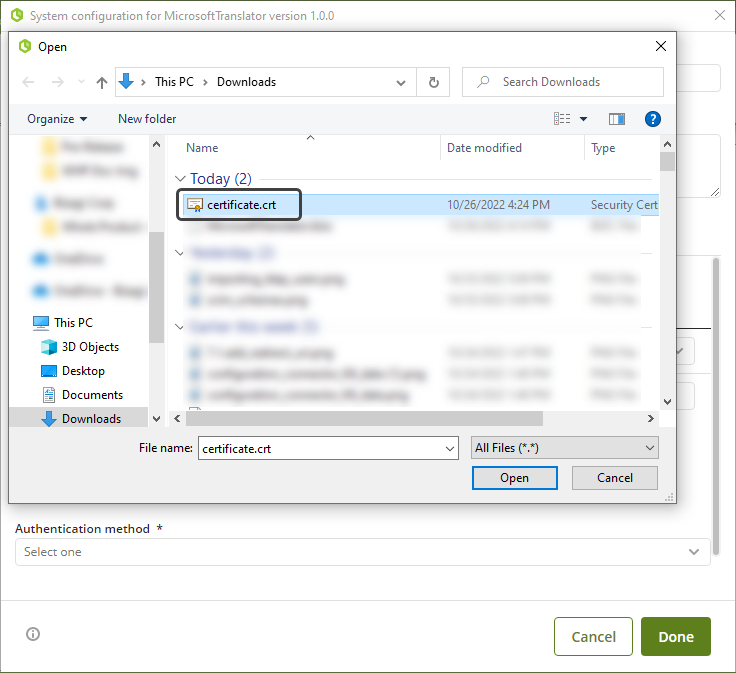
3.In the File Explorer, select the certificate you want to upload.
|
When selecting a certificate, take into consideration: •The certificate that you upload must be in PEM format. •Supported TLS versions are 1.0, 1.1 and 1.2. |
4.Once the certificate is uploaded, click Done. If you want to change the file, delete the certificate and then select Replace SSL Certificate.
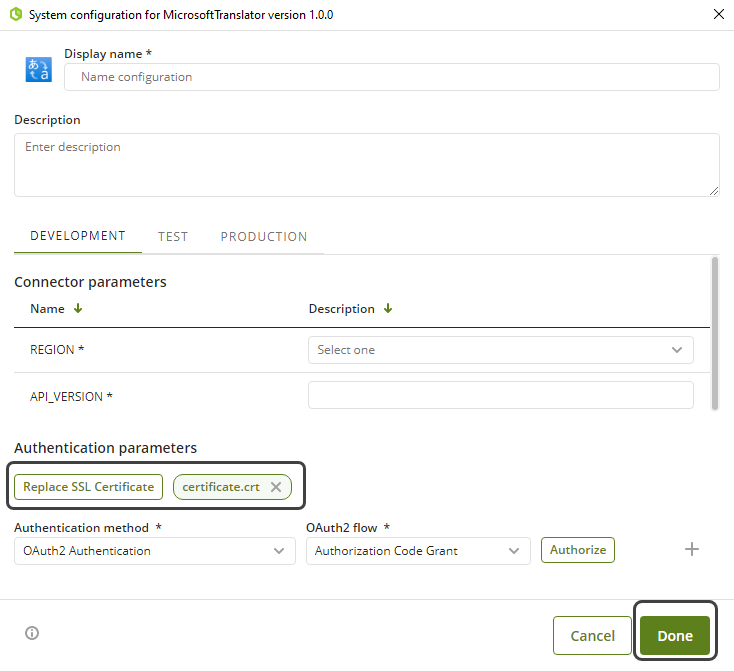
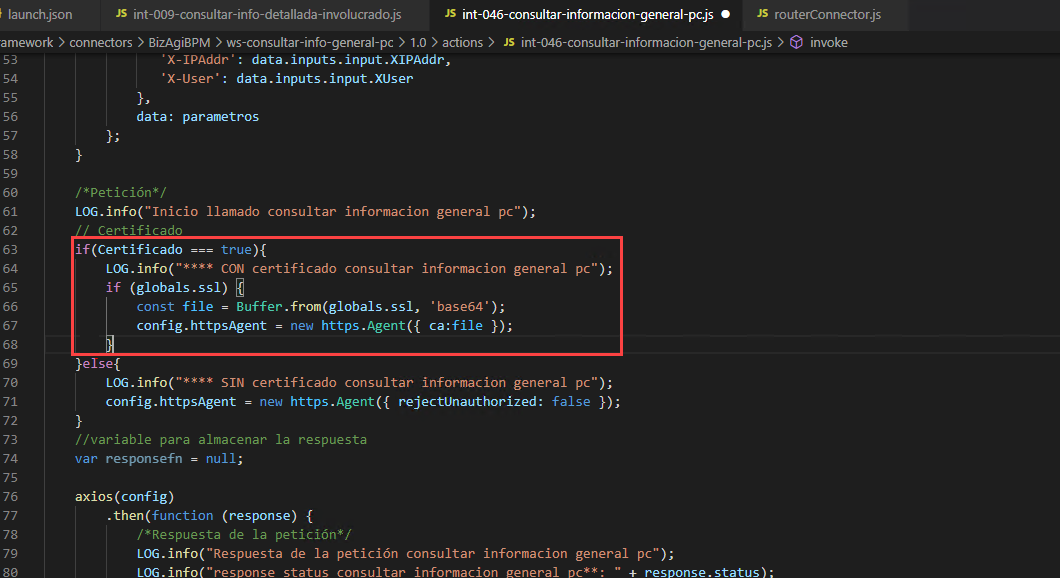
After uploading your certificate you must make sure that the following piece of code (or similar, depending on the used library) is included in every action of your connector. This code enables that in each petition the certificate is sent. In this case the library that it being used is Actions, therefore, the code snippet is the following:
if (globals.ssl) {
const file = Buffer.from(globals.ssl, 'base64');
config.httpsAgent = new https.Agent({ ca:file });
}
|
Bear in ind that if you use a different library, the syntax of the code snippet may vary. |
Managing connectors
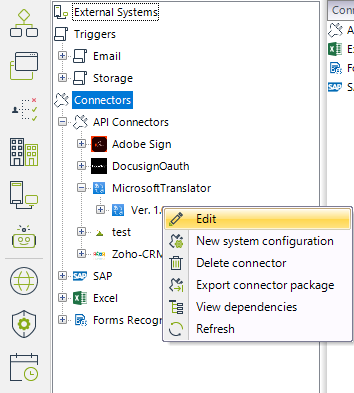
You may alter the parameters of a configuration instance of a specific version of a connection by right-clicking it and selecting Edit.
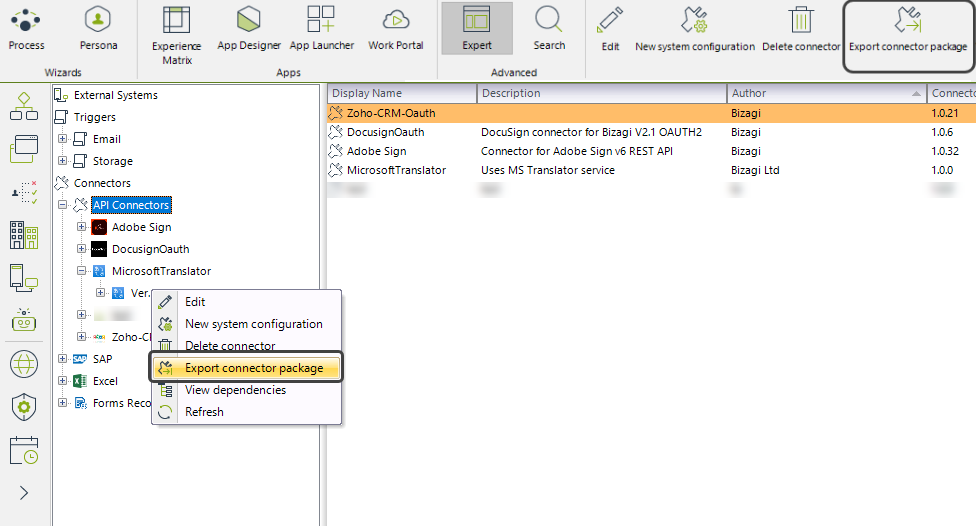
Furthermore, if you want to retrieve an original .bizc connector file set in Bizagi (for example, if you lost your local file), you can do so by selecting the Export connector package option in the version of a given connector:
Deleting connectors
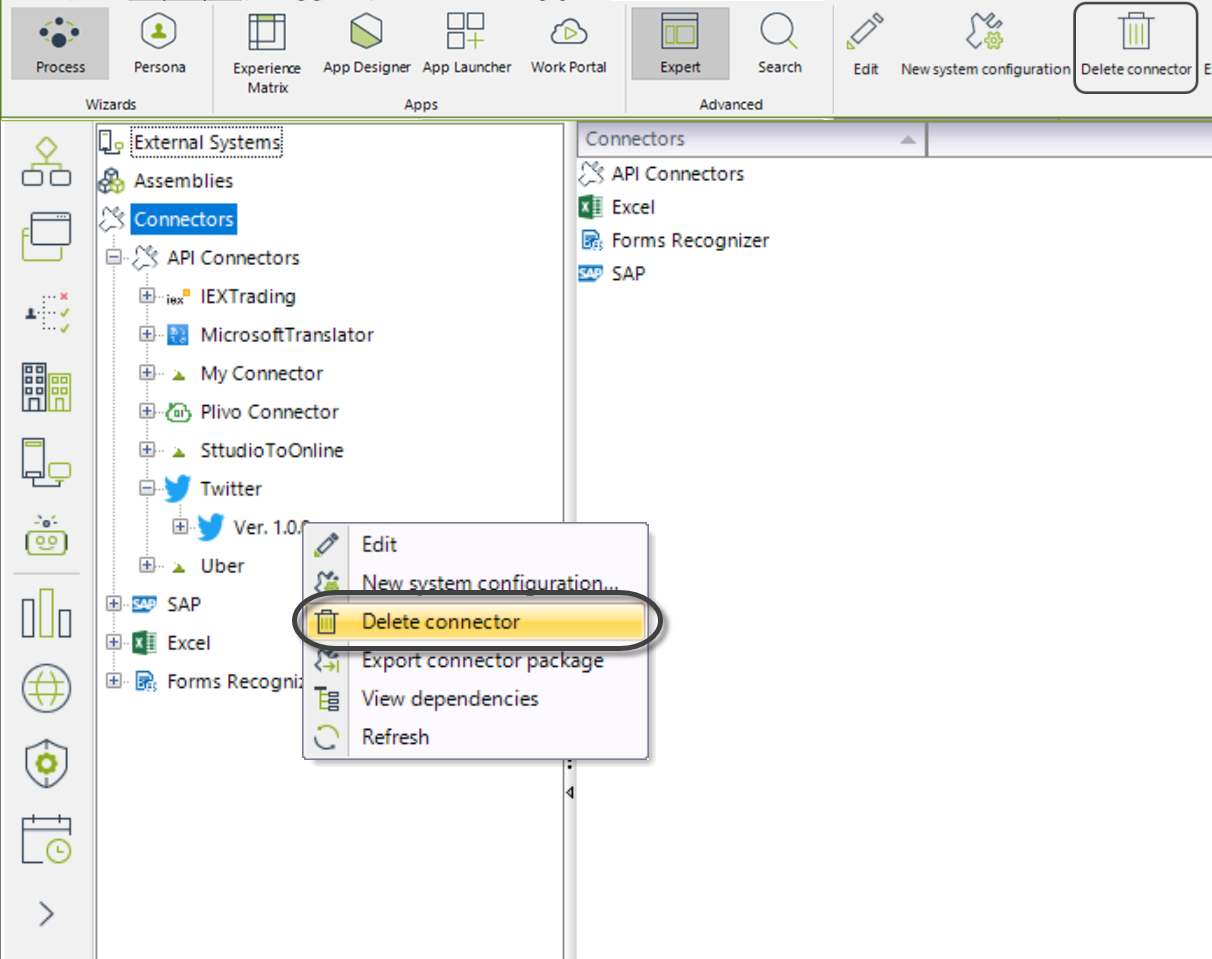
If needed, you can delete a connector's configuration that was previously created. Keep in mind that a connector may have more than one configuration; as a result, the Delete action is unique to each version.
To do so, right-click the configuration that you want to delete and then select Delete connector. You can also select the Delete connector option from the ribbon.
|
Before deleting the connector's configuration, make sure that it is not being used by your processes; otherwise, you will not be able to delete it. |
Last Updated 4/8/2024 11:31:40 AM
