Overview
Connectors in Bizagi are portable modules that allow you to extend the functionality in terms of integrating with other systems or applications, as described in Bizagi Connectors.
The final step when using connectors is configuring those integration points in your processes where they will invoke that other system or application.
This section explains how to use a connector from your Bizagi processes.
Prerequisites
At this point, you need to have your connector already installed and configured.
Refer to Installing connectors for more information about this step.
Using connectors
Connectors can be used in two different situations:
1. In Activity actions
This is the preferred approach, as it allows you to rely on Bizagi's asynchronous activities.
Asynchronous activities in Bizagi provide configuration for timeouts and automatic retries.
2. In buttons of user interfaces
This is possible in case you wish to perform actions while working on a form and show results on that same screen.
Note that given the nature of connectors into which you will be integrating another system, and that such a system may be offline or delayed due to external factors (connectivity issues, busy time frame, etc.), using connectors synchronously in user interfaces is not the recommended approach for the best user experience.
In this section, we will show you how to customize the use of connectors in activity actions.
Connectors in Activity actions
Having connectors execute as Activity actions (e.g., upon the termination of a manual activity) is the preferred option since it will facilitate the best user experience and allow you to configure such integration as robust as possible.
By executing connectors at the On Exit timing of a given activity, you may rely on an asynchronous activity and use a timeout definition and automatic retry configuration.
To do so, follow these steps:
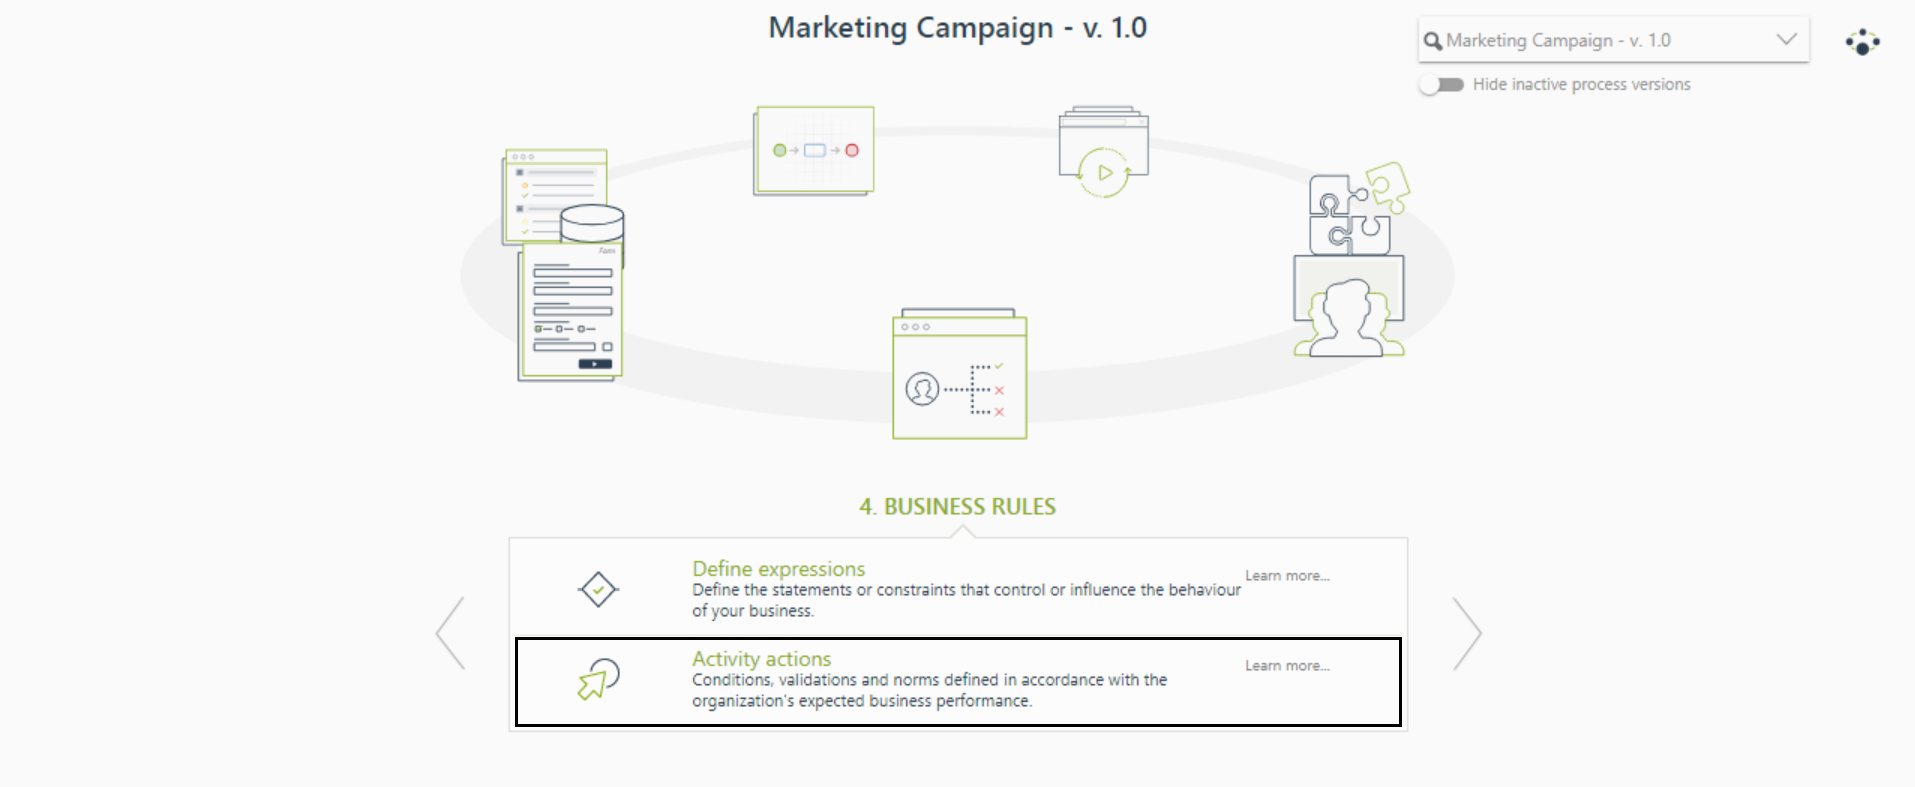
1. Go to the 4th step of the wizard called Activity actions.
Select the activity in which you want to execute the connector.
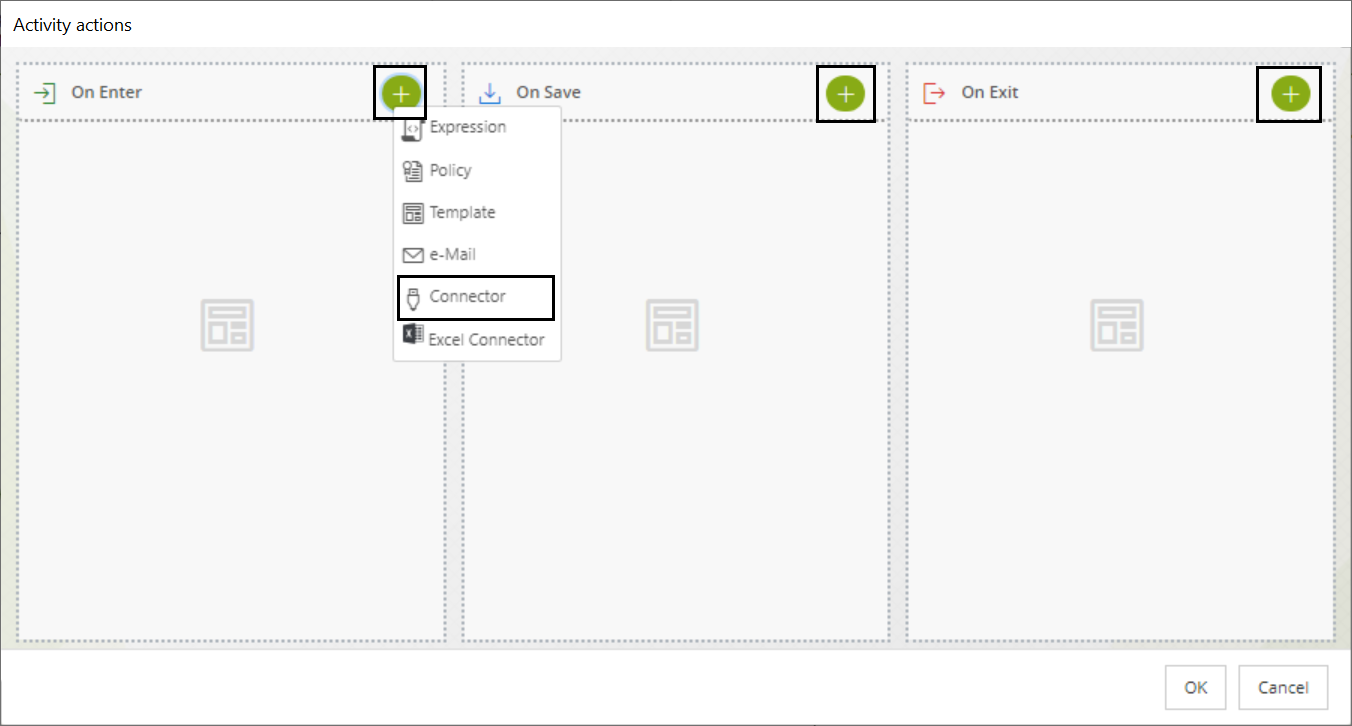
2. Add a rule of the type Connector.
Choose the timing when the activity will be carried out (e.g On Enter or On Exit).
|
You can add more than one rule for executing a connector, and the order behind them will be: On Enter first and finally On Exit (On Save, applies while in the form, given that button is pressed). Multiple rules in the same activity. Actions will be executed from the first listed one to the last listed one. |
3. Select the Connector instance configuration to be used and its action.
This indicates that you should already know the authentication credentials you will use for the connection at this point.
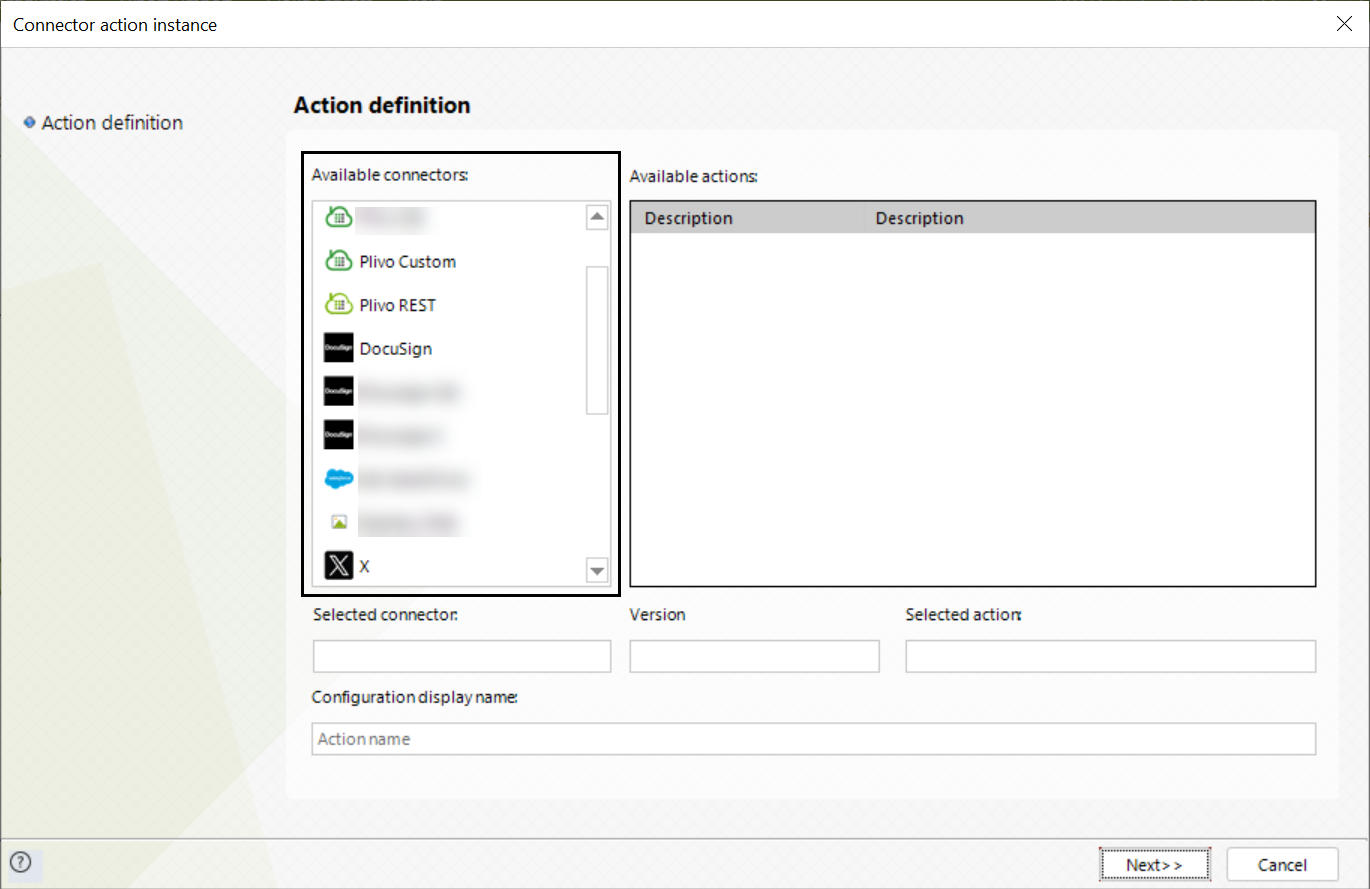
You will see that the list of all connector configurations accessible in your project is in the left panel. Keep in mind that if you configured multiple instances of the same connector (for example, because the actions within the method had different authentication configurations), the list of available connector configurations will show them all.
In the right panel, choose your connector configuration and then its method.
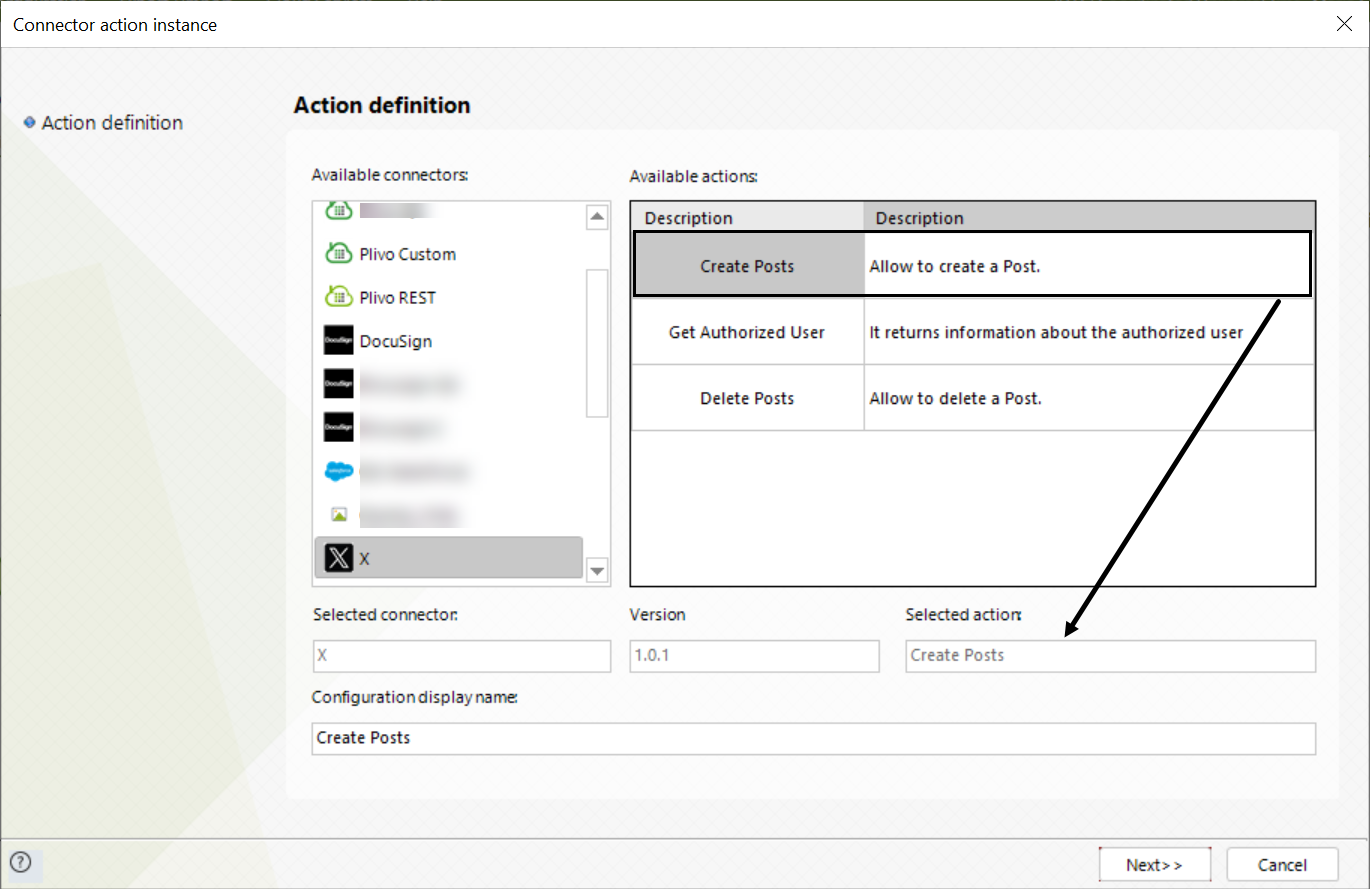
A configuration using a X service connector and the option to search for posts is shown in the image above.
Click Next when finished.
4. Map the inputs and outputs as required by the connector.
In the inputs, Runtime entities' information is available to be mapped from the Case attribute, just above the Process entity. They are displayed in the simple map (advanced mapping is not supported).
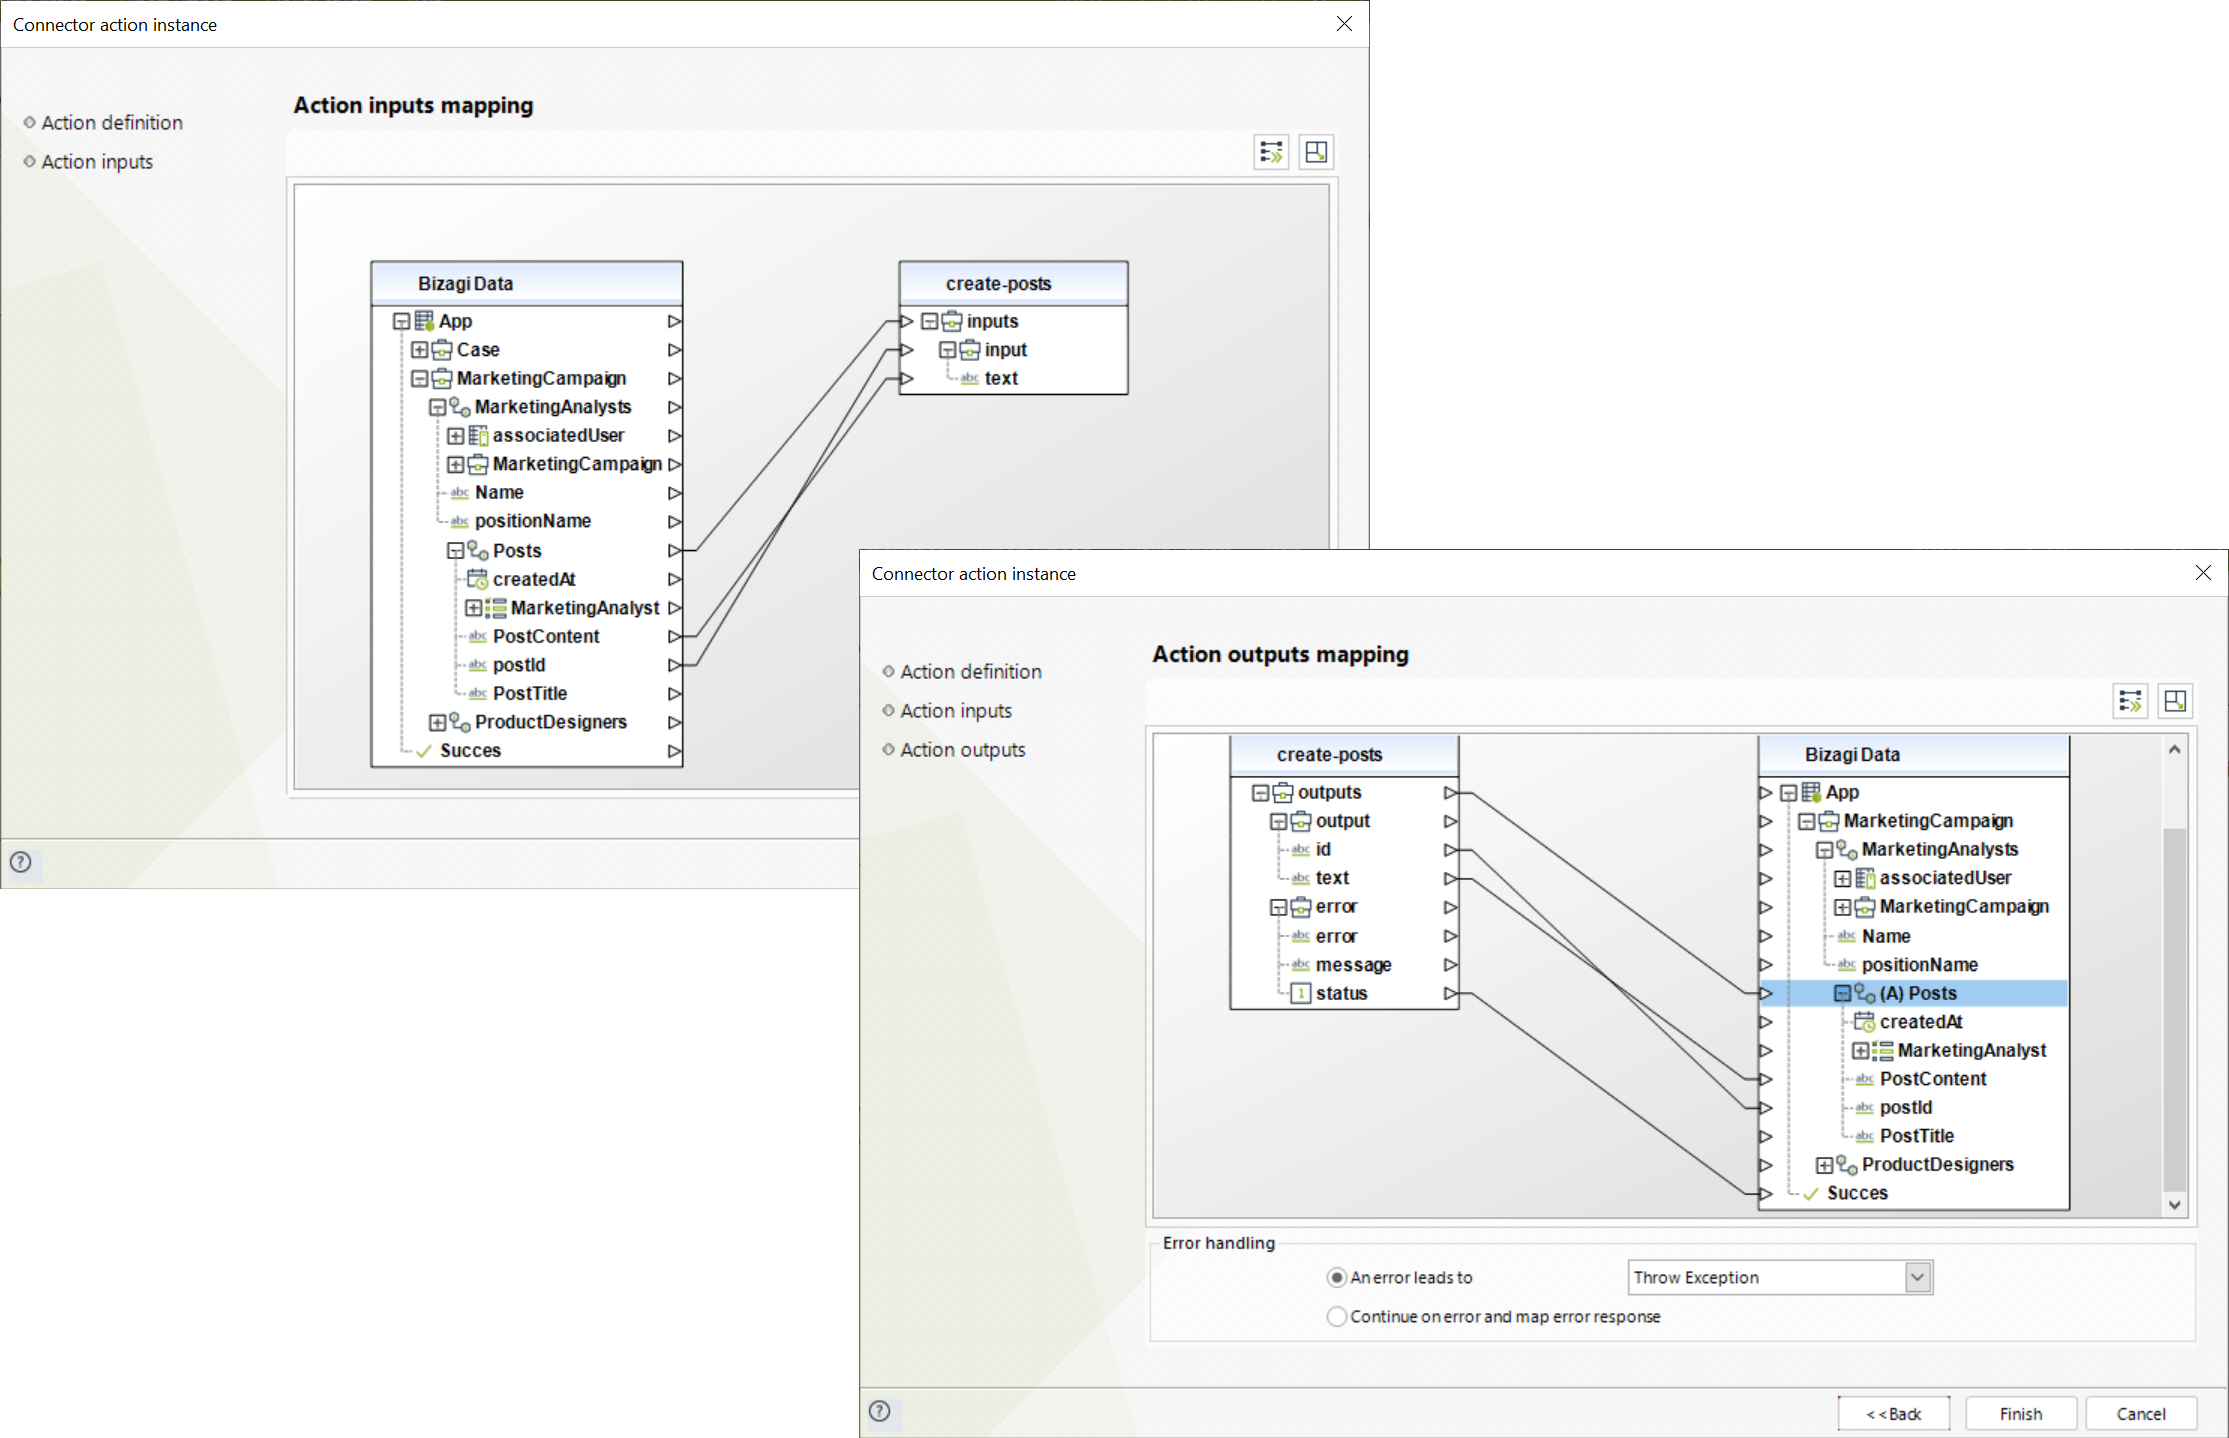
You may resolve doubts with the author of the connector if you do not follow exactly what inputs and outputs are required and how they are to be used, or by looking up the documentation for that third-party system's API (e.g., X's official website).
Click Finish when done.
|
If you want to map error outputs, be sure to check Continue and execute mapping when a connector error is received. Otherwise, select an option to specify the behavior when an error occurs:
|
Connector Service file size limit
The Connector Service has a file size limit for processing requests, including attachments. The default maximum size for HTTP requests, including files, in a connector is 50 MB. Any files exceeding this limit will be rejected.
In Node.js, files are encoded in Base64, which increases their size by approximately 33%, so a 50 MB file becomes about 66.5 MB when encoded.
|
If you need to adjust the maximum file size, contact Support by submitting a ticket.
Through testing, we have determined that the maximum adjusted file size the Connectors Service can handle is 100 MB. When files are processed in Base64 format, which increases their size by approximately 33%, the maximum adjusted size becomes 133 MB. This adjustment ensures that files, even after Base64 encoding, are processed efficiently without exceeding server limits. Files larger than these adjusted limits cannot be processed by the Connectors Service. |
Troubleshooting
To troubleshoot and watch over the execution of your connector, you may activate traces in Bizagi (in a Development environment or temporarily in a different environment).
To activate traces, open the Tracing window located in the Configuration tab in the Ribbon and make sure you mark the External connectors item (by pressing the All/Warning/Error buttons).
Upon execution, traces will be found at C:\Bizagi\Projects\<Your Project Name>\Temporary\Connectors\ file.
Refer to Tracing to learn more about the different types of traces.
|
These traces will store information about how the Log object's methods were used in your connector's code. Refer to Bizagi API for connectors to learn more about the Log object and its methods. |
In addition to traces, whenever connectors are run, you may use your browser's developer tools to get further information about errors (i.e., using the console and network tab to check out for details).
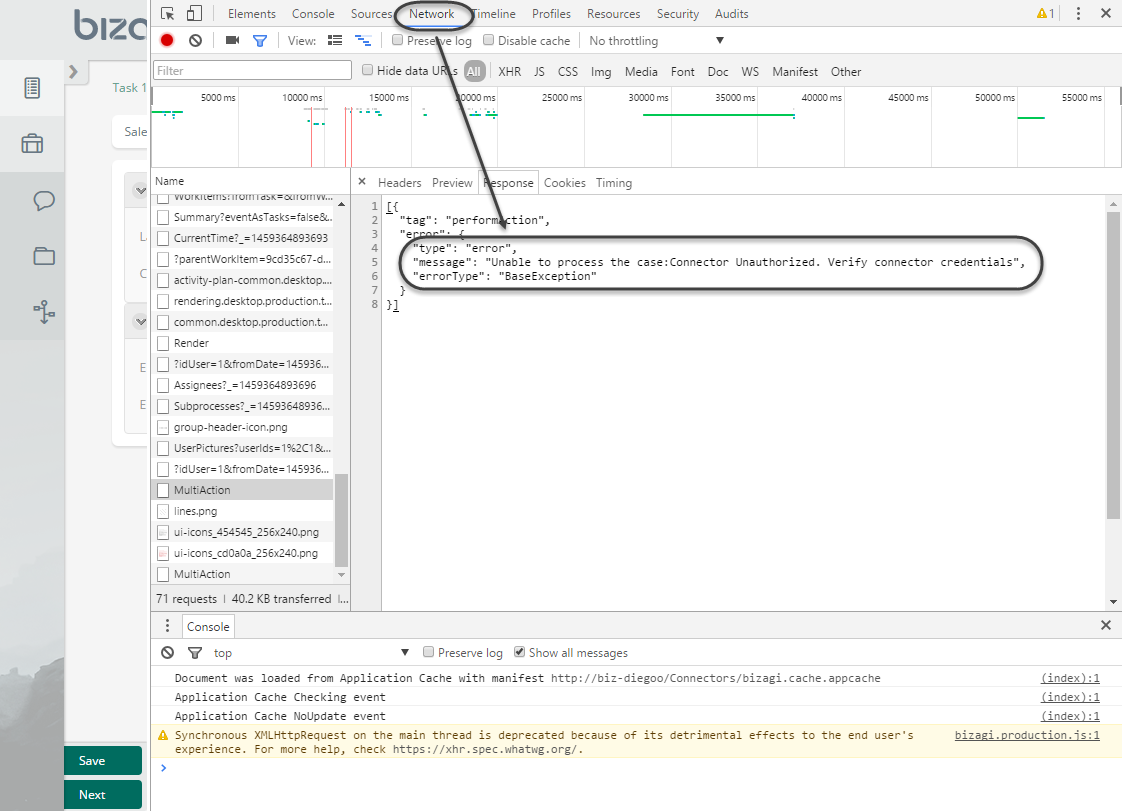
Last Updated 2/20/2025 9:42:03 AM
