Overview
To configure Transactional Sub-Processes we will use the following diagram: Travel Request.
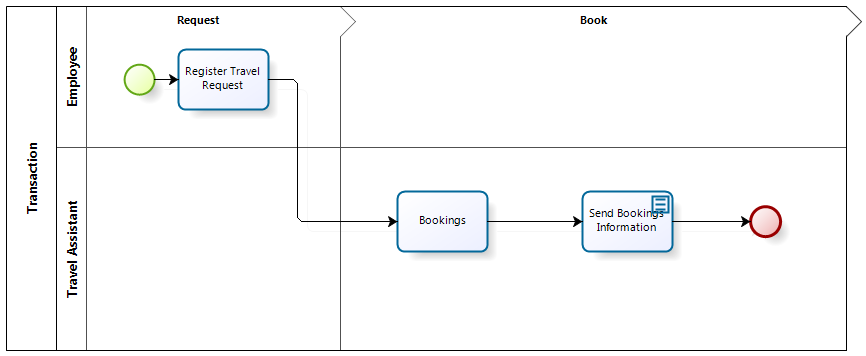
A Travel Request Process includes the necessary Activities to receive and handle travel requests made by the employees of a company. We will transform the Bookings Task to a Transactional Sub-Process taking into account situations that need special treatment.
Configure Transactional Sub-process
To configure a Transactional Sub-Process follow the next steps:
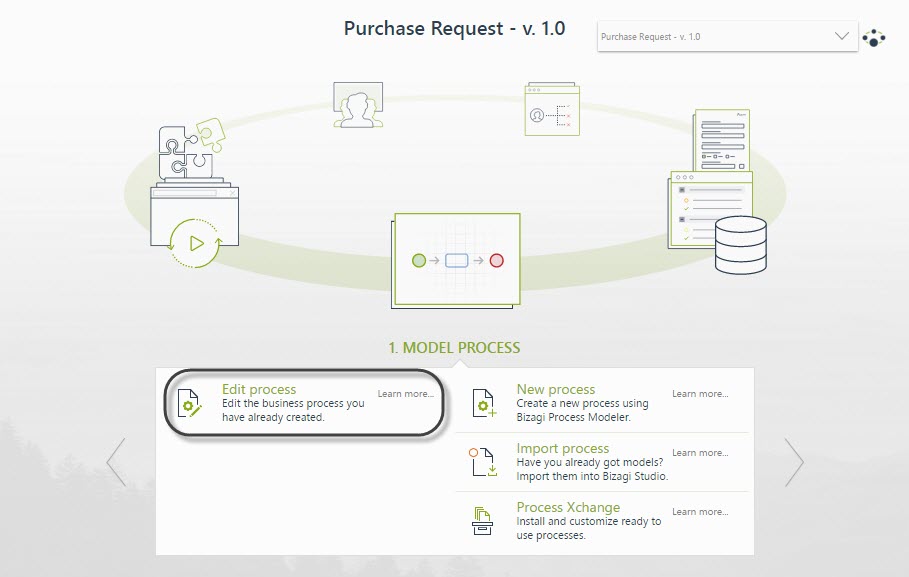
1.Go to step Model Process of the Process Wizard and then click Edit Process.
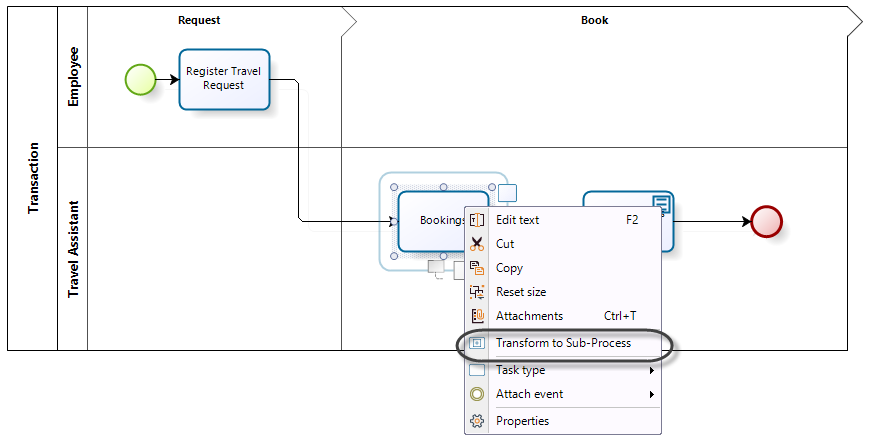
2.Right-click the task you wish to convert to Transactional Sub-Proces. In this case the Bookings task, and select the option Transform to Sub-Process.
3.The Sub-Process Wizard will launch and show the Sub-Process types. Select the Embedded option. In the new window you must select the Transactional check box control.
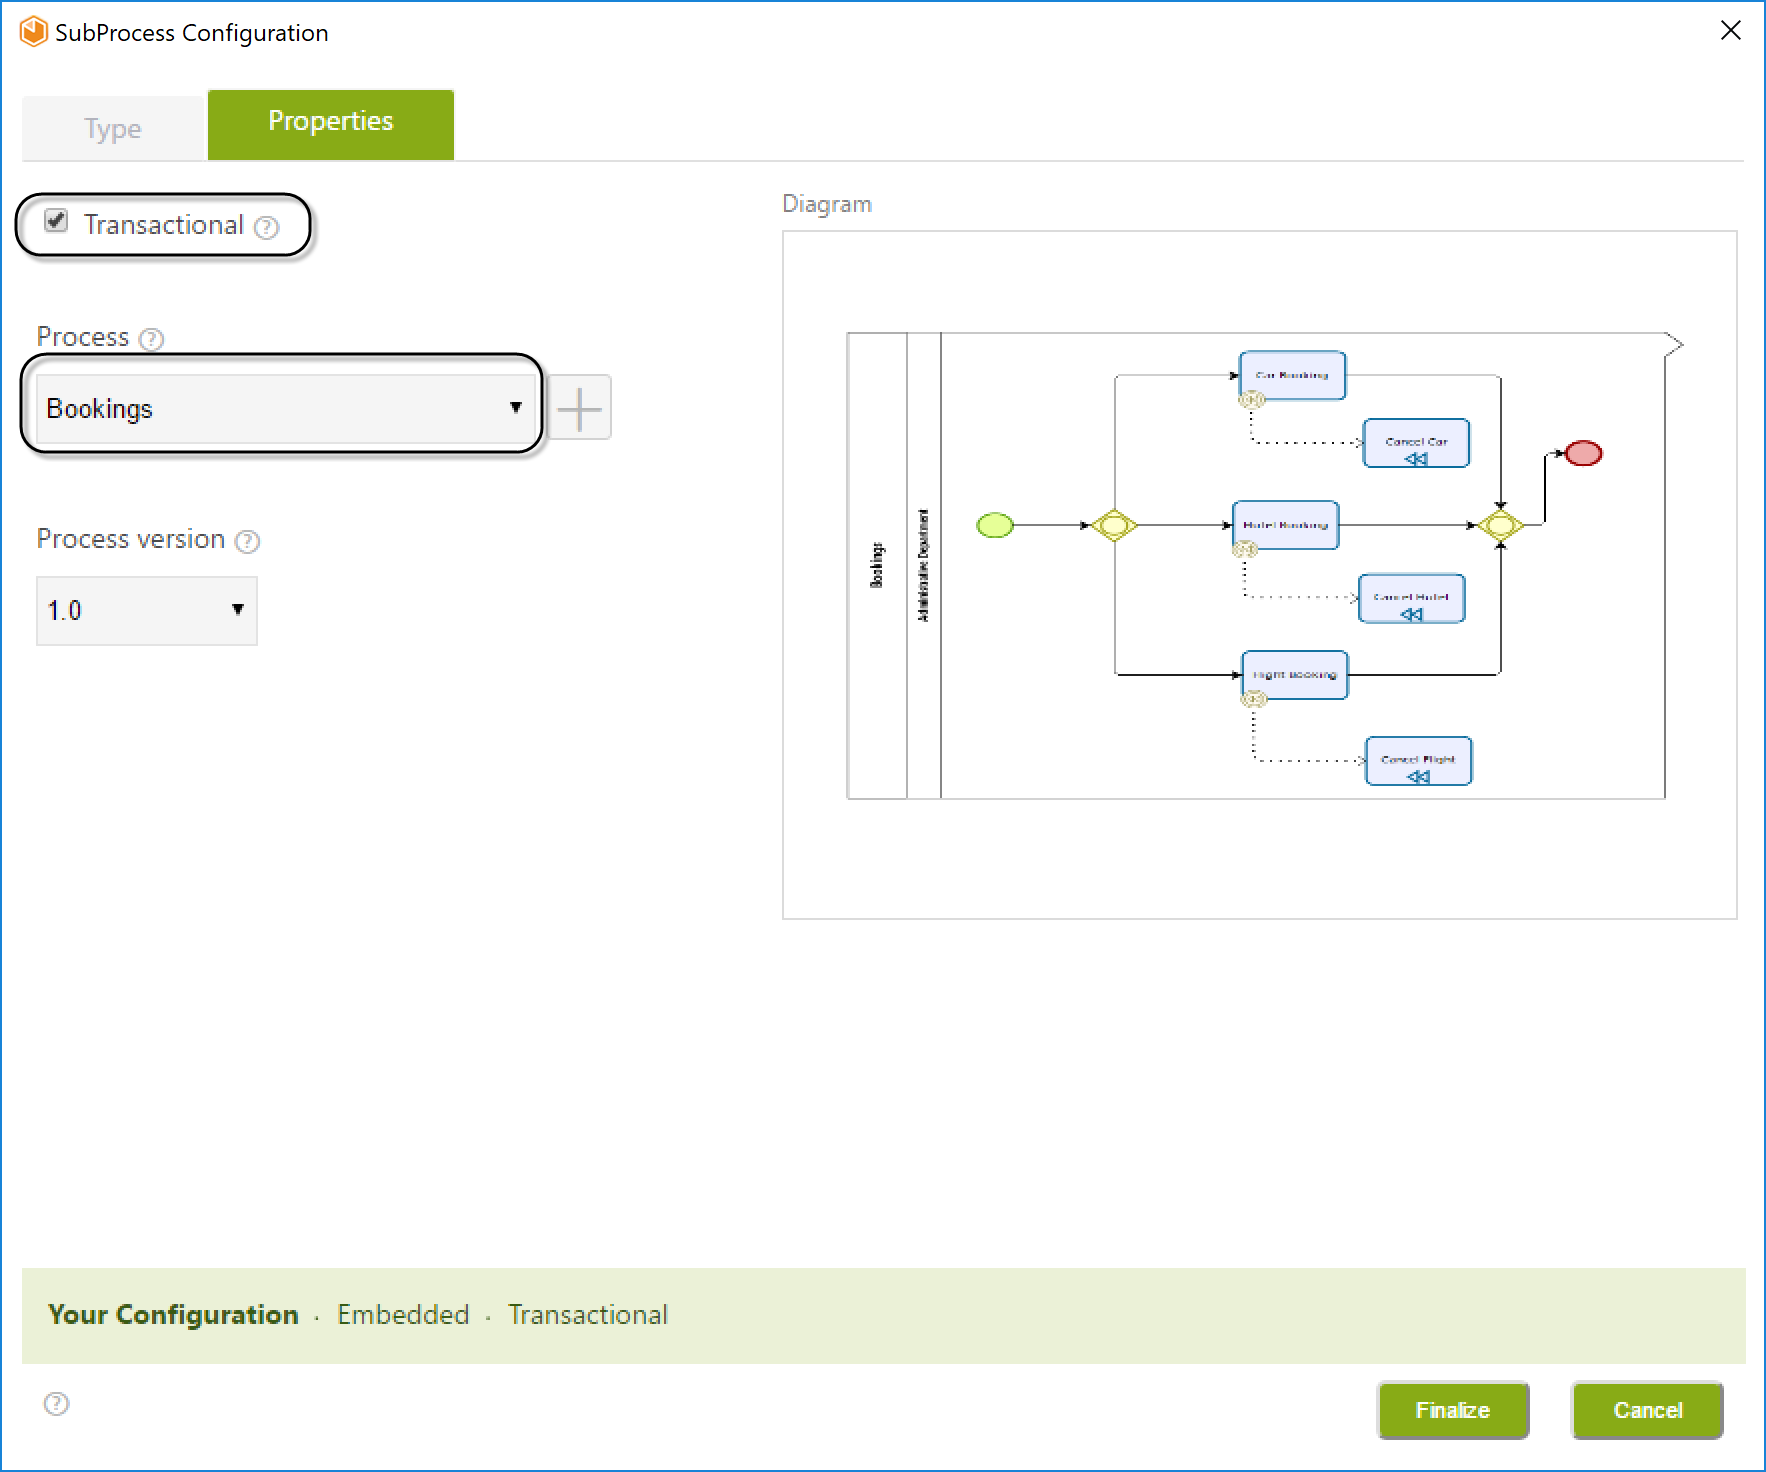
4.The Properties window will display the following controls:
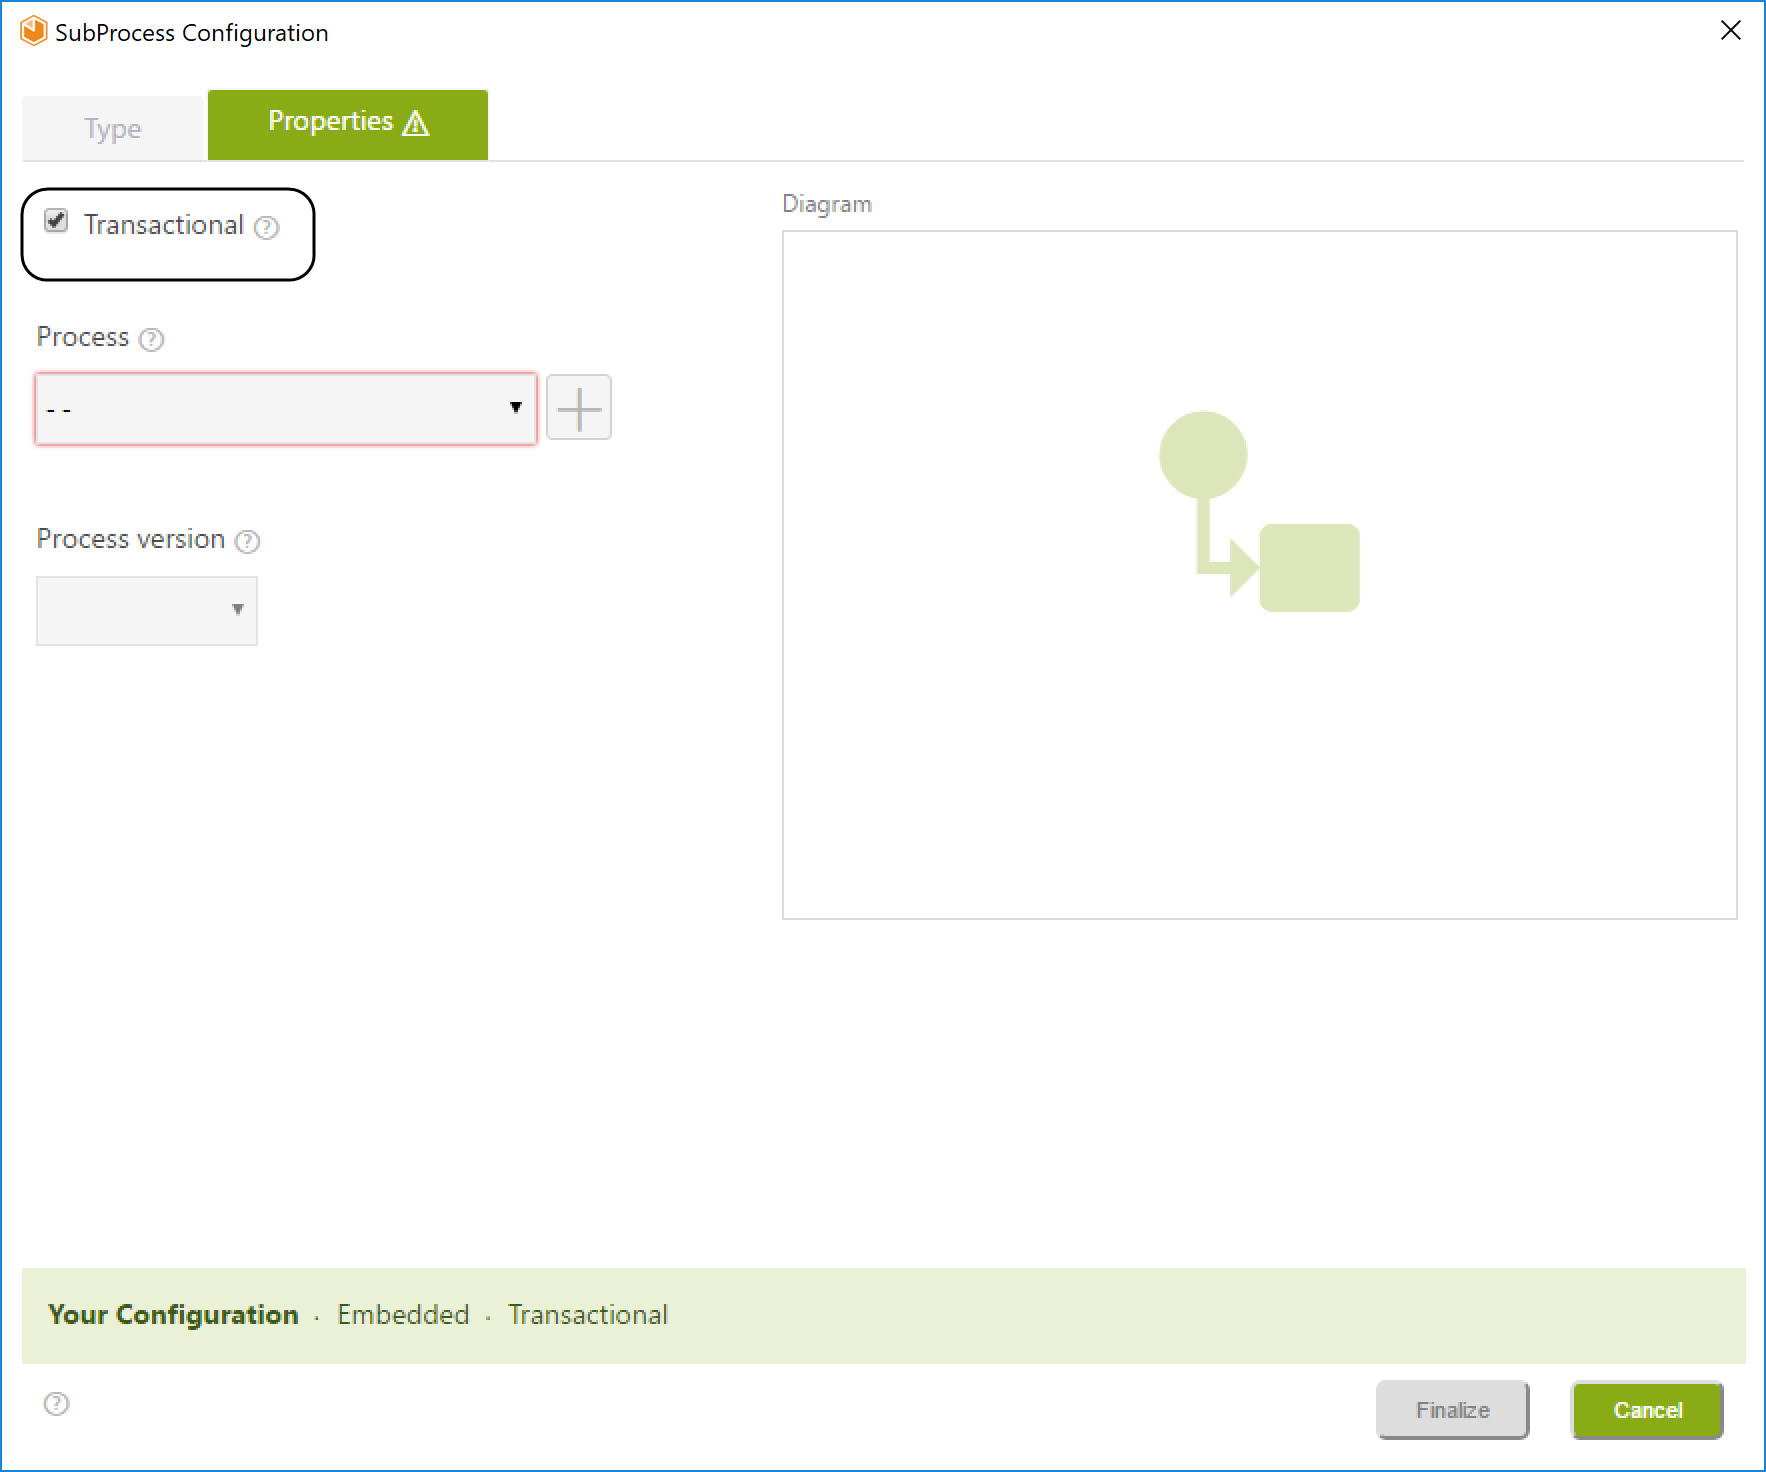
Controls |
Description |
|---|---|
Transactional Check-box |
Sets the Sub-Process as Transactional. |
Processes drop-down List |
Displays the existing processes list and sets the selected one as the Sub-Process. |
Add button |
Allows the user to create a new process |
Process version drop-down List |
Displays the selected process versions list. If a new process is created, the selected version will be the 1.0 |
Diagram |
Displays a preview of the process model selected. If a new process is selected, the Diagram will remain empty. |
Status Bar |
Presents the Sub-Process status configuration horizontally. |
To define the Sub-Process, you can either select an existing Process or create a new one from the Properties tab:
Existing Process
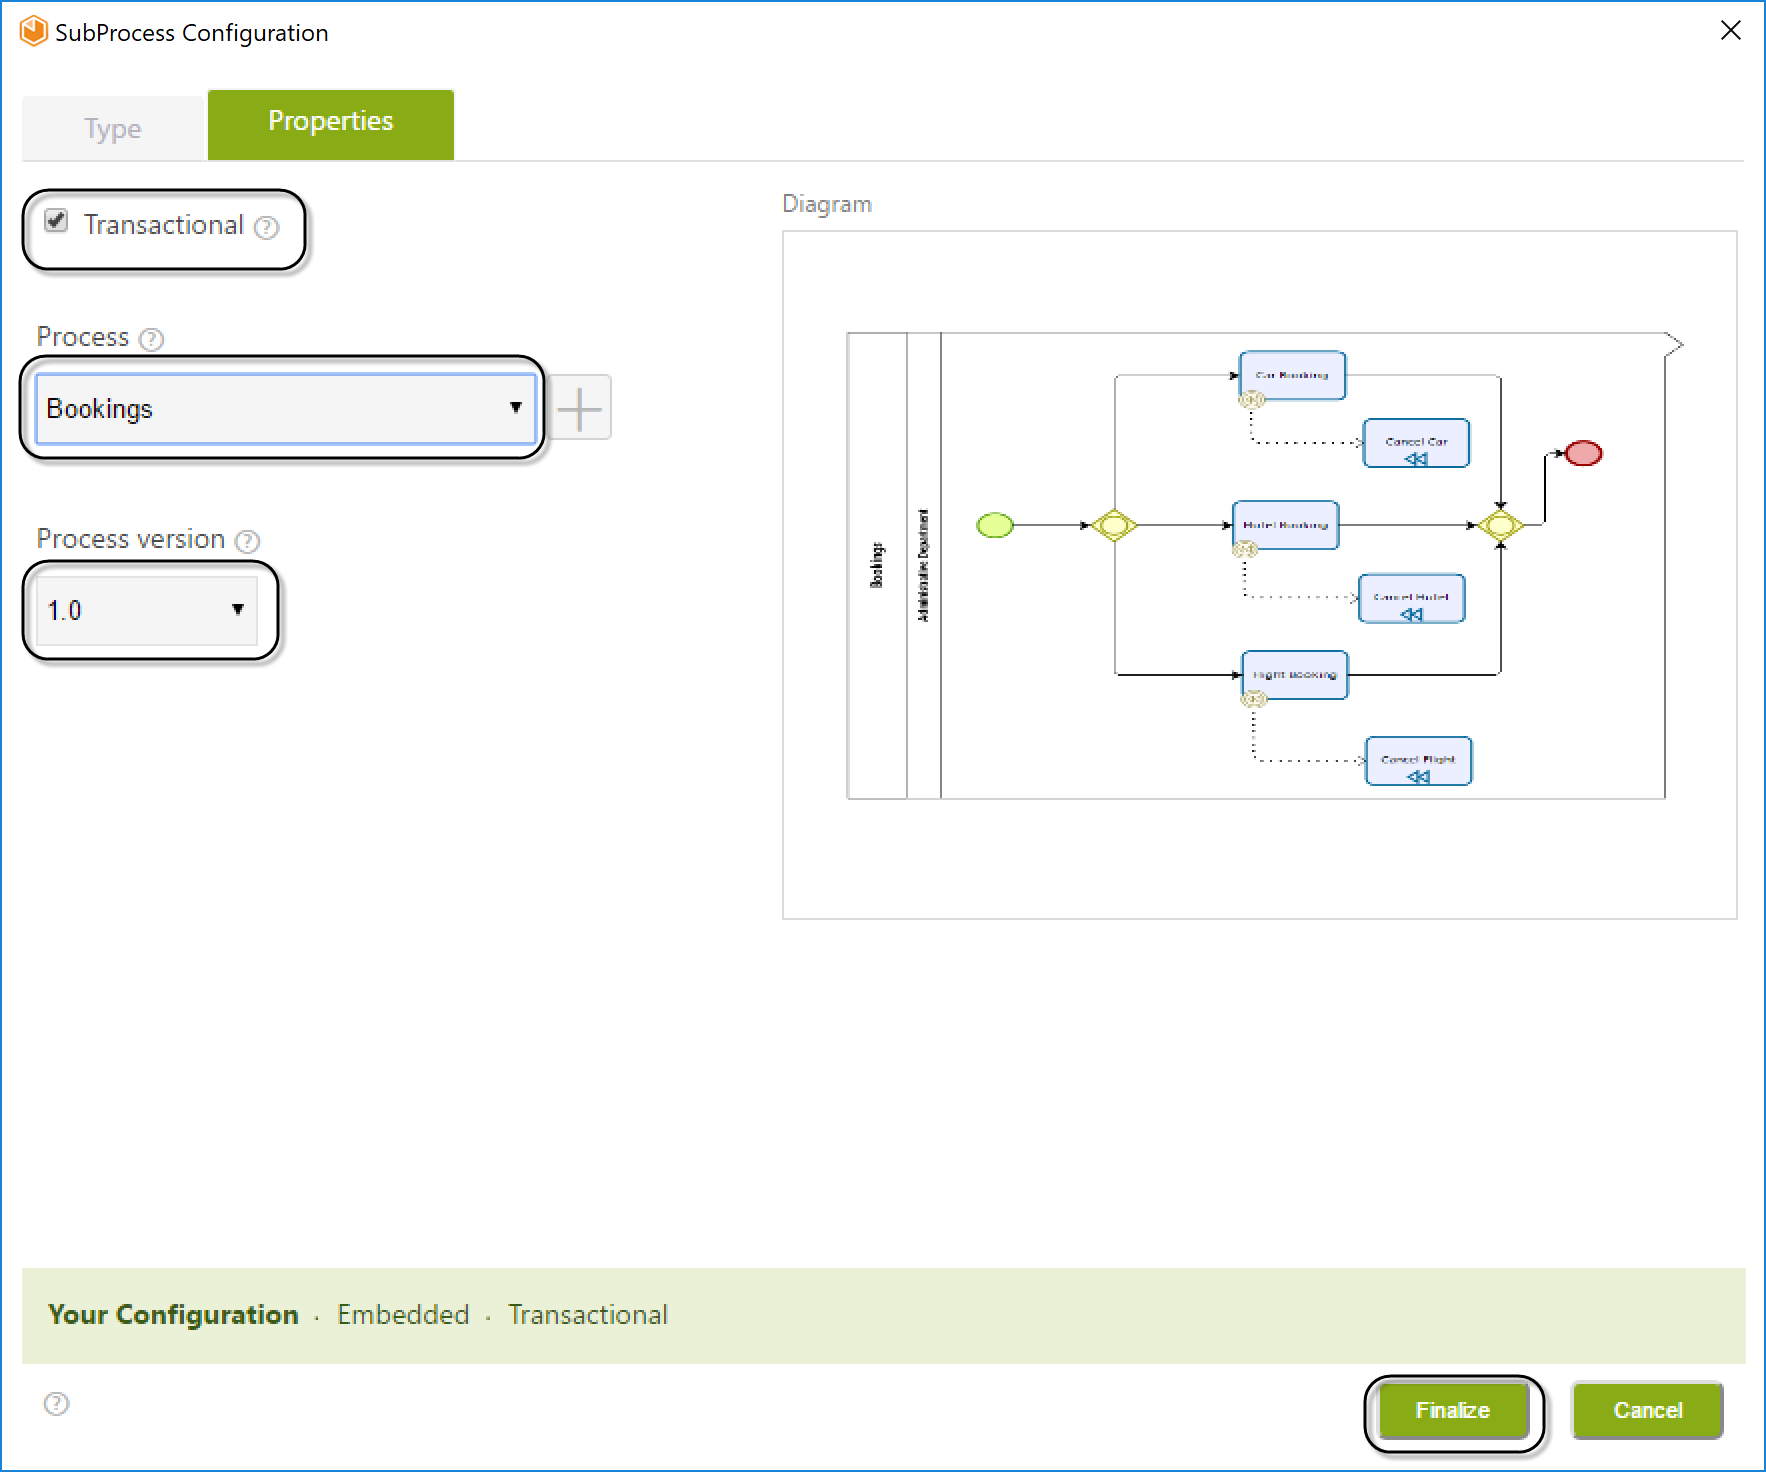
To set an existing Process as Transactional:
Enable the Transactional checkbox and then click the process drop-down list and select the process you want to define as a Subprocess. Select the version. Click the Finish button.
New Process
To create a new Transactional Sub-Process:
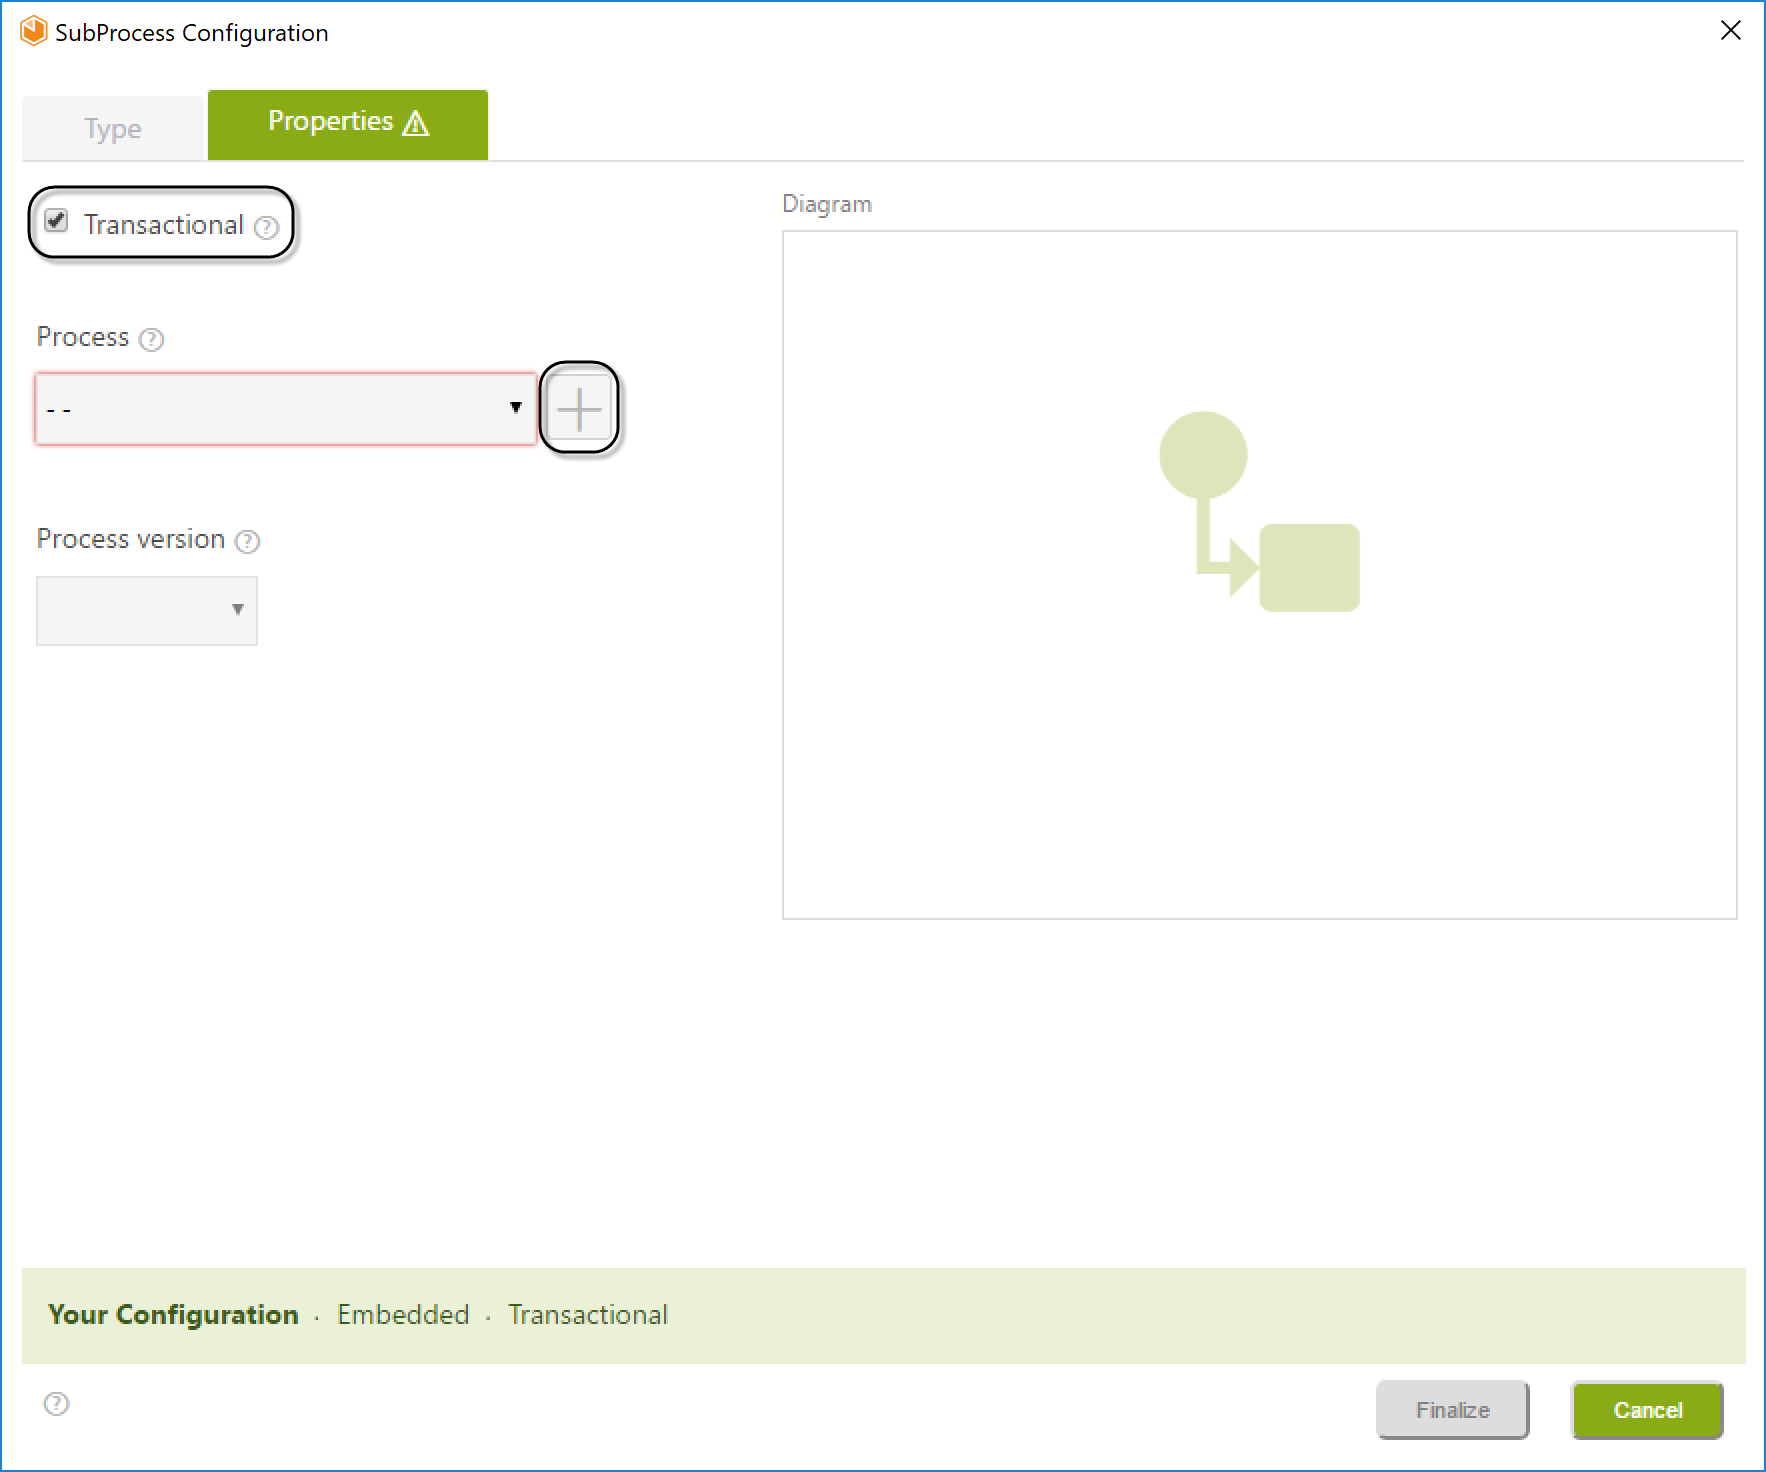
1.Click the Transactional Check-box control and click the Add button.
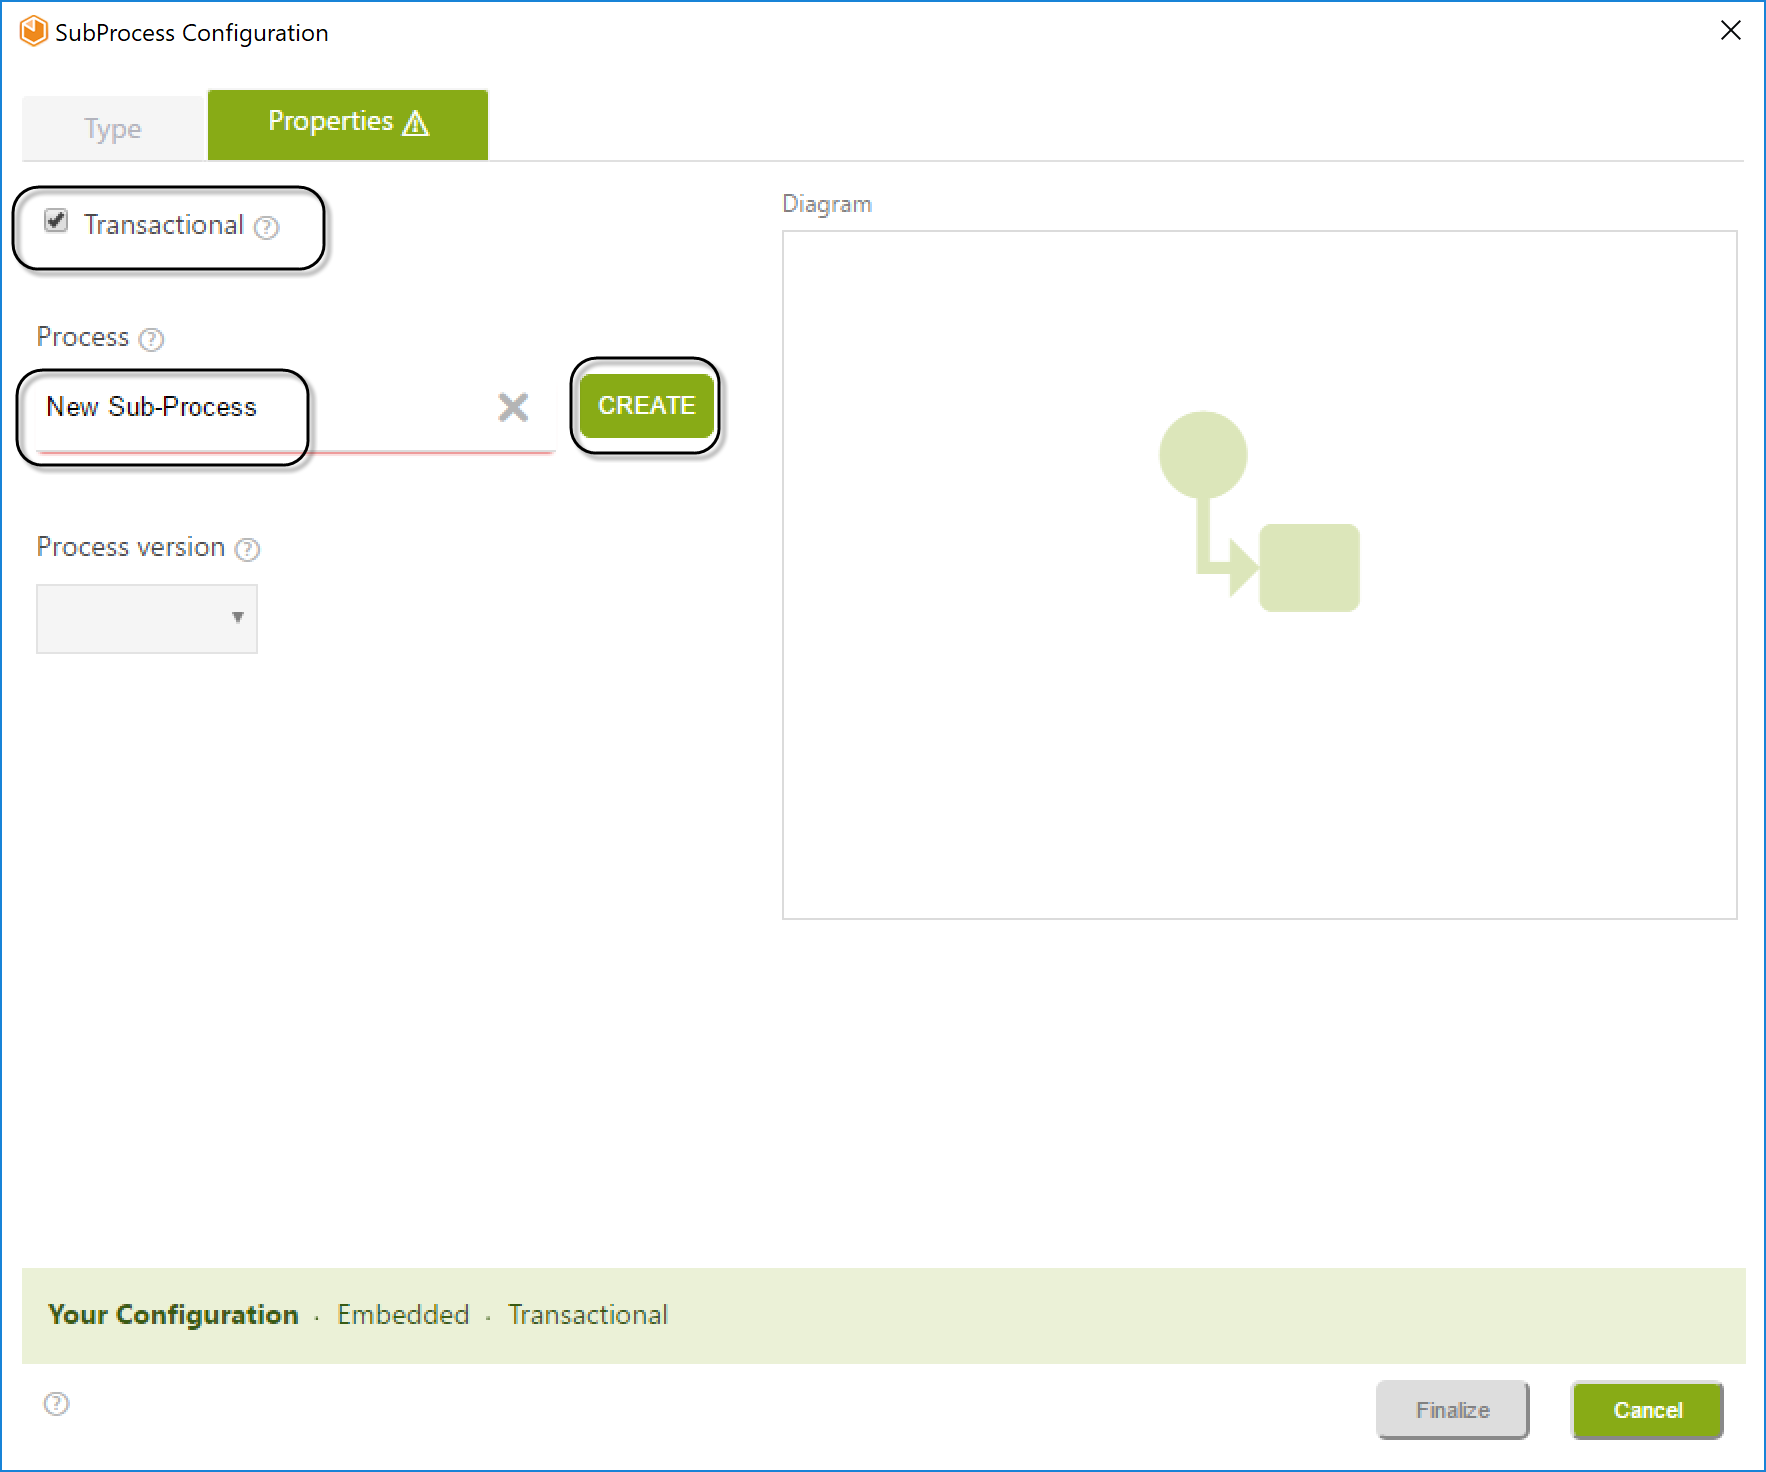
2.Type the name of the new Process and click the Create button.
3.The created Process will be listed on the Process drop-down list, select it and click Finalize.
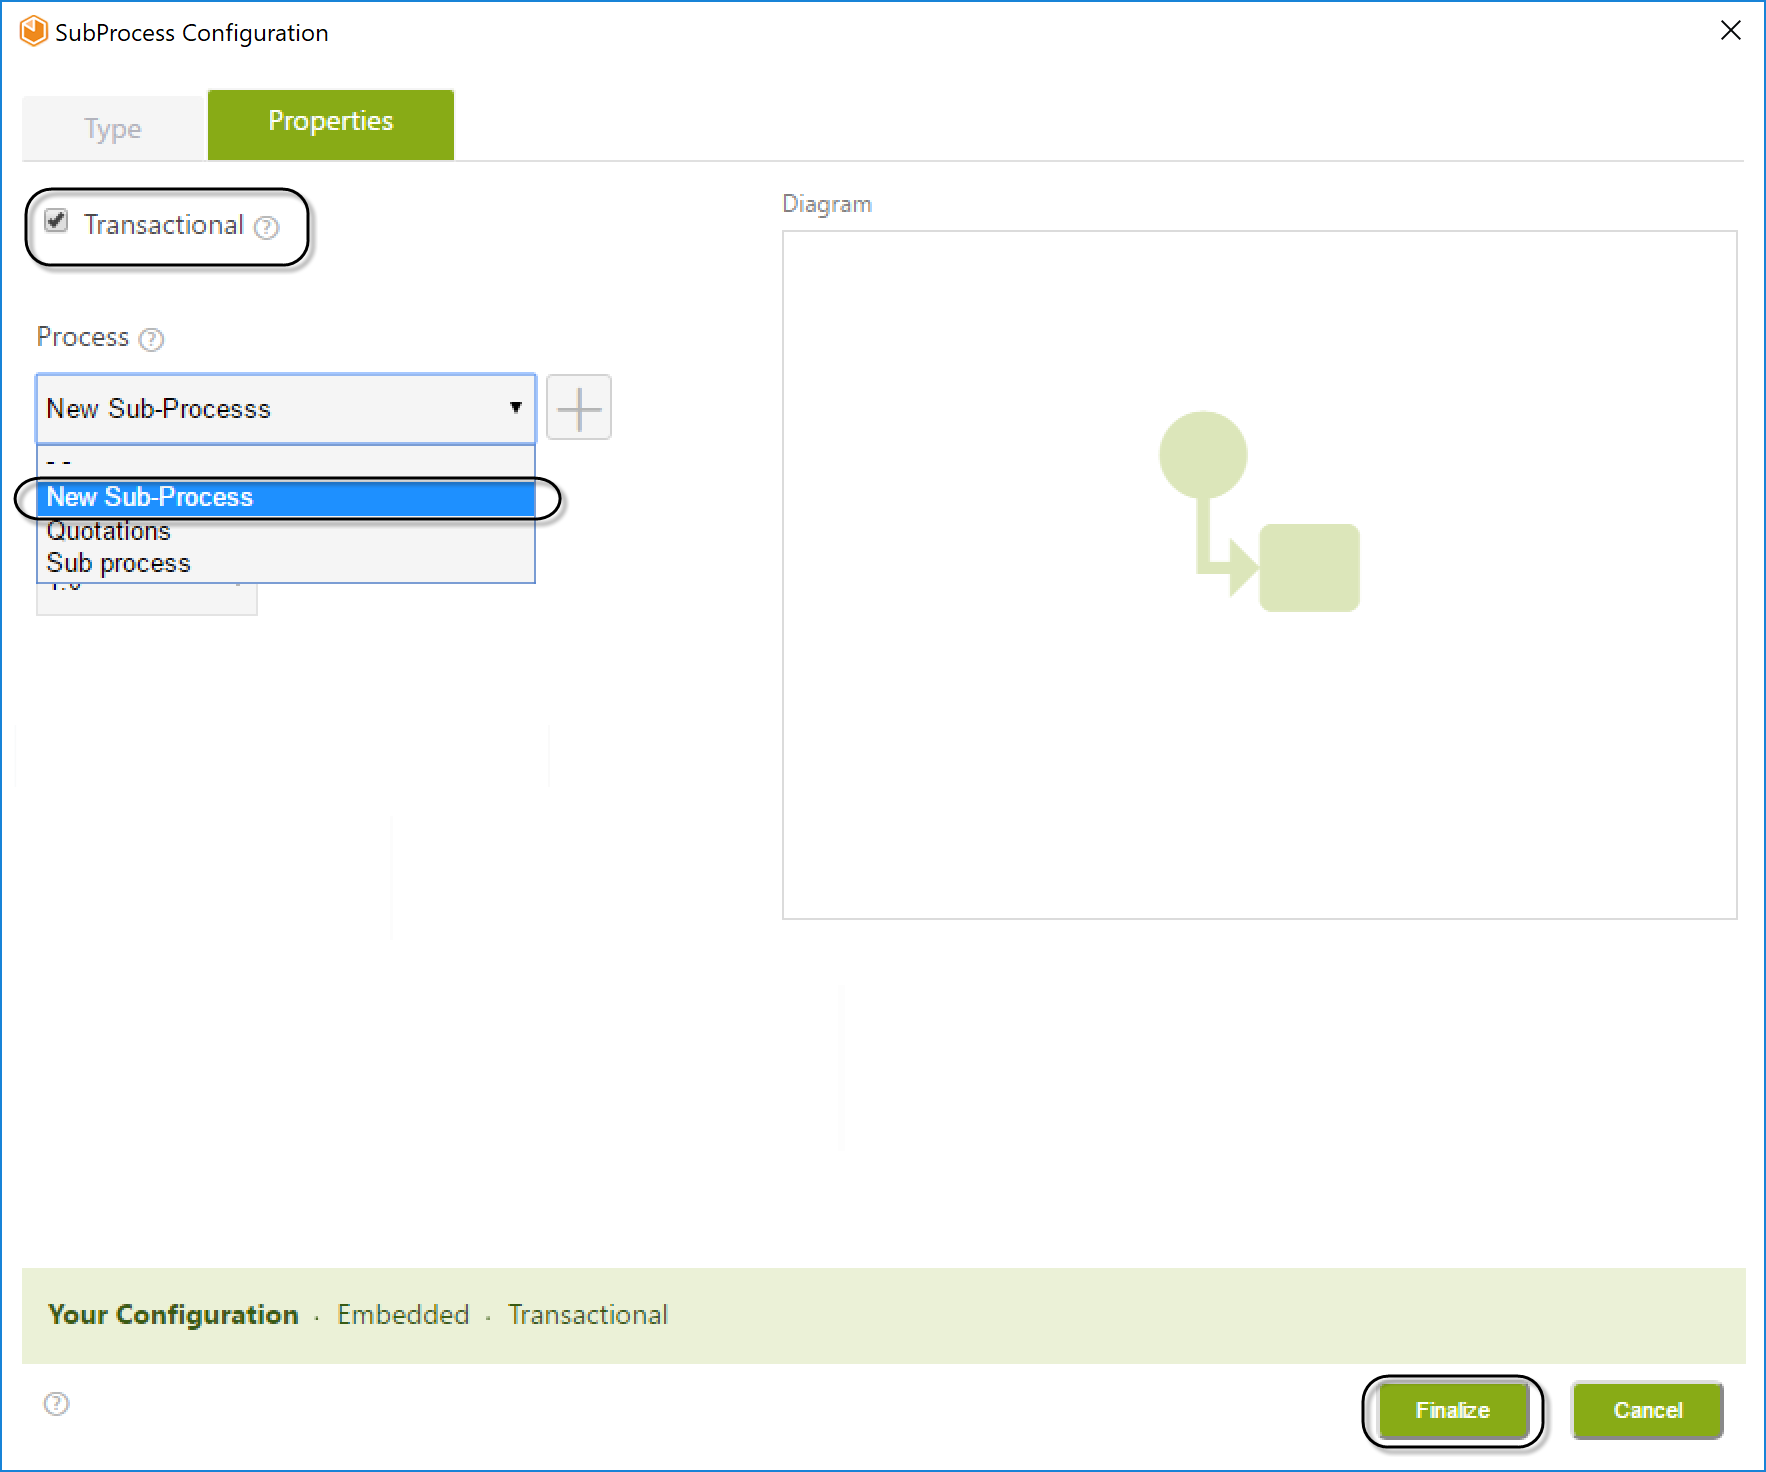
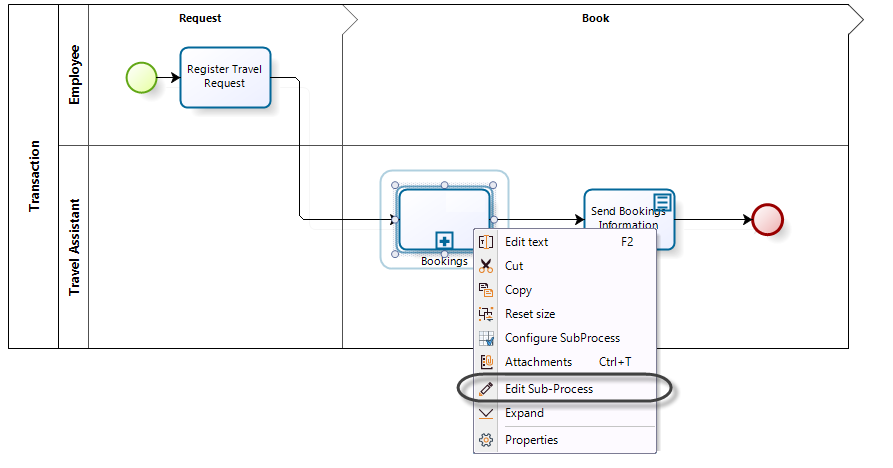
4.Once the Sub-Process is created, you can immediately edit it.
Right-click the new Sub-Process (Bookings) and select the option Edit Sub-Process.
5.The window will display the Sub-Process diagram.
When you create a process for the first time a pool containing one lane an one phase will display. You can model the process based on the following diagram.
In the Bookings Sub-Process, the Administrative Department manages the car, hotel and flight bookings simultaneously as requested by the employee. When the bookings are done, the Sub-Process ends. The Process flow is depicted in the following diagram.
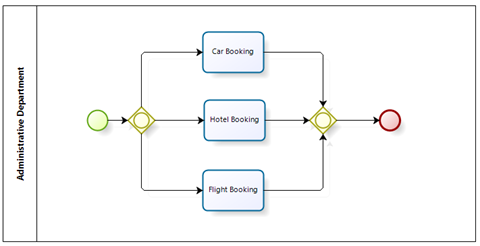
In this scenario, many situations can arise during the Process development.
For instance, the Administrative Department may successfully confirm the car and hotel booking. However, when attempting to book the flight, no airline has seat availability on the requested date for the specific destination. As the car and hotel have already been booked for the given date, these bookings need to be canceled and the employee notified.
This business scenario can be modeled as follows:
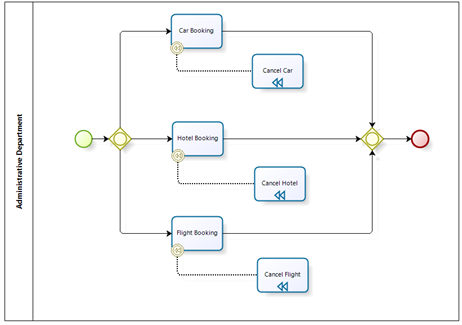
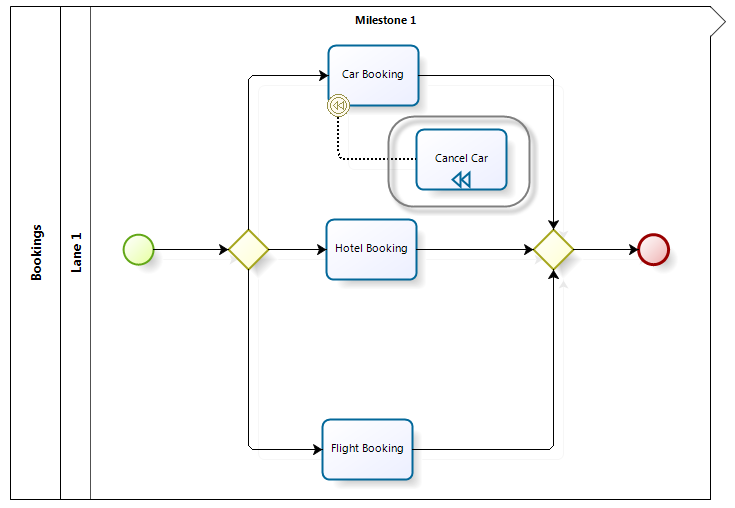
A Compensation Event is attached to the boundary of each booking Activity. This Event is used to activate a cancellation flow once it is triggered. In this case, the cancellation flow represents Activities that must be triggered manually by the user to resolve unexpected situations.
In the above scenario, the Compensation Events attached to the Car Booking and Hotel Booking Activities will be activated. In turn, the Cancel Car and Cancel Hotel Compensation Activities will be enabled allowing the Administrative Department to handle the compensation for each of the effected Activities.
To associate a Compensation Event, right-click the Activity to be compensated, and select the option Attach Event. Choose the Compensate event.
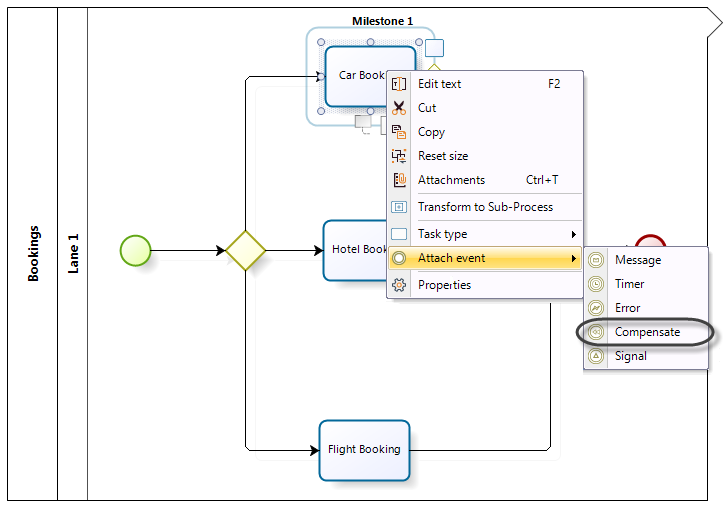
The associated Compensation Task is automatically created. Do the same for the remaining two Activities.
To raise the cancellation we need to use an expression once the activity is finished (on exit) and deviate the normal path towards the cancellation path (shown below). This function will add a cancellation log file that can be accessed from the Management Console. The expression should be created on the fourth step of the Process wizard.
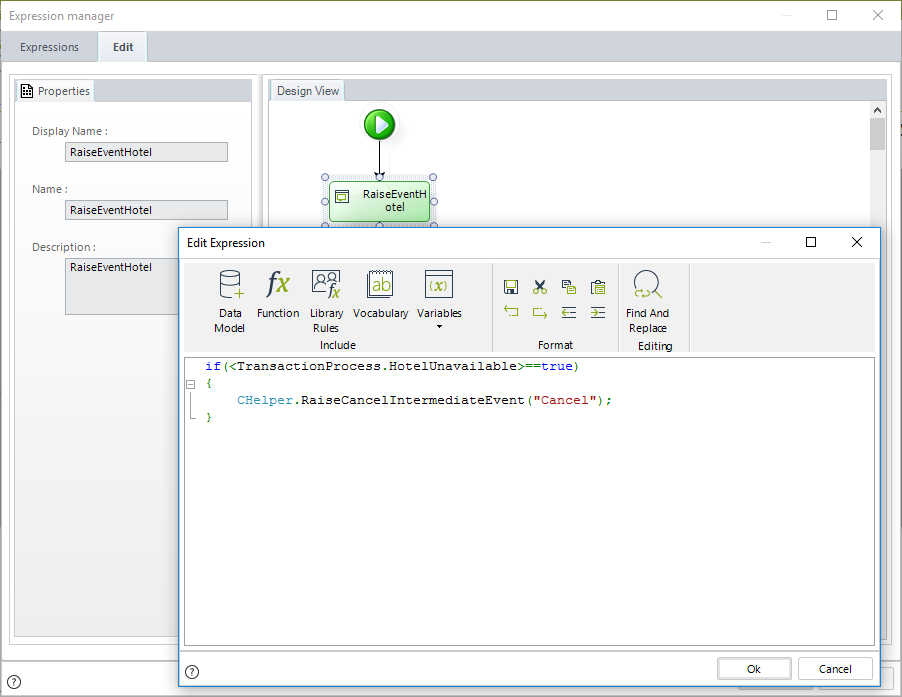
if(<TransactionProcess.HotelUnavailable>==true)
{
CHelper.RaiseCancelIntermediateEvent("Cancel");
}
The expression needs the following function:
CHelper.RaiseCancelIntermediateEvent("String message")
Where String message is a tag to identify the cancellation in the log file.
Next, model the cancellation flow for the parent Process.
If the Activities are compensated, the corresponding case token will not continue through the intended flow. As a result, the employee will not be notified of the two successful bookings as they were subsequently canceled. Taking this into account, we need to create a Cancel Event for the Transactional Sub-Process.
In the parent Process right-click the Bookings Sub-Process, select the option Attach Event. Choose the Cancel event.
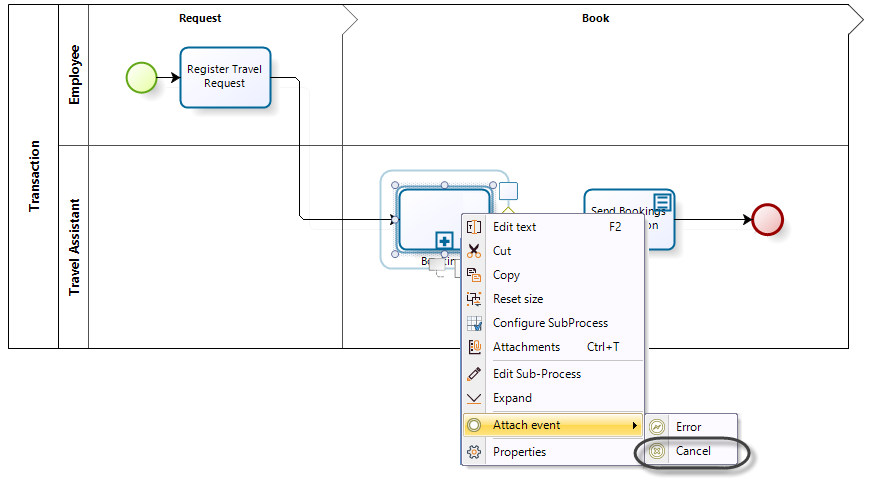
The cancellation flow will send a notification to the employee in order to inform them that the booking could not be made. For this reason, we add a Script task to the flow.
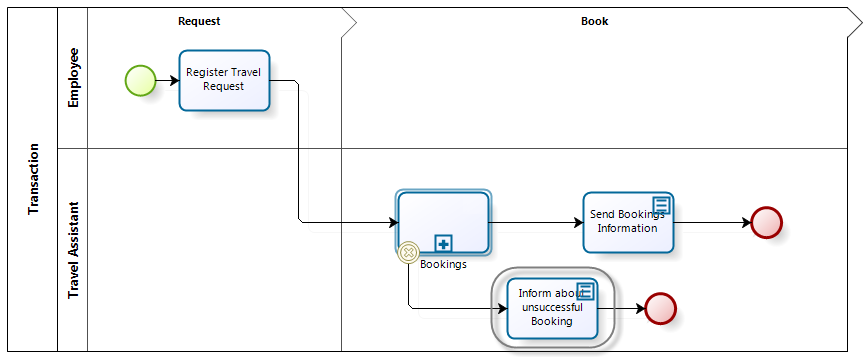
An End Event is used to terminate the Process.
The diagram still needs to allow for unexpected errors. An Error is raised when something unexpected happens and there is no defined procedure in place to handle it.
We will convert the Flight booking Activity to an automatic task and add an interface to it. If during the execution of the Flight booking automatic task an error arises (connection error, etc.), the Sub-Process will terminate and trigger an exception flow in the main Process.

To raise the error we need to use an expression once the activity is finished (on exit) and deviate the normal path towards the error path (shown below). This function will add an error log file that can be accessed from the Management Console. The expression should be created on the fourth step of the Process wizard.
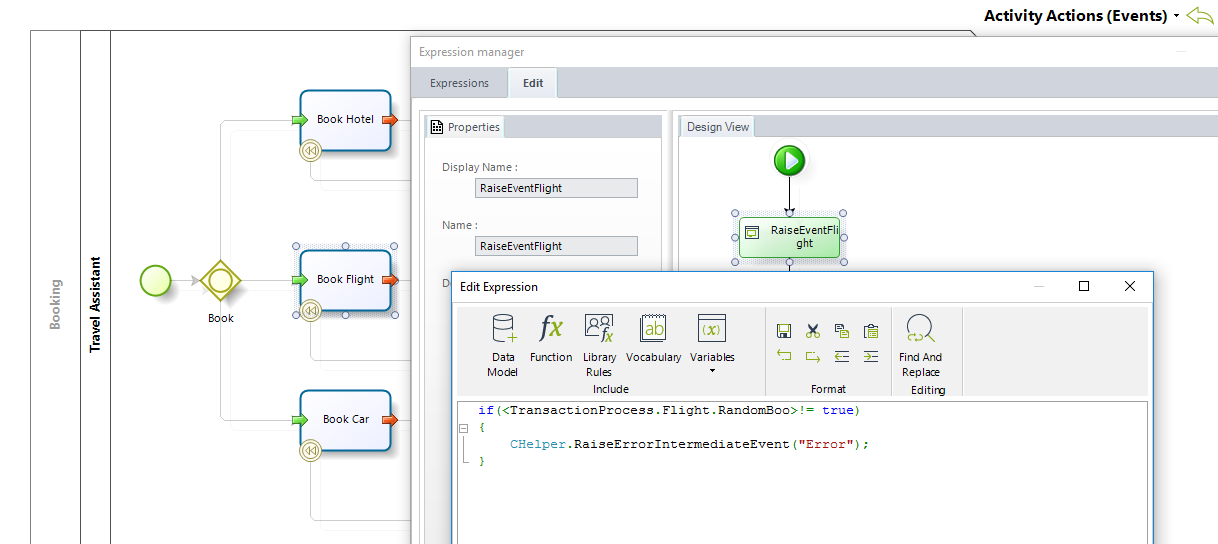
if(<TransactionProcess.Flight.RandomBoo>!= true)
{
CHelper.RaiseErrorIntermediateEvent("Error");
}
The expression needs the following function:
CHelper.RaiseErrorIntermediateEvent("String message")
Where String message is a tag to identify the error in the log file.
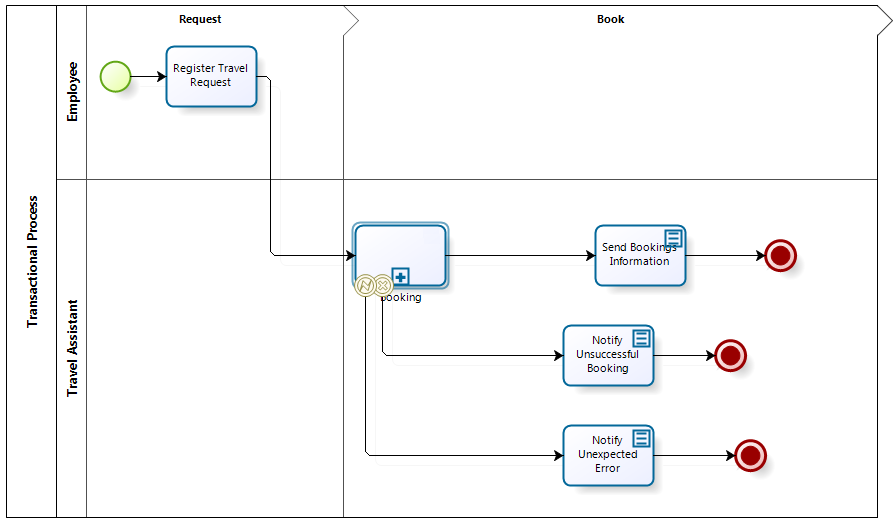
Finally, we include the exception flow in the parent Process to cater for the potential unexpected error in the Sub-Process.
To catch the error, an Error Event must be attached to the boundaries of the Bookings Sub-Process. Click the Bookings Sub-Process, select the option Attach Event and then choose Error.
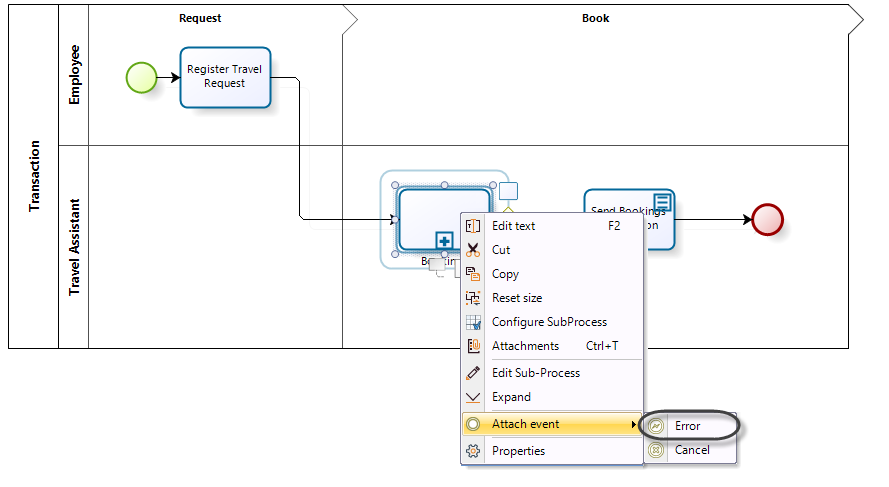
The exception flow will notify the assigned person, in the Administrative Department of the error.
Last Updated 7/16/2024 6:18:21 PM