Overview
The following section is step number two in your a process deployment, as described in From Studio to the cloud.
Check-list
Before exporting processes, double check the following points:
1. Processes to export must be checked-in
Coordinate the deployment with all members of your project, so they are all aware of, and agree about which exact processes (and their versions) are to be deployed.
Make sure that the correct versions of these processes are all "checked in" within the Development environment.
Note that a process under with checked-in status is not being edited, and that its implementation is completed. The best practice is for the team member who checked out and edited the process most recently is the person to check the process in.
To verify that a process is checked in, go to the Expert View and into the Processes module.
Checked-in process versions have no special marking. If you want to make sure, right-click a process: if it is checked-in the Check out option displays:
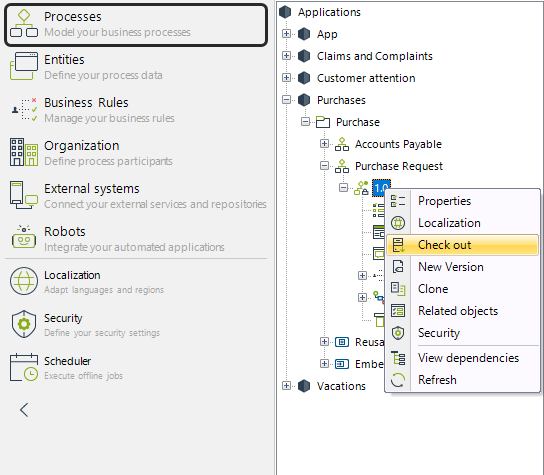
Otherwise, a process which is not checked-in shows the following icon and you may right-click on it to use its Check-in option:
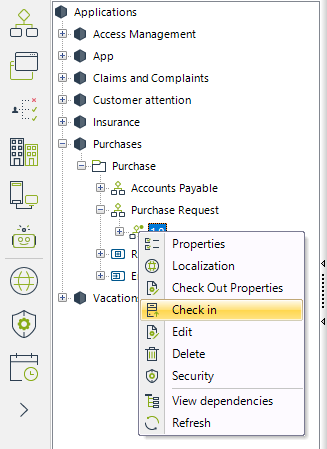
For more information about the check in and check out options, properties and configuration, refer to Expert view.
2. Initial deployment parameters and records.
The following only applies to the first time you deploy processes into a blank Bizagi environment, because that is when Bizagi lets you import certain definitions from your Development environment as a starting point to populate data. Definitions which are automatically included in a first deployment are:
•Environment options
•Records in parameter entities
•External systems connectivity parameters
•LDAP integration connectivity parameters
•End users
Therefore, before your first deployment, review the settings as configured throughout the different Bizagi Studio features.
For instance, review options set for your testing and Production environments so that these start off consistent with your target environment's expectations as described below:
2.1. Environment options.
These options cover: Email server settings, Email integration to complete activities, activation of Bizagi's web services API, custom values, and others settings like the default location of attached documents:
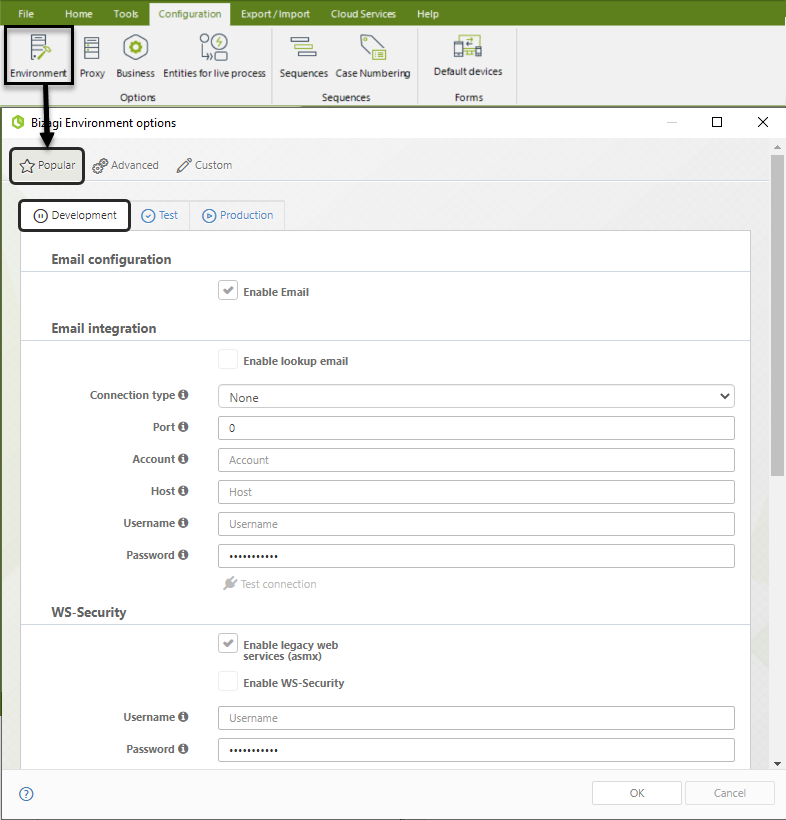
Set these so your first deployment automatically set the values of your target environment.
However, after the first deployment or at any time while that the target environment is live, you may modify the values through the Management console.
2.2. Records in parameter entities
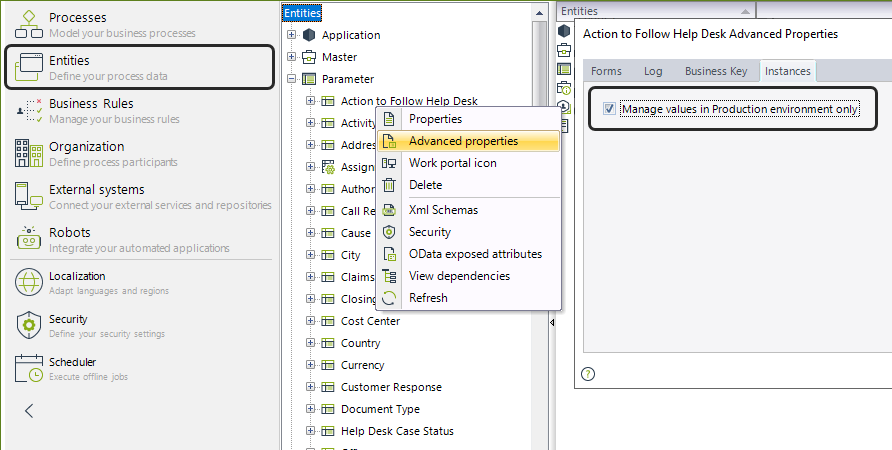
Records created in parameter entities are always be deployed from the Development environment if such entities are not set to be manageable in the Production environment.
However, you can choose to populate initial data in the Production environment for records which are manageable there, by copying the same records that are in the Development environment.
To check whether the records in the Development environment will be helpful to initially populate the Production environment, go into the Entities module:
2.3. External systems connectivity parameters.
You can set connectivity settings such as URLs, server location, and credentials, for any of the systems integrated by Bizagi, including: ECMs, web services, connectors, SAP, or data repositories connected via Data Virtualization or Replication. You configure and manage these in the External systems module by going into details of the specific type of system:
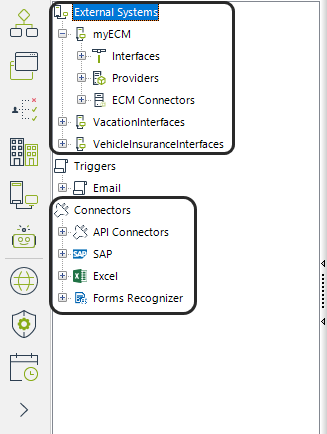
For example, configure or review connectivity parameters for a web service interface as shown below:
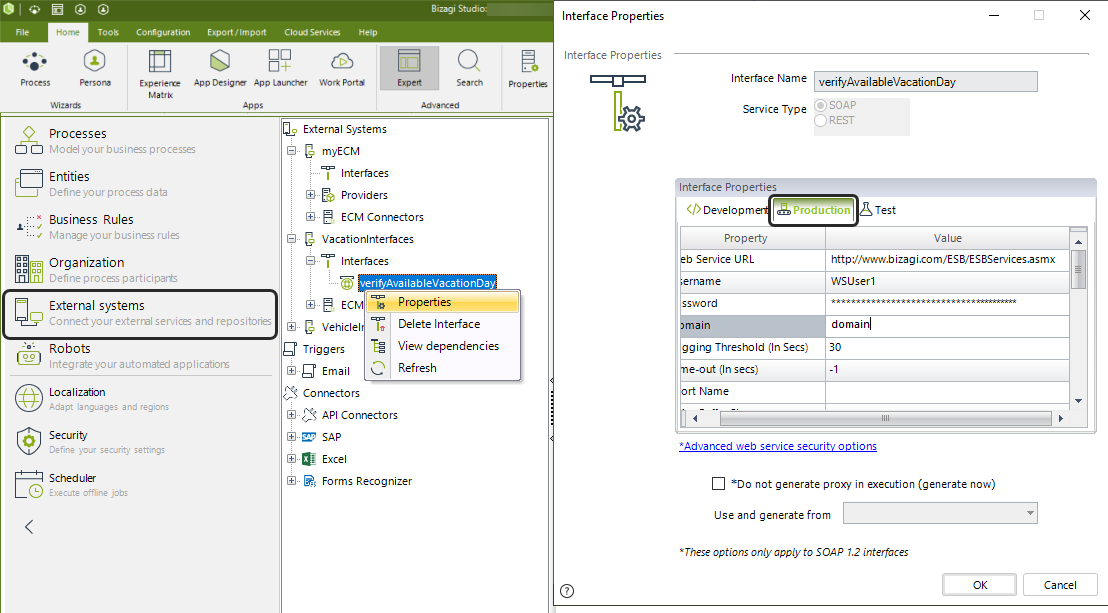
You set these so the first deployment automatically set your target environment with the same values.
However, after the first deployment or at any time while that environment is live, you can modify the values in the Management console.
2.4. LDAP integration connectivity parameters.
As with integrated external systems, you can set and manage connectivity and mapping settings for the LDAP user import module, for testing or Production environments, using the Security module:
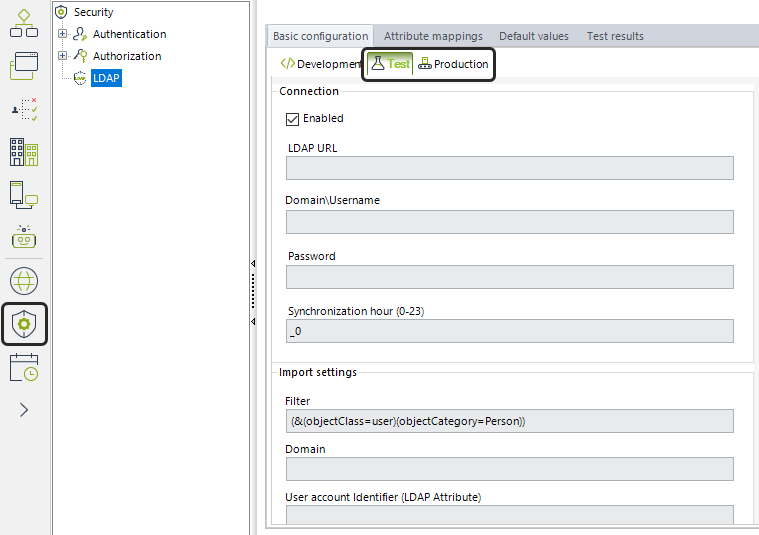
2.5. End users
The deployment does not include end users. By default, each environment has the admon user. However, you can synchronize users from your development environment using the Sync data feature. Refer to Synchronize data. Once users are sync, you can manage them. To learn more about managing end users, refer to User administration.
|
Remember that the domain/admon user is the internal system user employed by Bizagi. |
What should I do next?
Once you know what you will deploy to Automation Service, you can to start a deployment process.
For information about the next step, refer to Exporting processes.
Last Updated 7/18/2023 9:29:49 AM