Users with Admin privileges can manage cases to balance workload, eliminate unnecessary information and share case security among users.
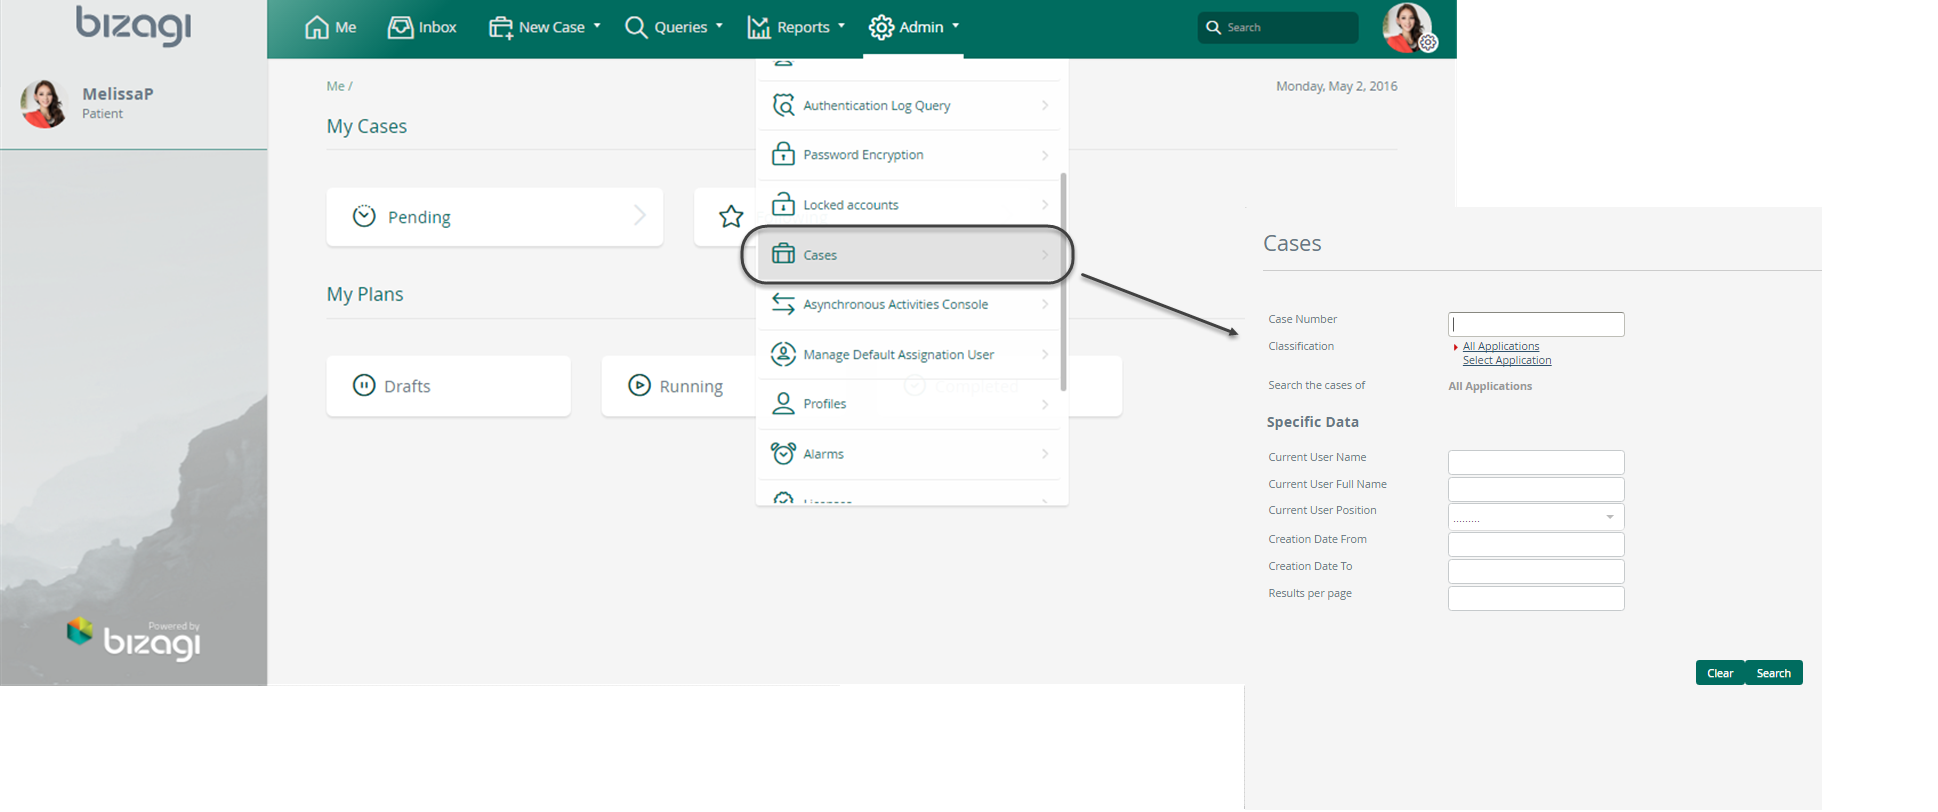
In the Admin options of the Work Portal, go to the Cases option located in the Process Management menu. This option allows administrator users to:
•Share case security among users

Users can invalidate one or more specific cases in any environment (development, testing and production). Once done, the cases will no longer be shown in the allocated user's Inbox.
1. Go to the Cases administration menu and search for the case you wish to abort or invalidate. You can search cases by different criteria as creation number, current assignee, creation date or process.
2. Once you have entered the search criteria, click the Search button
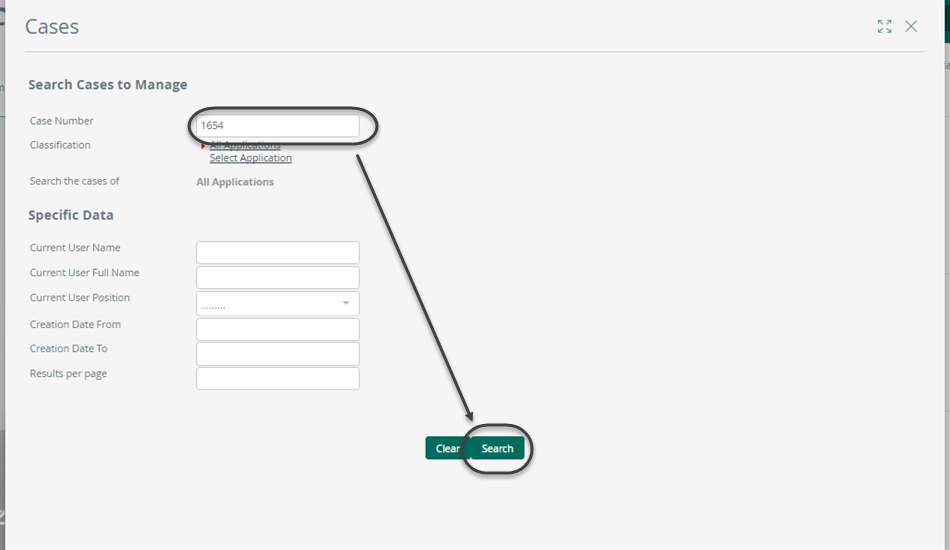
SEARCH CRITERIA |
DESCRIPTION |
|---|---|
Case Number |
Filters the results by Case Number. |
Classification |
Filters the results by Application. The default Value is All Applications. Click Select Application to display a list of the available Applications and processes in your Bizagi project. The selected criteria will be displayed in Search the cases of item. |
Current User Name |
Filters the results by the user name of the performer that is currently allocated to an activity. |
Current User Full Name |
Filters the results by the full name of the performer that is currently allocated to an activity. |
Current User Position |
Filters the results by the position of the performer that is currently allocated to an activity. |
Creation Date From |
Filters the results displaying cases created from the specified date. |
Creation Date To |
Filters the results displaying cases created until the specified date. |
Results per page |
Determines the number of cases to be displayed per page. |
3. A new window shows the results of the search:
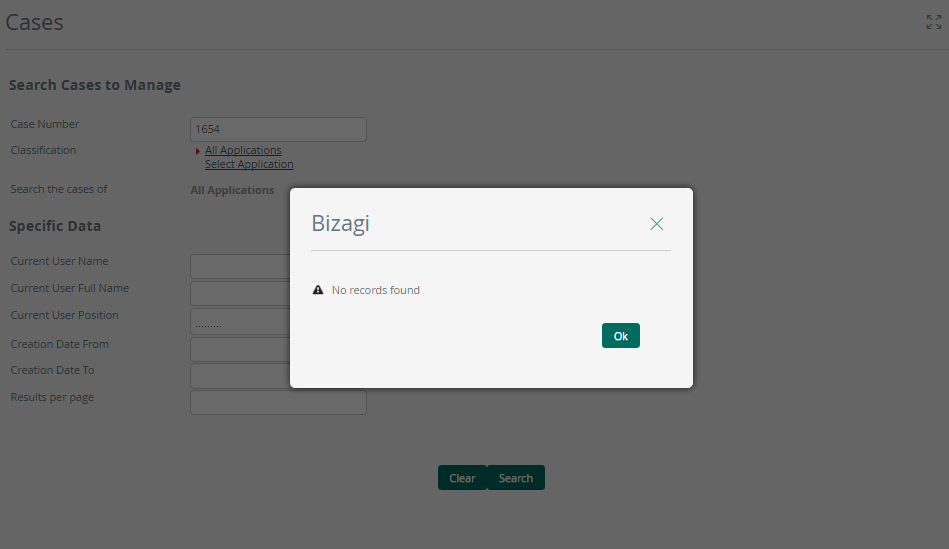
If there are no records, a message informs that the search returned no results.
If there are records, a window will show all the cases that match with the search criteria as illustrated below:
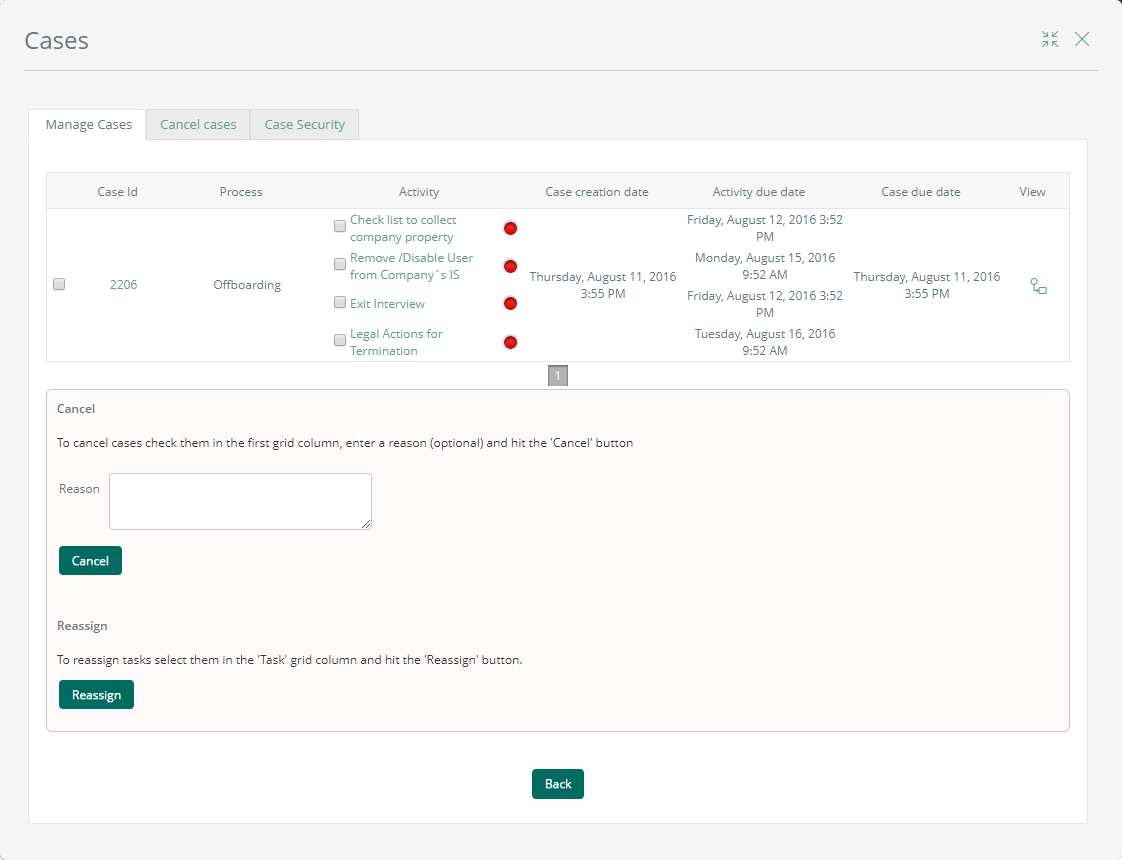
4. Select the case from the list by checking the first column of the table.
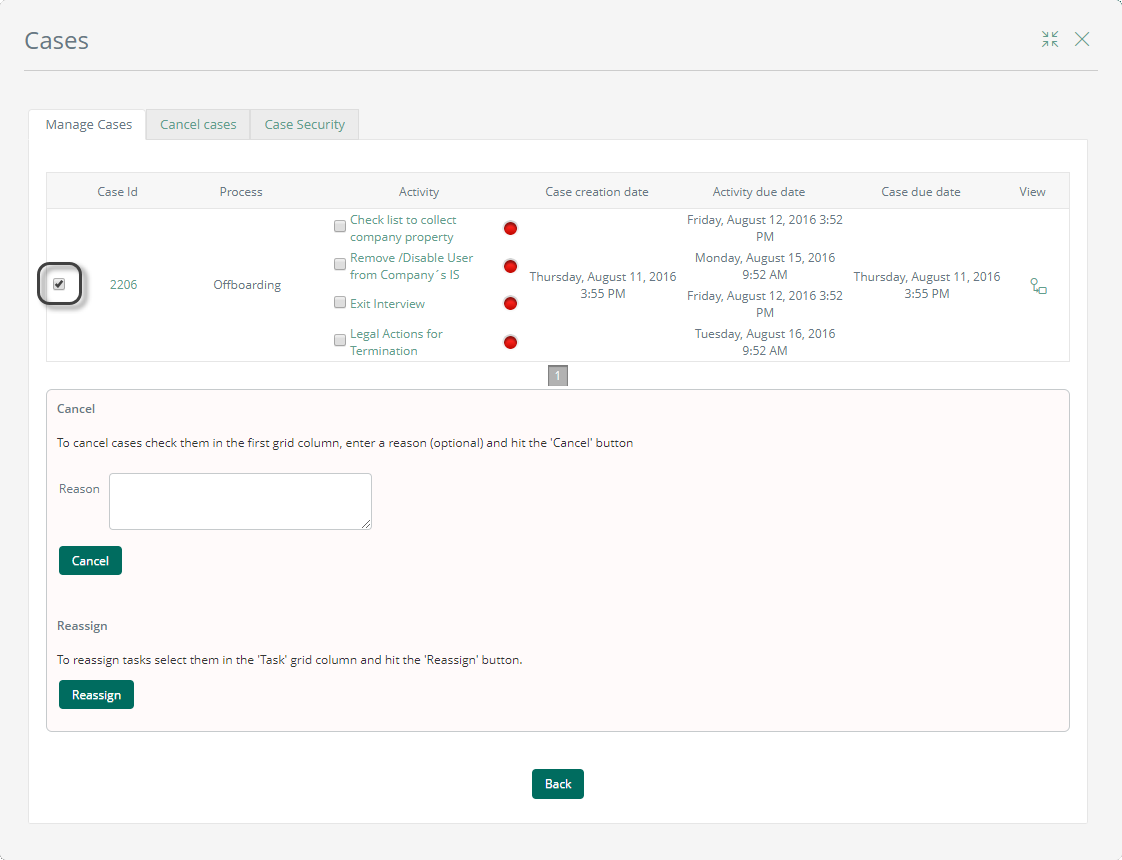
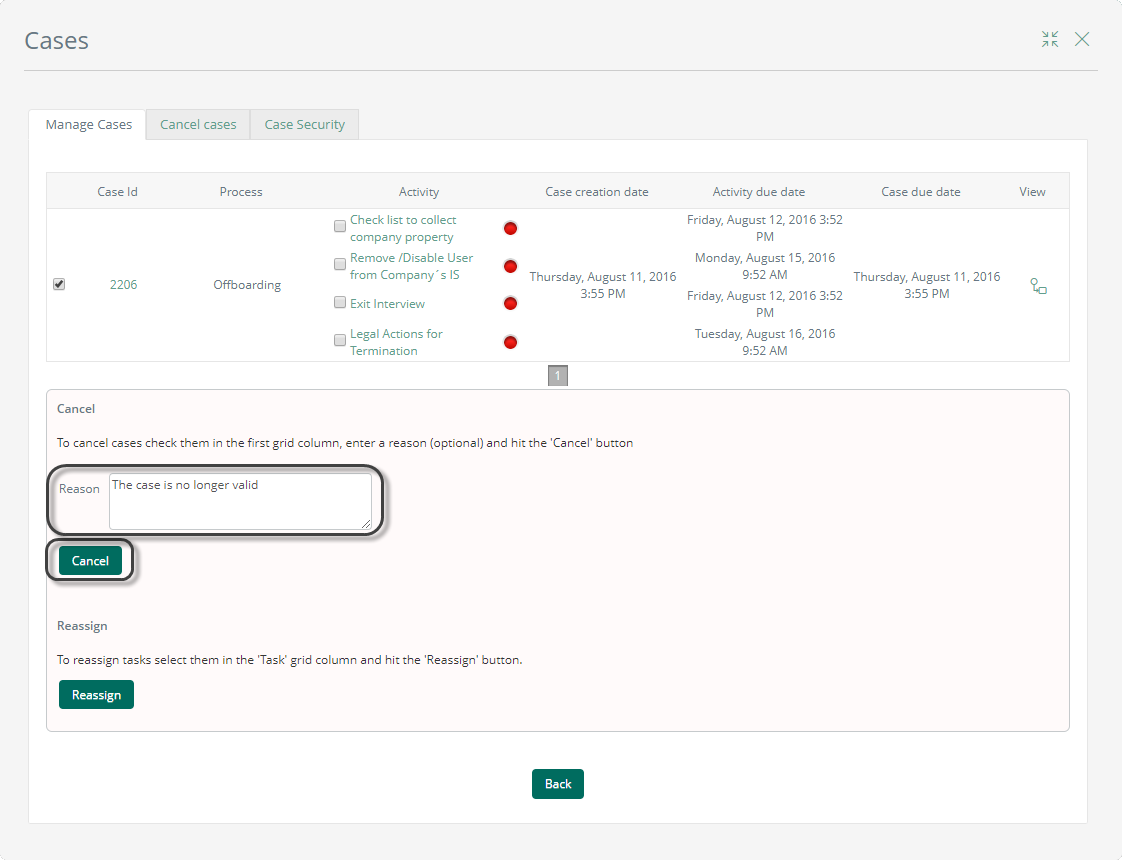
5. Once the case is selected, enter the invalidation reasons in the box that appears at the bottom of the screen. When filled, click the Invalidate button
Invalidate or cancel cases in batch for Development and Test Environments
In Development and Test Environments, users can get a very crowded inboxes due to the amount of cases created for validation and testing purposes.
User can invalidate cases in batch using a selective cleanup. This option is enabled for development and testing environments and SHOULD NOT be used in production.
With it, users can navigate the project's hierarchical structure, and invalidate cases for entire applications or specific processes.
1. Go to the Cases menu and select the Cancel cases tab.
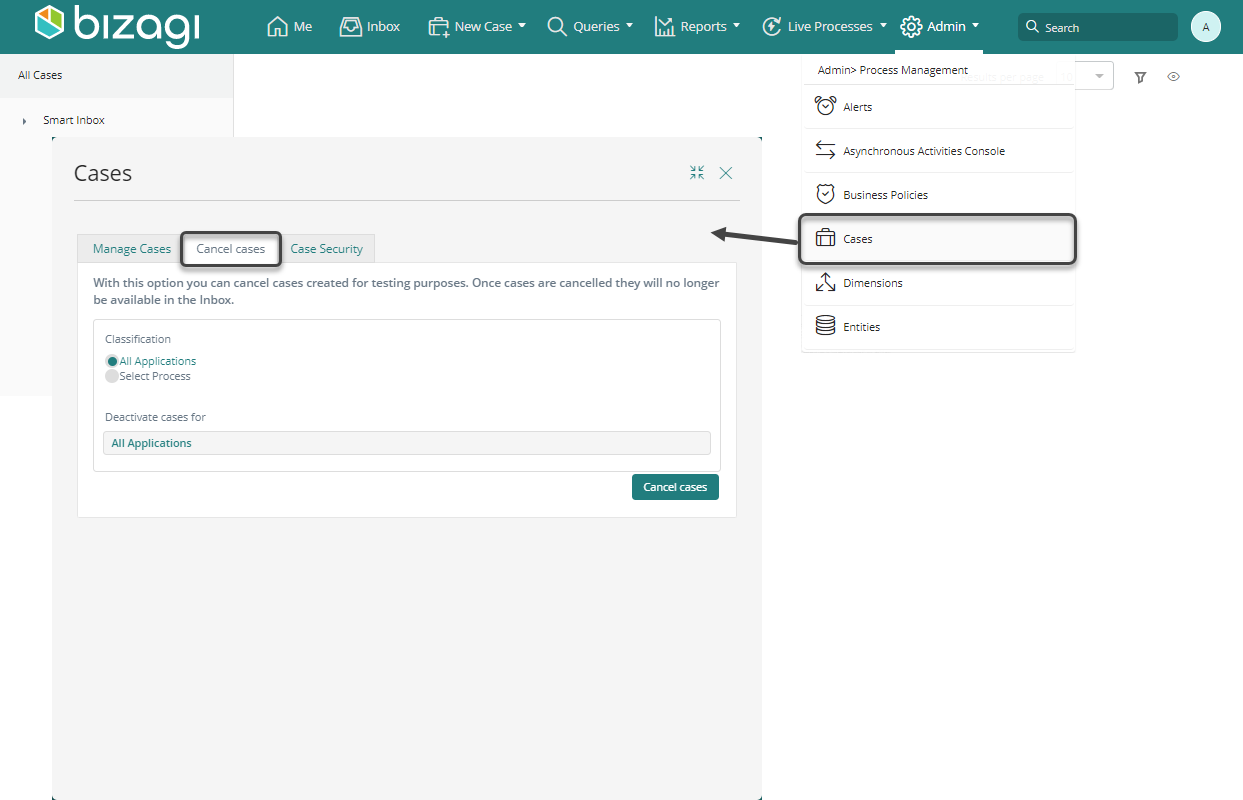
2. Select one option from: All applications, Select Process.
•To invalidate all cases from an application select the all applications option. You can only invalidate the cases of the processes in which you have Manage Cases permission allowed.
•To invalidate cases from a specific process, click Select Process option. The project's hierarchical structure within applications, categories, and processes displays. You can invalidate all the cases of a specific process. You can only select the processes in which they have Manage Cases permission allowed.
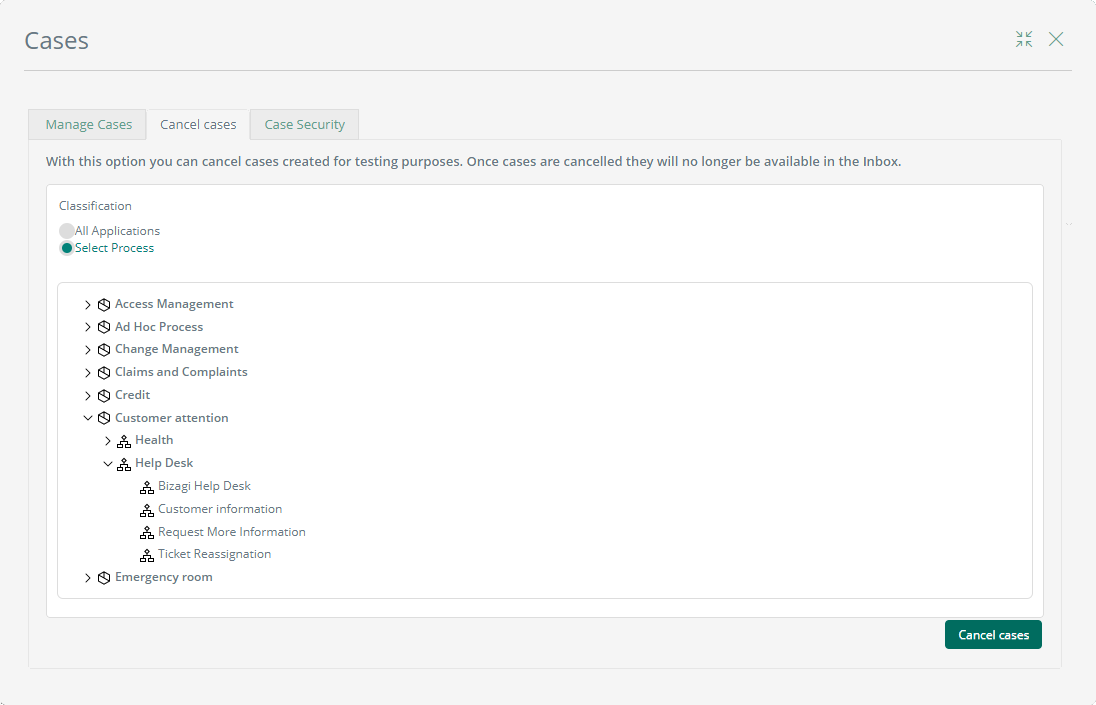
3. Navigate through your project's hierarchical structure and select the process. Then, click the Cancel cases button.

Depending on the number of cases, the invalidation can take some time. A warning message appears.

4. When the cases' cancellation finishes, a notification appears.
![]()
|
If the application is interrupted during the cases invalidation process (machine restart and other unforeseeable problems) all the cases that have been already canceled remain invalidated, and the other cases remain pending. |
An email message will be sent to all the users who have pending activities in the cases that has been invalidated.
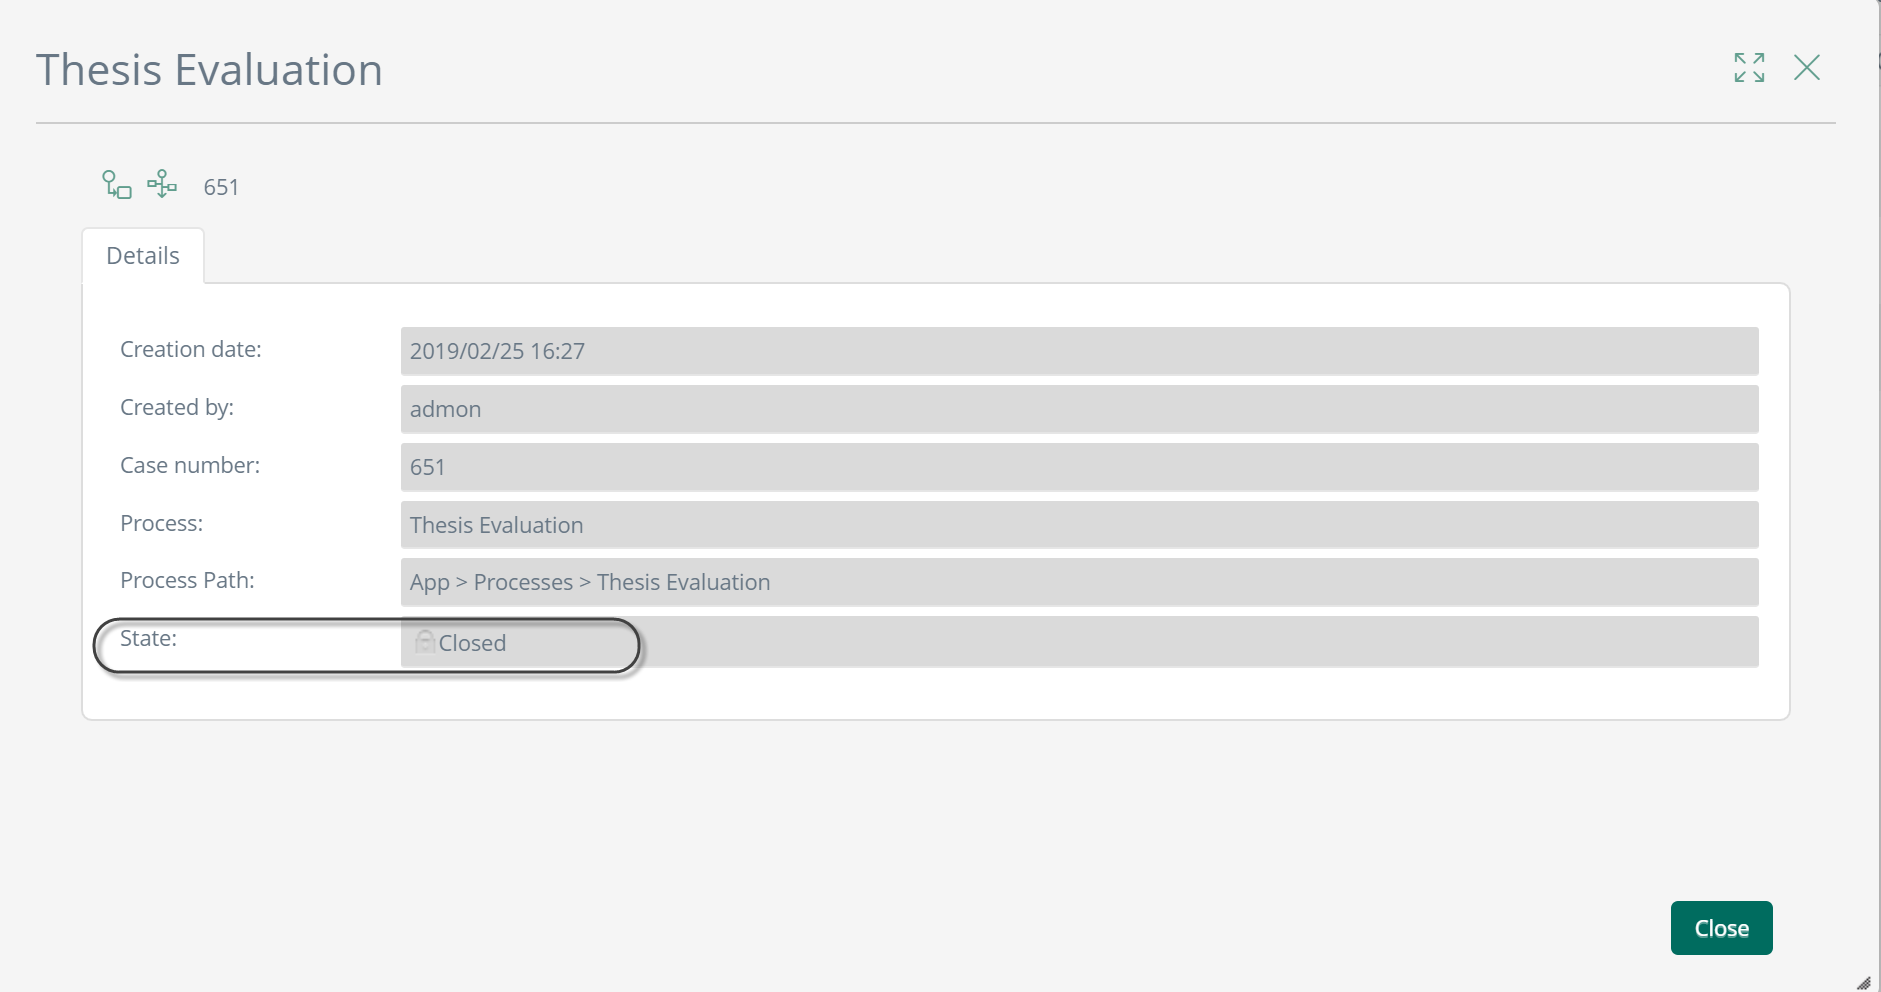
When looking up for an invalidated case and its detail, its status appears under the details tab:
1. Go to the Cases administration menu and search for the case you reassign. You can search cases by different criteria as creation number, current assigned user, creation date or process.

2. Once you have entered the search criteria, click the Search button

3. A new window will show the results of the search:
•If there are no records, a message will let the user know that the search returned no results.

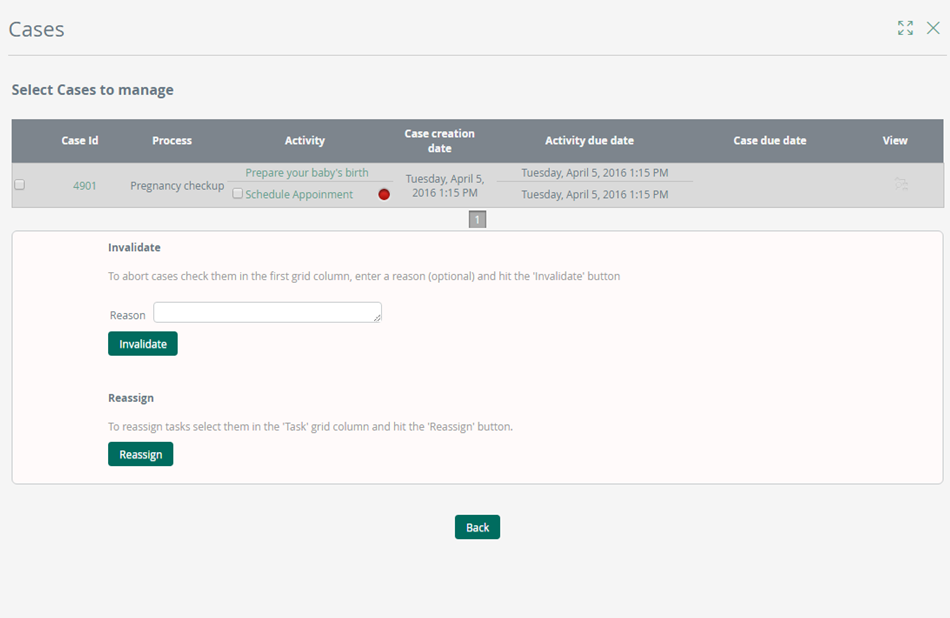
•If there are records, a window will show all the cases that match with the search criteria as illustrated below:
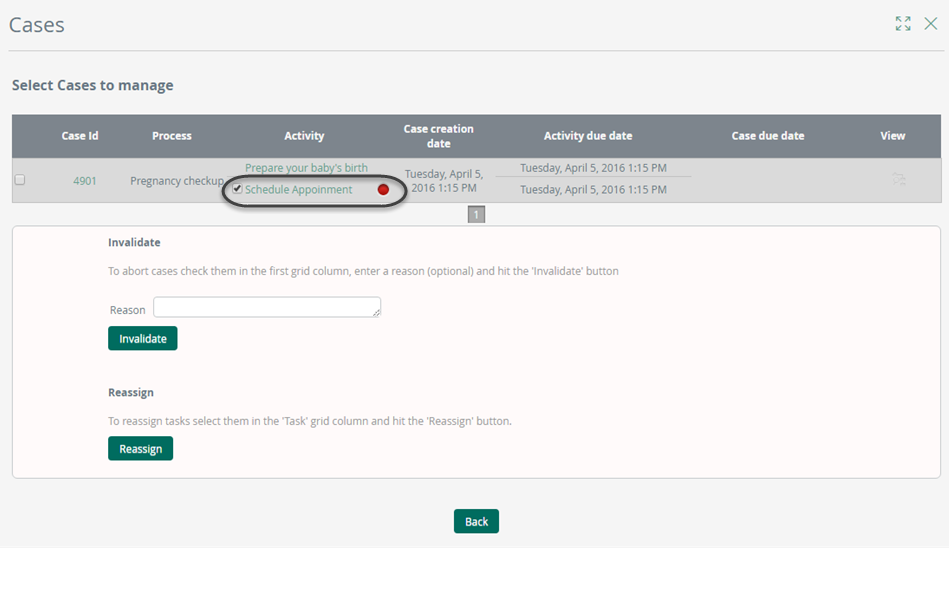
Select the activity or activities that need to be reassigned:
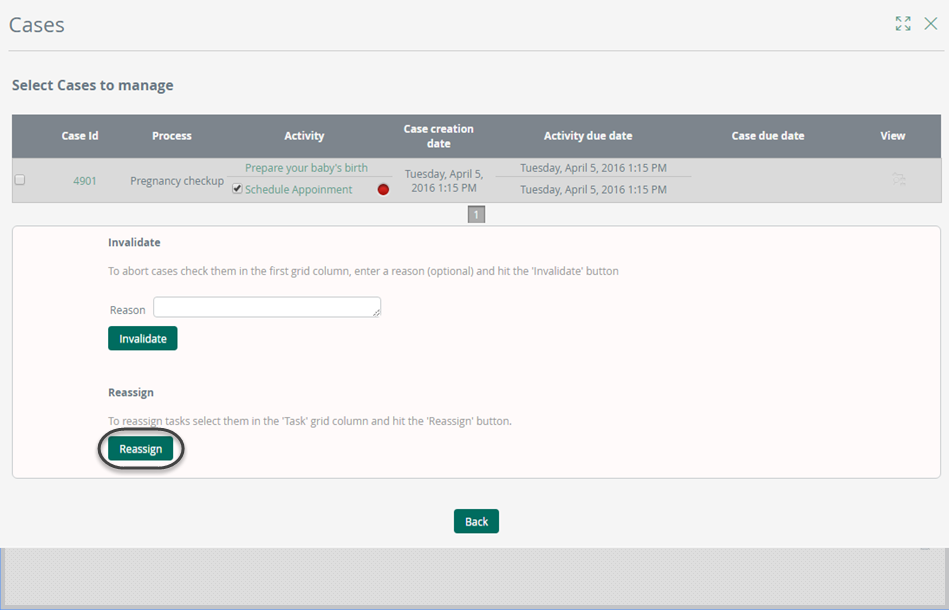
4. Click Reassign at the bottom of the screen
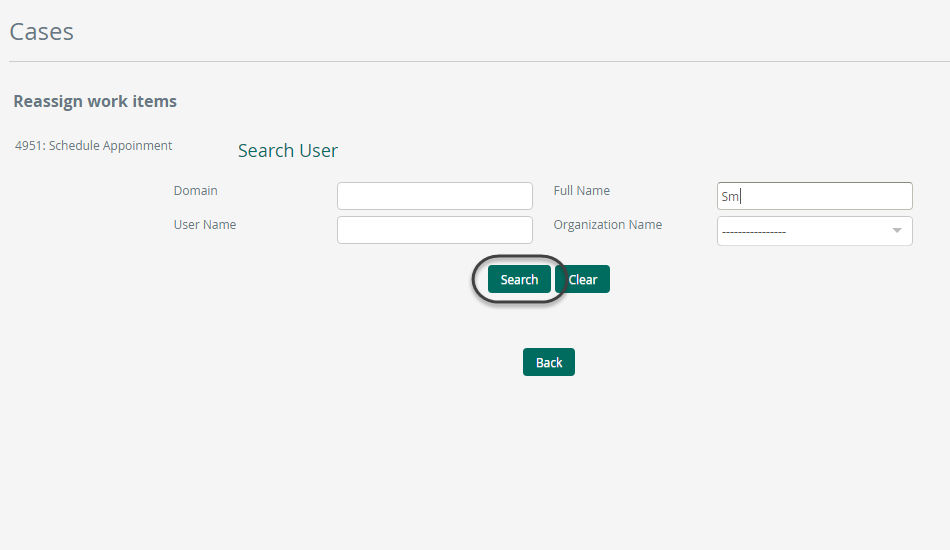
5. A new screen enables the search to find a user that will be in charge of the activity. Fill in the user information and click Search.
6. The list of users that met the search criteria will then appear. Identify the user that will be assigned and click Reassign.
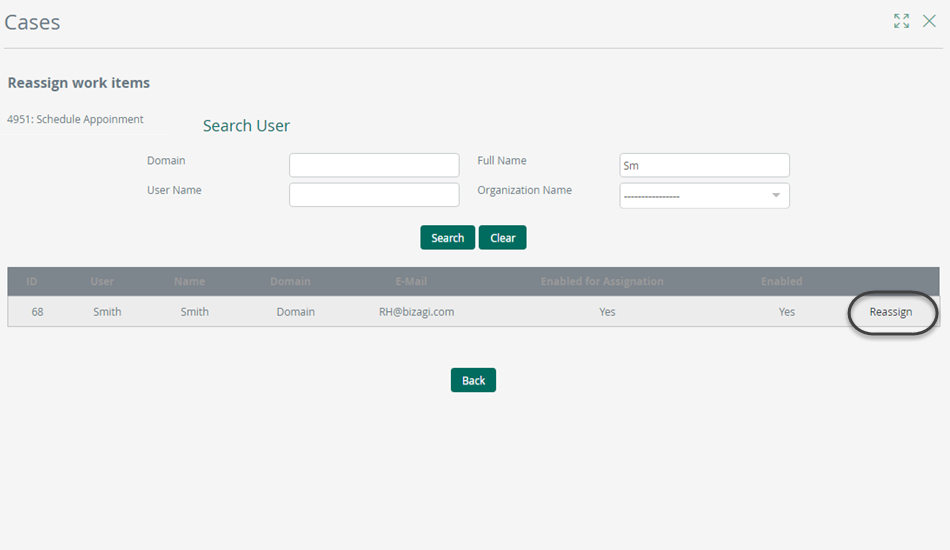
The case is now assigned to the selected user.

Last Updated 11/21/2025 2:40:41 PM