Overview
Attachments are files such as images or documents added to your diagrams to achieve complete documentation.
All your attachments are stored in Bizagi Modeler secure servers and can be reused as many times as you want within your models.
Managing attachments
To manage the files attached to your models, open the Cloud Attachment window:
1. Open Bizagi Modeler and log in.
Open the diagram where you want to manage the attachments by selecting the File tab > Open >Bizagi Cloud > Browse.
2. Click the Cloud Attachments option located within the Tools group in the Tools tab of the Ribbon.

3. When you select this option, the Cloud Attachment window appears.
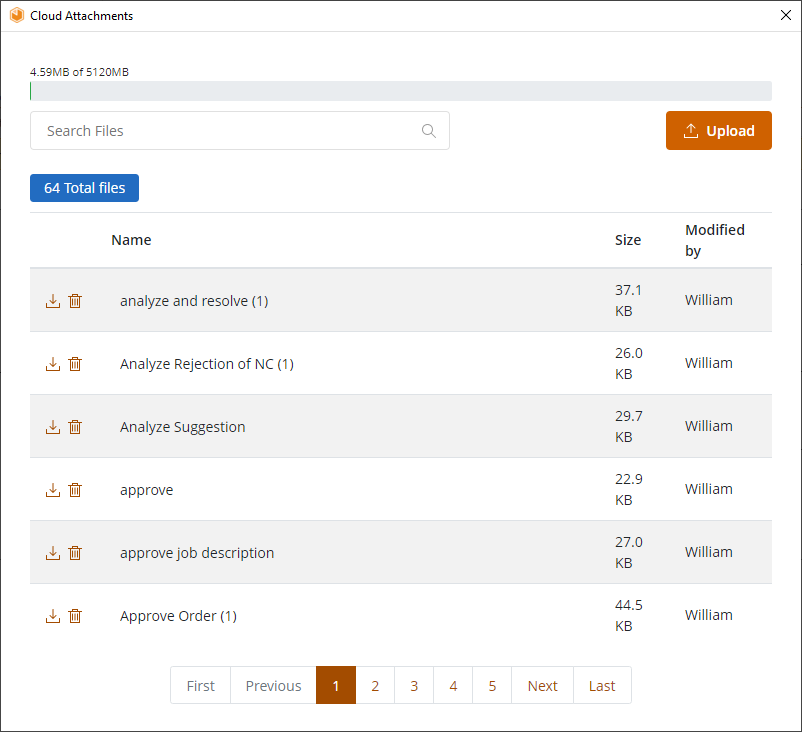
In this window you can add attachments without restrictions, as long as you have available space. You can rename your files, and delete them if you need to free up space.
The Cloud Attachment window is described below:
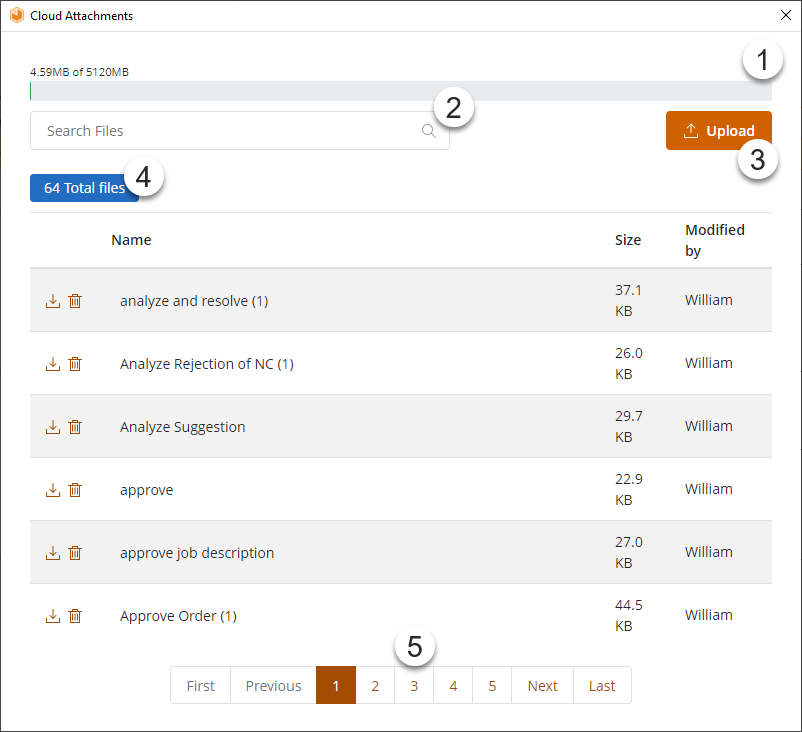
1. Storage bar: Displays the storage used out of the total storage space available, according to your plan and the number of editor licenses purchased. The storage is displayed in Megabytes (MB).
2. Search field: Lets you to search any file uploaded to the cloud by its name or a part of it.
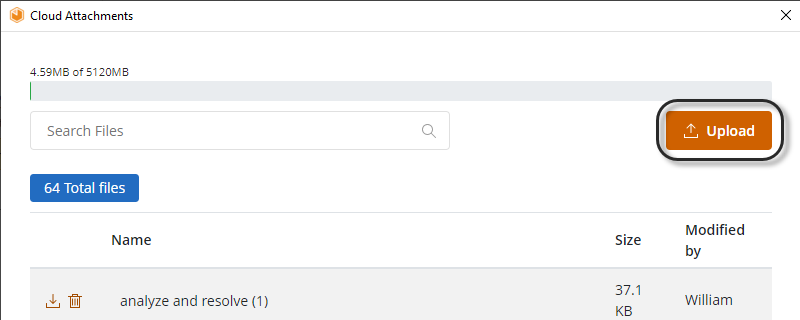
3. Upload button: Lets you add attachments to your models. For more information refer to Add attachments.
4. Number of files: Displays the number of files you uploaded in Bizagi Modeler cloud or the number of files that meet the search criteria (when searching).
5. Files: displays a table with the uploaded files, with the following columns:
oFile actions: refer to file actions for more information.
oName: The file name including its extension.
oSize: The size of the file in KB, or in MB when the size exceeds 1024 KB.
oModified by: The user name of the last person who saved a change in the file. When you hover the mouse pointer over this column, you can see when this file was modified.
This table is sorted by file name and has five records per page.
Add attachments
You can add attachments to your models and also link them to any of your diagrams using the extended attributes.
There are some file types that you can upload to Bizagi Modeler cloud repository:
File extension |
File type |
File extension |
File type |
|---|---|---|---|
.bmp |
Bitmap Image File |
.png |
Portable Network Graphic file |
.bpm |
Business Process Model file |
.ppt |
PowerPoint Presentation file |
.csv |
Comma Separated Values file. |
.pptx |
PowerPoint Open XML Presentation |
.doc |
Microsoft Word Document file. |
.psd |
Adobe Photoshop Document file |
.docx |
Microsoft Word Open XML Document file. |
.rtf |
Rich Text Format file |
.dwg |
AutoCAD Drawing Database file |
.txt |
Plain text file |
.gif |
Graphical Interchange Format file. |
.xls |
Excel spreadsheet file |
.html |
Hypertext Markup Language file. |
.xlsb |
Excel Binary spreadsheet file |
.ico |
Icon file |
.xlsm |
Excel Open XML Macro-Enabled spreadsheet file |
.jpg |
JPEG image file |
.xlsx |
Microsoft Excel Open XML spreadsheet file |
.json |
JavaScript Object Notation file |
.xml |
XML file |
Portable Document Format file |
.vsd |
Visio Drawing file |
If you try to use an unsupported file type, Bizagi displays a warning message showing that the file cannot be uploaded.
1. Open the Cloud Attachment window as mentioned before.
2. Click the Upload button.
3. The file dialog appears. Select the file and click Open.
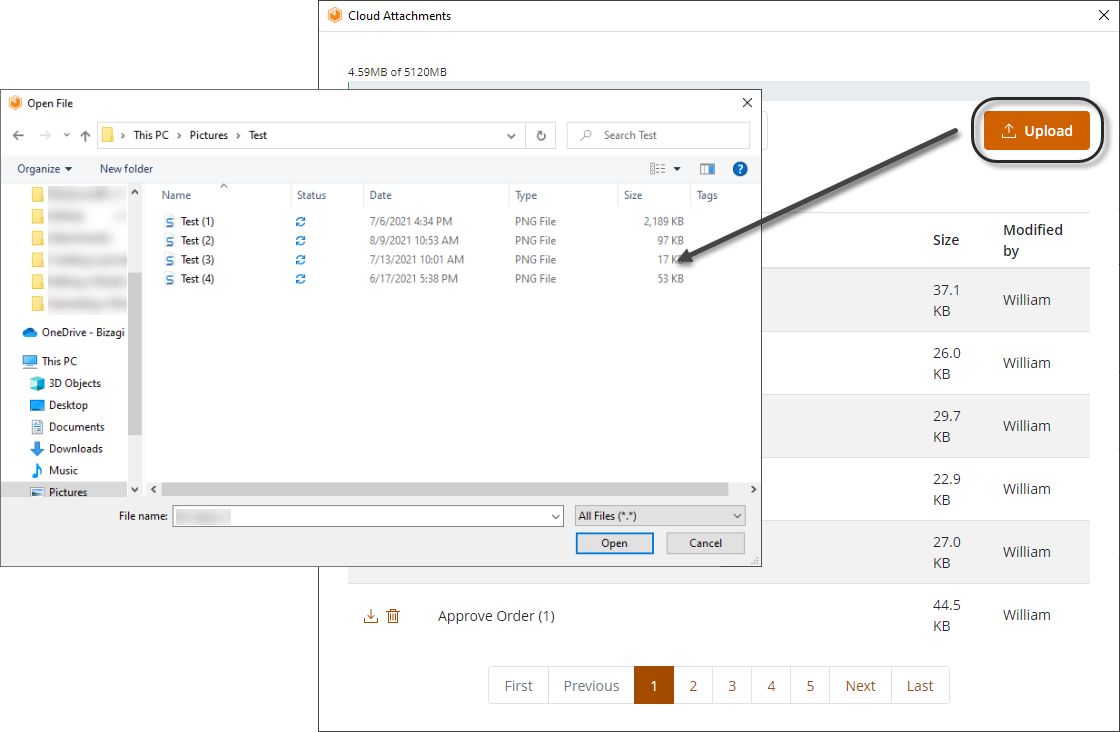
4. The file will appear in the list and adds to the consumed storage in the Storage bar. In the example presented, the file appears at the top of the list, because the list is ordered alphabetically.
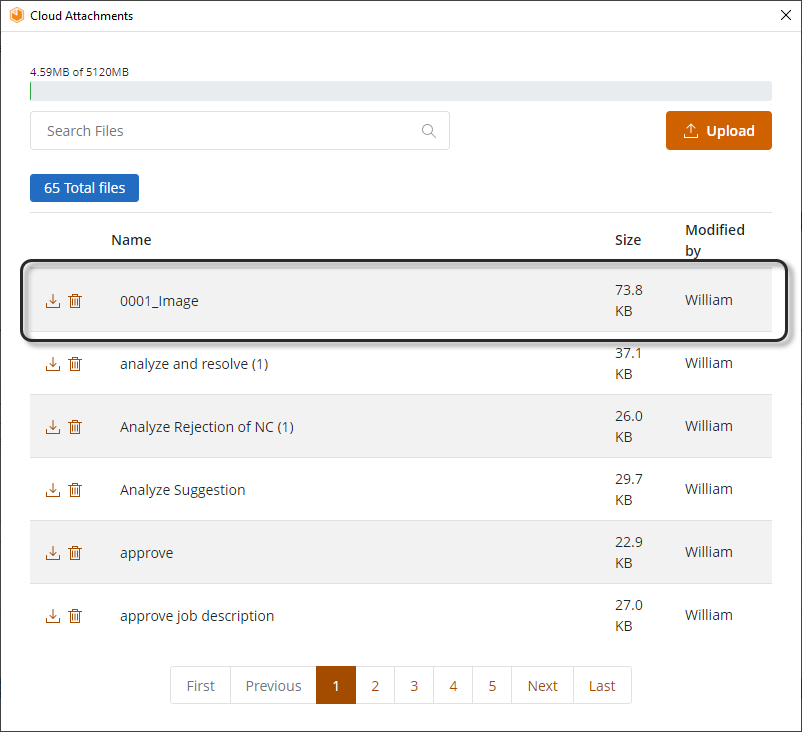
File actions
The first column of the files table display the actions available per each file:
Action |
Icon |
Description |
|---|---|---|
Download file |
|
Save the uploaded file to your local machine. |
Rename file |
|
Change the name of the selected file keeping the original extension. Any change you make in the name will record your user name as the latest editor in the Modified by column. This option only appears when you hover the mouse pointer over the current file name.
|
Remove file |
|
Delete the selected file from the Bizagi Modeler cloud repository. This action cannot be undone and helps you to free up space from your purchased storage. The file will be removed from the list right away. WARNING: If a file is linked to a task and is deleted, the task may still display the link. We recommend unlinking the file from all tasks before deleting it to avoid causing error messages. |
Link Cloud files to models
Once you have uploaded your files to the Bizagi Modeler cloud repository, you can link them to any diagram of your model. Follow these steps to link files:
1. Open the model from Bizagi Modeler. You need to be the owner of the model or an editor.
2. Open the diagram where you want to link the files hosted in Bizagi Modeler and check it out to lock it for editing.
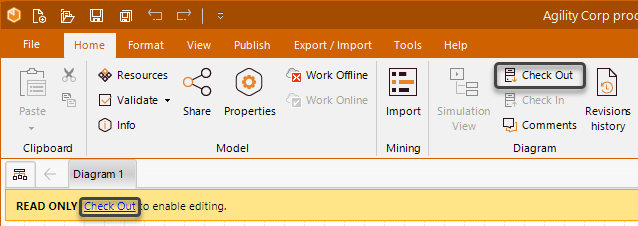
3. Select any element of the process diagram and open the extended attributes.
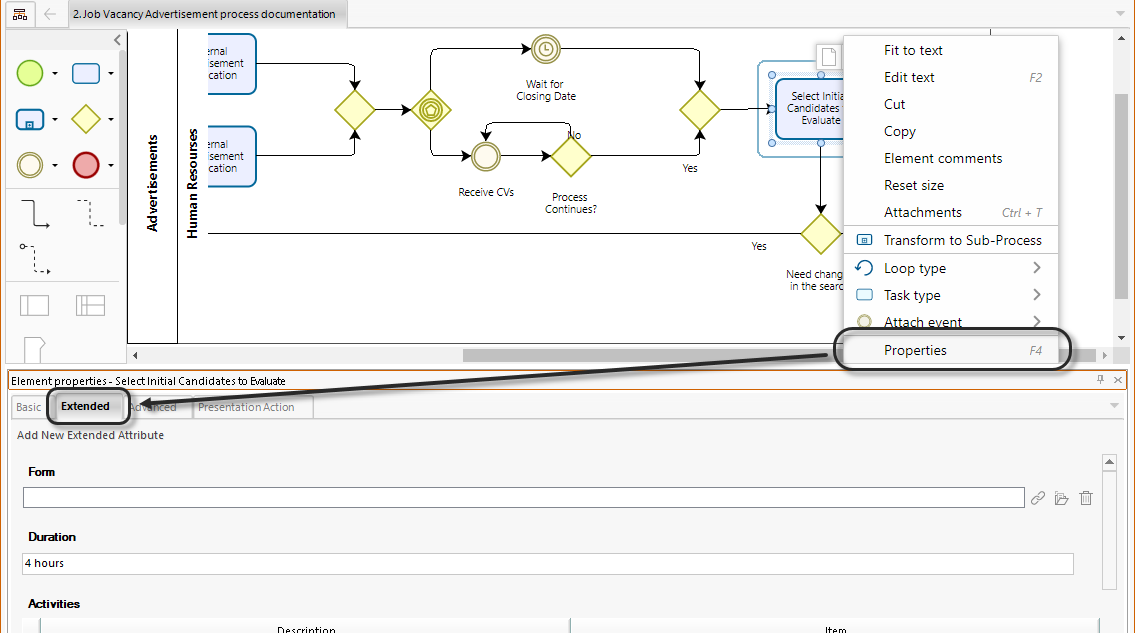
4. Select or create an attribute where you can load files (File). Then, click Link file from Cloud button.

5. The Select attachment window appears. In the files table, select the Link file action in the first column.
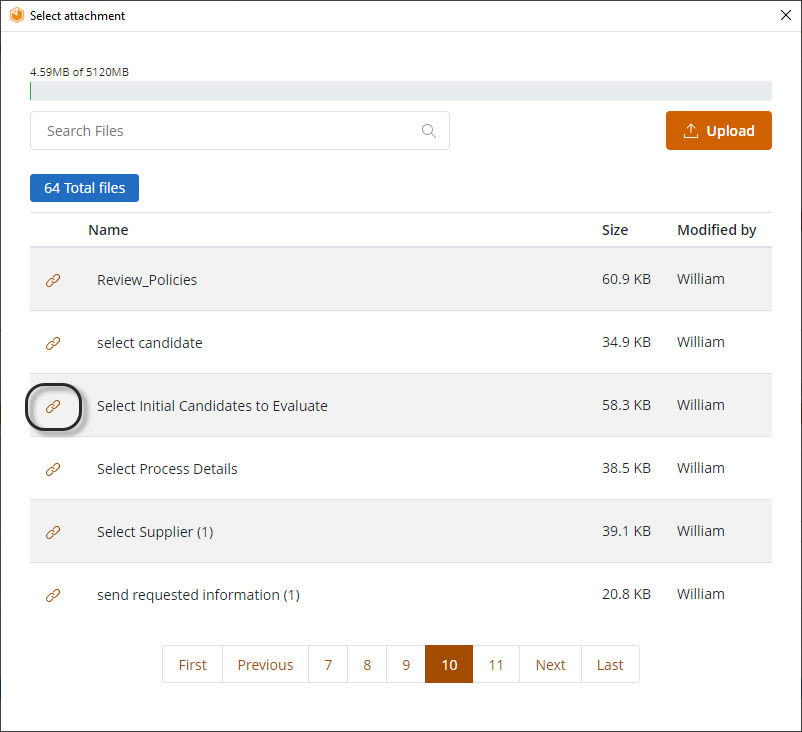
6. The file name appears in the Extended attributes box. Finally, once you finish your changes, release the diagram by clicking Check In Diagram.
Last Updated 3/16/2022 7:36:24 AM
