Overview
The HTML viewer Widget for Bizagi is available for download at Bizagi Widget Xchange.
Through this Widget, the end user will be able to enter an HTML code and visualize it rendered on his Work Portal. You can either enable it to be printed or not on Bizagi Studio's form designer.
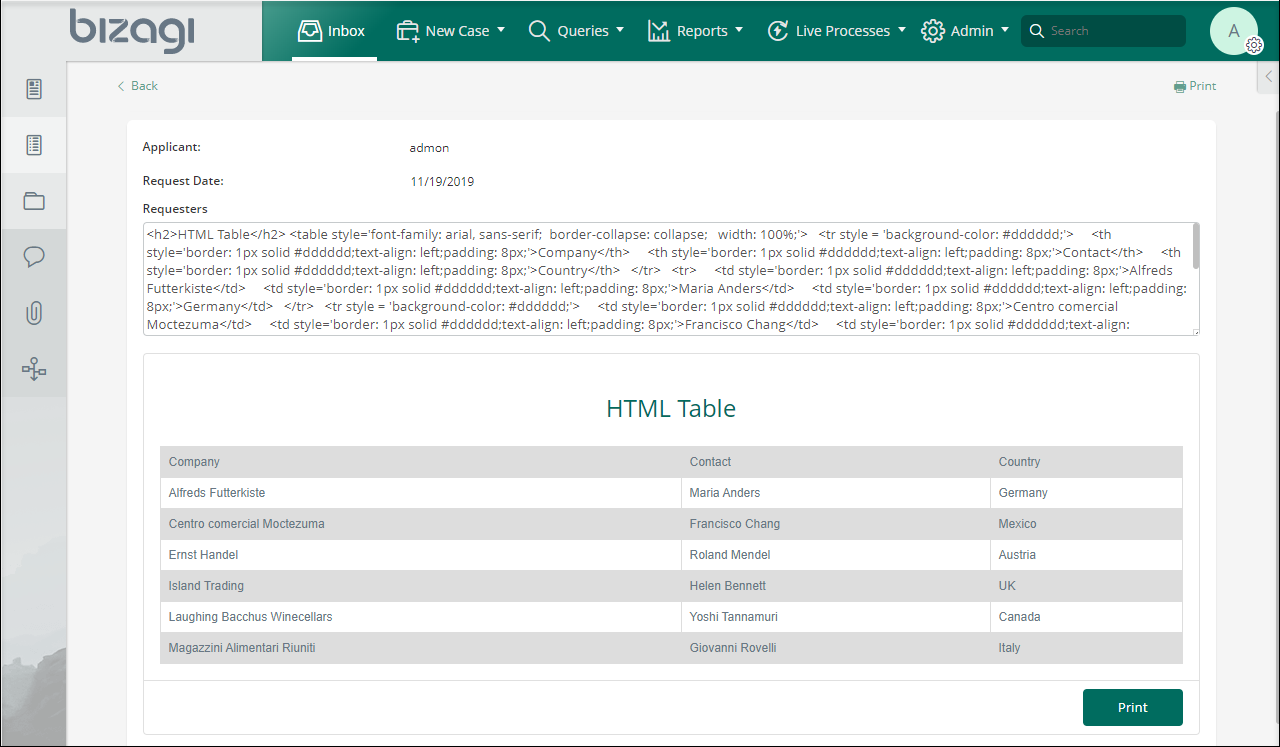
Before you start
To test and use this Widget, you will need:
1.Bizagi Studio previously installed.
2.This specific Widget previously installed, either as described at https://help.bizagi.com/platform/en/index.html?widget_xchange.htm, or as described at https://help.bizagi.com/platform/en/index.html?widgets_manualinst.htm.
3.On the Data Model, create an extended text attribute for the end user to fill with the HTML code.
Properties configuration
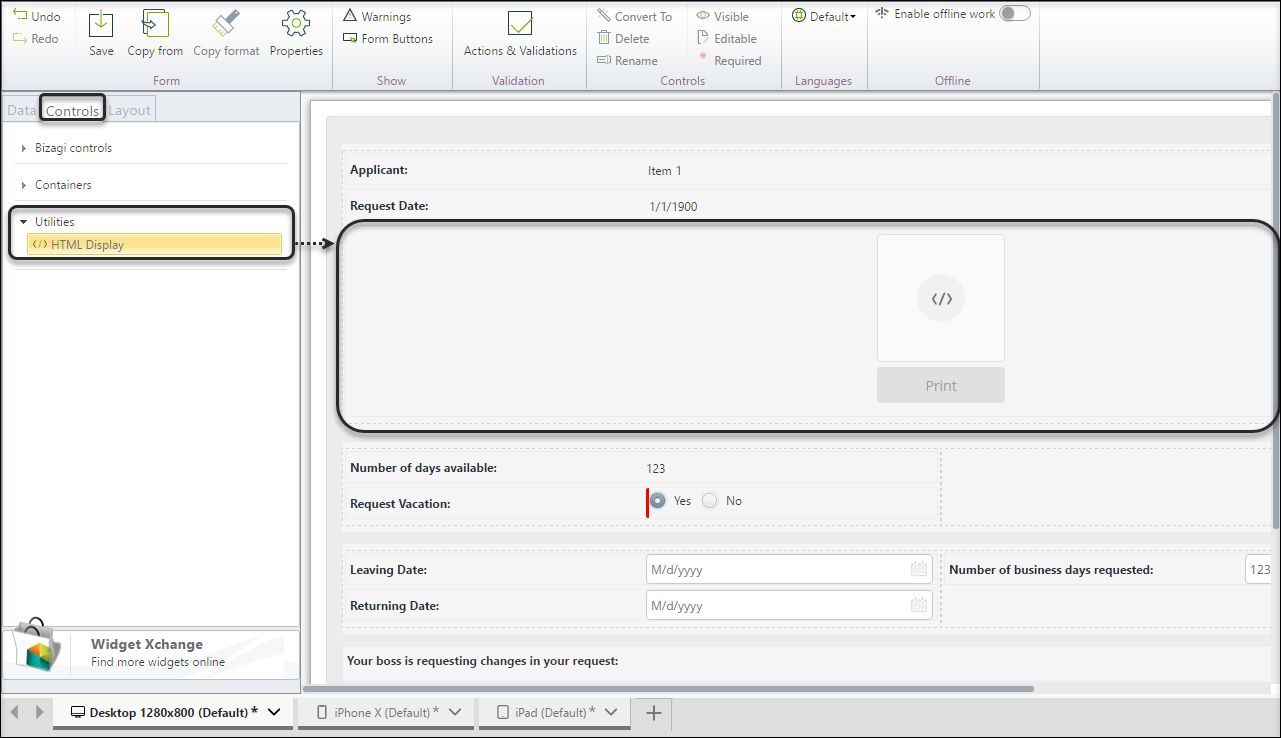
To configure this Widget once it is installed in your project, on the Forms designer of Bizagi Studio, select the controls tab. From the utilities section, drag and drop the HTML Display widget to the form.
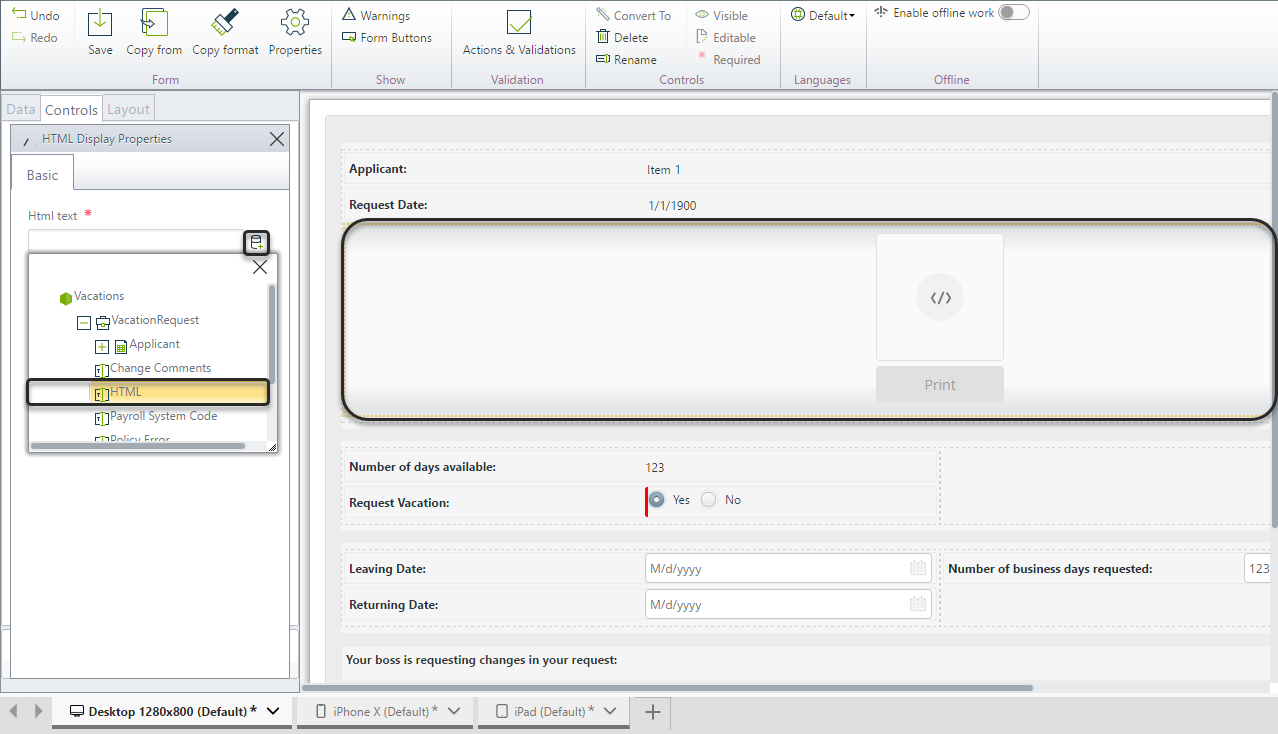
Select the widget on the form. Then, on the left panel set the data model source to the extended text attribute.
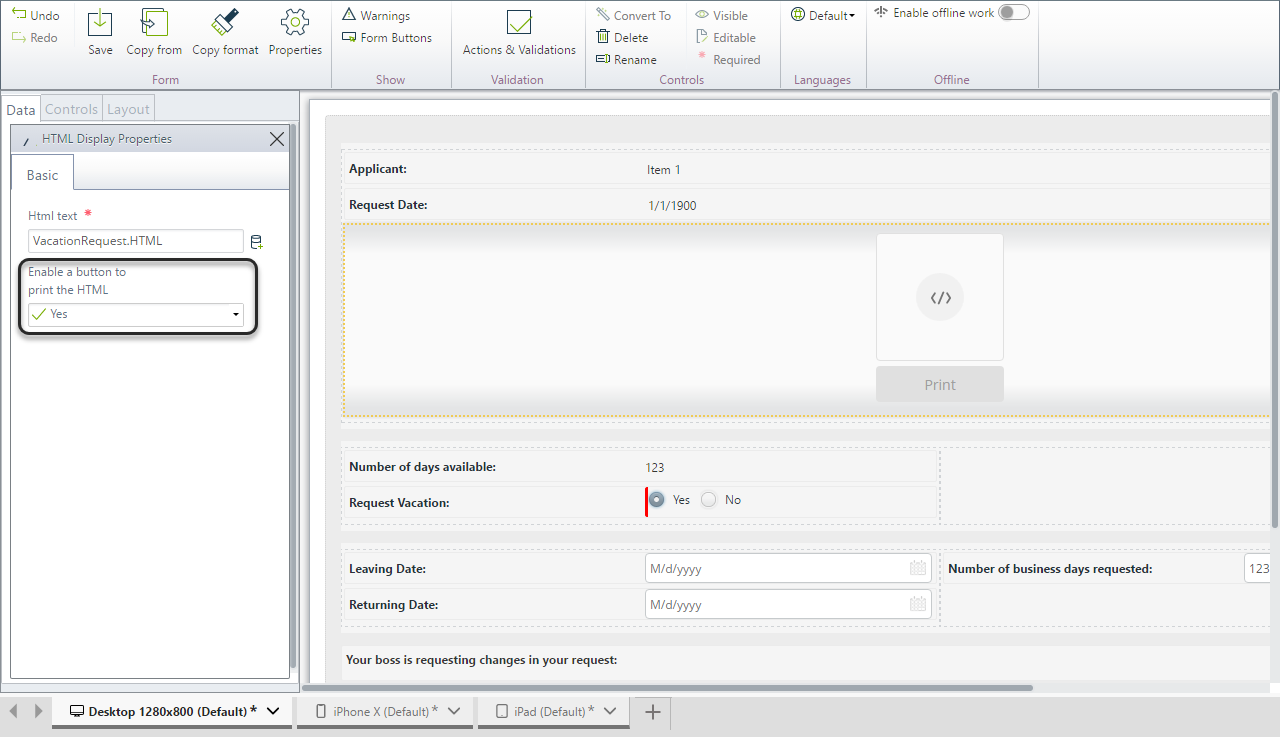
Either enable or disable the printing button to appear on the form.
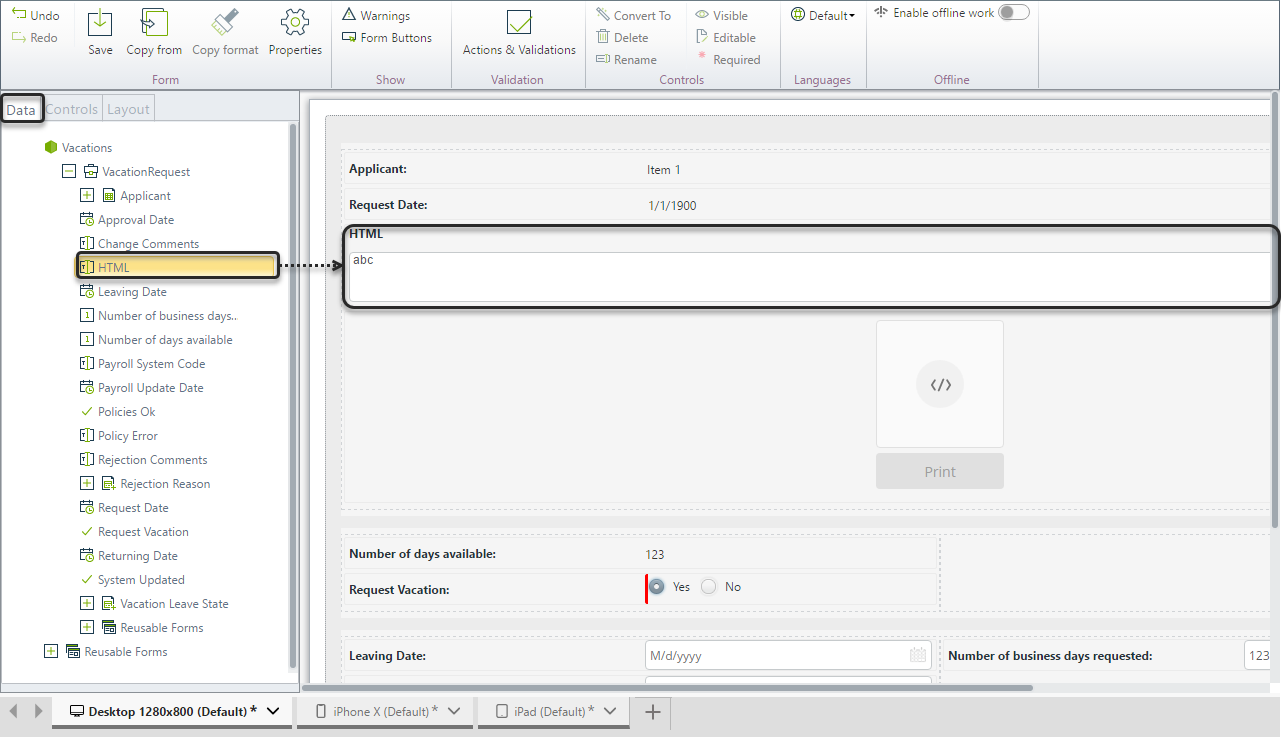
On the left panel, select the Data tab. Drag and drop the extended text attribute from the left panel to the form.
Examples and considerations
|
The widget does not require or support the usage of metadata or special tags outside the <body> section. Focus on providing the visible HTML content you want to display within the widget. By following these guidelines, you can make the best use of the widget to showcase your desired HTML content effectively. |
When using the widget to visualize HTML, follow these guidelines to ensure proper rendering and display of your content.
1.The Widget does not allow Script nor Javascript code execution.
2.The printing button is not available on the native mobile application. However it is supported for mobile browsers.
3.Restrict Code to <body> section: Only HTML code within the <body> tags will be recognized and displayed correctly by the widget. Please exclude any HTML code outside of the <body> section, including tags within the <head> section or the <title> tag.
For example:
<!DOCTYPE html>
<html lang="en">
<head>
<meta charset="UTF-8">
<meta http-equiv="X-UA-Compatible" content="IE=edge">
<meta name="viewport" content="width=device-width, initial-scale=1.0">
<title>Document</title>
</head>
<body>
<!-- Visible content within the <body> section -->
</body>
</html>
4.Inline Styles for Styling: If you wish to configure the styling of your HTML elements, you can use inline styles directly within each tag.
For example:
<h1 style="font-size: 28px;">This is a title test</h1>
By specifying the style attribute within an HTML tag and providing the desired CSS properties and values, you can customize the appearance of individual elements.
Note that external stylesheets or <style> tags within the <head> section are not supported by the widget. Inline styles are the recommended method for applying styling within the widget.
Example
Consider the following example that demonstrates the correct usage of the widget:
<div>
<h1 style="font-size: 28px;">This is a title test</h1>
<h2>This is a subtitle test</h2>
<ul>
<li>a</li>
<li>b</li>
<li>c</li>
</ul>
</div>
In this example, the HTML code includes a <div> element to wrap the visible content. The visible content consists of a <h1> heading with a custom font size, a <h2> subtitle, and an unordered list <ul> with three list items <li>. By following this structure, you ensure that only the visible content within the <body> section is recognized and displayed correctly by the widget.
Last Updated 6/30/2023 2:37:21 PM
