Overview
Bizagi presents a Replication Wizard which will assist the configuration to connect to an external SQL Server database (and automatically create any necessary components).
However, for more sophisticated scenarios, you may want to use the Advanced Configuration, which is an alternative way to set Replication in your project.
Such scenarios involve mainly the need to manually adjust the configuration. This may happen in sophisticated scenarios where you have a whole set of tables which are related to each other. This may involve relationships with virtual entities, and therefore this configuration requires that all of these tables are replicated and virtualized with some considerations.
The following article illustrates how to set Replication in Bizagi by using the Advanced configuration options.
Using the Advanced configuration options
In order to set Replication through the Advanced configuration, make sure that you have already created the necessary Parameter Entities and their attributes (to store the incoming values from the external data source).
For further information about creating entities in Bizagi, refer to the Creating your data model article.
Notice that the entities created in Bizagi should have a similar data structure to those in the external data source (for example, the corresponding data types to store the columns' values of the external tables).
To use the Advanced configuration for Replication, go to the External systems module view in Bizagi Studio.
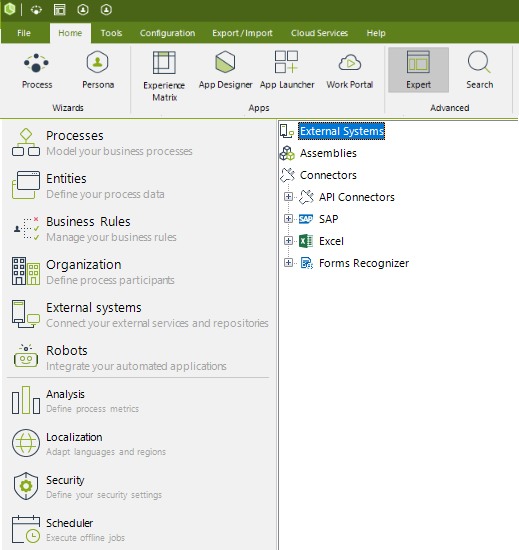
What you need to do
Configuring Replication through the Advanced options is done by:
1. Creating the entities in Bizagi with their attributes to match data at the source
This is done through Data modeling.
2. Defining an External System
Define the information for the system where the external data source is found.
3. Defining a Data Provider
Specify details for the Data Provider (the connection information to the external data source).
4. Registering the Replication class (the component having the implementation)
We need to explicitly define if we will be using a custom implementation.
5. Defining a Replication Schedule
Specify a scheduled job which will execute the Replication's synchronization.
6. Including Parameter Entities for the Replication
Include one by one, each of the Parameter Entities to be replicated for this connection (Data Provider) and given Replication Schema.
7. Matching attributes in Bizagi to the sources' columns
Map each of the attributes in the replicated entity to correspond to a column at the source.
8. Using additional configuration options
Finally, there is the possibility to use additional options for each replicated entity set, such as: Defining filters for records incoming from the external table, indicating if an attribute (column) of those entities will be disregarded, etc.
Once we have done these configuration steps, we may also run an initial import for these tables or views, so that we can test that the integration was properly set (checkpoint).
Example
In this example, the external SQL database has the following tables that are going to be virtualized: Territories, Region and Shippers.
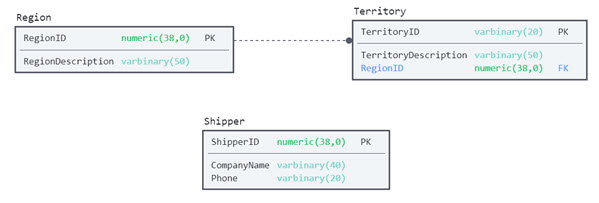
Our first step is to make sure that these tables have been previously created in Bizagi as Parameter Entities.
1. Creating the entities in Bizagi with their attributes to match data at the source
We create Region, Branch and Shippers as Parameter Entities in Bizagi.
Region attributes in Bizagi:

Territories (Branch entity) attributes in Bizagi:

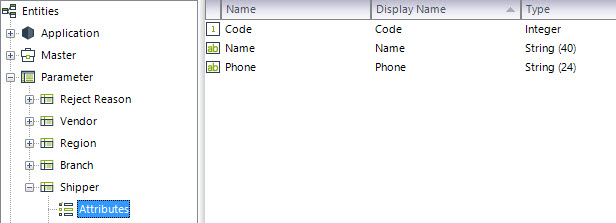
Shippers attributes in Bizagi:
2. Defining an External System
To define a new External System to be used in this integration, right-click External Systems and select New External System.
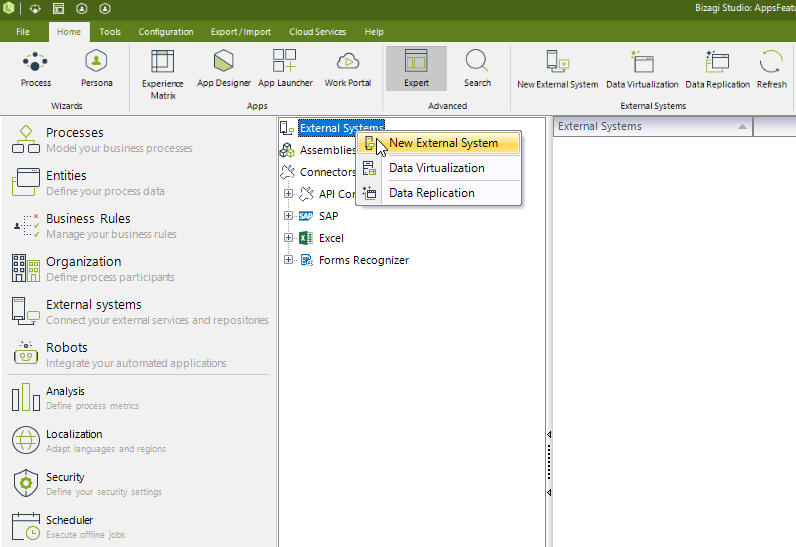
In the New External system window, define the information for the system where the external data source is.
Enter the detail for this new system: Display Name and Description.
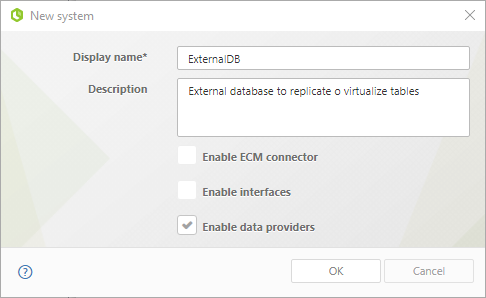
Make sure you also check the Enable data providers option.
Click OK.
3. Defining a Data Provider
Once you have defined and created the new external system in Bizagi, we will enter the details for the Data Provider used by this System and its Replication configuration.
To do so, right-click the Providers node located under the newly created system, and select the New Provider option.
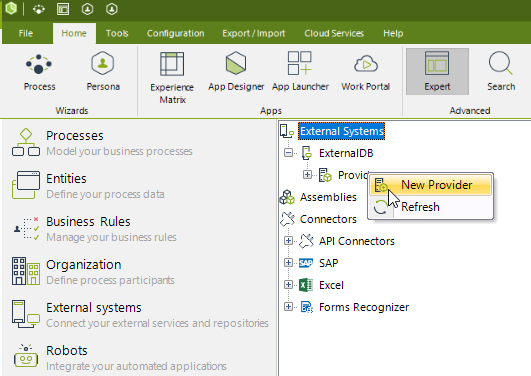
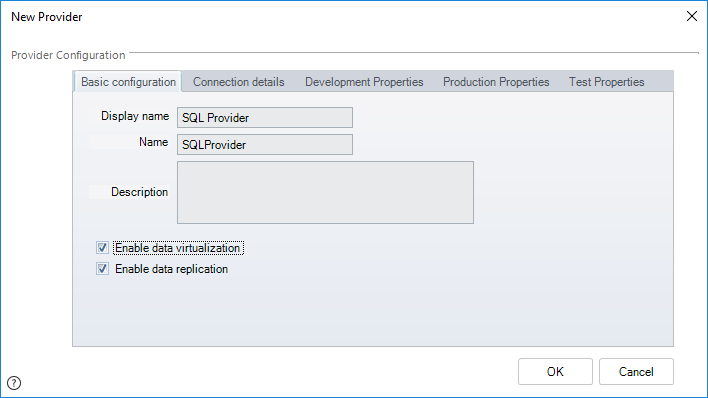
In the Basic configuration tab of the New Provider window, enter the detail for this new provider: Display Name, Name, and Description.
Make sure you mark the Enable data replication option.
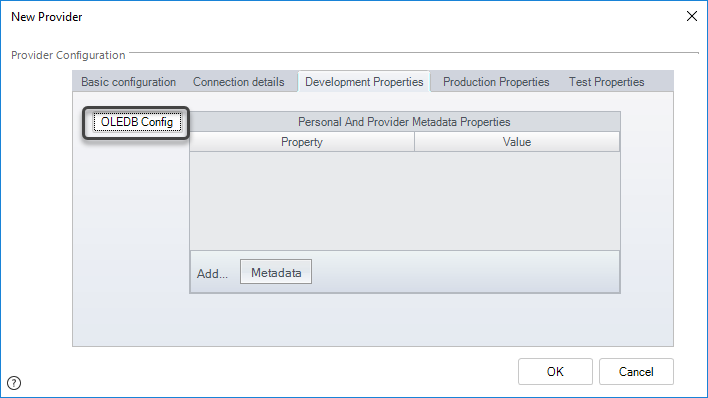
Then, in the Development Properties tab, click the OLEDB Config button.
Notice you may set different values for your different project environments (Development, Test and Production).
In this example, we will set the Development Environment properties.
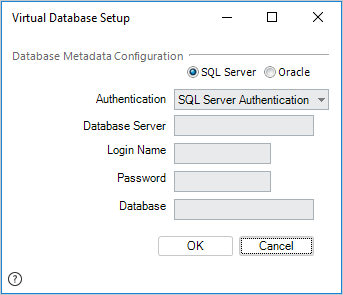
For configuring your external data source as a SQL Server database, select the SQL Server radio button and specify the following details.
•Authentication: The authentication method MUST BE SQL Server Authentication.
•Database Server: The name of the Database Server containing the SQL Server instance.
•Login Name: A login account to access that Database. Take into account that this account requires read-access to the tables or views to replicate.
•Password: The password for the previous Login Name.
•Database: The name of the Database where the tables or views to replicate are held.
|
Windows authentication and Oracle databases are not supported for Bizagi Automation cloud service. |
Click OK to save this connection.
Click OK again when returned to the New Provider window.
|
Take into account that you may define the properties and connection values for this integration for the different environments separately (Development, Test, Production). However, the definition for the Test and Production environments can only be done before this system and provider is deployed into that target environment. |
4. Registering the Replication class
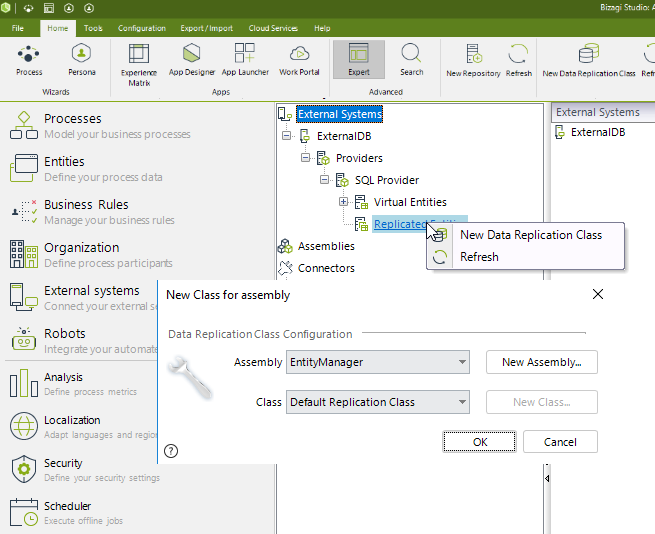
Next, we need to create a Replication class in Bizagi which can be defined to use Bizagi's default components (Implementation Class).
To do so, we define a Replication Entity Class by right-clicking on the Replicated Entities node and selecting the New Data Replication Class... option.
Leave the defaults and click OK.
5. Defining a Replication Schedule
Once the Replication class is created or registered, we specify its Replication Schema to run periodically as a scheduled job.
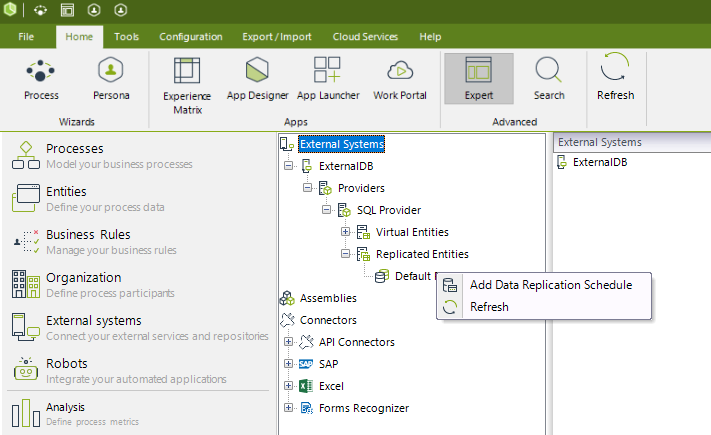
To define this schema, locate the Replication Class (the default one is called Default Replication Class) under the Replicated Entities and right-click it to select the Add Data Replication Schedule option.
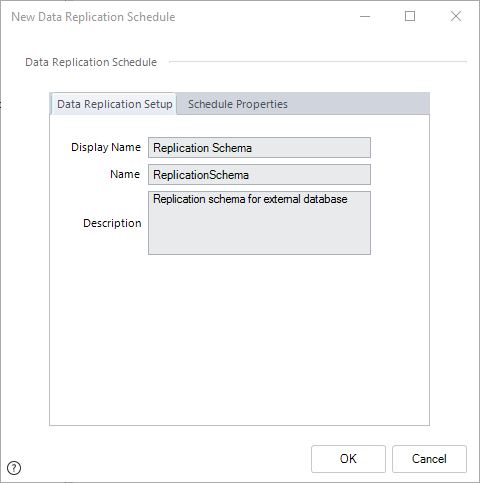
In the New Data Replication Schedule window, type a Display Name, Name and Description for this Replication Schema.
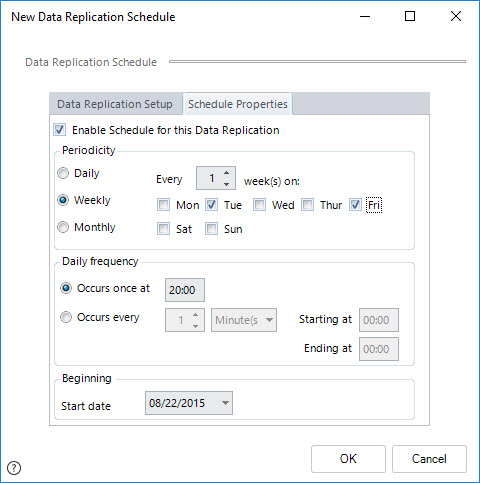
On the Schedule Properties tab, specify the frequency for which the information will be replicated from the data source (synchronized from the data source into Bizagi).
In this example, the replication will occur every week on Tuesday and Friday at 8:00 pm starting on August 22, 2015.
|
The replication will start at the day and time as set previously, nevertheless, you may use the option Replicate now to run immediately |
For the setup presented in this tab, define the periodicity and frequency of execution according to the options in this table below:
Schedule option |
Description |
|---|---|
Enable Schedule for this Replication |
Mark this option for Bizagi to execute the data replication from the external source. |
Periodicity |
Mark Daily, Weekly or Monthly to define how frequently Bizagi will execute the Replication schema. |
Every [...] day(s) |
This modifier further defines the interval selected in the above-mentioned Periodicity option as follows. •Daily option: Enter the number of days between repetitions of the execution. Its default value is 1. •Weekly option: Enter the number of weeks between repetitions of the execution. Also, specify on which weekdays this schema will be executed. •Monthly option: Enter the number of months between repetitions of the execution. Additionally, select the day of the month in which this schema will be executed. |
Daily frequency |
Define if the execution happens once a day (and at which time), or if it should be executed every certain time (minutes or hours). |
Beginning |
Set a starting date for this schema to begin its execution. |
Schedule properties description
Click OK.
6. Including Parameter Entities for the Replication
Now that we have set a Replication Schema, we will include in it our Bizagi Parameter Entities and match them to the external data source's tables.
To do this, include one by one each of the Parameter Entities used in this Data Provider's Replication.
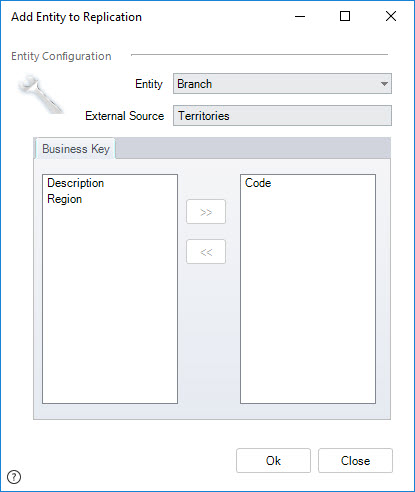
For instance, we will add our Territories entity and match it to the Branch table from the source.
Right-click the newly created Replication Schedule node, and select the Add Entity to Data Replication option.
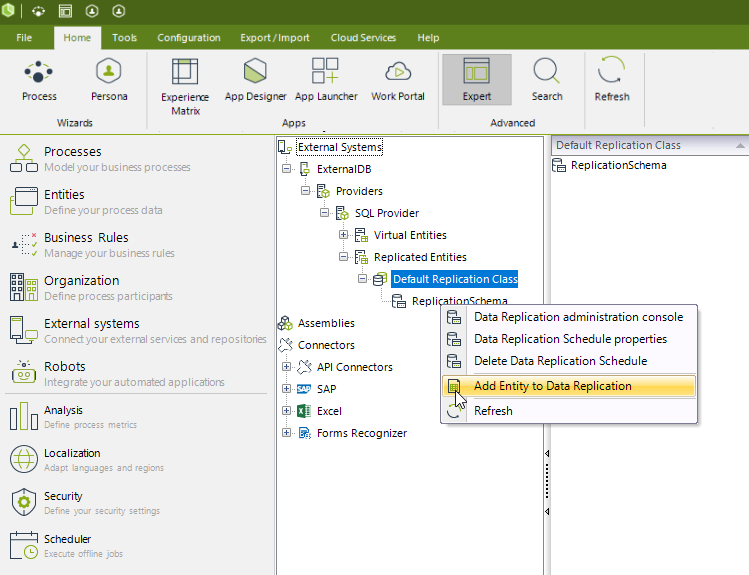
In this step, along with the source table definition, you may also define which of the source columns will be taken as business keys for the values in the entity.
|
The business keys should correspond to the primary key of the source's table. |
Do this for each of the Parameter Entities (Region, Branch, and Shipper in our example).
Territories table added (as Branch entity) to the replication configuration and schema:
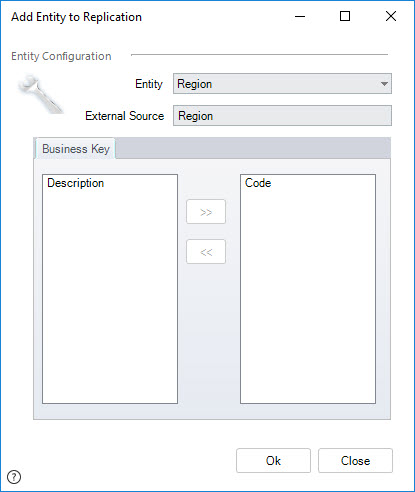
Region table added (as Region entity) to our Replication configuration and its Replication Schema:
Shippers table added (as Shipper entity) to the replication configuration and schema:
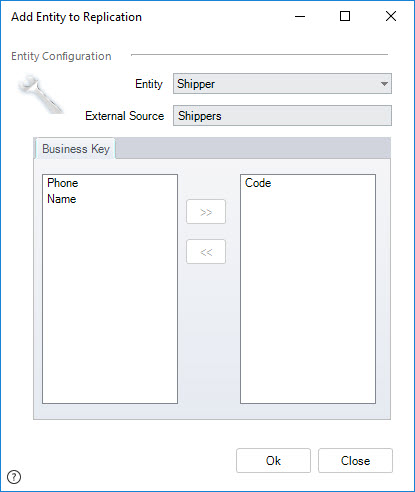
Notice that this means that once our defined Replication Schema executes, it will synchronize the information for the Region, Branch and Shipper entities.
Configuration Validations
When you add a new entity and click Ok, Bizagi performs a connection to the external table and executes the following validations:
External provider credentials: If the credentials set in the provider configuration are not correct, Bizagi alerts the user.
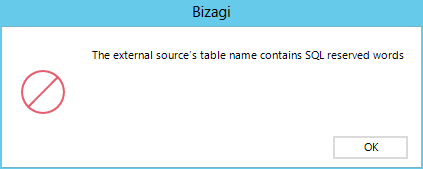
SQL reserved words: If the name of the external source contains a SQL reserved word, Bizagi displays the following message.
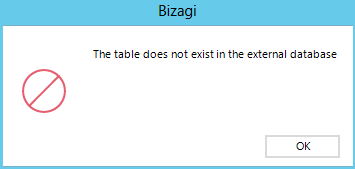
The Table does not exist: If the table named in the External source does not exist in the external database, Bizagi warns the user.
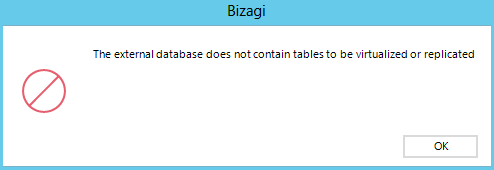
There are no tables to virtualize in the external database: If there are no tables to virtualize, Bizagi shows the following message.
7. Matching attributes in Bizagi to the sources' columns
Once we have added entities to the Replication Schema, they will be listed under the Provider.
By clicking on a specific entity (in our example, we need to do this for each of the 3 Parameter Entities), in the right panel you will be presented with the entities' current attributes.
Map each of the attributes in the replicated entity to correspond to a column at the source, by right-clicking on the attribute to be configured and choosing the Properties option

For the Branch Code, we type its matching external source's (TerritoryID column).
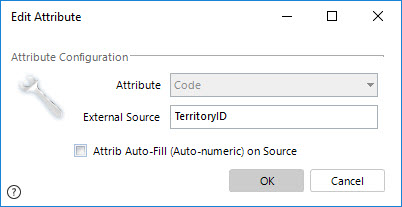
Repeat this step for all the attributes in each of the replicated entities.
At the end, our Configured attributes for Territories (Branch in Bizagi) are:

Configured attributes for Region are:

Configured attributes for Shipper are:

Notice that all listed attributes need to have matching information in their External Source property.
Should there be any attribute which you don't want to consider in the Replication, refer to the next section.
At this point, we completed the Replication configuration setup done through the Advanced options.
You may use additional configuration options as described in the section below, and verify that the values for these Parameter Entities are properly synchronized.
8. Using additional configuration options
Finally, there is the possibility to use additional options for each configured replicated entity, such as: Defining filters for the records in those tables to be replicated, defining if an attribute (column) of those entities will be disregarded, etc.
View more information about these options at the Additional configuration options article.
Last Updated 11/8/2023 4:51:06 PM