Overview
Bizagi integrates Swagger and OpenAPI to offer interactive documentation for OData endpoints in development environments. You can generate credentials in the Work Portal to explore endpoints, review parameters, test requests, and verify service responses in Swagger UI or in external API client tools, like Bruno, by downloading a JSON file available in Swagger 2.0 and OpenAPI 3.0 format that contains all OData endpoints.
|
Available only in development environments. |

Using Swagger and OpenAPI in Bizagi
Authorizing requests
1.Generate a Client ID and a Client Secret using the Work Portal. Follow the instructions found in OAuth 2.0 Applications options and use the following required values to configure your access keys:
•Name: Name of the credentials (for example: swaggerToken).
•Grant Type: ClientCredentials
•Allowed Scope: API
•User Name: Name of an existing Bizagi user.
•Token lifetime (mins) & Lifecycle type: Based on your security policies.
2.Open Swagger UI in the development environment, using the following URL:
https://{host}/{app}/swagger/ui/index#!/
3.Navigate to Authorization, enter the credentials to obtain the token and click Authorize.

If the token is generated correctly, a message confirms it and the token begins to be used for all endpoints.

If an error occurs while generating the token, a message informs you and you must generate new credentials to try again.

Testing an OData endpoint
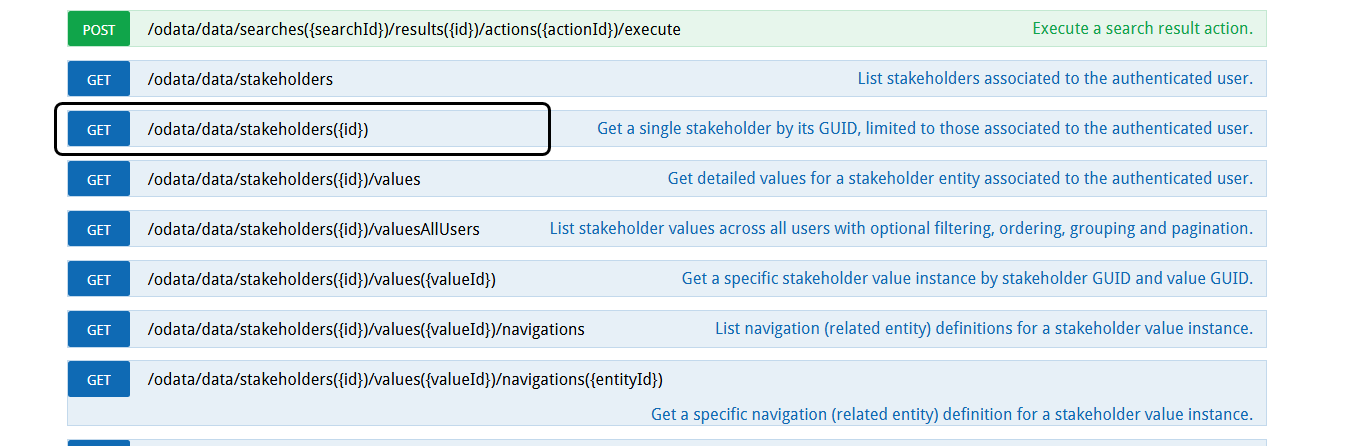
1.Select the controller and operation.
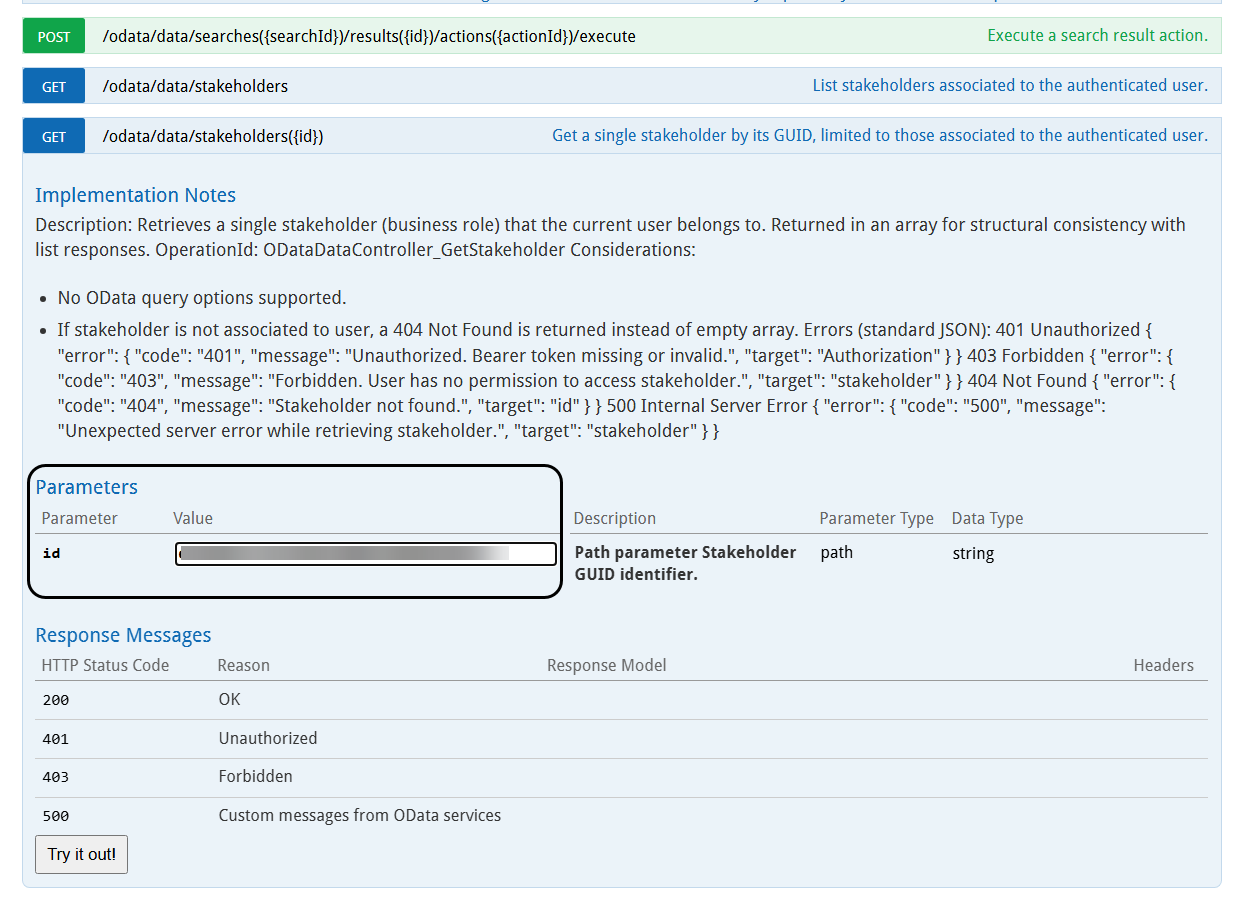
2.Review the parameters.
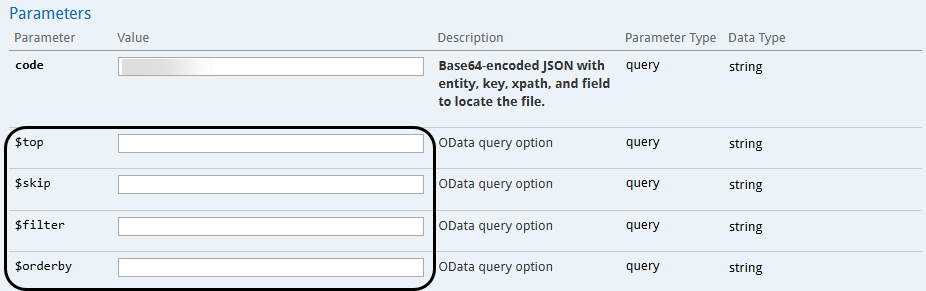
3.Add OData query options if needed.
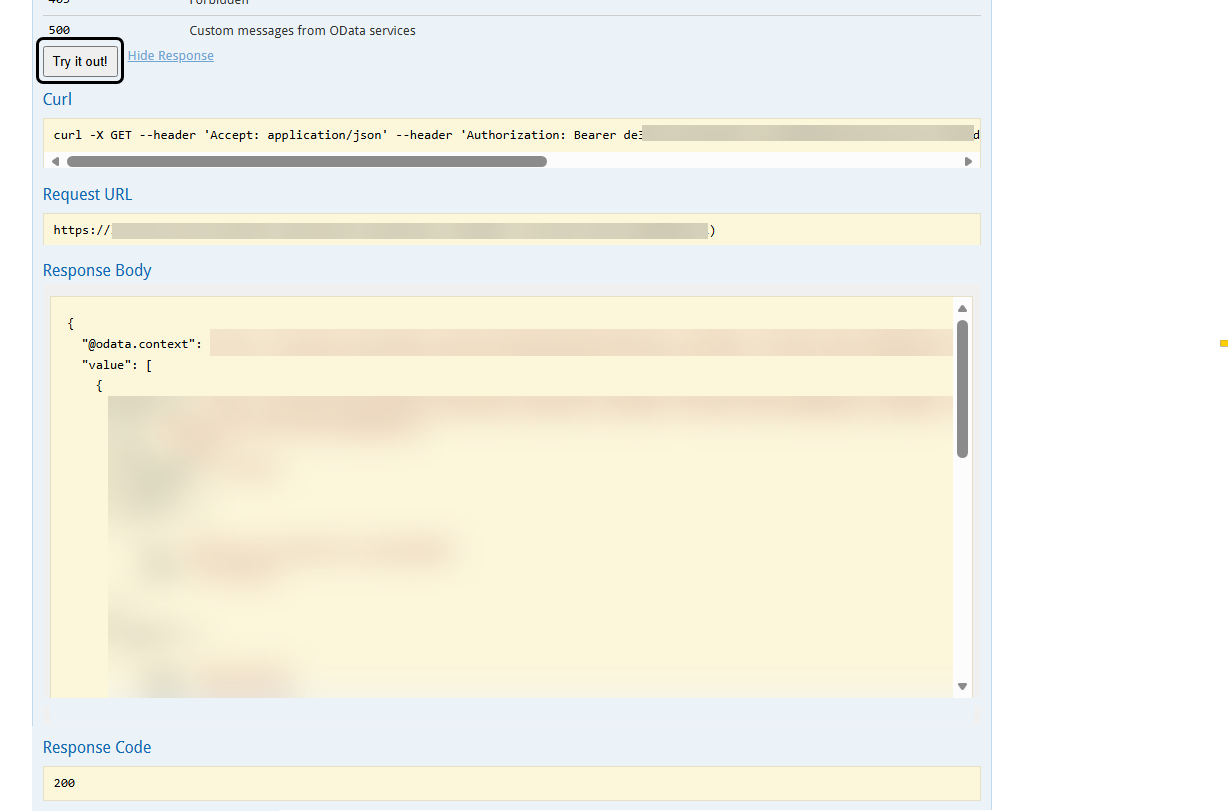
4.Click Try it out to see the response.
Downloading and testing in external tools
Downloading the JSON file
You can import the JSON schema into Bruno or similar tools.
1.Go to the download link for the JSON file.
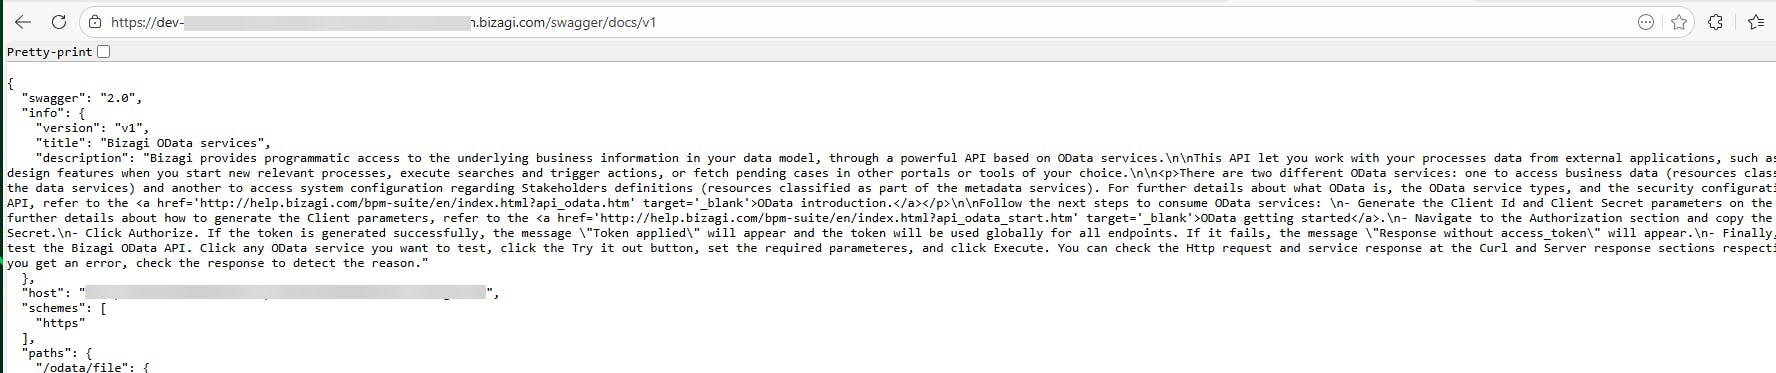
Use the following URLs depending on the format you want to download:
•Swagger 2.0: https://{host}/{app}/swagger/docs/v1
•OpenAPI 3.0: https://{host}/{app}/swagger/oas3/v1
|
Keep in mind that the base URL (https://{host}/{app}/) corresponds to the same Work Portal URL structure described above. |
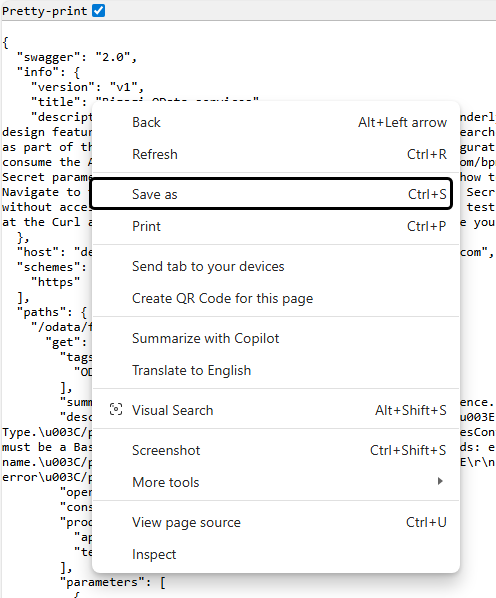
2.When the page opens, right-click the text and select Save as.
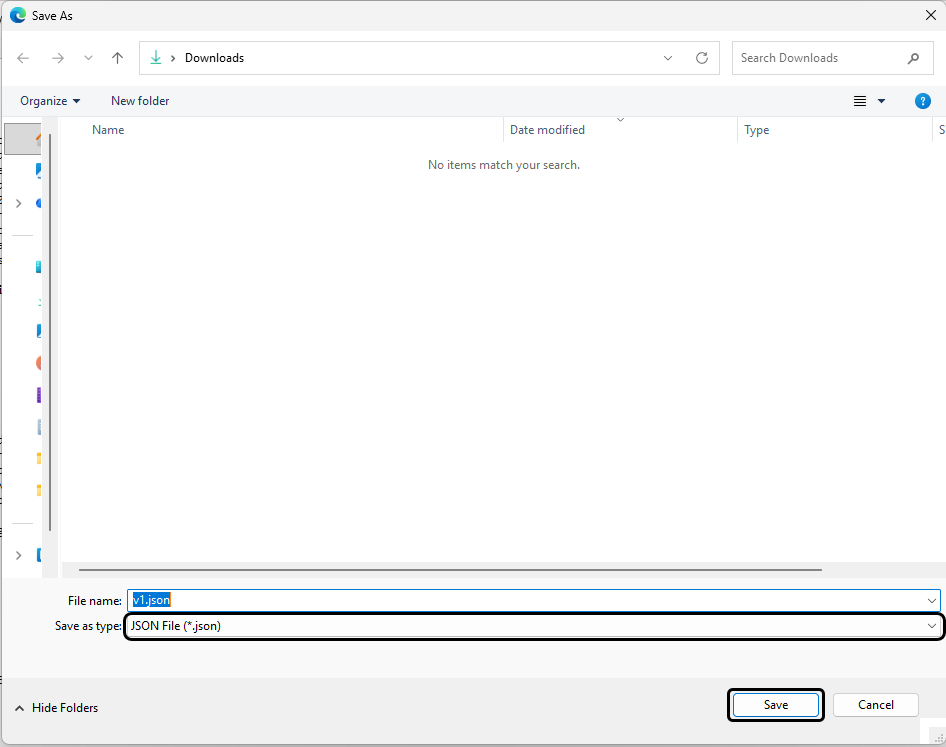
3.On the File Explorer review the file type and click Save.
Import File into Bruno
1.Open Bruno.
2.In the left panel, in the Collections menu options, select the + icon.
3.Click Import collection.
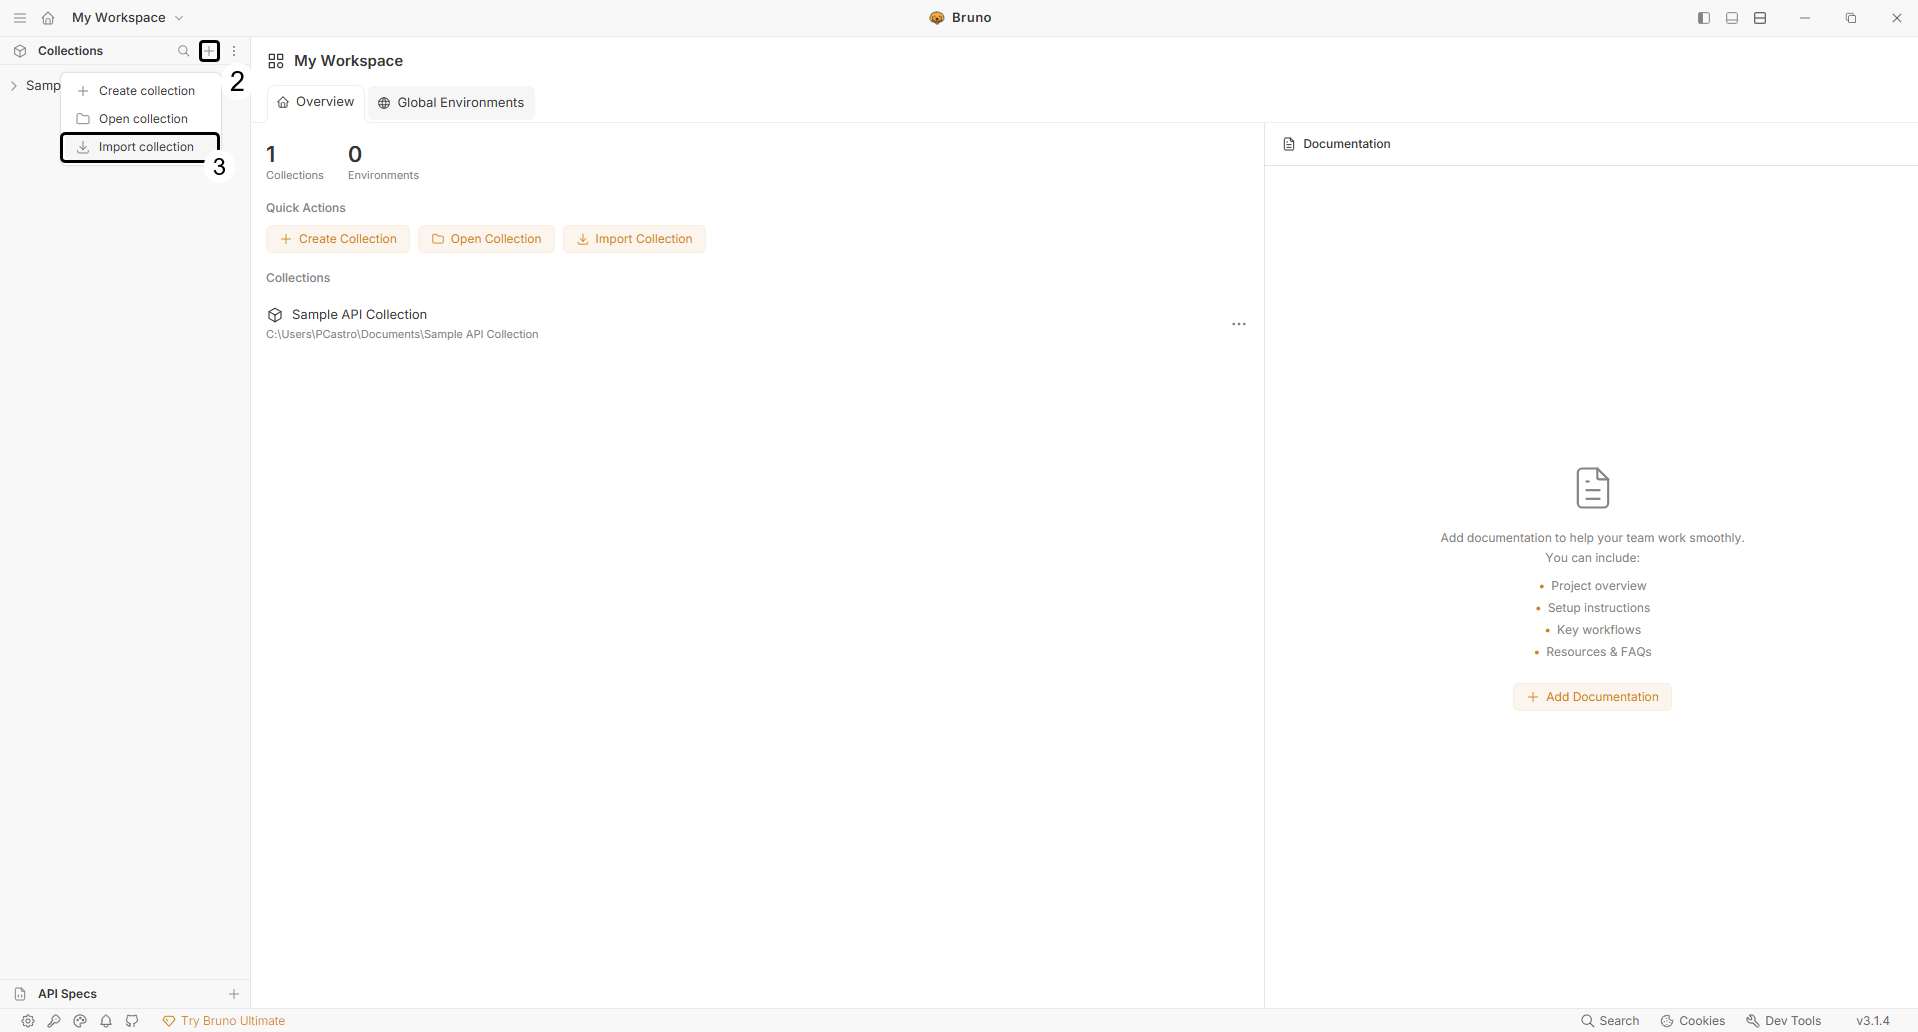
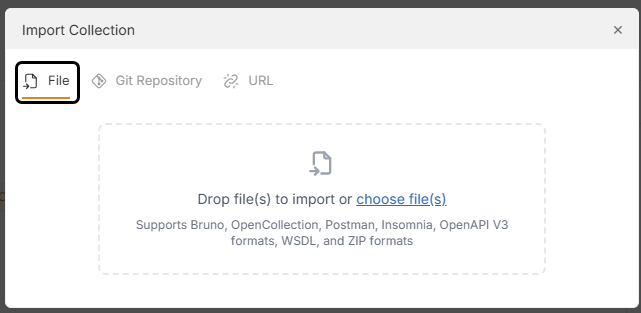
4.In the Import Collection modal window, open the File tab and drop your file or click Choose file to browse for it.
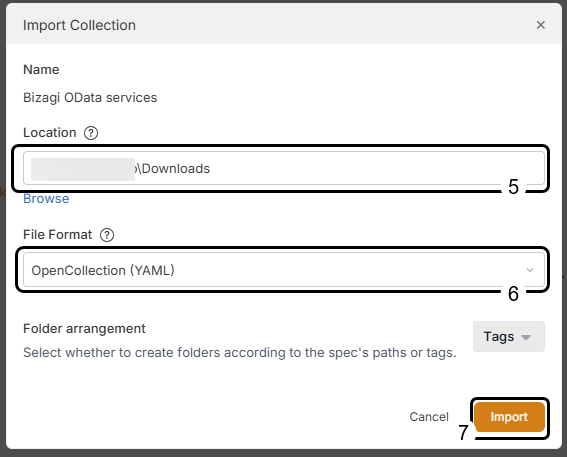
5.Select a Location for the new collection.
6.Make sure the OpenCollection (YAML) format is selected.
7.Click Import.
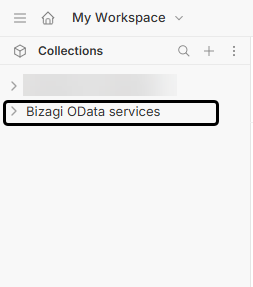
Your collection must now appear listed under Collections. Select it to continue.
Configure the token in your collection
1.Go to the Get the authorization token section in Bizagi API authentication and follow the instructions using the Client Credentials generated in the Work Portal.
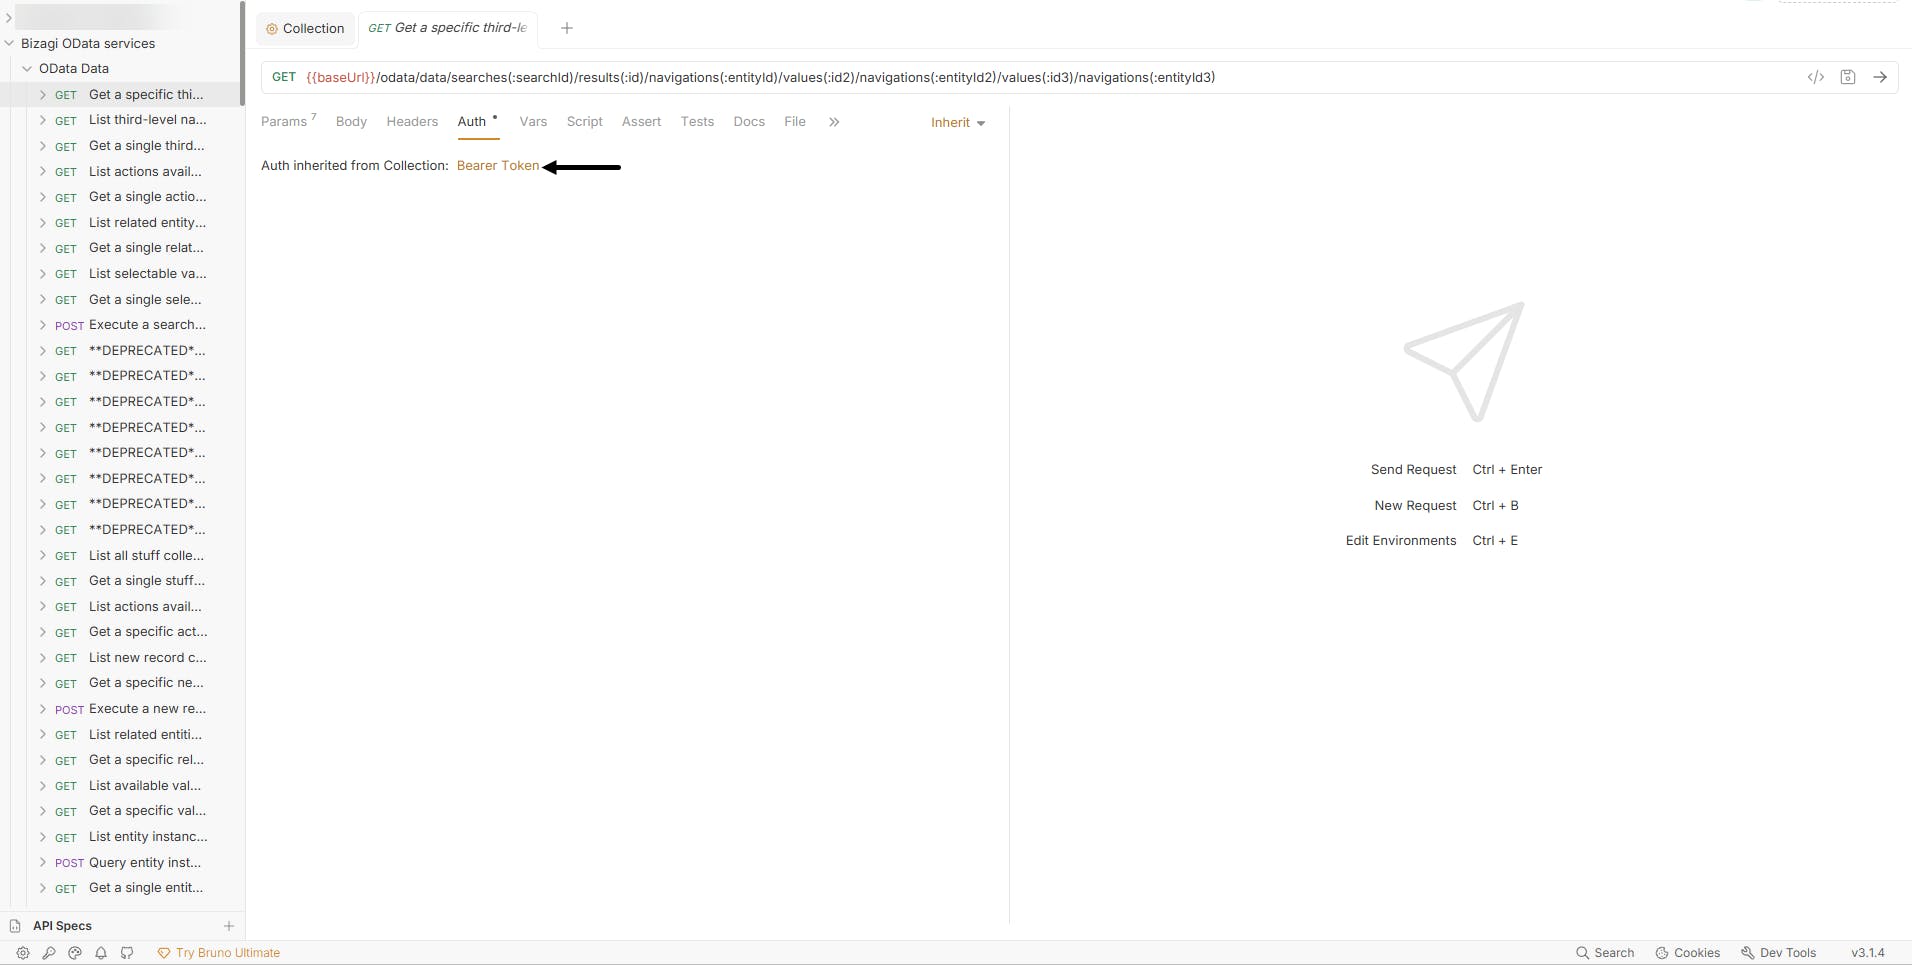
2.Open Bruno and go to the Auth tab.
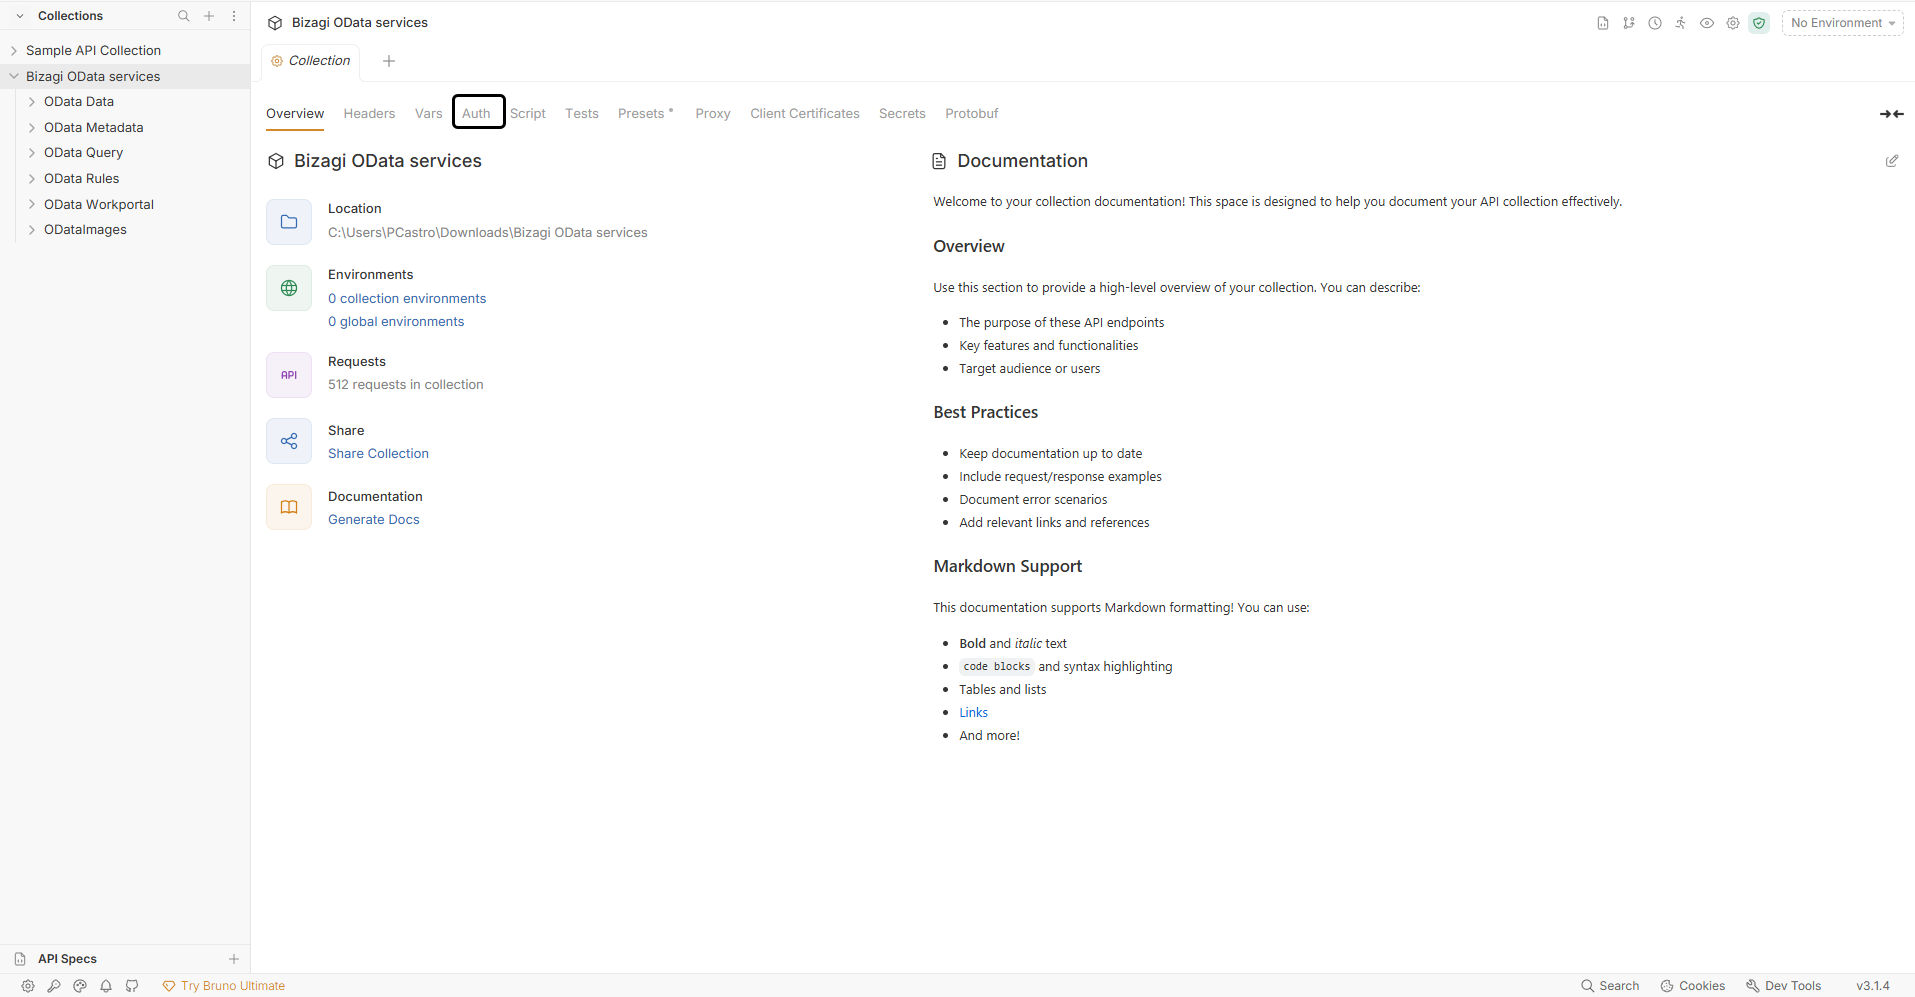
3.Open the Authorization dropdown list.
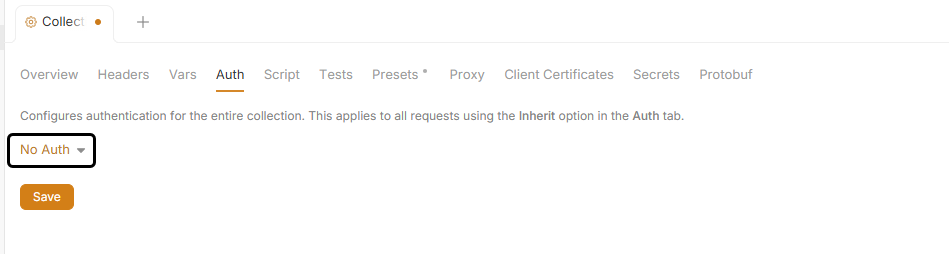
4.Select the required format:
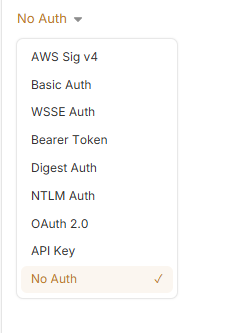
•Swagger 2.0: Bearer
•OpenAPI 3.0: API Key
5.Enter the token.
•If you selected Bearer (Swagger 2.0):
oIn the Token text field type {{token}}

oHover over {{token}} and type in the token.
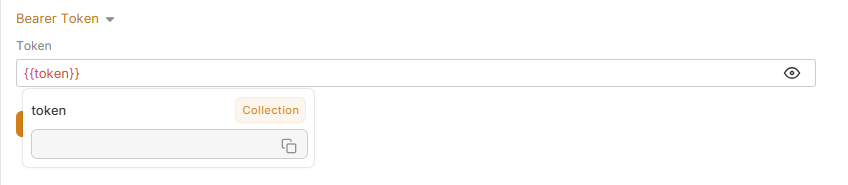
oClick Save.

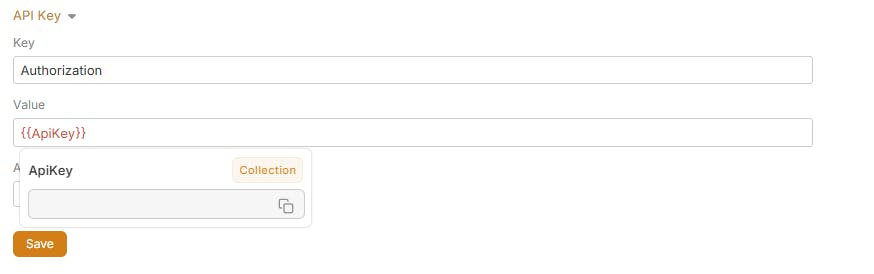
•If you selected API Key (OpenAPI 3.0):
oFill in the following fields:
▪Key: Authorization
▪Value: {{ApiKey}}
▪Add to: Header
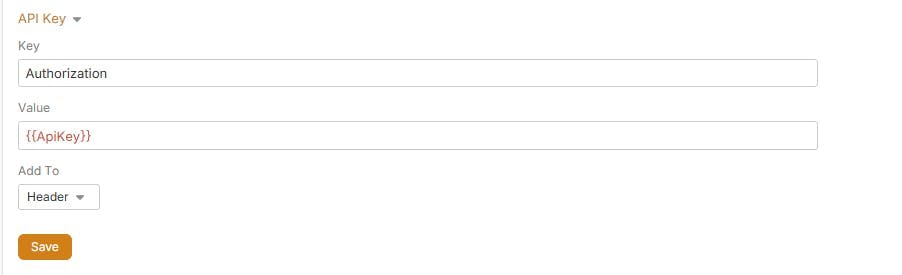
oHover over {{ApiKey}} and type in the token.
oClick Save
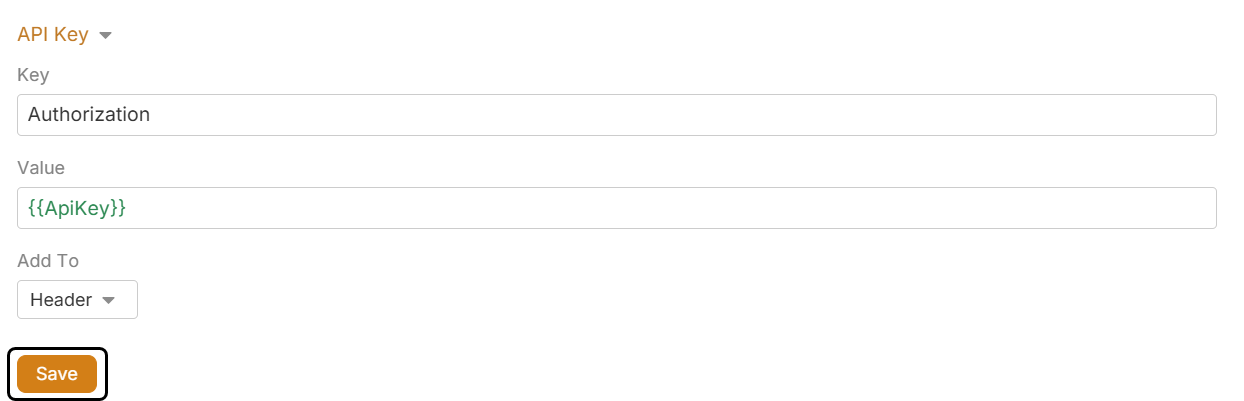
Your token configuration now applies to your entire collection.
Start testing
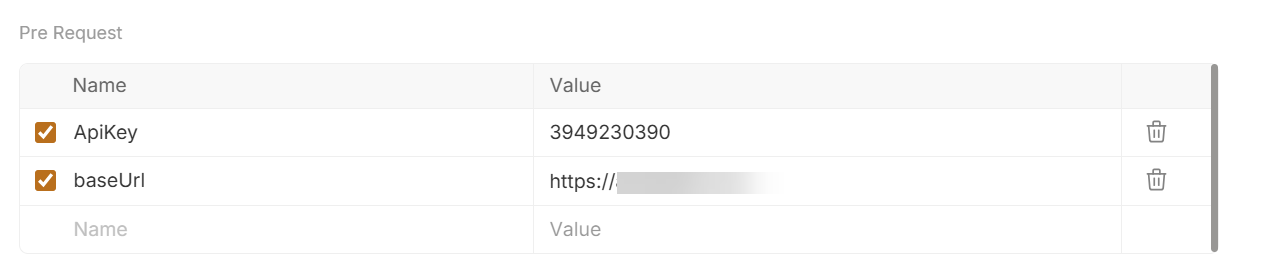
You can begin testing endpoints. To do so, define the baseUrl parameter first:
1.In your collection, go to the Vars tab.

2.Click the first empty row to add a new parameter.

3.In the Name column, type baseUrl.
4.In the Value column, type your Work Portal development URL.
5.Make sure the row is selected.
6.Go to the endpoint you want to test and click the arrow icon to send a request.
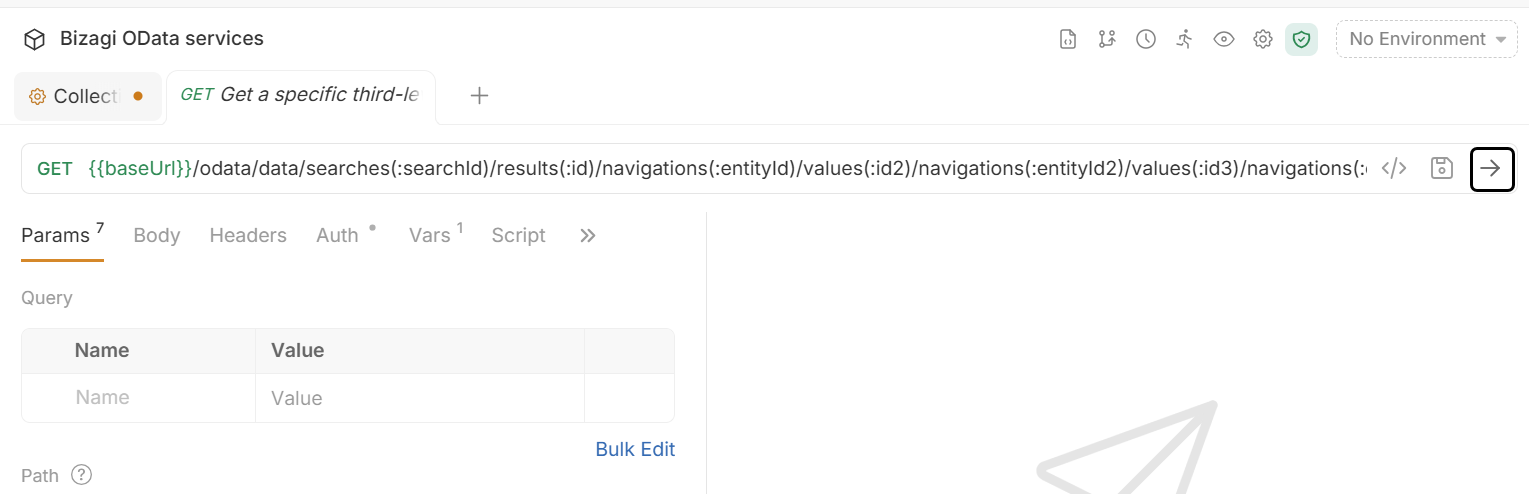
You can now review the response.
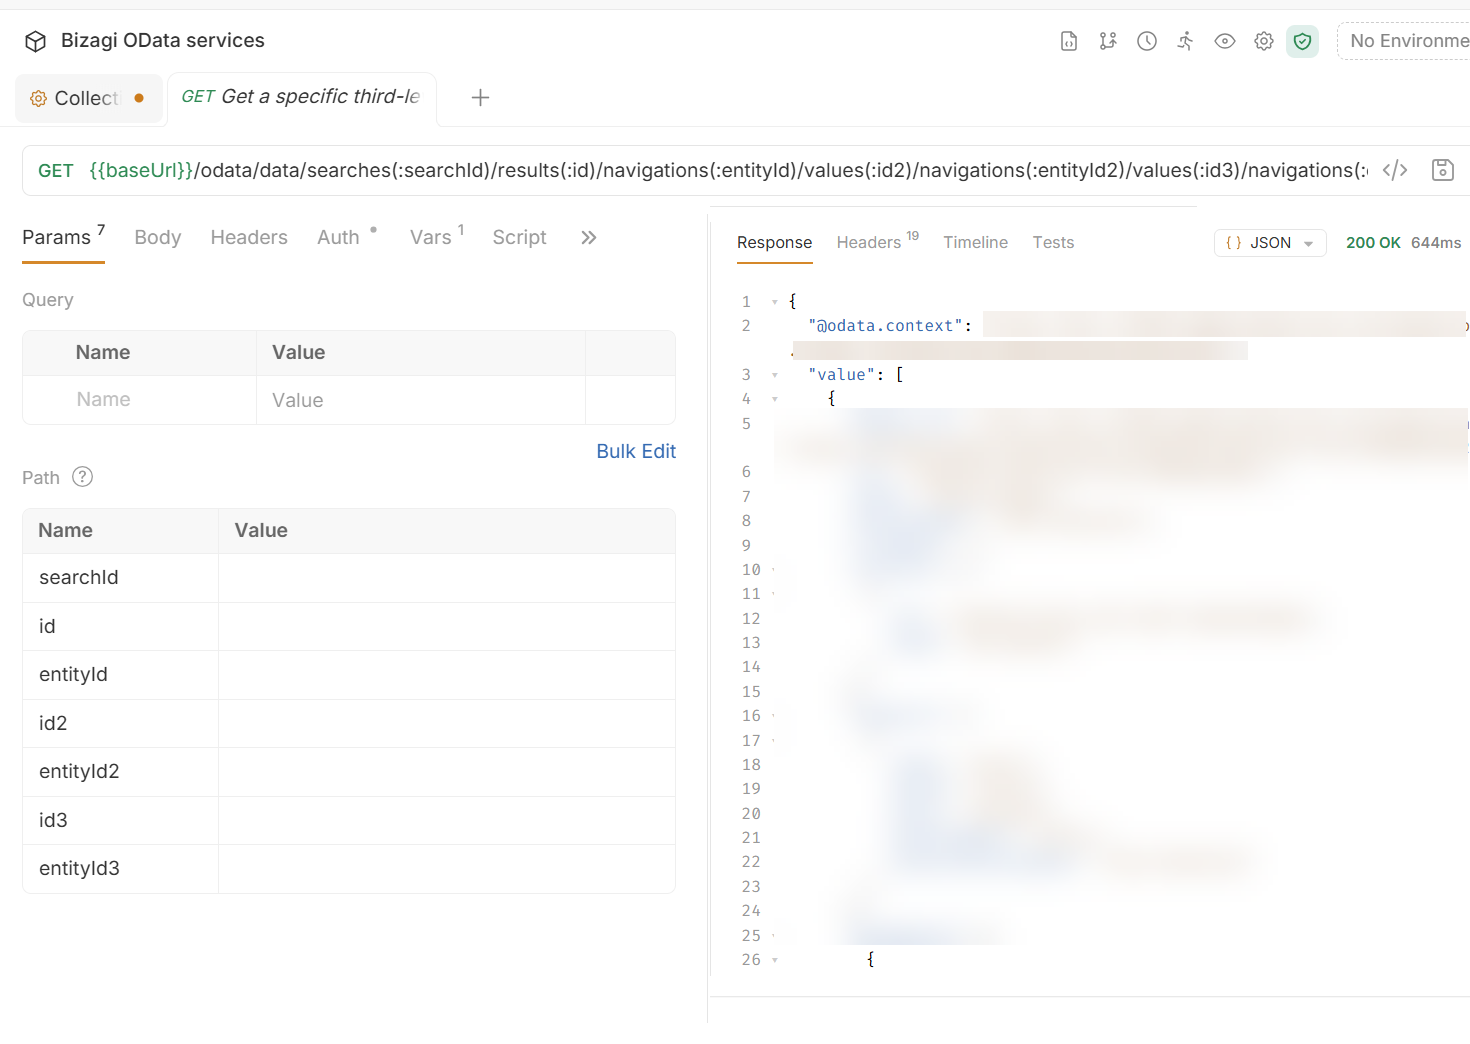
|
Swagger 2.0 and OpenAPI 3.0 may behave differently in external tools (including token formatting). |
Last Updated 7/14/2026 2:49:24 PM