Security in Bizagi API
The OData services in Bizagi are protected and rely on a standard authentication mechanism: OAuth version 2.0. Requests made to these services need to be granted with rights to resources, using previously generated OAuth keys. With the OAuth version 2.0 specification, Bizagi supports the three OAuth flows, which are the most commonly used ones:
Authorization code:
This lets client application authenticate users with inputted credentials at runtime (throughout a login page).
This flow is designed for human interaction, where requests use impersonation of end users.
For more information about this specification, refer to https://tools.ietf.org/html/rfc6749#section-1.3.1.
Client credentials:
This allows server to server integration without further use of specific end user credentials.
For more information about this specification, refer to https://tools.ietf.org/html/rfc6749#section-1.3.4.
Bearer Token:
This lets client application authenticate using a token.
For more information about this specification, refer to https://tools.ietf.org/html/rfc6750.
What you need to do
Here are the steps to get authentication for OData services invocations:
1. Register an OAuth application
This first step is granting access to an external application and creating appropriate access keys.
This is a requirement to use OData services.
2. Get the authorization token
This step uses Postman to establish authenticated communication with the OData services.
By using the access keys, you get an access token to make further requests.
Steps
1. Register an OAuth application.
Go to the Work portal. Click the OAuth2 Applications option under the Admin>Security menu to grant access to an external application.
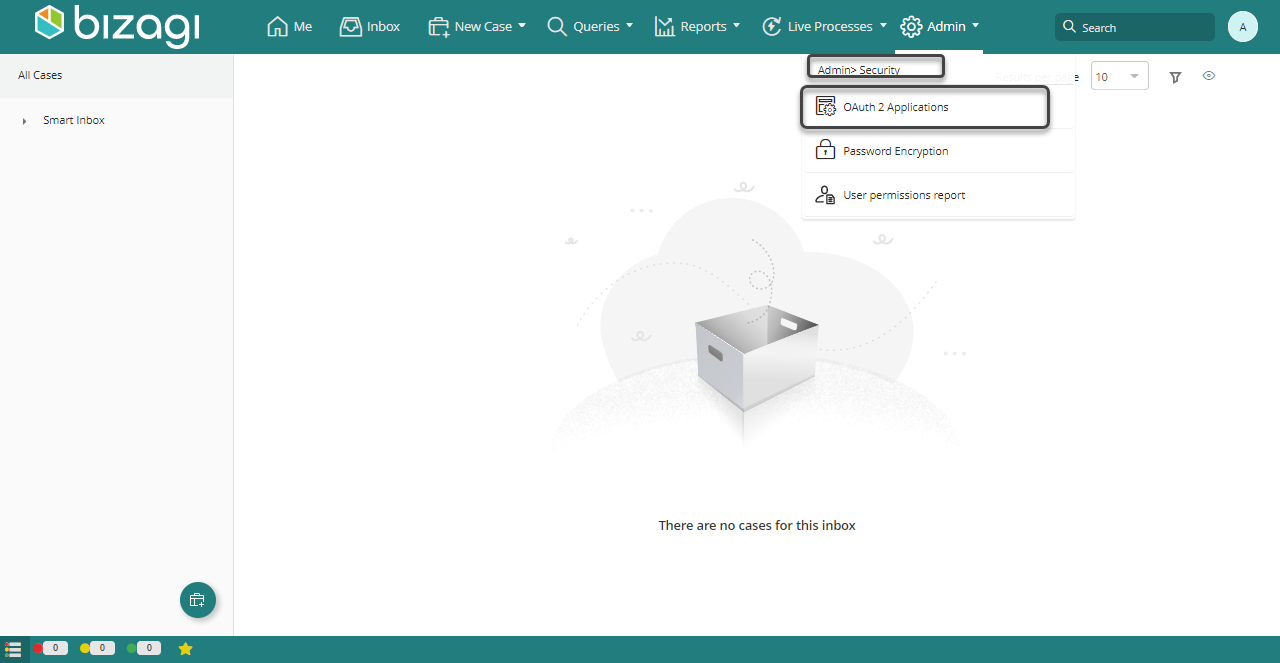
This option lists services being accessed by Bizagi devices, and allows you to include additional applications that represent granted access to the services by getting appropriate access keys. Click the option to add a new record to this table:

When defining the new application, provide the following details:
•Name: provide a unique and representative name.
•Grant type: Possible values are: Authorization Code, Client credentials, All, or Bearer token.
•Web Site: Specify an associated web site URL.
•Allowed Scope: Possible checkboxes to check are: API, Login, User Sync, OData query or RPA.
oWe recommend you enable API to grant access so you can make full use of the OData services.
oEnable Login especially when using Authorization Code as the Grant type.
oEnable User Sync when synchronizing users using SCIM.
oEnable OData query when using the Query resource of the OData services.
oEnable RPA when using Automation Anywhere Callbacks.
•User name: (applies when using Client credentials). Provide the name of an existing Bizagi user. Make sure you select it from the suggested list of matching users (includes the domain information).
•Redirect strategy: (applies when using Authorization Code). Possible values are: Web Application, Mobile Title Bar Browser, and Mobile Localhost Port.
oWeb Application: Redirects the user to a web URI using the code obtained from the authorization server.
oMobile Title Bar Browser: Value used when the application redirects the user to a mobile device app. As mobile devices don't have an endpoint, the request is redirected sending the authorization code in the title HTML tag. So the mobile device can get it from there.
oMobile localhost port: Bizagi sends the code to https://localhost:port/ where a mobile device can get the one sent by the authorization server.
A redirect strategy defines which clients will be able to make use of this application.
For this initial test and for general use, consider selecting Web application.
A standard approach is to use Web application so a server capable of processing requests through endpoints invokes the Bizagi API, while mobile apps or other type of clients invoke services from such server.
•Redirect URI: (Applies when using Authorization Code). Define the URL to which the user is directed in the callback after providing their credentials.
You always need to define the URL using HTTPS.
•Token lifetime: Define the number of minutes for which a same token is valid and can be reused for another invocation (this limit enhances security while avoiding replay attacks).
|
We recommend that you use these combinations, usually involving two different applications: •For Data services: Grant type: Authorization code, Allowed scope: Login and API. •For Metadata services: Grant type: Client credentials, Allowed scope: API. |
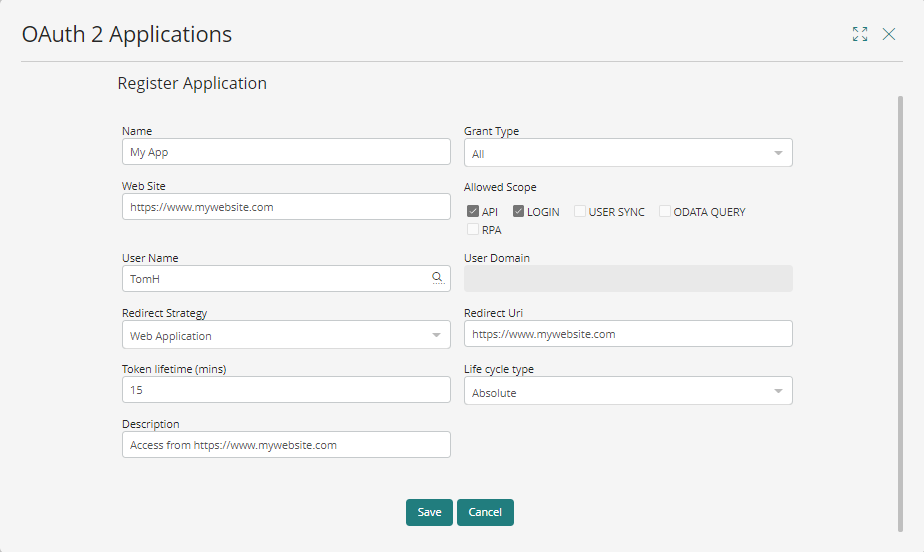
In this example, the registered application authenticates on behalf of the agilityCorp\TomH user.
Once you are done, click Save.
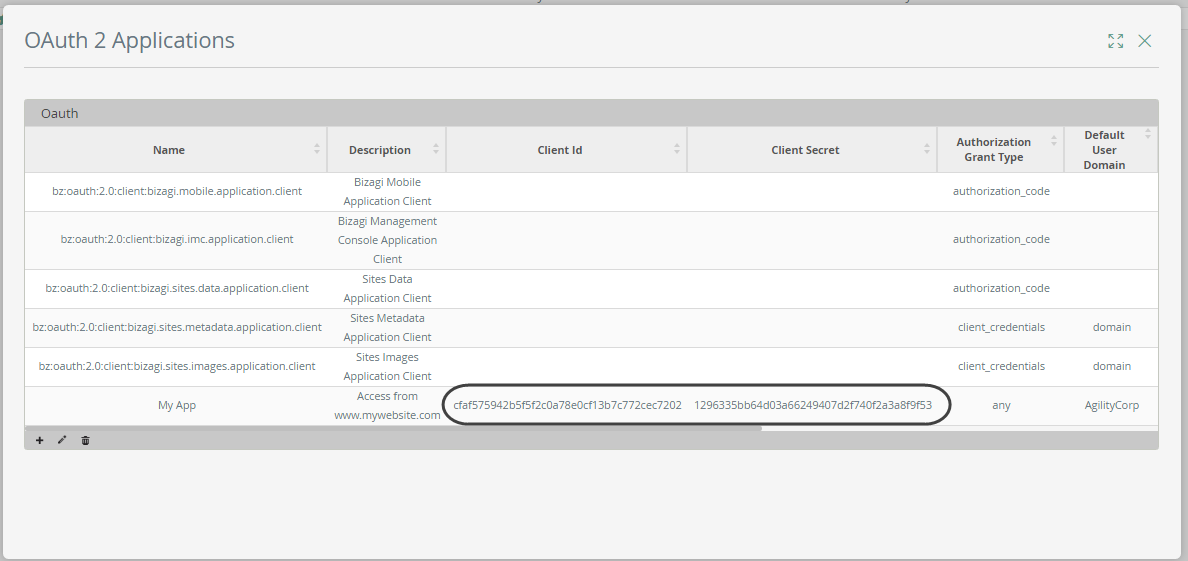
Your new registered application appears in the list with its access keys.
Access keys to be used and copied to the clipboard, are: Client Id and Client Secret.
2. Get the authorization token
Once you have copied the Client Id and Client Secret, establishing authenticated communication through Postman.
Note that Bizagi expects the credentials as a single string encoded in base64.
2.1 To encode the credentials as a single string:
•Copy the Client id first and append a colon (:), then add the Client secret.
Here is the format, disregarding the [] characters:
[Client Id]:[Client Secret]
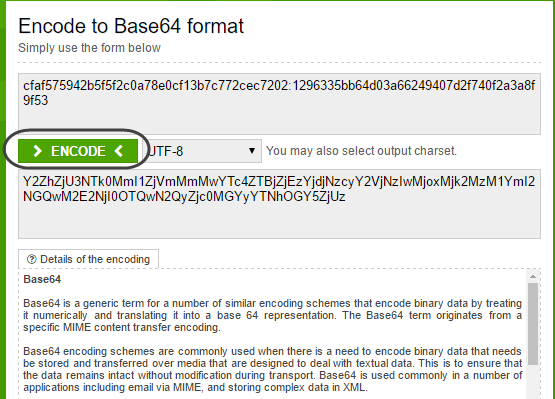
•Encode this string with base64.
For this you can rely on external web sites such as https://www.base64encode.org/, or use your own program.
The result is a string containing the Encoded credentials:
2.2 Open the Postman extension plug-in and use this encoded string to authenticate to the OAuth service.
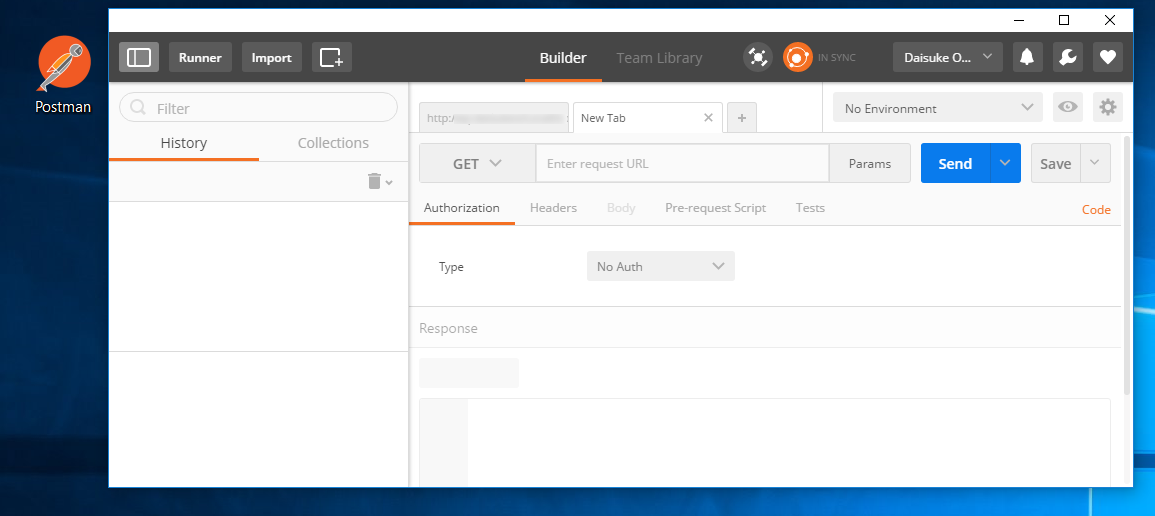
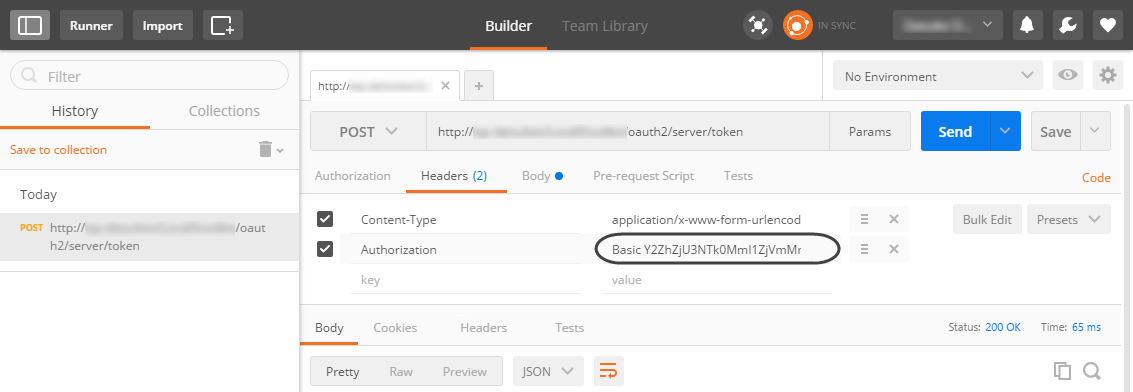
2.3 Input the URL of this service for your specific Bizagi project.
Use an HTTP POST action with the URL set as:
[your_bizagi_project_url]/oauth2/server/token
Make sure that:
•[your_bizagi_project_url]: The URL where end users access the Bizagi Work portal.
For Automation Service projects, the URL would be:
https://[project_environment]-[your_project]-[your_company].bizagi.com/oauth2/server/token
Specify as well that No Auth is employed as the authorization type.

2.4 On the Headers tab, specify:
•Content-type: application/x-www-form-urlencoded
•Authorization: Provide the Basic keyword, add a blank space and then add the Encoded credentials obtained in a previous step.
Use the following format, disregarding the [] characters:
Basic [Encoded credentials]
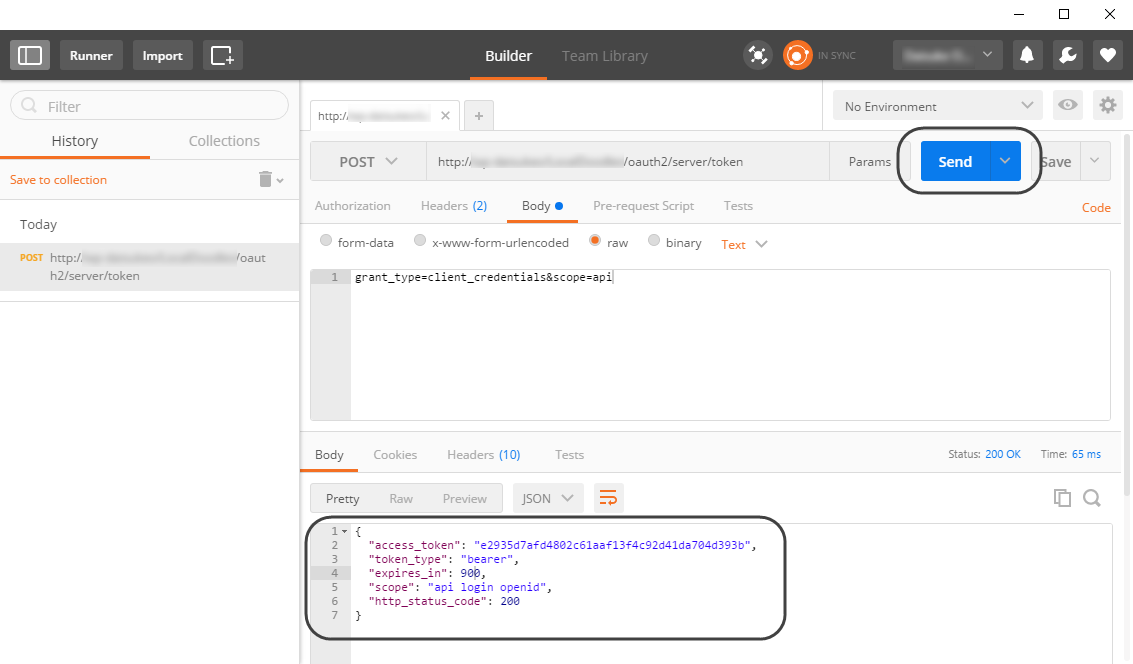
2.5 Finally, on the Body tab, check the raw checkbox to include this line in the body:
grant_type=client_credentials&scope=api
|
The possible values for grant_type are client_credentials and authorization_code. The possible values for scope are login, api and all. You need to use authorization_code in a client application that implements this spec adequately (while sending out credentials). |
At this point you can click Send, which triggers the request to authenticate.
A successful response returns an access_token along with other data relevant to it:

Last Updated 6/7/2023 10:18:44 AM