Overview
When you provision users via SCIM, you can add a Scope Filter to assure that only users and groups that meet a condition are synchronized. This lets you have more control on the users and groups that are provisioned from Entra ID to the Customer Portal, and who will then have access to Bizagi Modeler.
Prerequisites
•Have the right access and permissions in the Entra ID environment to configure the provisioning of applications and policies.
•Have previously connected and configured the Customer Portal for the SCIM provisioning.
Add a Scope Filter
Follow the next steps to add a Scope Filter from Entra ID to the SCIM provisioning:
1.Log in to the Azure portal (https://portal.azure.com) with your administrator account.

2.Navigate to the Entra ID service and select Enterprise Apps in the side menu.

3.Search and select the application that you want to use for the provisioning process. In this case, it is the Bizagi application.
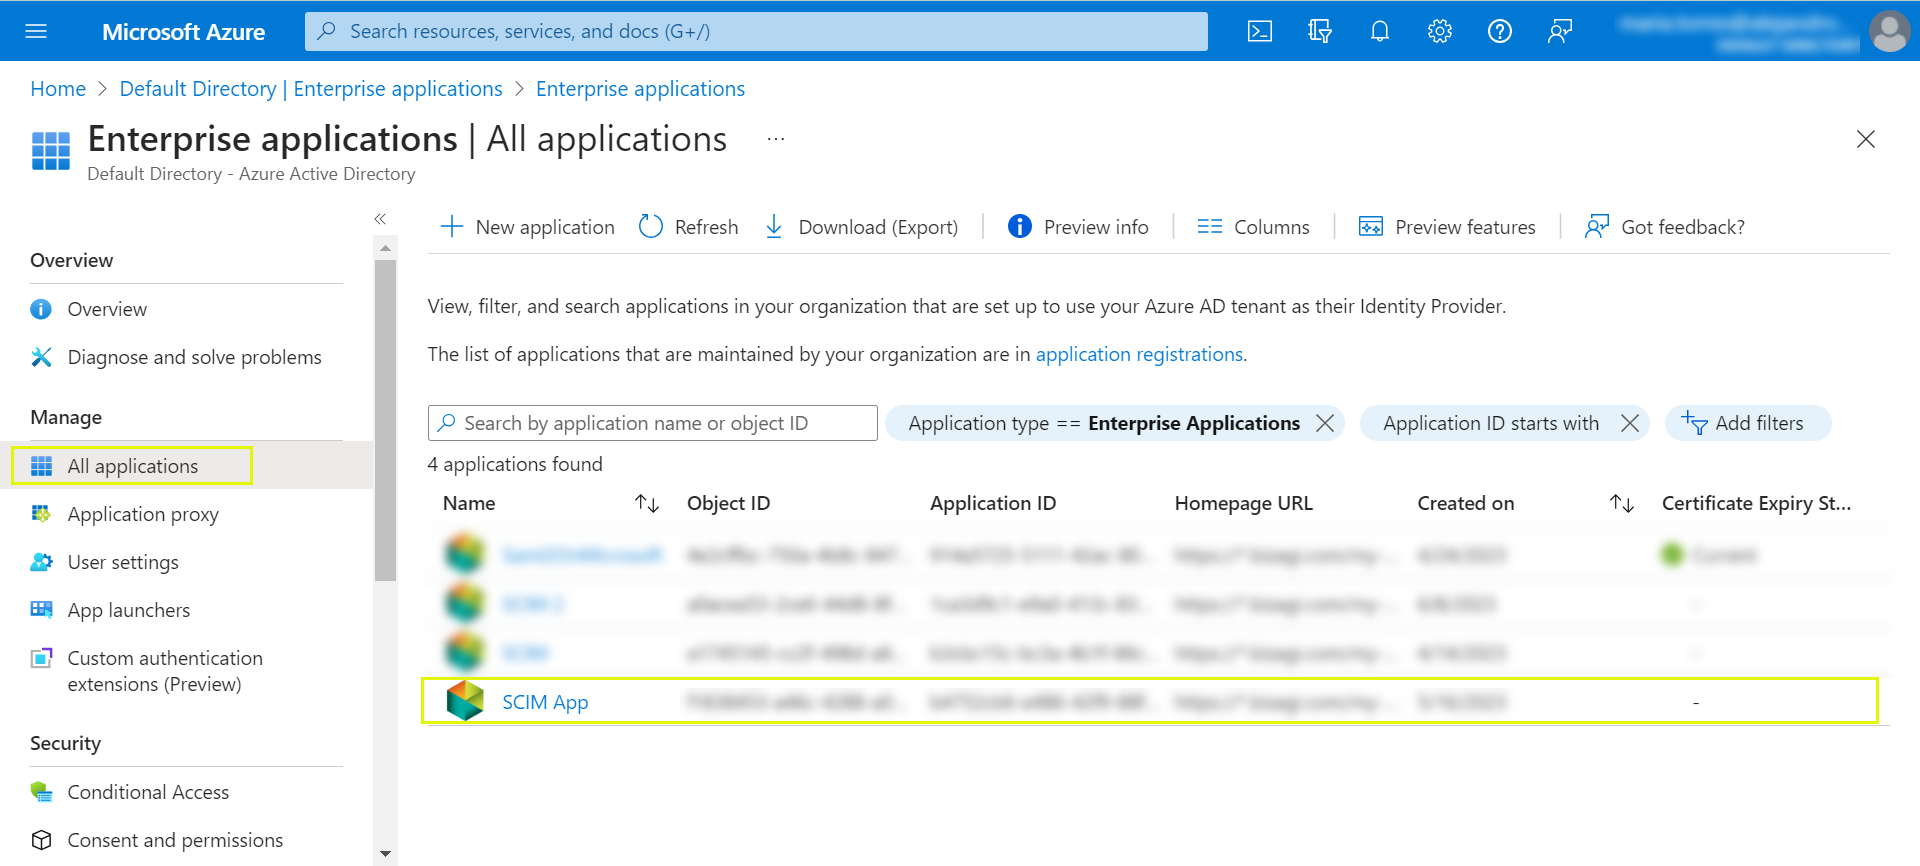
4.Navigate to the application configuration page and select the Provisioning option from the side menu.
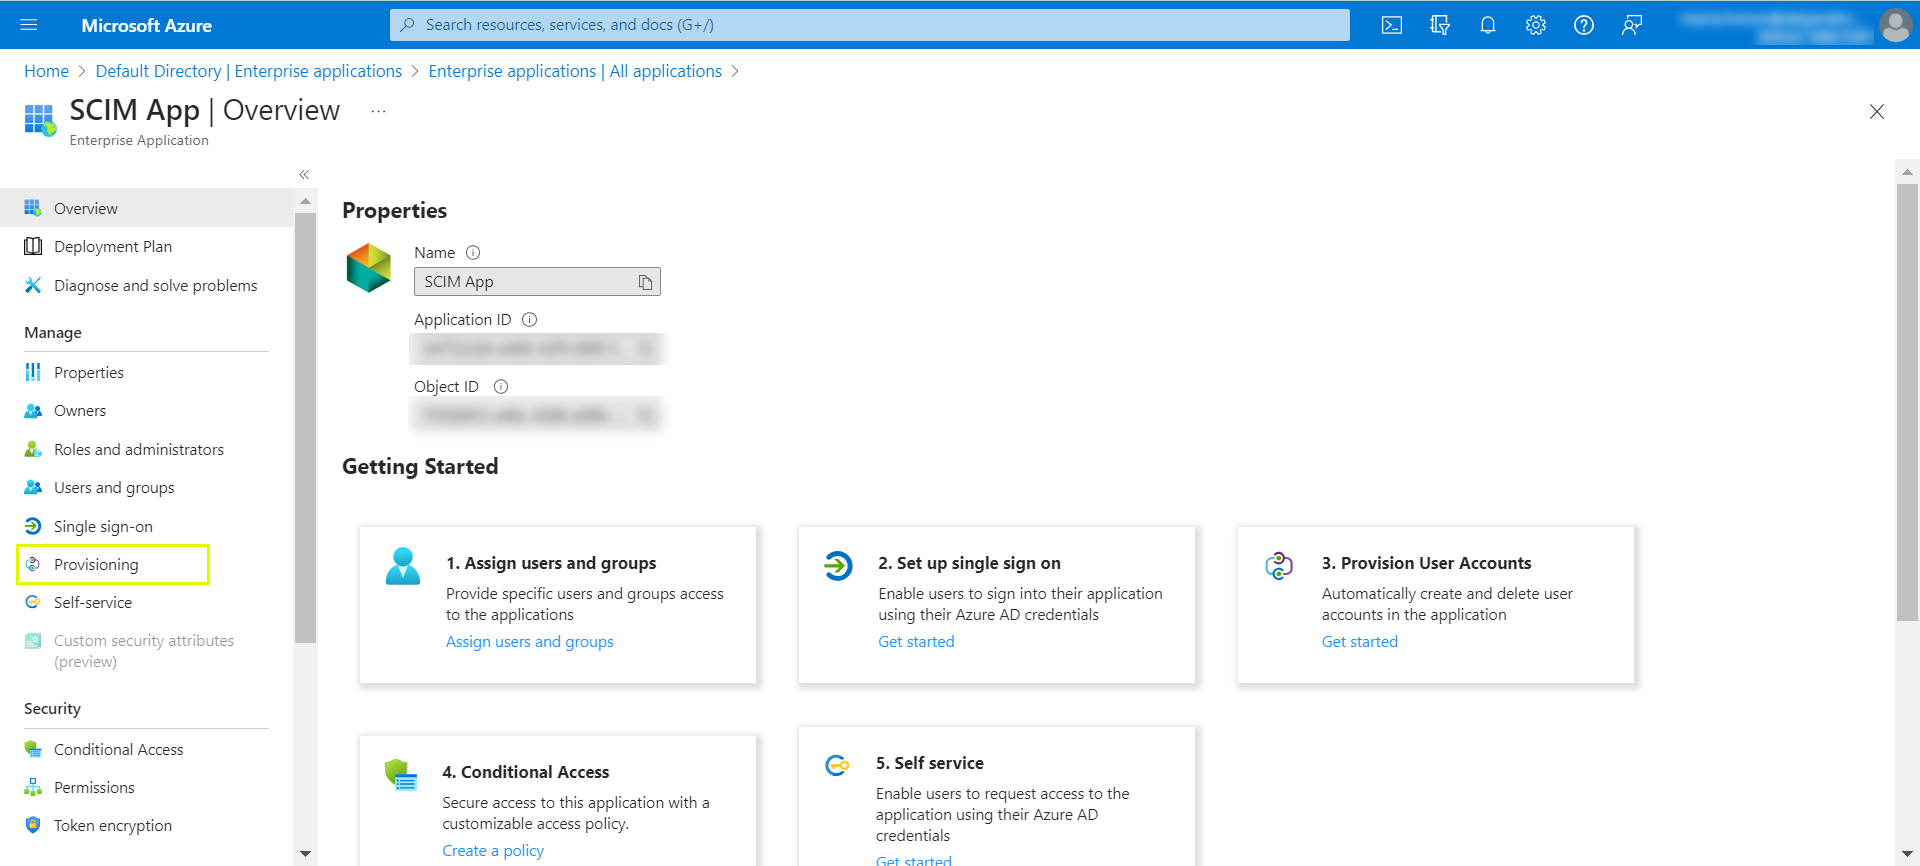
5.Select the Edit provisioning option.
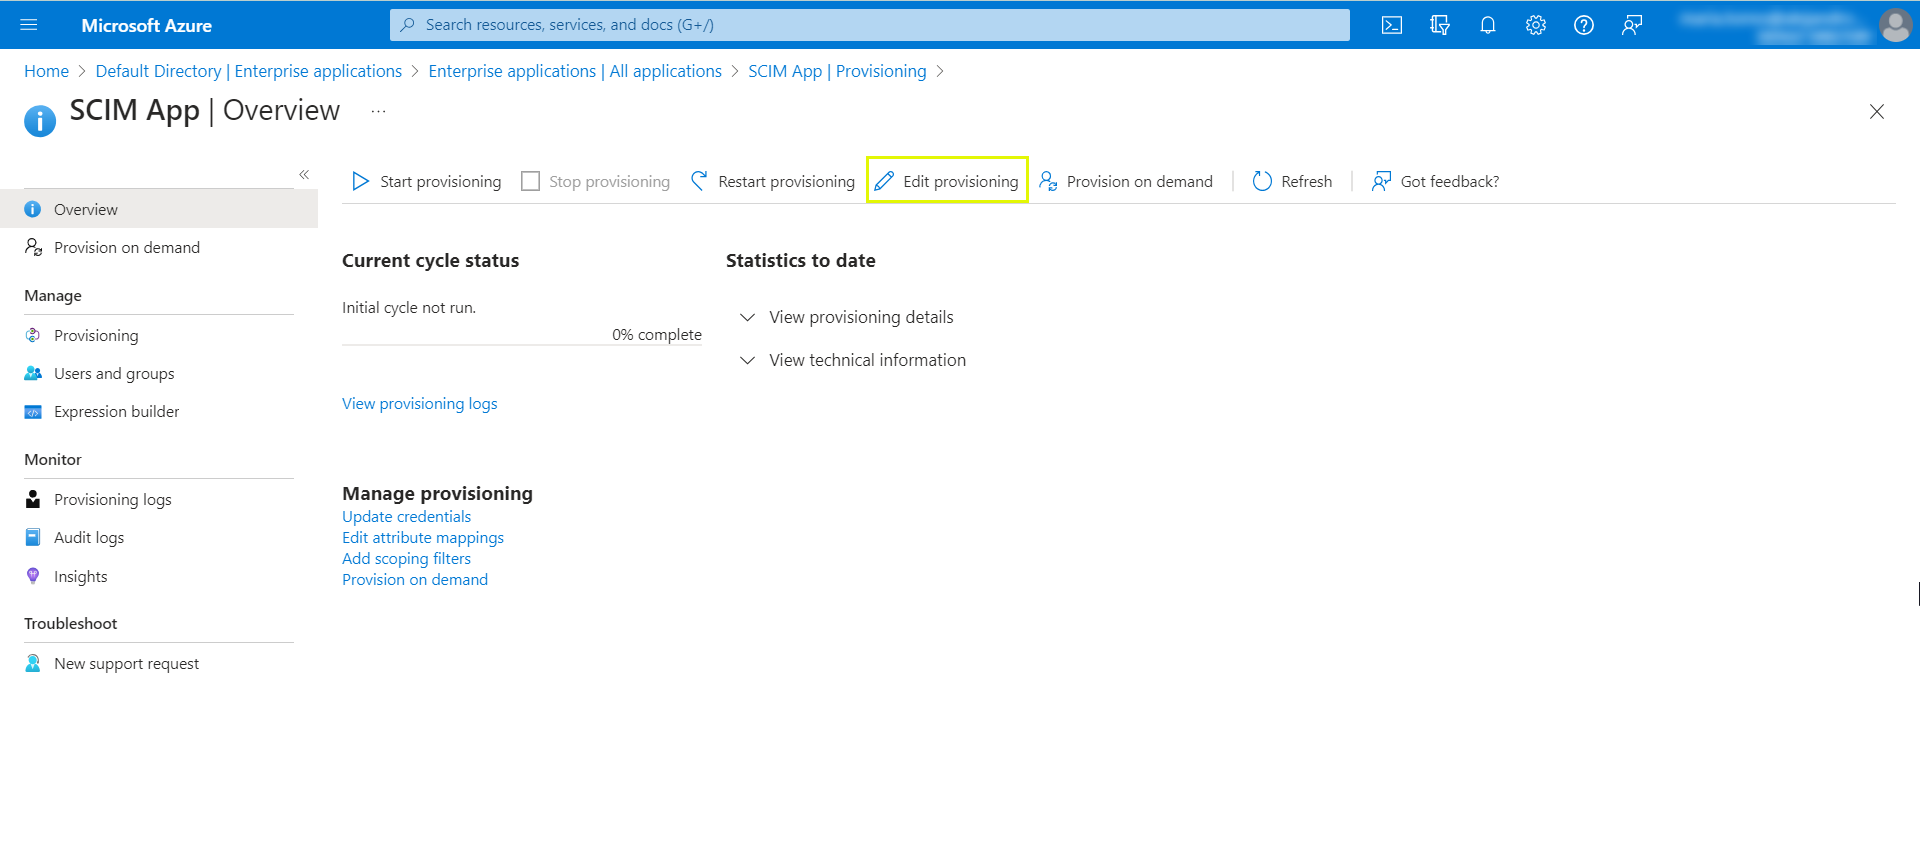
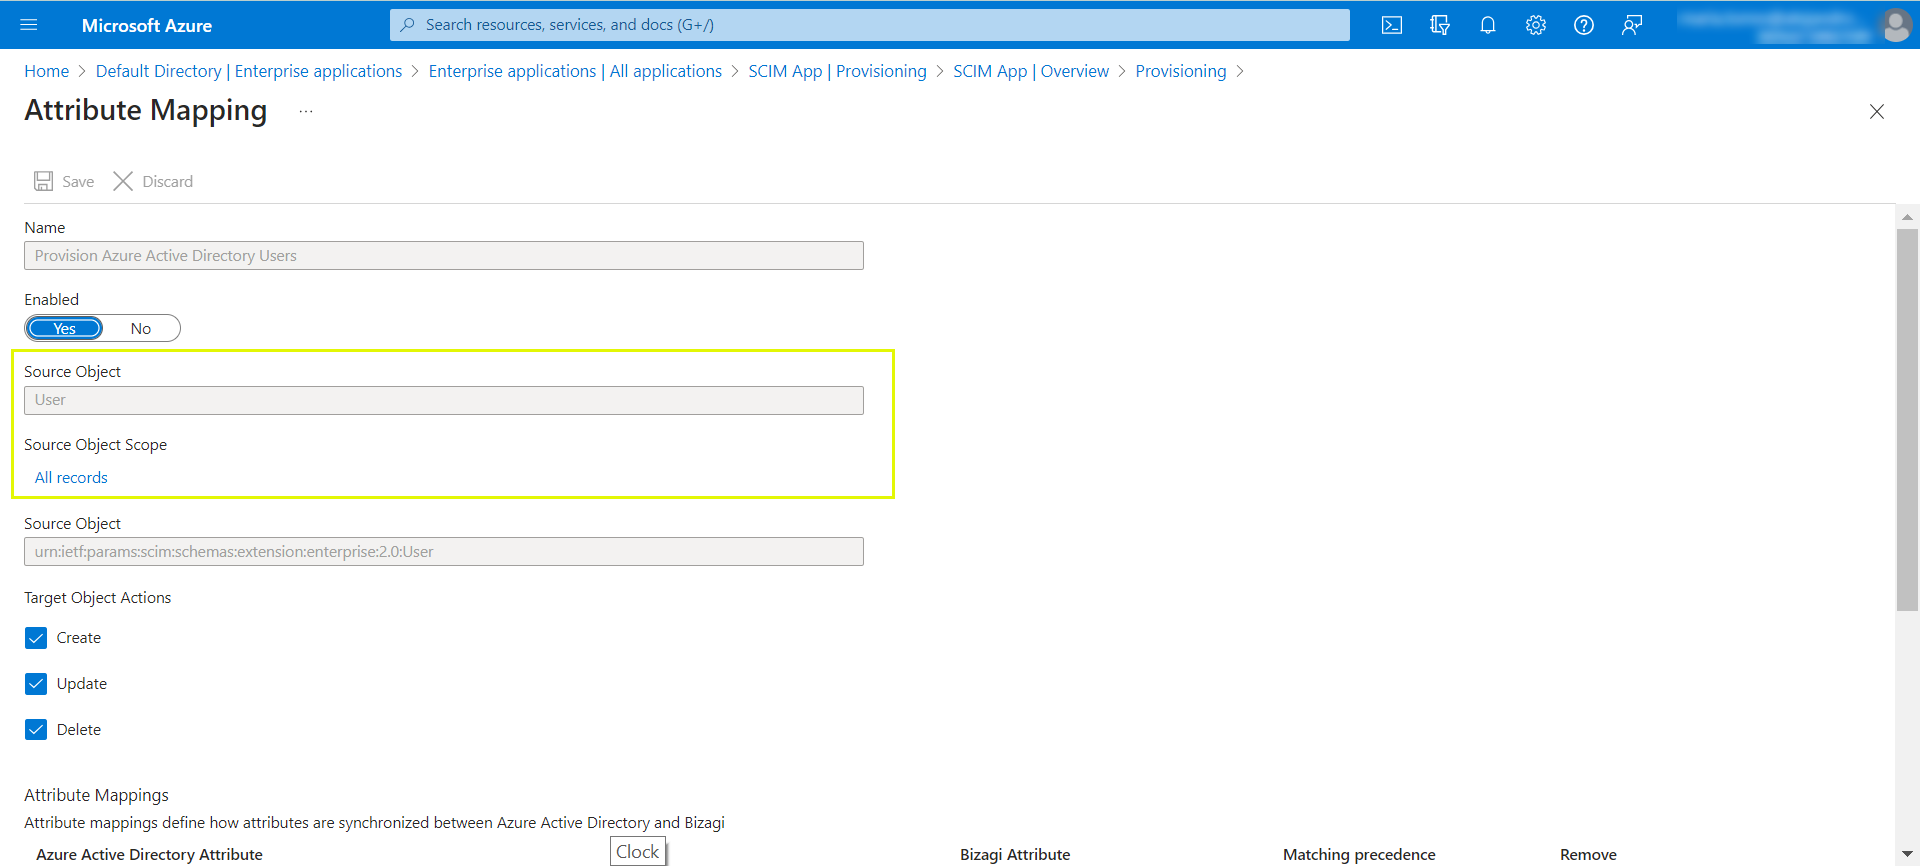
6.In the Mapping section, click the Provision Azure Active Directory Users hyperlink.

7.Select the Scope Filter or Source Object Scope option.
|
Bear in mind that a country or region can be represented with a two character code with a field named 'c'. In case you want to add this attribute to your SCIM configuration, you can check if you have this option available with the help of Entra ID Connect. You can do so by editing an attribute of the mapping and selecting the drop down list Source attribute. If the 'c' field is in the list, then the option is available.
|
8.Add the Scope Filter according to the desired criteria. You can use logical operators like AND, OR, NOT and comparing operators.
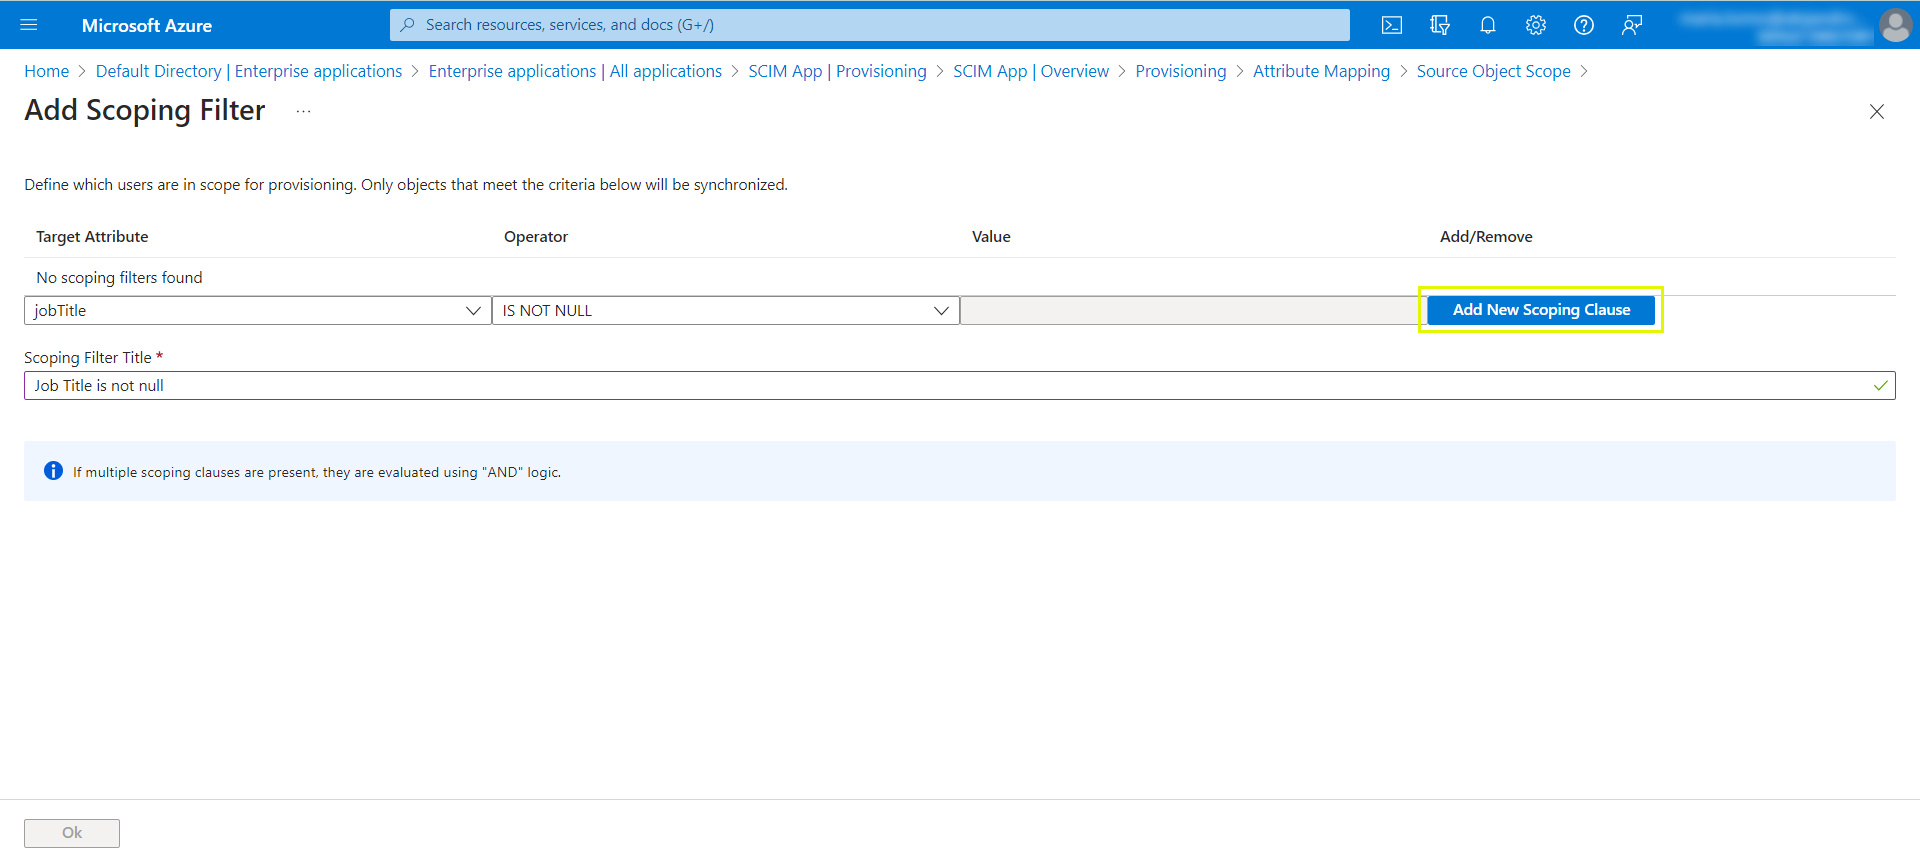
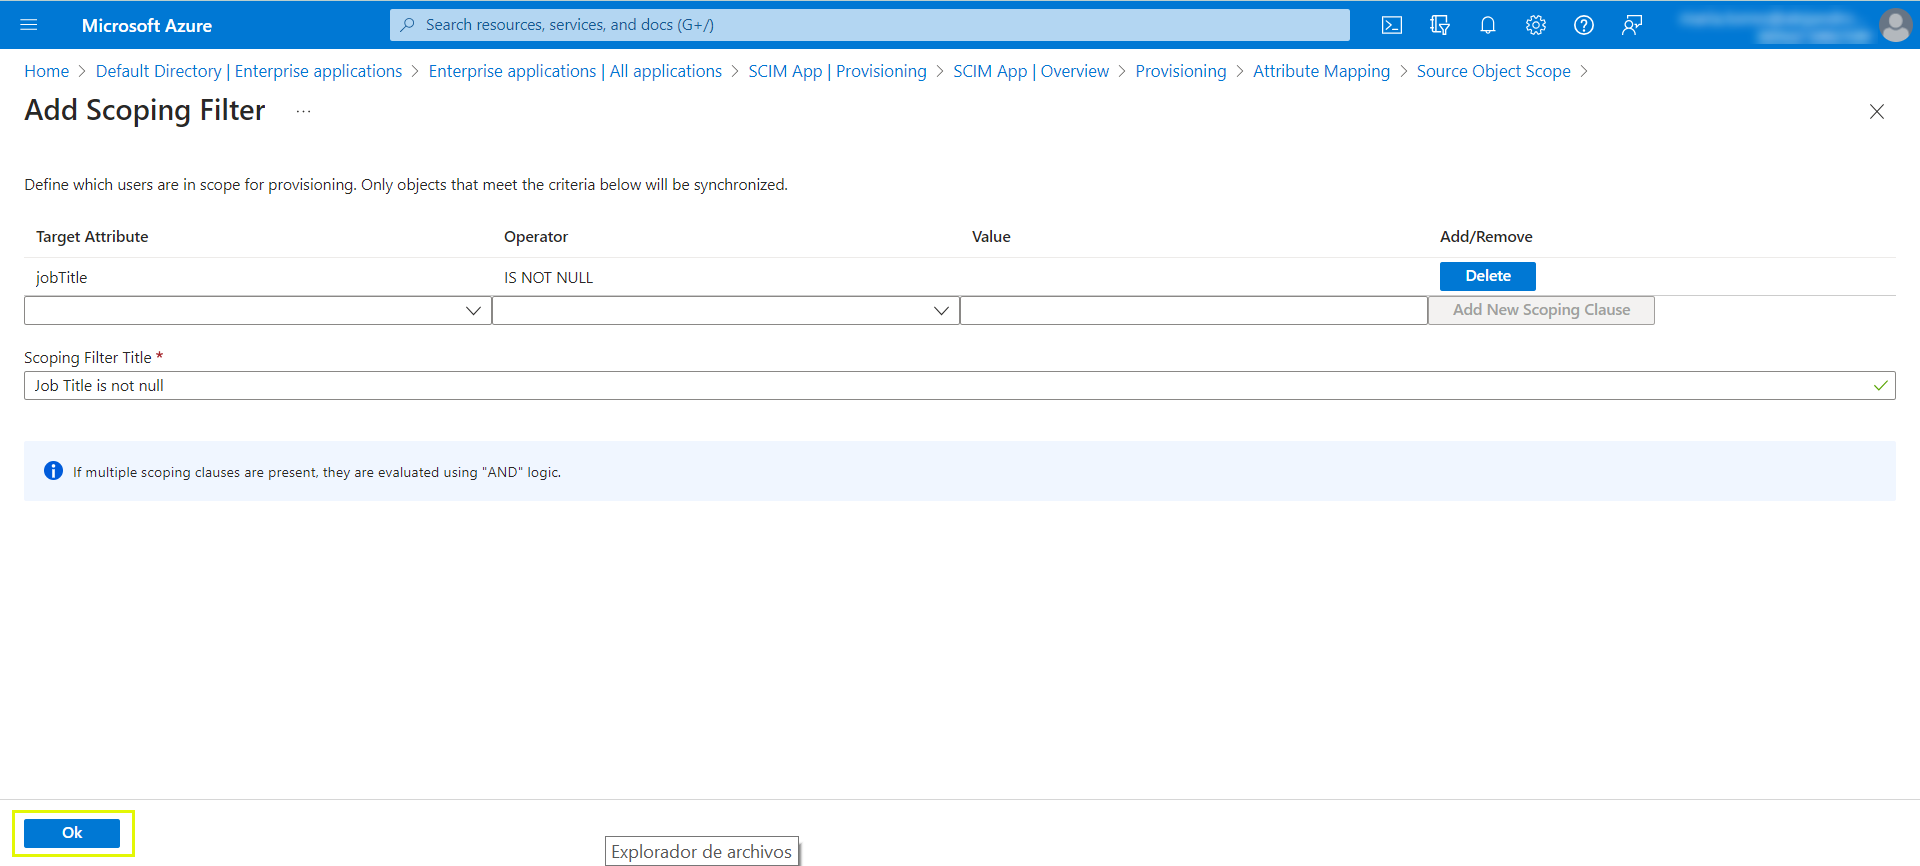
9.Click the Ok button and then the Save button.
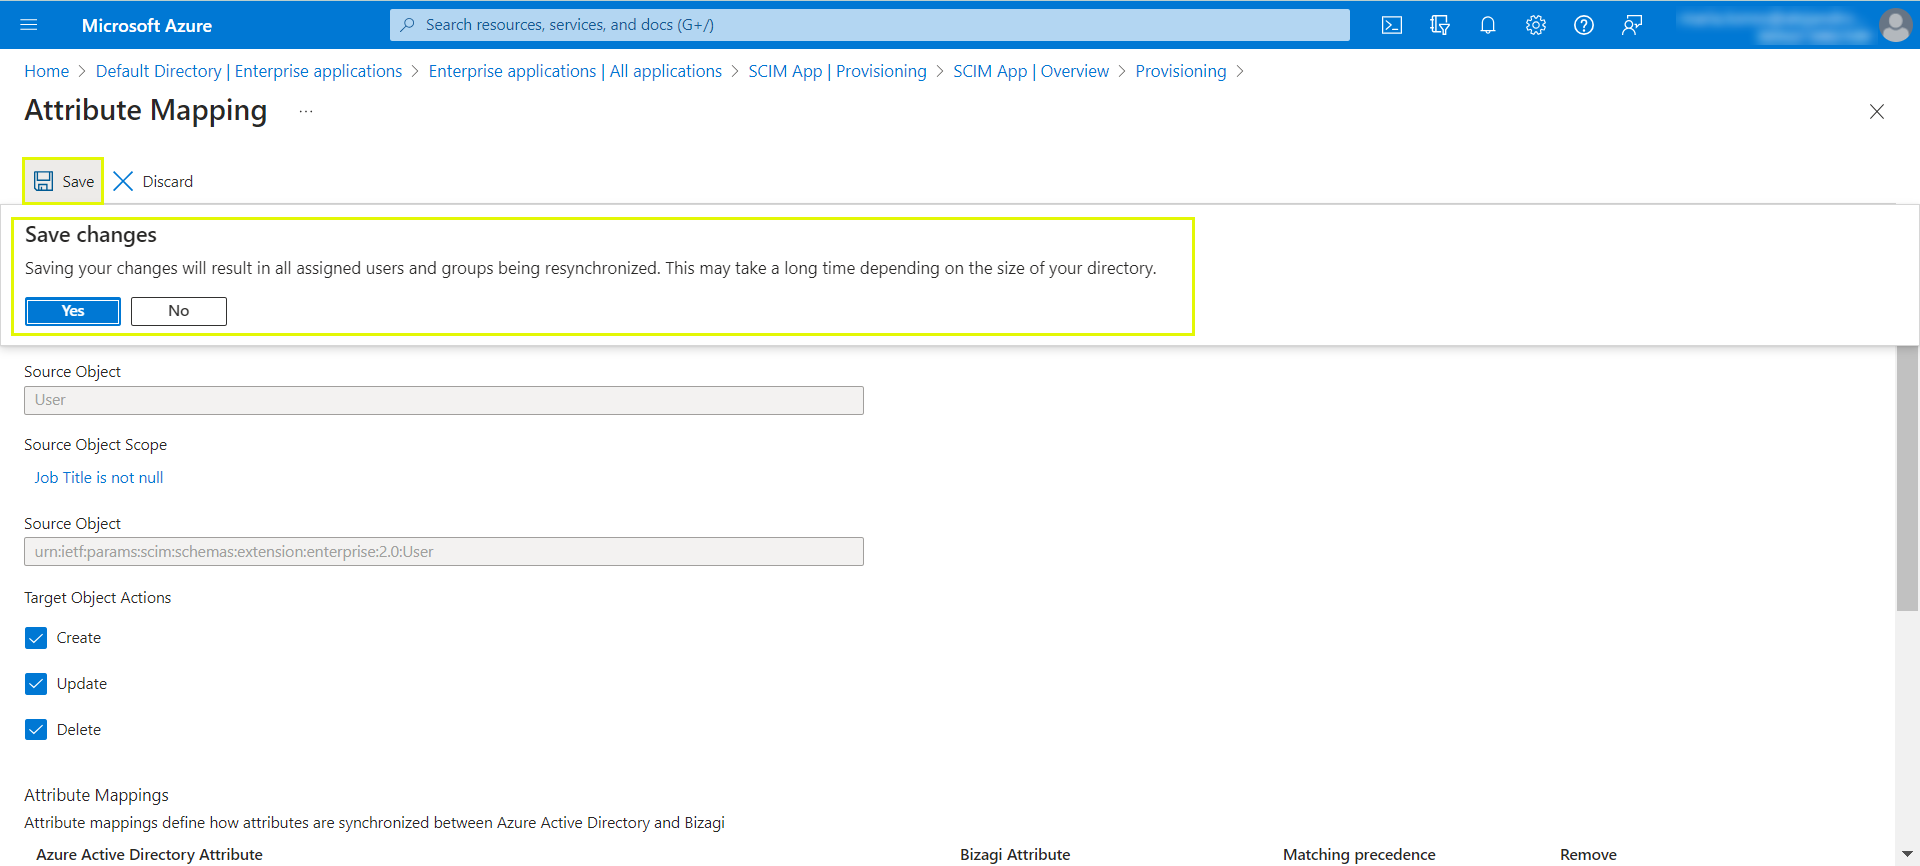
Now Entra ID will use the filter during the synchronization of the data with the Customer Portal using the SCIM protocol.
|
You can edit the Scope Filter whenever you need to.
If you configure the Scope Filters after synchronizing the users, the ones that do not meet the conditions of the filter are deprovisioned and deactivated from the Customer Portal. |
Last Updated 9/11/2024 10:24:54 AM
