Overview
You can also map the custom user properties configured in Bizagi.
Configuration steps
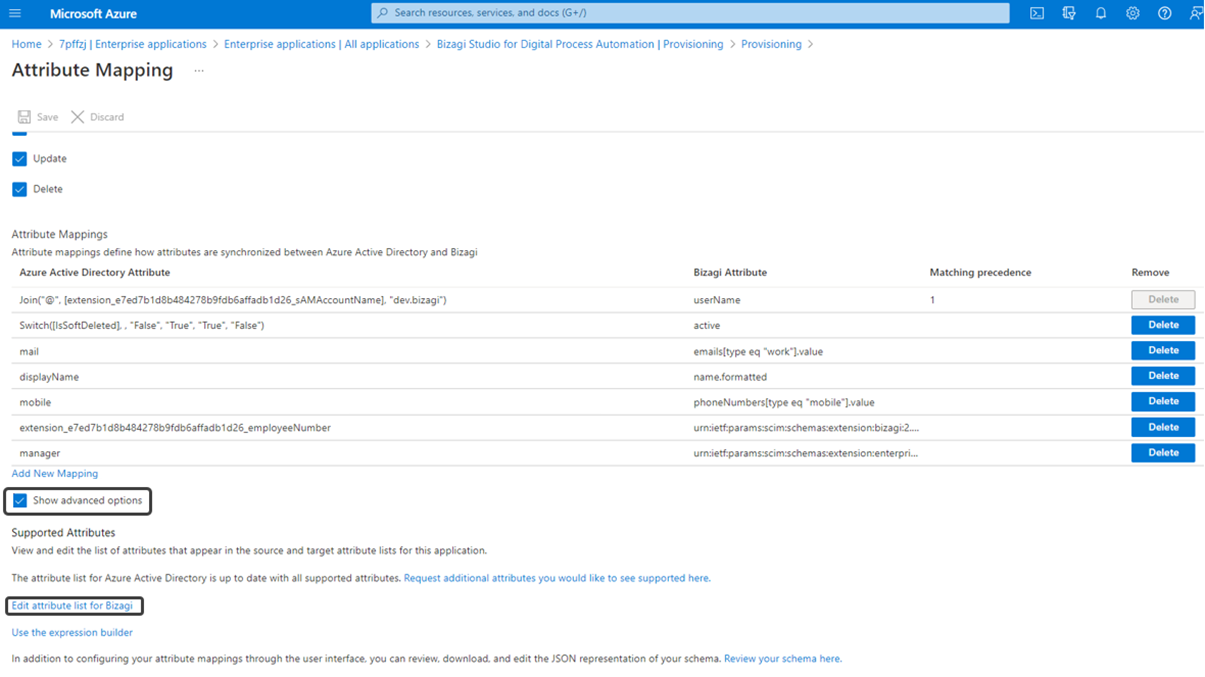
1. Customize the mapping options in Entra ID
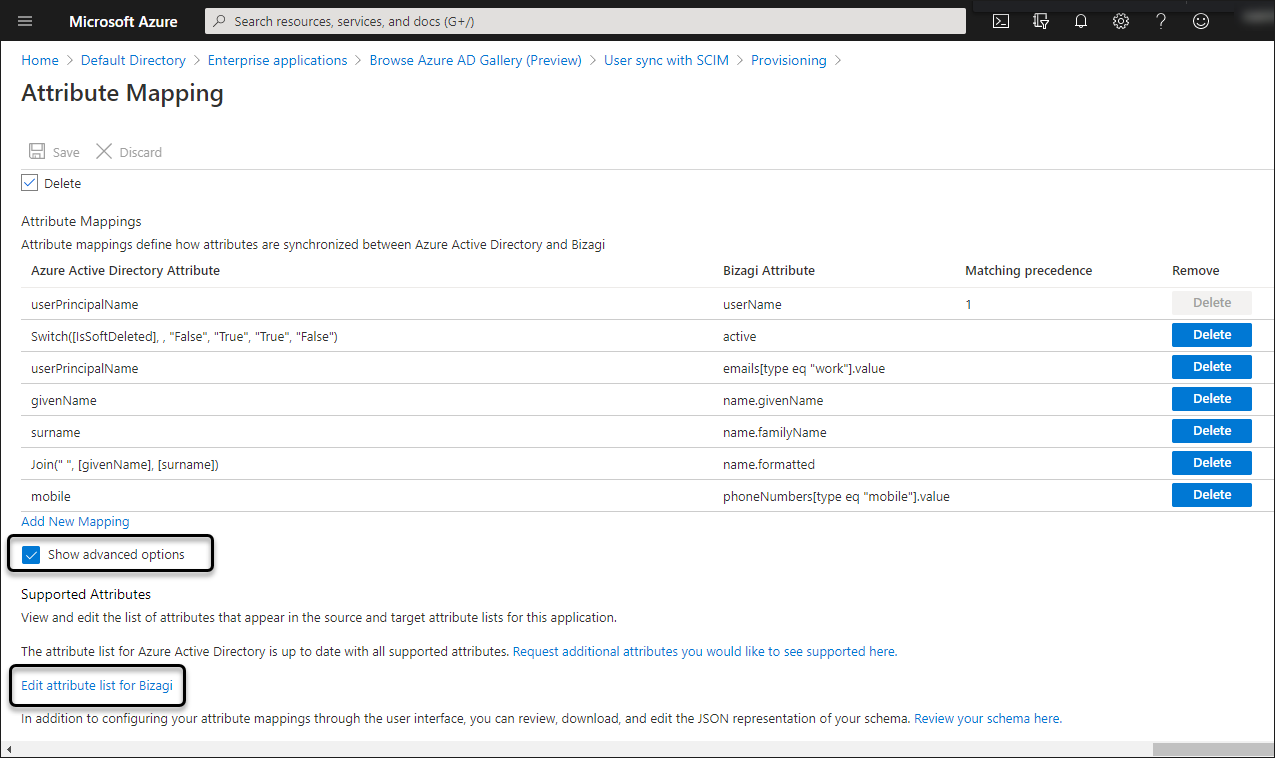
Select the Show advanced options checkbox and click Edit attribute list for Bizagi.
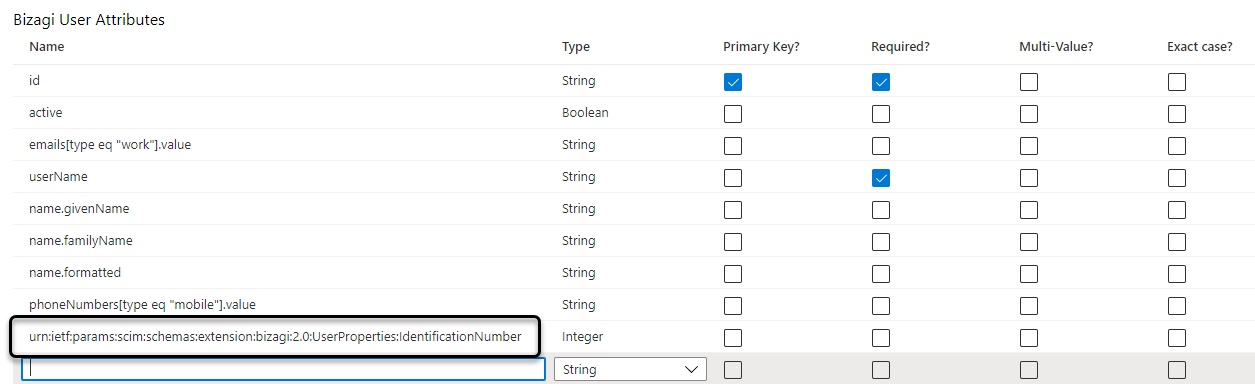
each custom property must be preceded by the following prefix:
urn:ietf:params:scim:schemas:extension:bizagi:2.0:UserProperties:
For example, if a user property is called IdentificationNumber the attribute must be added as follows:
urn:ietf:params:scim:schemas:extension:bizagi:2.0:UserProperties:IdentificationNumber
For further information about mapping customizations click here. When you finish registering all the Customized User Properties that you want to synchronize, click Save.
|
In custom user property mapping, only basic type properties can be mapped (e.g., strings, int, boolean, or date). The properties linked to parametric tables or to multiple types are not supported. |
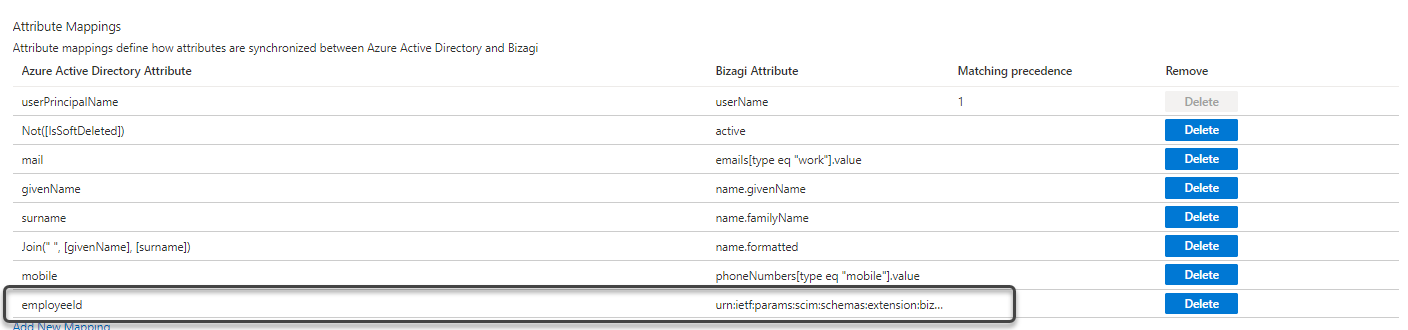
2. Add the mapping
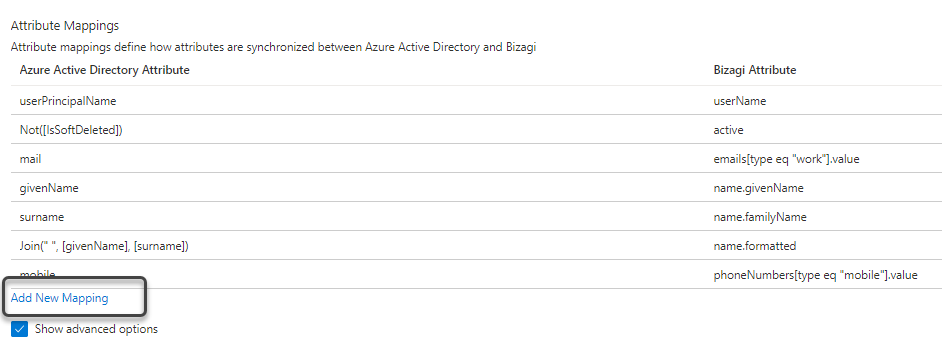
In the attribute mappings section click Add New Mapping.
in the Source Attribute select the Entra ID attribute. In the Target Attribute select the attribute created in the previous step.
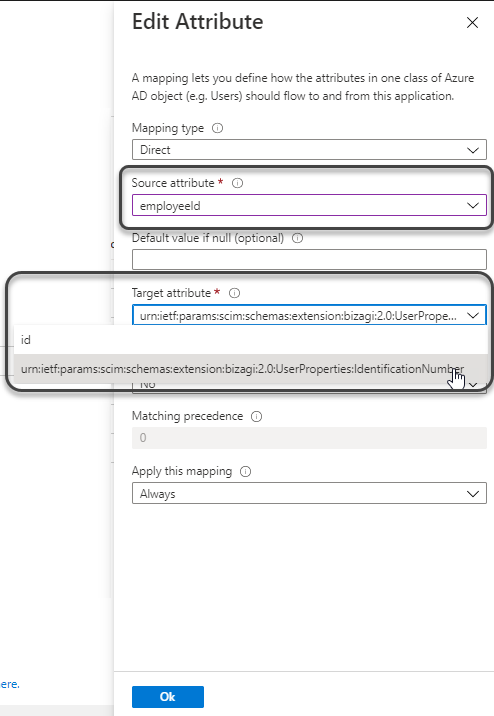
It must be displayed in the list of all attributes.
Mapping Manager Property
To map and synchronize the manager user in the Azure Active Directory (AAD) follow these steps:
1. In your Bizagi connector, you must add the manager attribute to the target attribute parameter. To do so, go to the Provisioning page and select Show Advanced Options. Then click the Edit attribute list for Bizagi button.
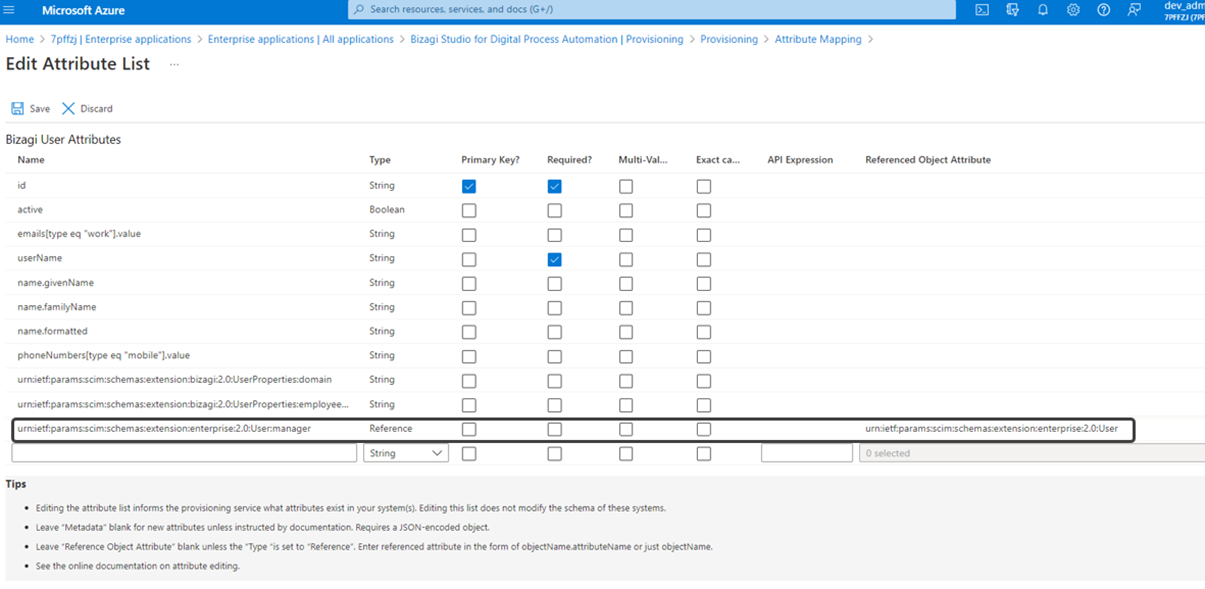
2. Once you are on the Edit Attribute List page from the Attribute Mapping you will configure the Bizagi User Attributes. You need to enter the following data for each parameter:
a.In the Name field, enter the following input "urn:ietf:params:scim:schemas:extension:enterprise:2.0:User:manager".
b.In the Type field select the Reference type from the list options.
c.In the Referenced Object Attribute field enter the following input "urn:ietf:params:scim:schemas:extension:enterprise:2.0:User".
d. Make sure to save your configuration by clicking the Save button.
The following image shows how the Attribute Mapping should be configured:
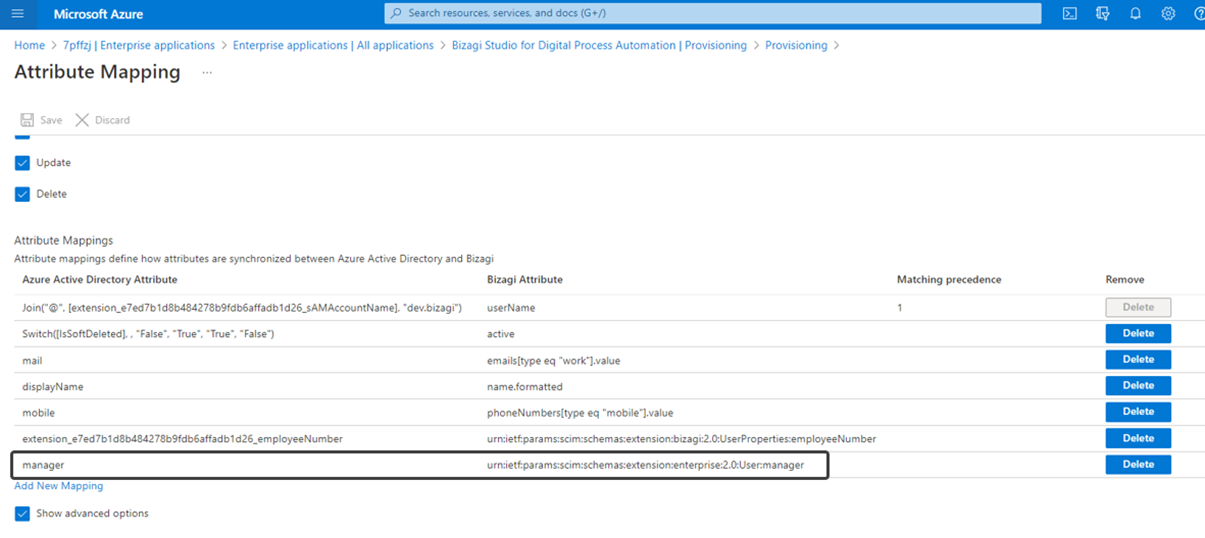
3. As a final step, go back to the Attribute Mapping page where you need to map the manager's attributes. In this case, you just need to enter the text manager in the Azure Active Directory Attribute field like in the following image:
Last Updated 1/20/2025 9:37:48 AM