Overview
There are two types of connectors (Easy REST and Custom) as described at Creating connectors.
This section presents a high-level sketch of steps you should carry out to create custom connectors.
Before you start
It is very important that you first understand the API of that system or application you want to integrate to.
Pay special attention to the type of authentication used by that given API.
This means that you will need to browse the official documentation of that external system or application.
This information regarding the supported authentication methods should give you indications on whether you may create an Easy REST Connector or if you will need to create a Custom Connector.
For details about when you will need a Custom connector, refer to Authentication methods and REST connectors.
Bizagi has a global Proxy available to connect with external services such as custom connectors.
Steps to create Custom connectors (Expert mode)
When choosing to create a Custom connector, these are the high-level steps you need to accomplish:
1.Make sure you have a valid account and authorized access from applications to your external application (i.e, valid username and password, plus access tokens and further settings in that external application).
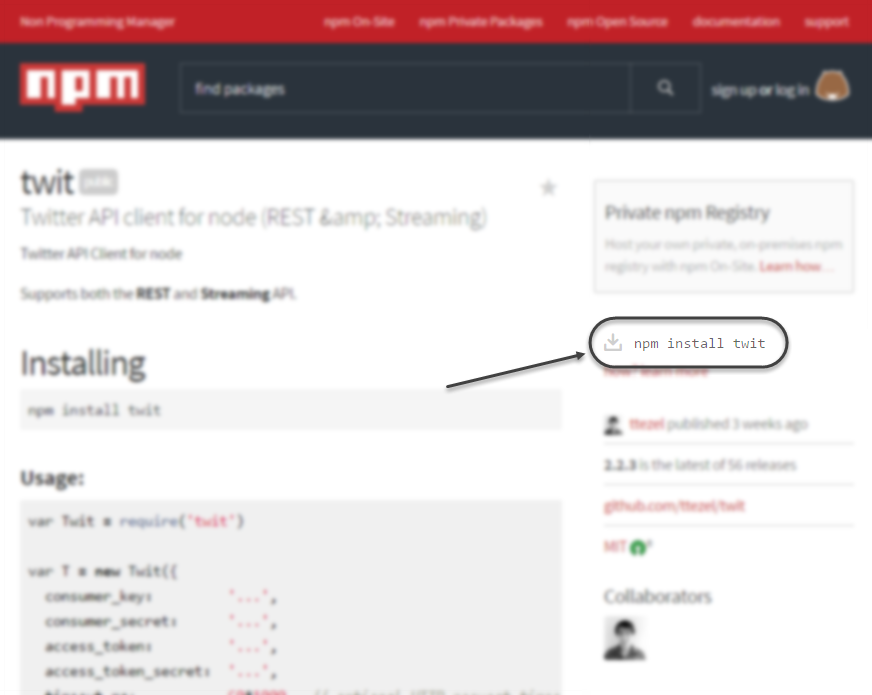
2.Browse for a reusable connectivity library at npm.
Make sure you find one at www.npmjs.com that is reliable (e.g by analyzing its popularity, open issues and its documentation, etc) and that you can use according to its license (e.g, MIT).
3.Package the connectivity library.
If you found a reliable library that suits your needs, make sure you download and package it via npm (the final package should be a .zip file). Otherwise you need to code it and still package it as a portable/reusable library.
To download and package a library, you will need to install npm in your machine, as described at Required profile, concepts and tools.
|
Do not download the library directly from the browser, as it might not download with all its dependencies (if that library in turn uses other libraries which are not packaged inside). This will result in an incomplete/invalid library. |
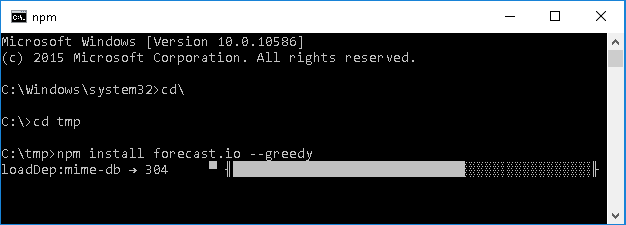
Packaging the library is done via a console prompt with admin rights as shown below (through the npm install <library-to-download> --greedy command).
Note you should execute this command from the folder you choose as the download destination; because otherwise it will be placed among your system32 path/files.
|
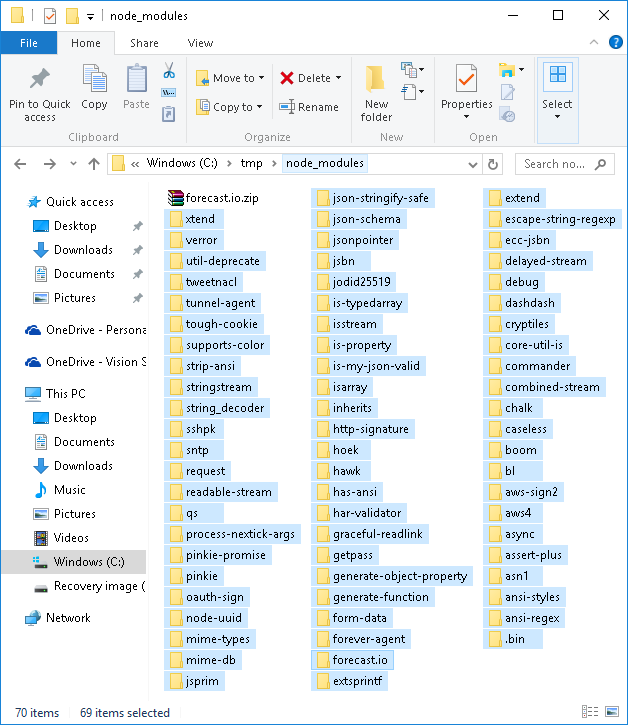
Keep in mind that the .zip file of the library you package, must have the following structure: 1. All dependencies and libraries in a flattened structure (non-recursive and non-hierarchical). 2. There must not be an intermediate folder. The .zip file extracts these multiple folders (one for each library or dependency).
|
4.Use the Integration Hub to create a new Custom connector and enter details of that new connector.

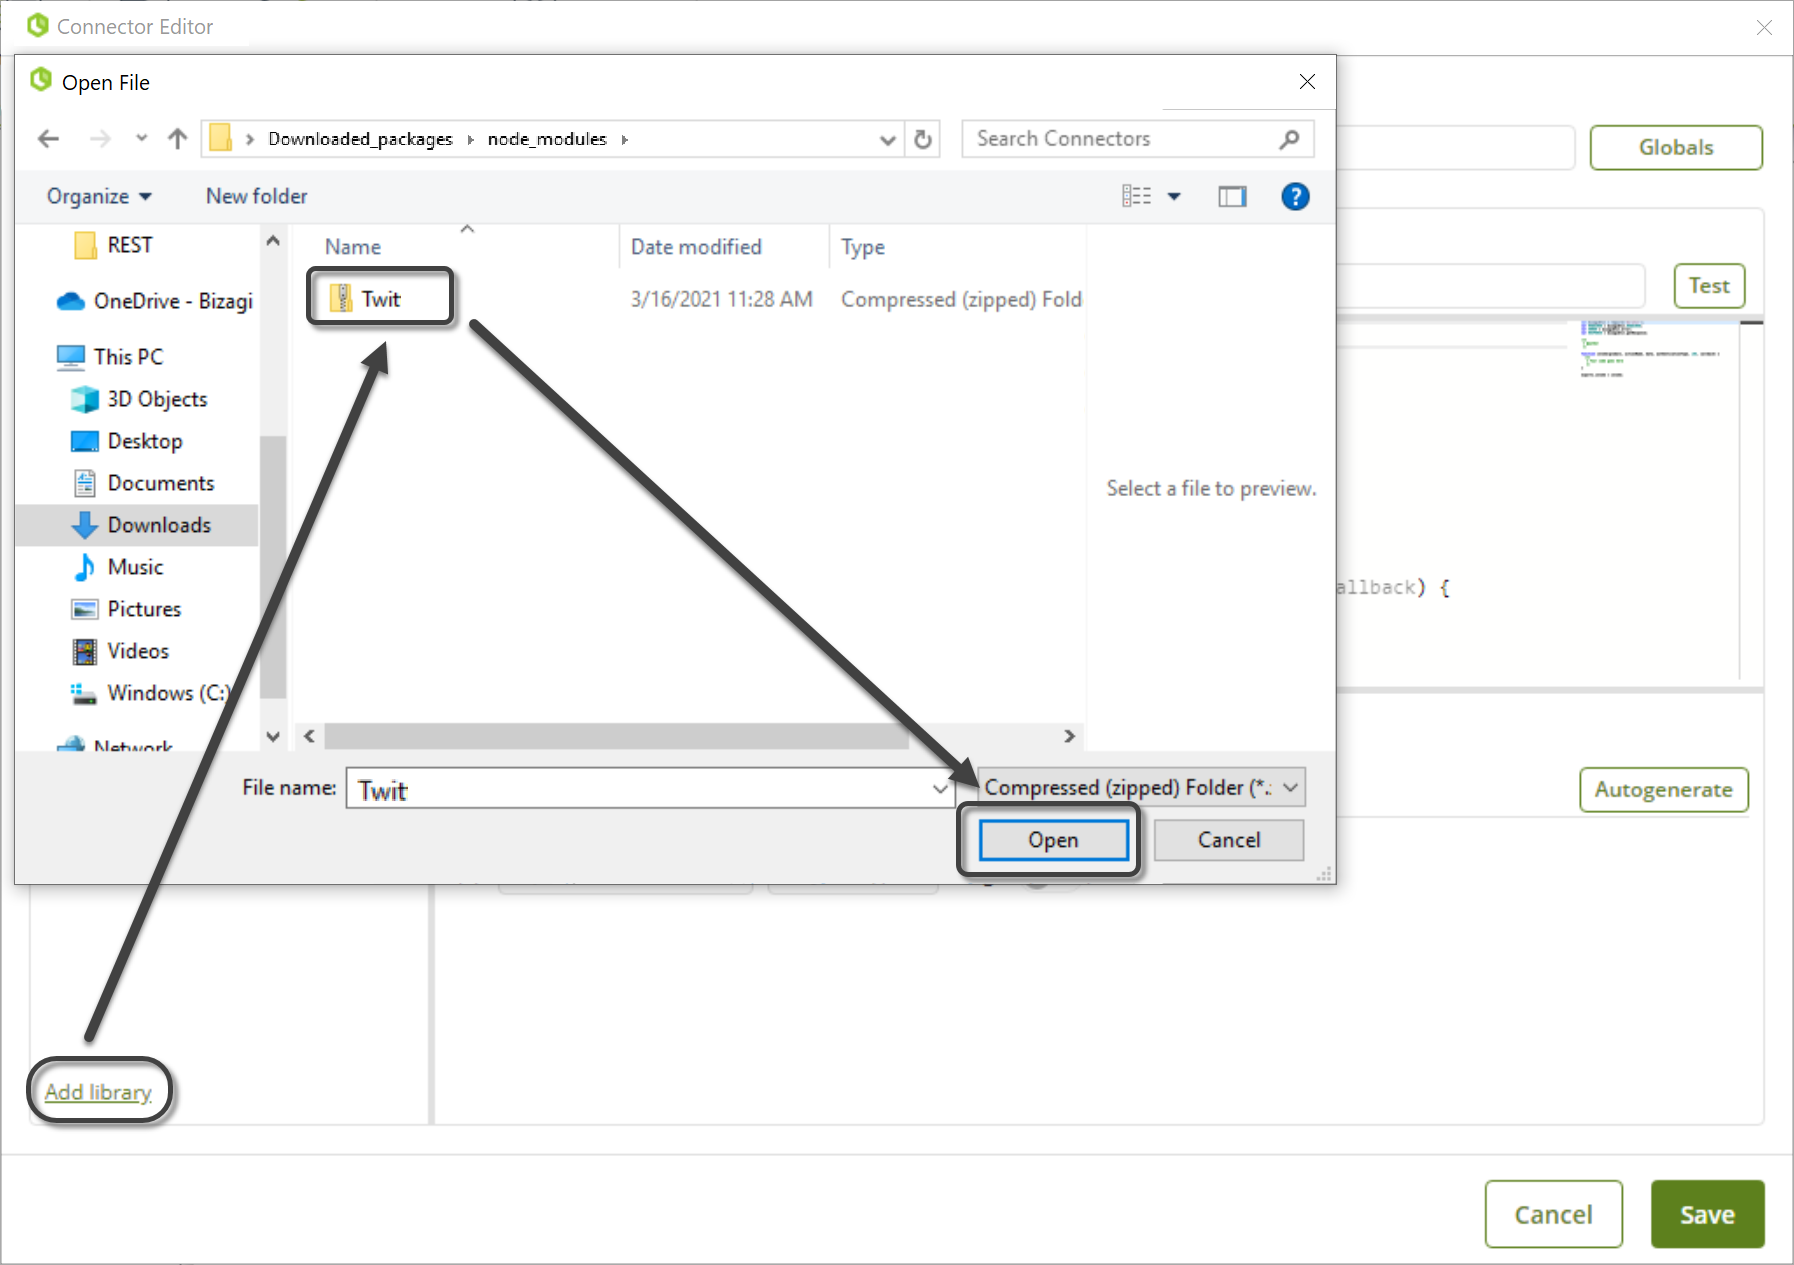
5.Import the connectivity library.
6.Configure global parameters.
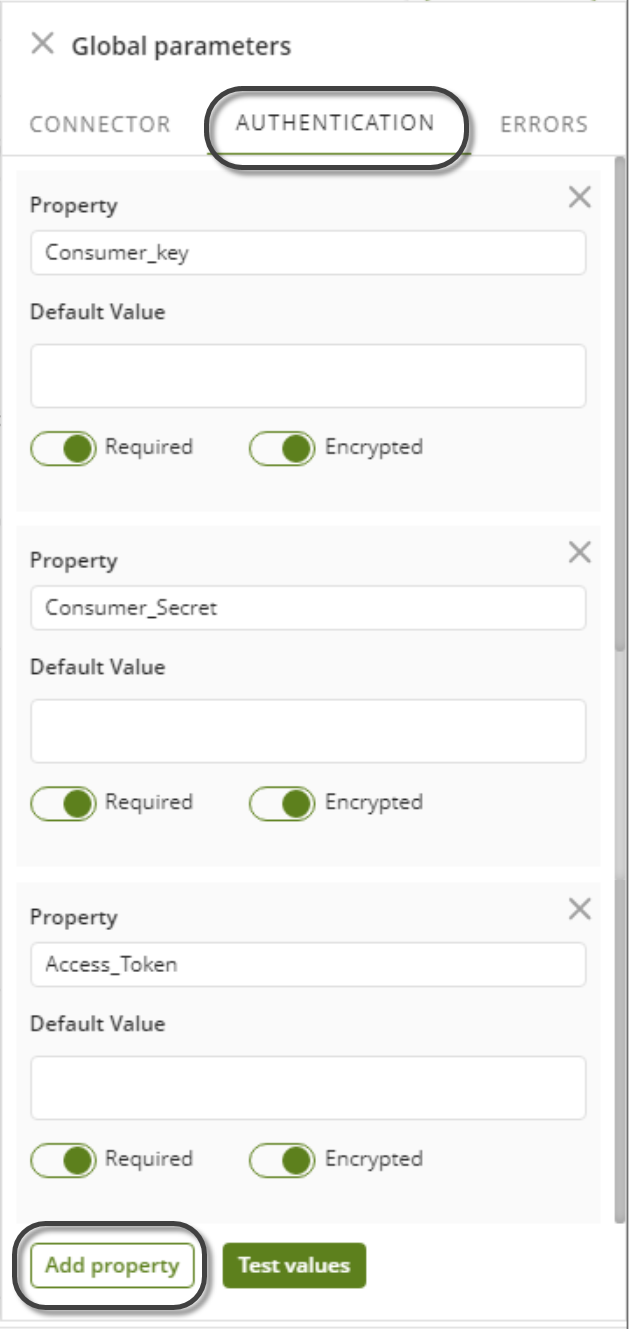
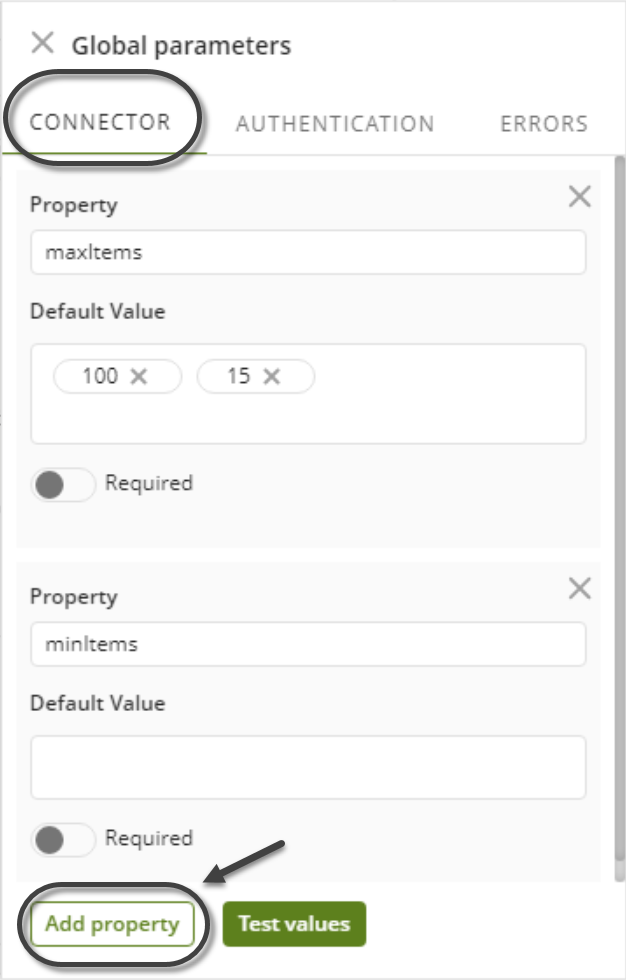
Take into account that there are three types of global parameters: Connector, Authentication and Errors. When configuring these parameters, do not define them all in the same tab. Instead, use each of the tabs according to the nature of the parameter to be defined, as described in Global Parameters.
Mandatory parameters to manage at this point, are Authentication parameters:
If the authentication itself has to be customized you can edit the auth.js file.

Press the </> auth.js button to open the auth.js file.
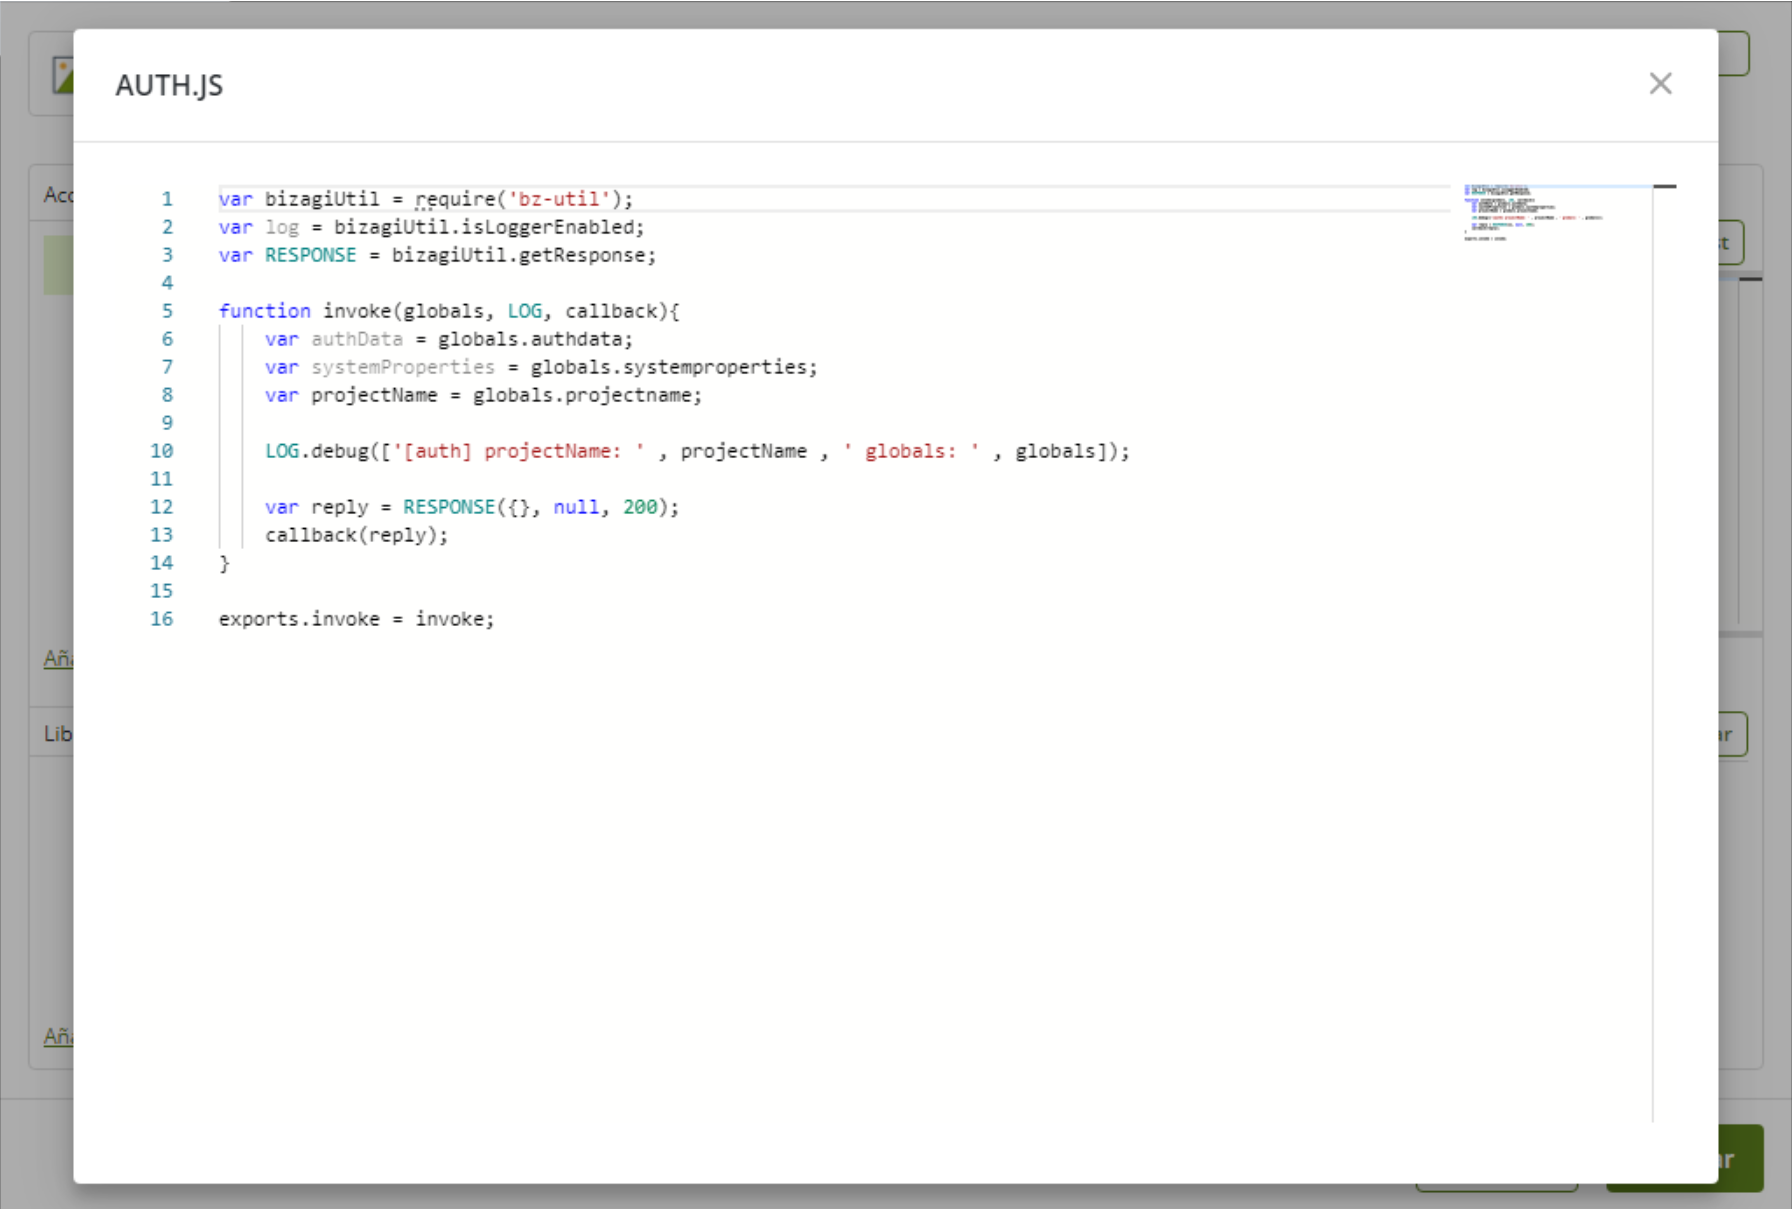
When editing the auth.js file, you can include additional validations to the authentication, configure different protocols to those offered or send information directly to Bizagi through the response.
Also, when the auth.js is changed to have a customized authentication, the code will be executed every time the connector is invoked before the action is executed.
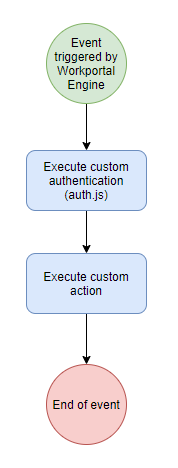
Keep in mind that this method must return a callback object that will be concatenated in the globals.authdata. The following example shows how a token is obtained through the Auth.js file and then used in a specific action.
Authentication token obtained in the Auth.js file:
var bizagiUtil = require('bz-util');
var log = bizagiUtil.isLoggerEnabled;
var RESPONSE = bizagiUtil.getResponse;
var request = REQUIRED("request");
function invoke(globals, LOG, callback){
var authData = globals.authdata;
var systemProperties = globals.systemproperties;
var projectName = globals.projectname;
var argsAuth = {
method: 'POST',
url: 'https://api.box.com/oauth2/token',
form:{
user: globals.authdata.user,
password: globals.authdata.password
}
}
request(argsAuth,function(err, response, body){
// ...
// some error handling
// ...
var reply = RESPONSE({
token: body.access_token
}, null, 200);
callback(reply);
});
}
exports.invoke = invoke;
Authentication token used then in an action:
var bizagiUtil = require('bz-util');
var REQUIRED = bizagiUtil.REQUIRED;
var ERROR = bizagiUtil.error;
var RESPONSE = bizagiUtil.getResponse;
var request = REQUIRED("request");
/**
* @author Bizagi
*/
function invoke(globals, actionName, data, authenticationType, LOG, callback) {
let args = {
method: 'POST',
url: 'https://api.box.com/2.0/files',
headers: {
'Authorization': 'Bearer ' + globals.authdata.token, // token got from auth.js execution
}
}
request(args, function (err, response, body) {
// ...
// some functional code here
// ...
});
}
exports.invoke = invoke;
Optionally, define the Connector and Errors parameters.
7.Create at least one action and specify its details.
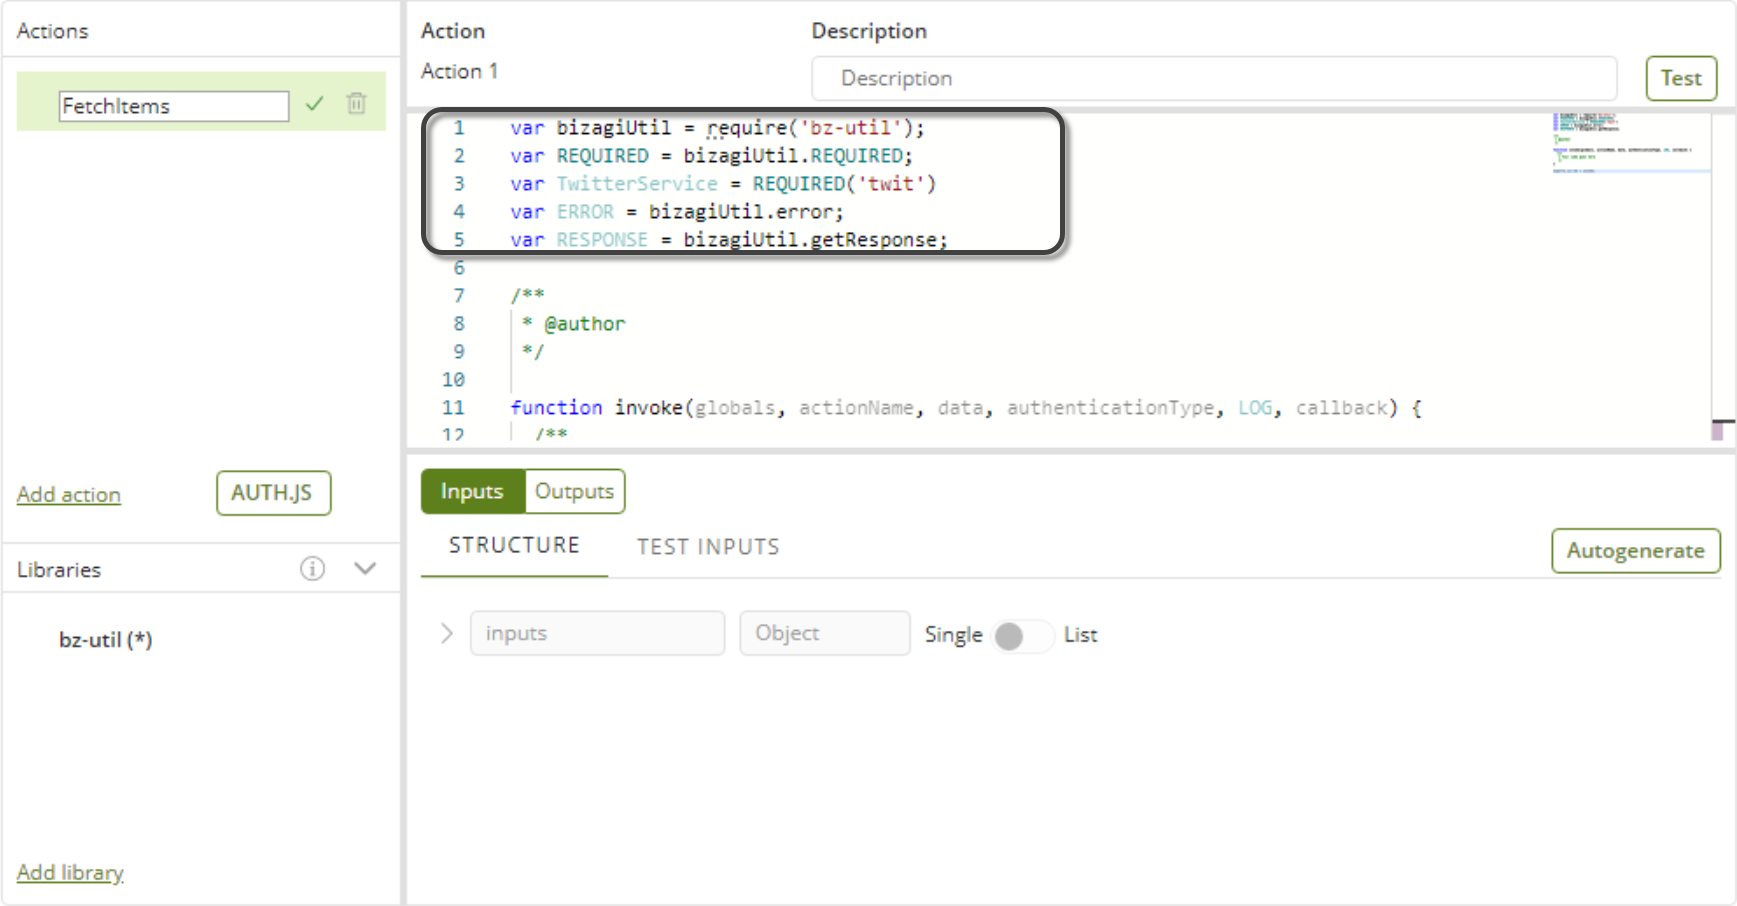
|
We recommend that you use the following status code nomenclature for when you code your actions, for the error states that you define in your parameters, and for when you use the Auth.js button to customize the authentication of your external system: Status codes from 400 to 500: To declare issues during authentication. Negative status codes: To declare exceptions in the logic of your invocation. 200 status code: Should be specified for a successful invocation. |
8.Define inputs as defined by the API of the external system/application. Remember that you can do this using the Autogenerate button, or manually, as described here.
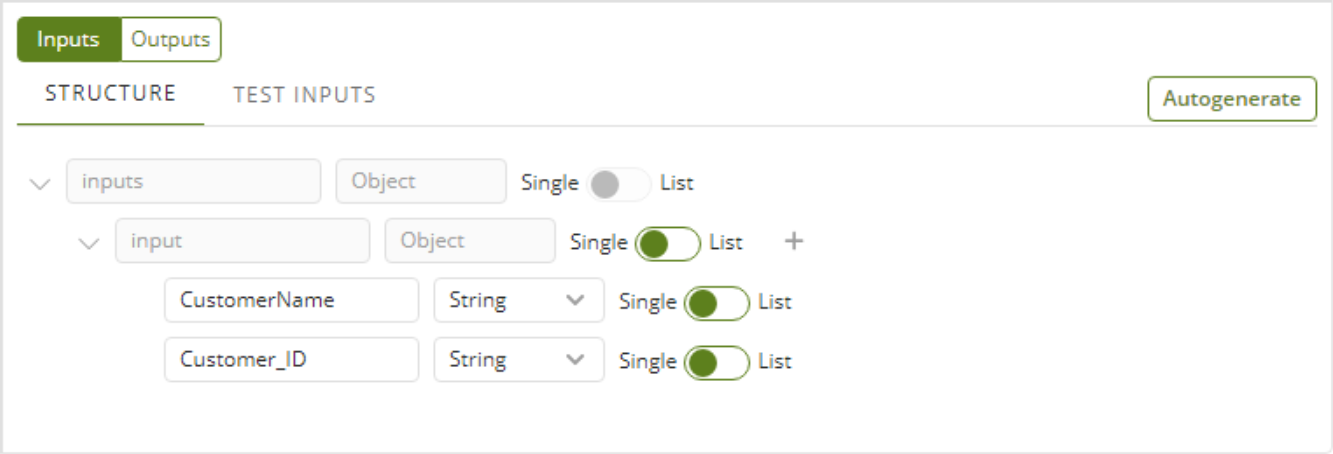
9.Define outputs as defined by the API of the external system/application. Remember that you can do this using the Autogenerate button, or manually, as described here.
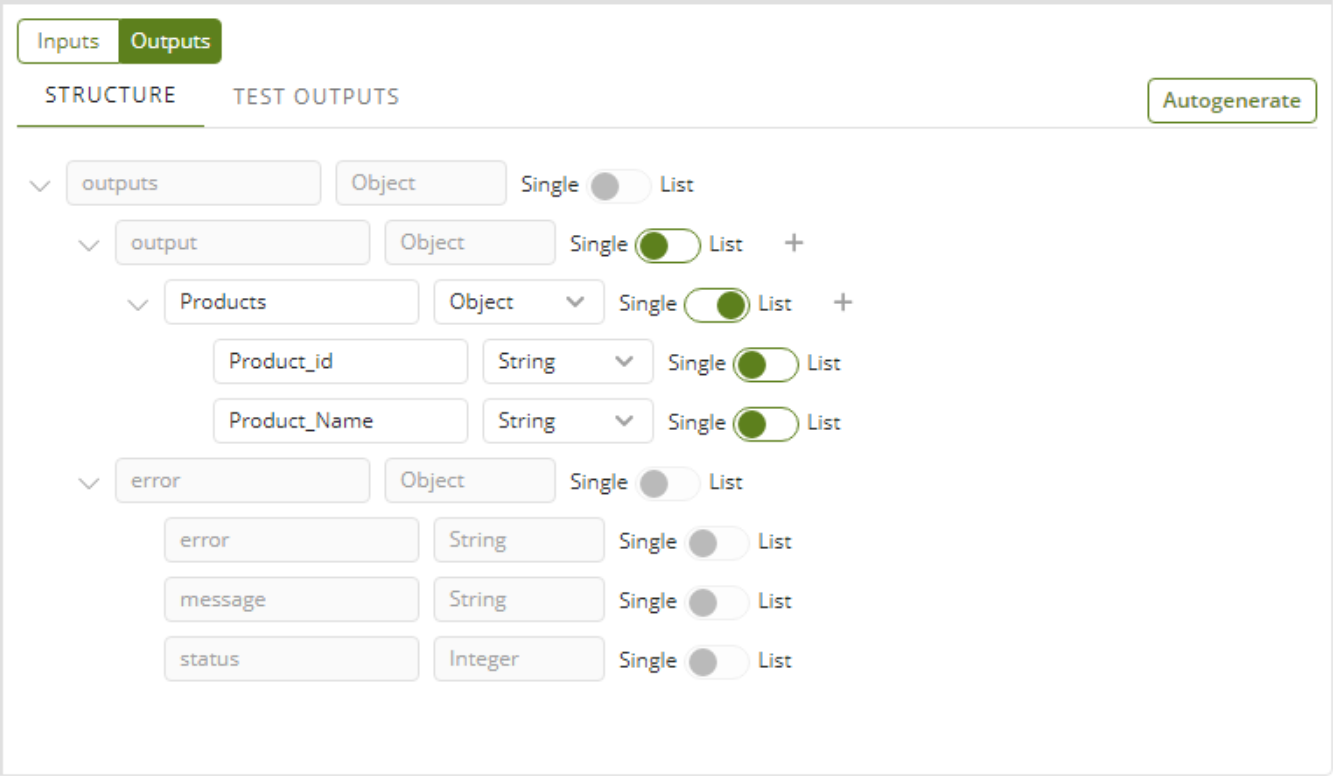
10.Implement the invoke function.
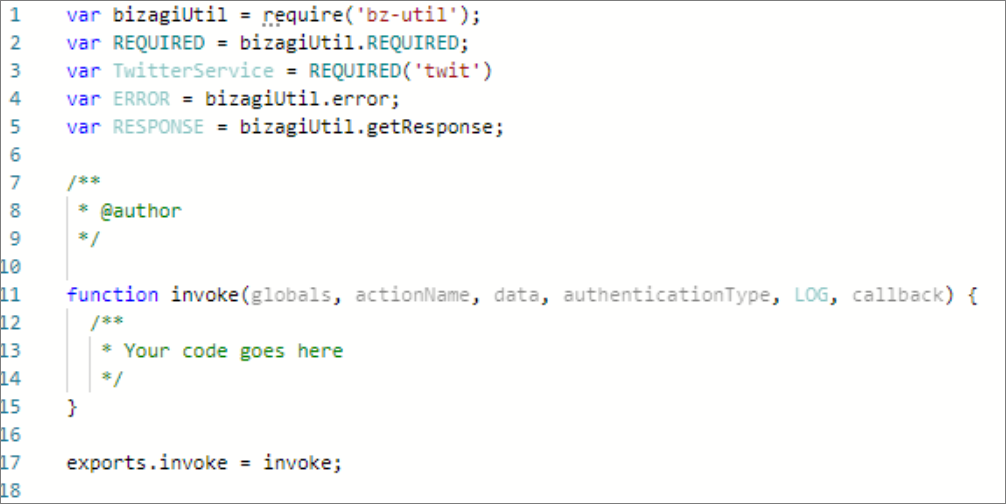
Write your own code to implement how to translate that action into invoking a method at the external application.
Do this in the invoke function and by making use of Bizagi API for connectors.
|
If the action uses one of the libraries imported in step 5, take into account the following considerations: •Always use REQUIRED() instead of require() to import your libraries. The only library (the only exception) which is imported by using require() is Bizagi API which is always seen in the first coded line: var bizagiUtil = require('bz-util'); Afterwards, and other than this one, the use of the REQUIRED() method of the bz-util library, ensures that your libraries are imported by using Bizagi's API which validates for dependencies. For example, you will be then using: var TwitterService = bizagiUtil.REQUIRED('twit'); •We strongly recommend you to avoid modifying the bz-util library (provided as-is). Any modifications done to this library are not supported by Bizagi. |
11.Save the connector.
Once you have done this, next steps are installing it and testing it from Bizagi Studio, as described at Installing and configuring connectors.
|
Additionally and as best practices, consider these recommendations:
1. A downloaded connector will include proprietary Bizagi libraries (bz-util) which provide the API for connectors as well as other methods and general framework to connect to RESTful services. You should never modify this library, and keep in mind that Bizagi Ltd will not support nor guarantee compatibility for connectors which use a modified bz-util library. At anytime Bizagi Ltd may modify or update the contents of this bz-util library or any related others, considered by Bizagi to successful run connectors in a secure and optimal manner.
2. You should include license information inside of the readme files of the connector (or alternatively, in the description text). Recall that some libraries you may reuse in your connectors are available at www.npmjs.com (and most are MIT-licensed), may demand the use of a link to its source or other license clauses. |
Last Updated 1/9/2024 11:38:52 AM
