Overview
Bizagi's Connector Editor allows you to create connectors from scratch. You can create two types of connectors: Easy REST connectors, which require no code (the preferred approach), and Custom connectors, which allow you to include third-party libraries and implement your own code.
This article describes each section of the interface used to create a Custom connector.
User interface options explained
Whether you are creating a new connector or opening an existing one, the work area displays the following options:
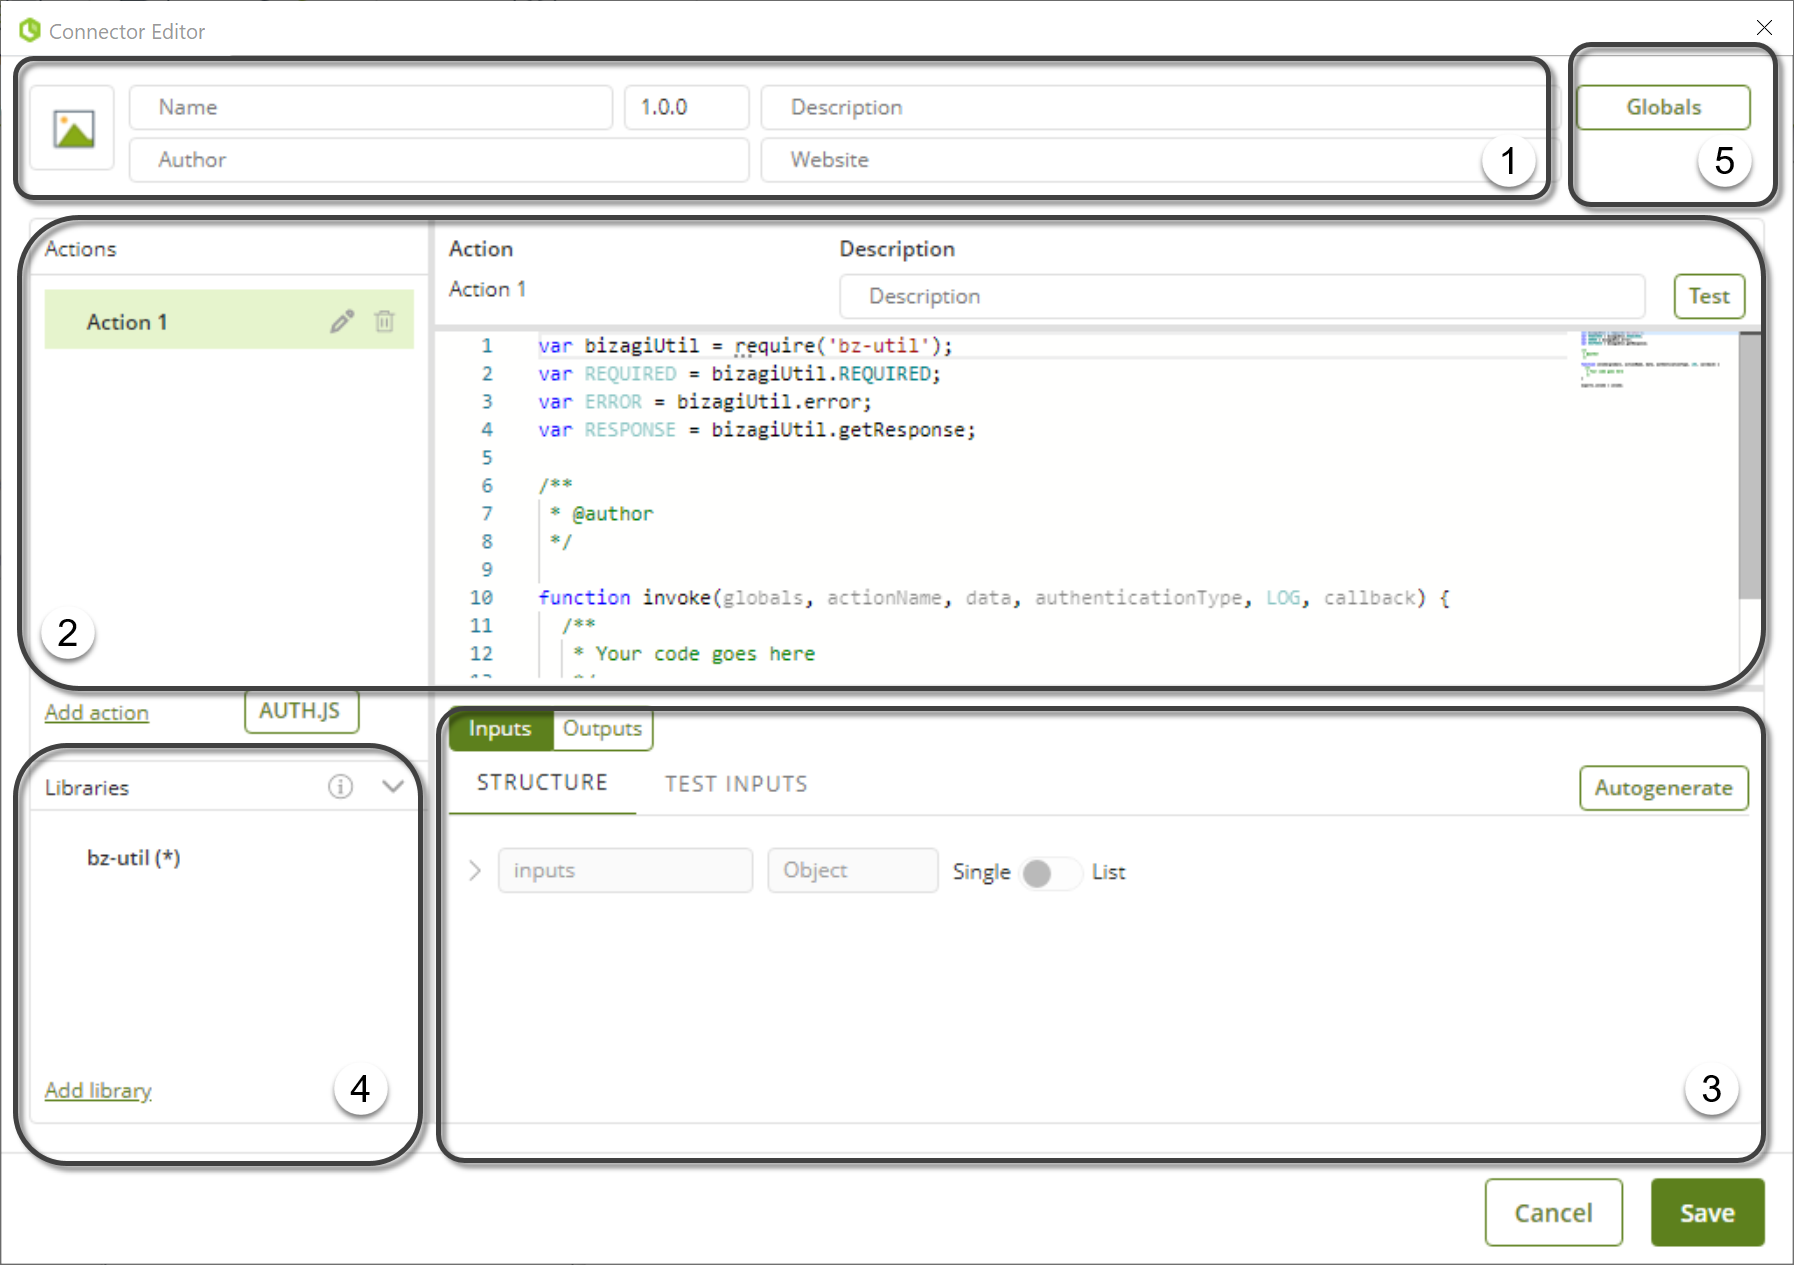
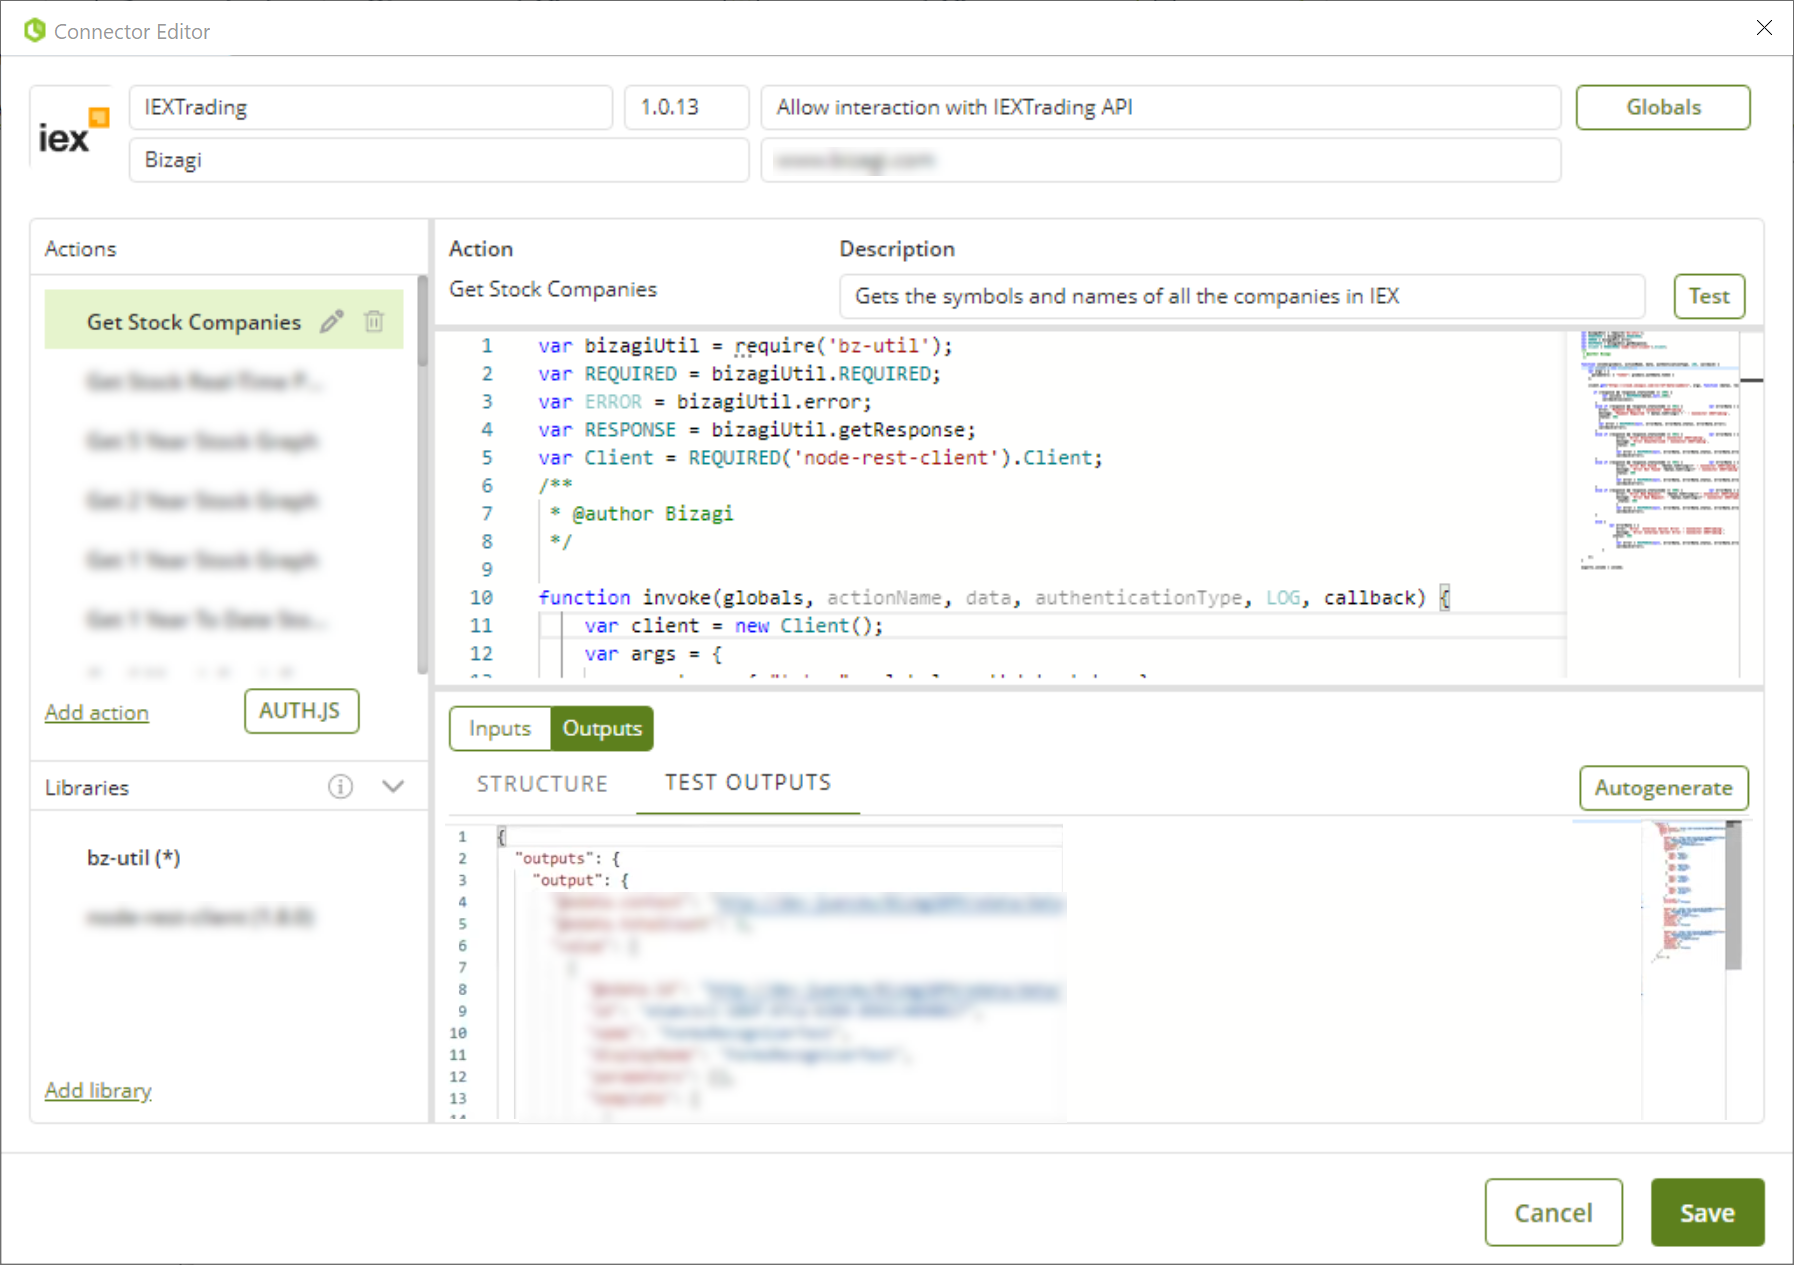
1. General Connector information
This section contains general information about the connector: its name, version, author, website URL, description, and icon.
You can modify this information at any time.

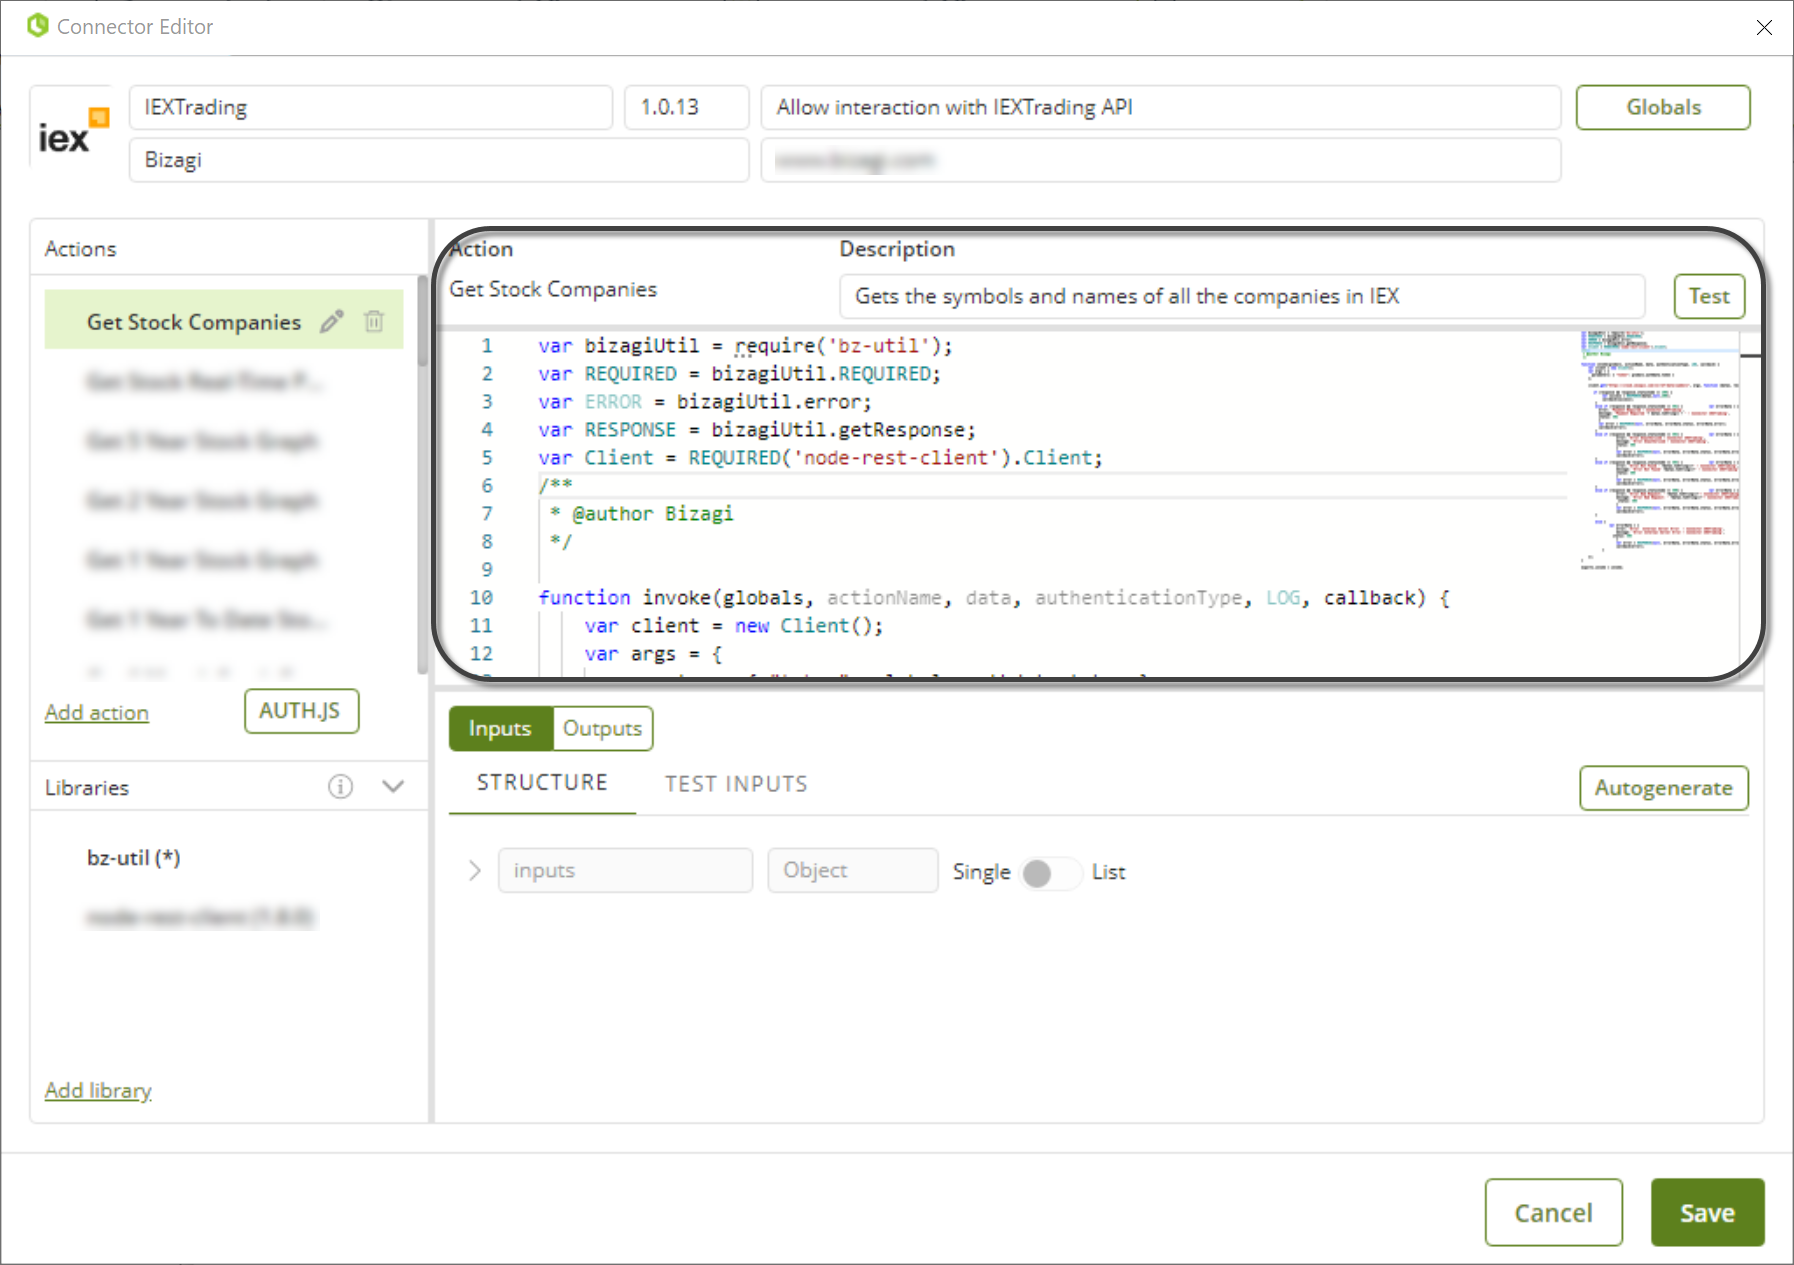
2. Actions and work area
This section displays all actions defined for the connector along with their properties.
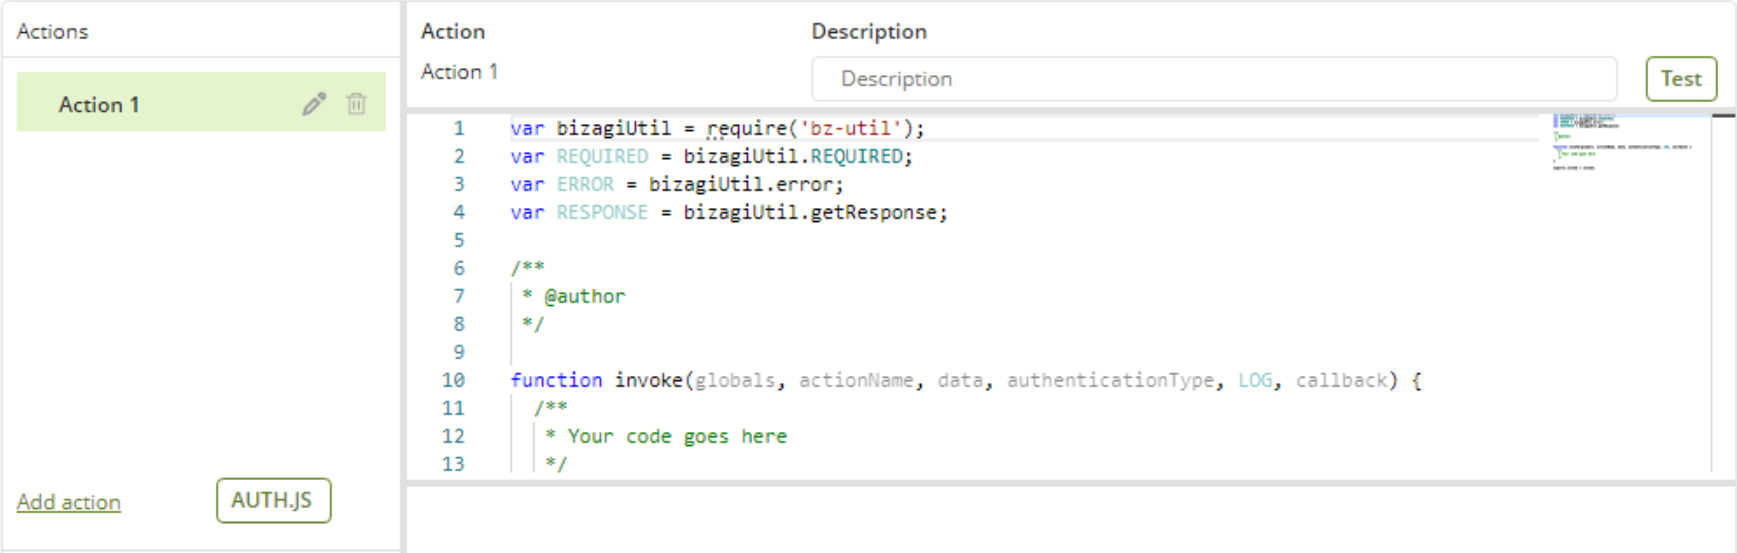
The left panel lists the actions and allows you to manage them (create new actions or delete existing ones). You can edit an action’s name by clicking the pencil icon, or delete it using the trash can icon.
When you select an action, the work area on the right shows the implementation details for that action.
The lower section displays the details regarding the inputs and outputs.
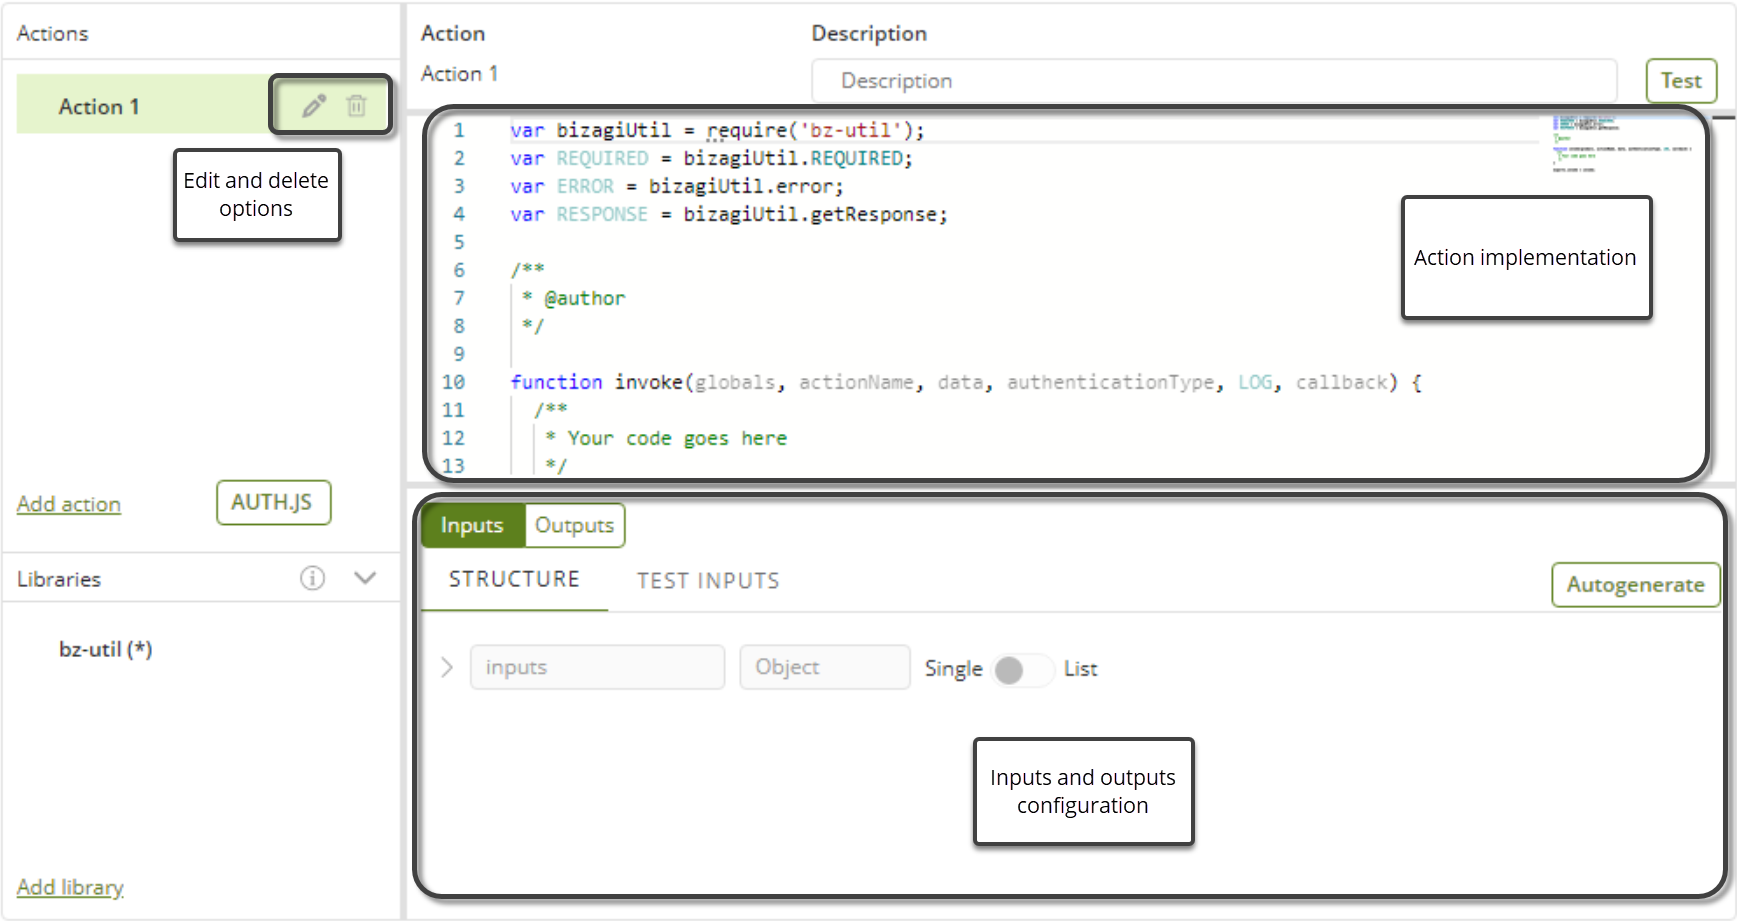
This section defines the inputs and outputs of an action. Both are defined in the same manner.
You must define a hierarchical structure (JSON or XML compliant) with the data types required by your service, whether they are inputs consumed by the external service or outputs returned by it.
|
The data types must match those expected by the external system or application's API. Available simple data types include: •Boolean •Byte •Date •Decimal •Double •Integer •String
Complex data types must be defined as Object, allowing you to include inner elements that may be simple data types or additional nested Objects. |
For example, consider the following input structure:
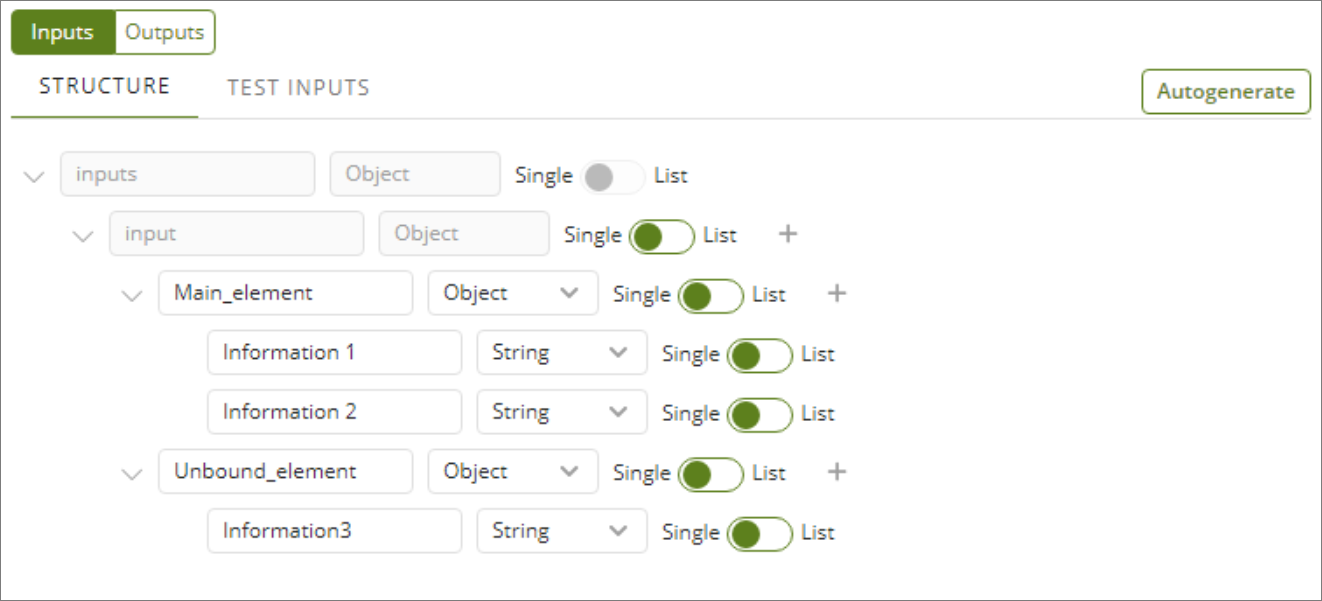
Viewed as JSON, it would look like this:
{
"Main_element": {
"Information1": "String",
"Information2": "String"
},
"Unbount_element": {
"Information3": "String"
}
}
Viewed as XML, it would look like this:
<?xml version="1.0" encoding="UTF-8"?>
<root>
<Main_element>
<Information1>String</Information1>
<Information2>String</Information2>
</Main_element>
<Unbount_element>
<Information3>String</Information3>
</Unbount_element>
</root>
You have two options for defining this structure in the Connector Editor:
3.1. Autogenerate option
Click Autogenerate, select a JSON or XML file, and the Connector Editor automatically builds the structure.
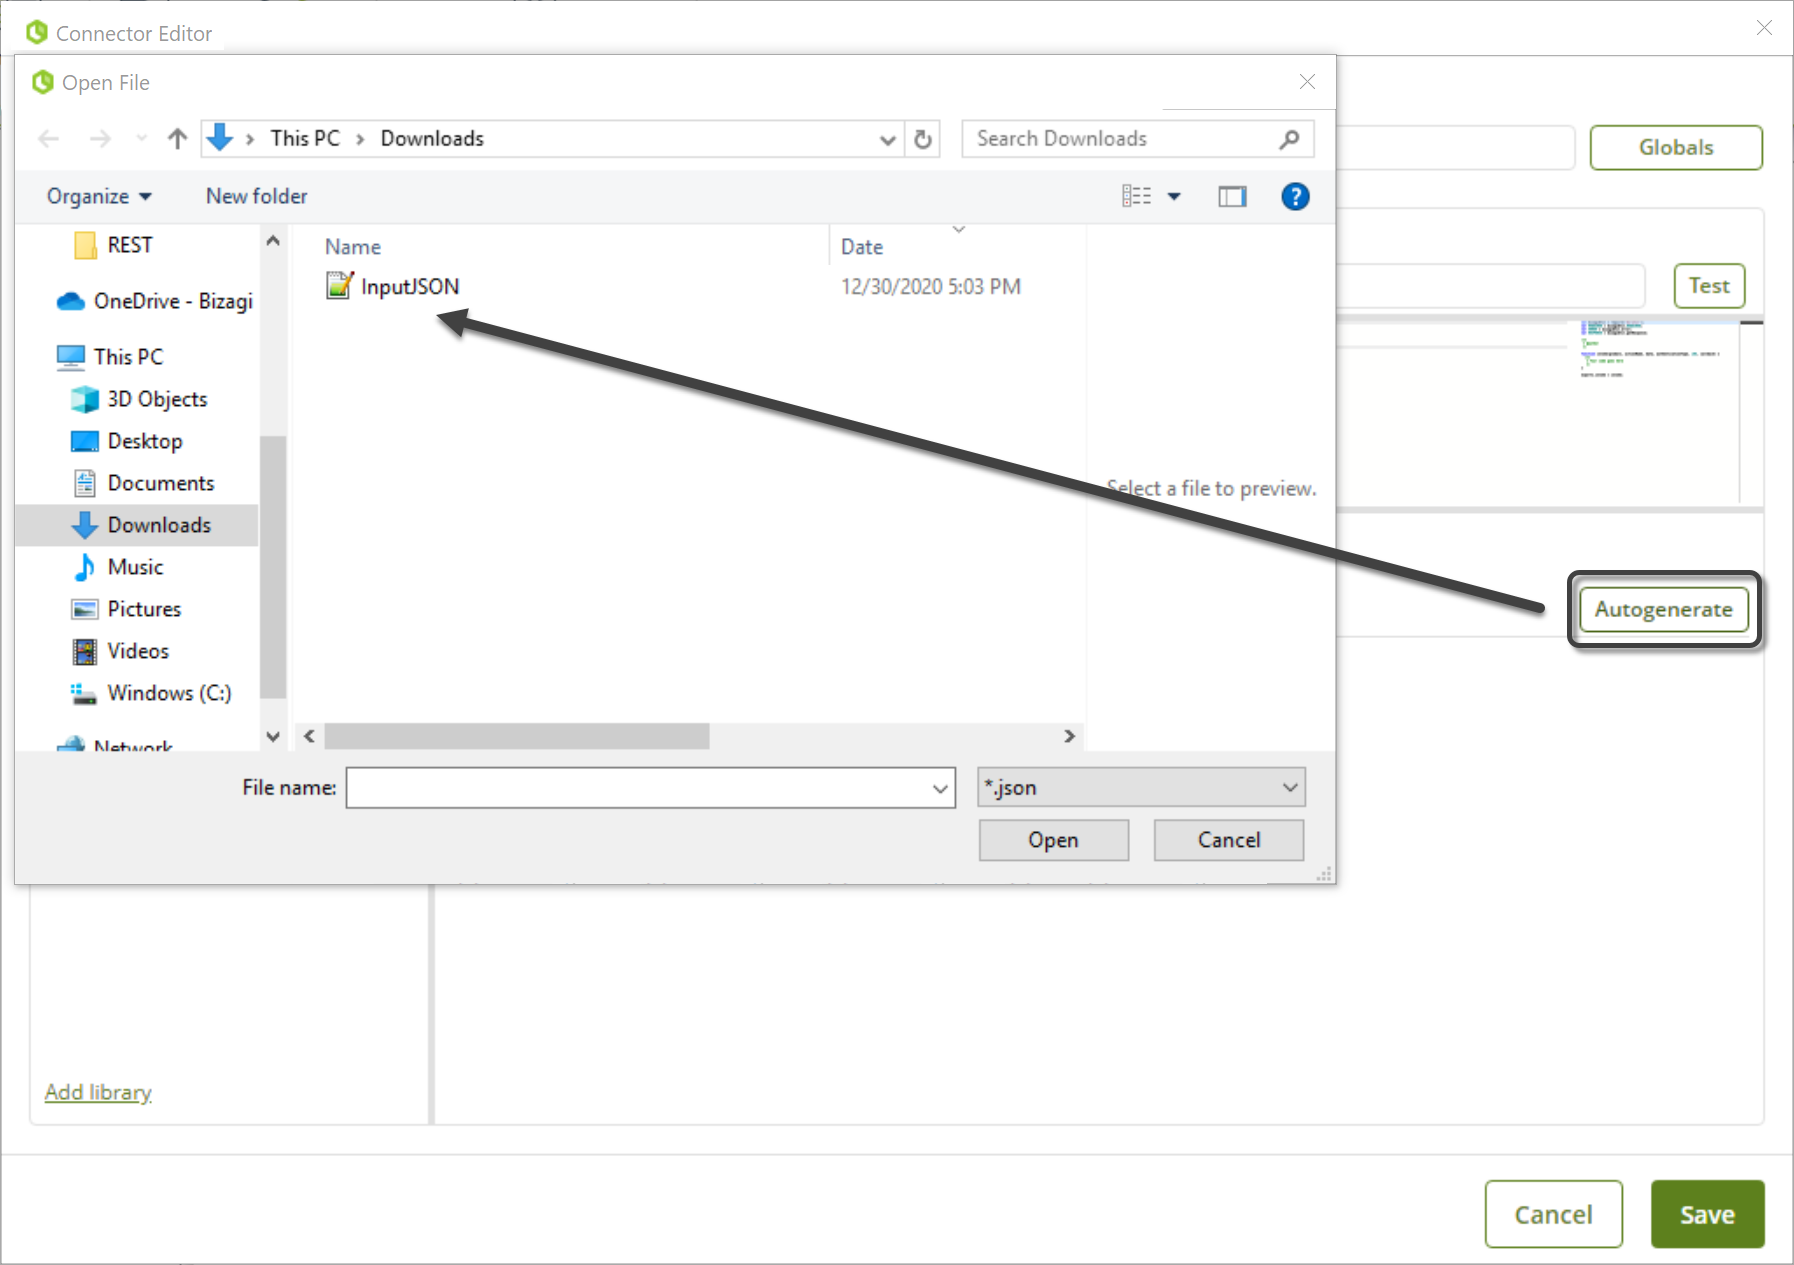
|
When using Autogenerate, only Object and String data types are supported. If your structure contains other data types (e.g., Double), upload the file first and then manually adjust those fields. |
3.2. Manual definition
You can enter the structure manually. Object-type elements may contain additional elements. To add new elements, click the ![]() icon. For each new element, specify:
icon. For each new element, specify:
•Name
•Data type
•Whether it is a list (multiple) or single occurrence
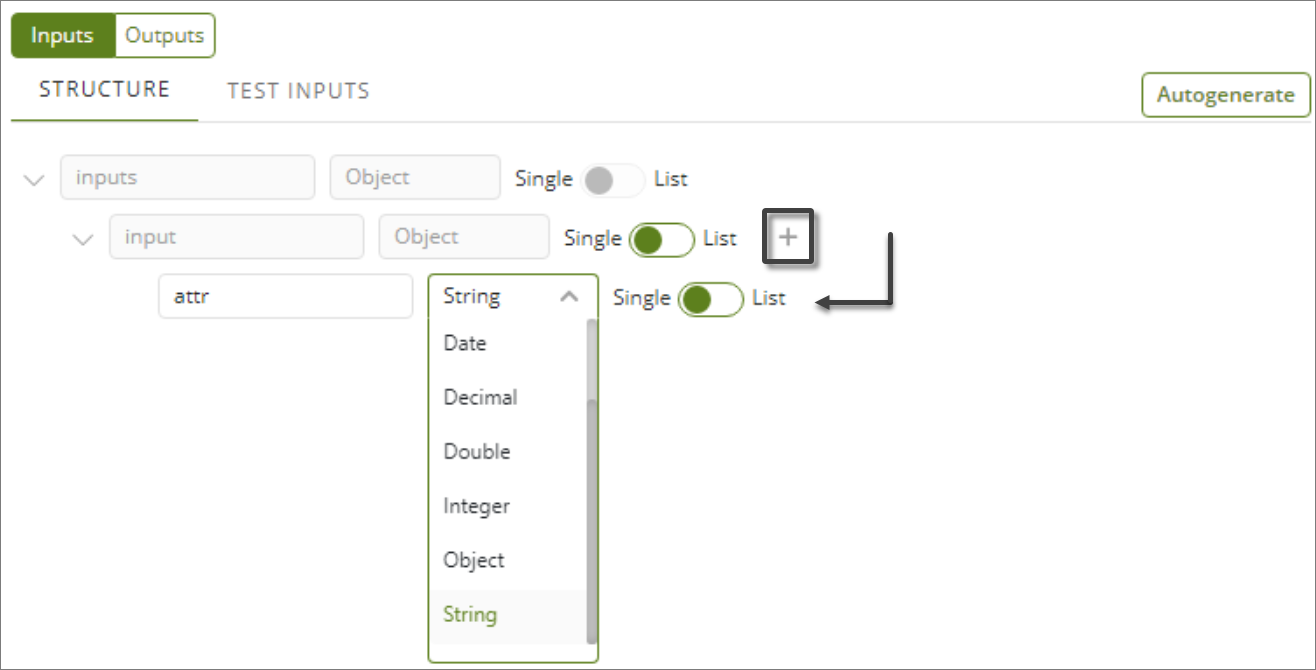
Add parameters one by one until the structure is complete.
4. Libraries
This section allows you to manage the libraries used in the connector. Imported libraries, along with their internal dependencies, appear in the list, together with Bizagi's built-in bz-util library.
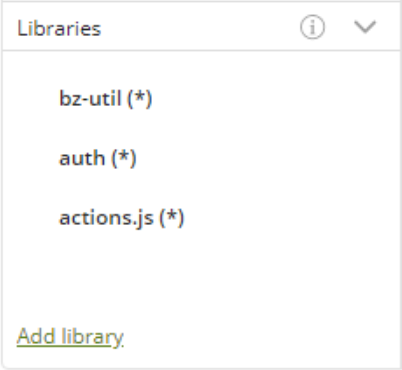
Although you import the library here, you must still reference it explicitly in your code (similar to import in Java or using in C#).
Global parameters allow you to specify generic properties that can be used by any action in the connector.

You can add, remove, or edit these parameters. Each parameter includes the name, default value, required and Field encryption properties.

There are three types of Global parameters:
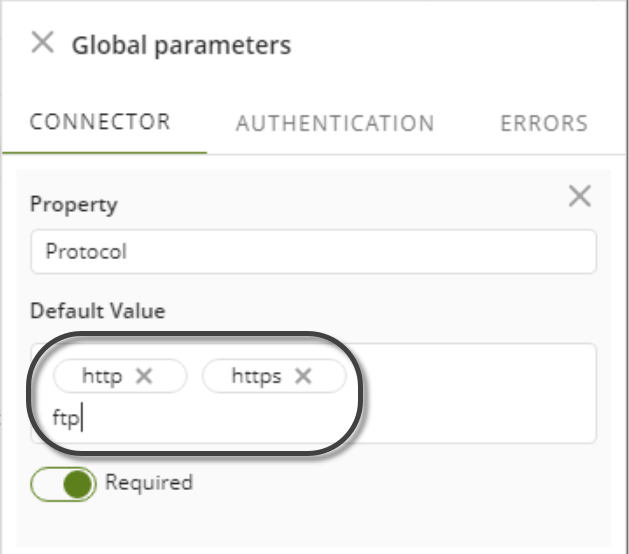
5.1. Connector parameters
These parameters remain constant during action execution (e.g., the external system URL).
They may also vary by environment (Development, Test, Production), allowing you to configure each environment in Bizagi Studio without affecting other mappings or connector settings.
To access these parameters, use:
globals.systemproperties.[PropertyName]
|
Brackets are not part of the code (e.g., globals.systemproperties.SERVER). |
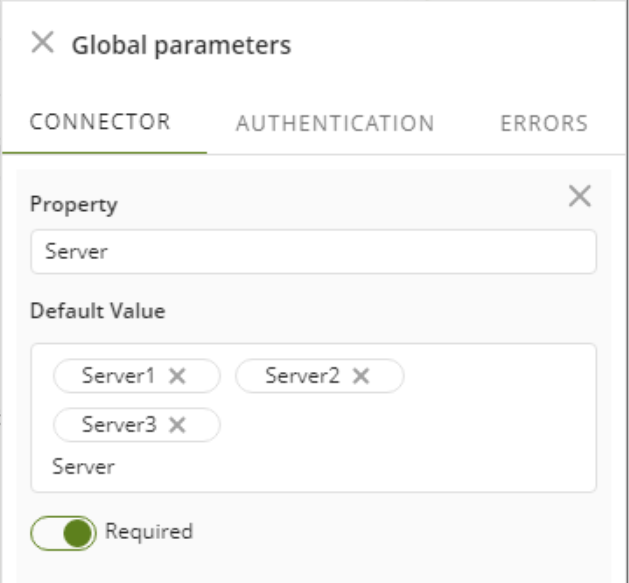
Connector-type parameters can also be defined as a list of values. To do this, enter each value in the Default value(s) field and press Enter to add multiple values.
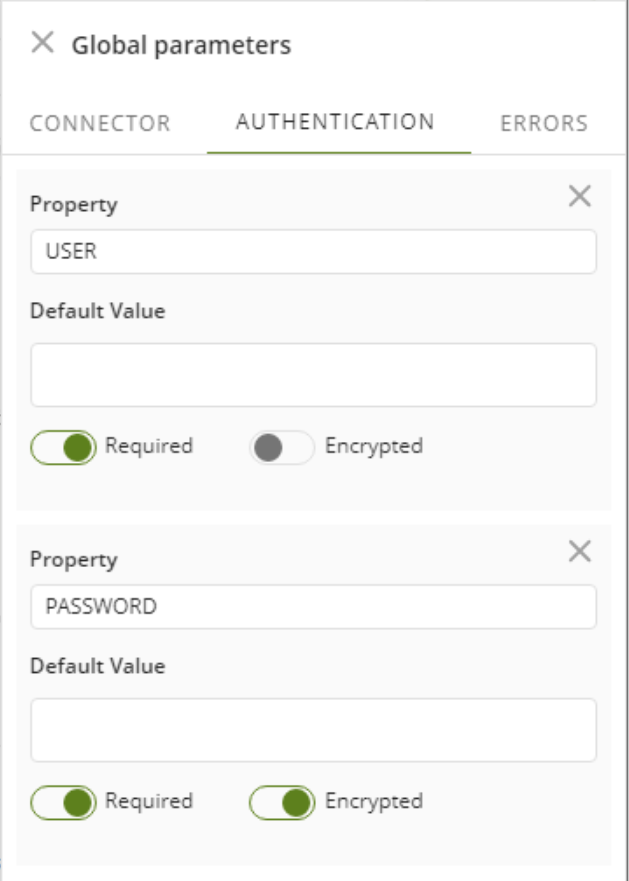
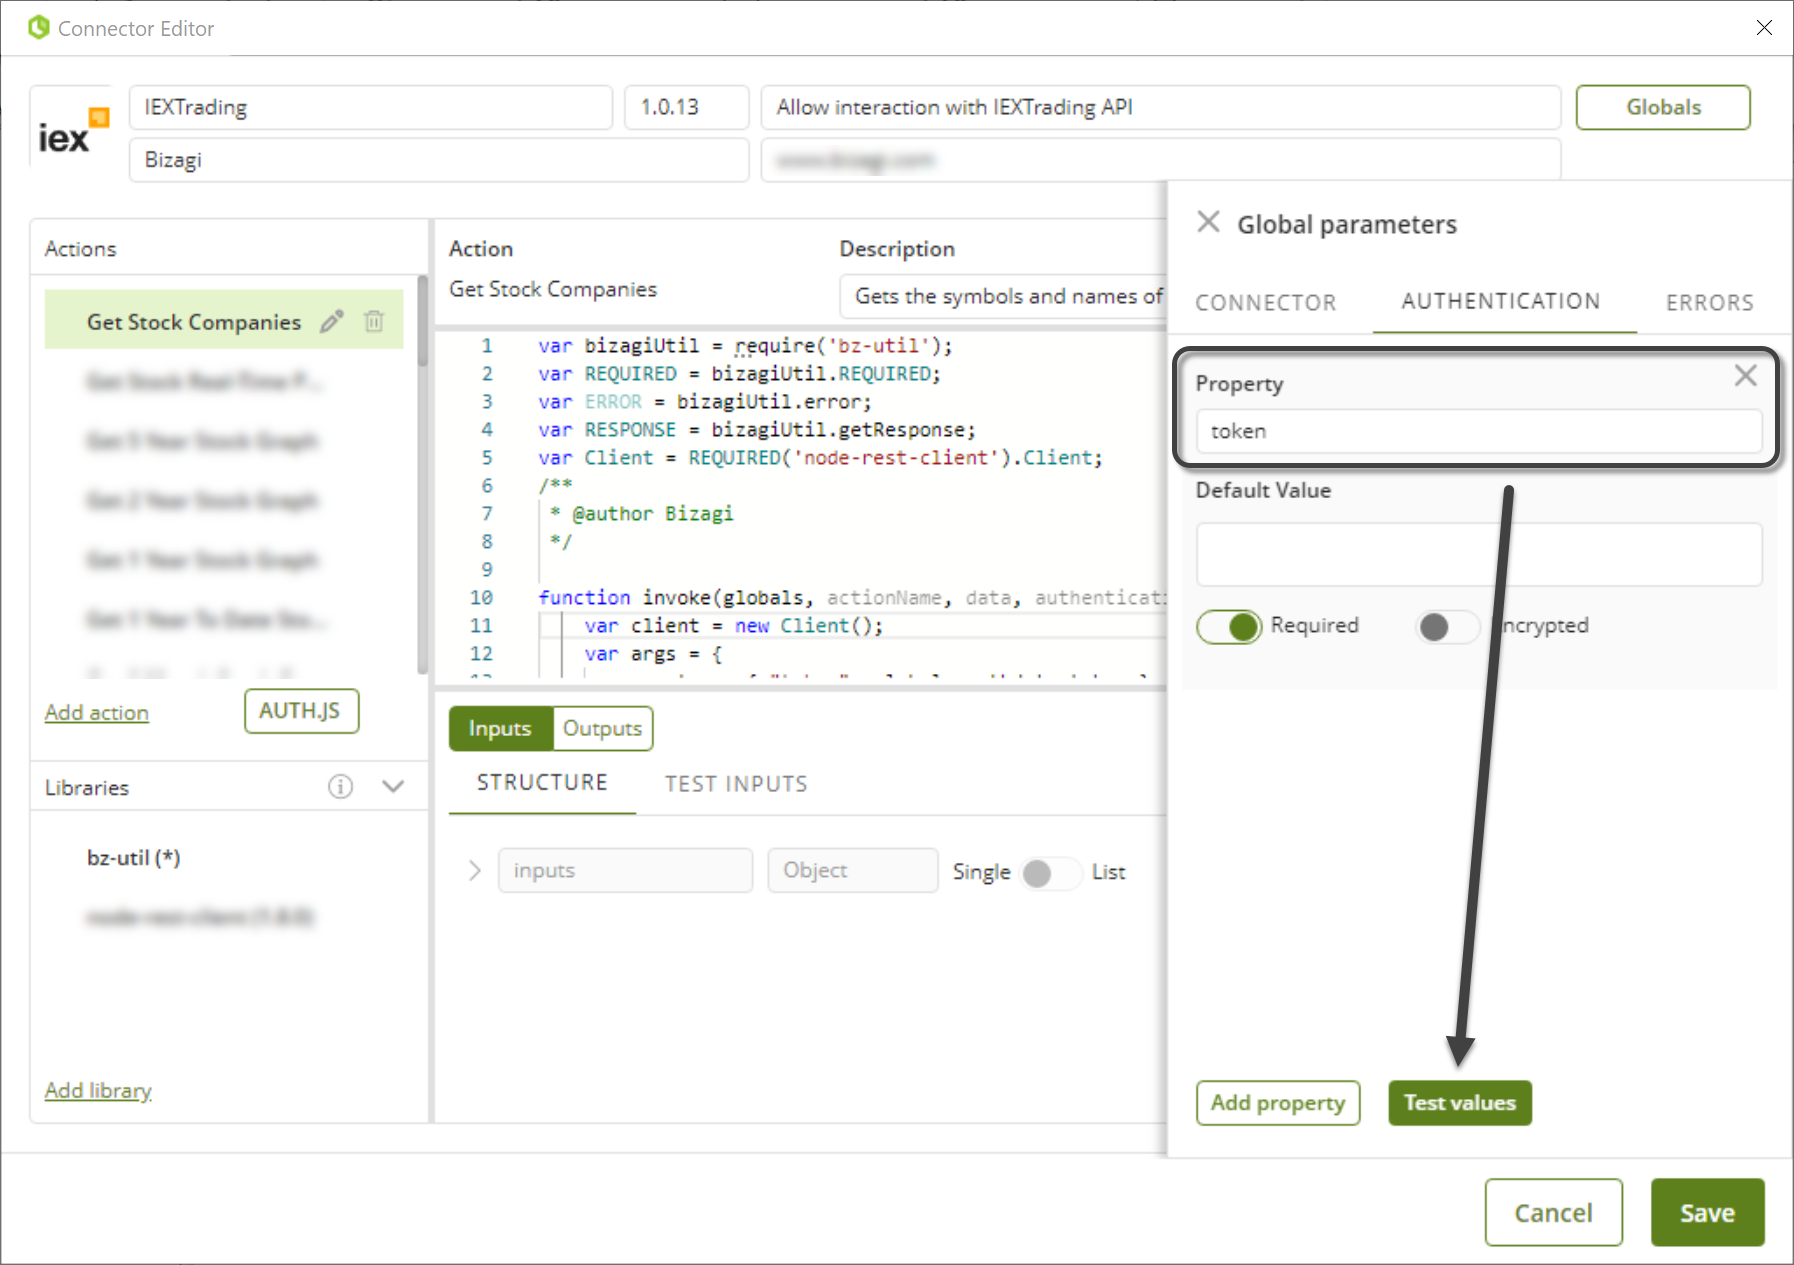
5.2. Authentication parameters
Here you define the security-related parameters used by the actions (user, password, clientId, clientSecret, etc.).
To access them, use:
globals.authdata.[PropertyName]
|
Brackets are not part of the code (e.g., globals.authdata.USER). |
5.2.1. Impersonation token
The Impersonation token is an OAuth2-based access token that allows the connector to act on behalf of an authenticated user when calling protected external services.
When editing a Custom connector, a variable named impersonationToken is available inside the GetService action of the Connector Editor's invoke function.
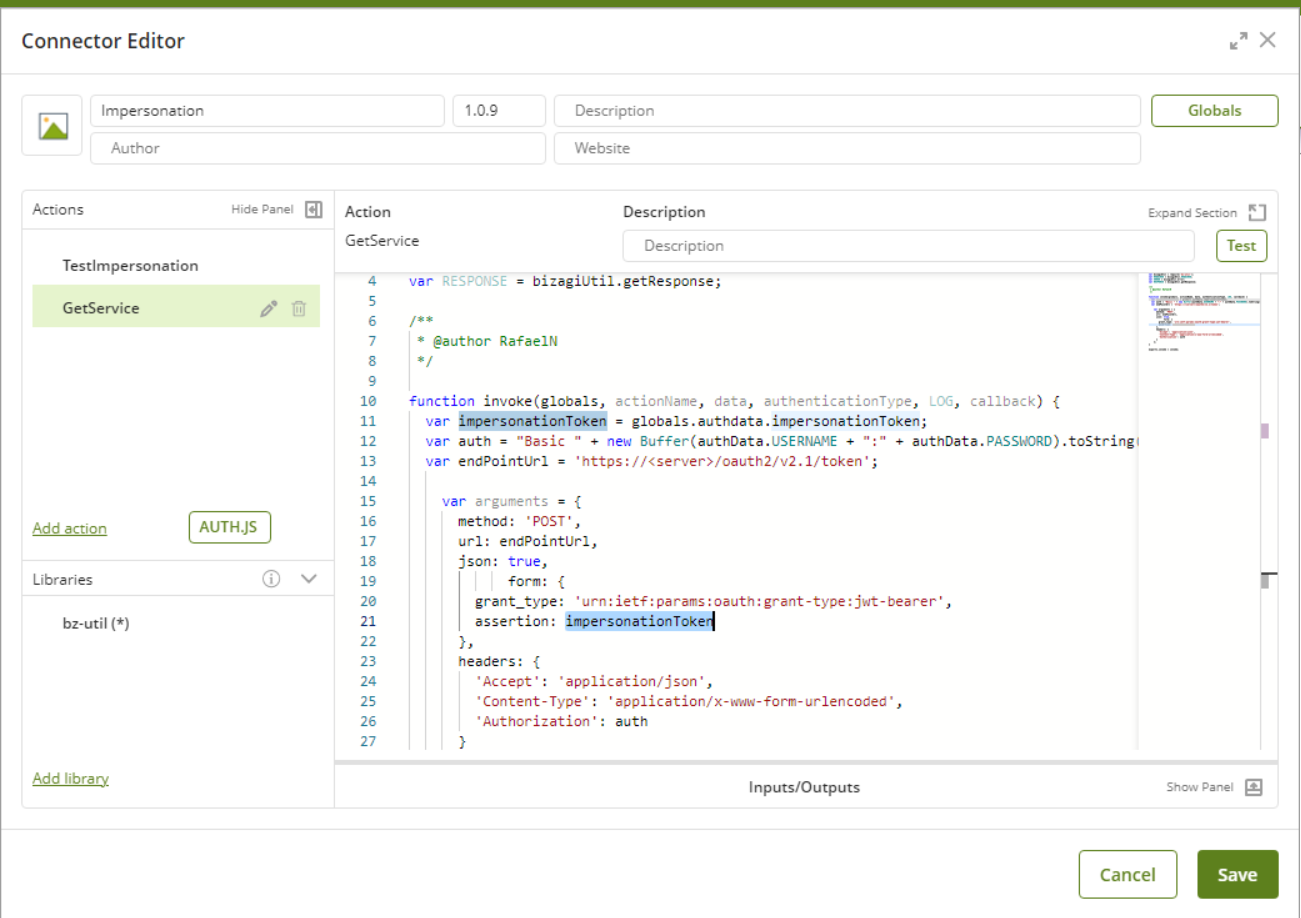
As the image shows, the value is:
globals.authdata.impersonationToken
You can use this token to request a new impersonation token from an external provider and then access protected resources.
Below is a simplified example of requesting and using an impersonation token:
var bizagiUtil = require('bz-util');
var REQUIRED = bizagiUtil.REQUIRED;
var ERROR = bizagiUtil.error;
var RESPONSE = bizagiUtil.getResponse;
const axios = REQUIRED('axios');
/** Request impersonation token */
function login(globals, LOG) {
return new Promise(function (resolve, reject) {
var authData = globals.authdata;
var auth = "Basic " + new Buffer(authData.USERNAME + ":" + authData.PASSWORD).toString("base64");
var endPointUrl = 'https://<server>/oauth2/v2.1/token';
var requestArgs = {
method: 'POST',
url: endPointUrl,
json: true,
headers: {
'Accept': 'application/json',
'Content-Type': 'application/x-www-form-urlencoded',
'Authorization': auth
},
form: {
grant_type: 'urn:ietf:params:oauth:grant-type:jwt-bearer',
assertion: authData.impersonationToken
}
};
axios.request(requestArgs)
.then((response) => {
resolve(response.data);
})
.catch((err) => {
reject(err);
});
});
}
/** Main function */
function invoke(globals, actionName, data, authenticationType, LOG, callback) {
login(globals, LOG).then(function (data1) {
var endPointUrl = 'https://<server>/customers/basic-info/raw';
var requestArgs = {
method: 'GET',
url: endPointUrl,
json: true,
headers: {
'Content-Type': 'application/json',
'Authorization': 'Bearer ' + data1.access_token
}
};
axios.request(requestArgs)
.then((response) => {
var result = response.data;
var success = RESPONSE(result, null, response.status);
callback(success);
})
.catch((err) => {
var e = RESPONSE(null, { status: err.status, message: err.message }, err.status);
callback(e);
});
}).catch(function (err) {
var e = RESPONSE(null, { status: err.status, message: err.message }, err.status);
callback(e);
});
}
exports.invoke = invoke;
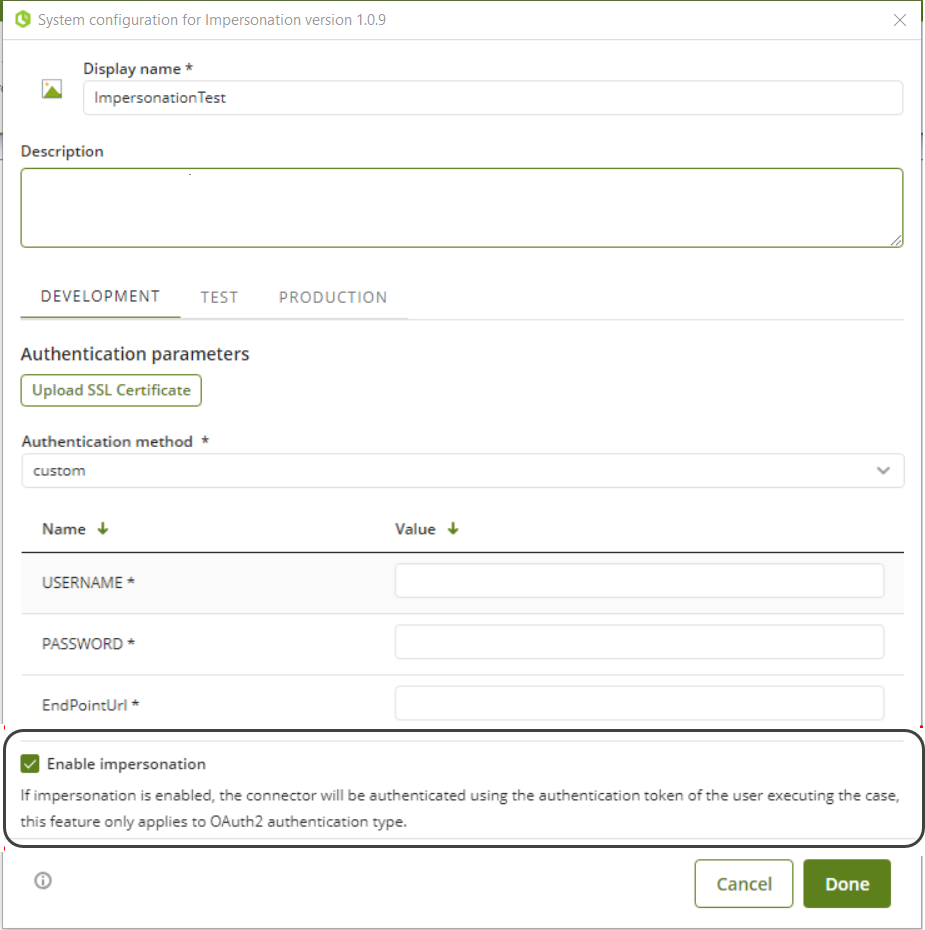
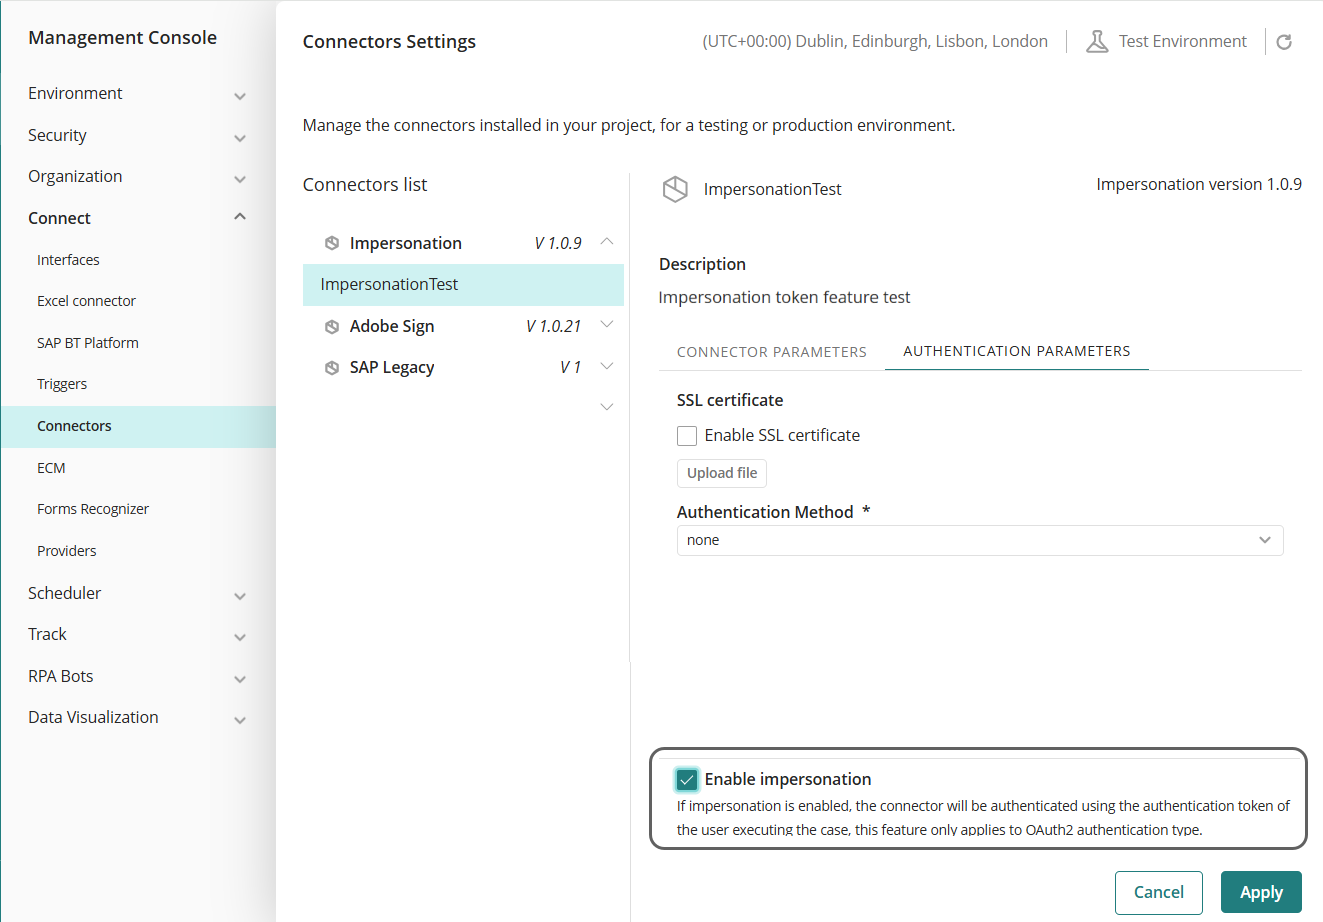
When configuring the Custom connector in Bizagi Studio, an Enable impersonation checkbox appears in the authentication settings.
When enabled, Bizagi automatically passes the impersonation token to the connector.
|
The Enable impersonation checkbox is also visible in the Management Console, under the Connectors settings.
|
|
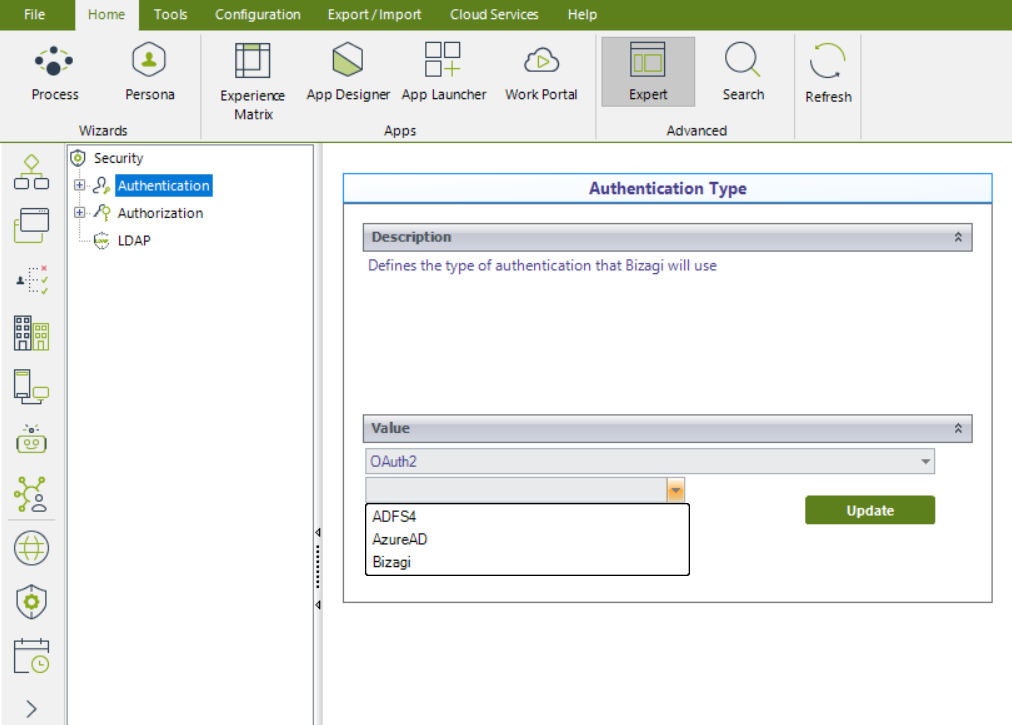
•The impersonation feature is enabled by default; however, it can be disabled through a Support ticket. •For impersonation to work correctly, the project must use OAuth2 authentication. For more information, refer to Bizagi authentication.
|
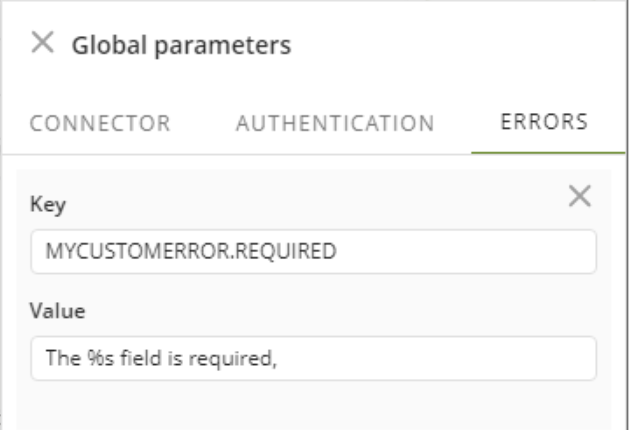
5.3. Error parameters
You can define custom error messages. Defining error parameters allows you to maintain a list of known errors identified by unique codes, improving error handling in your connector’s logic and enhancing the user experience.
Each error parameter includes a key (unique identifier) and a value (the message to display).
To access these parameters, use:
var bizagiUtil = require("bz-util");
var ERROR = bizagiUtil.error;
LOG.error(ERROR("<Key>", [Params]));
The ERROR function receives two parameters: the key defined in the parameter, and an array of Strings representing the parameters to resolve. Example:
var bizagiUtil = require("bz-util");
var ERROR = bizagiUtil.error;
LOG.error(ERROR("MYCUSTOMERROR.REQUIRED", ["ID"]));
Bizagi already provides a set of predefined error codes.
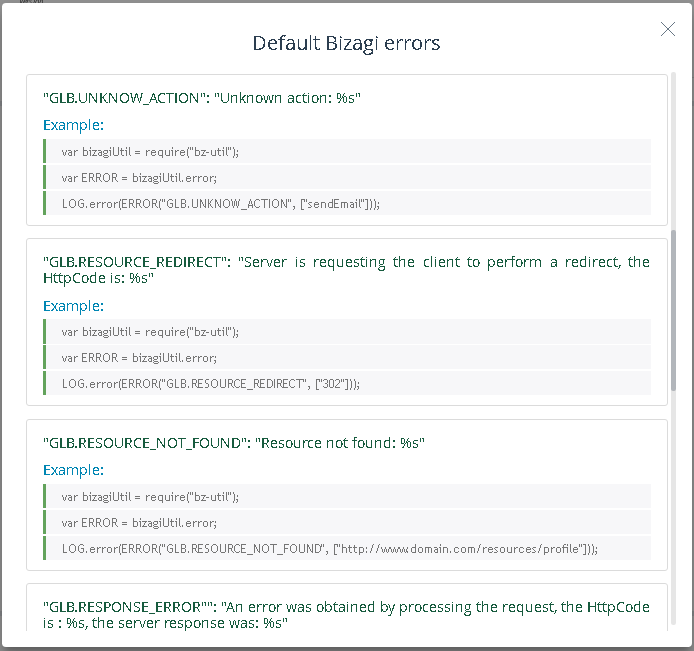
DO NOT reuse the following codes, as they are already in use:
•GLB.EXCEPTION
•GLB.IS_NOT_A
•GLB.IS_NOT_AN
•GLB.UNKNOW_ACTION
•GLB.RESOURCE_REDIRECT
•GLB.RESOURCE_NOT_FOUND
•GLB.RESPONSE_ERROR
•VAL.REQUIRED_PARAM
•VAL.REQUIRED_ELEMENT
•VAL.REQUIRED_PARAMS
•VAL.PARAM_TYPE
If your Custom connector must use a Proxy configuration, Bizagi sends a proxy object inside the global parameters of the invoke function.
The structure of the proxy object is as follows:
| Proxy object structure { "globals": { ... "proxy": { "isEnable": boolean, "password": string, "port": string, "url": string, "useAuthentication": boolean, "username": string, "allowedIps": [ string ] } } } |
With this object is possible to program the HTTP request using the proxy, as in the following example:
| Proxy example var bizagiUtil = require('bz-util'); var REQUIRED = bizagiUtil.REQUIRED; var ERROR = bizagiUtil.error; var RESPONSE = bizagiUtil.getResponse; var request = REQUIRED("request"); function invoke(globals, actionName, data, authenticationType, LOG, callback) { ... const proxyUrl = globals.proxy ? globals.proxy.url : null; request({ url: data.inputs.input.url, method: "POST", proxy: proxyUrl, ... }, () => { ... }) ... } exports.invoke = invoke; |
How to test your connector
The Test option in the Connector Editor lets you test actions without downloading the connector or executing it in the Work Portal.
To test your connector's action:
1. Configure the action. Depending on what you want to test, you may need to configure global parameters, inputs, or outputs.
2. If the action uses a global parameter (e.g., a token), assign a test value to that parameter.
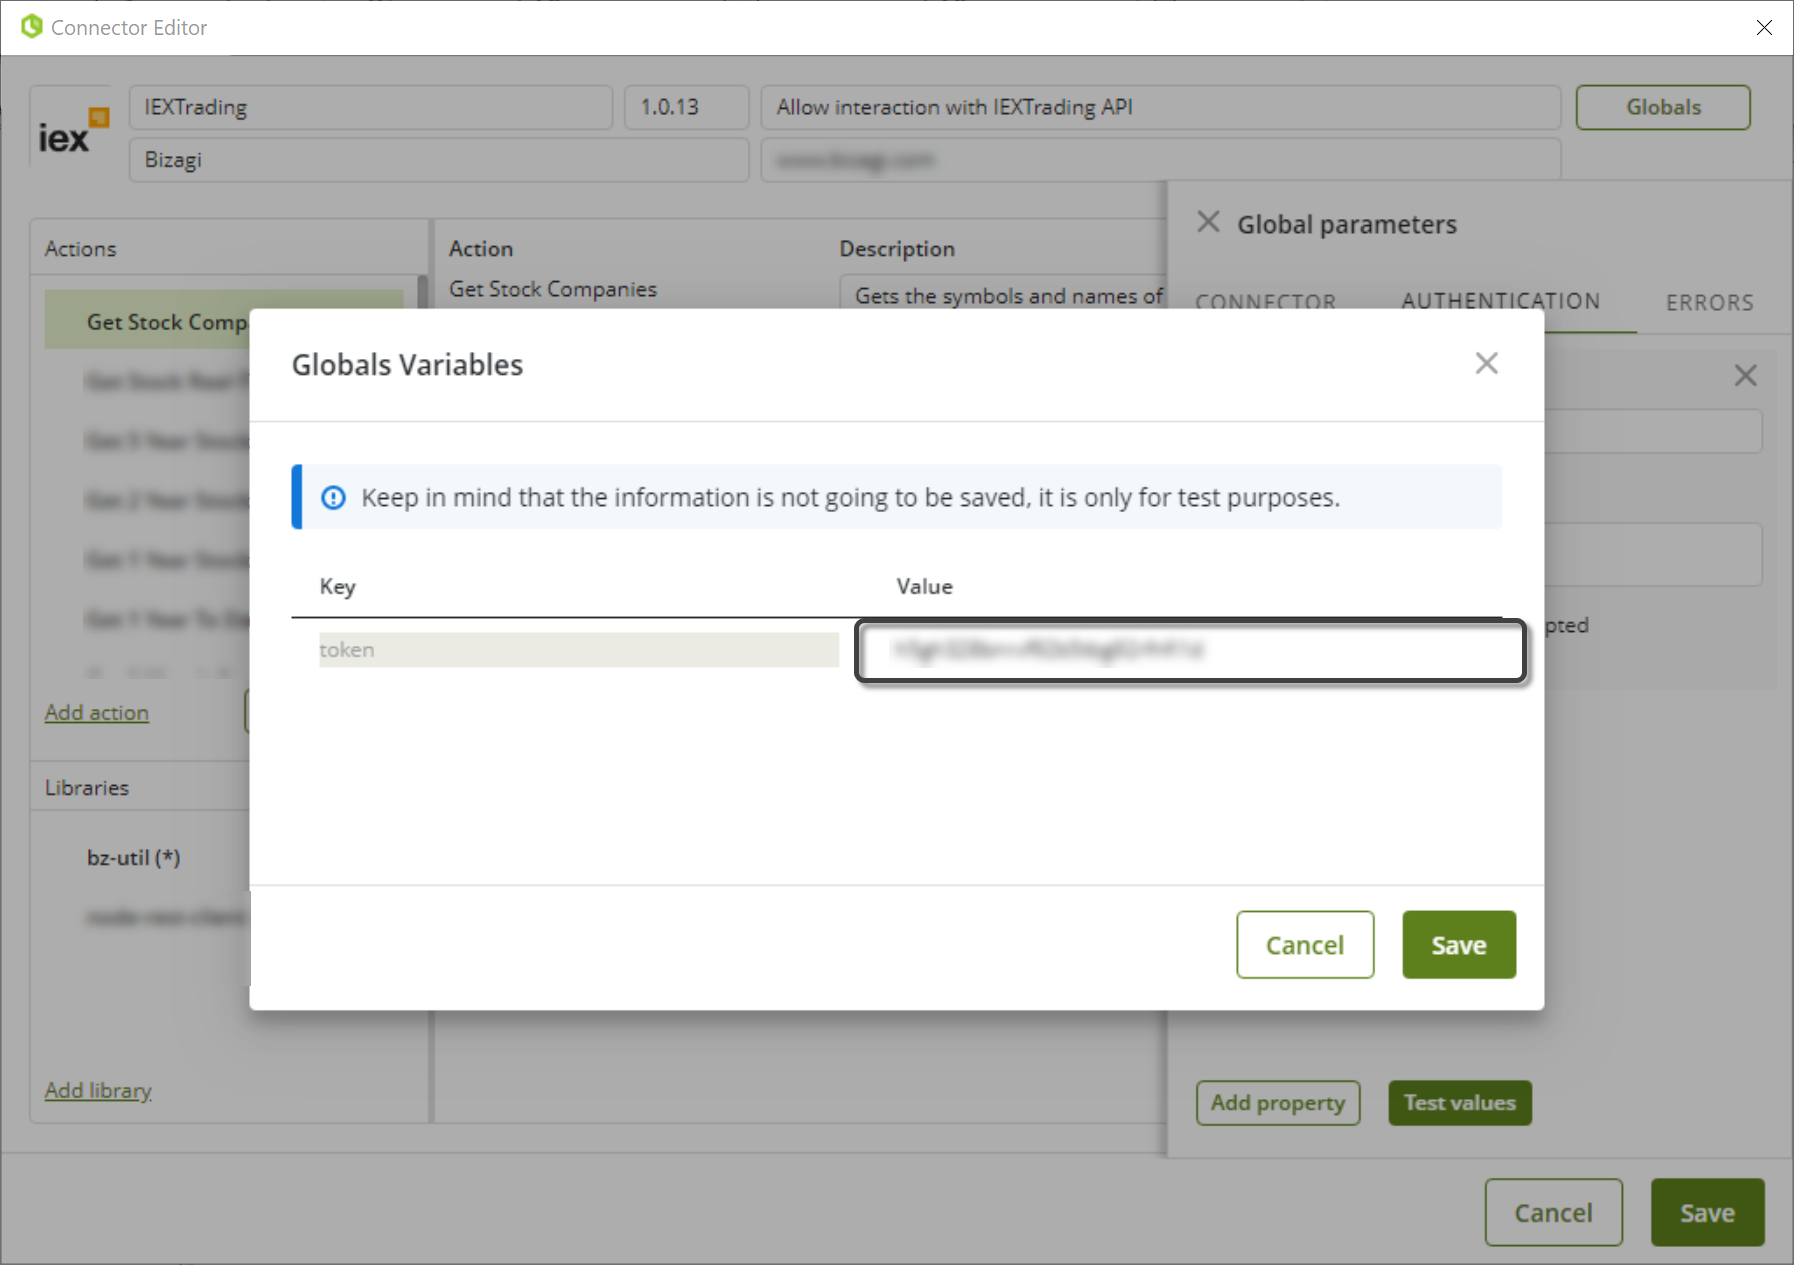
3. Click Test.
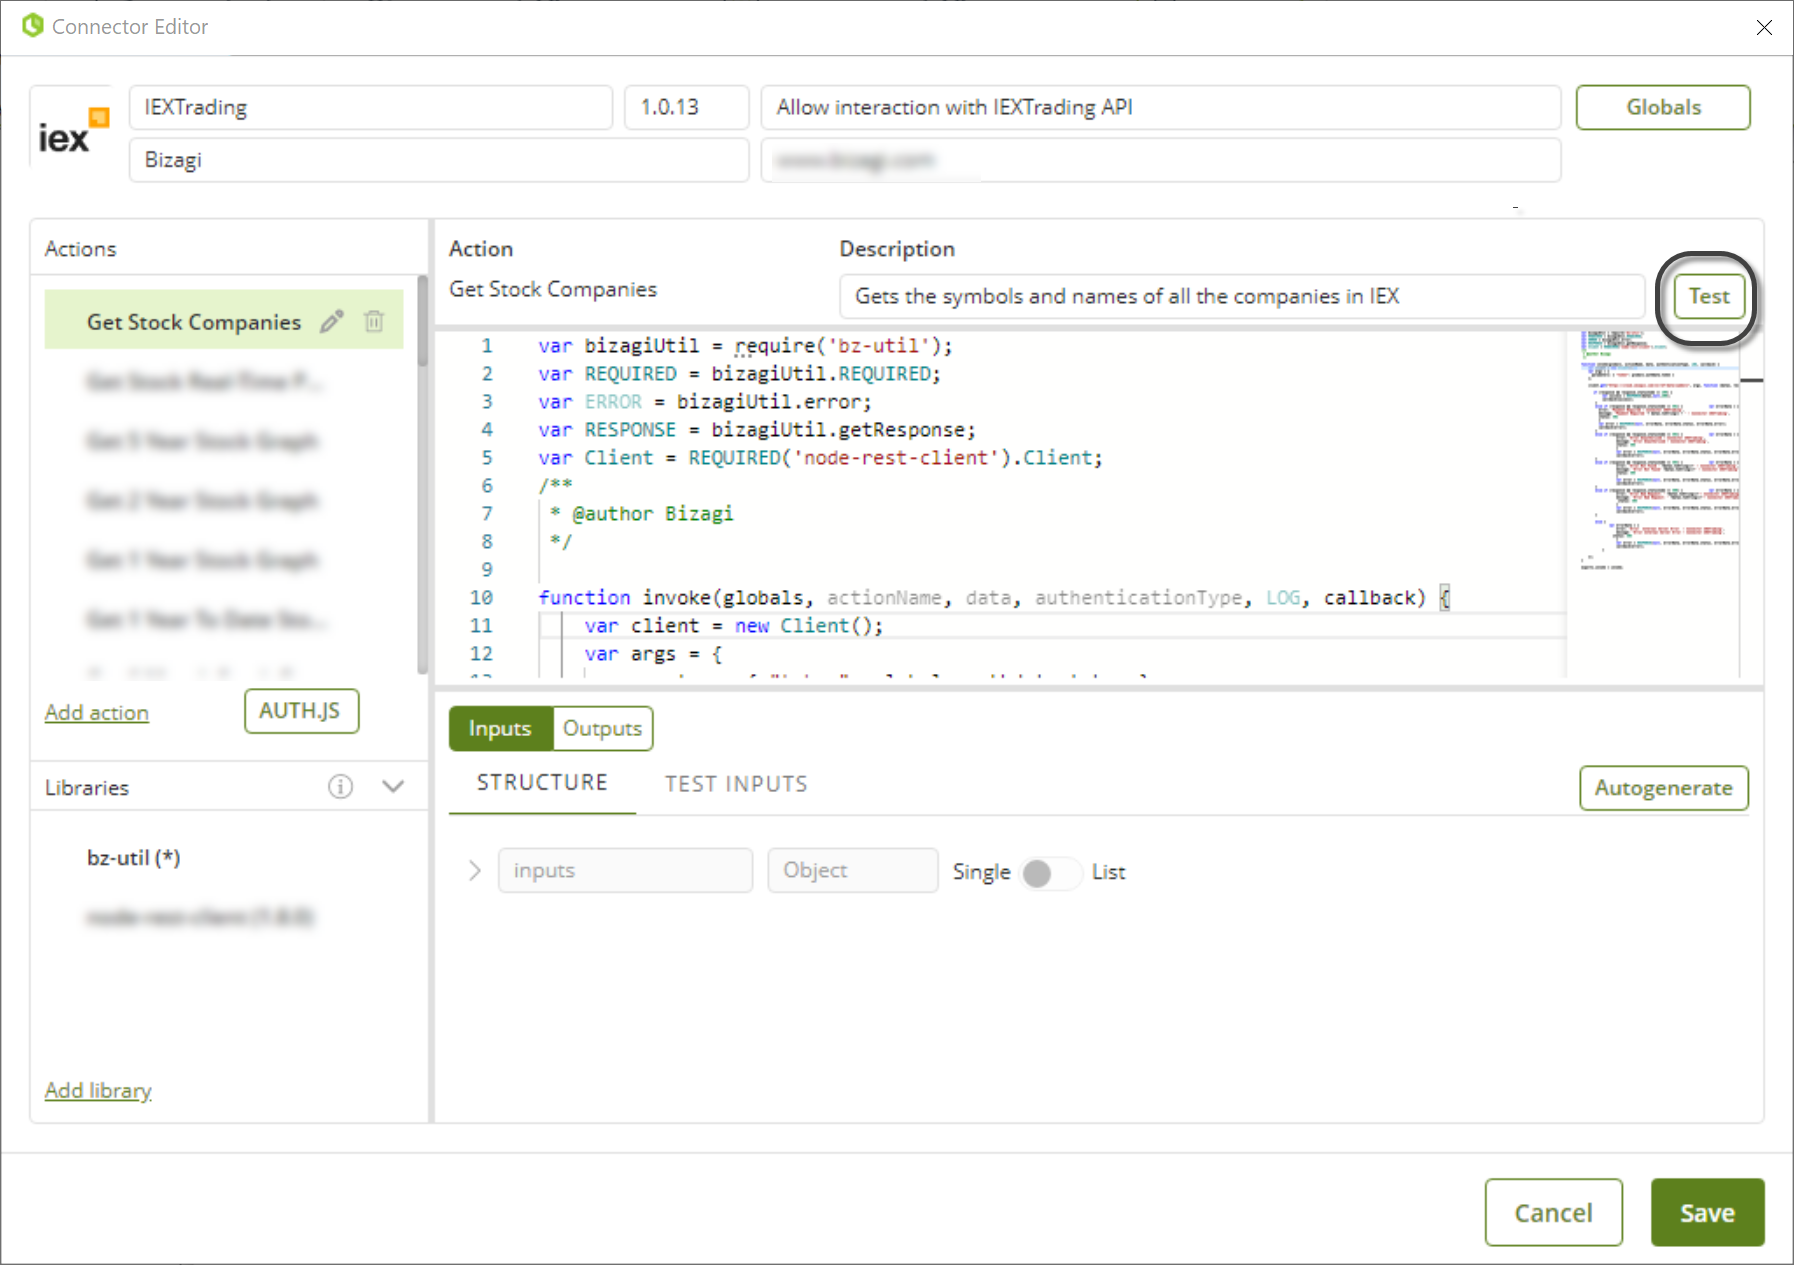
If the connector is defined correctly, the TEST OUTPUTS tab opens and displays the output the connector would return during execution.
Last Updated 11/18/2025 11:50:11 PM