Overview
Bizagi Modeler offers you a Proxy configuration panel. When set, it filters all users queries and requests made through Bizagi Modeler desktop application on your company's physical or virtual Proxy to access every internet resource consumed by the desktop application such as the Bizagi Modeler web application.
Considerations
•Once you configure your company proxy settings, you must restart the Bizagi Modeler desktop application.
•You can set either HTTP, Socks 4 or Socks 5 proxy configuration.
|
A proxy configuration can only be used in Enterprise subscriptions. |
Architecture
Configuring your Proxy settings enhances your company governance and security. It works as a service-oriented architecture that lets you filter every query requested by each user in your company through Bizagi Modeler desktop to reach a cloud services resource. Each time a user requests an internet resource, an authentication entity validates the user credentials, recognizes the user and determines whether or not to allow access and permissions for the user to access the requested resources.
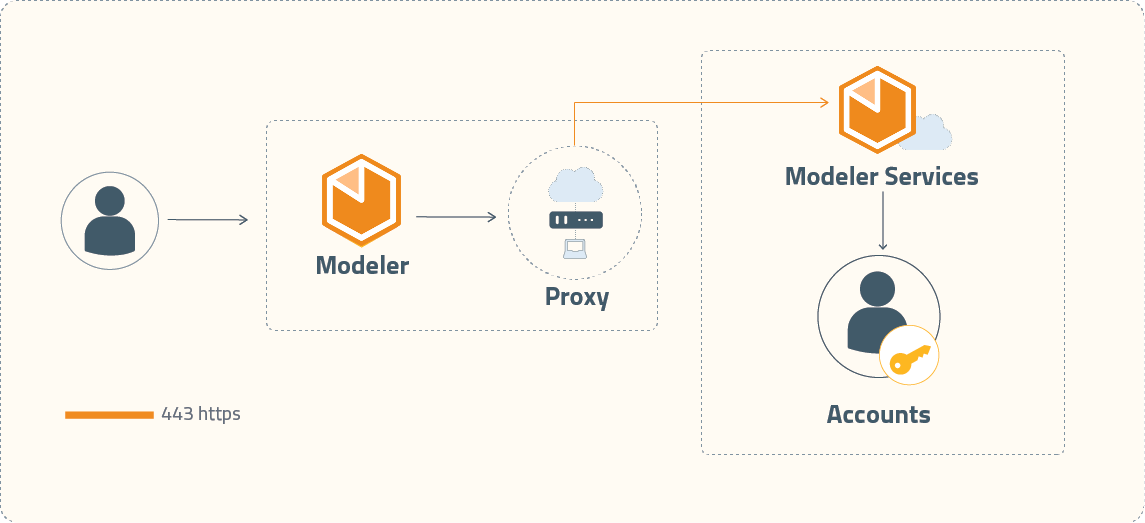
How to set your Proxy configuration
there are two ways to set your Proxy configuration. The first, is done by accessing Bizagi Modeler after setting the Windows proxy configuration; and the other, is directly from
From Bizagi Modeler.
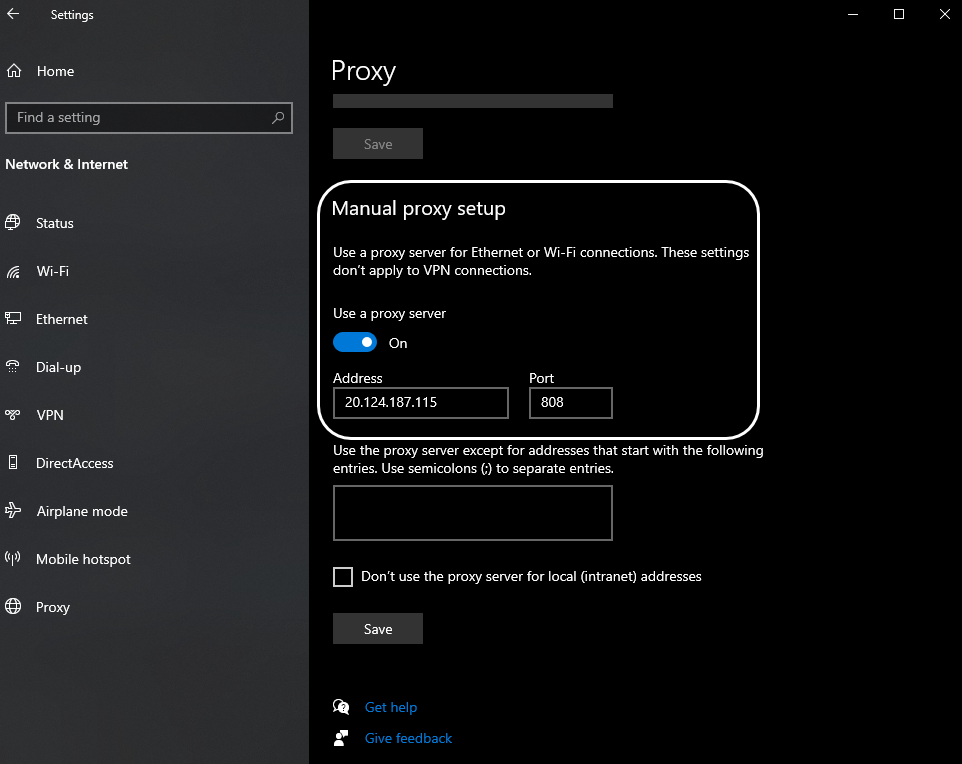
From Windows
Access Proxy Settings on the Settings options in Windows. Under the Manual proxy setup label, activate the Use a proxy server switch option and fill the information of the server.
Open the Bizagi Modeler Desktop application. A new window will show on your screen, to proceed click the Configure proxy button

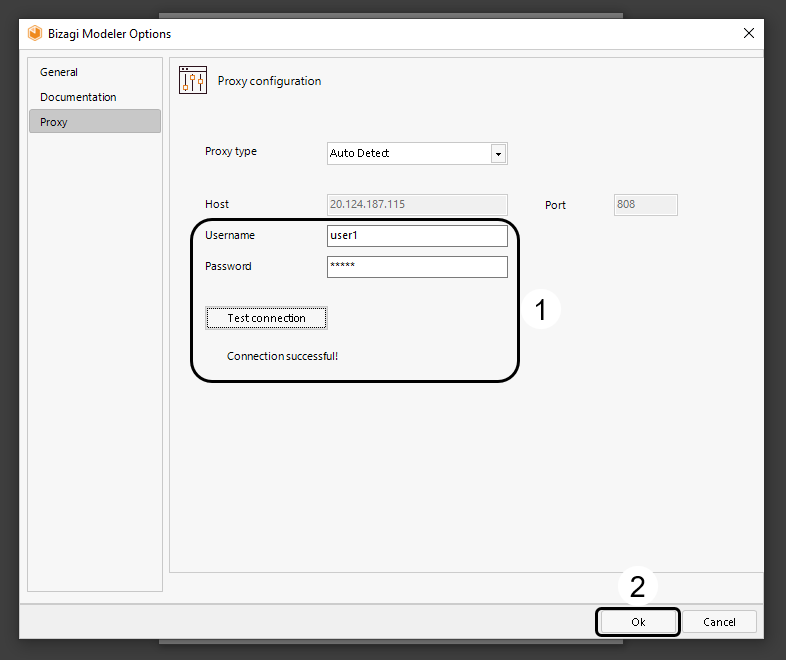
This opens the Proxy configuration window. Select the Auto Detect option in the dropdown-menu next to the Proxy type label. This option shows the Host and port configured in Windows Proxy Settings.

Fill the Username and Password textbox with your information, then click Test connection button located beneath the Password textbox. A Connection successful! message should appear indicating the process was done correctly. Finally, click the ok button in the bottom right corner of the screen.
You are redirected to the login window. Click the Refresh button to continue.
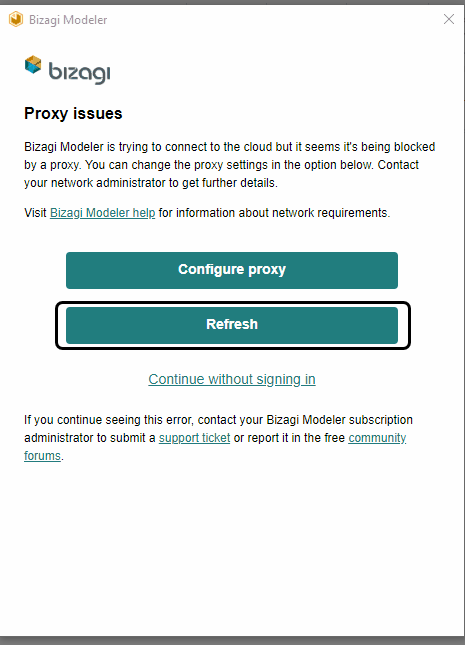
This allows the correct connection to the internet through the established proxy.
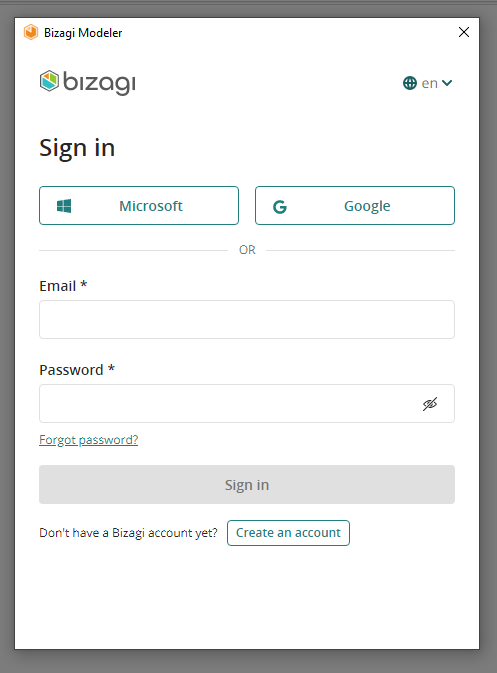
From Bizagi Modeler
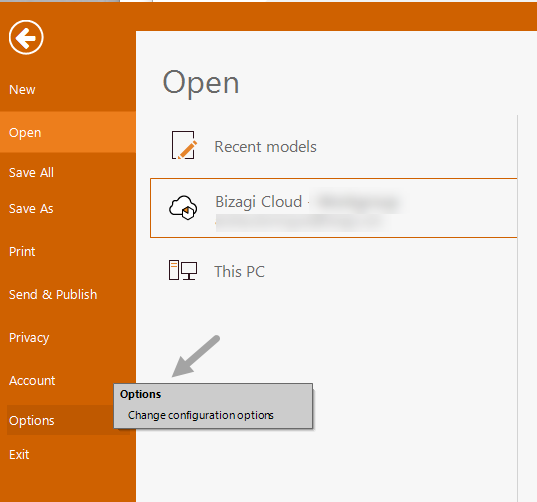
On the ribbon, select the file tab, then options.
Select the Proxy tab.
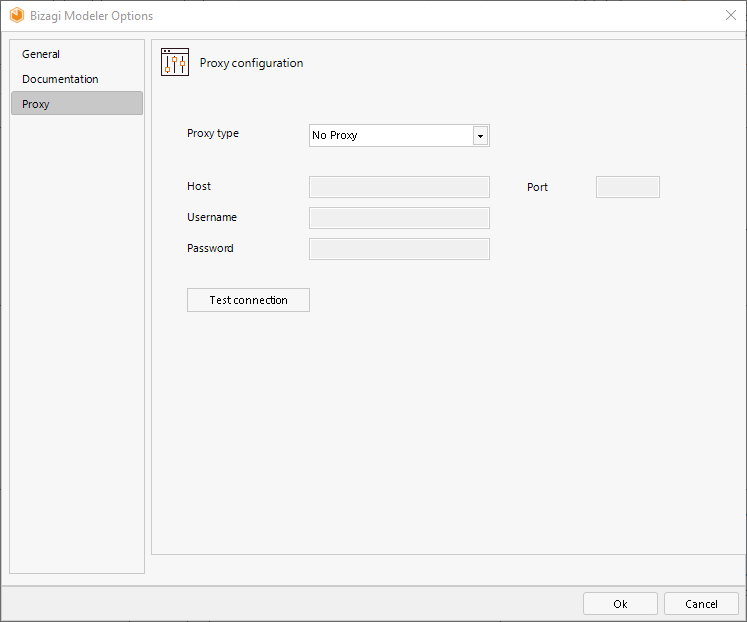
How to configure a HTTP Proxy
MENU OPTION |
DESCRIPTION |
|---|---|
Proxy type |
Choose one within: Autodetect, Socks4, Socks5, HTTP. By default the No Proxy option is chosen. |
Host |
Type the host address. It is enabled when either HTTP, Socks4 or Socks 5 is selected. |
Username |
Type the User name. It is enabled when either HTTP, Socks4 or Socks 5 is selected. |
Password |
Type the Password. It is enabled when either HTTP, or Socks 5 is selected. |
Port |
Type the port. |
Test connection |
Once you set the Proxy configuration, select the Test connection button to test it. When the connection is right, the message successful connection appears, otherwise a warning message appears. |
Last Updated 10/9/2023 4:36:54 PM