To illustrate how to grant and restrict access to the Work Portal's menus we will use the following example:
Assume that in a Vacation Request Process four roles have been defined: Analysis, Management, Director and Vacation Requester. The following permission are selected for these roles.
Grant Access Rights for Case creation
In the Vacation Request Process, only certain employees are able to request vacations. For this reason, the Vacation Requester Role was created. This role is assigned to each employee that applies.
Only employees holding the Vacation Requester Role are able to create cases of the Vacation Request Process.
In order to grant access rights for case creation, follow the next procedure:
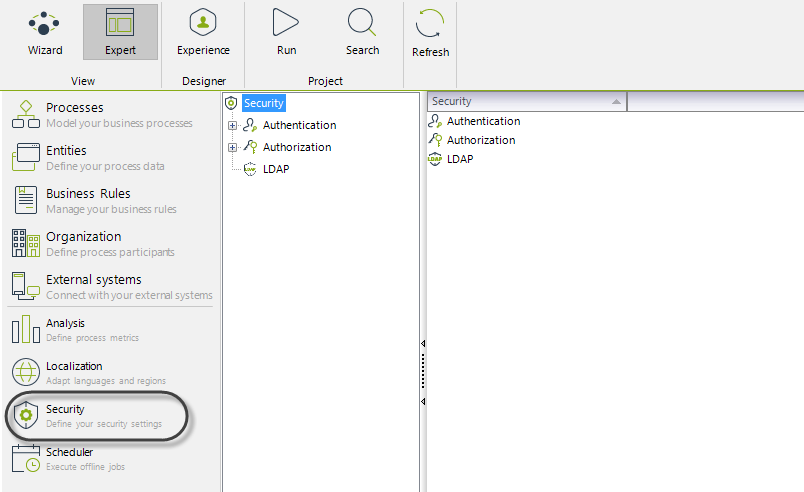
1. Go to the Security module in the Expert View.
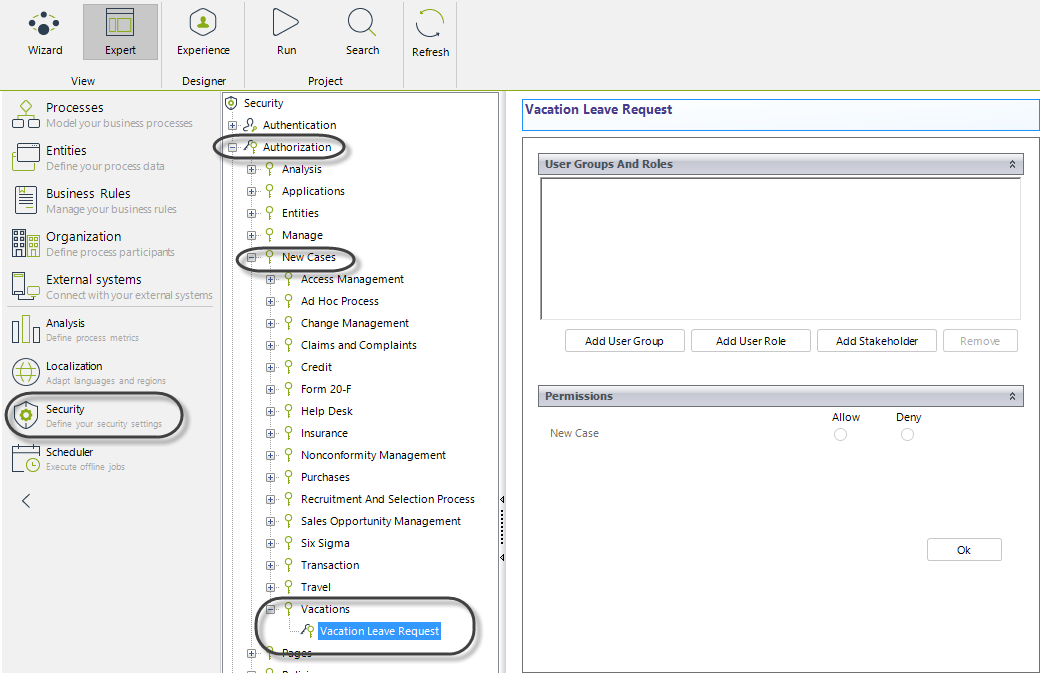
2. Expand the Authorization options. Then go to the New case option, select the application and Process where the access rights are to be granted. For this case the application is Vacation Request and the Process is Vacation Leave Request.
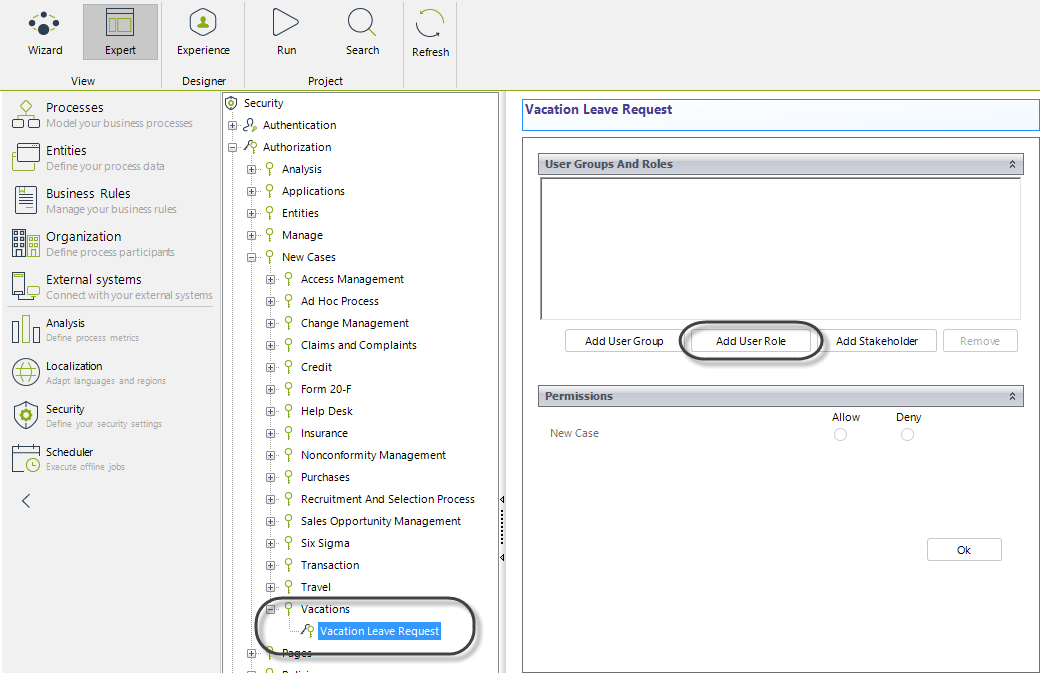
3. Note that new options are displayed in the right panel. Click Add User Role to define the authorized roles to create cases.
The same configuration applies if user groups are selected by clicking Add user Group.
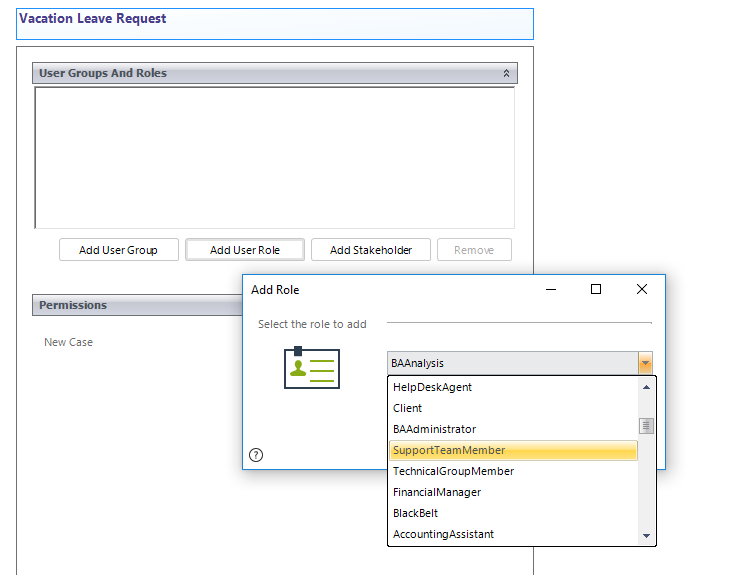
4. In the new window select the role to include from the drop-down list and click OK.
5. As the selected role should be allowed to create cases, click the role and select Allow in the New Case option. Click OK.
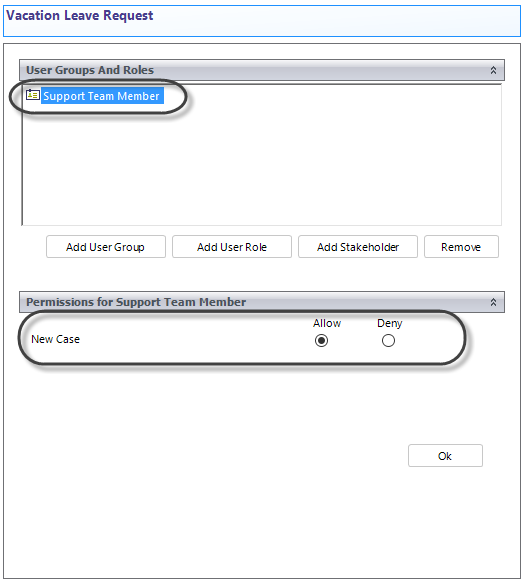
The Vacation Requester Role has been enabled to create Vacation Request cases. Anyone holding a different role will be denied.
Grant Access Rights to Entities
Assume that the Vacation Request Process has a Parameter entity called Rejection Reason where the possible reasons to reject a request are defined.
The following access rights to the Entity have to be defined according to the roles of the Organization.
•The Director Role is able to view and modify the Rejection Reason entity, that is, the role has Full Access Rights.
•The Management Role is able to view the Rejection Reason entity's data but is not able to edit it.
•The Analysis Role is not able to view the Rejection Reason entity's data at all.
In order to grant access rights for entities, follow the next procedure:
1. Go to the Security module in the Expert View.

2. Expand the Authorization options and go to the Entities option. Select the entity to which access rights are to be granted. For this case the entity is Applicant Status.
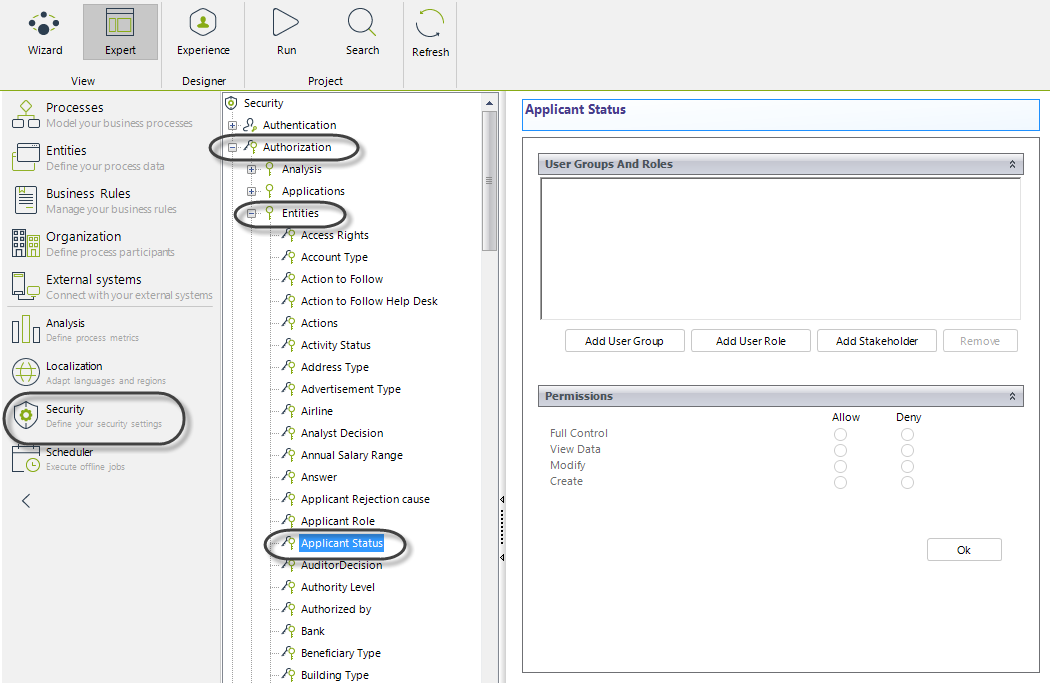
3. Note that new options are displayed in the right panel. Click Add User Role to define the roles.
The same configuration applies if user groups are selected by clicking on Add user Group..
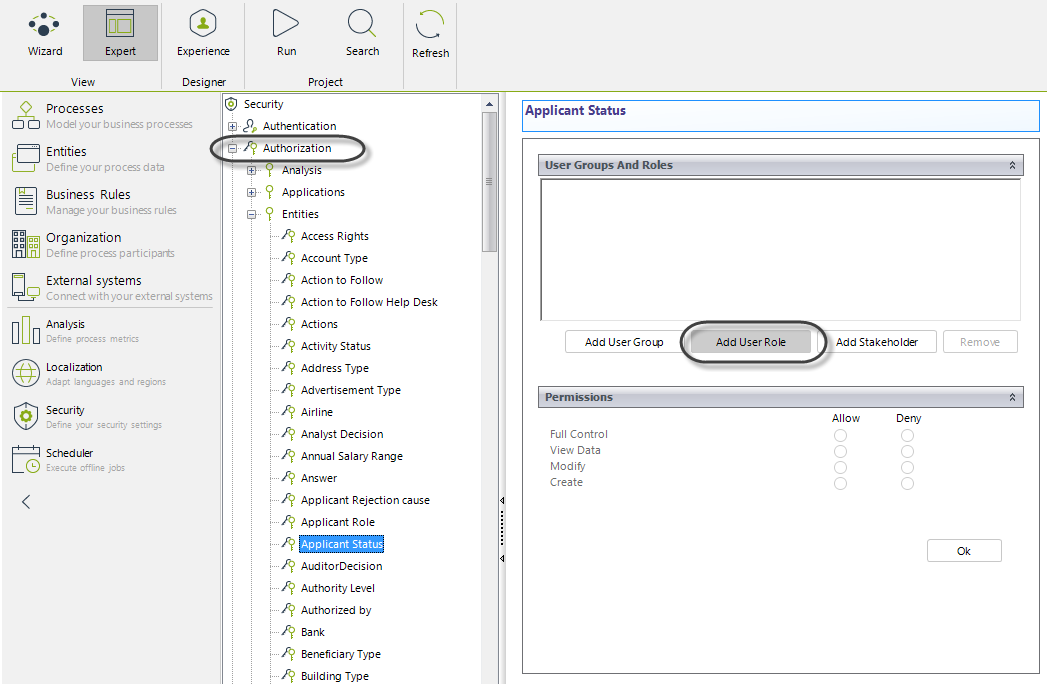
4. Include the roles to define the access rights to the entity. In this case include Office Manager, Financial Manager and Financial Assistant.
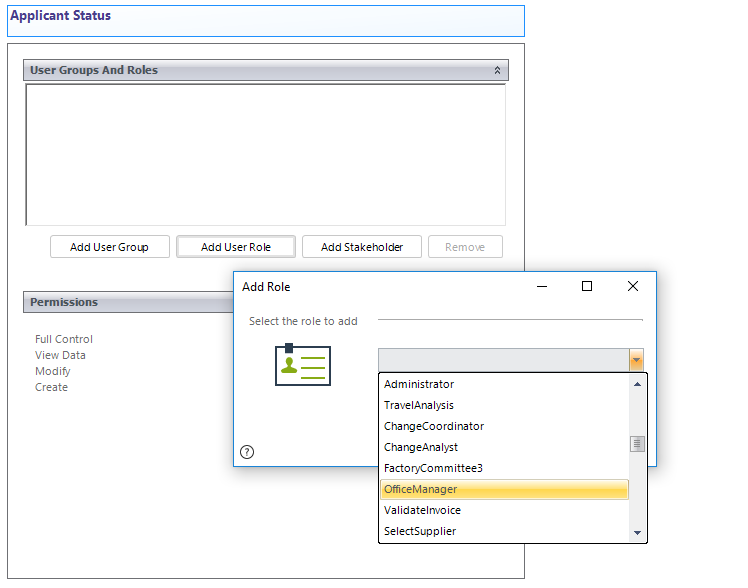
5. For each role or user group, allow or deny access rights accordingly:
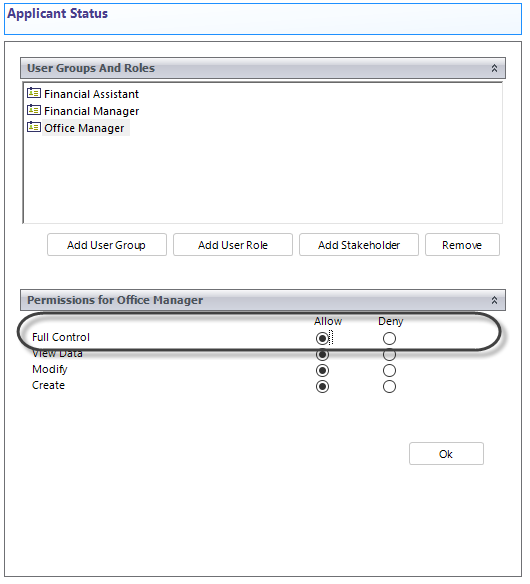
For the Office Manger Role check Allow for the Full control option. This will grant the Office Manger full control over the Applicant Status entity. Note that the View Data, Modify and Create options will be automatically marked.
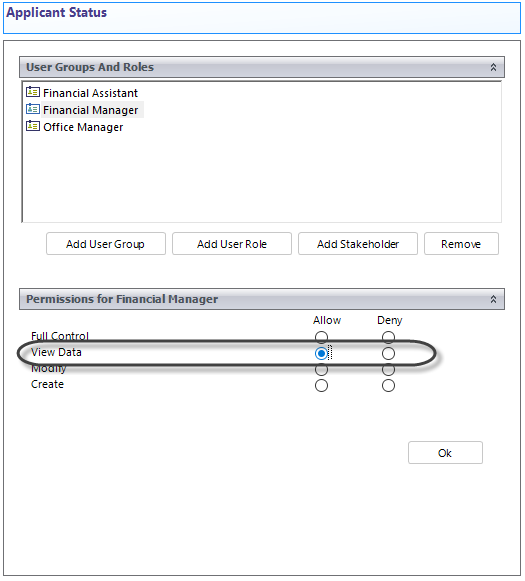
For the Financial Manager Role check Allow for the View Data option. This will allow managers to view the entity's records but will disallow them to modify or create new ones.
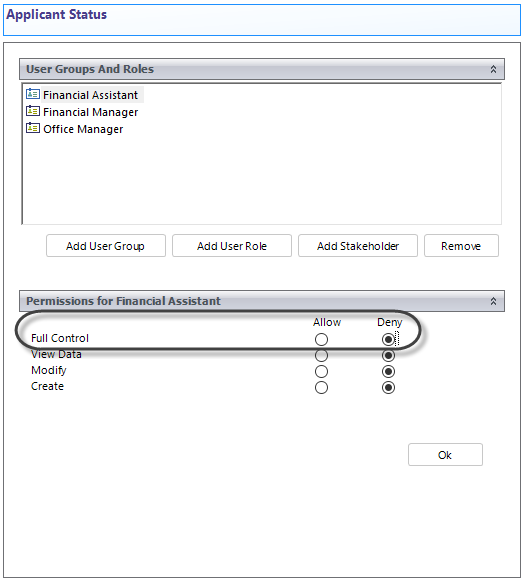
For the Financial Assistant Role check Deny for the Full control option. This will prohibit analysts to access the entity. Note that the View Data, Modify and Create options will be automatically marked.
When Finished click OK to save the changes.
Grant Access Rights to Queries
As queries are used to search cases that meet defined criteria and to perform analysis, only people in charge of the analysis of the processes performance should be able access to them. We created the Process Analysis group where we included the Analysis and Management Roles.
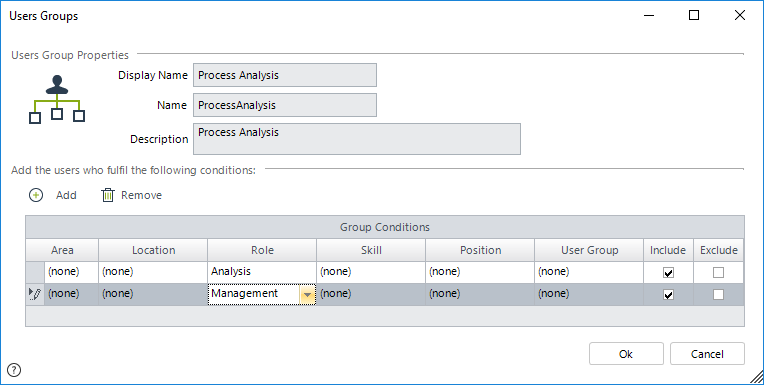
In order to grant access to queries for roles or user groups, follow the next procedure:
1. Go to the Security module in the Expert View.

2. Expand the Authorization options. Then go to the Queries option and select the query to which access rights are to be granted. For this case the query is Vacations Request Query.
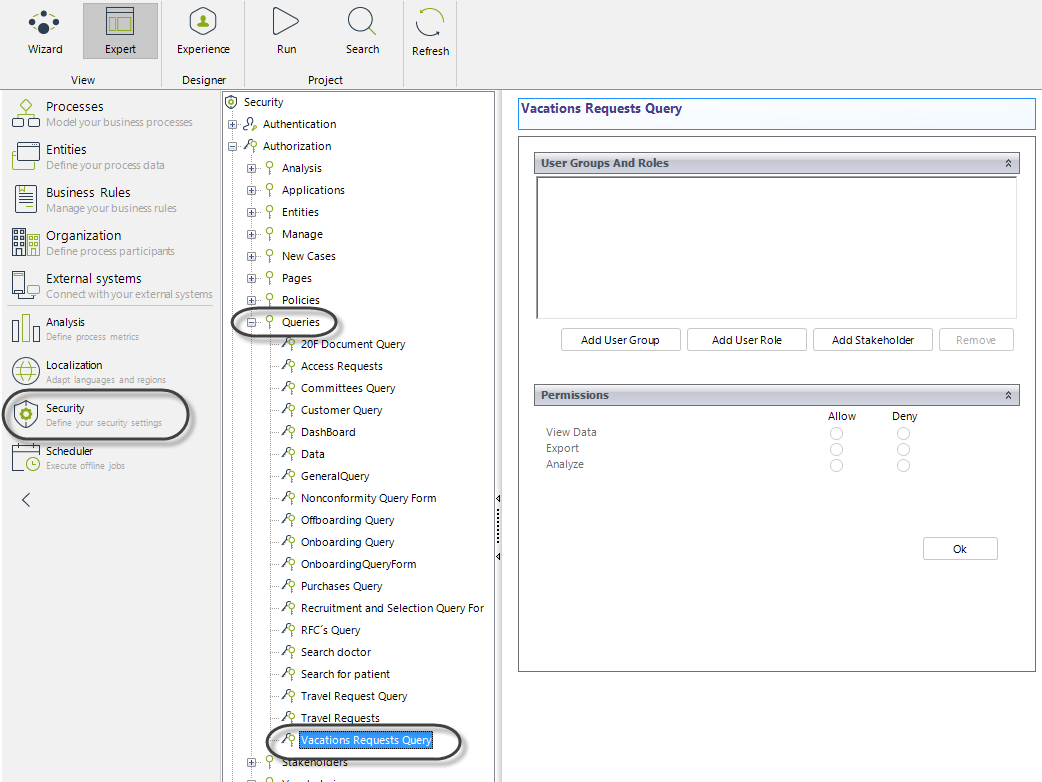
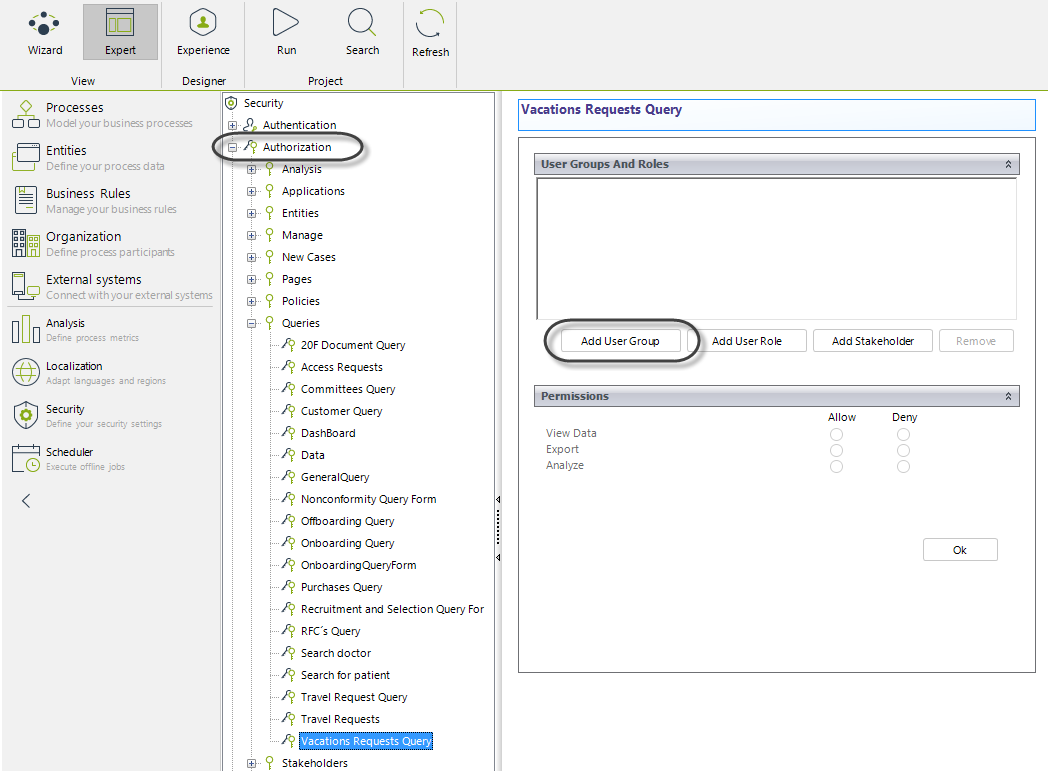
3. Note that new options are displayed in the right panel. Click Add User Groups to define the groups to administrate access rights.
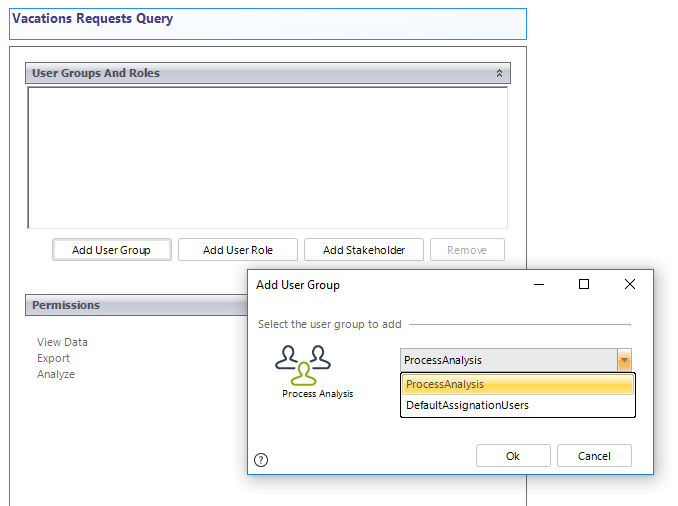
4. Include the user groups for which to grant or deny access to the query. In this case include the Process Analysis Group.
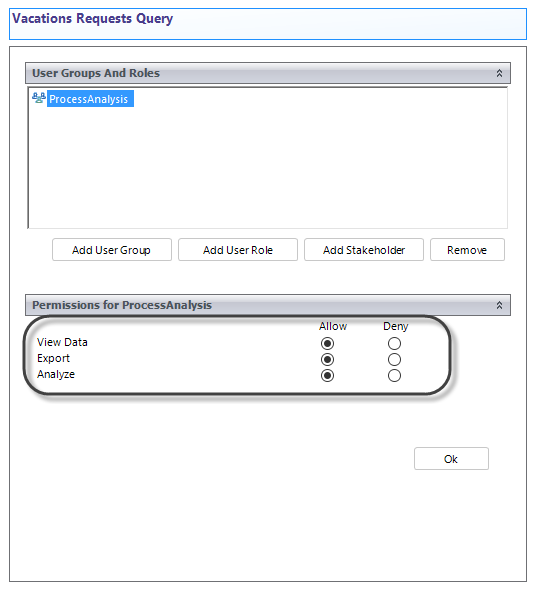
5. The group will be allowed to View Data, Export and Analyze the Query. Click on the group and select the Allow in every option. Finally click OK.
|
The procedure followed above to configure access rights is similar for all the elements in this Module. |
Grant Access Rights to Queries Permission Manager
To grant access to the saved queries transferal permissions management, you must grant the access to the user that performs that operation.
To grant access to queries Permission Manager for roles or user groups, follow the next procedure:
1. Go to the Security module in the Expert View.

2. Expand the Authorization options. Then go to the pages option and select Bizagi Queries, then select Permission Manager.
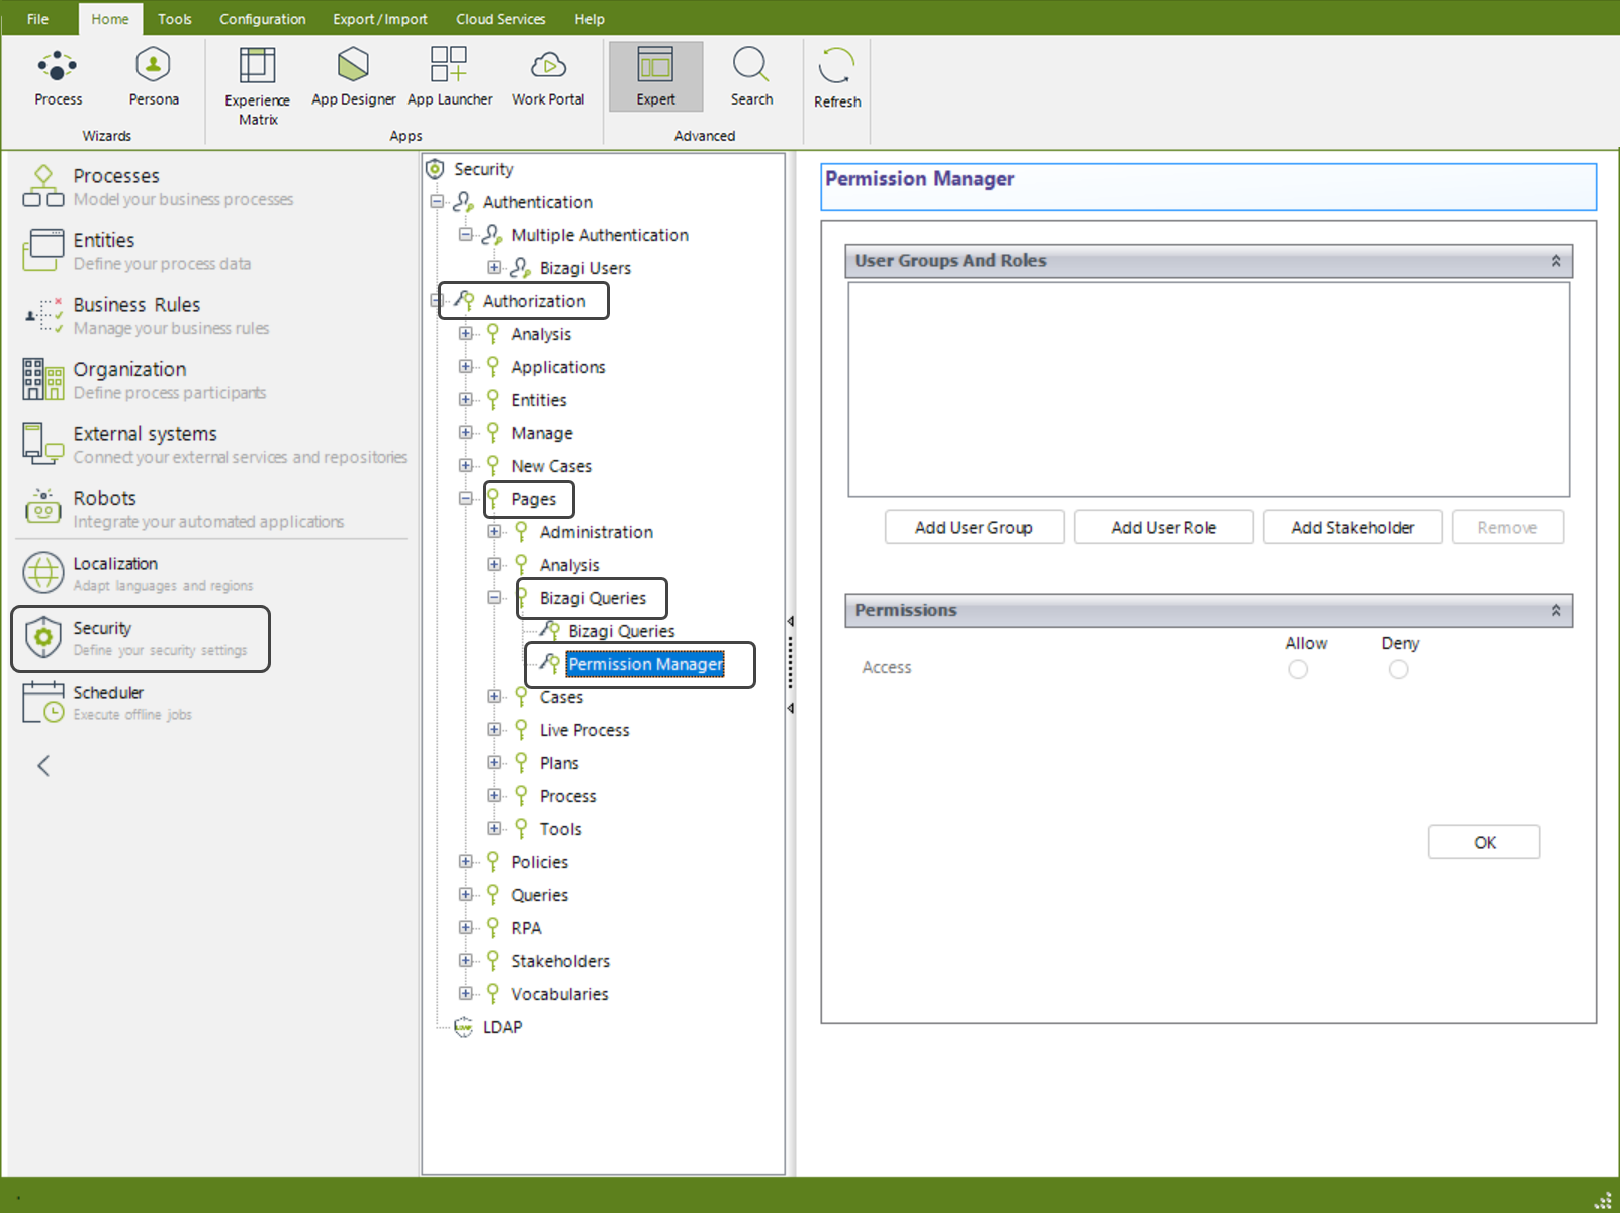
3. Note that new options are displayed in the right panel. Click Add User Groups to define the groups to administrate access rights.
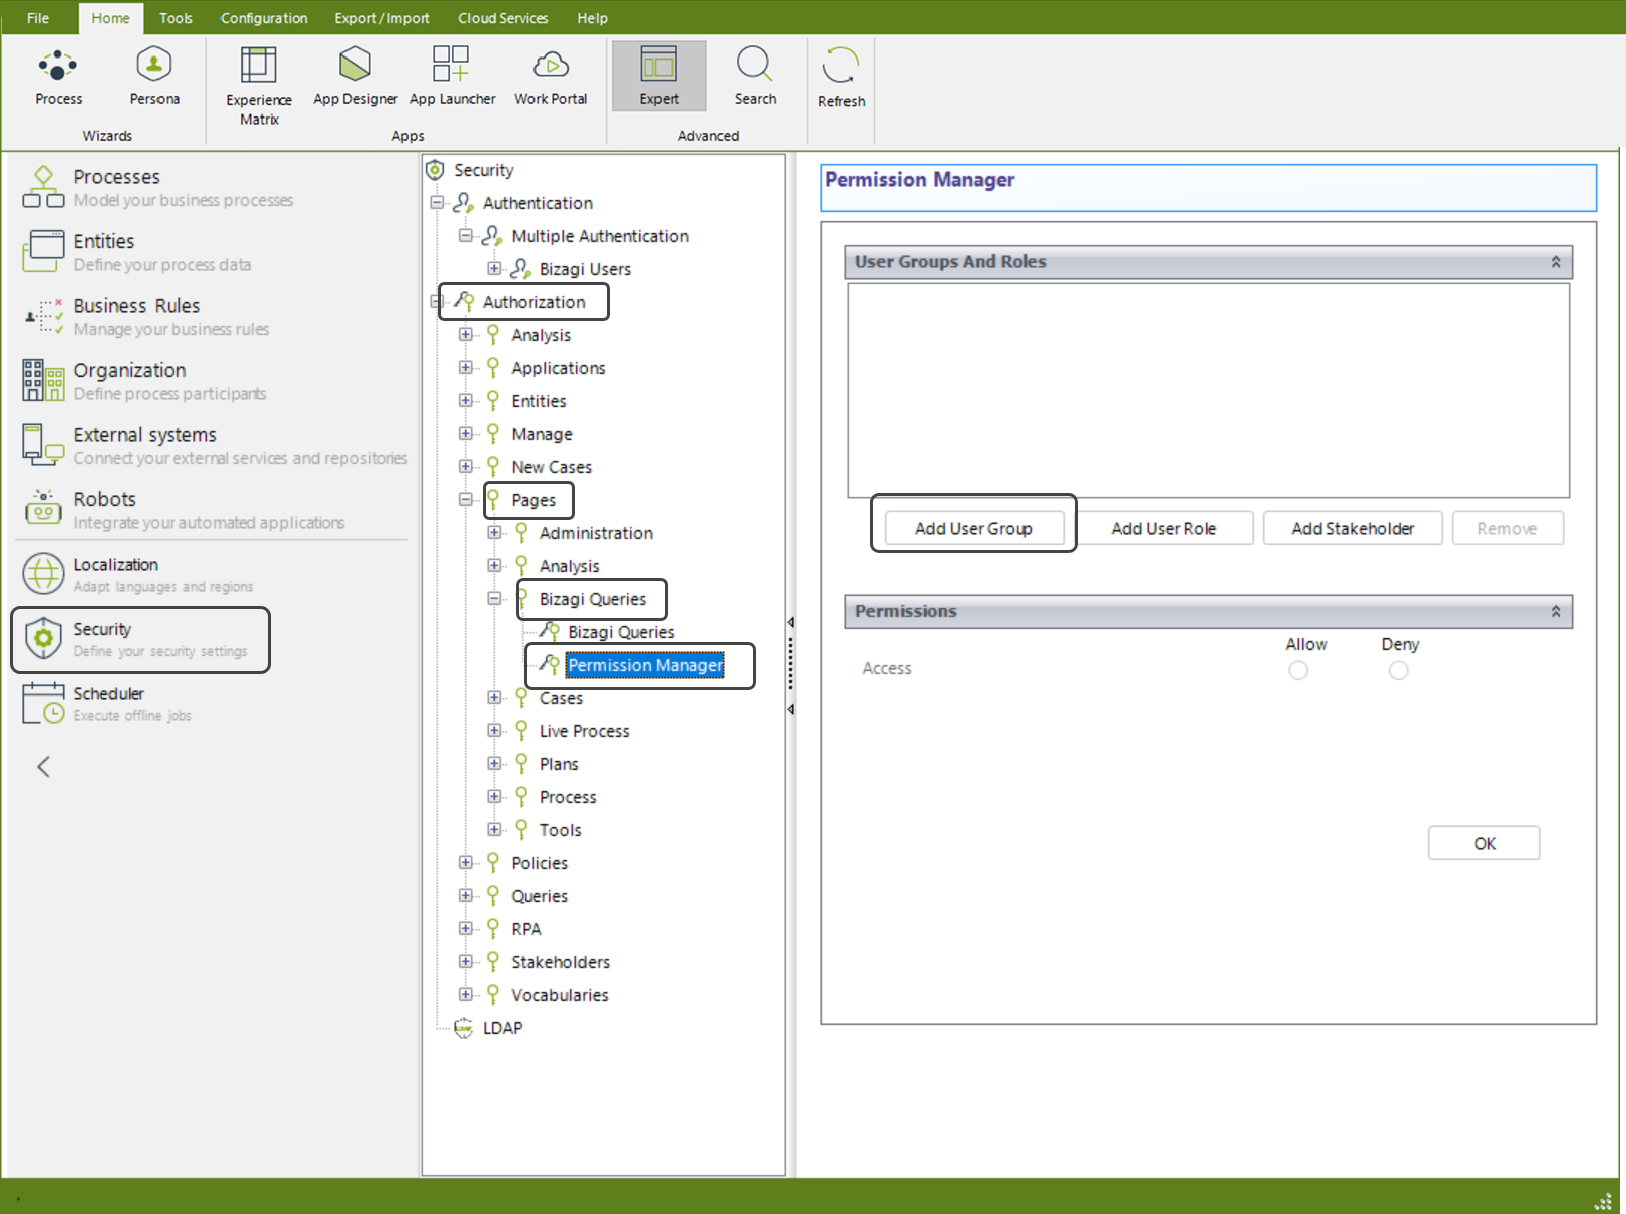
4. Include the user groups for which to grant or deny access to the query. In this case include the Process Analysis Group.

5. The group will be allowed to View Data, Export and Analyze the Query. Click on the group and select the Allow in every option. Finally click OK.

Last Updated 1/31/2023 3:15:47 PM