Apply filters that apply to an entire table
Setting a filter for an entire Table allows you to define a smaller set of values from the list of all possible values in the collection. Bizagi will display the records that meet the filter condition.
If a filter has been defined for the Table Control, the definition will appear in the Filter property description area; otherwise it will remain empty.
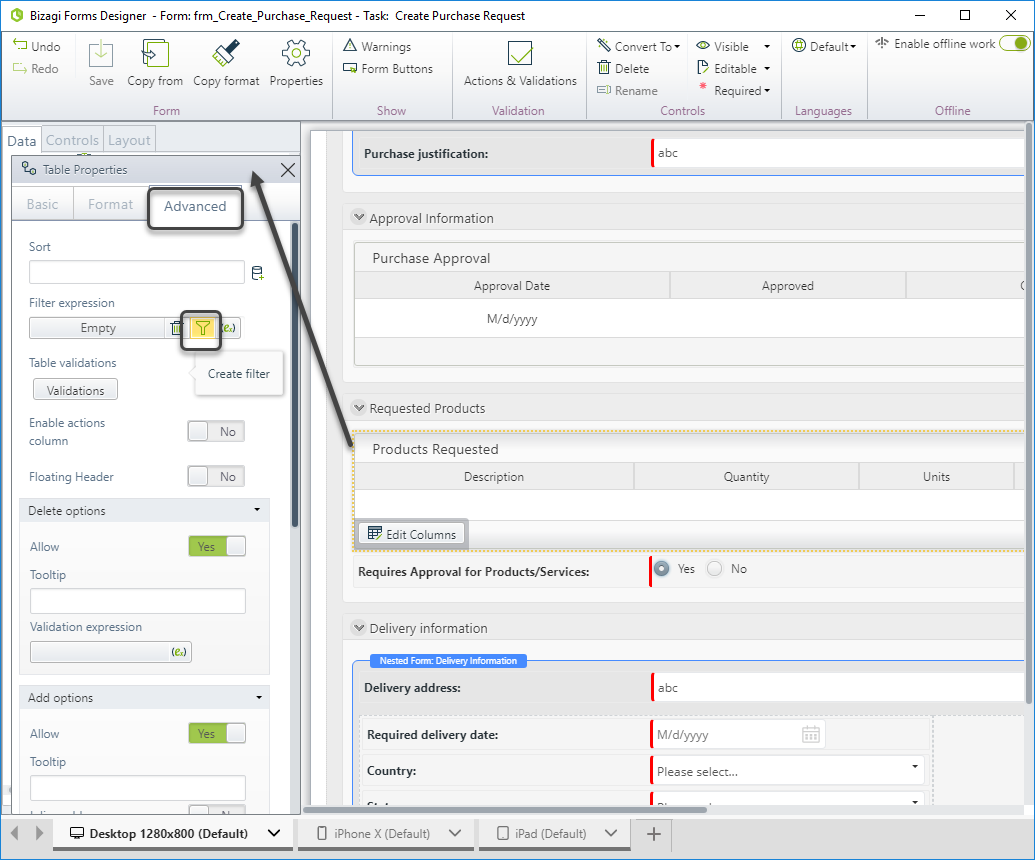
Creating filters
Click the Filter icon (![]() ) alongside the property to add a filter.
) alongside the property to add a filter.
In the new window, click the Add filter condition button to include a new condition.
Notice that you can enter multiple conditions. Be sure to join multiple conditions by selecting the logical AND or the logical OR depicted as radio buttons at the top of the window. You need to choose if the records to be displayed should meet ALL the conditions (logical AND) stipulated or one condition only (logical OR).
You can also define advanced filters by using complex expressions. For further information please refer to Advanced filters.
Example
In a Purchase Request Process the Supervisor of the requester must approve all products that are more than $500 in Unit price.
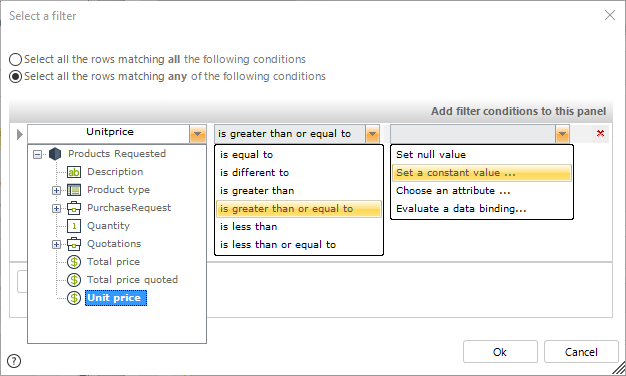
We need to display the Products Requested filtering only those entries with a unit price greater than $500, so the Supervisor only need to focus on the records that specifically pertain to him.
The following image depicts the data model of this example.
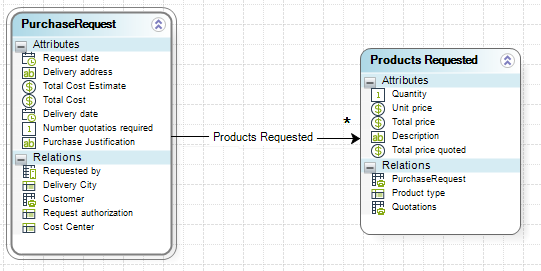
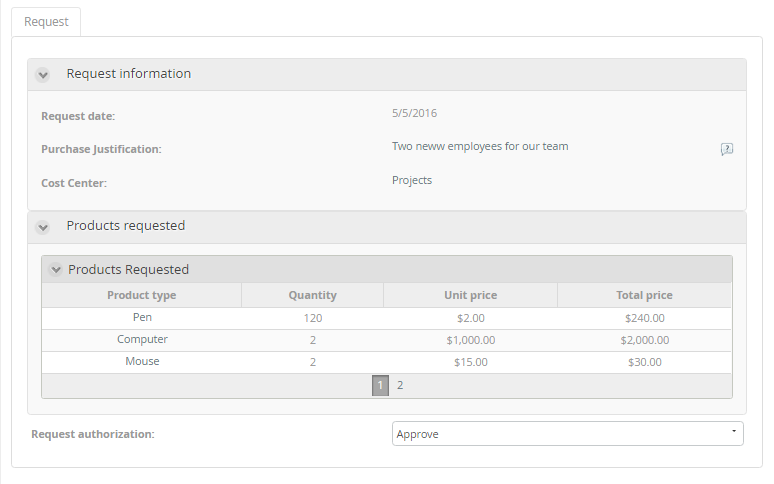
If there is no filter defined the Table will display all four products requested, regardless of the Unit price.
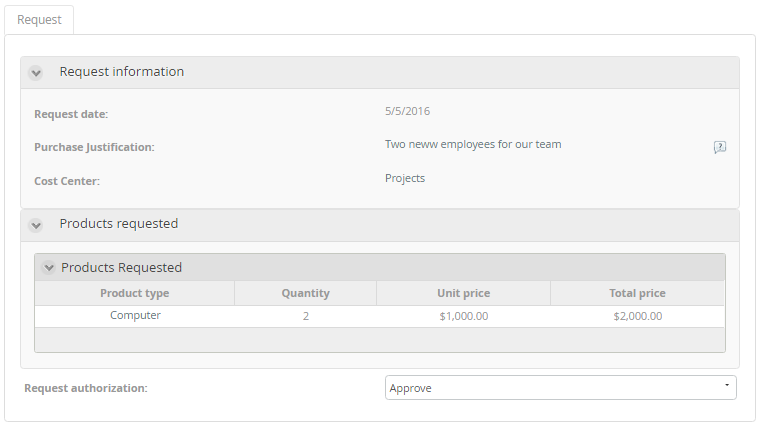
When we create the filter only one product will display, the entry with a Unit price of $1,000.
1. In the Work Portal confirm the Products Table initially displays all the records of the entity.
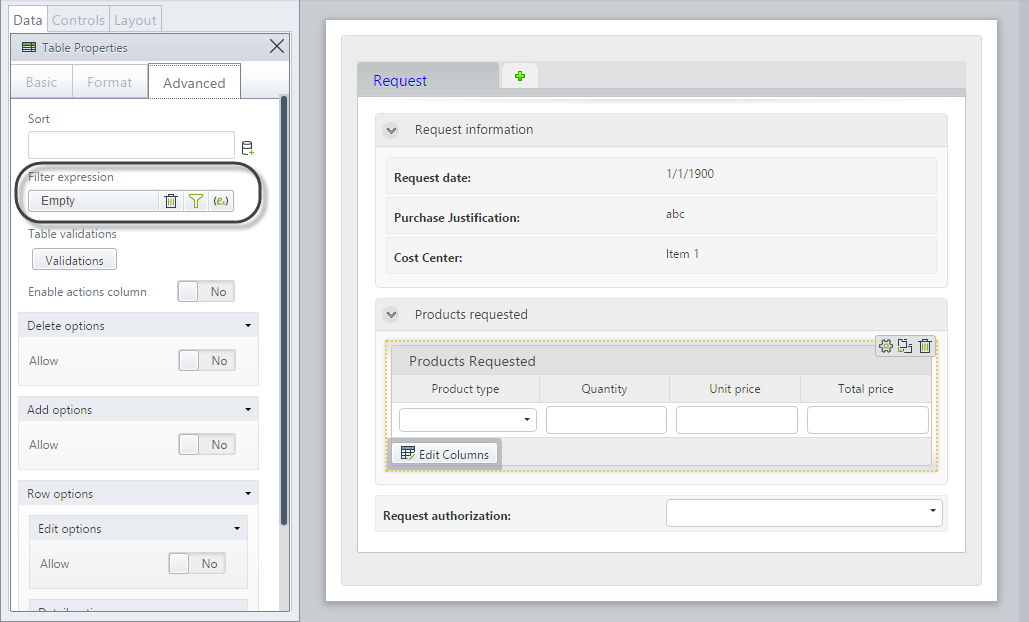
2. Go to the Forms designer, define a filter for the Table control and Save the form.
 .
.
3. The Work Portal now displays only the relevant product in the Table.
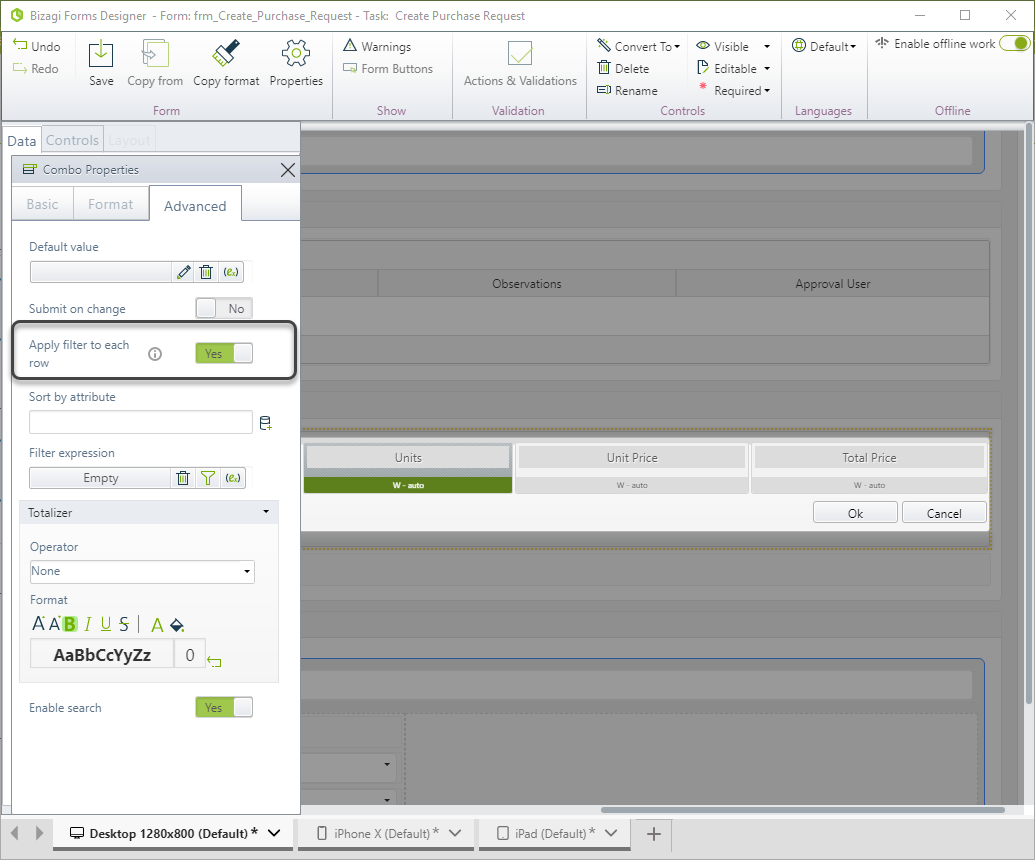
Filters can be added to be individually evaluated for each column in a Table. However, you have to decide whether the filter applies to the entire column across the Table or if it applies to each individually, considering each row's specific data.
That is, the column as a whole can be filtered (the same filter applies for all rows) or each row evaluates the filter independently (each row evaluates the filter according to its data).
To add a filter to the column(s) of a Table, click the Edit columns option on the Table control.
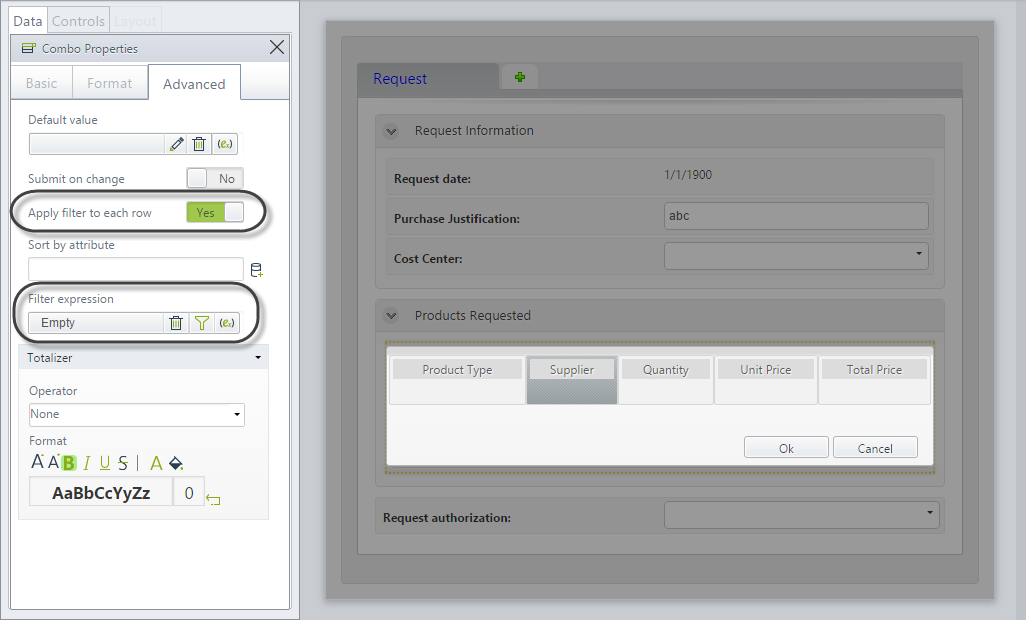
Enable (Yes) or disable (No) the Apply filter to each row property according to your requirements.
Example
In a Purchase Request Process the requester must select a supplier for each Product. But suppliers are set according to the product requested.
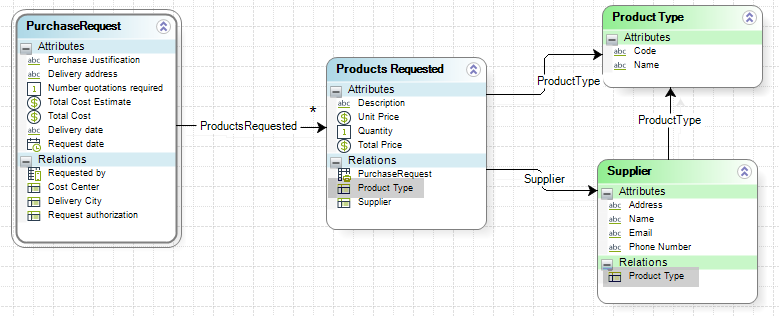
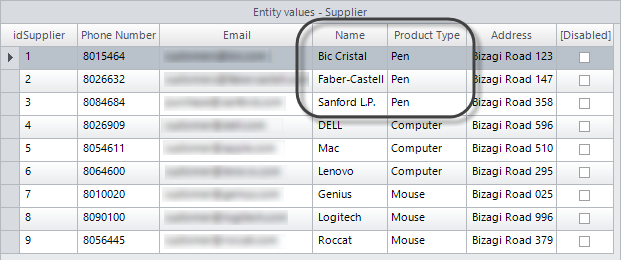
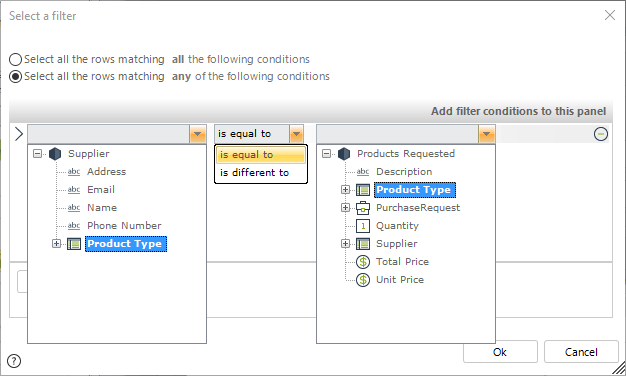
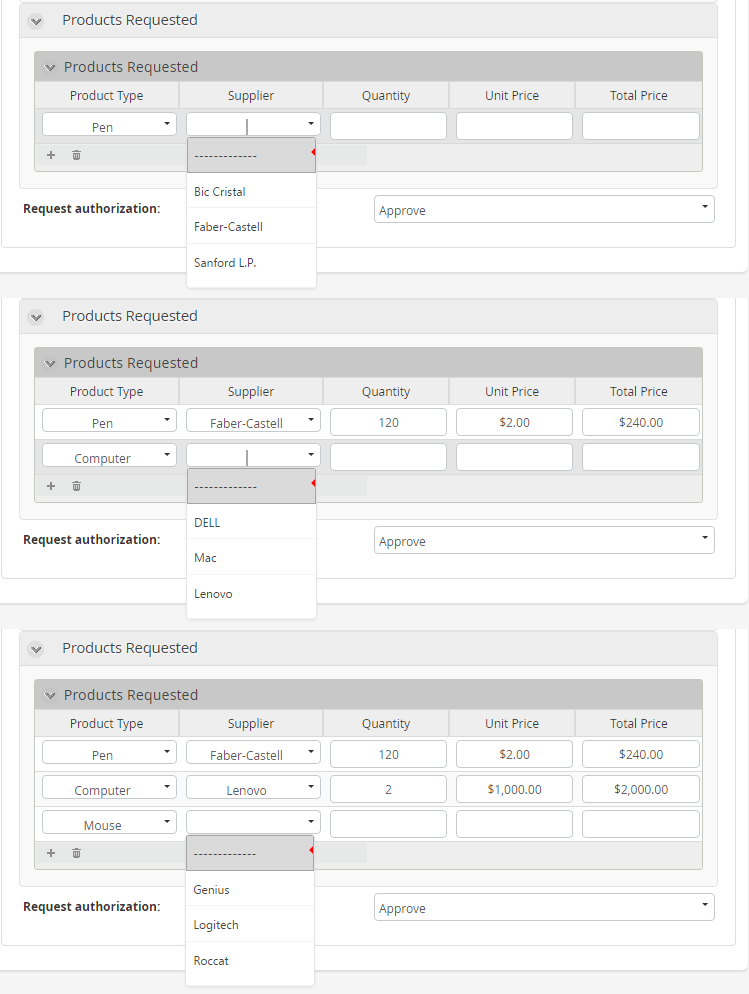
Thus, for each Products Requested in the table, the Suppliers must be filtered according to the Product type.
The following image depicts the data model of this example.
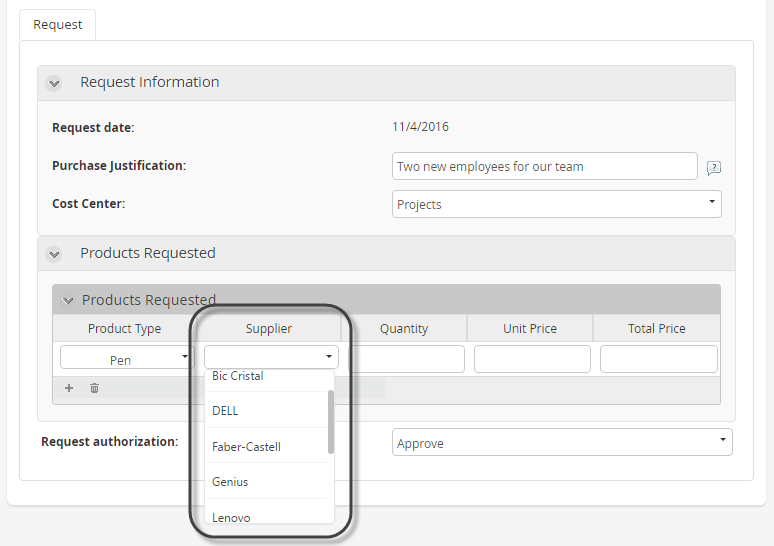
If there is no filter defined, the combo of the Supplier column will display all the suppliers, regardless of the Product Type.
When we create the filter only the corresponding suppliers will be displayed.
1. In the Work Portal the Supplier column initially displays all the records of the entity.
2. Go to the Forms designer and edit the columns of the table. Enable the Apply filter to each row property and define a filter for the desired column control.
Finally, Save the form.
 .
.
3. The Work Portal now displays only the relevant Suppliers in the column according to the selected Product Type.
Last Updated 1/6/2022 11:23:31 AM