Overview
After configuring your objects in Dropbox or SharePoint, the next step is configuring the File Storage Trigger in Bizagi Studio. This article explains how to establish the connection between Bizagi Studio and Dropbox or SharePoint through the OAuth 2 authentication protocol, and how to create a Trigger in Studio that defines the rules to activate and start a process.
Configure Dropbox or Sharepoint Connection
To create and configure a Dropbox or Sharepoint connection follow these steps:
|
Note that each environment must be configured individually. |
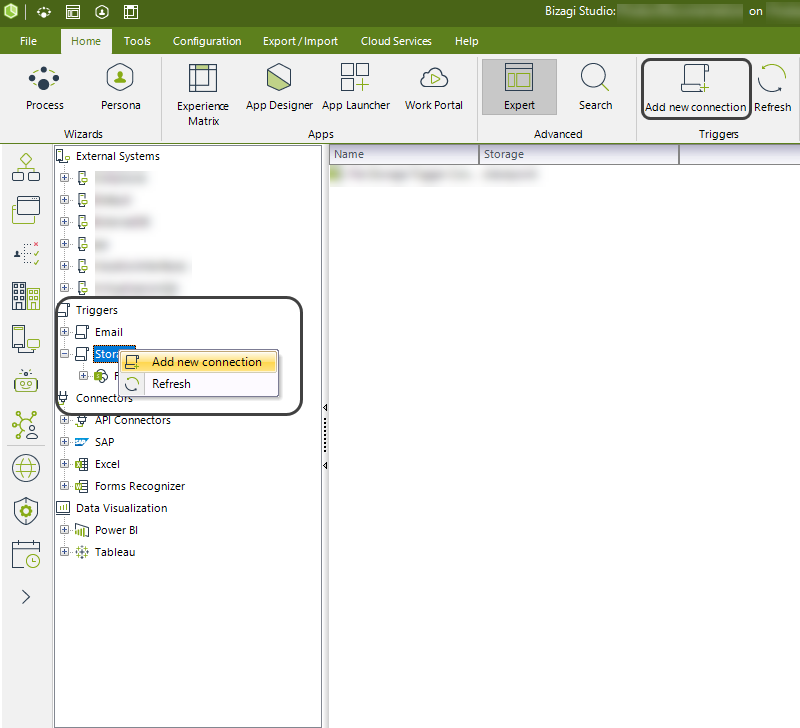
1.Enter the Expert view and open the External Systems module. Within this, open the Triggers option and right click the Storage option and select the Add new connection option. Another way to add a new connection is with the menu that is enabled at the top when the Storage option is selected.
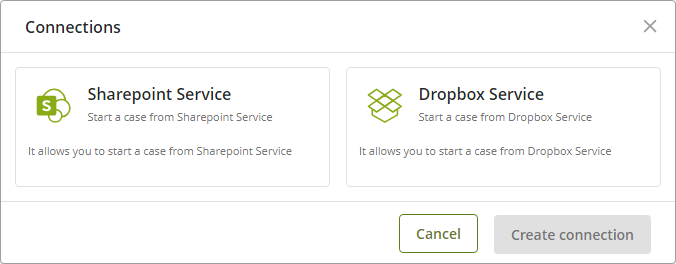
2.In the Triggers window select the desired storage provider system (Dropbox or Sharepoint).
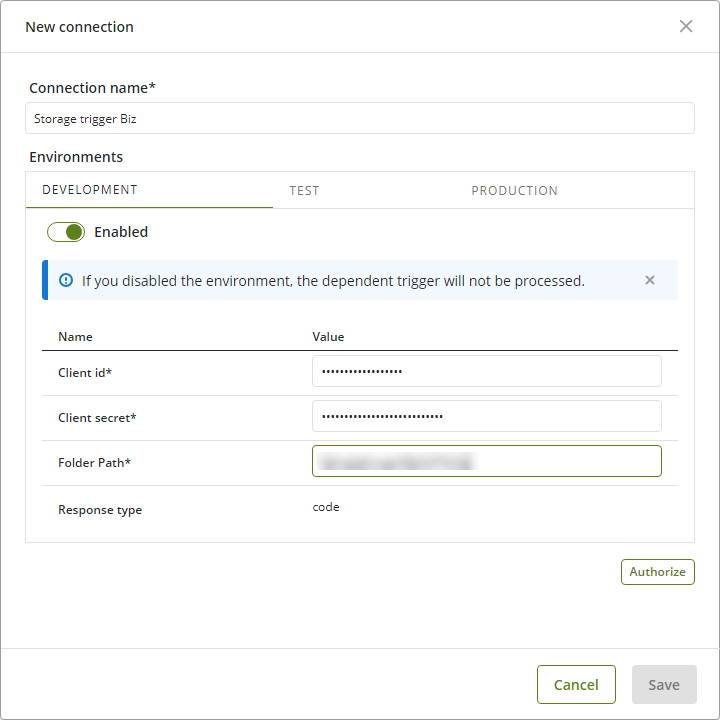
Dropbox Option
In the New Connection window, enter the same information you obtained in the Configure objects in Dropbox section if you select Dropbox.
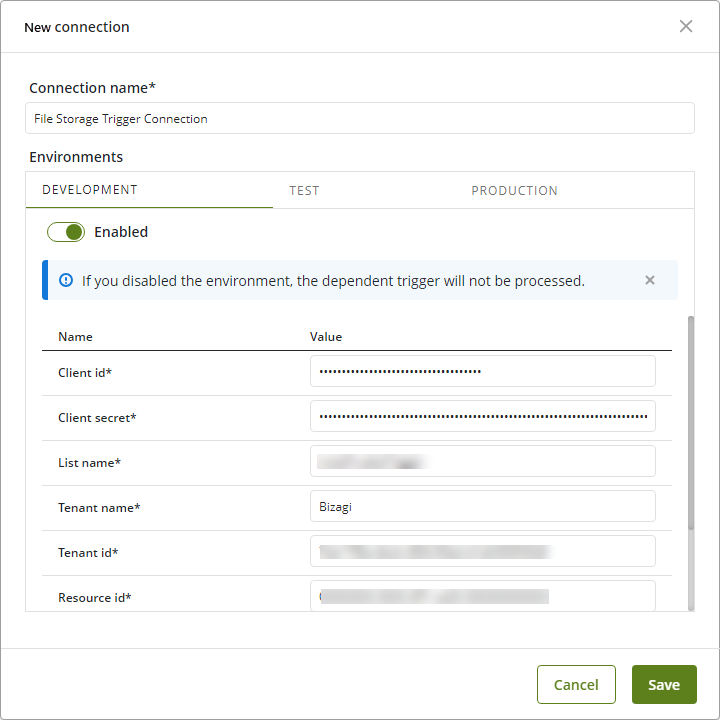
Sharepoint Option
If you selected the Sharepoint option enter the parameters obtained in the registry of your application. For more information, visit the Configure objects in Sharepoint documentation.
3.After entering the necessary parameters for authentication, click the Next button.
Configure Storage Trigger
With the connection set up, you can now create the Storage Trigger where you will define the rules to activate the trigger and then, the outputs of the information to your data model.
To create and configure the Trigger follow these steps:
1.Select the connection you created earlier in the External Systems module in the Expert view and click the Add Storage option.
2.In the Configure Trigger step you must add a Name, select the environments where you want the trigger to be active (Development, Test or Production) and finally the Activation Conditions for the trigger.
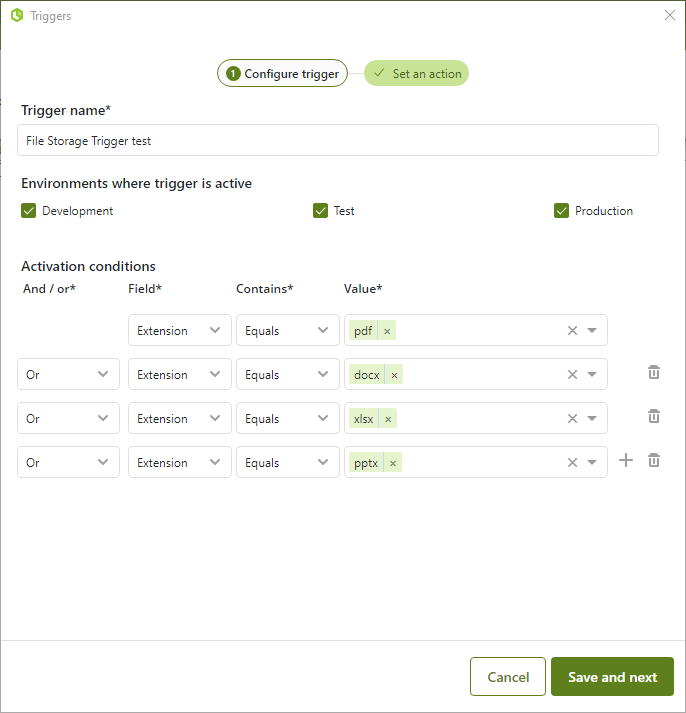
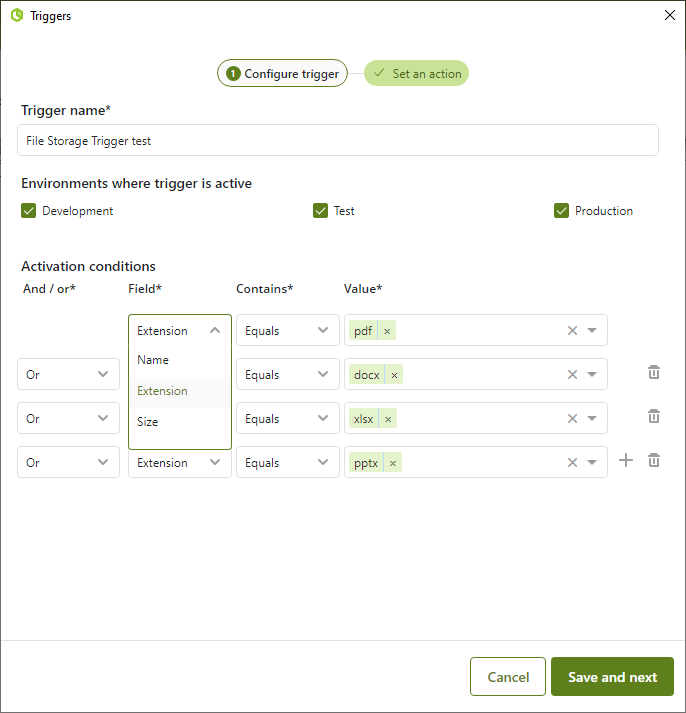
3.The Activation Conditions can be set by Name, Extension or the Size of the file in your Sharepoint. Once you have defined these conditions, click the Save and Next button.
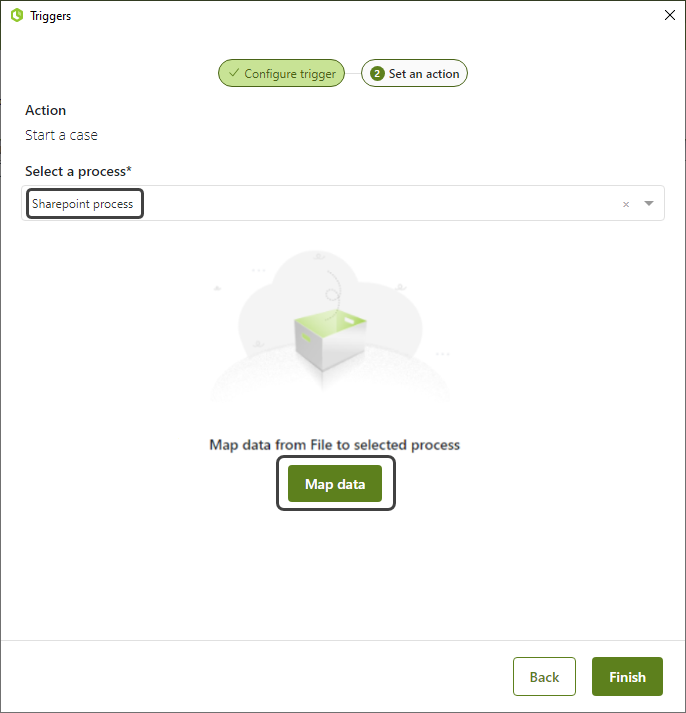
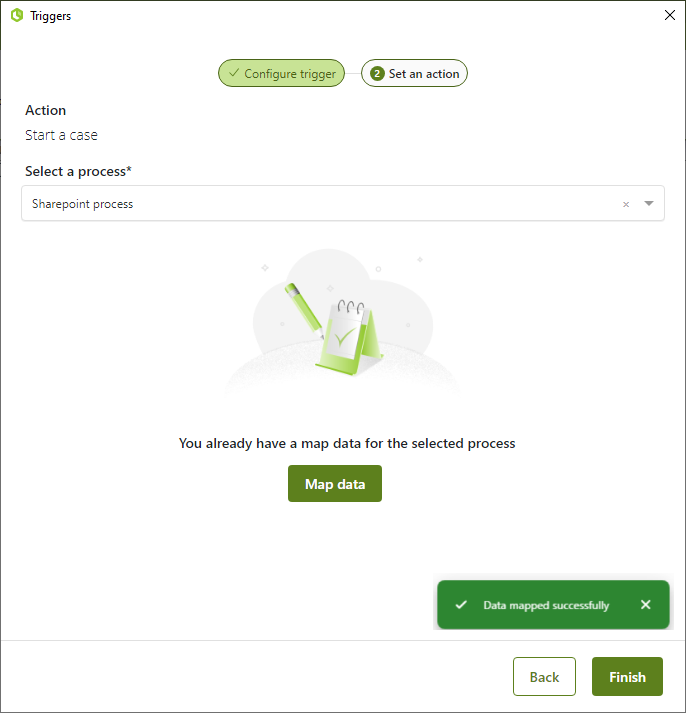
4.In the Set an action step, you must select the process on which the Trigger will be implemented and then map the output data path of your business model. To do this, click the Map data button.
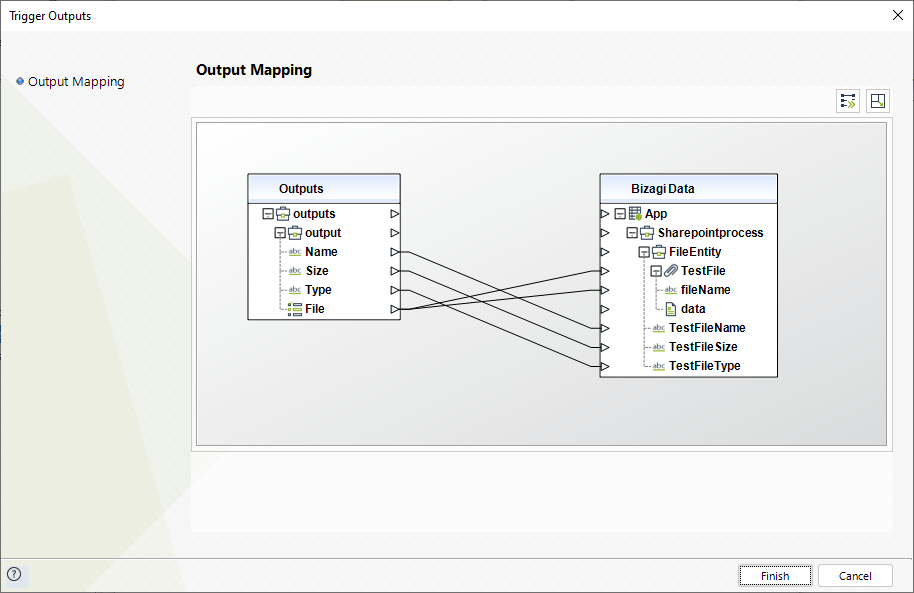
5.In the Trigger Outputs window you must connect the Trigger output data to the existing data model. To save the changes, click Finish.
6.If the data mapping is successful, a message will appear indicating this. To finish the configuration click on the Finish button.
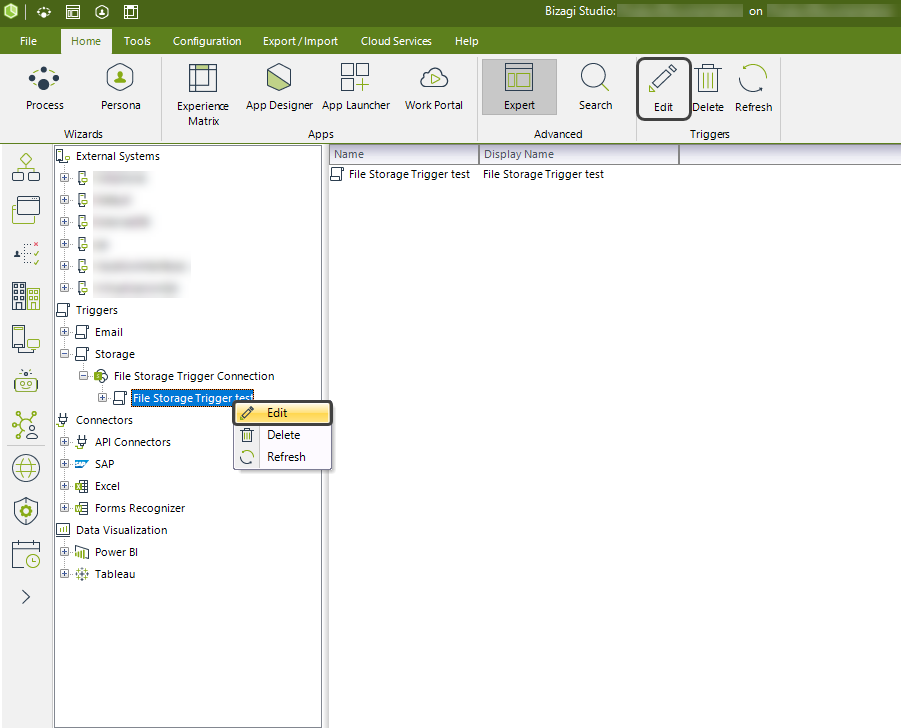
7.To edit the Trigger settings, click the Edit option.
|
You can activate Trigger logs in the Management Console (MC), you must go to the tracing configuration in the MC. For more information, refer to the File Storage Trigger in the Management Console documentation. |
Last Updated 12/10/2024 12:27:20 PM