Overview
This section explains details about the execution of Triggers, and gives you some modeling recommendations. Also, we describe how you can identify issues with Triggers executions.
Execution
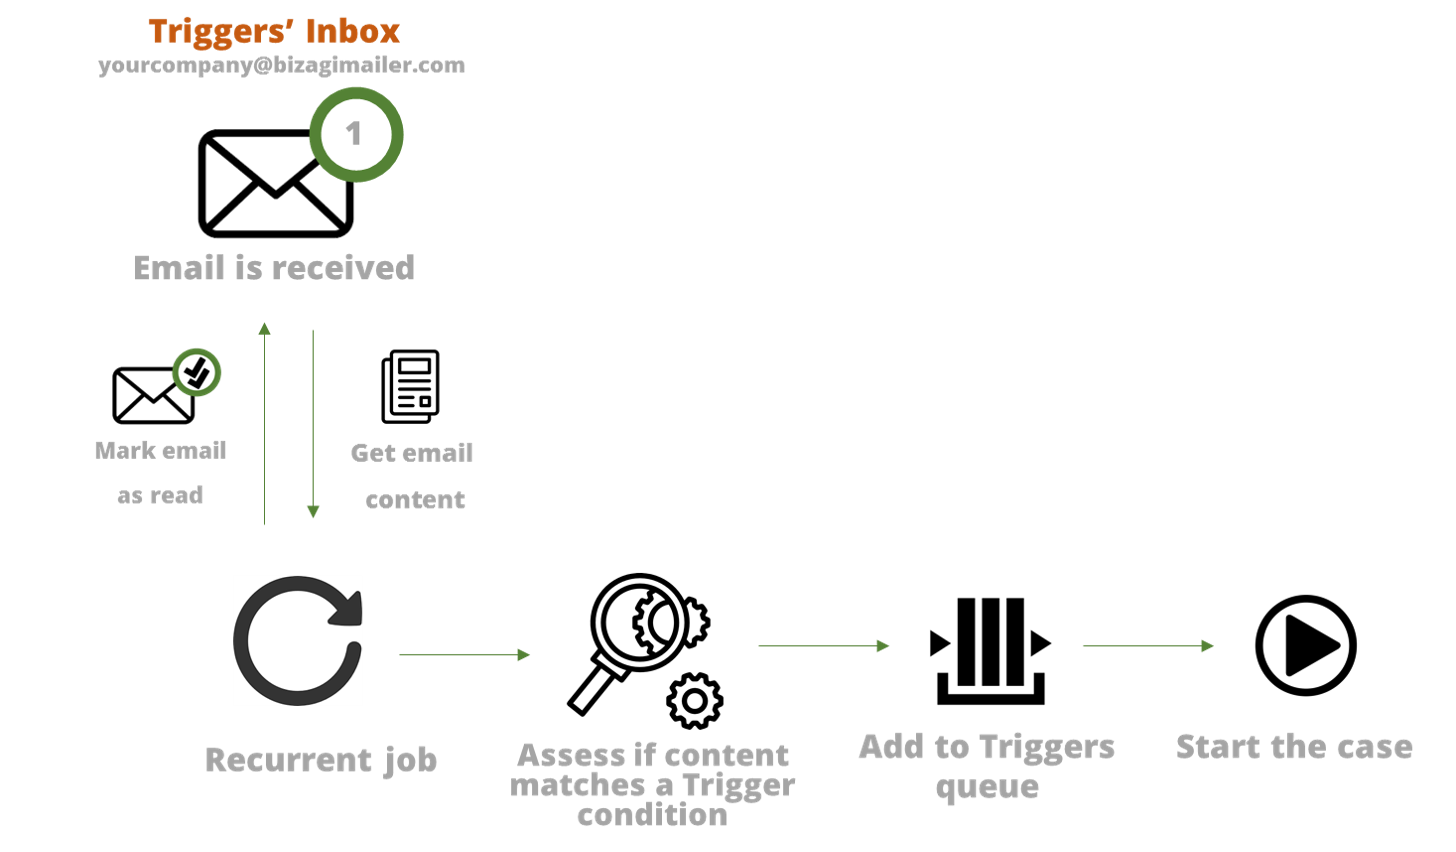
All emails considered for Triggers and Actions must be sent to the email inbox provided by Bizagi. Once the email is received, there is a recurrent job that constantly looks for new and unread emails.
The recurrent job analyzes the content of the email and assesses if it matches the conditions of configured Triggers. If it does it leaves in a queue bus the action to be executed. For example, to start the case of the Claims and Complaints process.
Finally, the case is started when the queue is executed.

|
|---|
Once an email is marked as read, it is NOT going to be considered for further Triggers. |
Activate two or more processes from the same email
If the content of an email matches the conditions of TWO or MORE triggers, only one Trigger is executed. Bizagi will execute the trigger of the most recently created or modified process.
If you need to start cases of more than one process from the same email, we recommend modeling a process that works as a dispatcher. Let us see the following example.
You need to activate two processes:
•Credit card request
•Vehicle loan request
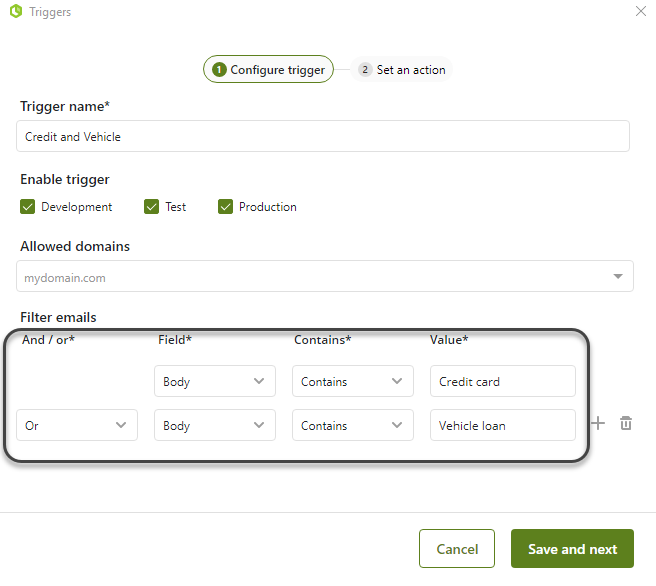
We recommend that you create a Trigger with the conditions that activate any of these processes.

If you receive an email that matches both conditions, we recommend creating a dispatcher process, that internally creates the cases of the Credit card and Vehicle loan.

For further information about how to create cases from a process, refer to Create a new case.
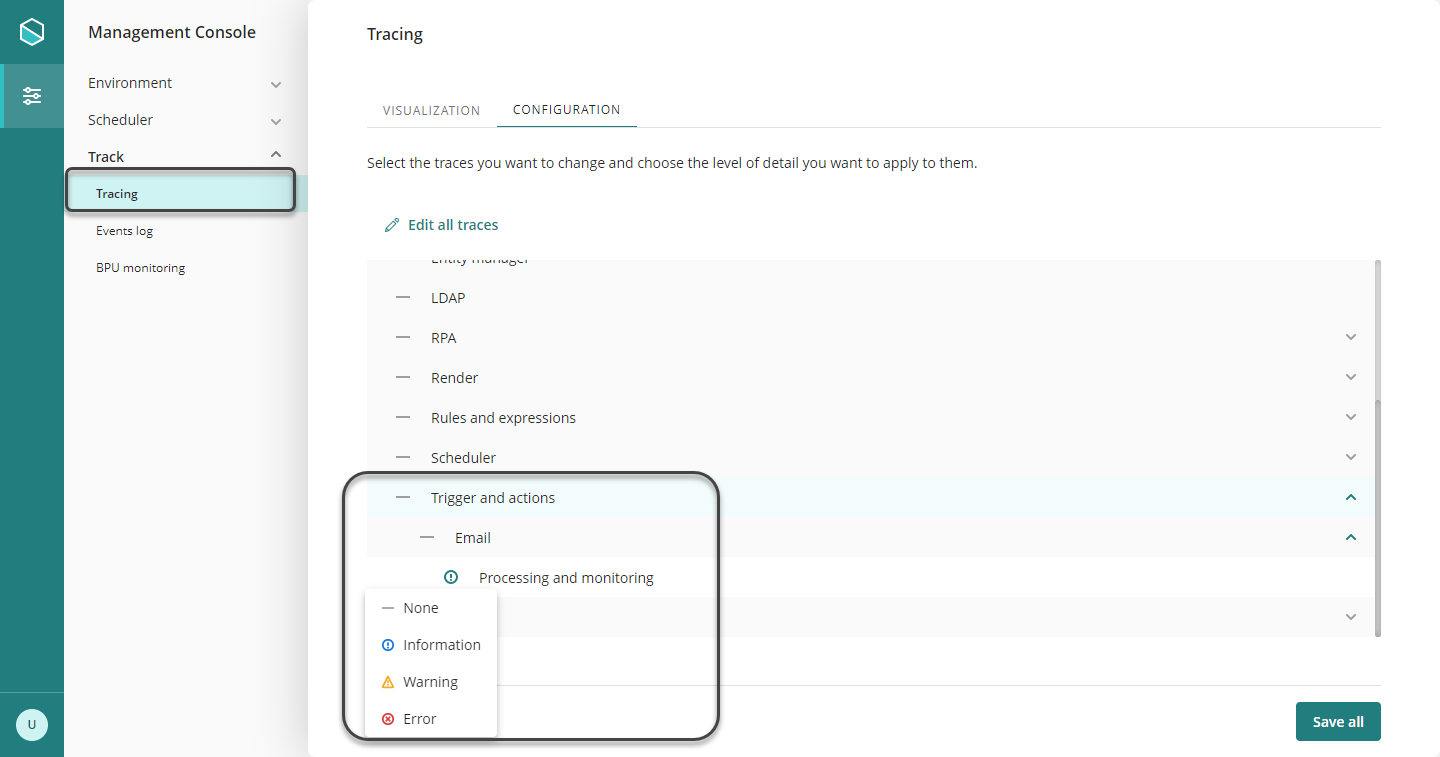
To review the correct execution of Triggers or assess possible issues, Bizagi includes Trigger's tracing. You can active it accessing the Management Console of the environment you want to review.
Select the Track section, click Tracing, and open the Trigger and actions node. Right-click the Processing and monitoring trace, and select the option you want to log (information, warnings, or errors).

|
|---|
Only activate tracing options when needed. Otherwise, leave this option off. |
When facing problems, we suggest the following steps:
1. Check the email address you are sending email messages to. A misspelling in the mailbox name will return a “mail not found” error on your email client. Please check the naming rules for your specific scenario. When in doubt, contact Bizagi support to get current mailbox name.
2. Check trigger conditions used when you set up the trigger. Sometimes the condition is too restrictive, so the trigger is not activated. Try loosening or removing the condition.
3. Check OAuth permissions: In the OAuth applications administration feature in Bizagi Work Portal, check in the OAuth endpoint, used by Triggers & Actions. Check if the set up has access to the process you selected in the trigger action. Even if the OAuth application was setup automatically, there may be the case the user was changed to one with lesser permissions.
When OAuth has not been configured, check the Management Console’s traces, to verify.
4. Check OAuth configuration: As explained above, you can review specific details of the OAuth endpoint used by Triggers & Actions in the OAuth applications administration feature in Bizagi Work Portal. You can double check details like client id and secret, URLs, to make sure they match the details placed in the Trigger and Actions configuration feature in Bizagi Studio.
5. Review traces: If nothing of the above works, review Trace files as explained above. You will find detailed information about details like how emails are processed, which trigger conditions are met, what happens when calling the OData endpoint of Bizagi Automation Services, and more.
Last Updated 10/31/2025 4:47:19 PM