Overview
In this article, we will guide you through the necessary steps to obtain the essential parameters required in the email server configuration using OAuth authentication.
|
For this type of configuration, you will need to obtain the settings from Office 365 or Entra ID. |
For this type of configuration follow these steps:
1.Register the application with the Microsoft Identity Platform.
2.Add permissions to the application.
4.Identify the application data.
6.Register main services in Exchange.
1. Register the application with the Microsoft Identity Platform
The Microsoft Identity Platform performs identity and access management (IAM) only for applications that are registered. Whether it is a client application such as a web or mobile application, a web API that supports a client application, registering it establishes a trust relationship between your application and the identity provider (Microsoft Identity Platform).
To register the application in the Azure Portal, you must meet the following requirements:
•Your Azure account must have permission to manage applications in Azure Active Directory (Entra ID). The following Entra ID roles have the required permissions: Application Administrator, Application Developer, Cloud Application Administrator.
To register the application, you must:
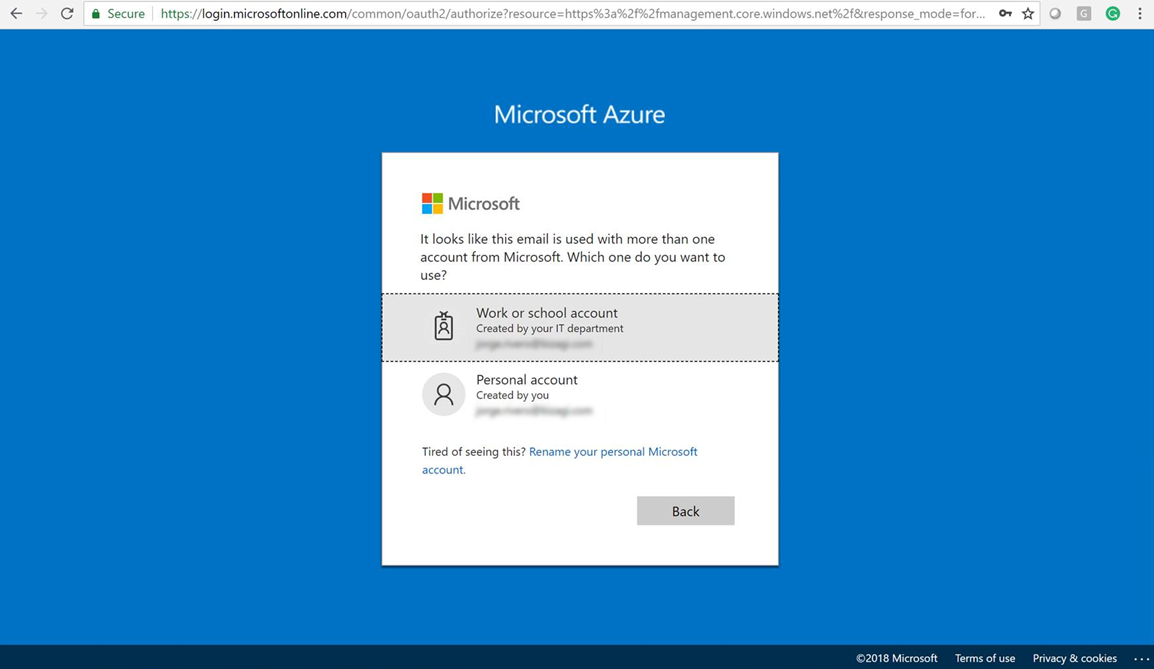
a. Log in in the Azure Portal: https://portal.azure.com
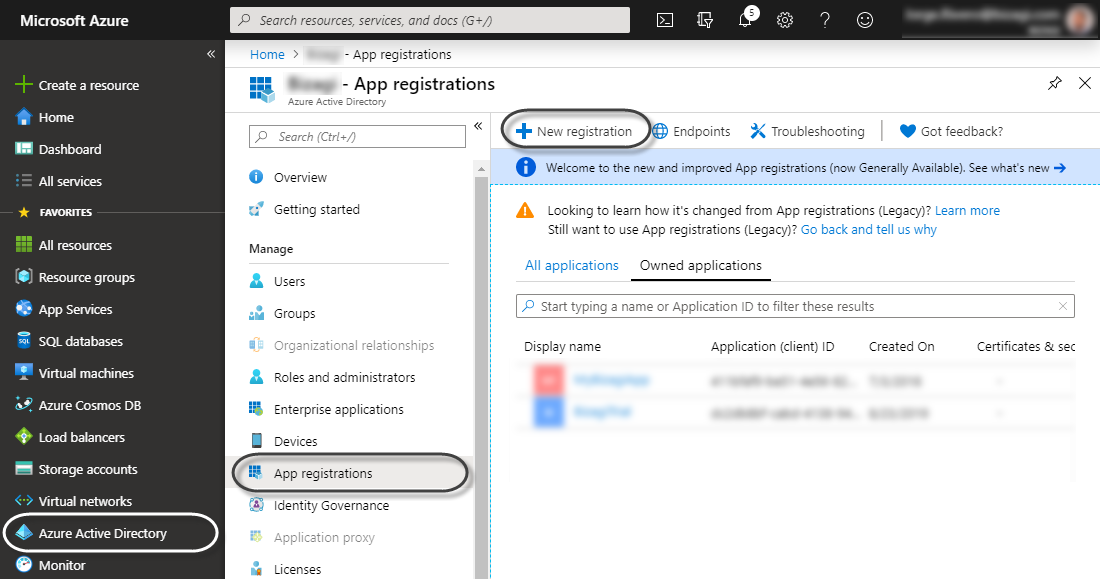
b. Select the Azure Active Directory option in the left pane and click the Application Records and then add a new application to it (by clicking New Application Record).
c. Enter the name of the application to register and select Web App / API for this type.
For your login URL, you must enter the base URL where your end users access the Bizagi Work Portal.
Consider:
For Automation Services (cloud projects), this URL is specified as:
[https://[project_environment]-[your_project]-[your_company].bizagi.com/oauth2/client/callback.
Replace [your_company] and [your_project] with the values of your subscription.
Similarly, replace [project_environment] with test for a test environment, or with nothing for a Production environment.
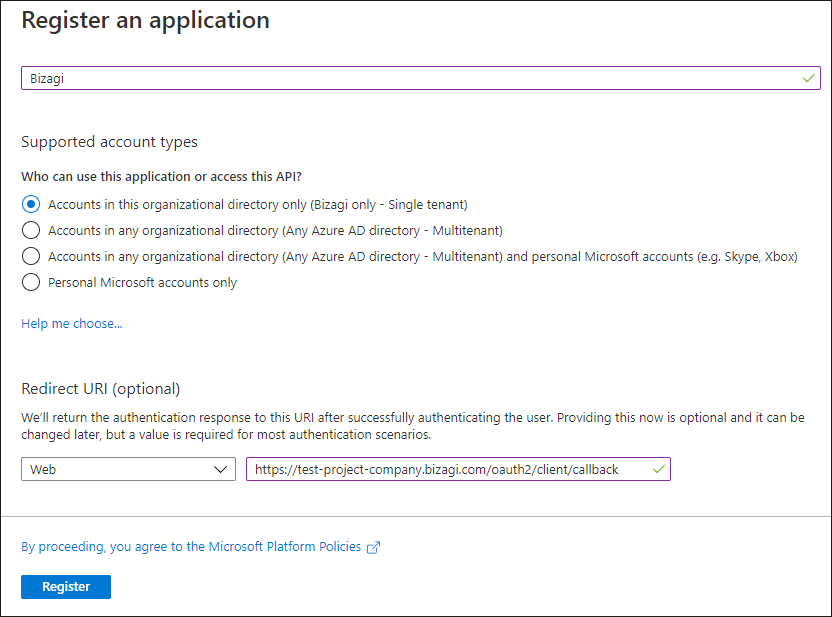
To finalize the registration of the application, click the Register button.
2. Add permissions to the application
In this step you can add POP, IMAP or SMTP permissions to the Entra ID application:
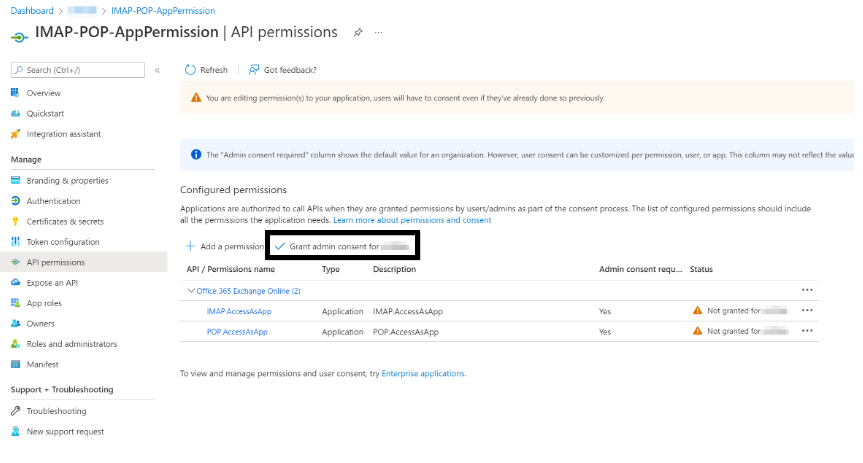
a. On the Application Logs page, select the application you have created to open its Overview page. Under Manage, select API Permissions and under Configured Permissions, select Add a permission.
b. Select the API tab that your organization uses and search for Office 365 Exchange Online.
c. Click the API permission option.
d. For POP access, choose pop with the AccessAsApp permission. For IMAP access, choose imap with the AccessAsApp permission. For SMTP access, choose SMTP with the SendAsApp permission.
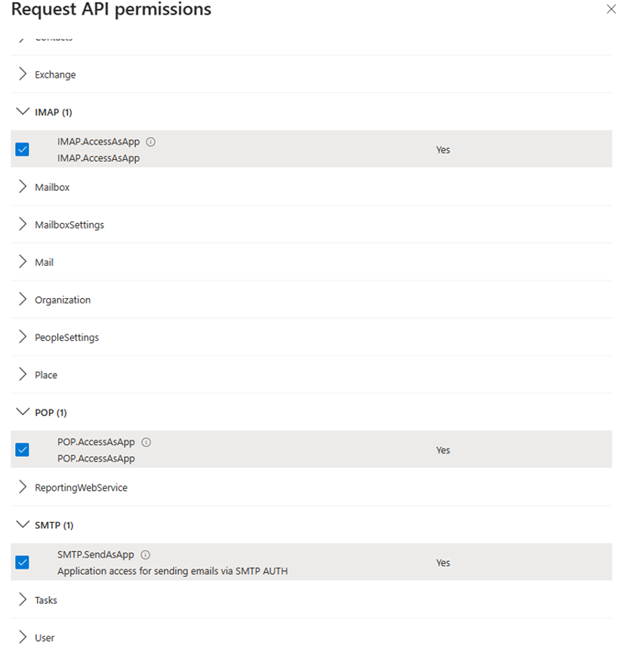
Once you have selected the IMAP, POP and SMTP permissions, you have to grant consent if you registered the application for your own tenant.
To create the Client Secret, follow these steps:
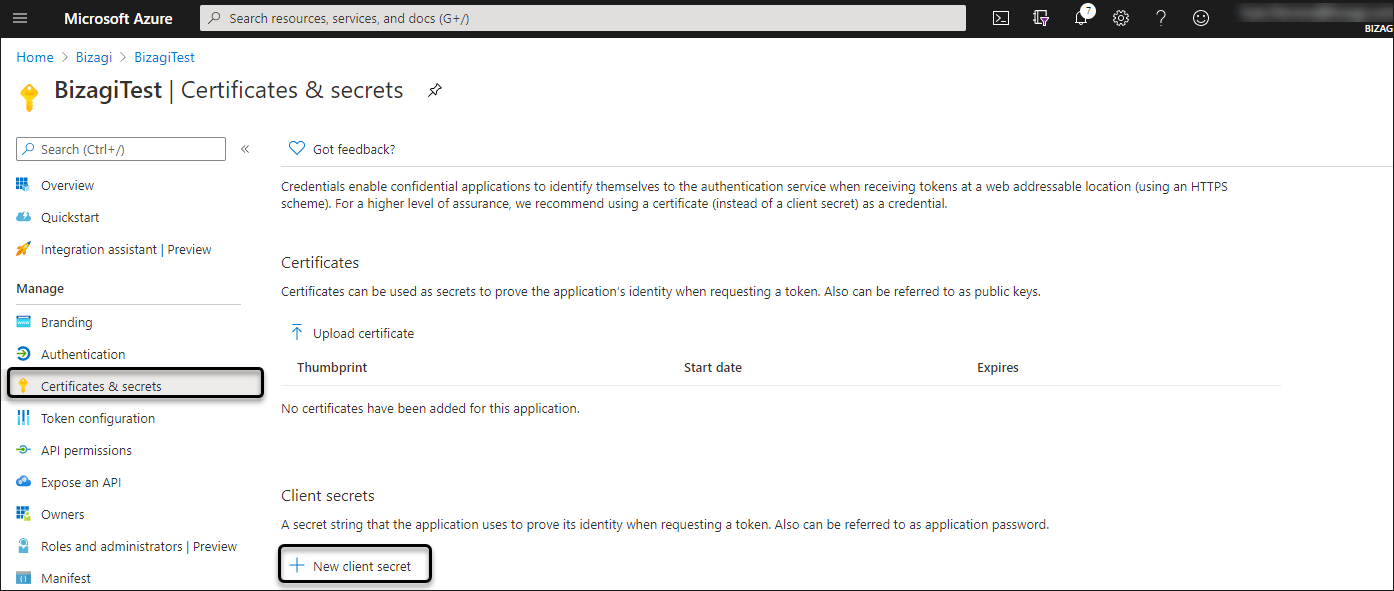
a. Navigate to the Certificates & Secrets and click the New client secret
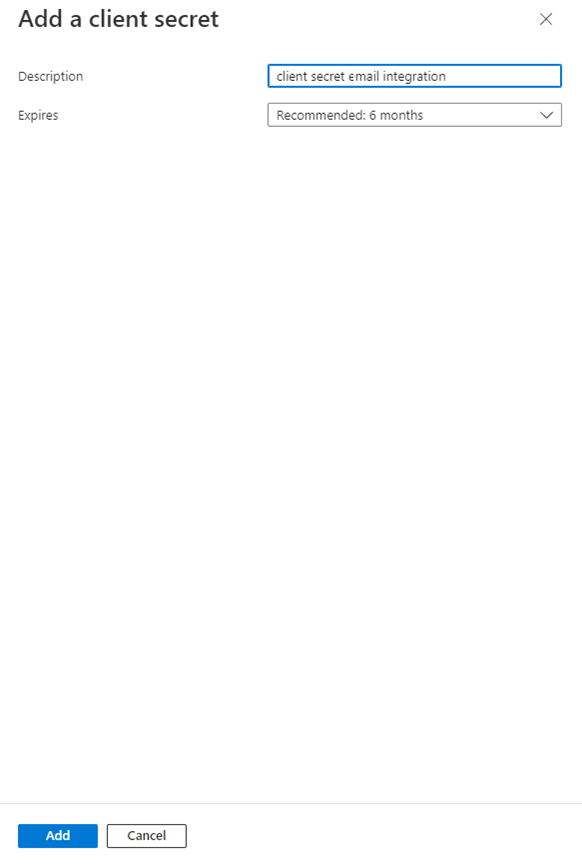
b. On the next screen, be sure to add a long description for the creation of your access key. Enter that number in the Description field. Make sure to set the expiration of that key and then click Add to have the key generated and displayed to you.
c. Once the Client Secret is generated, a record of it will appear as shown below.
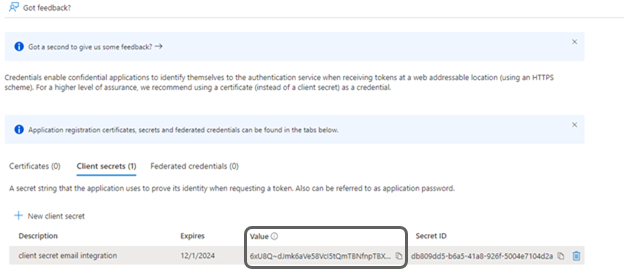
d. Copy the Client Secret Value field and note that when changing the screen this value will no longer be visible.
4. Identify the application data
Follow these steps to locate the relevant data for the application that has been created:
a. Go to Home in the Azure Portal and select the Azure Active Directory.
b. Select your created application in the App Registrations tab in Owned applications. Then, select the Essentials field and there you can get the Client ID, Object ID, and Directory(tenant) ID.
When entering the parameters for the configuration of your email by OAuth authentication in the Management Console, these are the equivalent fields from Entra ID:
OAuth Email Configuration Fields |
Entra ID data |
Client ID |
Application (client) ID |
Access Token URI |
Directory (tenant) ID: You must enter a value with the following format: https//login.microsoftonline.com/String value from the Directory (tenant) ID in Entra ID data/oauth2/v2.0/token |
User |
Office 365 created inbox |
Client Secret |
Value from the Create Client Secret section of this article. |
Scope |
https://outlook.office365.com/.default |
Request your IT support area to obtain this data. It is recommended to create an email inbox for each web app created.
6. Register main services in Exchange
Use Windows PowerShell (run as administrator) on your machine to register service principal entities in Exchange.
Set the execution policy first:
Set-ExecutionPolicy RemoteSigned
a. Install the ExchangeOnlineManagement Module:
Install-Module -Name ExchangeOnlineManagement
Import-Module ExchangeOnlineManagement
b. Login as an Administrator (You must provide a password):
Connect-ExchangeOnline -UserPrincipalName your-admin-account@your-domain.onmicrosoft.com
c. For Exchange running in hybrid mode, log in with the following code:
$lc = Get-Credential
Connect-ExchangeOnline -Credential
d. Create service entity and obtain the Application ID value from the previous step. The Object ID should be taken from the Azure Portal by going to Azure Active Directory, selecting Enterprise Applications, finding and selecting the corresponding application, and locating the Object ID in the Properties section, as this Object ID differs from the one in the application registration:
New-ServicePrincipal -AppId <APPLICATION_ID> -ServiceId <OBJECT_ID>
e. Add specific mailboxes in the tenant:
Add-MailboxPermission -Identity "test@microsoft360.com" -User <SERVICE_PRINCIPAL_ID> -AccessRights FullAccess
Now, you can open the Management Console and configure your OAuth email server authentication.
Last Updated 11/28/2024 10:06:34 AM