Overview
When using the Abbyy connector, the outputs depend on the configuration of your document definition. Because the outputs can vary depending on the document definition, you need to setup the connector to get information in the same structure.
Bizagi offers a connector template where you can define your outputs using a response sample of the batch type. This section explains how you setup the Abbyy connector tailored to your outputs definitions.
To start processing documents or images, you need to create a batch, refer to Abbyy connector for more information. Only after the batch is fully processed, you can get the results, therefore, you need to invoke three actions.

The connector uses three actions to process a batch of documents:
•Scanning documents: this actions creates a new batch in the Abbyy processing server, as a result, Abbyy returns the batch ID.
•Is batch complete: This action sends the Batch Id to look if the batch processing is complete. Only after the batch is complete, you can get the results of the scanning process.
•Getting processing results: This actions looks for the information obtained in the batch based on your document definition and batch type configuration. Because outputs depends on your batch type, this action must be tailored in the Bizagi connector editor.
Before you Start
You need to have the following information:
•An Abbyy response sample in XML format from a batch type. See Obtain a response sample.
•Abbyy processing server name or URL.
•Abbyy project name.
Setup Steps
To setup and install the Abbyy connector, follow these steps:
1. Setup the connector template
2. Install the connector in Bizagi Studio
3. Configure the actions' invocation
1. Setup the connector template
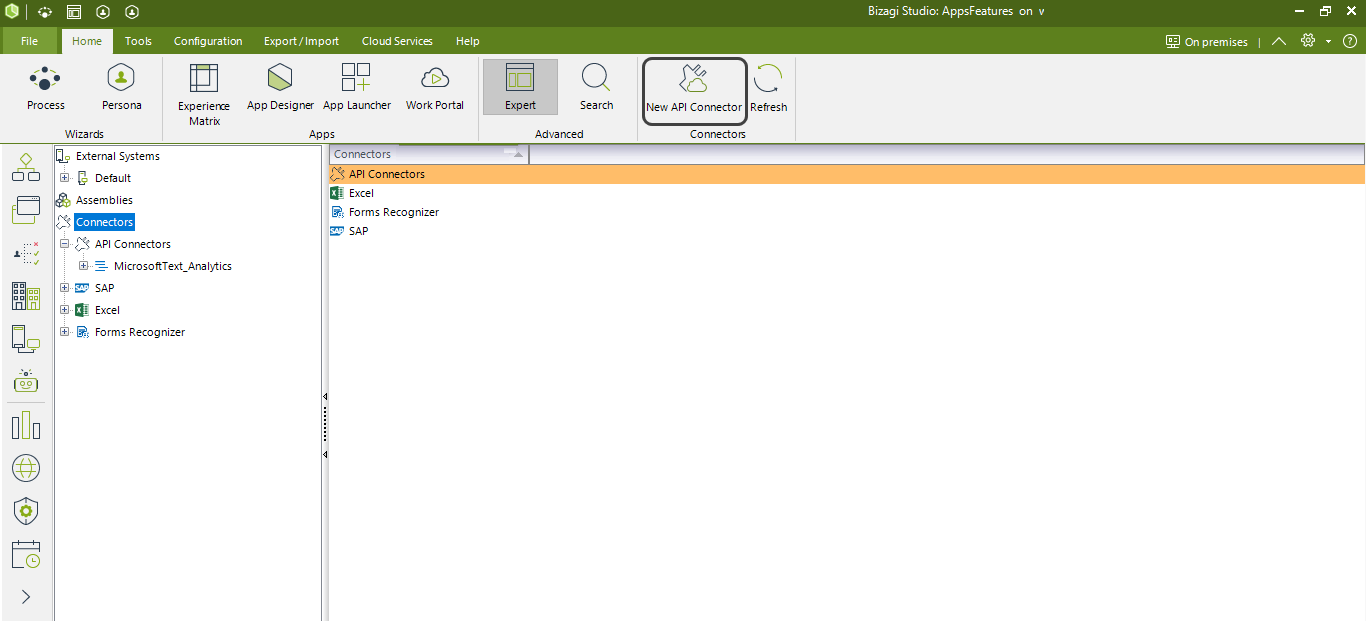
In Bizagi Studio, in Home > Expert tab, select Systems > Connectors > New API Connector (you can also right click "API Connectors" and it will display the "New API Connector" option).
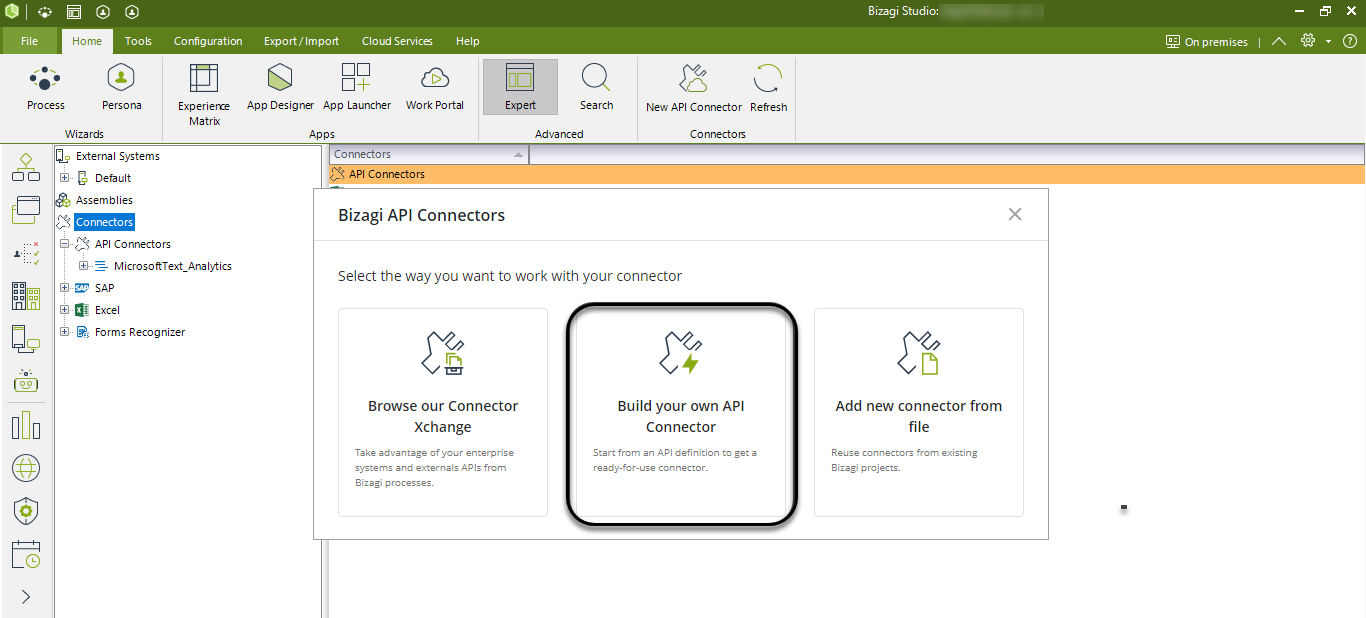
Then the following pop-up window will appear and choose the Build your own API connector option, as shown in the image:
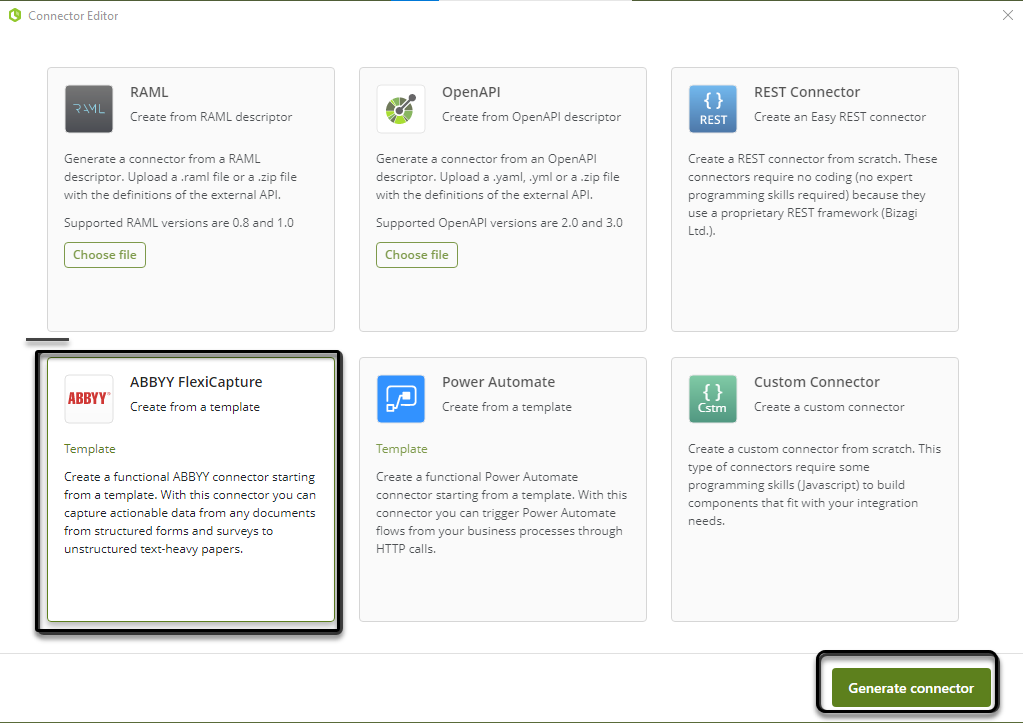
This will display the following interface and select Abbyy Flexicapture and then click the Generate Connector button, as shown below:
This will lead you to the connector interface, as shown in the picture below:
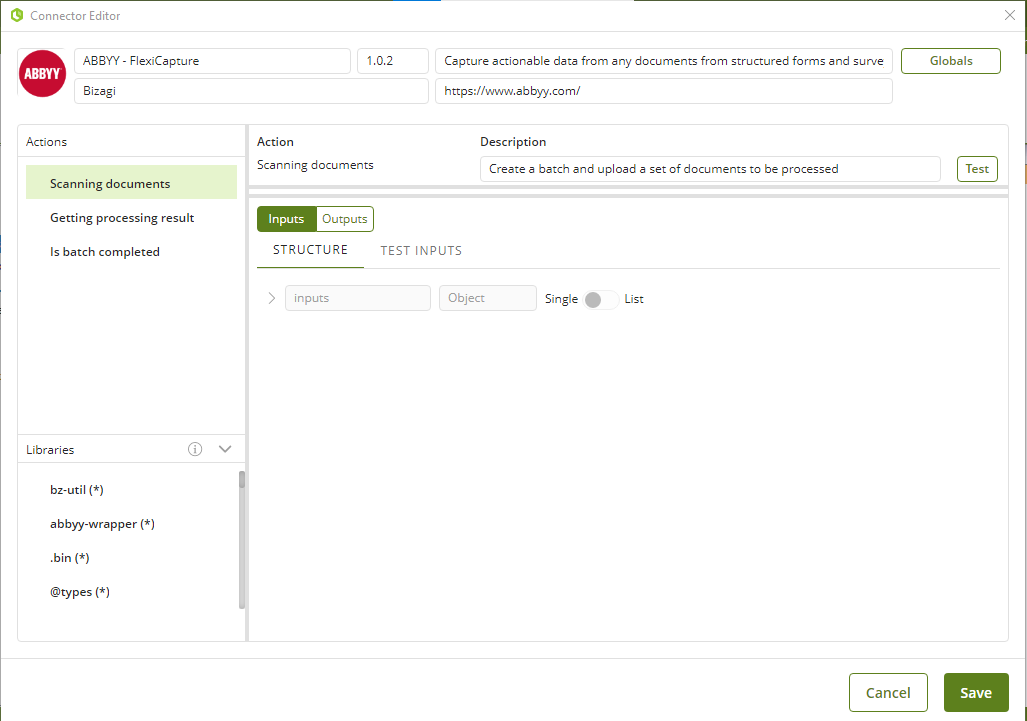
For the three available actions, Is batch completed and Scanning Documents are the ones that allow users to set the output to single or list view. There is no need of any additional configuration, since the connector editor automatically creates the entire output structure for the selected option. Select the Outputs tab within the action and then click Save:
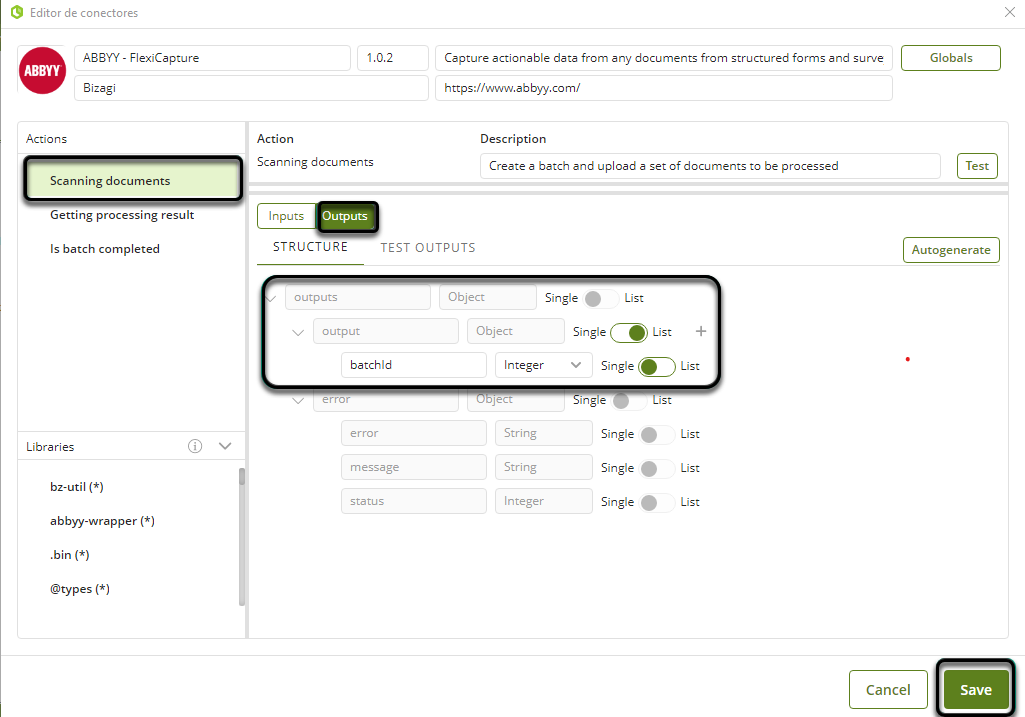
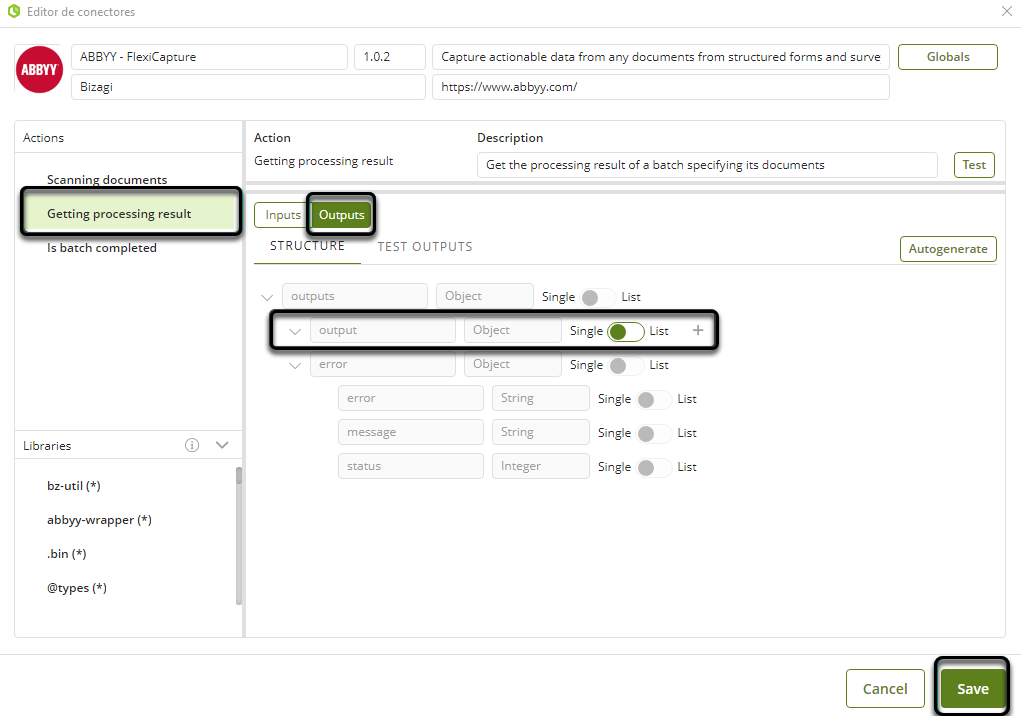
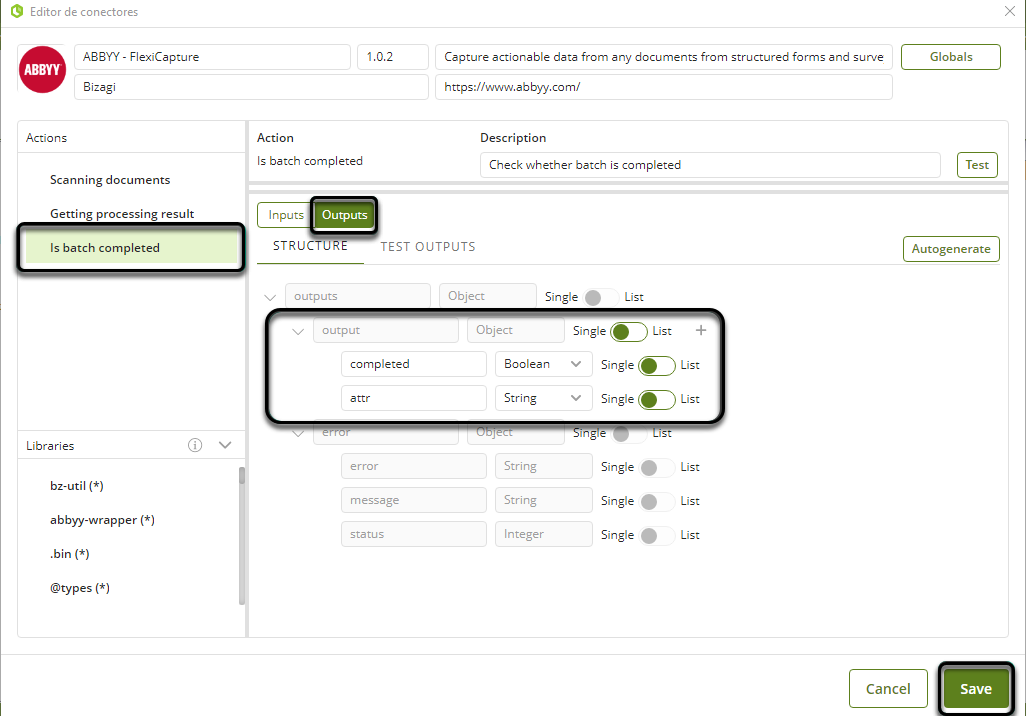
For further information, check the Connector Editor user interface.
2. Install the connector in Bizagi Studio
Upload the connector to Bizagi Studio and provide the Server and Project name. See more information about installing and configuring connectors. Set the Custom Authentication method, and provide the user credentials of the Abbyy project.
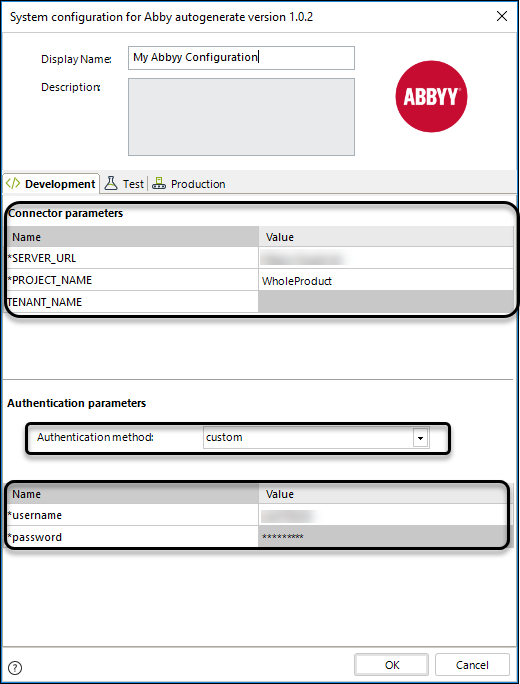
Where:
Server_UR: This is the on-premises or cloud Abbyy server.
Project_name: Name of the project where you created the batch types.
Tenant_Name: If your server is cloud-based you must provide the Tenant name. Only mandatory for cloud servers. If your server is on-premises you can leave this parameter empty.
Username: Username of to admin user that can access the server to create batches.
Password: Password of the admin user that can access the server to create batches.
3. Configure the actions' invocation
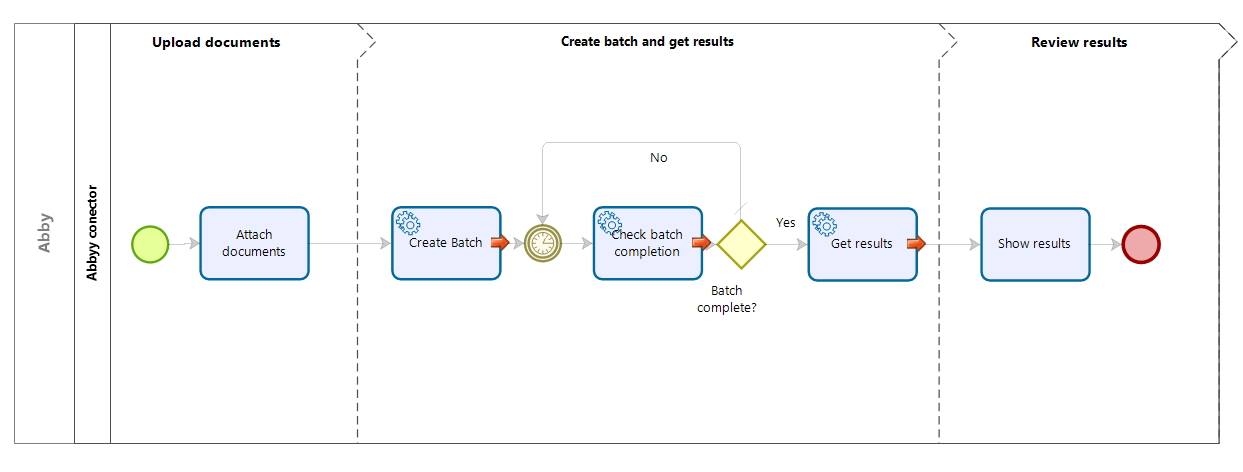
As mentioned before, to get results from a batch type in Abbyy you need to invoke three actions: Create the batch, see if the batch is complete, and get the processing results. As a good practice we recommend invoking connectors using service tasks configured as asynchronous activities. This is an example of how you can model the invocation of the Abbyy connector:
These are configuration of each action:
Create Batch
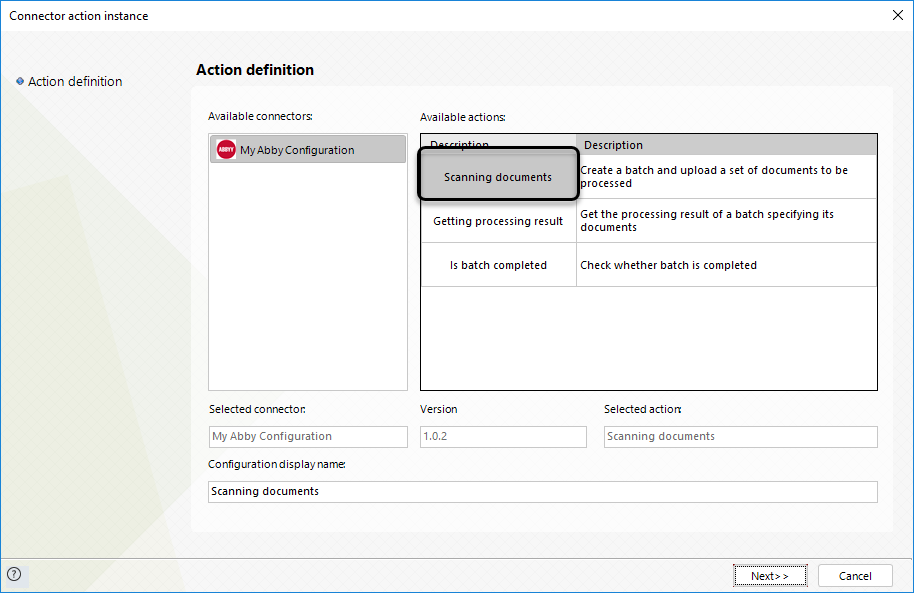
Select the Scanning documents action:
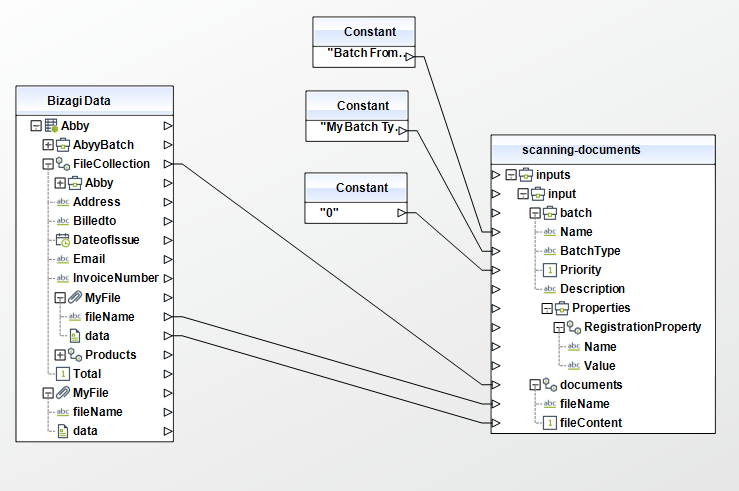
For input mapping you need:
•Collection of files to be scanned by Abbyy
•Batch Type: This needs to be the same batch type name that you defined in the Abbyy project. See Setup the Abbyy project.
•Batch name: Any name to identify your batch invocation.
•Priority: You can set the priority from -2 as the lower to 3 as the highest. See Processing Priority.
Other inputs such as description and registration properties are not mandatory.
|
You cannot sent individual documents. All documents are processed by Abbyy in batches, therefore, they must be mapped from a Bizagi collection. |
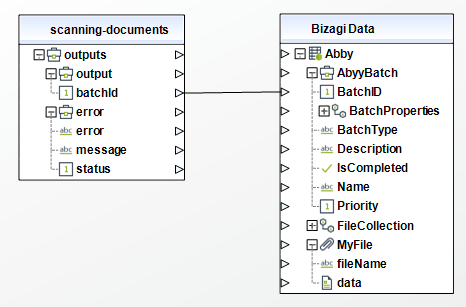
This action returns the Batch ID. Save it in an attribute of your data model:
Check Batch Completion
This action reviews if the batch is already processed by the Abbyy processing server.
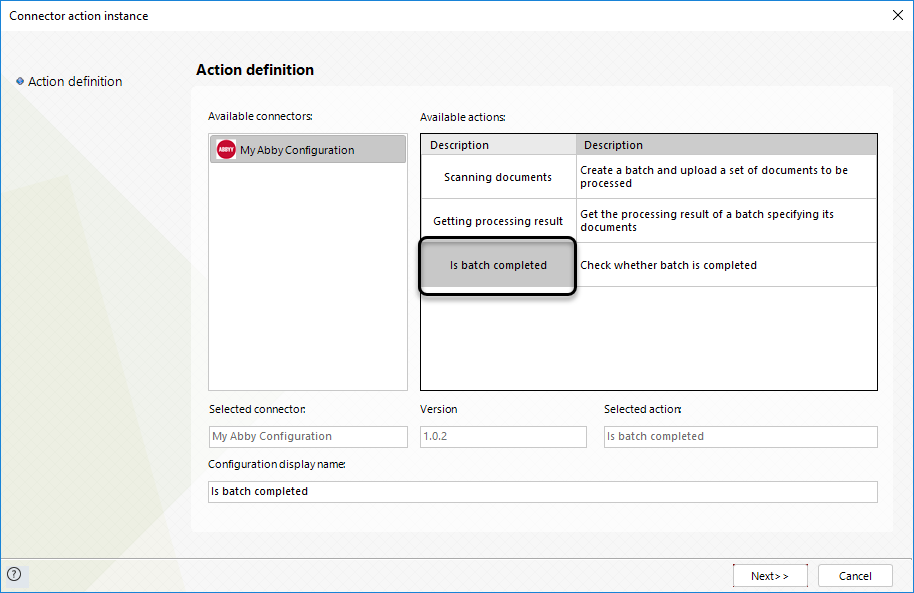
Therefore, the input is the Batch ID and the output is a Boolean attribute which is true if the batch is completed, and false, if the batch is still being processed by Abbyy.

Get Processing Results
Once the process validates that the batch is complete, you can fetch the information from your documents using the Getting Processing Results action.
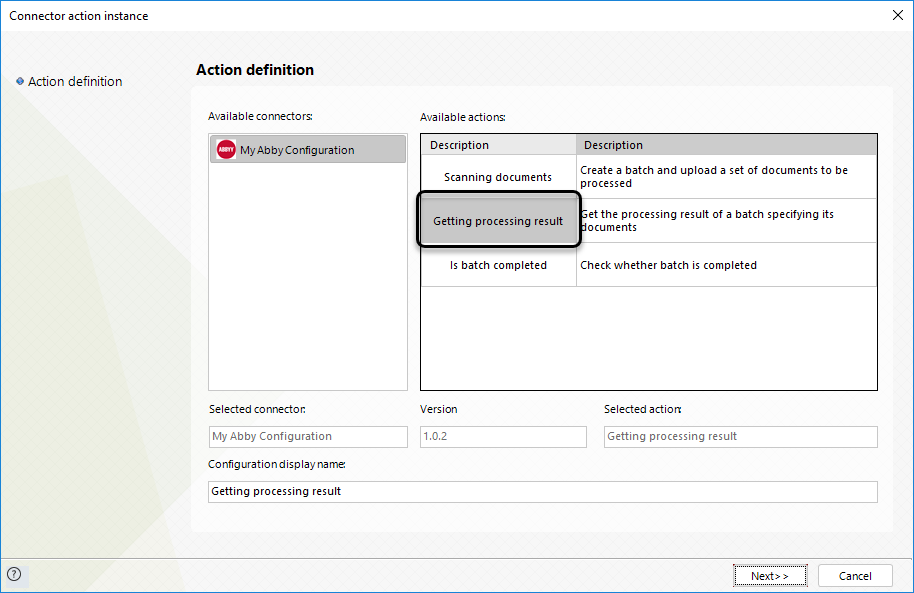
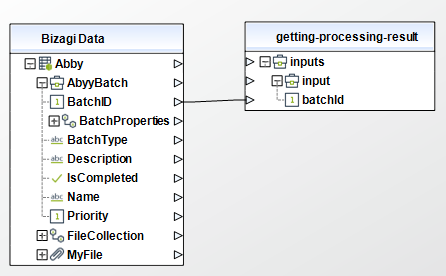
You need to provide the Batch ID in the input configuration.
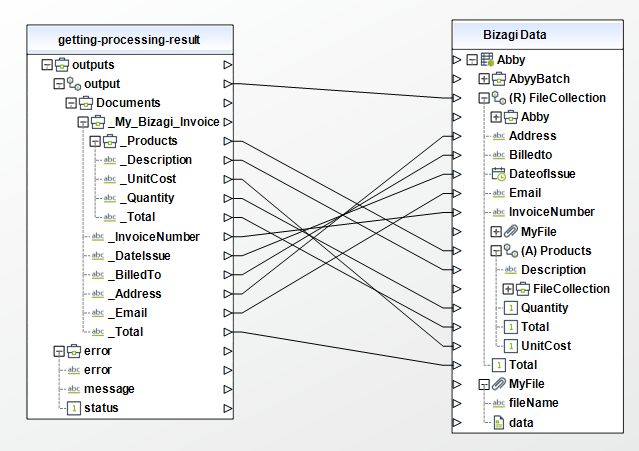
Outputs, on the other hand, can be different depending on your batch type configuration and document definition, based on your output definition, you can save the information obtained by Abbyy in your process, for example Invoice information:
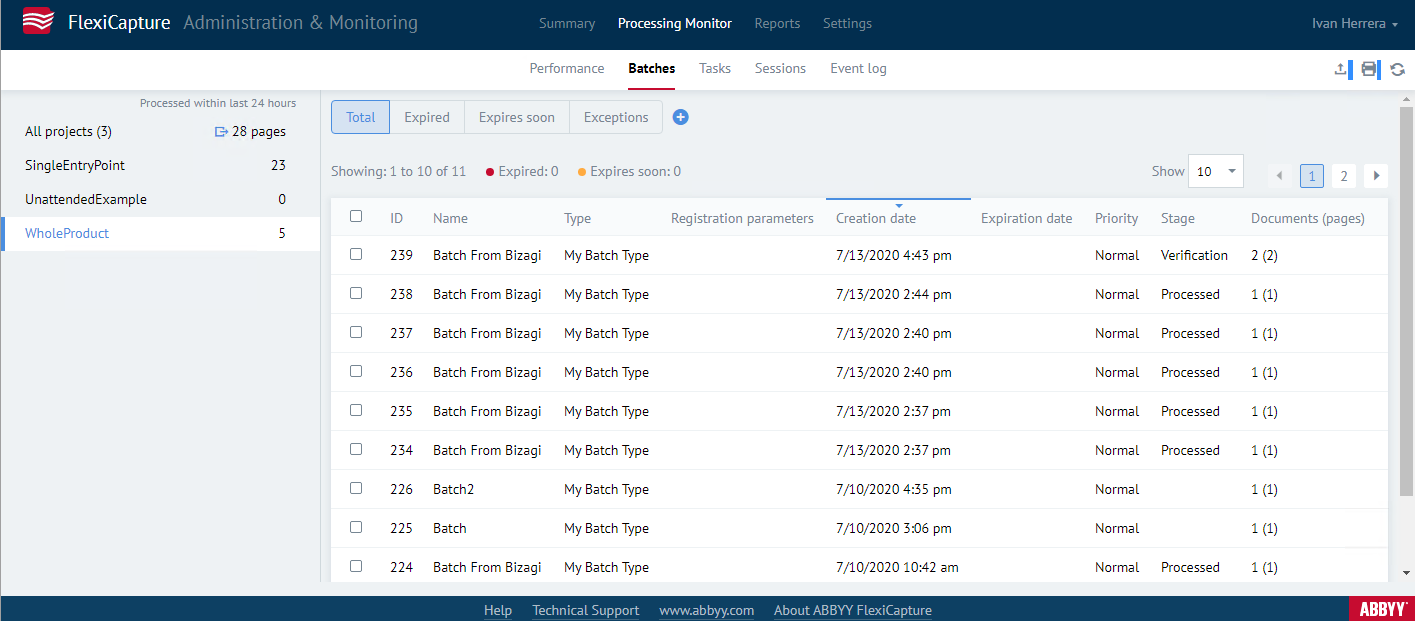
Finally, you can test the Abbyy connector. You can upload files in the collection and get the results according to your mapping. You can review the batches stage in the FlexiCapture web administration station. From a browser, access the server URL (the same URL used for the connector configuration), open the Administration & Monitoring option, and click Batches:
Verification
When you use document definitions that are not fixed, like semi-structured or unstructured sometimes information cannot be properly identified in batches. In those scenarios, Abbyy provides a verification stage. Abbyy displays in the processing monitor the batches that require verification.

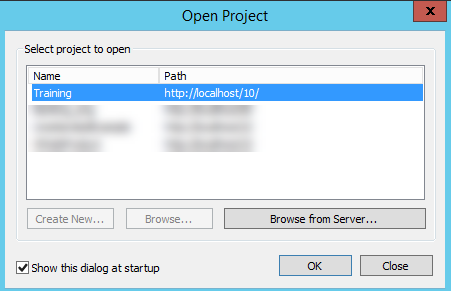
This requires Abbyy user intervention. To troubleshot a batch at the verification stage you need to access the Verification Station. Select the project.
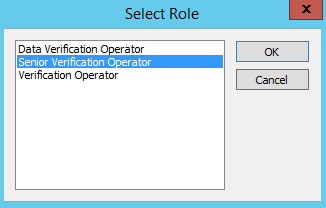
Select the role. We recommend accessing as a Senior Verification Operator.
|
This requires experience in Abbby. We recommend learning about the Abbyy platform and verification options. See Abbyy Verification Station. |
You can search the batch ID that requires verification. Double click the batch, and select Get task. and see in red the data that needs to be verified. You can change the values, or leave them as they are.
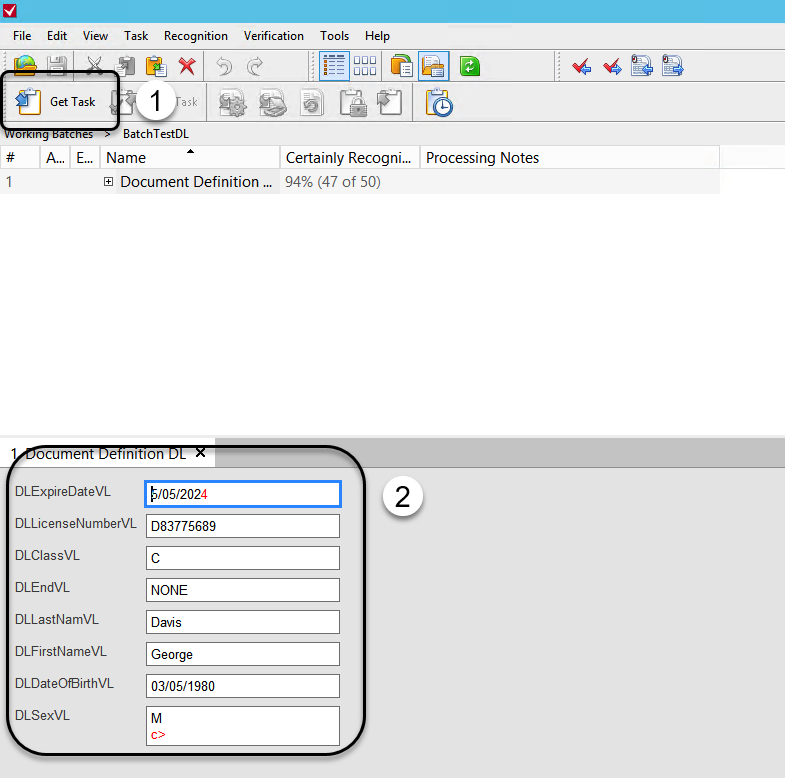
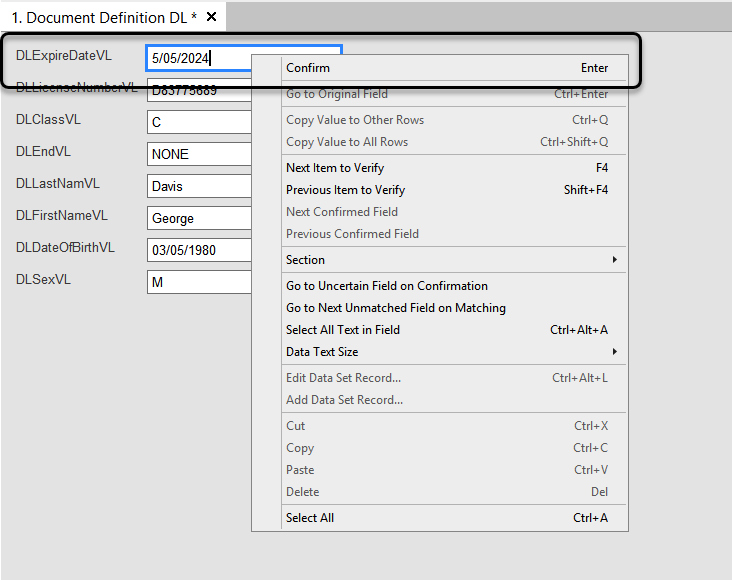
For each attribute that needs verification (in red), after verifying or fixing the value, right-click it, and click confirm.
After you confirm all the values, the batch changes the status to Verified.
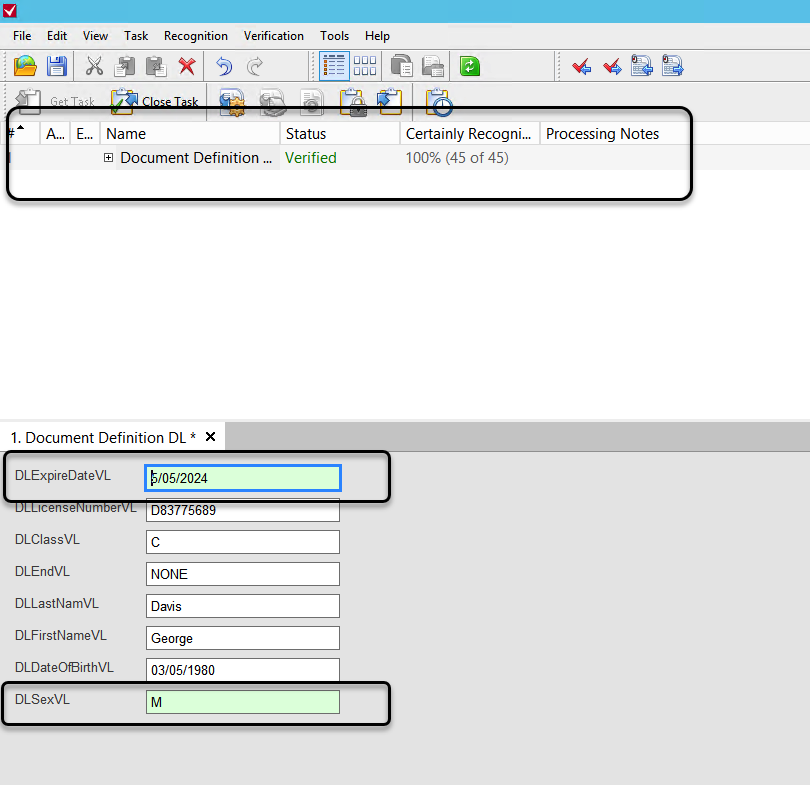
Make sure that you close the task before continuing.

Abbyy sets the status to processed, and the Bizagi can fetch the information from the batch.
Last Updated 1/22/2024 11:12:32 AM