Overview
A Smart Inbox is created within the Work Portal, directly in the target environment. Since these inboxes use information from custom columns, it is important to understand how you can provide attributes that Work Portal users can use to create filters associated with the Smart Inbox.
Before you start
•By default, Bizagi imposes no restrictions on creating a Smart Inbox. Nevertheless, you can Define permissions to create Smart Inboxes.
•Each user is allotted a maximum of 20 Smart Inboxes.
•Smart Inboxes are created directly within your Work Portal, and they do not require deployment. However, if you intend to incorporate business information for display, a deployment becomes necessary. Further details are provided in the following section.
Business information displayed in Smart Inboxes
Smart Inboxes employ dynamic filtering, and Bizagi presents them in a manner similar to a standard Inbox within the Work Portal. Should you wish to integrate business information, such as attributes stored in your data model, it is essential to incorporate these attributes into your Custom Columns.
Custom Columns are specified in Bizagi Studio and require deployment to your Test or Production environments for visibility to your users.
What you need to do
To create a Smart Inbox, you have two options:
As an Administrator with access to the Admin menu |
As a Non-administrator user |
|
|---|---|---|
Where do you create them? |
From the Admin menu in the Work Portal. |
From the left-hand sidebar in the Work Portal. |
How do you share them? |
Based on Roles, User Groups or Personas. |
Via email to users registered in the Work Portal. |
Where do you edit them? |
From the Admin menu in the Work Portal. |
From the left-hand sidebar in the Work Portal. |
Can be edited by the user? |
No, only the Administrator can edit it from the Admin menu. |
Yes, each user who has been granted access to a Smart Inbox can independently edit it. |
|
A Smart Inbox can only be created and viewed using the Work Portal on a desktop. This feature is not available on mobile devices. |
Create a Smart Inbox as an Administrator
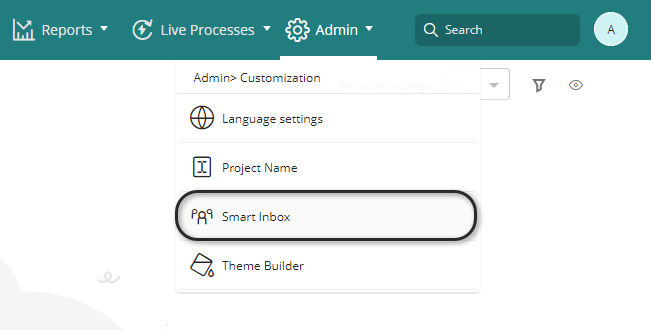
To create a Smart inbox as an Administrator, log in with a user account that has access to the Work Portal's Admin menu and then click the Smart Inbox option.
Click the New Smart Inbox button.
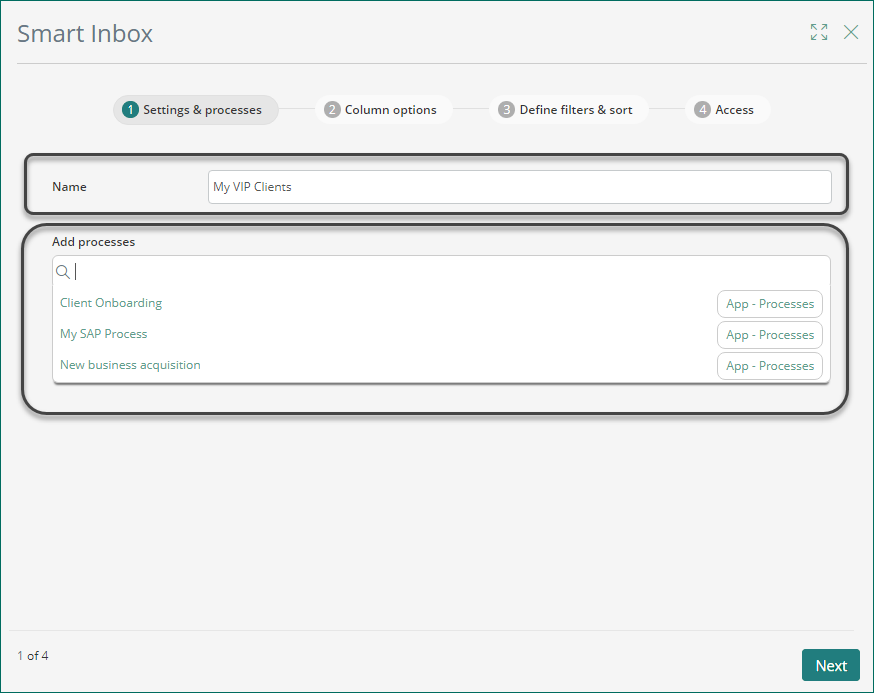
Specify a name for the Smart Inbox. This name cannot be localized. To include processes, click the Add processes search box, or manually type the process name.
|
Live Processes cannot be chosen to be included in a Smart Inbox. |
Once you have finished adding the processes, click the Next button.
Define columns
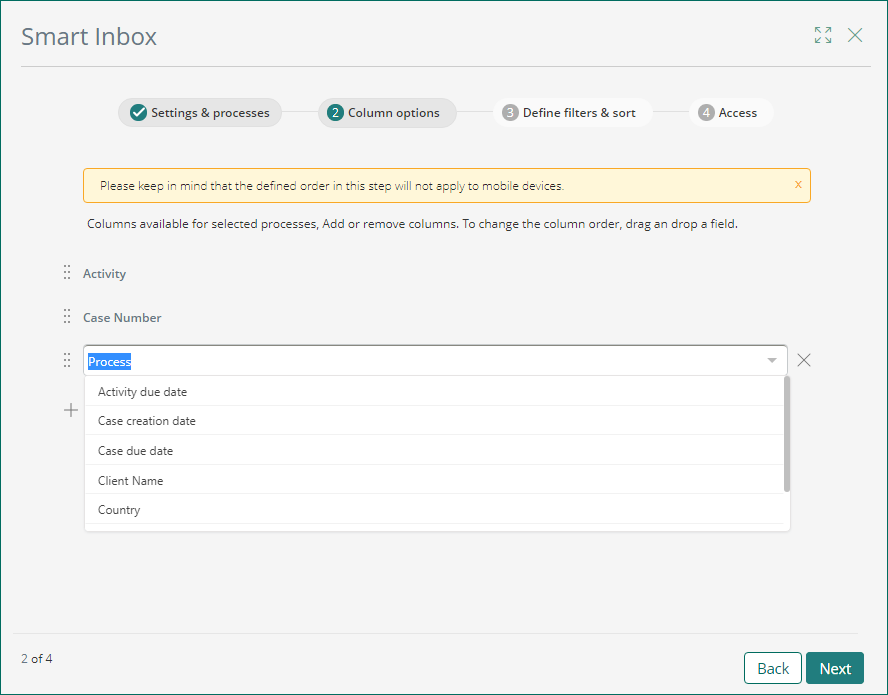
In the second step, you need to specify the columns that you wish to have displayed. Once the Inbox is created, these columns serve as filters. Open the drop-down list, and Bizagi presents the common attributes found in the Custom Columns across the processes selected in the preceding step. The displayed columns are those defined as Customized columns in Bizagi Studio. Internal and predefined columns, such as case number and activity, are exhibited by default, allowing you to modify their order; however, they cannot be deleted.
|
•System columns are not available for a Smart Inbox, meaning they cannot be added, modified, or removed. Additionally, they cannot be filtered as their values are calculated. This restriction extends to columns such as Category, CurrentUserFullName, CurrentUserName and UserLocation. Even if configured as custom columns in a process Inbox, they are not available for filtering using Live Filters. •In the case of predefined columns like Case Creation, Case Due Date, and Activity being set as custom columns, they are not duplicated in the card view on tablets. Nevertheless, you have the flexibility to rearrange their order through the Smart Inbox settings. |
Bizagi can group attributes as long as the Display name and attribute type of the customized column are identical. For instance, if two columns share the same Display name but have different types (e.g., one is an integer and the other is a float), Bizagi treats them as independent columns and does not group them together within the wizard.
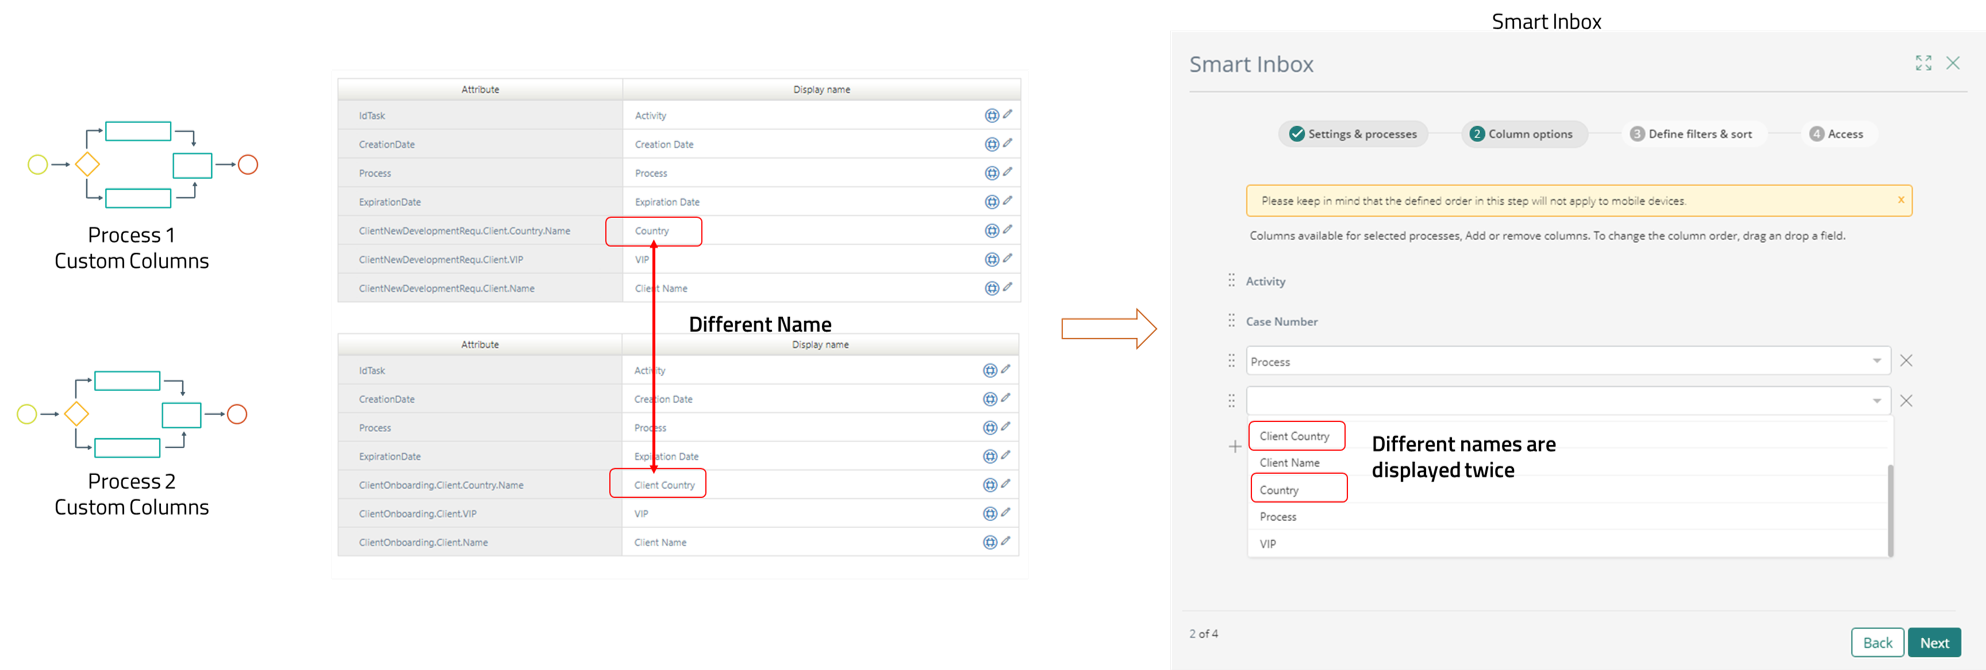
Moreover, the Customized columns utilized must pertain to business information associated with your process data models. To incorporate multiple columns, click the Add a Column button.
You can rearrange the order of the attributes by clicking and holding the left-side select, then dropping the attribute to your desired position.
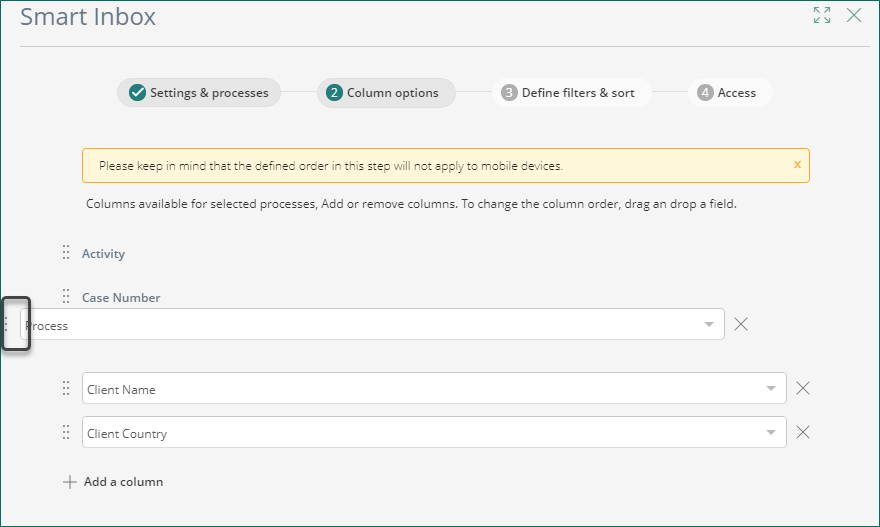
Once you have completed adding columns, click the Next button.
|
You can have a maximum of 20 columns. |
Define filters
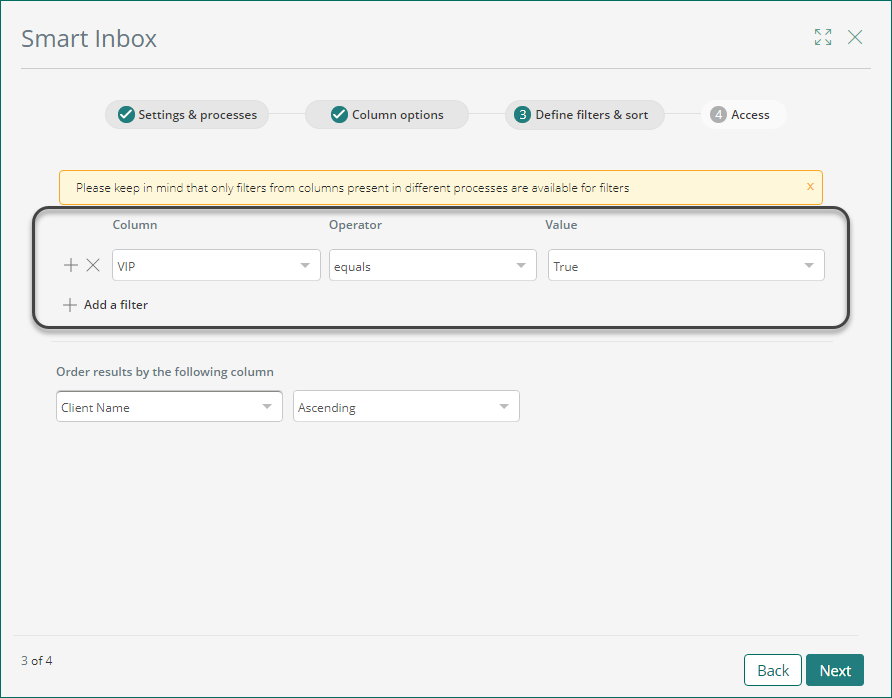
You can also define filters for the Smart Inbox. These filters differ from those applied when working directly in the Work Portal's regular Inbox. In the third step of the wizard, click the Add a filter button.
Bizagi presents a drop-down list containing all the columns that are common across all the processes.
|
The attribute used in the filter must be both displayed and selected in the Column options in step number 2 of the wizard. |
Select the column, the operator, and the value of the filter.
|
The operator depends on the data type of the column (e.g., string, integer, date, etc.). The available operators are:
“is-empty”, “is-not-empty”, “equals”, “not-equals”, “starts-with”, “ends-with”, “contains”, “in”, “not-in”, “greater-than”, “greater-than-or-equals”, “less-than”, “less-than-or-equals”, “on”. |
|
You can include a maximum of 15 filters per Smart Inbox. Moreover, when the filter encompasses values of Parameter entities or Activity names, it applies exclusively to non-localized values. Non-localized values refer to the default values established during the design phase in Bizagi Studio.
For instance, in the case of Parameter entities:
Similarly, for an activity's name, Bizagi considers only the design display name (non-localized) value:
|
If you wish to arrange the results of your Smart Inbox based on specific criteria, you can choose a value and the corresponding order.
Define the viewing permissions
In the final step of the wizard, you have the option to define the Roles, Personas, or User Groups that can access the Smart Inbox. Check the box or manually input the Role, Persona, or Group to which you wish to provide access to the Smart Inbox.
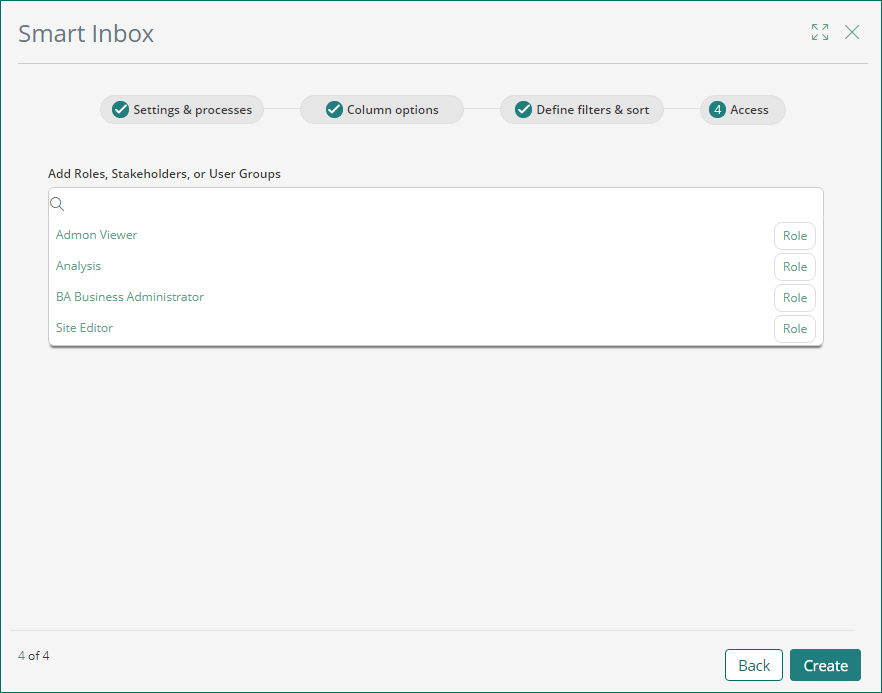
Once you have finished adding the access groups, click Create.
The administrator can then observe the new Smart Inbox in the wizard, along with the groups of users who have access to it.
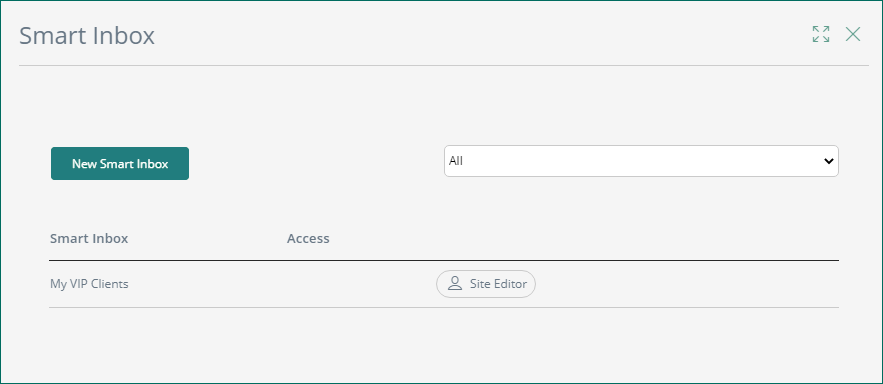
Any user who is part of these Roles, Groups, or Personas can view the Smart Inbox in their Work Portal.

Create a Smart Inbox as a Non-Administrator user
Any user with the permission to create a Smart Inbox can do so by clicking the button located at the bottom of the left-hand sidebar.
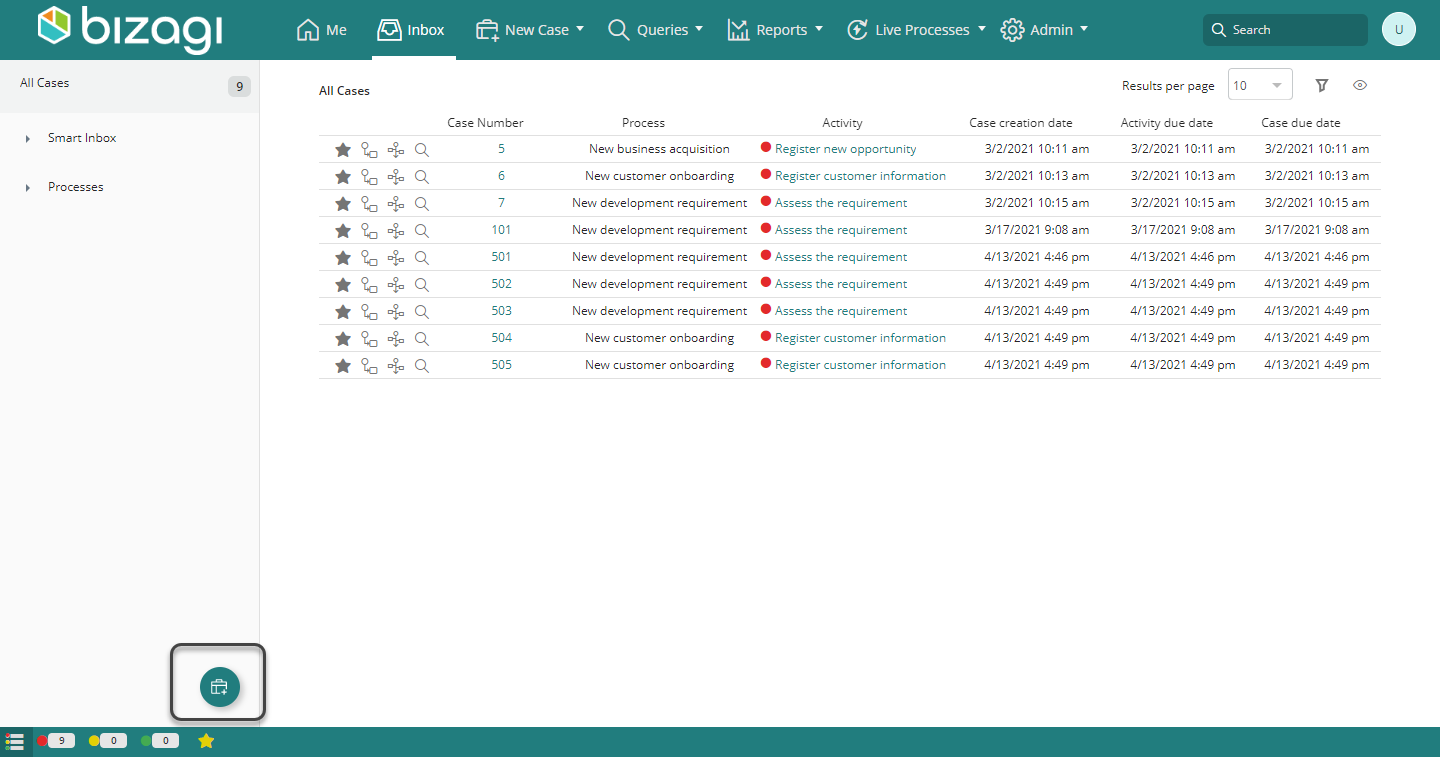
The wizard for non-administrators closely resembles the one utilized when creating a Smart Inbox as an Administrator. The key difference is that the non-administrator wizard consists of three steps, and it does not allow for the configuration of access permissions for groups.

Next steps
•If you wish to share a Smart Inbox, you have the option to invite users individually. This applies only if you created the Smart Inbox as a non-administrator user.
•As the creator of the Smart Inbox, you retain the ability to edit a Smart Inbox at any time.
Last Updated 1/3/2024 11:05:01 AM
