Overview
Bizagi allows you to customize which data is displayed when listing your pending activities at the Inbox, or when presenting search results, among others.
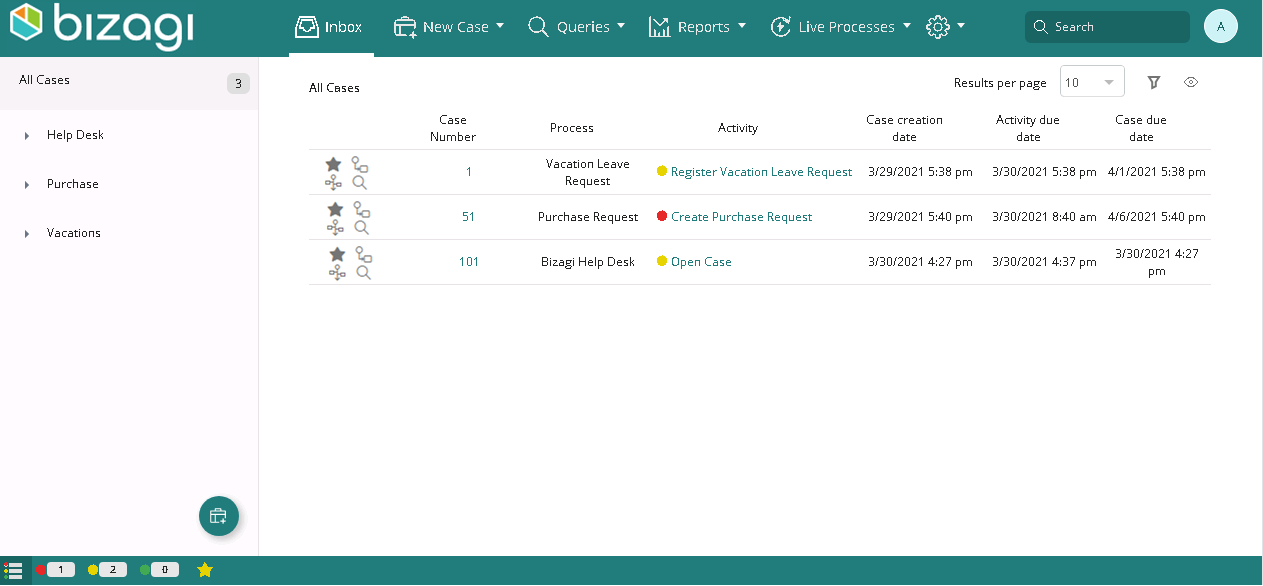
By default, Bizagi summarizes each case by presenting information related to the processes and SLAs, such as the case id, creation date, due date, or activity in which cases are at.
Such default configuration does not include business information of each specific process' data model.
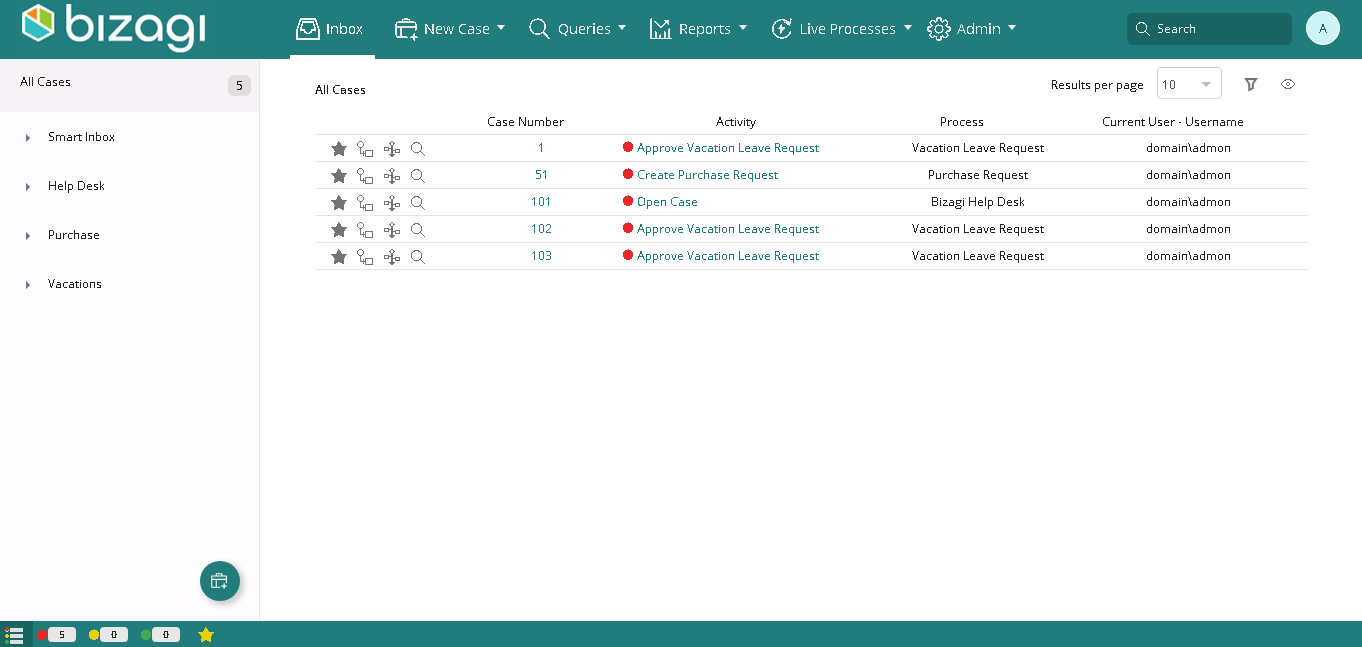
Defining which data to display is done through the customize columns option, in which you may include additional fields (e.g those holding concise business information useful to summarize or to allow sorting at the Inbox), or choose to exclude some of the default columns or rearrange their order.
The following images illustrate the most frequent uses of customizing columns.
•Default Inbox columns:
•Rearranged columns, using additional information:
Concepts
Through the customize columns option in general, you will redefine which information is displayed in the following options at the Work portal:
•The Inbox
•Searches results
•Queries (reports)
•Cases administration (mainly for an admin to reassign or abort cases)
|
Note that when displaying the Inbox (using the grid view) and while not having filtering by any specific process, you may not include columns holding business information. This is so because at this point, the Inbox will make sure that it presents only columns holding information which is common to all cases (given that there will be cases from many different processes and not all of them necessarily would have information belonging to a specific process' data model). |
Customizing columns can be done at four different levels:
1. Globally: Applies to the Inbox that loads up initially, while in grid view when no process filter has been specified.
2. Per business application: Applies to the search results when filtering by a specific business application (useful mainly in queries).
3. Per processes: Applies to the Inbox while in grid view when filtering by a specific process.
Or similarly to the previous one, applies as well to the search results when filtering by a specific process (useful in queries).

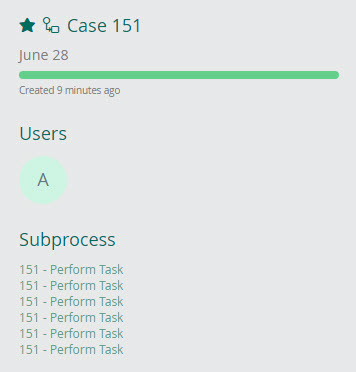
4. Per Sub-Processes: Applies to the information presented when hovering over the Sub-Process instances while in a task of their parent process.
|
When no explicit configuration is redefined for a specific level as presented above, such level will use the definition from its upper level (an inherited hierarchical definition). |
How to customize columns
1. Go to the Processes module from Bizagi Studio and look for the level where you would like to customize columns.
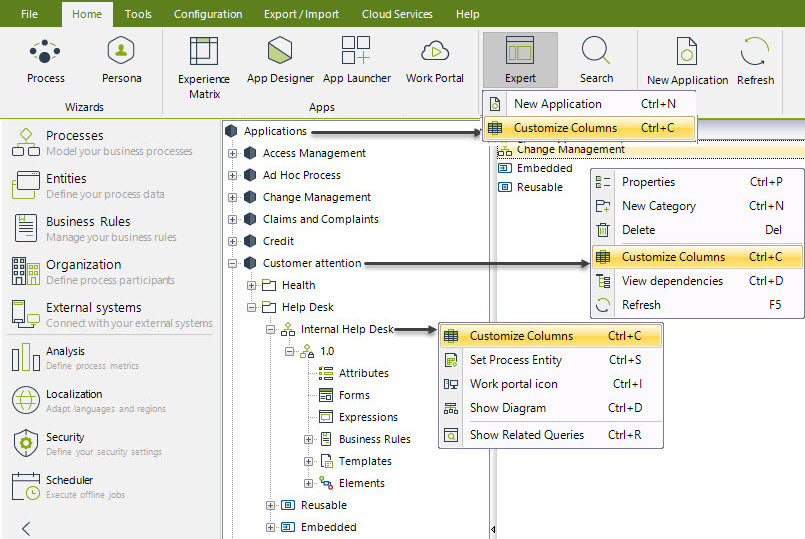
2. Right click the component you wish to customize (global applications, application, diagram) and select the Customize columns option.
Note that you can also access this option through the contextual menu on the top when selecting a specific project, application or process.
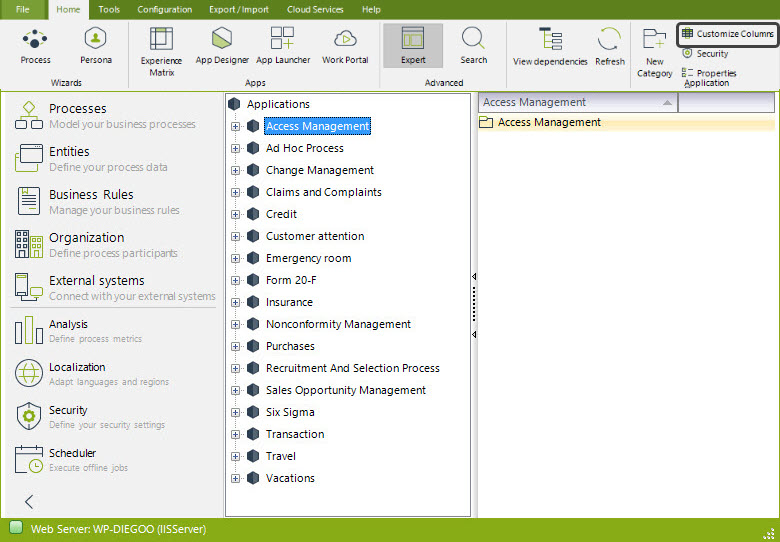
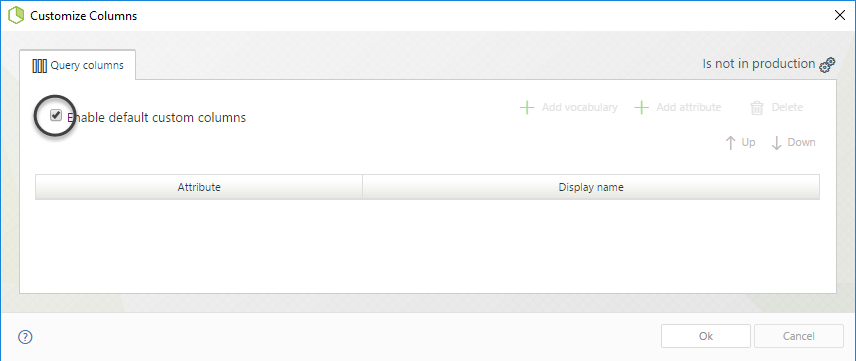
3. Override the default configuration by un-checking the Use Default Configuration box.
Then choose to use the Add Vocabulary or Add Attribute options, according to the type of information you wish to include.
Adding an attribute
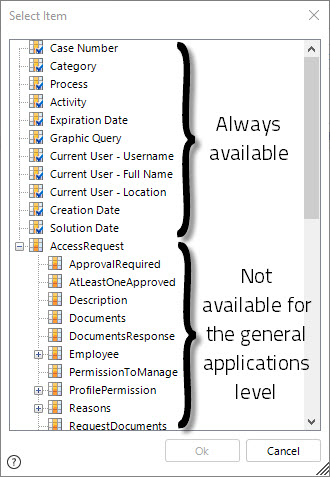
When adding an attribute, you will find the list of standard columns (always available, those which apply to any type of process), such as Case number, Category, Process, Activity, Expiration Date, Creation Date among others.
But note that you can also find the attributes of the business data model directly related to that application.
Recall that these attributes will not be available for the global applications level:
Adding vocabulary
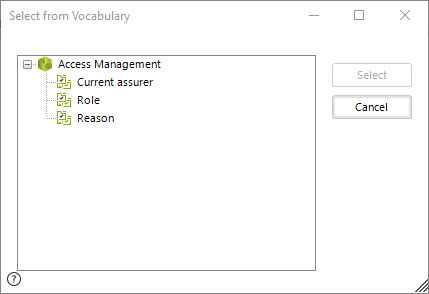
When adding a vocabulary definition, you will find those which have been previously defined:
Sorting
Additionally, you may rearrange the order in which columns will be presented, by using the Up ![]() or Down
or Down ![]() icons.
icons.
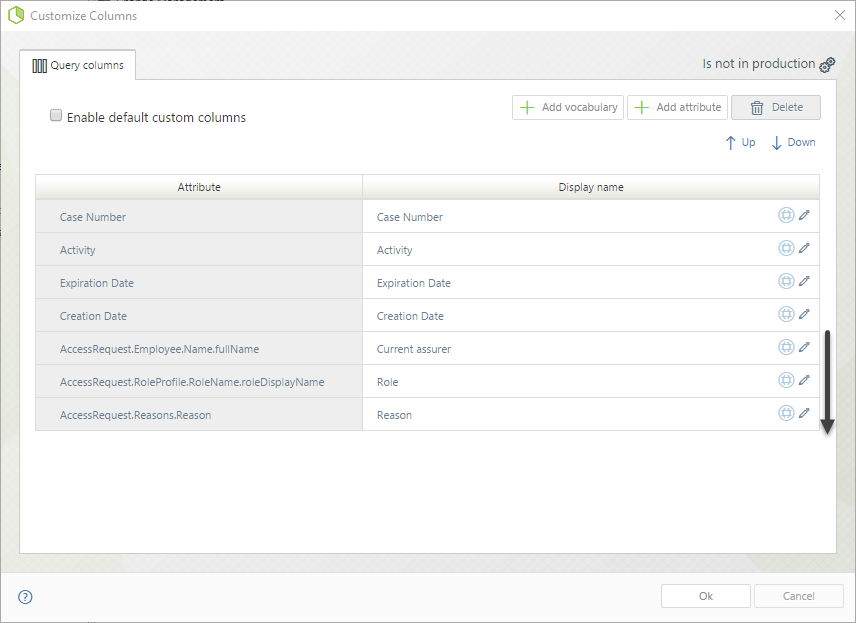
Note that the order in which such columns are listed in this configuration, will not only determine the order of how these columns are shown (from left-to-right or top-to-bottom), but it will also be used as secondary criteria to sort cases when end users decide to order results by clicking on a specific column.
In other words and according to the image above, if an end user dynamically sorts his or her Inbox for instance by Current assurer (AccessRequest.Employee.Name.fullName), then all cases with a same classification will be sorted secondarily by using their Role. Similarly, the next criteria would be Reason and the last criteria will always be the Case number.
Further options
Once you have included any desired columns, note that you may modify their display names:

To delete a column (attribute or vocabulary) just select it and use the Remove option ![]() .
.
|
The columns Case number, Graphic Query, and Expiration Date will always be presented even if they are not explicitly included in the configuration. |
View examples for each of the different levels of customization at Customize columns examples.
Customized columns in Production
When a project has been already deployed in a production environment, some definitions such as the use of customized columns will keep some restrictions in order to avoid potential conflicts with subsequent (incremental) deployments.
Due to this reason, customize columns definitions being used by processes or applications in production may not be edited nor deleted.
Last Updated 2/1/2023 9:28:02 AM