Overview
Bizagi supports ADFS4 as an identity provider using the OAuth 2.0 protocol. This section explains step-by-step how to configure an ADFS server as an Identity Manager server with Bizagi.
ADFS4 Configuration
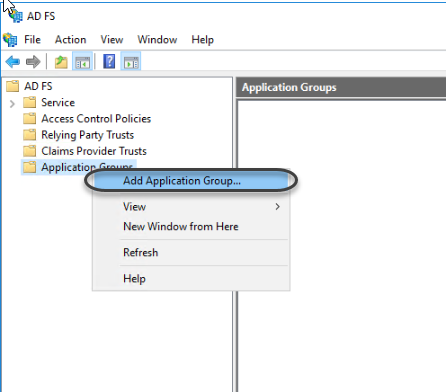
1.1 Open the ADFS Management Wizard. Right-click Application Groups and click Add Application Group.
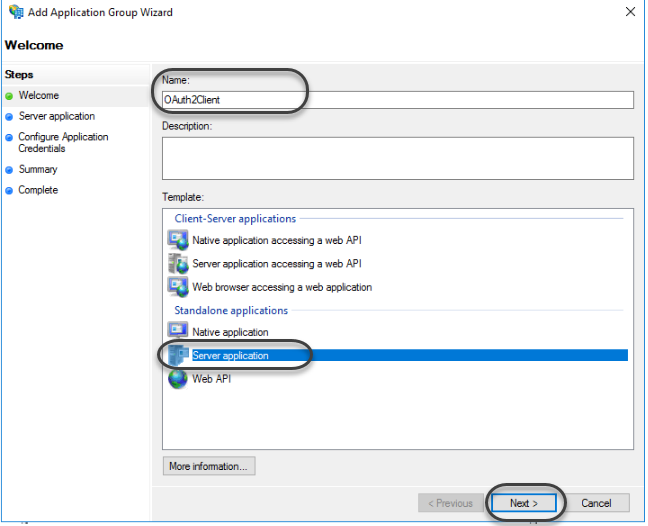
1.2 Register the application name and select Server application in the Standalone section. Then click next.
1.3 Save the Client Identifier where the administrator can access it securely. Additionally, add the Redirect and Post-logout with the following format:
Redirect: https://[environment]-[project]-[company].bizagi.com/oauth2/client/callback
Post logout: https://[environment]-[project]-[company].bizagi.com/post-logout.html
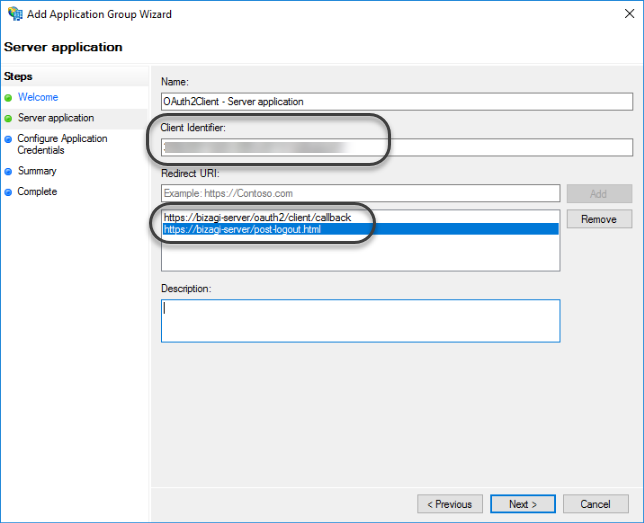
Then click next.
1.4 Select the Generate a shared secret and Copy to clipboard the secret generated. Save it in a place where the administrator can get it securely.
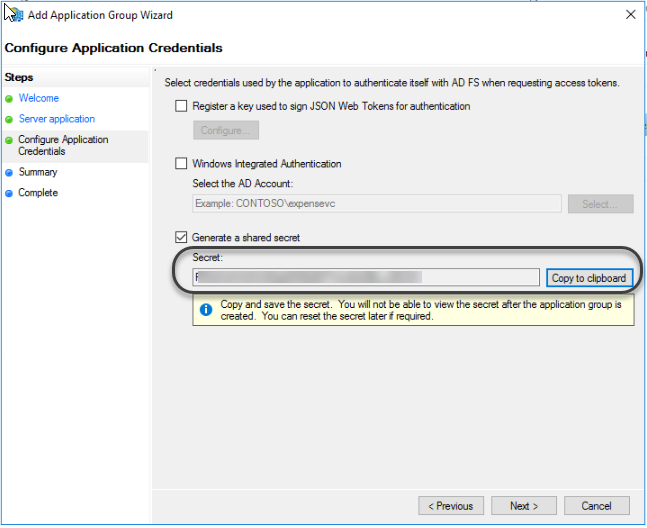
Then click next twice after you close the configuration wizard.
1.5 In the ADFS Management wizard right-click the created application group and open its properties.
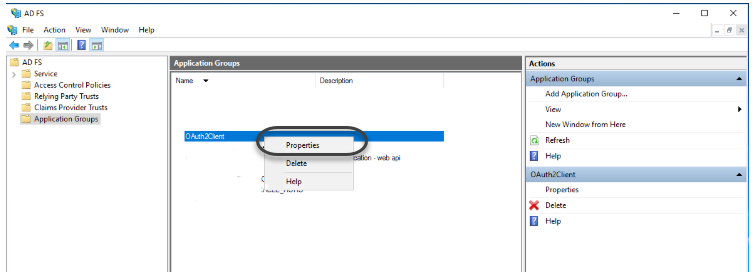
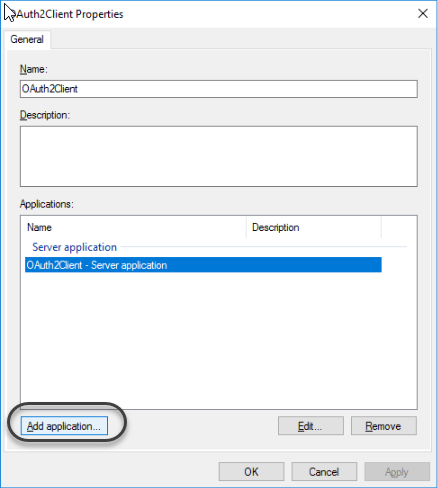
1.6 Add an application.
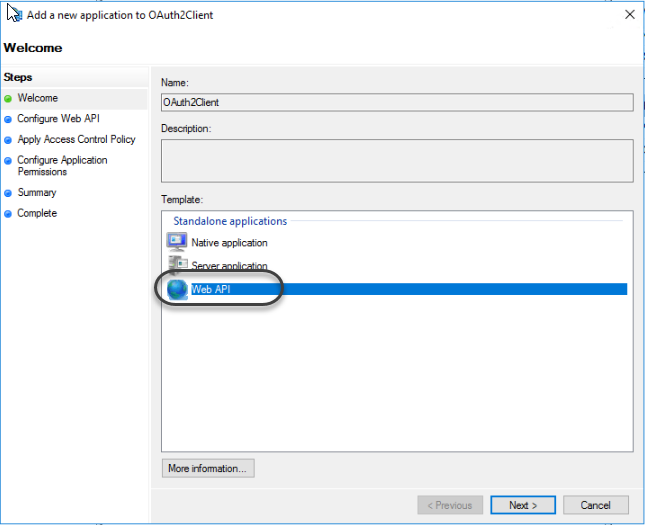
1.7 Select the Web API template:
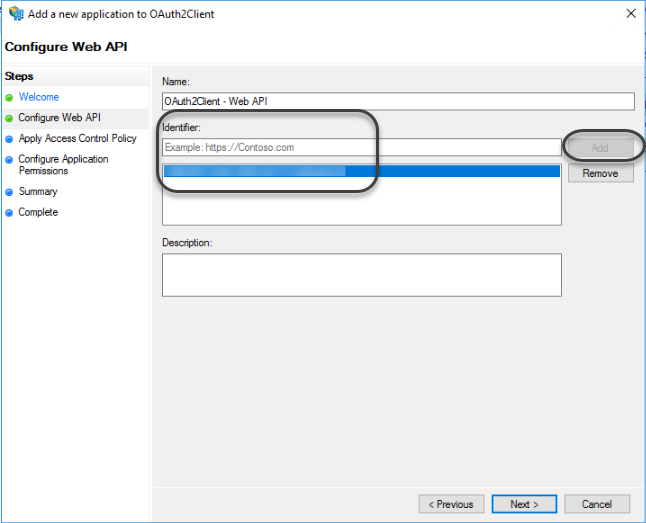
1.7 In the Identifier field paste the Client identifier saved in step 1.3 of this section.
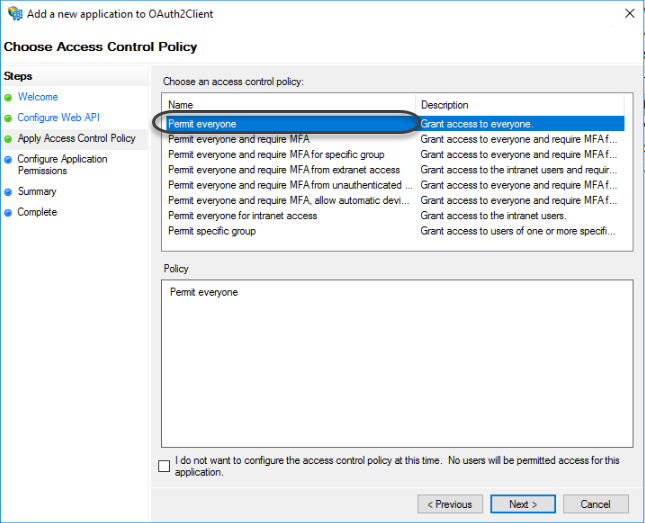
1.8 Select the Permit everyone access control policy.
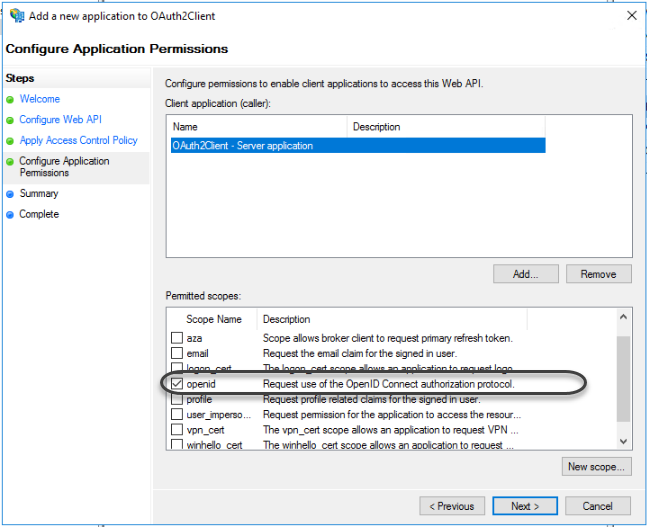
1.9 Allow the OpenId permitted scope:
Finally, click next twice after you close the Application configuration wizard.
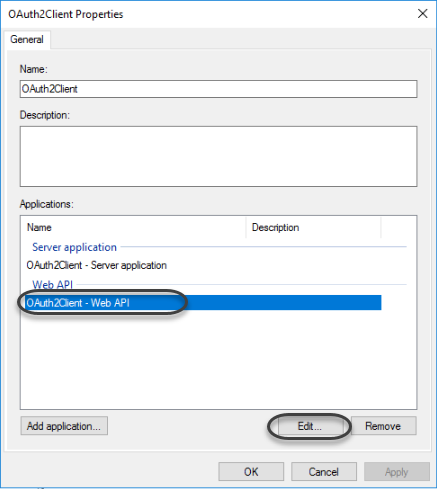
1.10 In the application properties, edit the Web API.
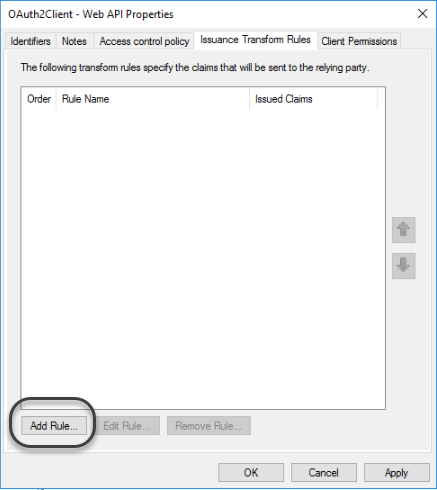
1.11 Add a new Issuance Transform Rule.
1.12 Select Send LDAP Attributes as Claims in the Claim rule template drop-down list.
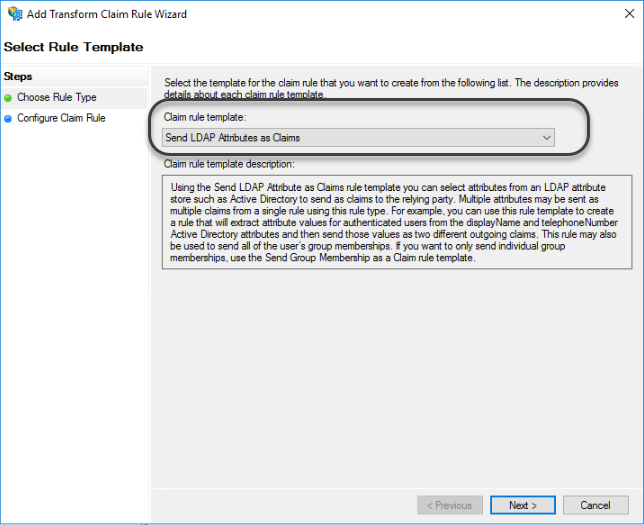
1.13Now you need to map the attributes from the Active Directory considered as keys when Bizagi validates users' credentials against the Identity Provider. First register a rule name, select Active Directory in the Attribute drop-down list.
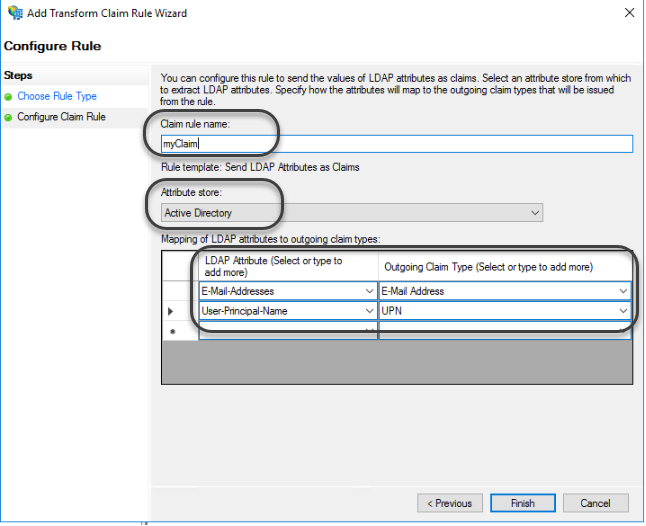
Map the following LDAP attributes:
LDAP Attribute |
Outgoing Claim Type |
|---|---|
E-Mail Addresses |
E-Mail Address |
User-Principal-name |
UPN |
Configure ADFS4 in Bizagi
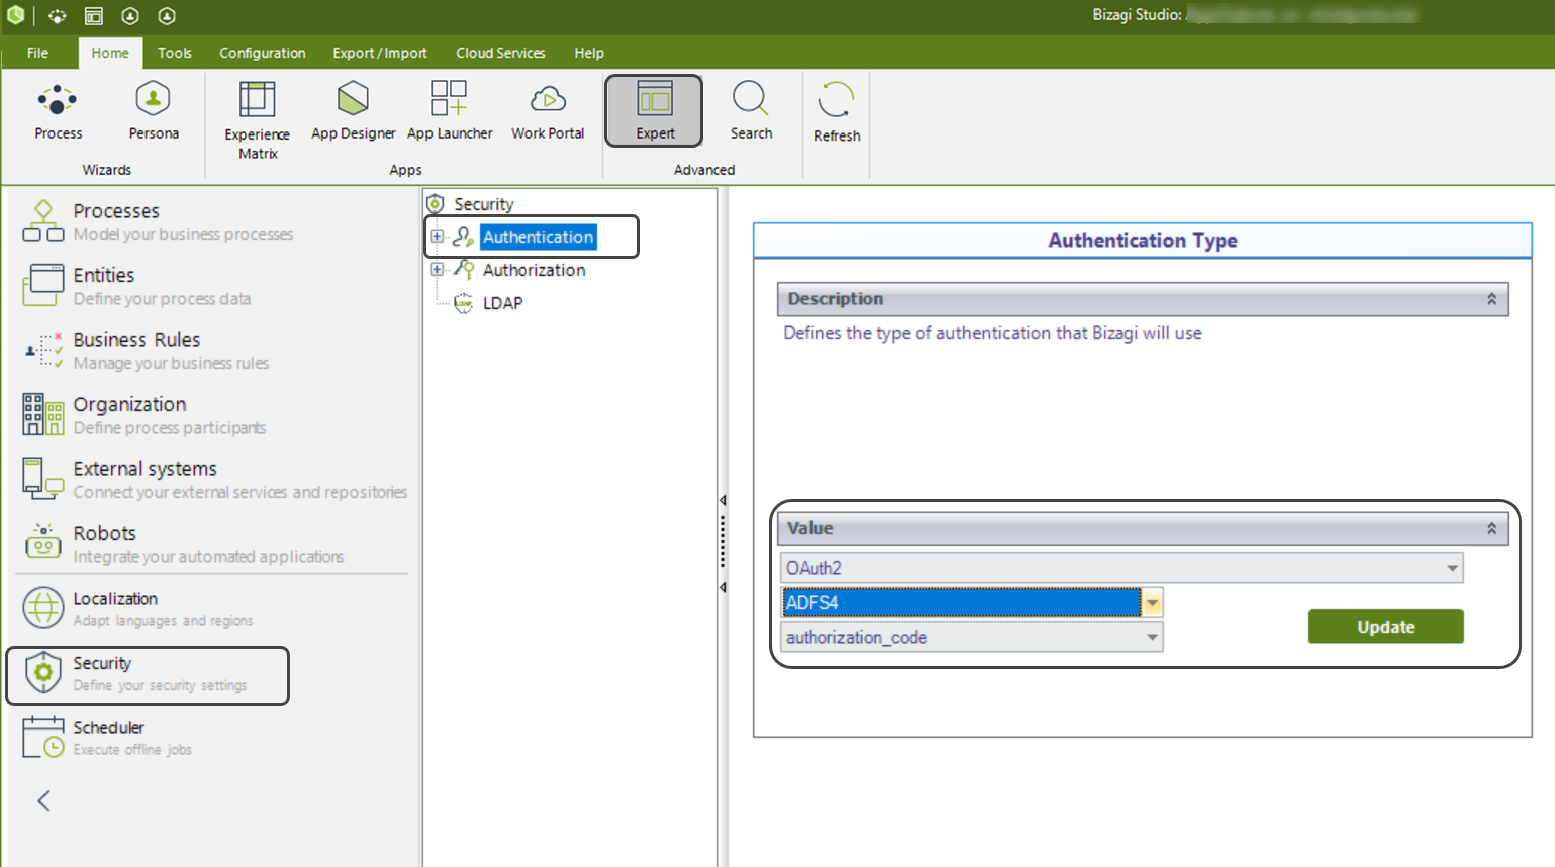
In the Expert view, open the Security module, and select the Authentication nod. On the first drop-down list select OAuth 2.0. In the Second drop-down list, select ADFS4. Finally, select authorization_code on the last drop-down list.
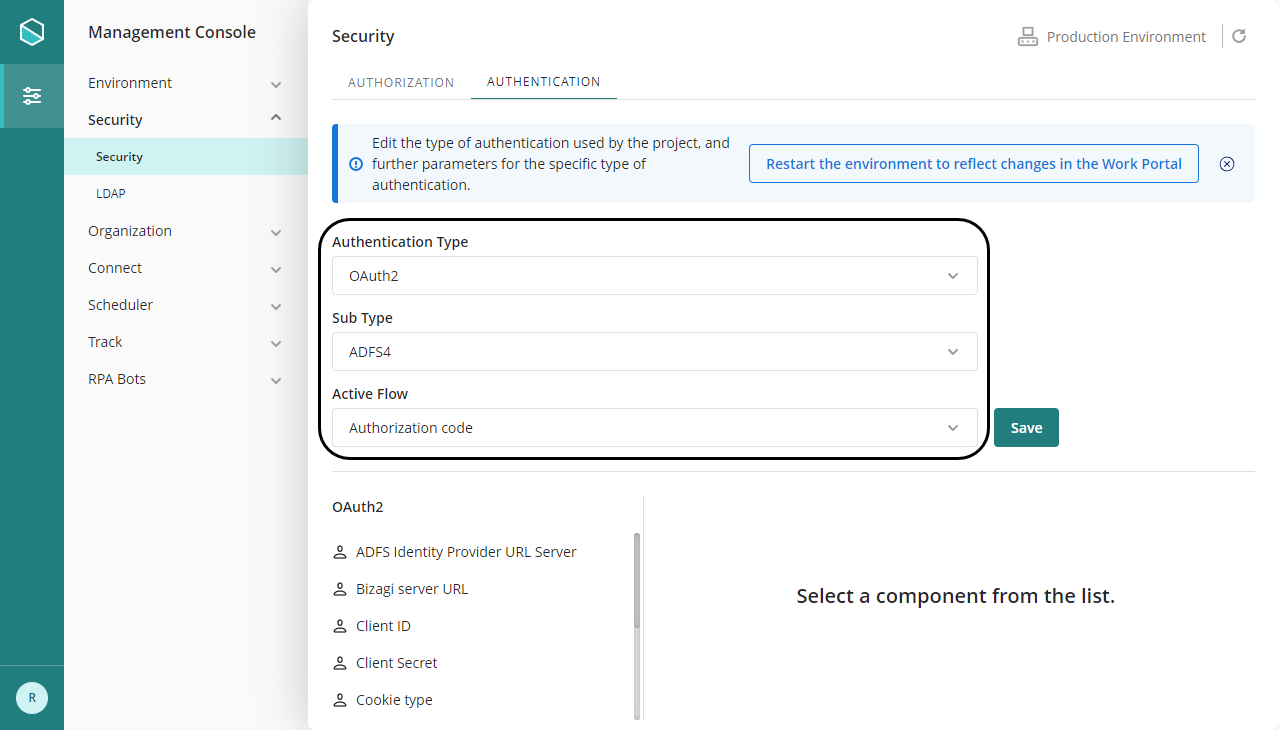
You can also set or change these parameters from the Management Console.
|
In the management console, before modifying the authentication configurations, it is necessary to set the environment status as Maintenance from the Maintenance window. After doing the desired modifications, remember to restart the environment to reflect the changes. |
Then configure the following attributes:
Parameter |
Description |
|---|---|
ADFS Identity Provider URL Server |
Defines the Bizagi server URL, for that Server authenticating users. This value is set as https://[adfs4].com |
Bizagi Server URL |
Add the URL of the Bizagi Work Portal. |
Client ID |
Holds the client id as generated in step 1.3 |
Client Secret |
Holds the client secret as generated in step 1.4 |
Cookie type |
Persistent cookie: This cookies remains in your computer until they are removed (logging off) or expires. The remaining time of a cookie depends on how much time you have set in the waiting time for inactive sessions.
Session cookie: These cookies are temporary and they are removed when you close your browser |
Idle sessions time-out |
Defines the time (in minutes) after a session expires |
Redirect to a logoff after logoff process |
By default, when logging off, Bizagi redirects to the log in page. Change this value if you want to change this behavior. |
Redirect URI |
Defines the callback URI after successful authentication. |
Show detailed authentication error messages |
For security reasons, the authentication error causes does not appear in the Work portal. |
Last Updated 12/10/2025 12:24:42 PM