Overview
The Case Folder serves as a collaborative space where users can participate in discussions through the Discussions tab and upload various items such as images, documents, and files. This collaborative content remains accessible even after the case has been closed.
Moreover, the Case Folder includes a Timeline that offers a chronological representation of all activities initiated within the case. This Timeline serves to provide users with a comprehensive overview of the entire case, connecting launched activities, associated processes, the list of individuals involved, and the respective resolution times.
Importantly, the Case Folder remains accessible to all Personas, even after the case has been closed.
Discussions
Discussions are available to all users with access to a case, allowing them to initiate conversations on various topics and share additional information, fostering collaboration. Significantly, discussions can be continued even after the case has been completed.
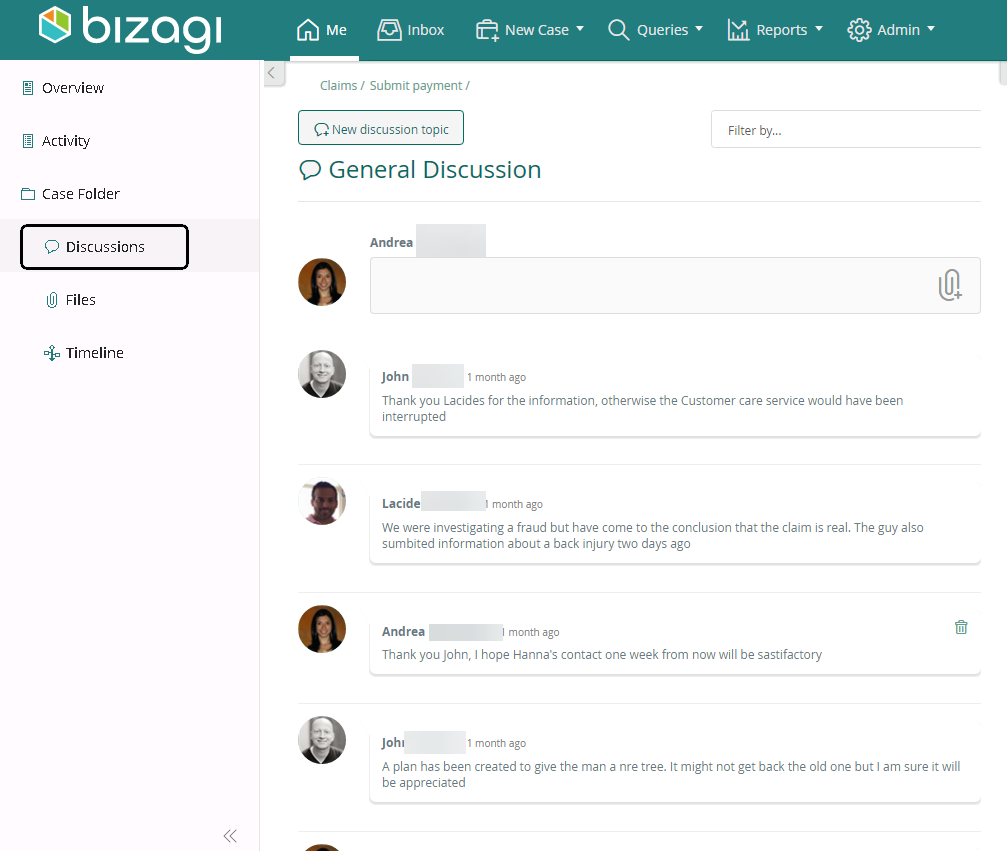
By default, when a user enters a comment, it is automatically included in the General Discussion group, as illustrated above. Additionally, all comments have the option to include attachments, enhancing the comprehensiveness of the communication. The permissible file types for uploads are those specified in Bizagi Studio.
Discussion topics
Users can also engage in discussions around specific subjects, leading to the creation of new discussion groups dedicated to hosting information relevant to the case.
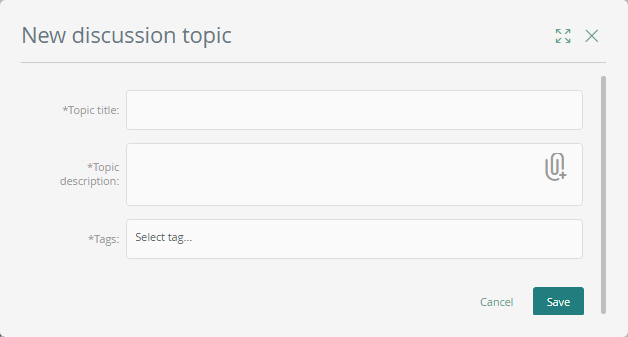
To create a new discussion topic, click New discussion topic. This action opens a window where you can input the Topic title, provide a brief description, and include tags. Tags prove useful for searching specific information, especially when discussions become extensive. To add a tag, type its name and press the Enter key to set it in the topic. For easy retrieval of tagged content, type the tag name in the upper right corner and press Enter to execute the search.
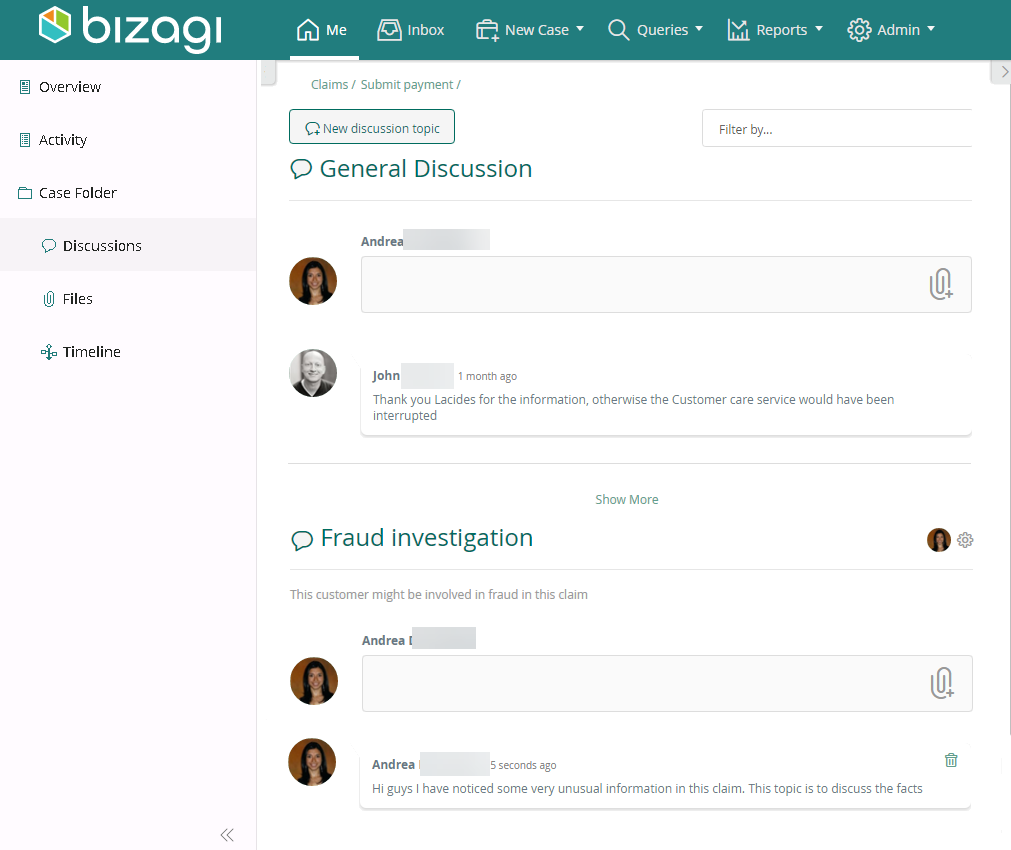
Upon creation, the discussion topic is situated under the General Discussion group. Users have the flexibility to decide where to post their comments, selecting the appropriate location based on the objective or content of their contribution.
Files
Each case has a Files menu, providing a dedicated space where users can include any file to enhance collaboration and ensure comprehensive case documentation.
|
Keep in mind that users with the authorization to create new cases are specifically those granted permission to upload files. |
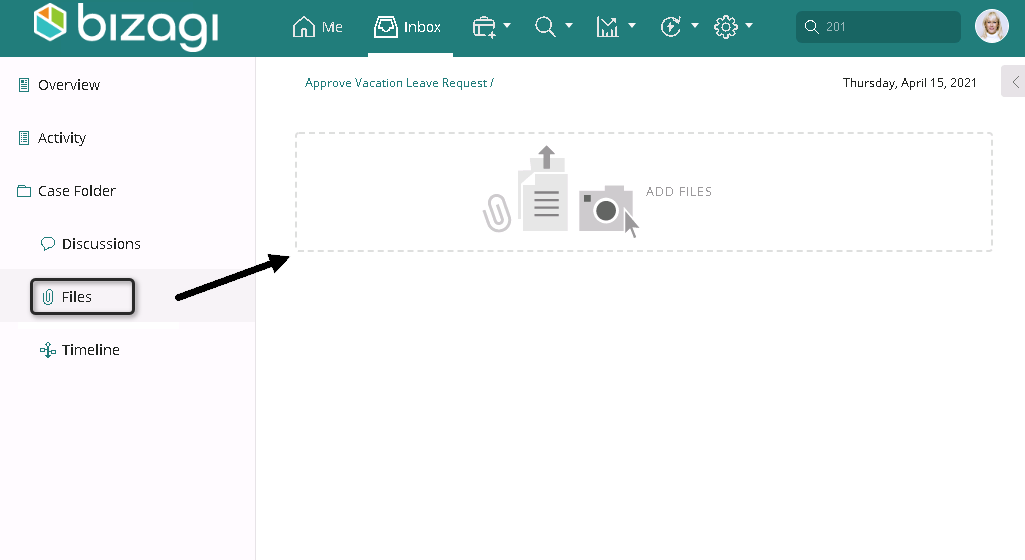
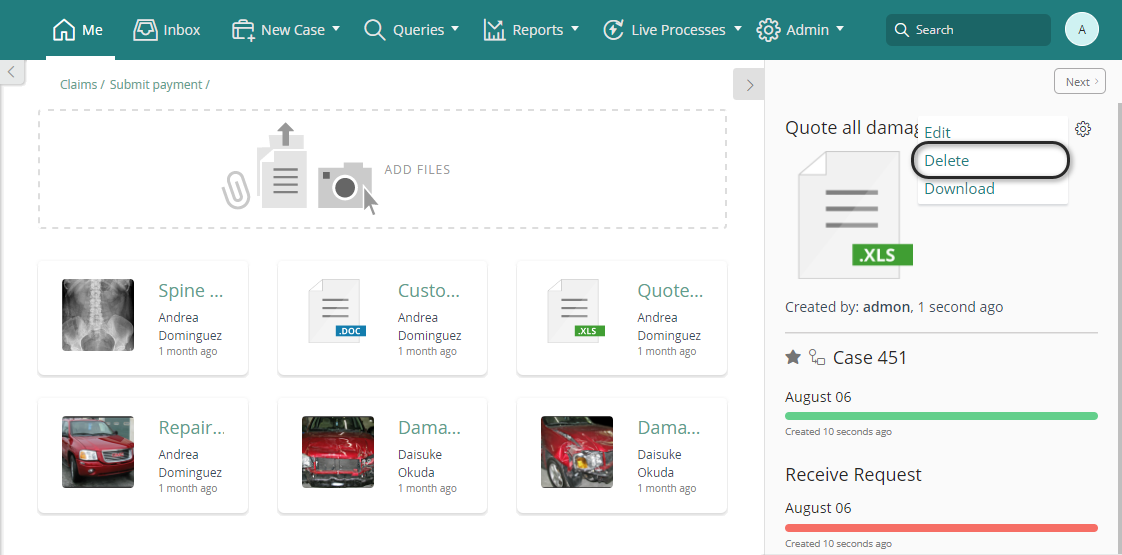
To upload a file, navigate to the Files tab and click the Add files section. You can either use this section to manually add files or simply drag and drop the desired file into the designated area.
To delete an existing file, click it, and on the right side of the screen, select the Delete option displayed under the gear icon.
Timeline
The Timeline provides users with a comprehensive view of the entire case, interconnecting all launched activities, associated processes, the list of individuals involved, and the respective resolution times. This option is also accessible directly from your Inbox.
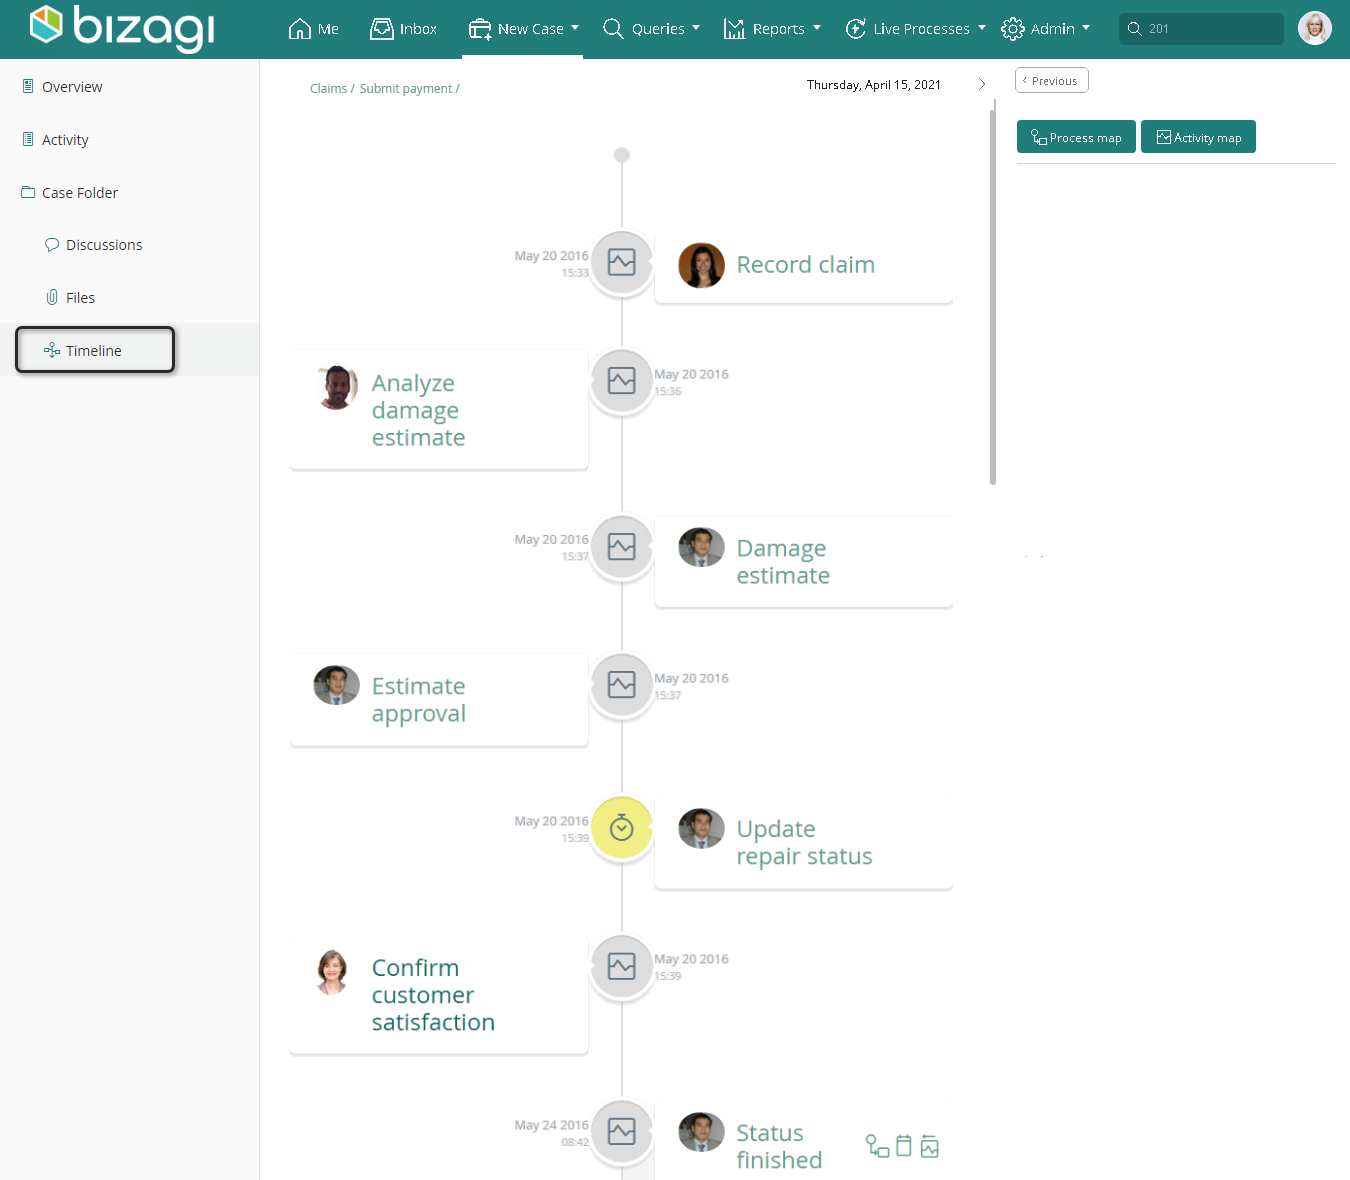
You can search for an activity by typing its name at the top.
|
Bear in mind that canceled tasks are not displayed on the case's Timeline. |
•By default, the Timeline displays all user activities as they are active until completion.
•Events are exclusively listed when they have been executed.
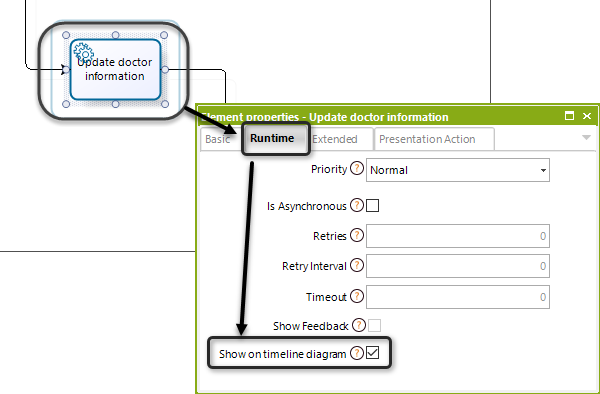
•For Service tasks to appear in this view, they must be manually included in Bizagi Studio. This can be done through the activity's Properties, specifically in the first step of the Bizagi Wizard (Model Process). Ensure that the Show on timeline diagram property is checked in the Runtime tab.
When hovering over an activity on the Timeline, both the Process Path and State Log options become visible.

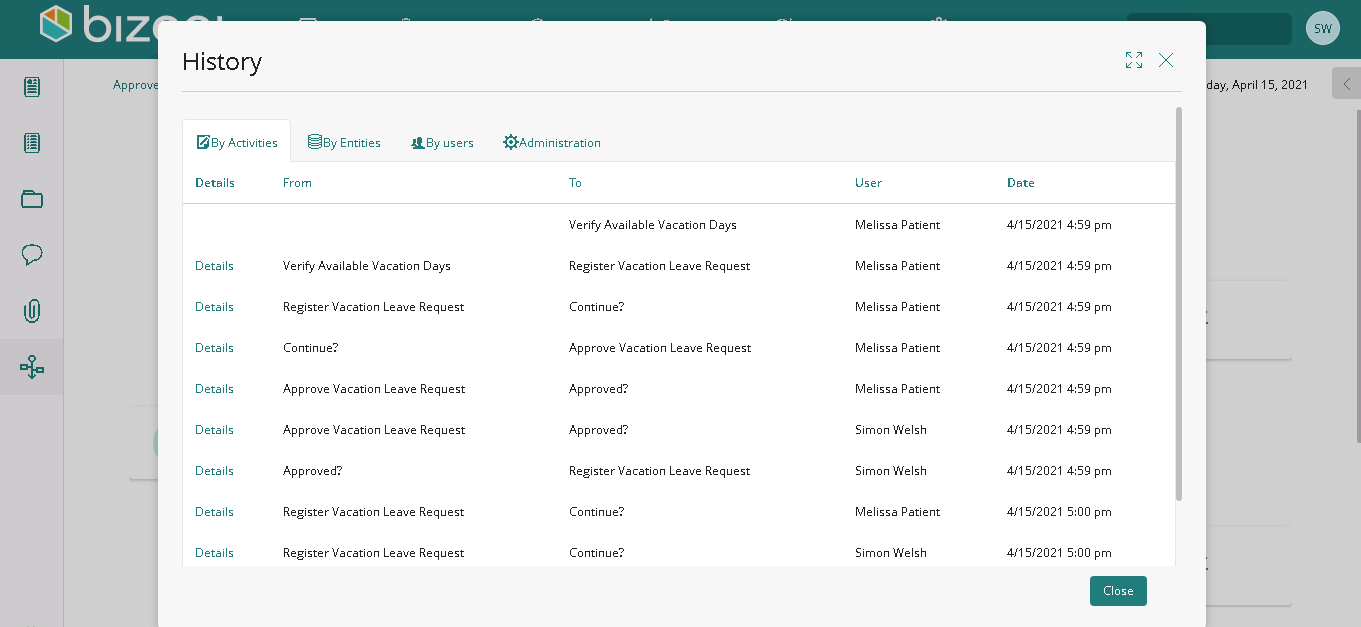
The State Log encompasses all information related to state changes of the Activity, indicating who performed the changes and when they occurred.
Process map
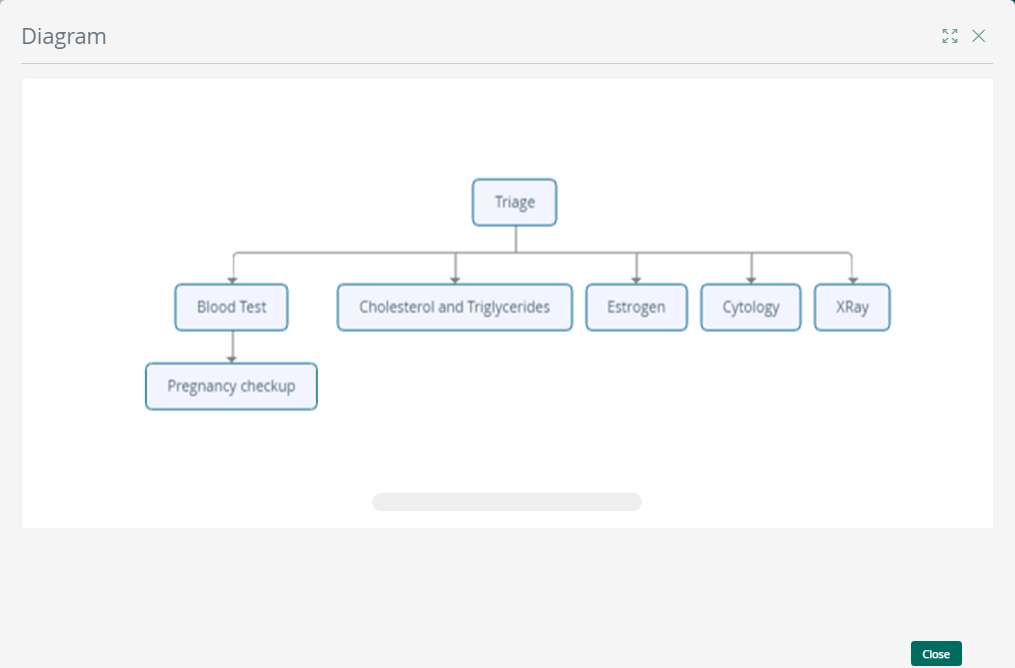
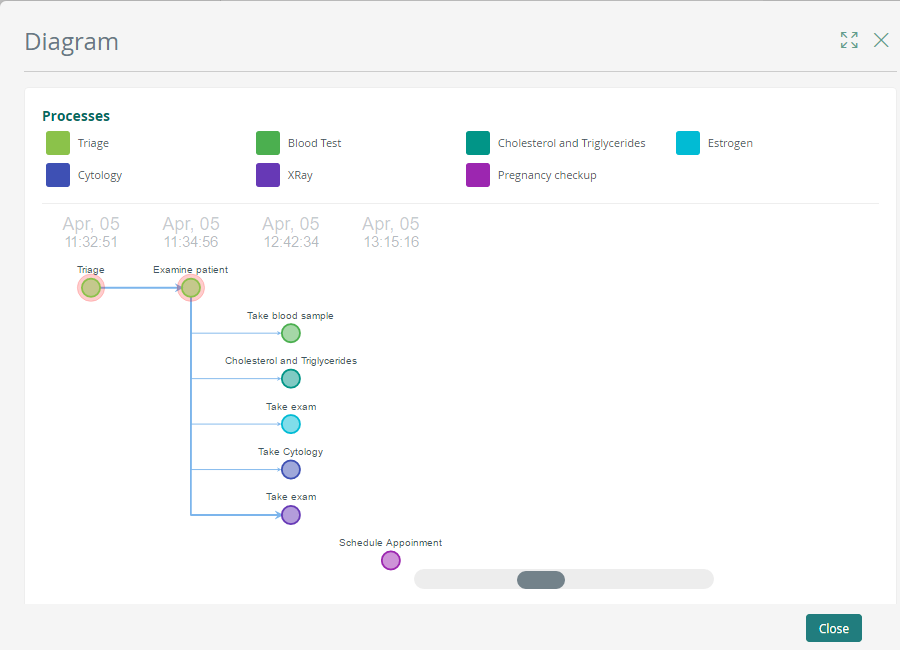
The Process map displays all processes initiated by Personas or triggers that constitute the case. In the provided example of a hospital, depicted in the map below, a Triage process triggered several other processes, ultimately culminating in a Pregnancy checkup.
Activity map
The Activity map illustrates the sequence of activities that have been executed and the order in which they were launched by Personas via Actions. This view serves as a complement to the Process map, providing details on the actual user allocated to the activity that triggered the next one.
Activities without incoming arrows were either launched automatically by a Trigger or were set after a shape in a process that is not a user activity (such as an event, Sub-Process, or gateway). In the image below, the Schedule Appointment activity lacks an incoming arrow. This activity is part of the Pregnancy checkup process, launched automatically by a Trigger when a Blood Test confirms a girl's pregnancy.
Certain activities in the diagram are highlighted with a pink circle, indicating that these activities are part of the same process as the selected case. This visual cue helps identify the executed activities within that process in the case.
State Log
The State Log details the history of each process, capturing changes in data, involved users, and the flow of the process. It organizes information based on four criteria: Activities, Entities, Users, and Administration.
For further information, refer to State Log.
Last Updated 1/9/2024 5:13:33 PM