Overview
Microsoft Power Automate allows you to automate manual and repetitive tasks through the creation of workflows. For example, users can create automatic reminders, move business data between systems, among others. For further information about Power Automate, click here.
As part of our Digital Process Automation offer, you can include a Bizagi connector within your Microsoft Power Automate. This connector let you interact with your Bizagi processes from a Power Automate Flow.
Each step of the workflow lets you obtain information, send emails or connect with external systems.
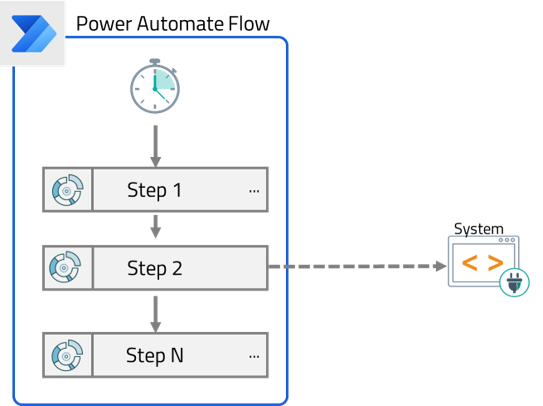
How does the integration work
Microsoft Power Automate allows you to create a custom connector which interprets and consumes methods exposed in Bizagi API through an OpenAPI file. After this connector has been created, you can use it as a step of the flow to perform the available operations in Bizagi.
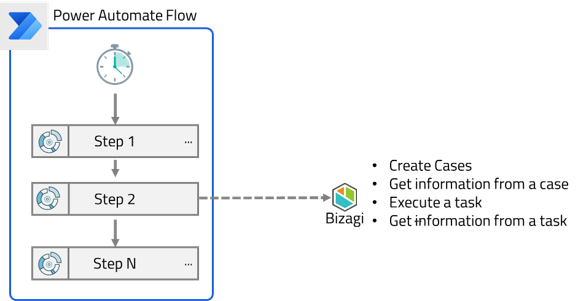
When integrating Bizagi with Microsoft Power Automate, you can use the following OData methods:
Considerations
•Your Bizagi project must be exposed on the Internet.
•You need to have a paid or trial Microsoft account.
Configure the connector
Follow these steps to configure the custom connector to Bizagi in Microsoft Power Automate.
1. Generate the Authentication keys
2. Import the connector descriptor
3. Set the redirect Uri in Bizagi
4. Include the connector in your flow
1. Generate the Authentication keys
The first step you need to do is generate the Authentication keys to let a flow step to access your Bizagi project.
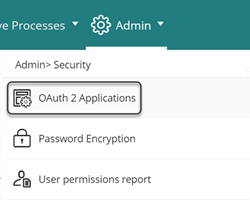
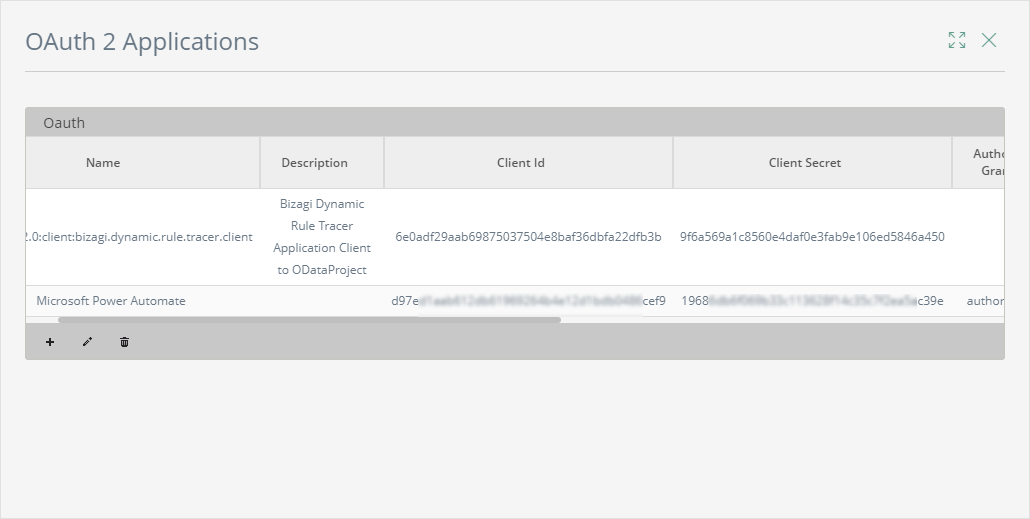
In your Bizagi project's Work Portal, go to OAuth 2 Applications option located in Admin > Security menu.
In the window that appears, click plus icon to create the keys. Provide the following information:
•Name: Provide any name of your choice.
•Grant Type: Authorization Code.
•Allowed Scope: API.
•Redirect Uri: http://localhost. This value is temporary.
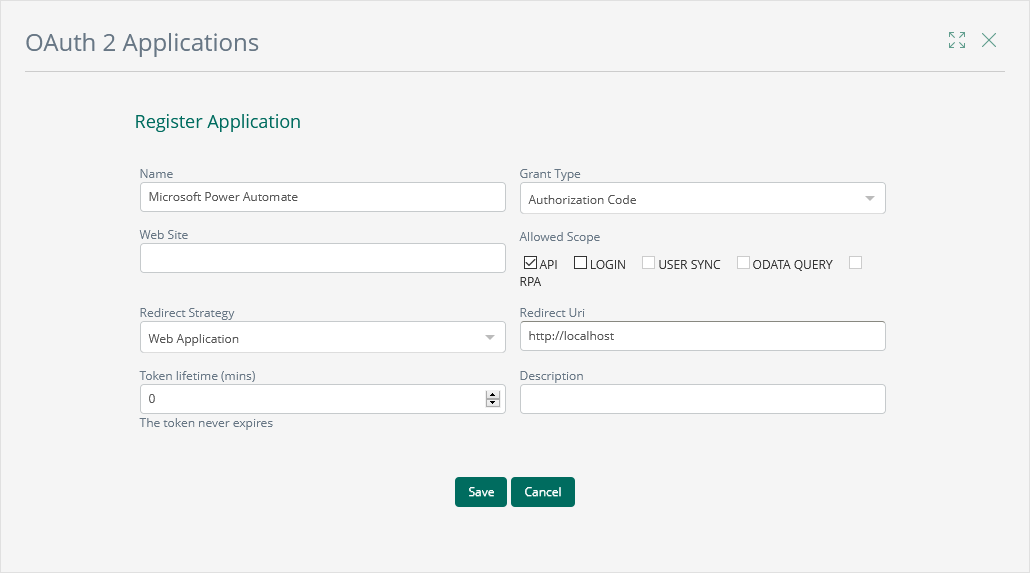
Click Save. Copy the values generated for Client Id and Client Secret. This values will be required later.
2. Import the connector descriptor
In this step, you configure the connector in Microsoft Power Automate to let you connect to your Bizagi project through a flow step.
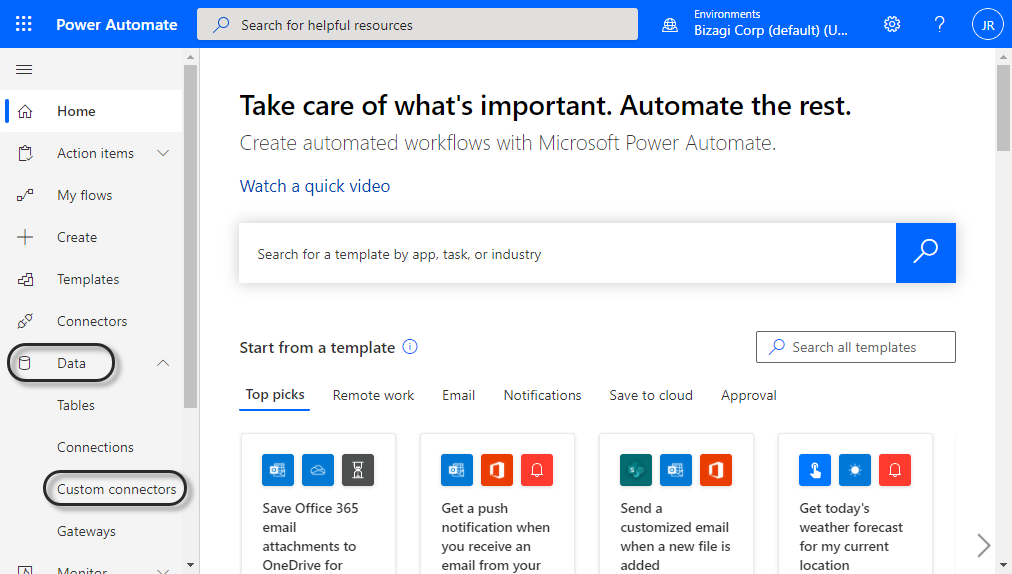
Go to Microsoft Power Automate portal, and log in using your credentials. Then, go to Custom Connectors inside the Data menu.
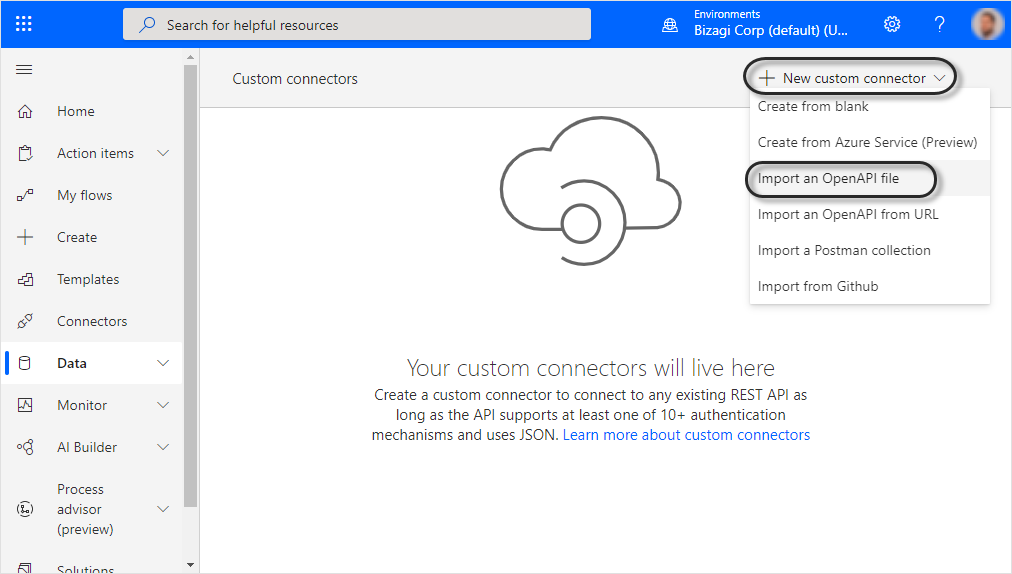
Expand the New custom connector menu and select Import an OpenAPI file.
Download the swagger file here, Then, upload it to Power Automate and provide a meaningful name for it.
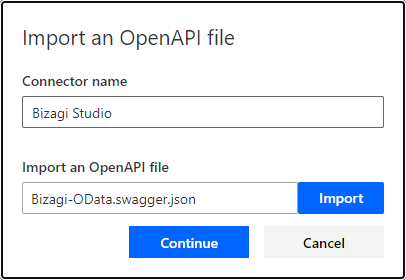
Click Continue. In the appearing window, provide the following information:
•Connector icon: you can upload an icon to identify the connector in the flow.
•Scheme: HTTPS or HTTP.
•Host: URL where your project is hosted. This parameter does not include the project name.
•Base URL: path in the host where you project is located. If the project is located in the root of the path, set /.
Example: If your work portal URL is https://[project_environment]-[your_project]-[your_company].bizagi.com/[Project_Name], set the values as:
oScheme: HTTPS
oHost: [project_environment]-[your_project]-[your_company].bizagi.com
oBase URL: /[Project_Name]
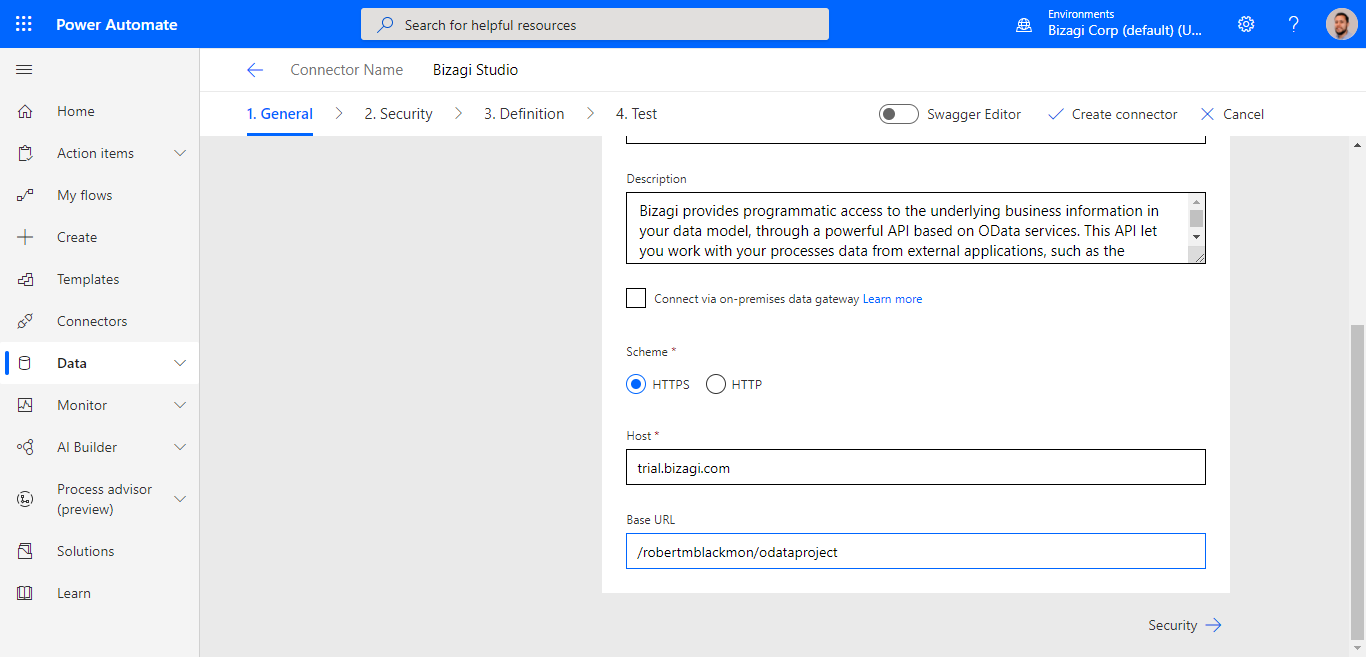
Click Security. In the new window, provide the following information.
•Authentication Type: OAuth 2.0.
•Identity Provider: Generic Oauth 2.
•Client id: Key generated before in your Bizagi Work Portal.
•Client secret: Key generated before in your Bizagi Work Portal.
•Authorization URL: URL of your work portal plus /oauth2/server/authorize.
•Token URL: URL of your work portal plus /oauth2/server/token.
•Refresh URL: URL of your work portal plus /oauth2/server/token.
•Scope: api.
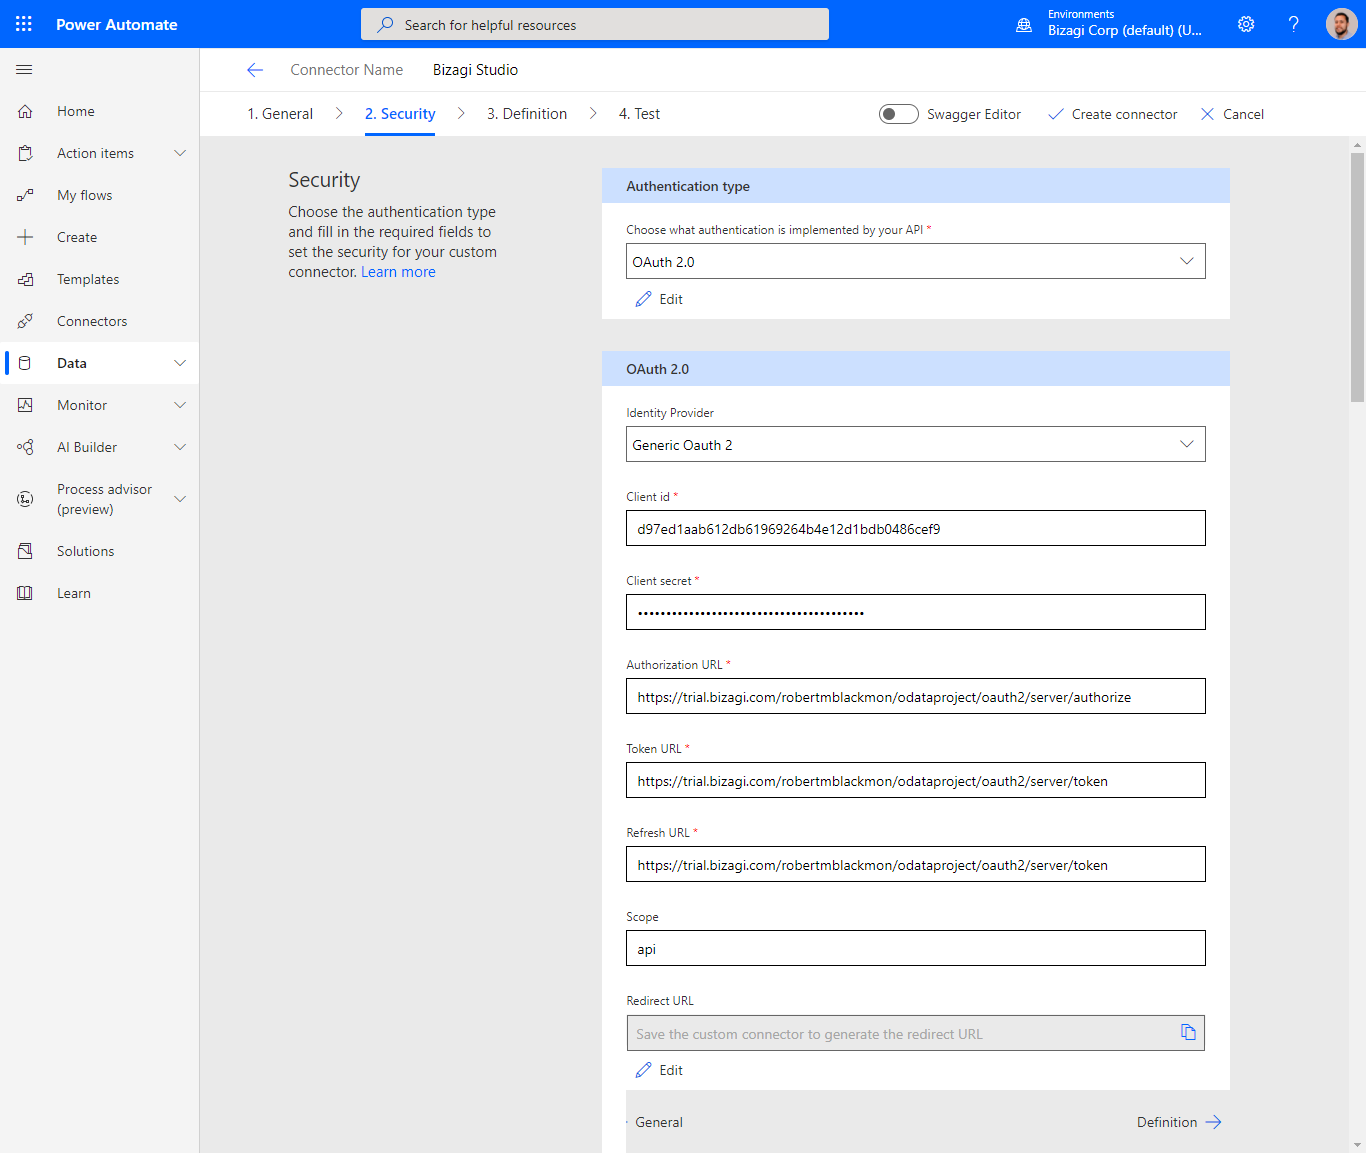
Click Create Connector.
3. Set the redirect Uri in Bizagi
Once you have created the connector, copy the Redirect URL generated and paste it in the keys you generated in Bizagi Work Portal.
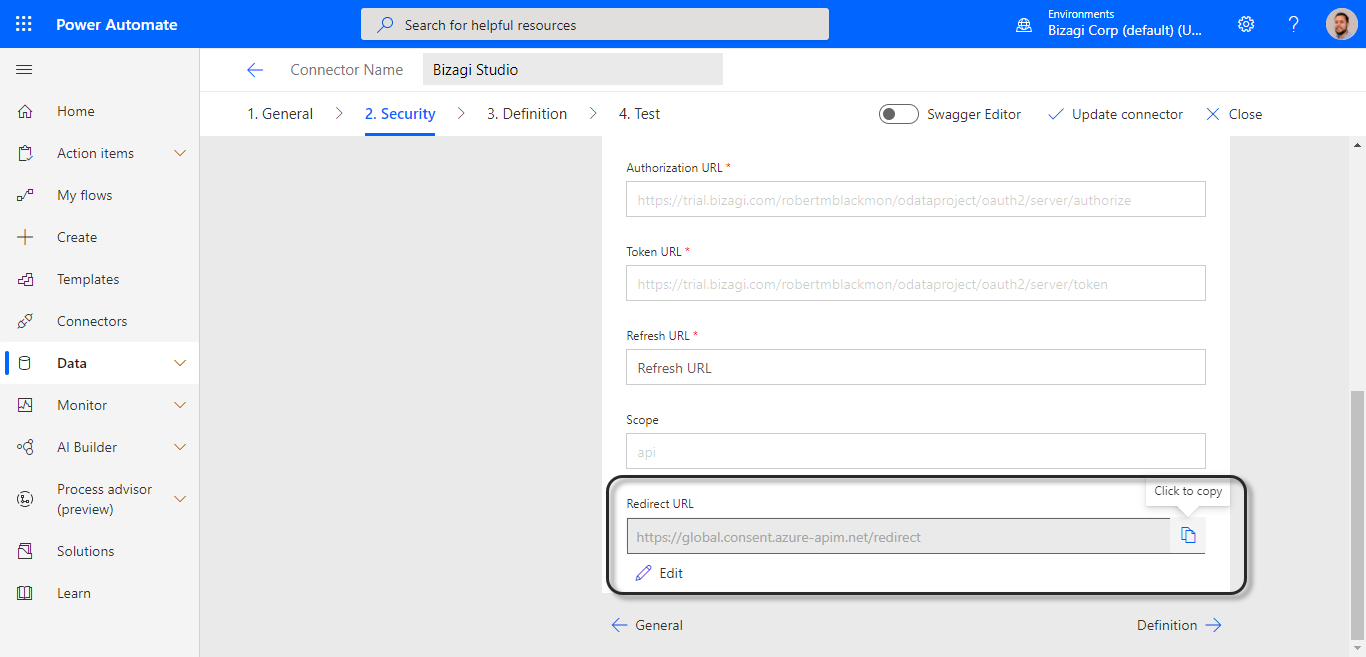
Log in you Bizagi Work portal and go to OAuth 2 Applications option located in Admin > Security option. Locate the key generated before and click the pencil icon to edit it.
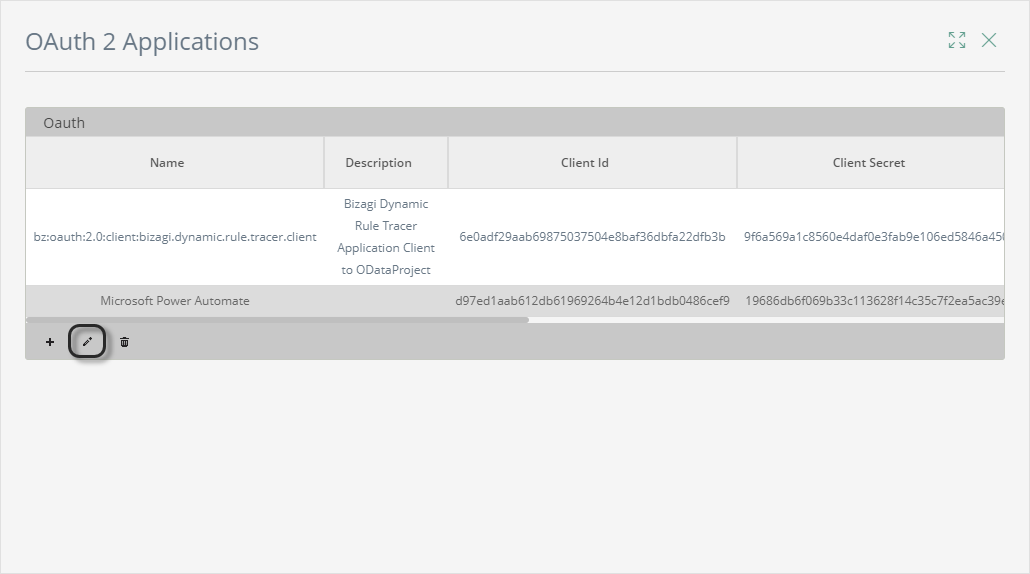
Replace the URL copied in the Redirect Uri field.
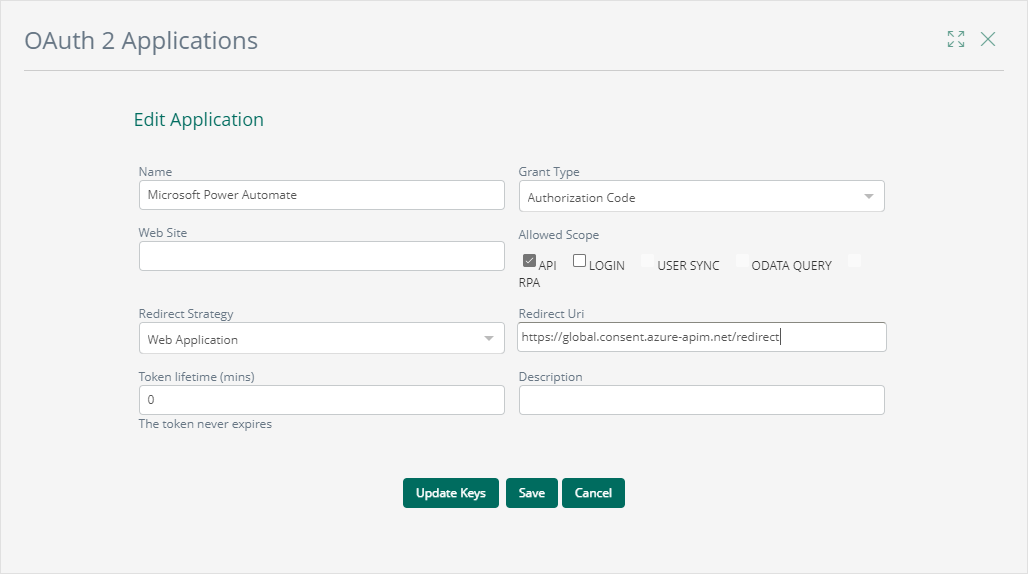
At this point the connector has been configured and it is ready to be used in Power Automate.
4. Include the connector in your flow
As the connector has been included in Power Automate, you can include it as a step of your flow. The following example provides a brief explanation of how to create a flow, for more information, refer to Microsoft Power Automate official documentation.
For this custom flow, when a new mail arrives to the PQRS email address, a new case of the Claims and Complaints process has to be created in Bizagi to retrieve a solution to the customer.
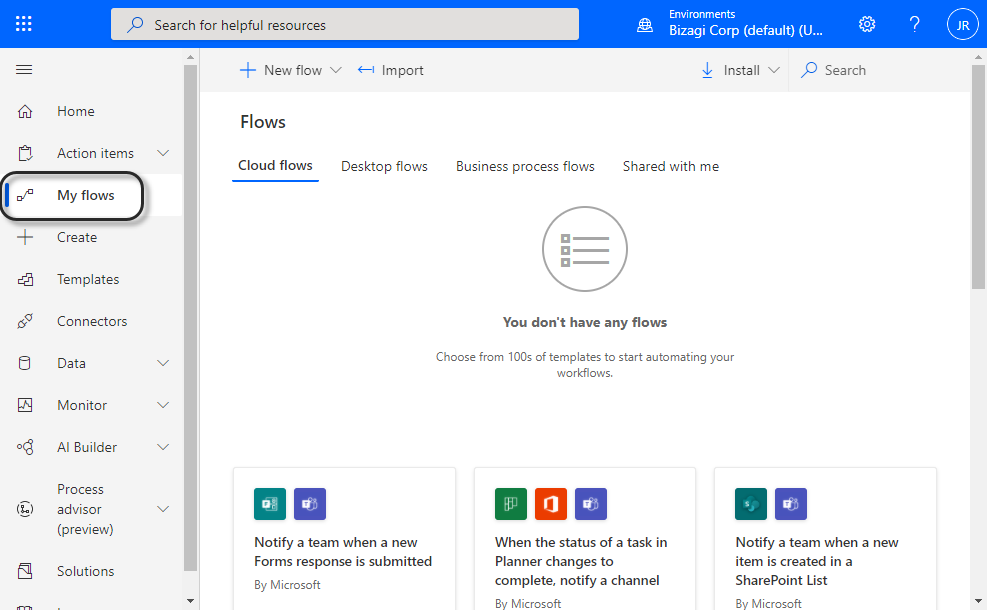
In Power Automate, select My flows option located in the left ribbon.
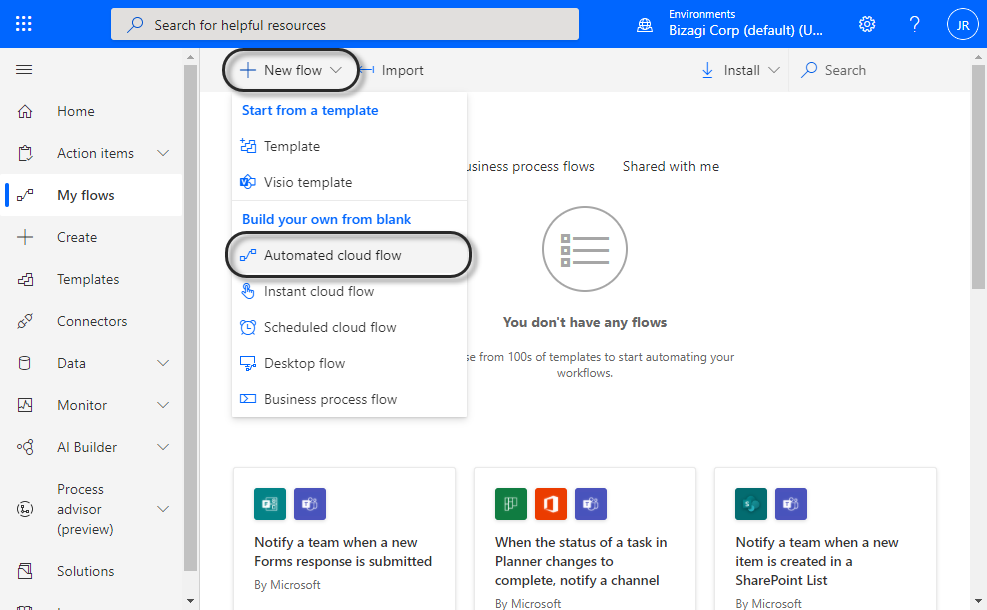
Expand New flow option and select Automated cloud flow.
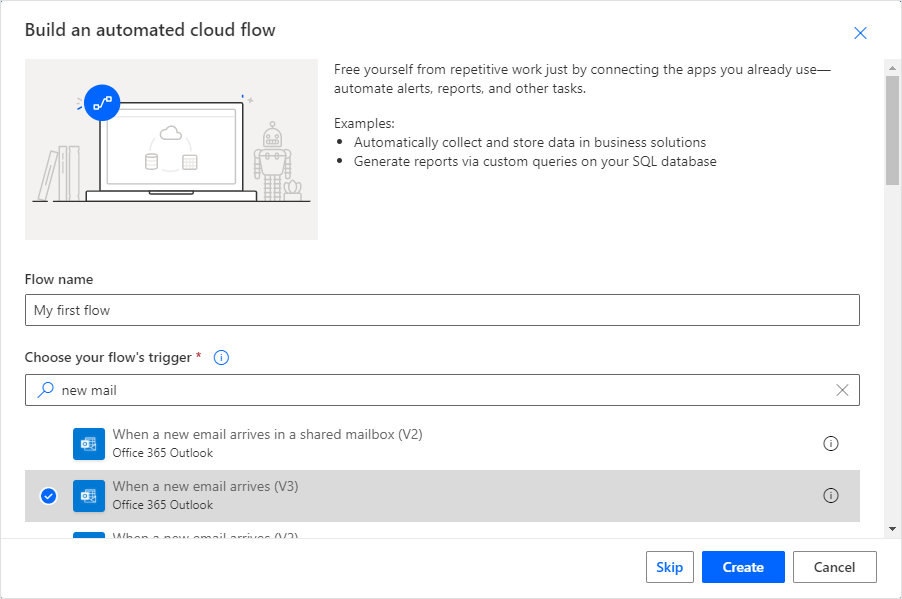
Provide a name to your flow. In this example, the PQRS email is hosted in Office 365 Outlook, write "new email" in the Choose your flow's trigger field and select When a new mail arrives of the Office 365 Outlook service. Then, click Create.
The flow has been created. Provide the credentials for the Office 365 Outlook service.
|
Take into account: •If you don't have to enter the credentials of the account in this step of the flow, verify that the connection of this step uses the right email address by clicking the three dots menu at the top right corner of the step. •If you need to provide further filters such as sender of the email, subject, and more, click Show advanced options. |
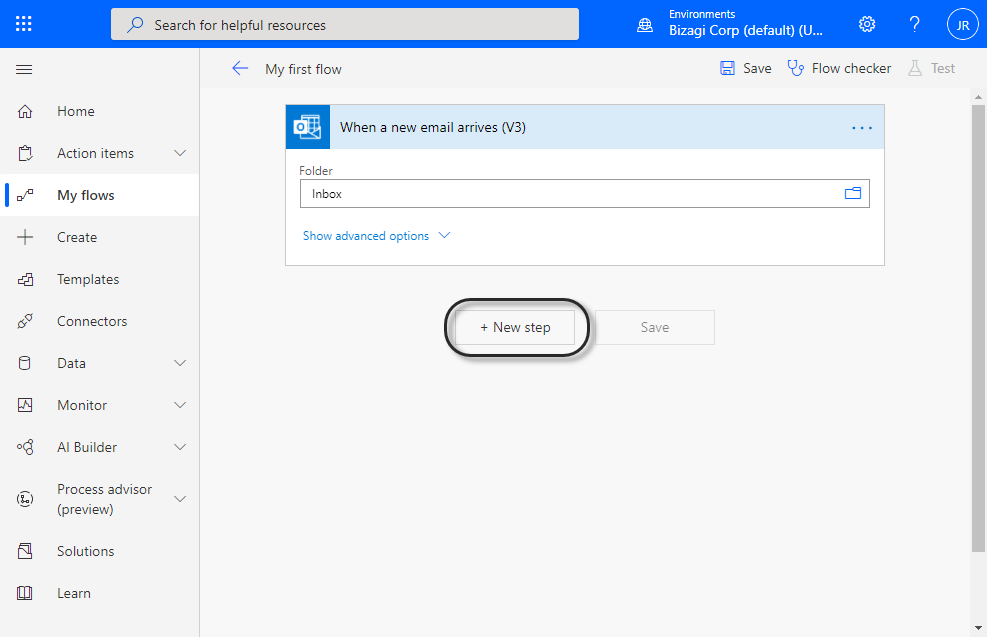
Click New step to include the Bizagi connection.
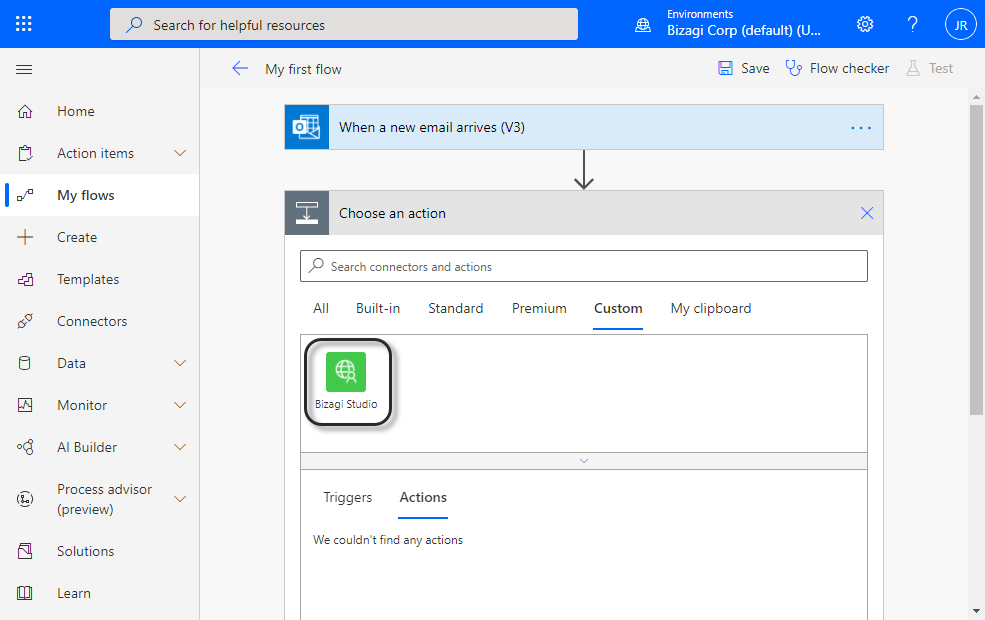
In the new step, go to Custom tab and select your recently created connector.
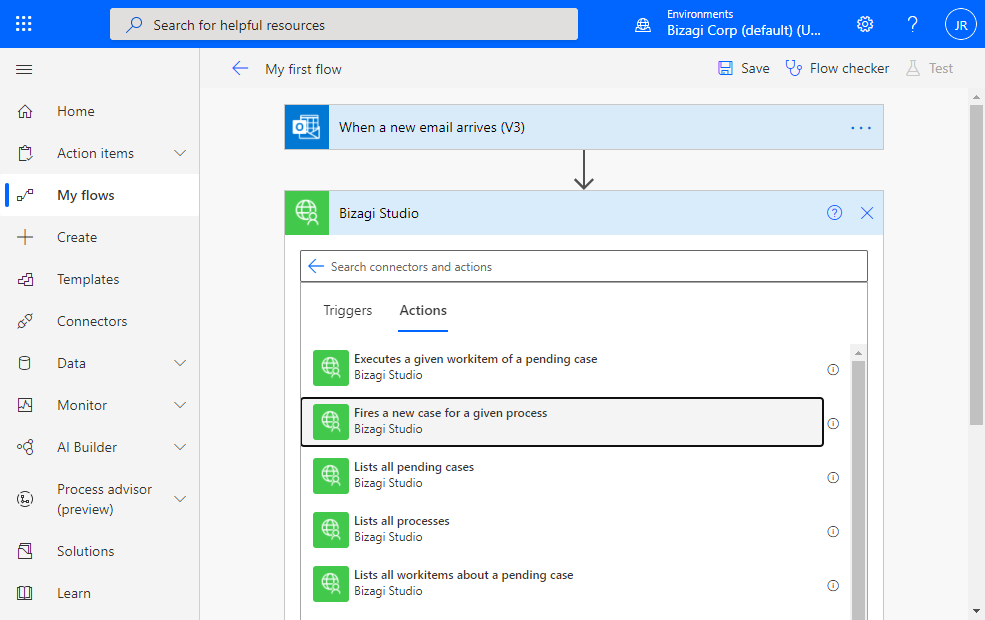
Select Fire a new case for a give process option.
At this point, the step has been created. Click sign in inside the step to validate the client secret and client id provided in the connector.
Once Validated, the step shows two parameters: processId and body. For more information of these parameters, refer to Process startup data.
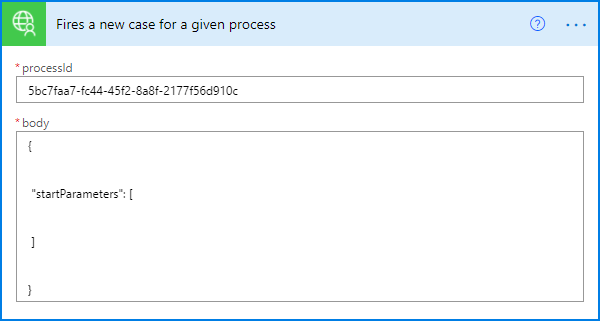
|
The inputs of the step depend on the method invoked. See our list of available functions to see the inputs of each one. |
Click Save in the top Ribbon to finish the creation of your flow. At this point, your flow is ready to be tested.
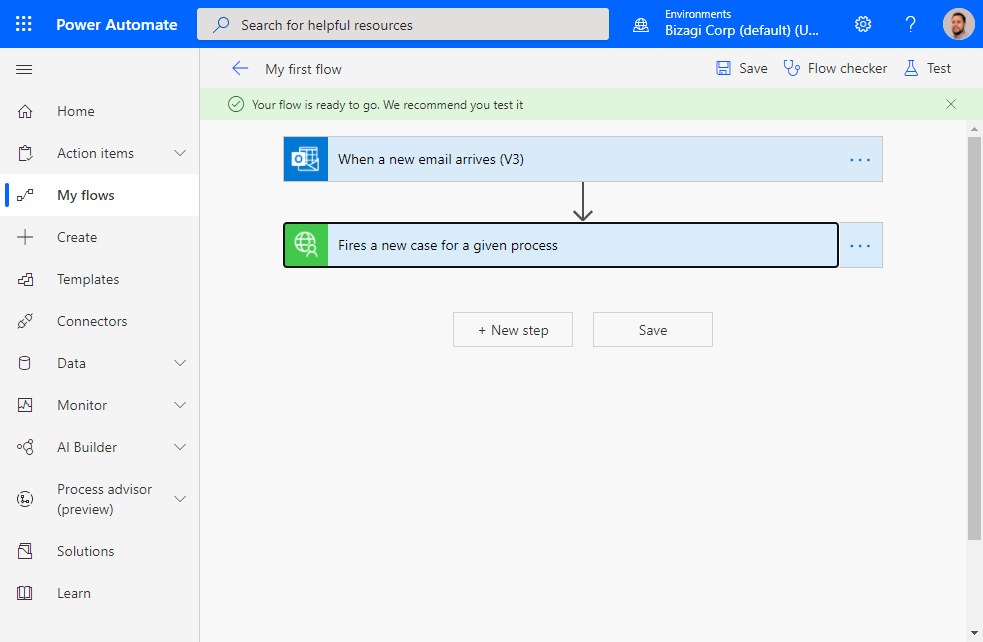
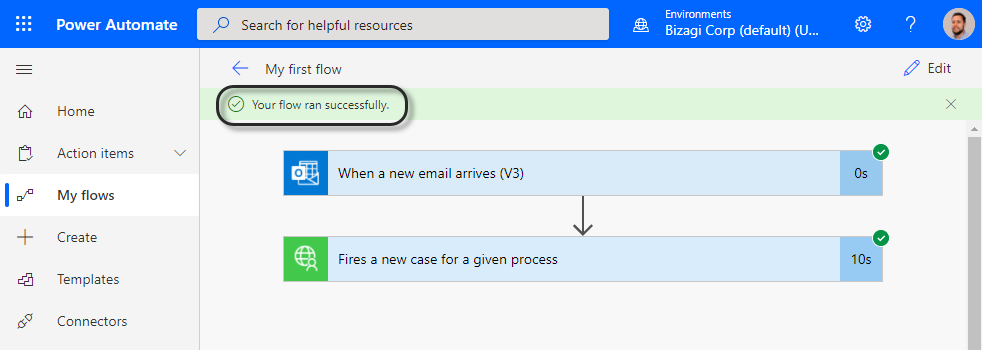
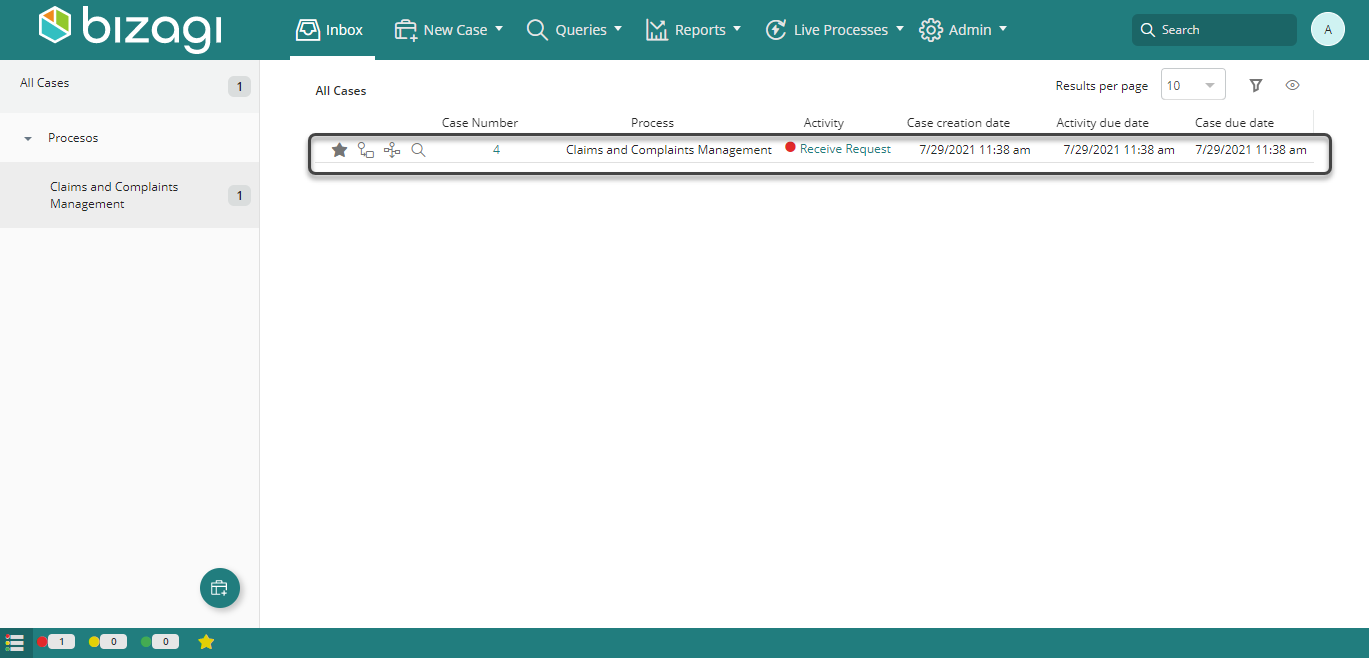
After a successful execution of the flow, you can see that a new case has been created in the inbox of your Work Portal.
|
The outputs generated after the execution of the method can be used in further steps of your flow and depend on the method invoked. See our list of available functions to see the outputs of each one. |
Last Updated 3/4/2022 4:46:18 PM